There is no question that organizations and home lab enthusiasts if running VMware vSphere are thinking about migrating. With the Broadcome buyout and the recent titanic changes Broadcom has made (killing VMware ESXi free edition, partner changes, eliminating all but 2 SKUs in their catalog, etc), there is a lot of uncertainty and fear about the platform, as well as concerns about costs. Nutanix AHV might very well be the best platform for many organizations operations moving forward, and for home labs, you can do this totally free.
Why Nutanix?
Nutanix has one of the best “enterprise” hypervisors that is still free, Nutanix Community Edition, now that there is no free VMware ESXi or free Hyper-V environment. In fact, it has no limitations for all practical purposes, outside of a limit of 4 node clusters. If you want to get up to speed quickly on how to use Nutanix for your home lab for free, take a look at my step-by-step guide on Nutanix Community Edition here and access the full list of features here:
Don’t get me wrong. I love free and open-source solutions like Proxmox and XCP-ng. However, the Nutanix Community Edition (also totally free) has the enterprise polish that the free and open source hypervisors don’t really have.
Also, I recently found out that Nutanix Move, an enterprise solution for VM migration, is also free. So cool! OK, so what is Nutanix move?
Nutanix Move
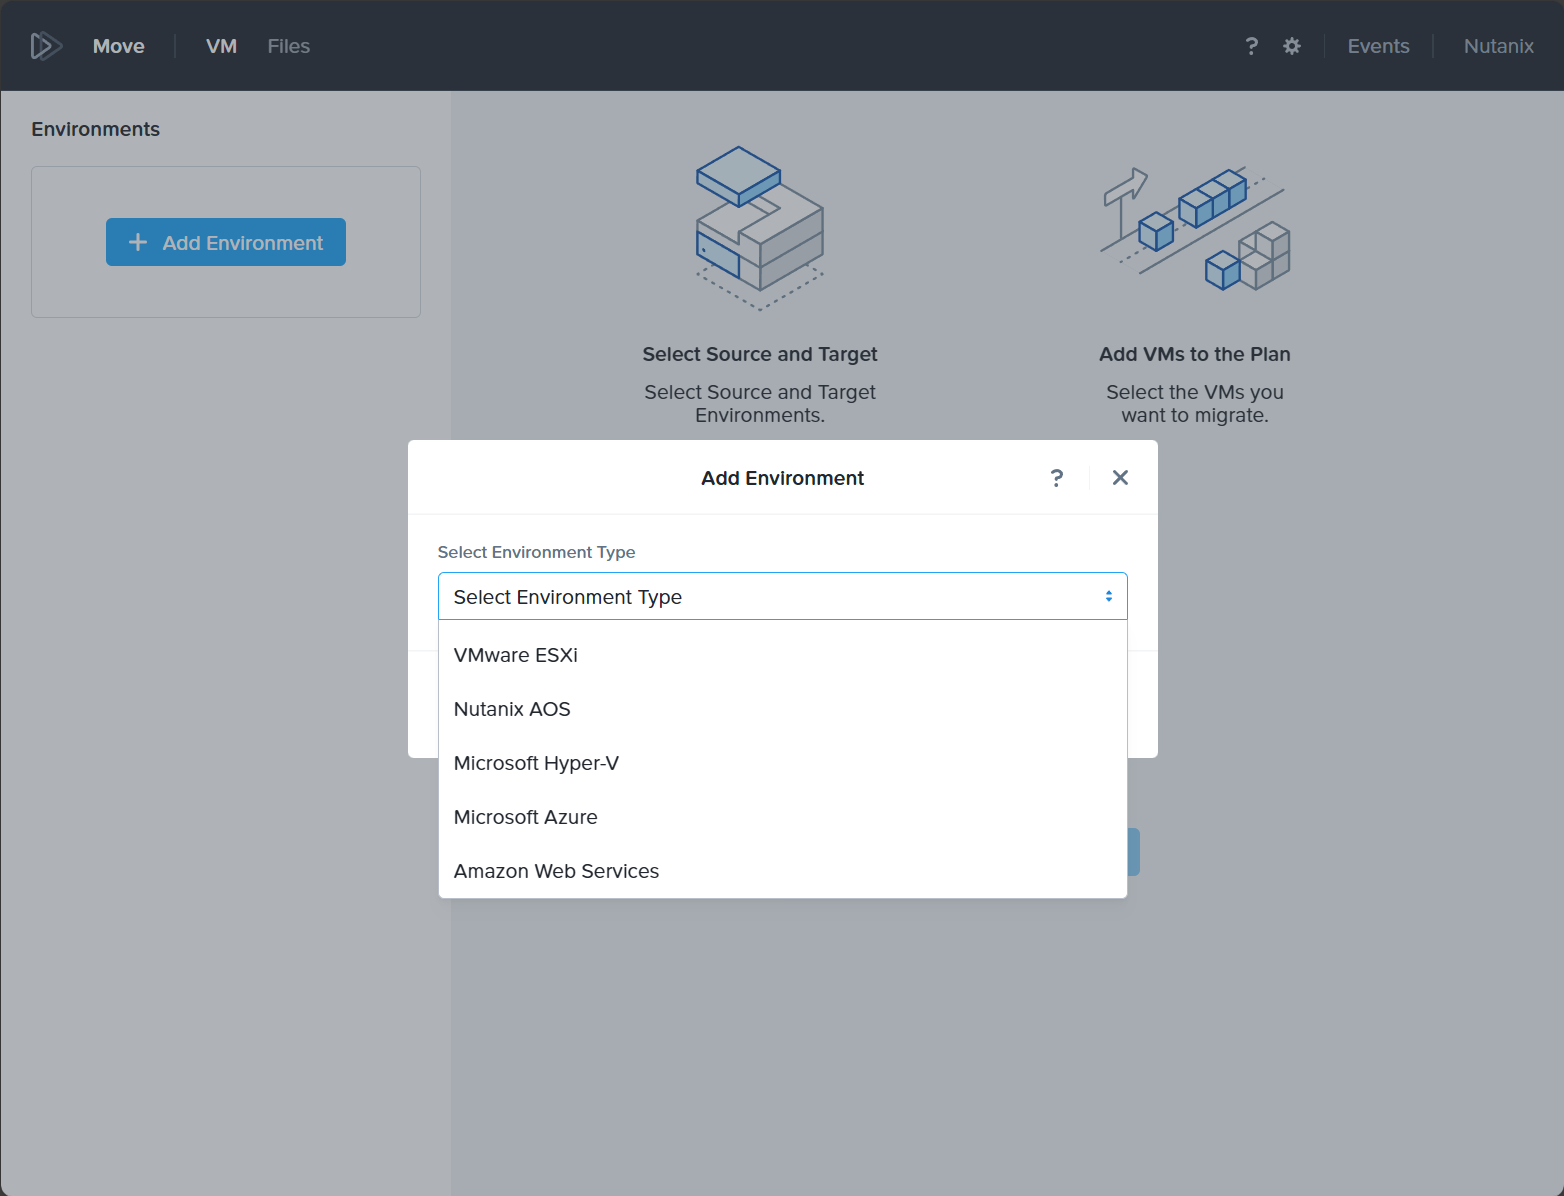
Nutanix Move is a cross hypervisor mobility solution that supports migration from VMware ESXi environments to Nutanix AHV, but also supports many other platforms, including:
- VMware ESXi
- Nutanix AOS
- Microsoft Hyper-V (Hyper-V to AHV)
- Microsoft Azure
- Amazon Web Services for AWS migration
Below you can see these listed in the screenshot from the move utility. It takes the complexity out of the migration process with proper planning and automation in the Move app.

The tool prioritizes minimal downtime with migrations which is extremely important for businesses that cannot afford to have systems down for a prolonged period of time. The Nutanix Move utility is geared towards production virtual machine workloads and getting them over as quickly and efficiently as possible.
Nutanix Move Download
One of the little snags I ran into when initially trying to get my hands on the Nutanix Move utility was actually being able to download it. When I started looking at downloading the utility, after logging in with my free Nutanix Community, I would see the following on the Nutanix Move download link that is listed in Google, making it look like it was not free and I needed a paid support contract.
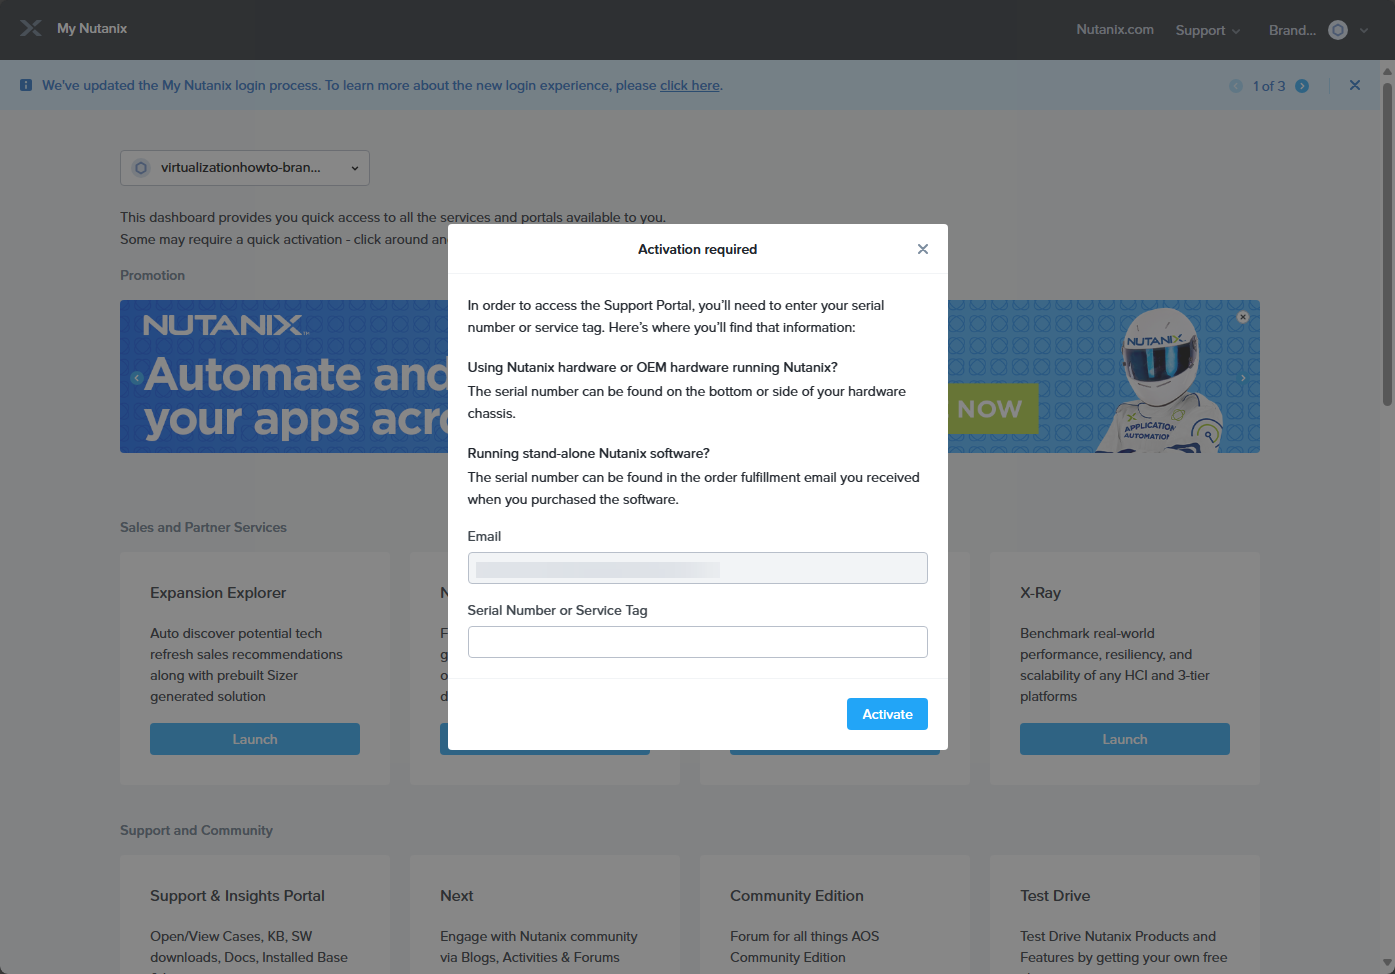
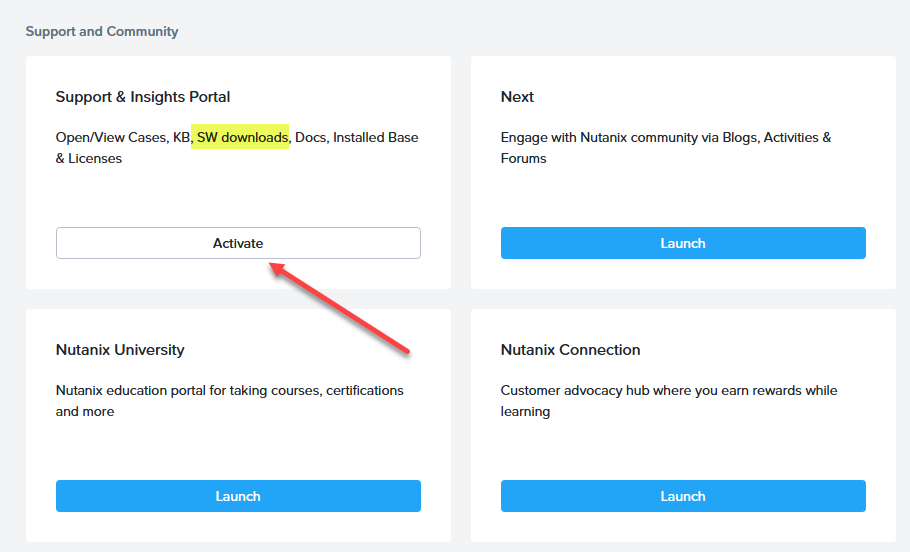
If you close out of the Activate box, you will see the below. If you see the SW downloads, it is locked by the activation.
However, I want to give a shout out to Chris Hall and Jason Burns at Nutanix. Exchanging a few emails back and forth, Chris (check out his blog at Polar Clouds) noted after doing some testing himself, you need to follow the procedure he notes here:
- Create a Community Edition account as normal at https://www.nutanix.com/products/community-edition/register
- Verify email address via link sent in email
- Navigate and login (with credentials set above) to https://my.nutanix.com/
- Scroll down to, launch and register with Nutanix University – again using credentials set above
- Launch https://portal.nutanix.com directly (as in enter this address into your browser)
You’ll know you’ve got it correct when portal.nutanix stops redirecting you to my.nutanix. Finally, with stable access to portal.nutanix, click the hamburger menu navigation (top left) to access downloads. Here you will have the ability to download the latest version of the Move software.
Installing Nutanix Move
Actually the “installation” process with Nutanix move is actually the process of the following (downloading and spinning up an appliance disk image):
- Download the QCOW disk image for the appliance
- Upload the image to your Nutanix AHV server
- Create a new VM with the QCOW image
- Power on the Nutanix Move VM
- Log in and change the password
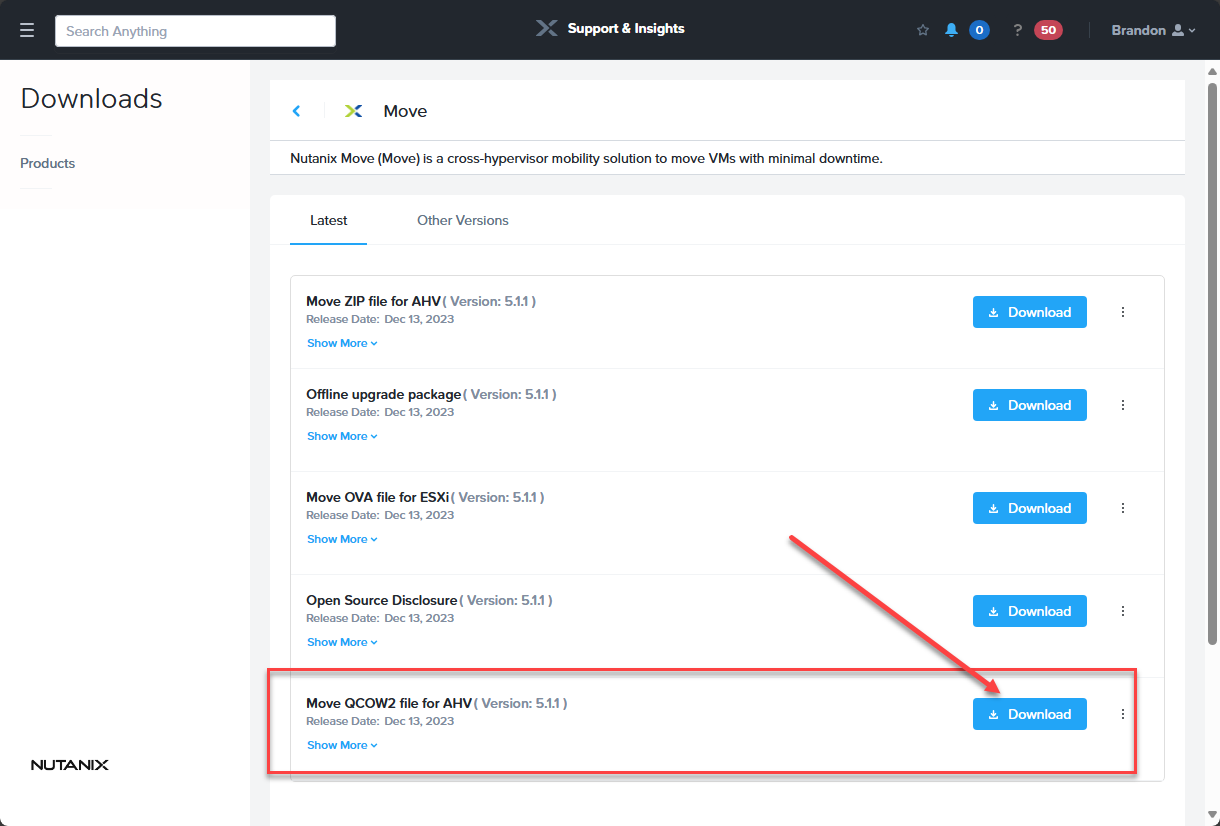
1. Download the QCOW disk image
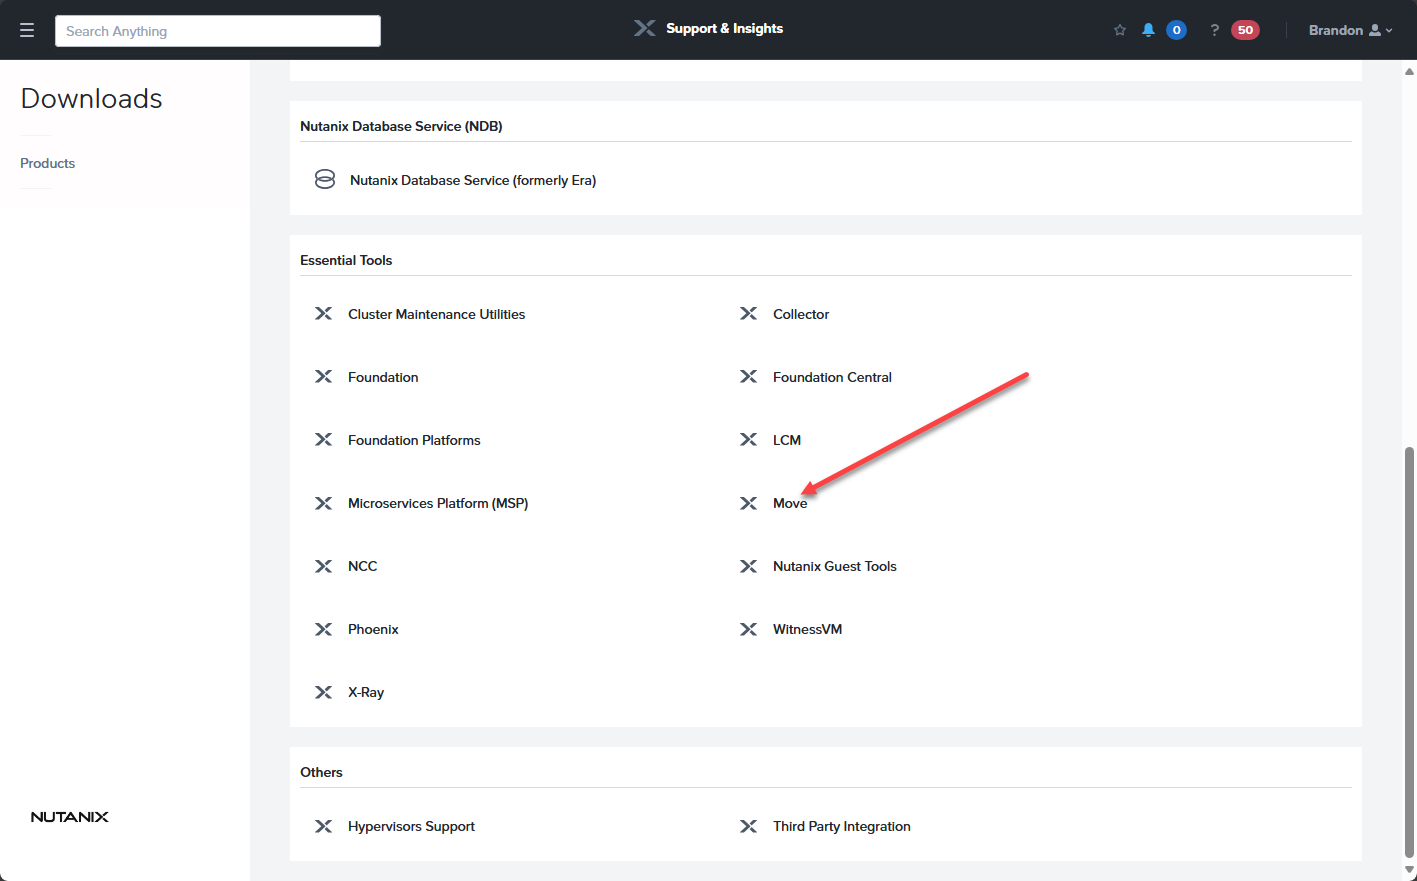
Below, once you have access to the downloads section using the “login” process above, navigate to the Essential tools section. You will see Move listed here.
Next, you will download the Move QCOW2 file for AHV.
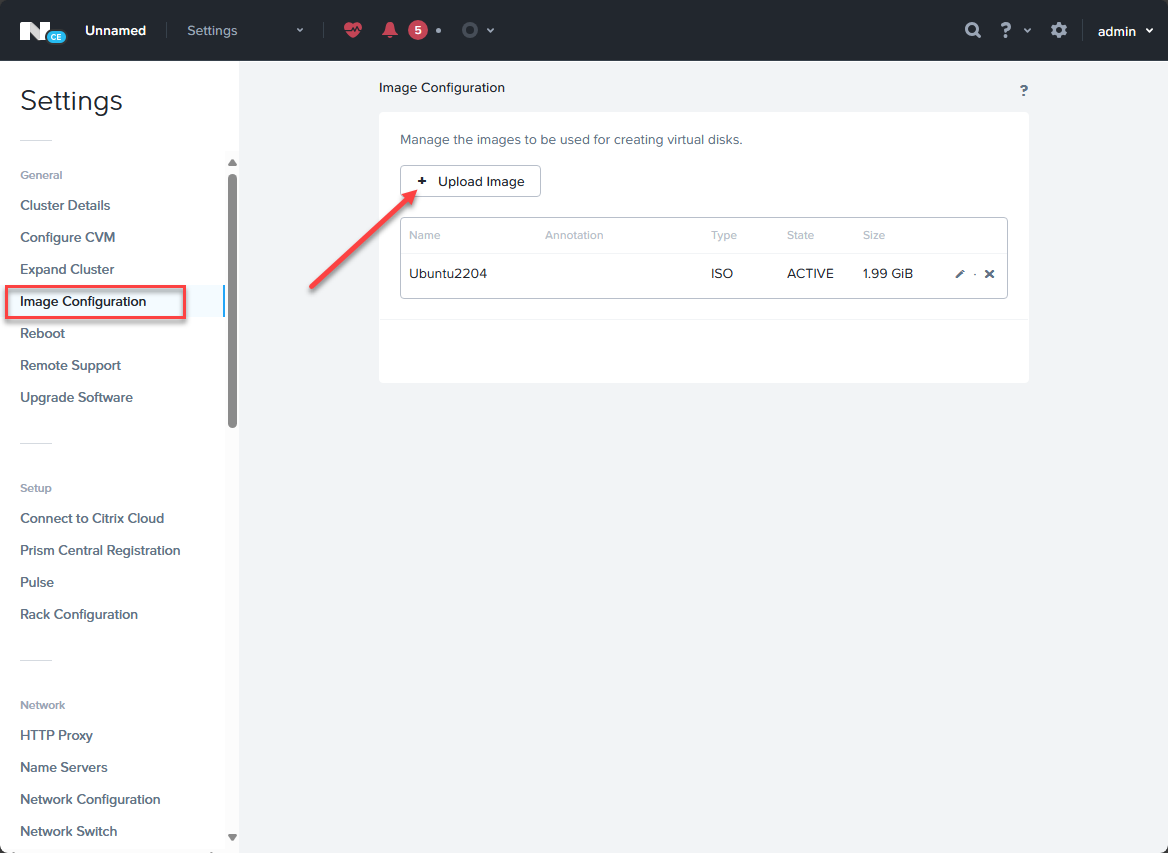
2. Upload the image to your Nutanix AHV server
Now, we need to upload the image we just downloaded to our Nutanix AHV server. To do this, navigate to your Settings “cog” and then General > Image Configuration.
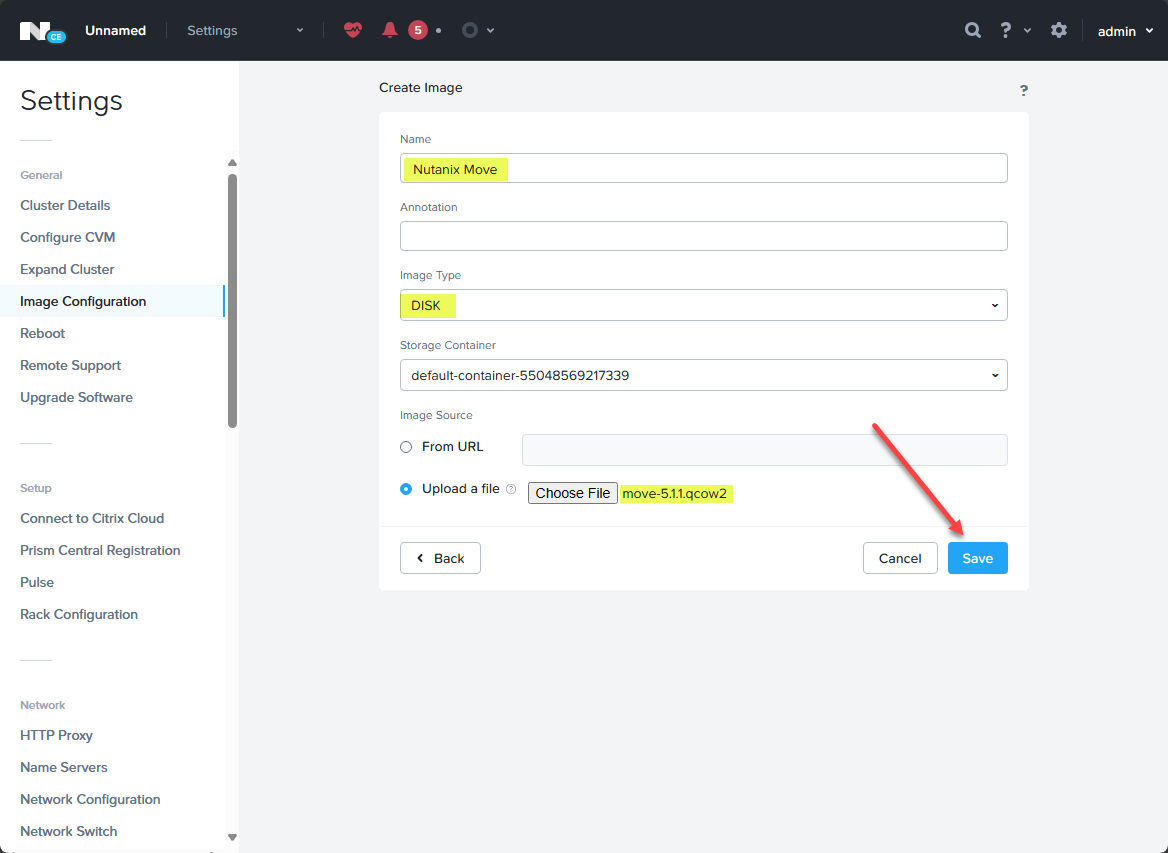
Name the image, choose DISK for Image type and then select Upload a file and browse to your QCOW image file you just downloaded. Click Save.
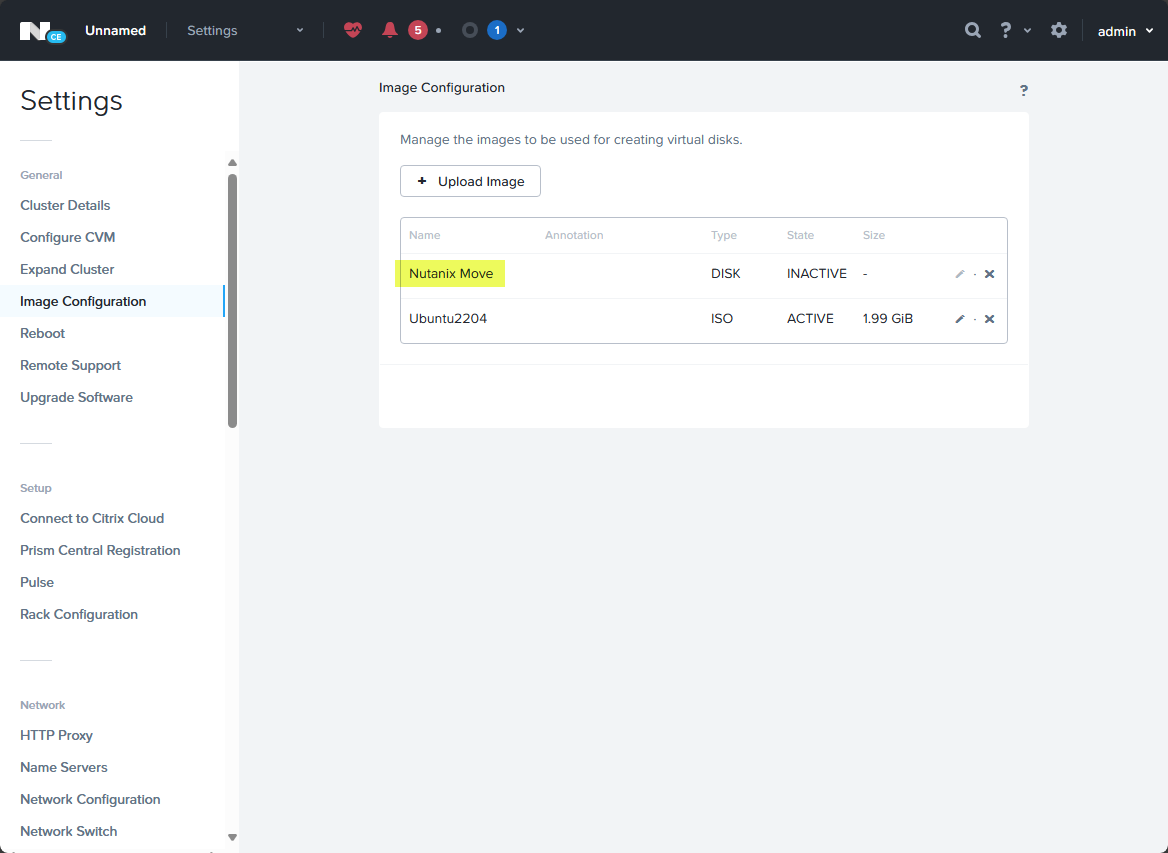
The image will upload and will be added to your Image library.
3. Create a new VM with the QCOW image
Below, I have switched to the VM menu and clicked + Create VM.
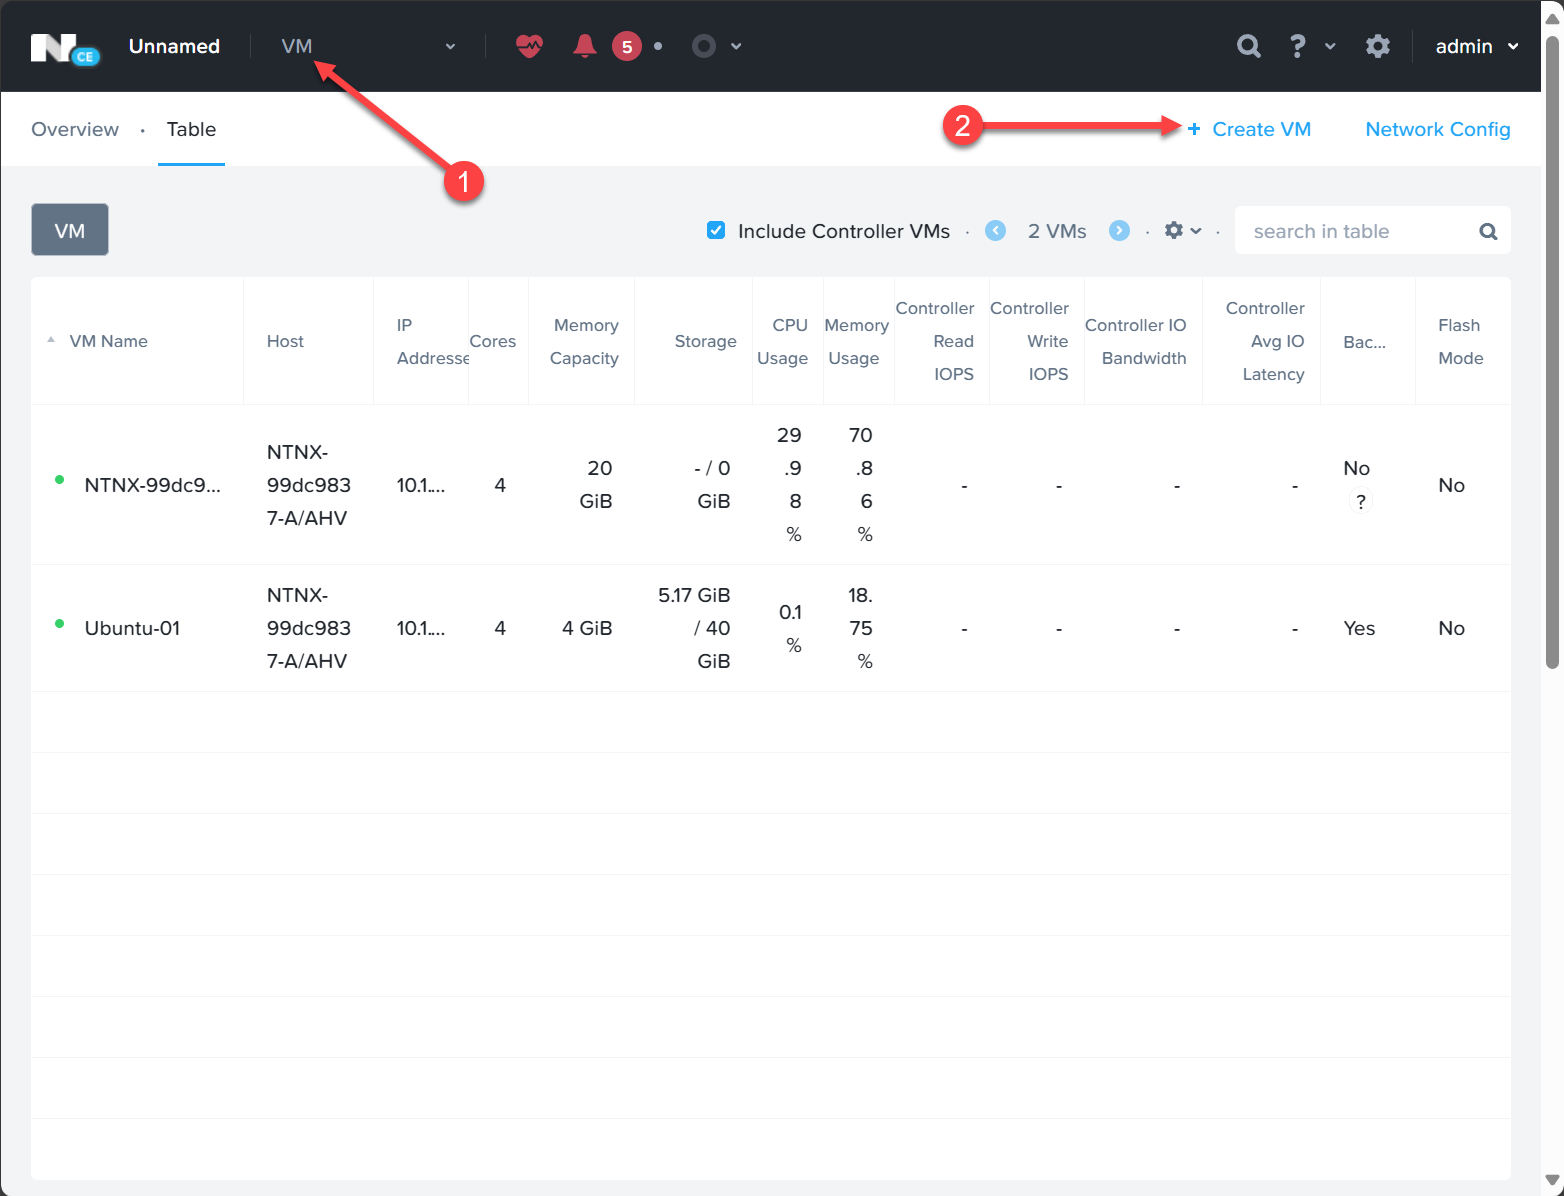
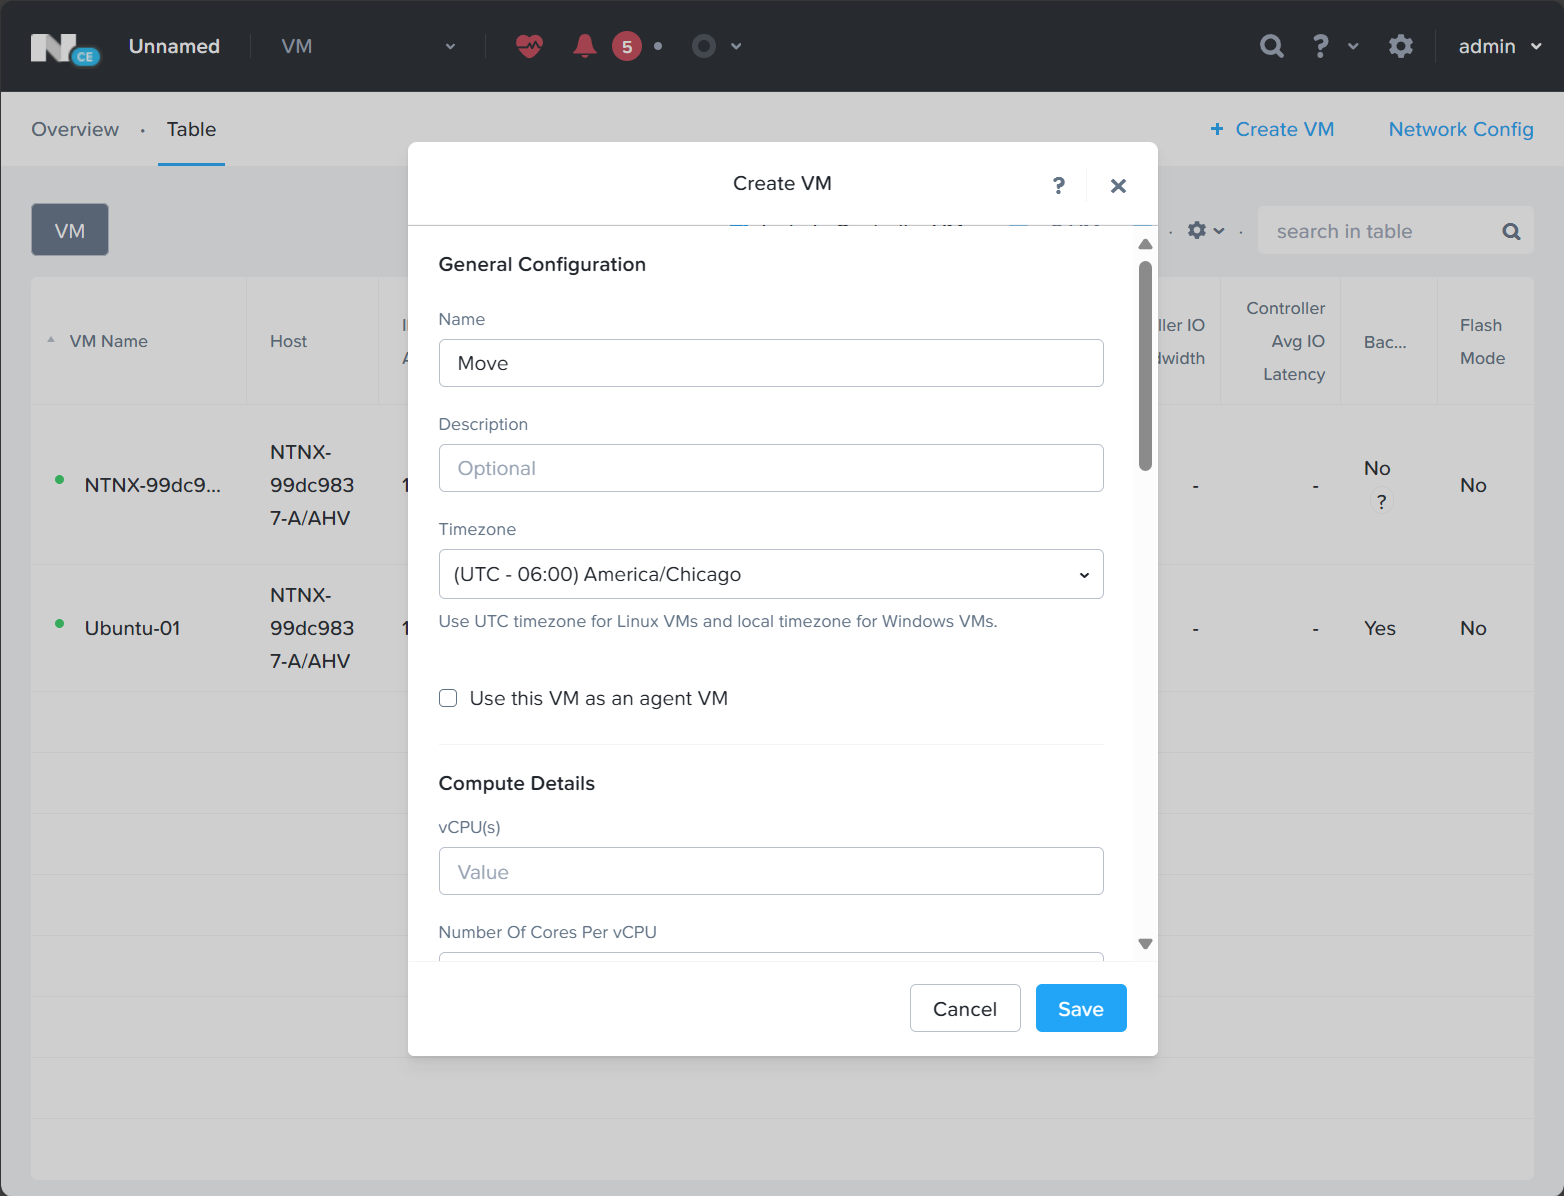
Name your VM and setup your compute details, vCPUs, memory, and other virtual hardware information from your cluster resources.
Click the + Add New Disk:
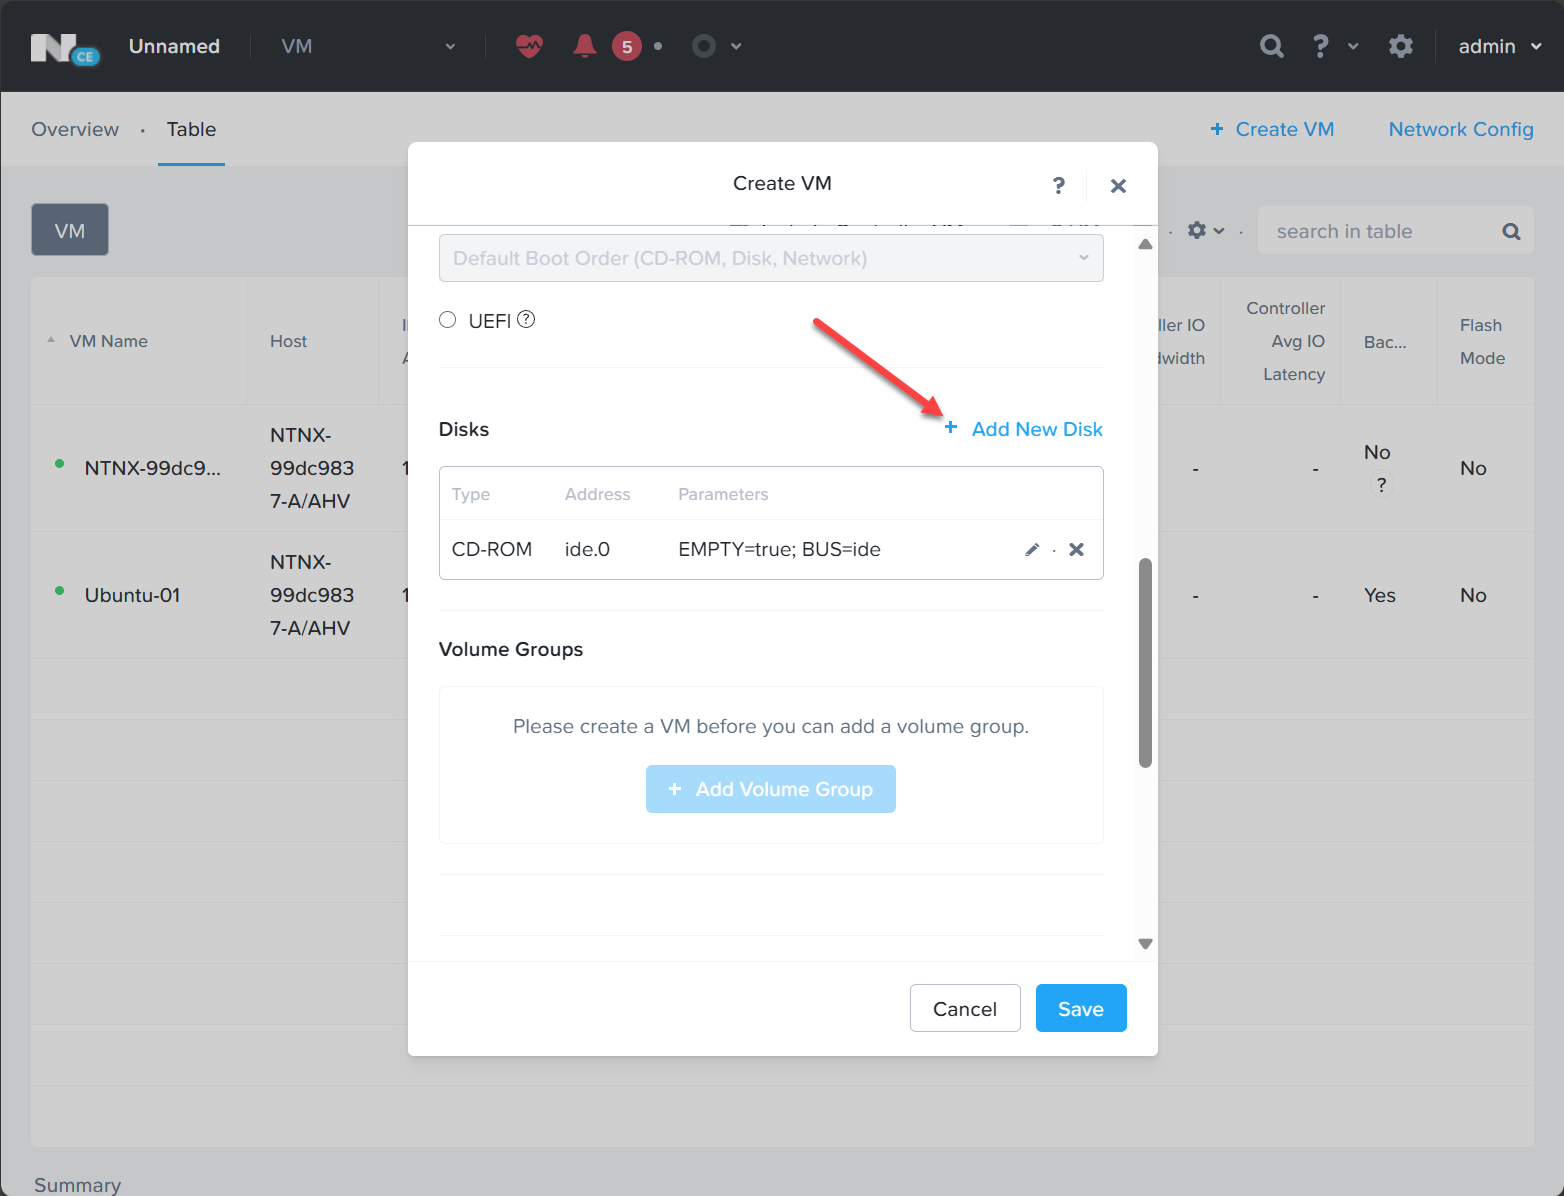
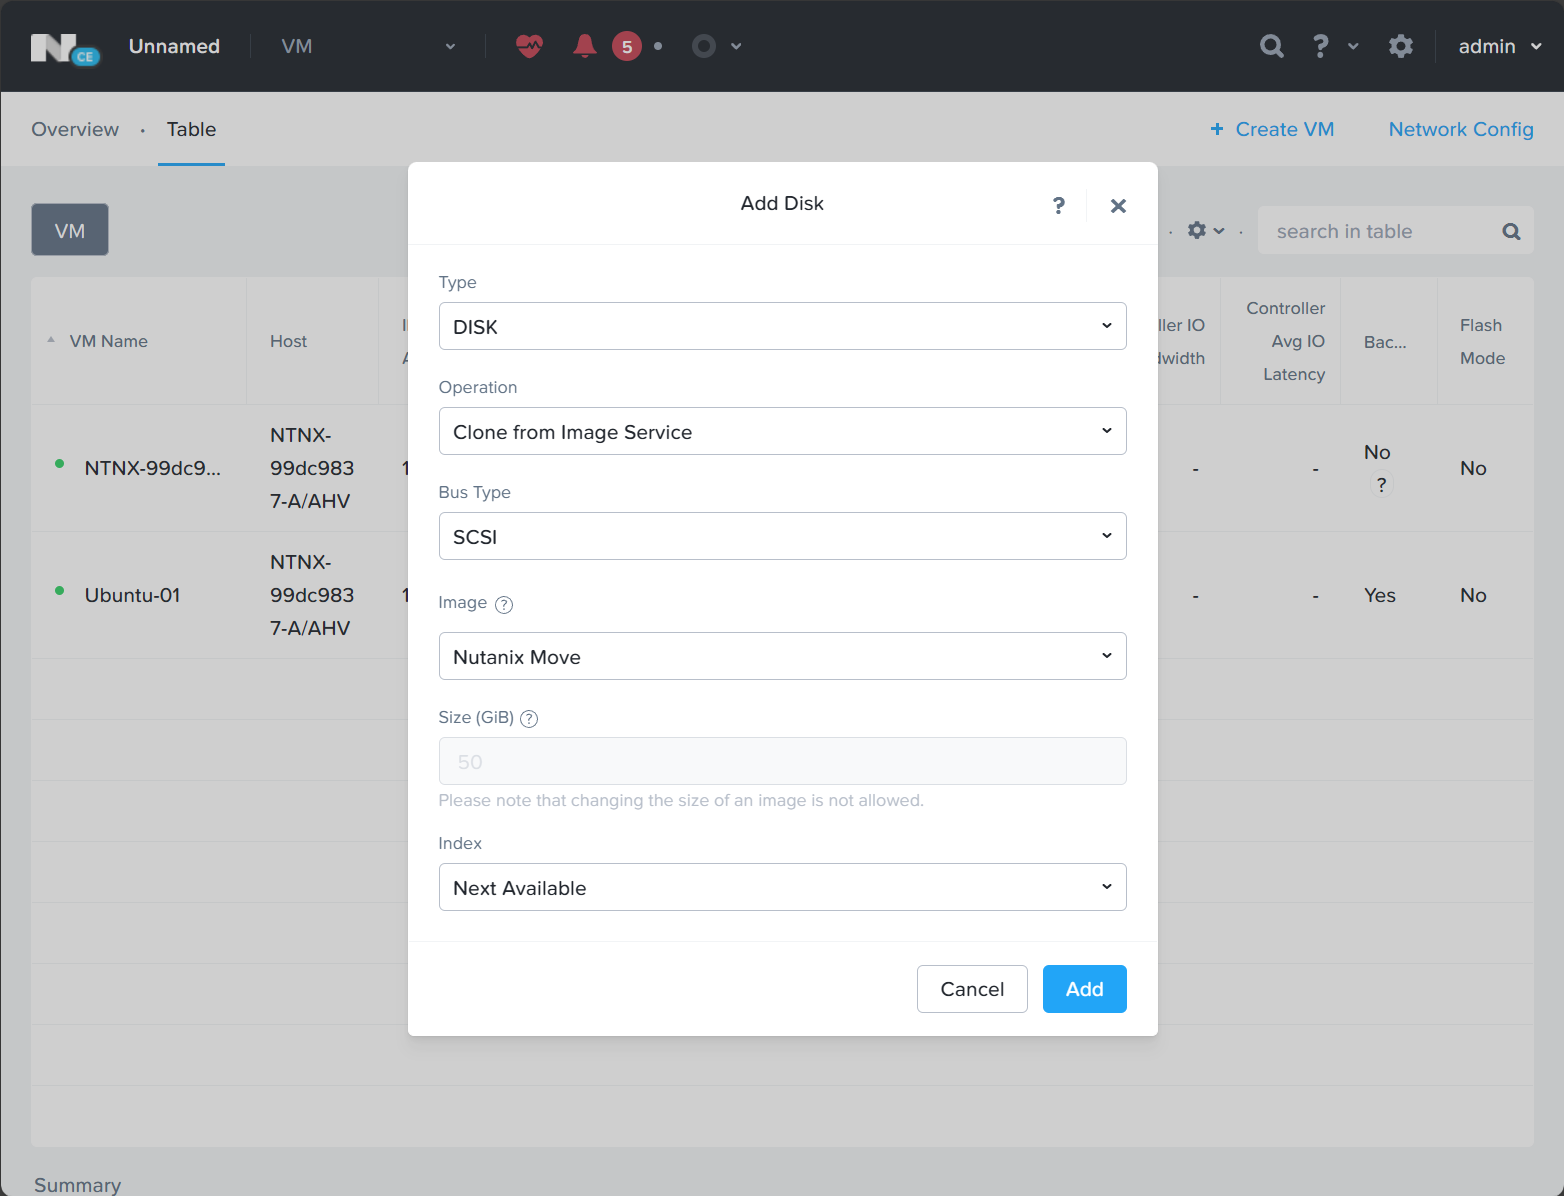
Choose Clone from Image Service and select the Image you uploaded in the steps above. Click Add.
Click the + Add New NIC button.
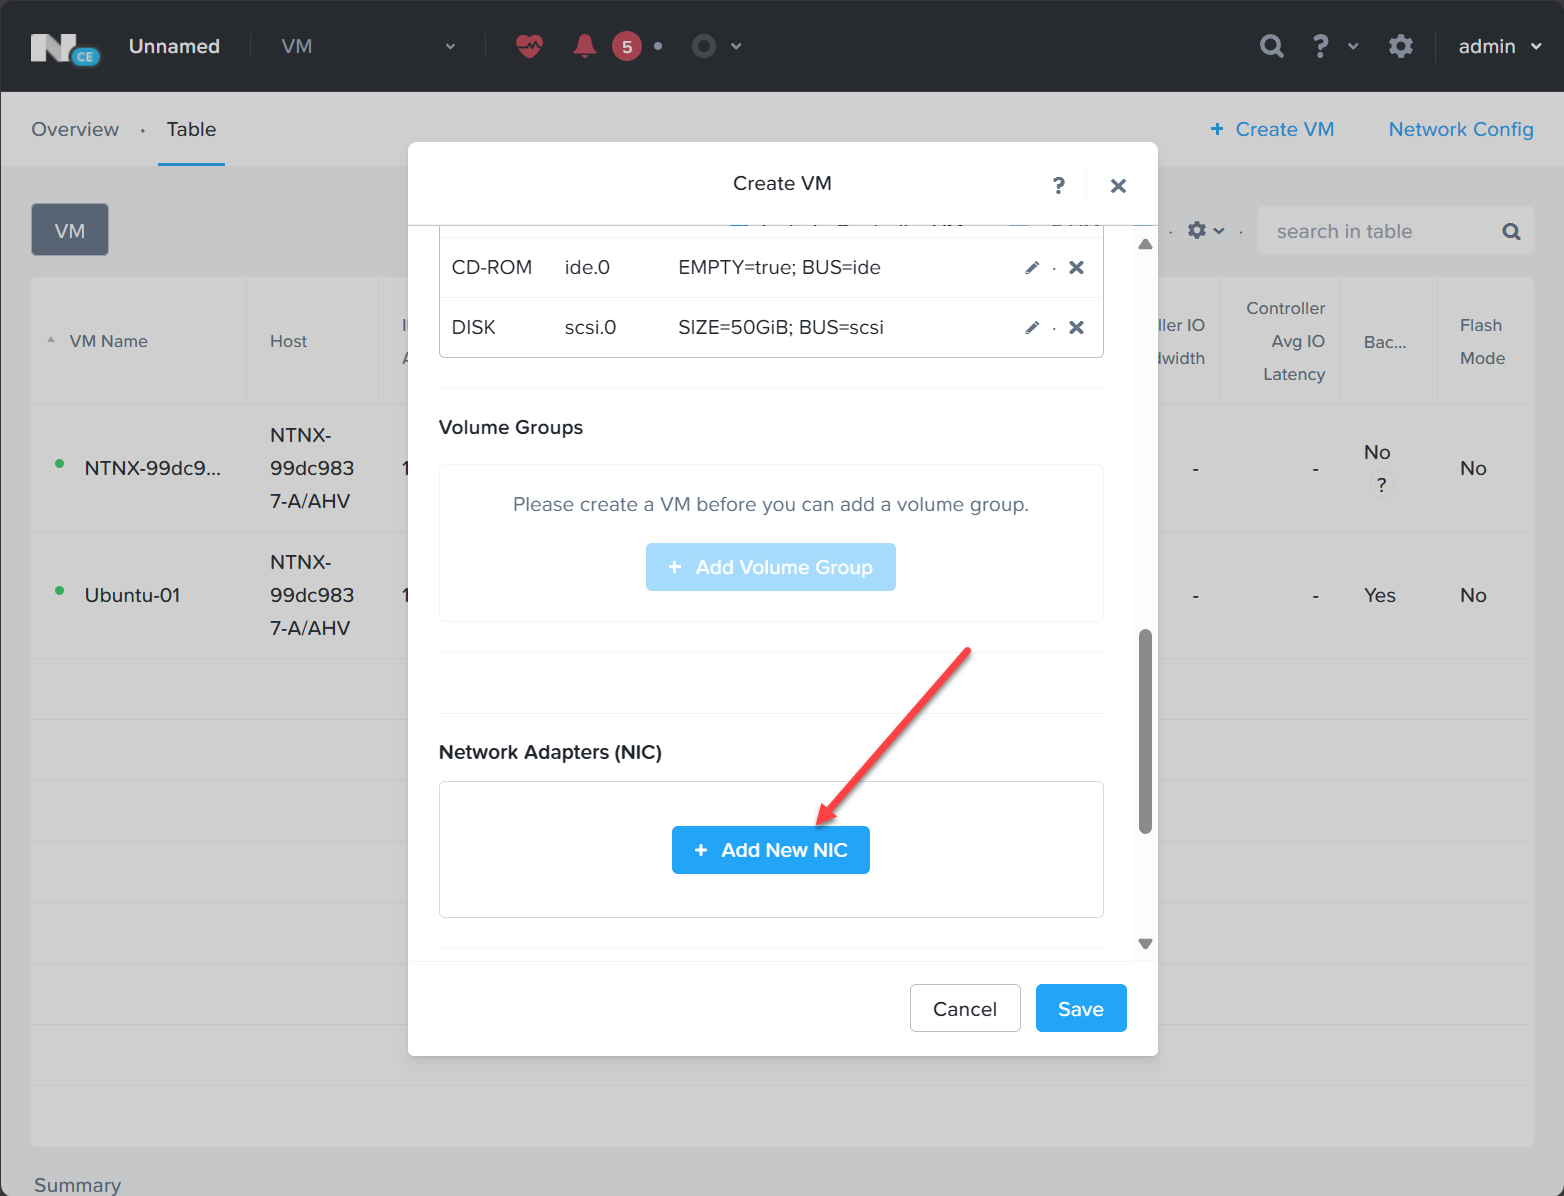
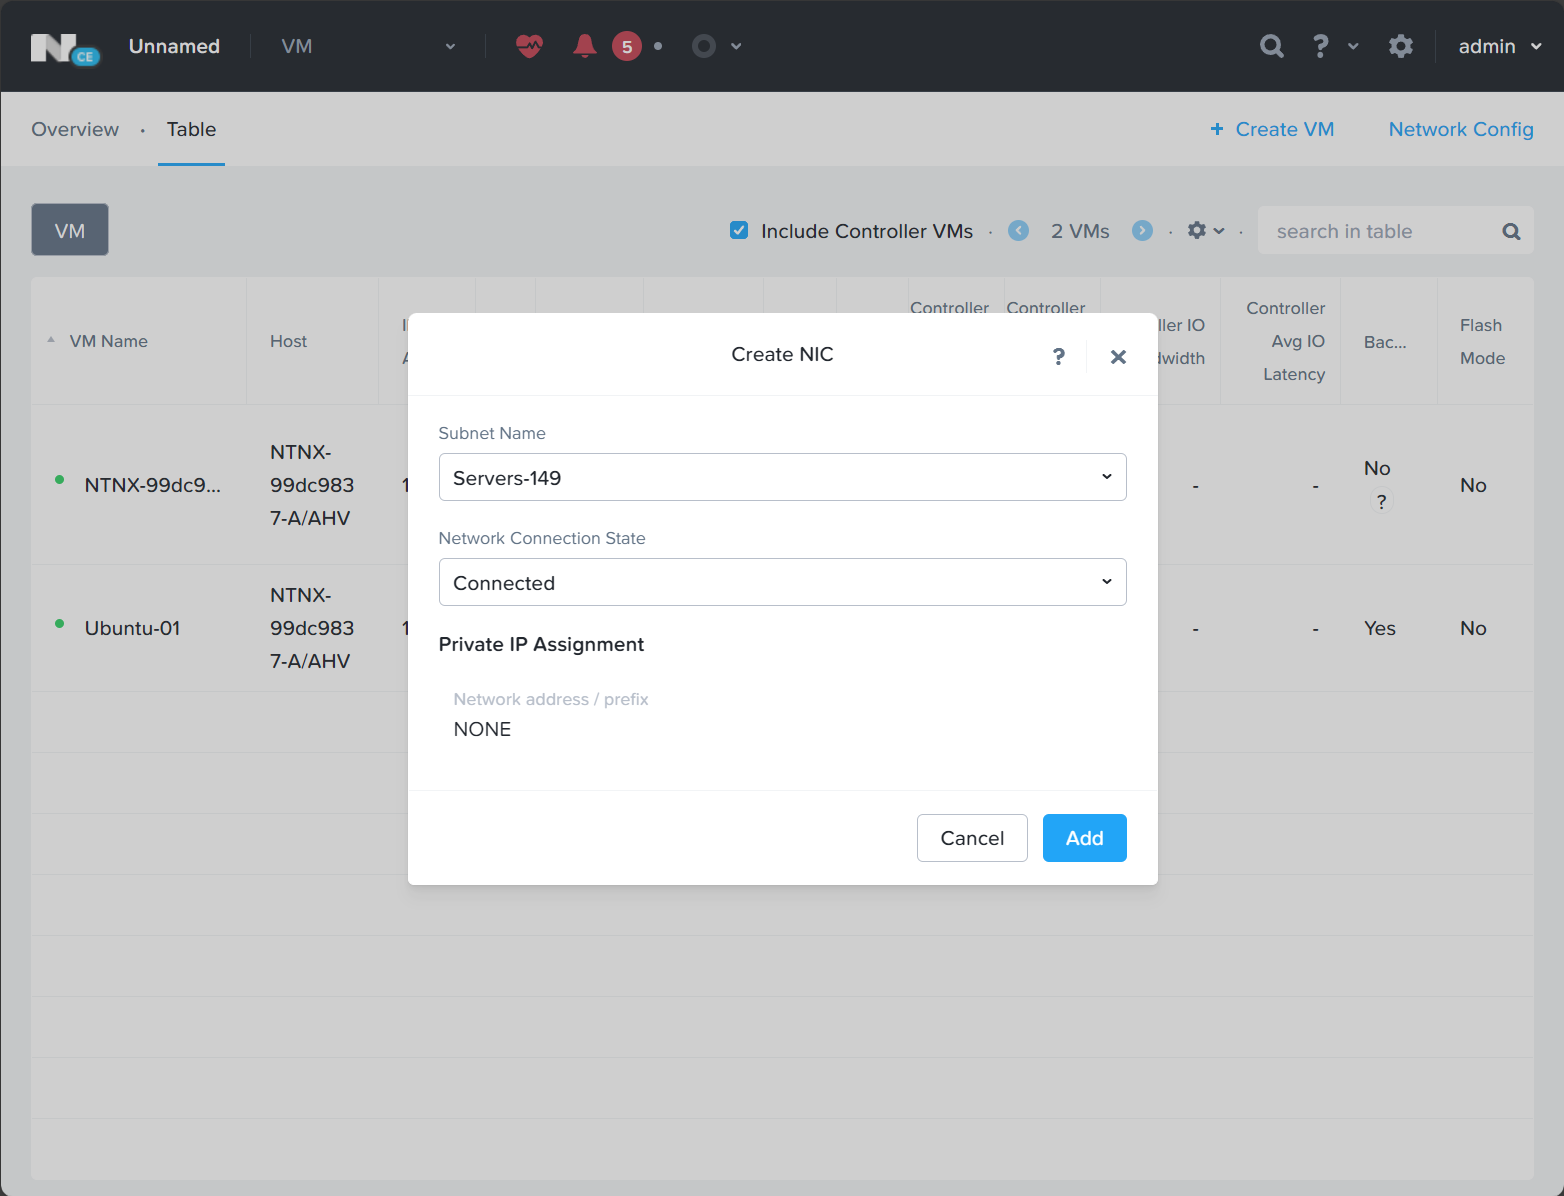
Select your Subnet Name, connection state, etc, and click Add.
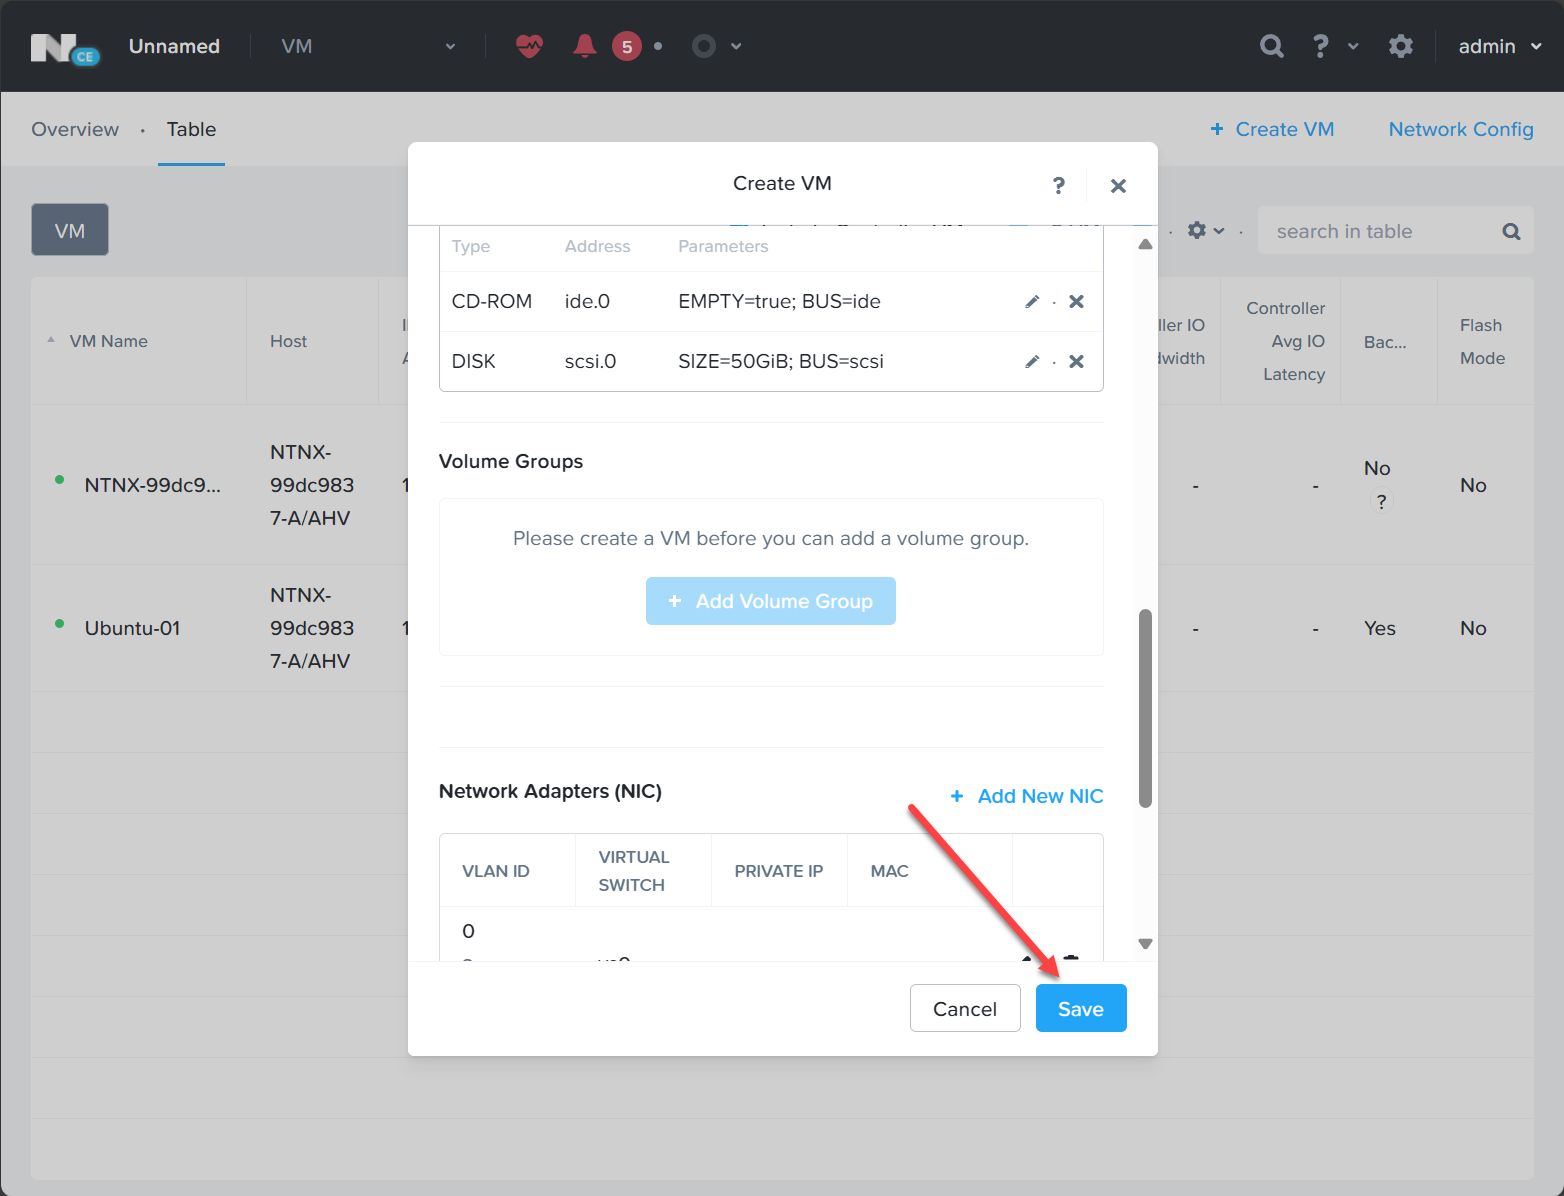
Now, we simply click Save to create the VM.
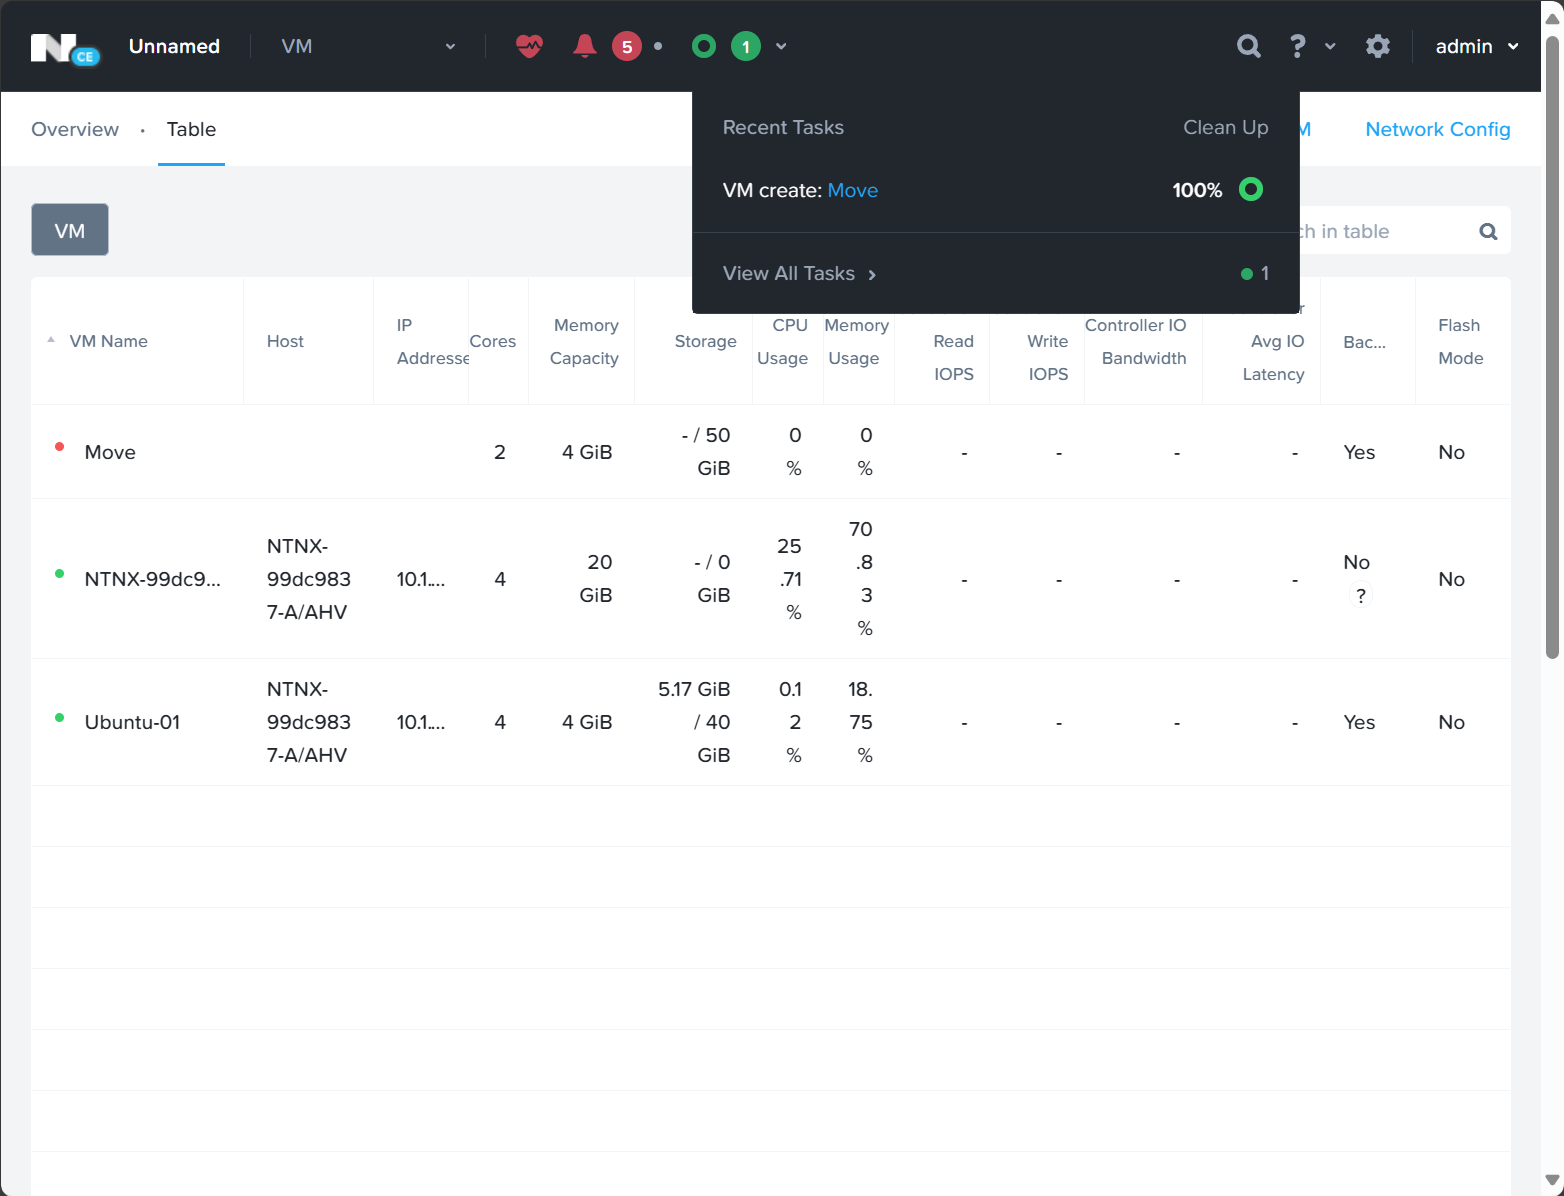
Nutanix creates the VM:
4. Power on the Nutanix Move VM
Now, we can right-click the VM and power it on.
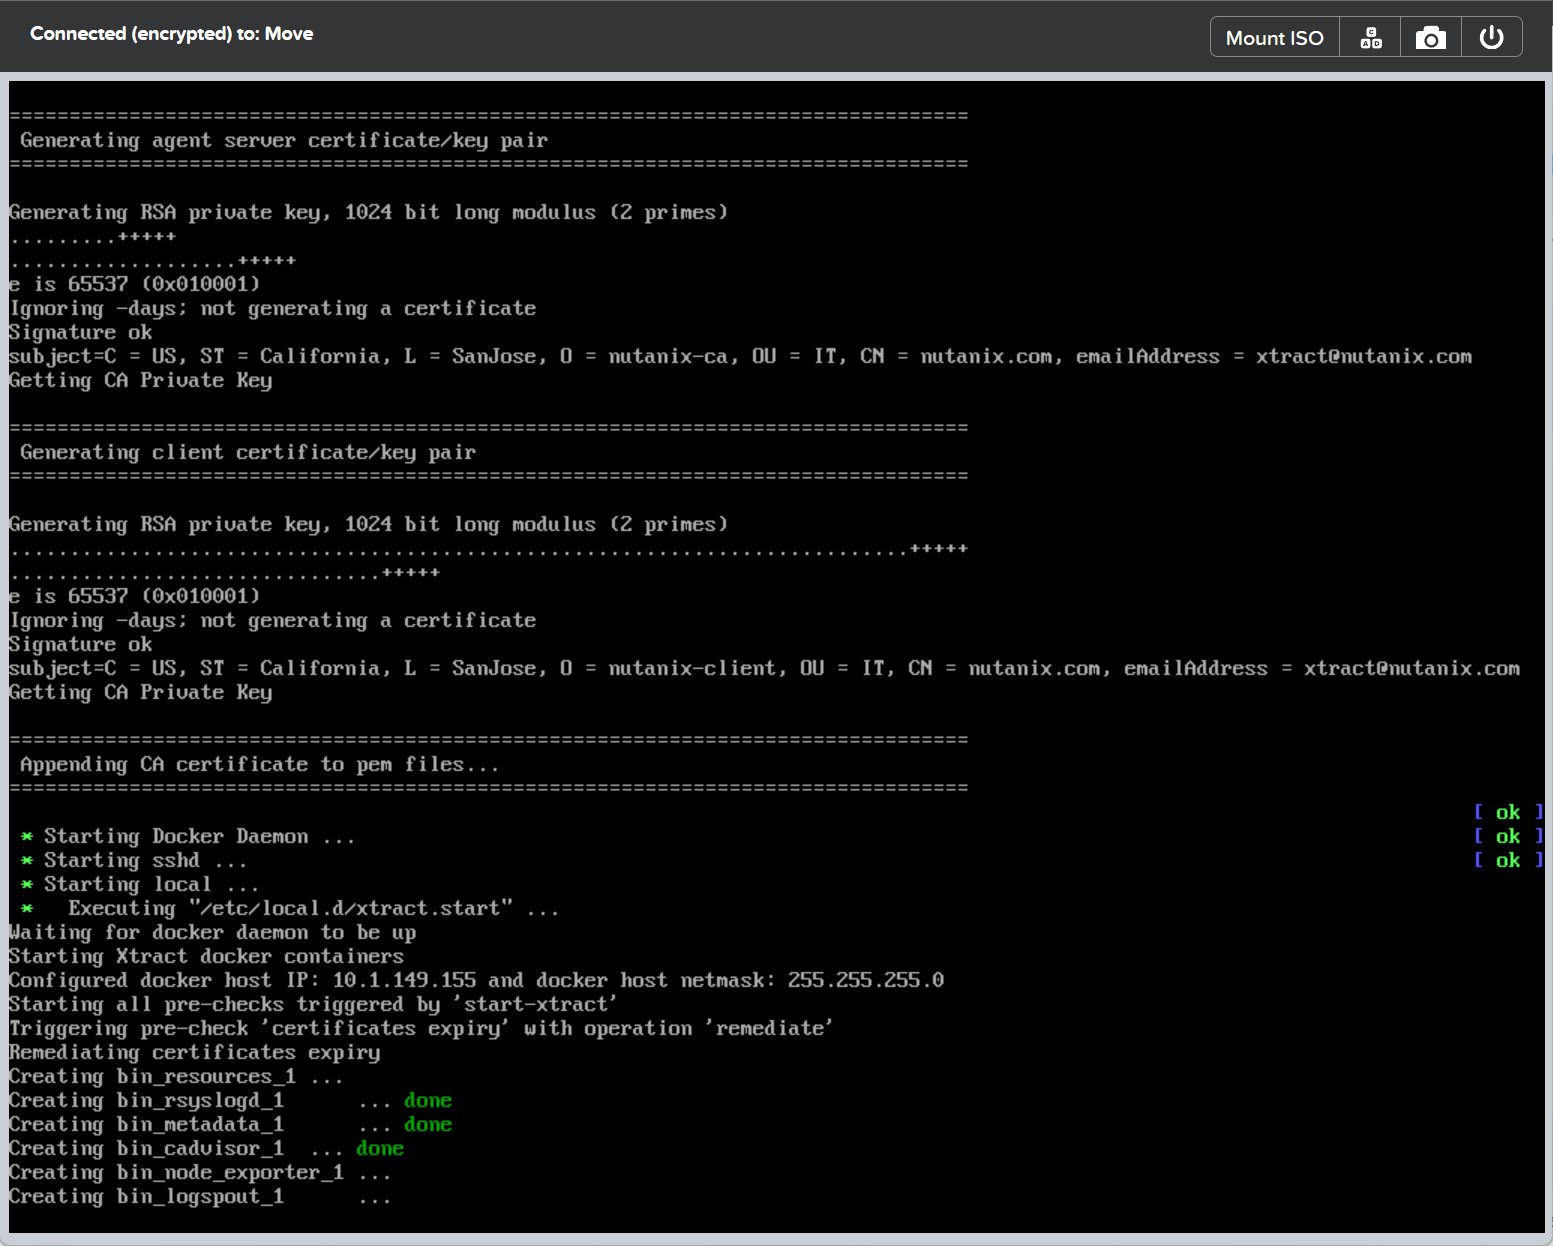
5. Log in and change the password
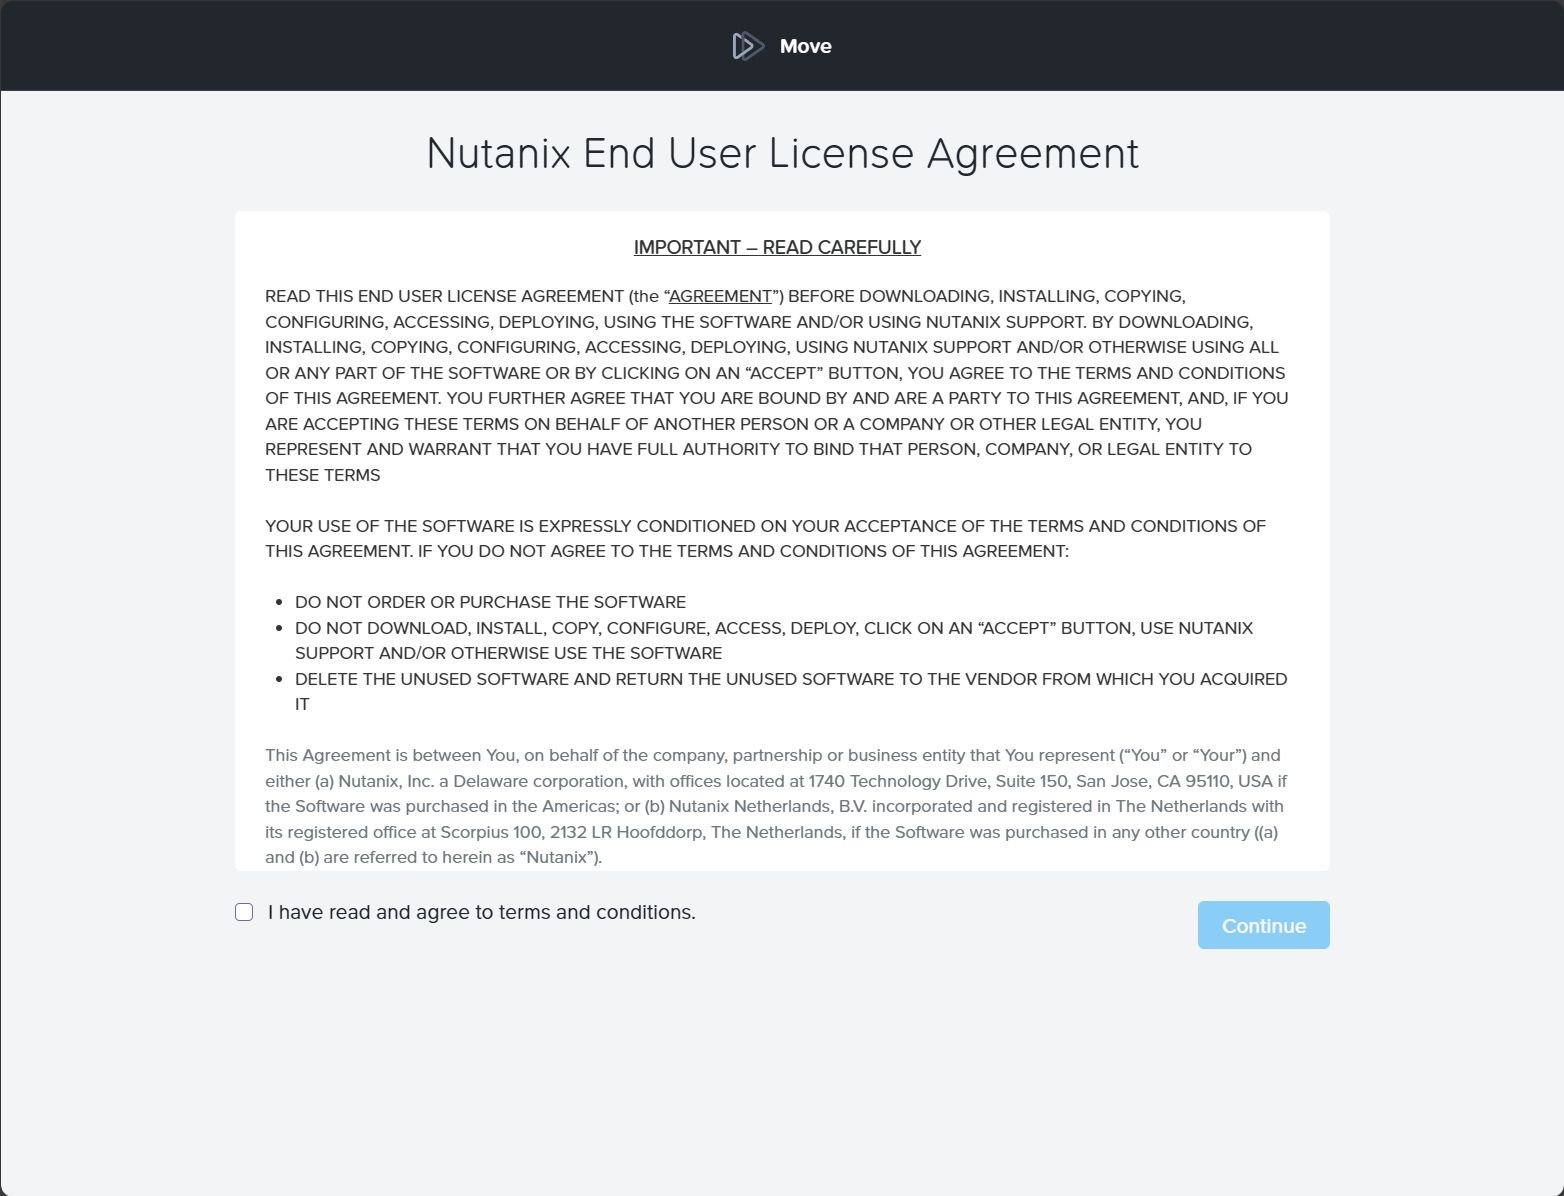
Now that Nutanix Move is installed via the new VM we created, we can browse to the IP address of the Nutanix Move VM. You should see the IP address in your Nutanix Prism central portal.
When you browse there, accept the EULA.
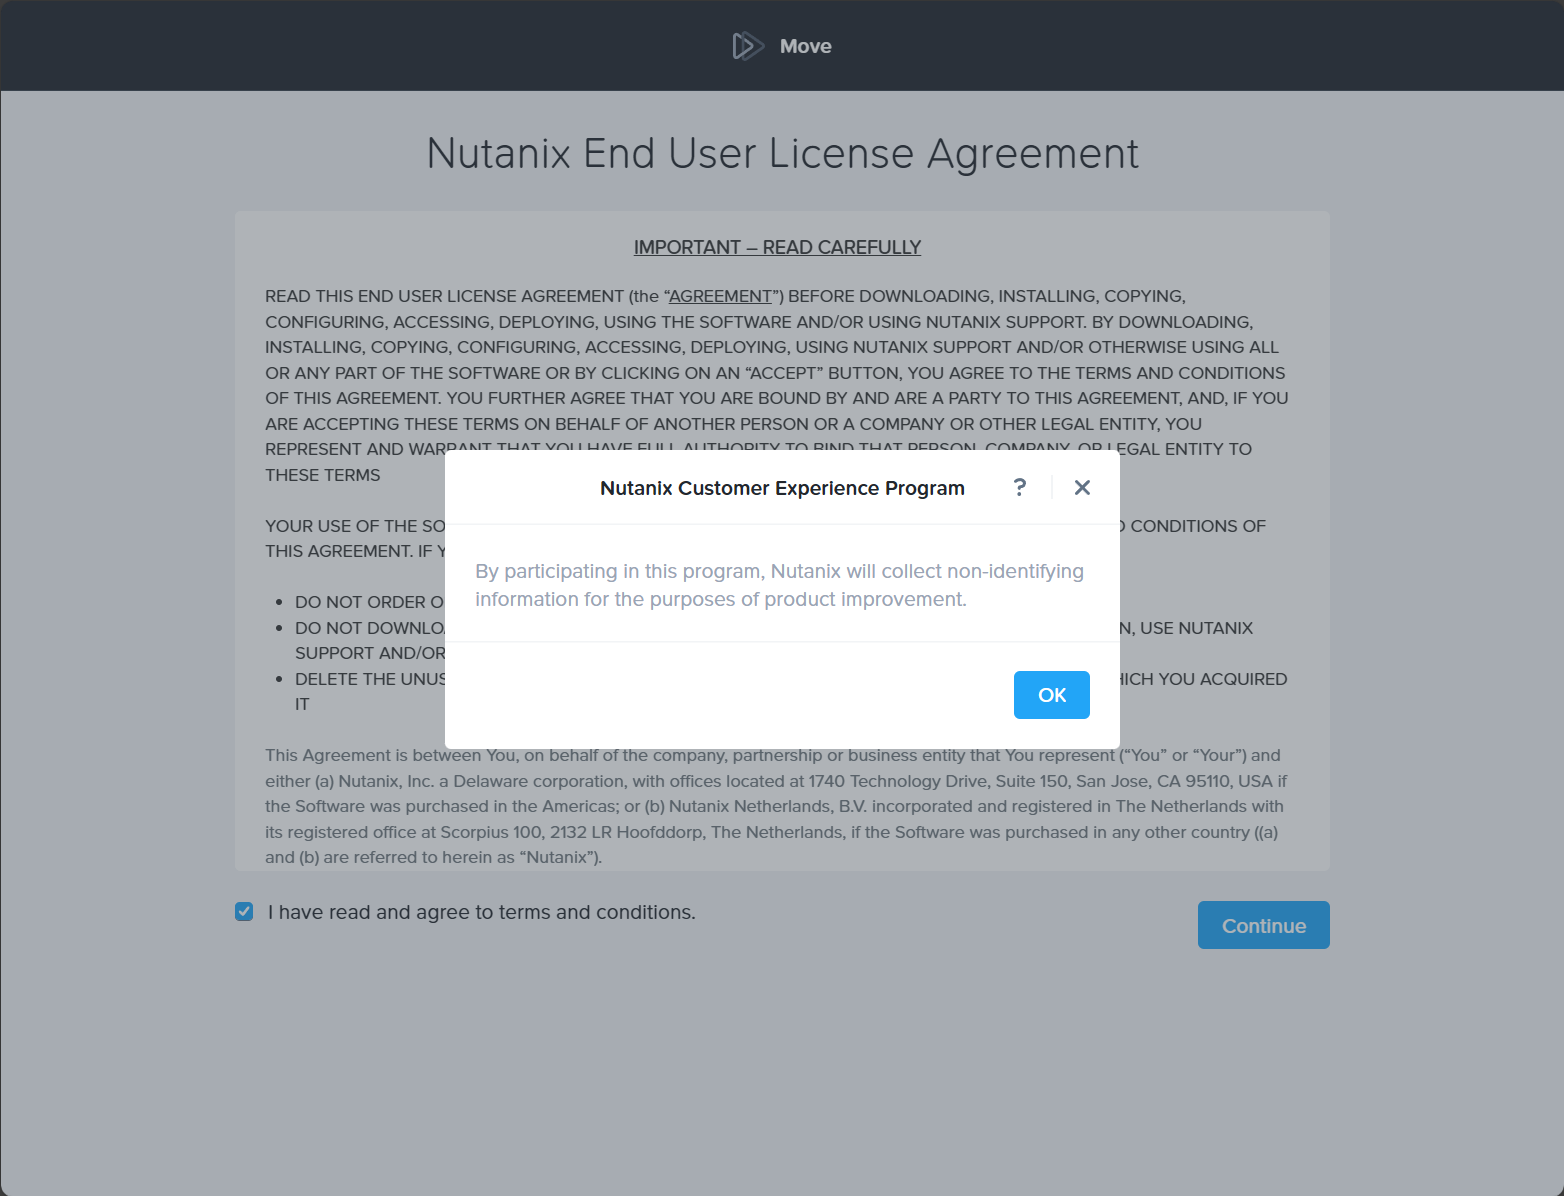
Click OK to the Nutanix Customer Experience Program.
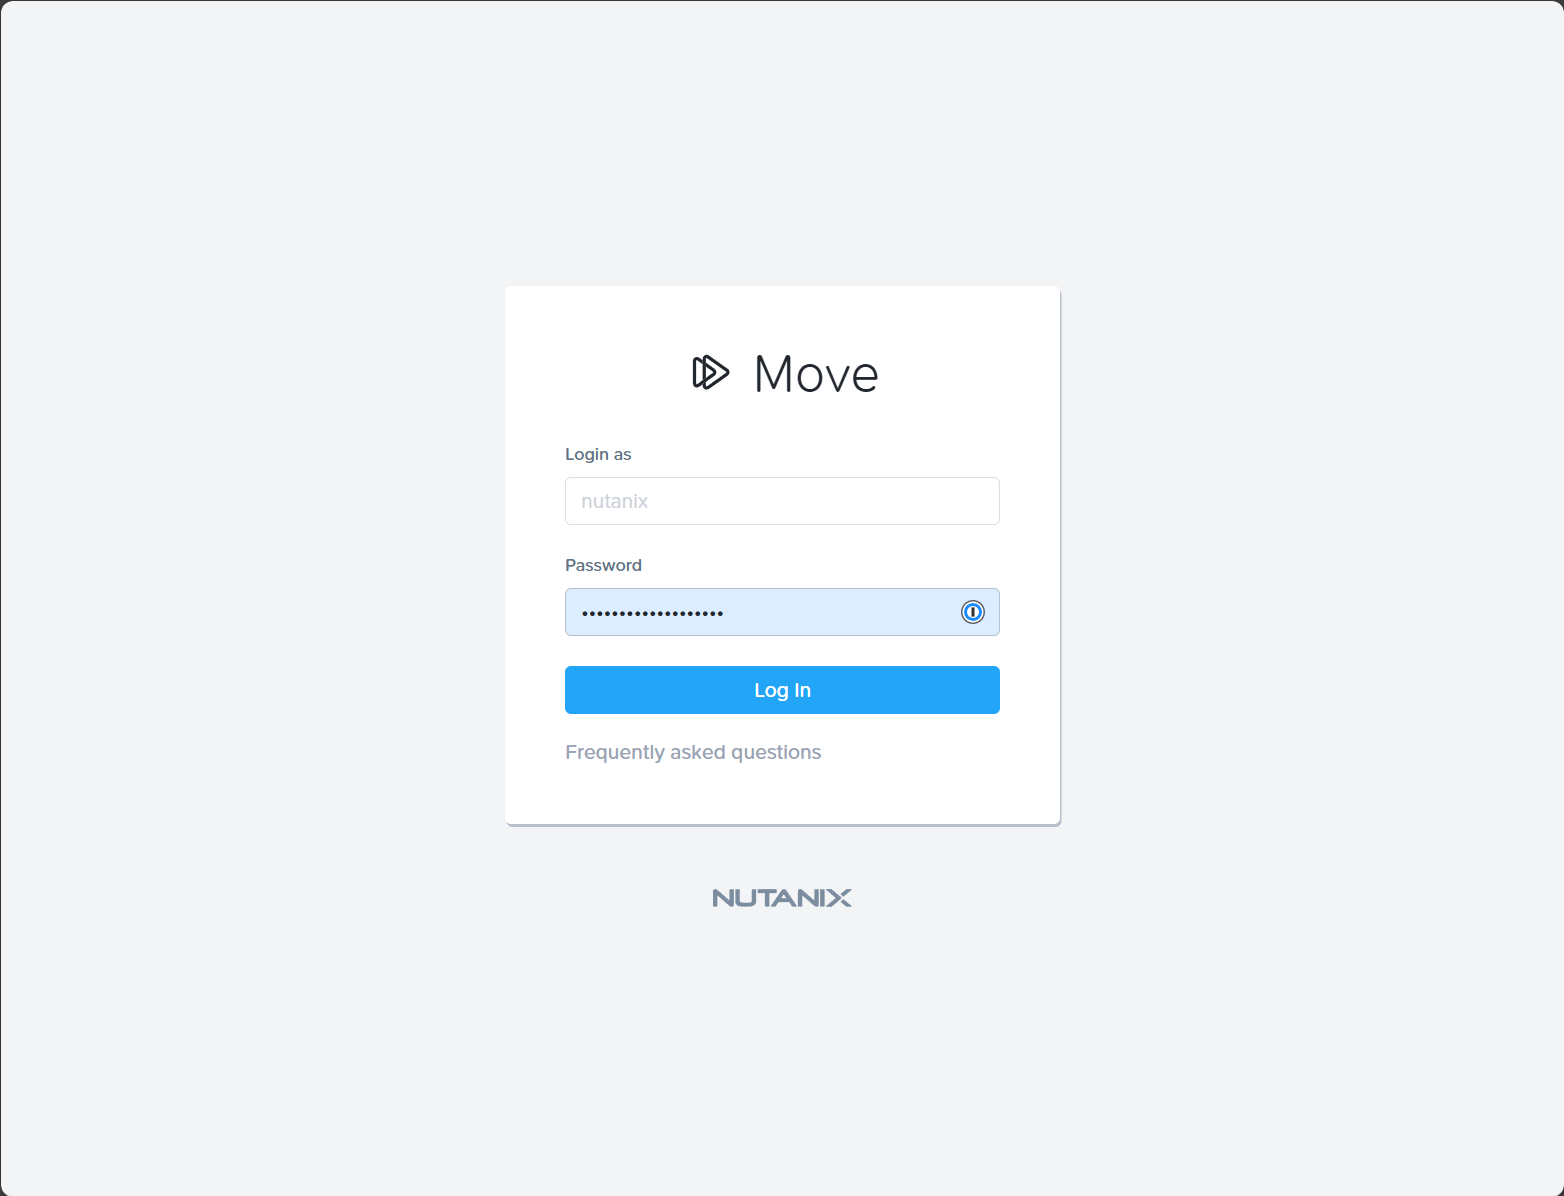
It will now take you to the change password dialog box. You can see the username is nutanix and you will set the password information.
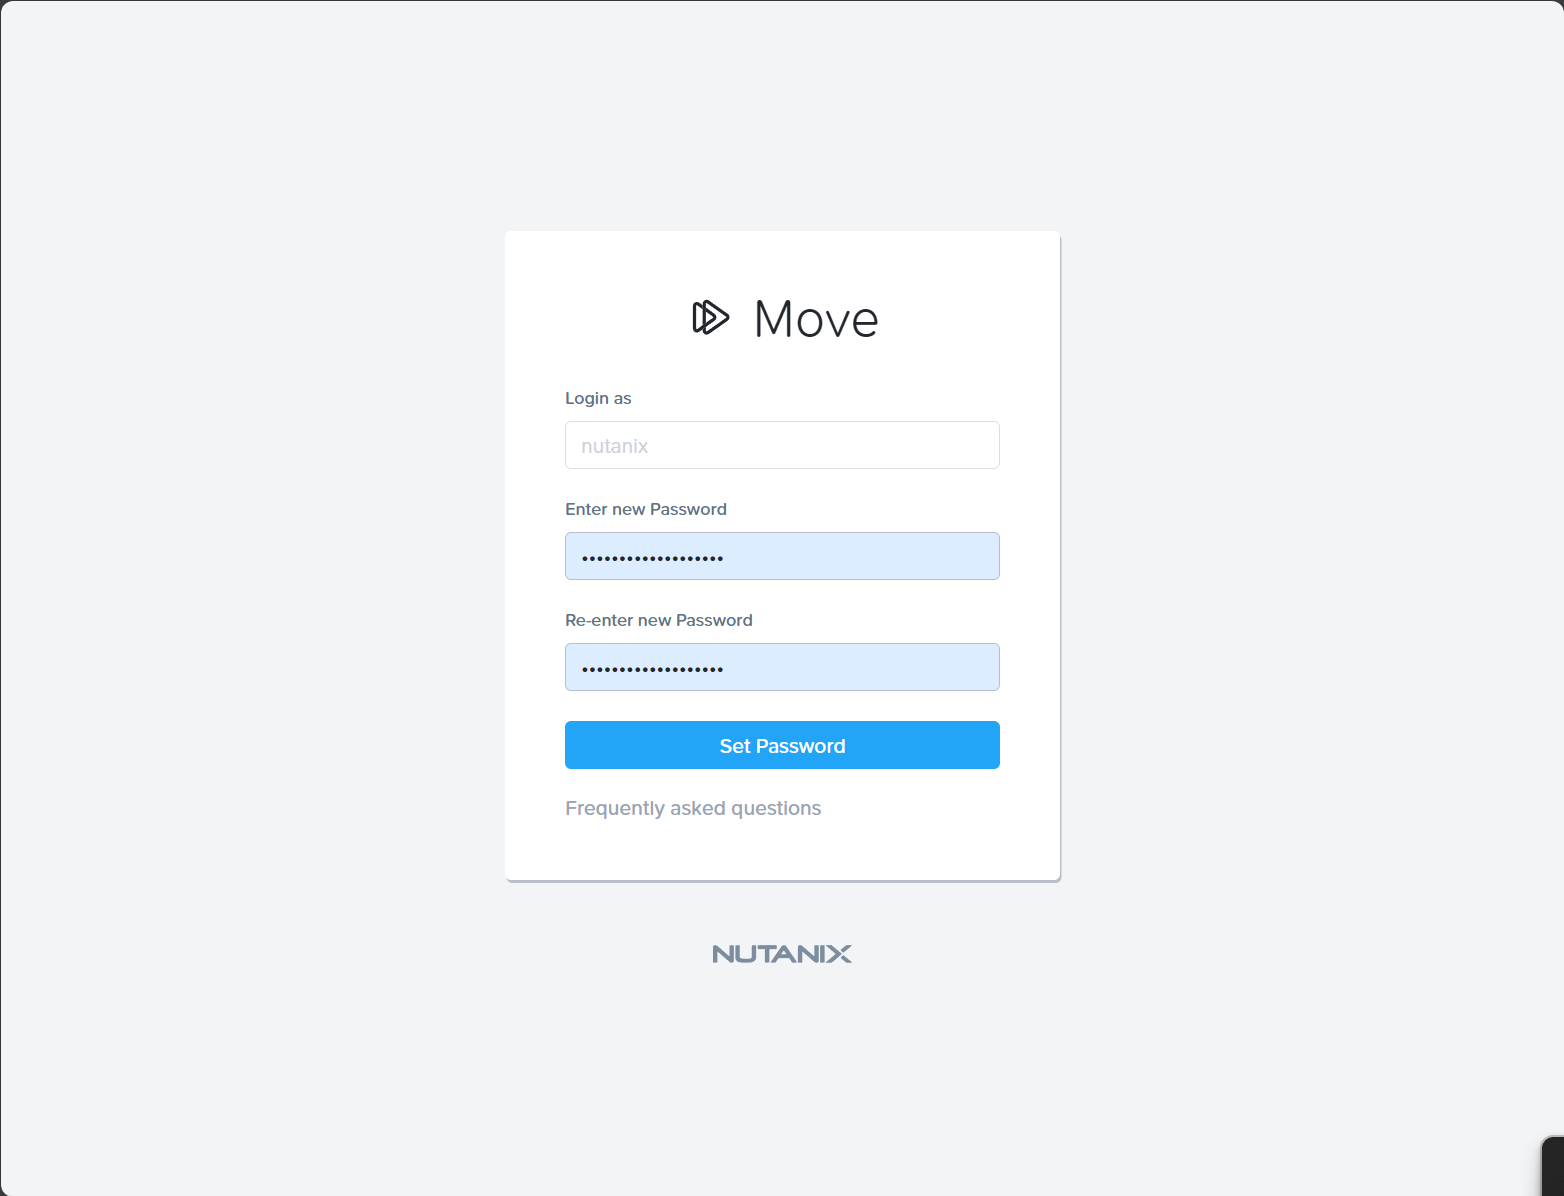
After changing your password, you can then login with that password.
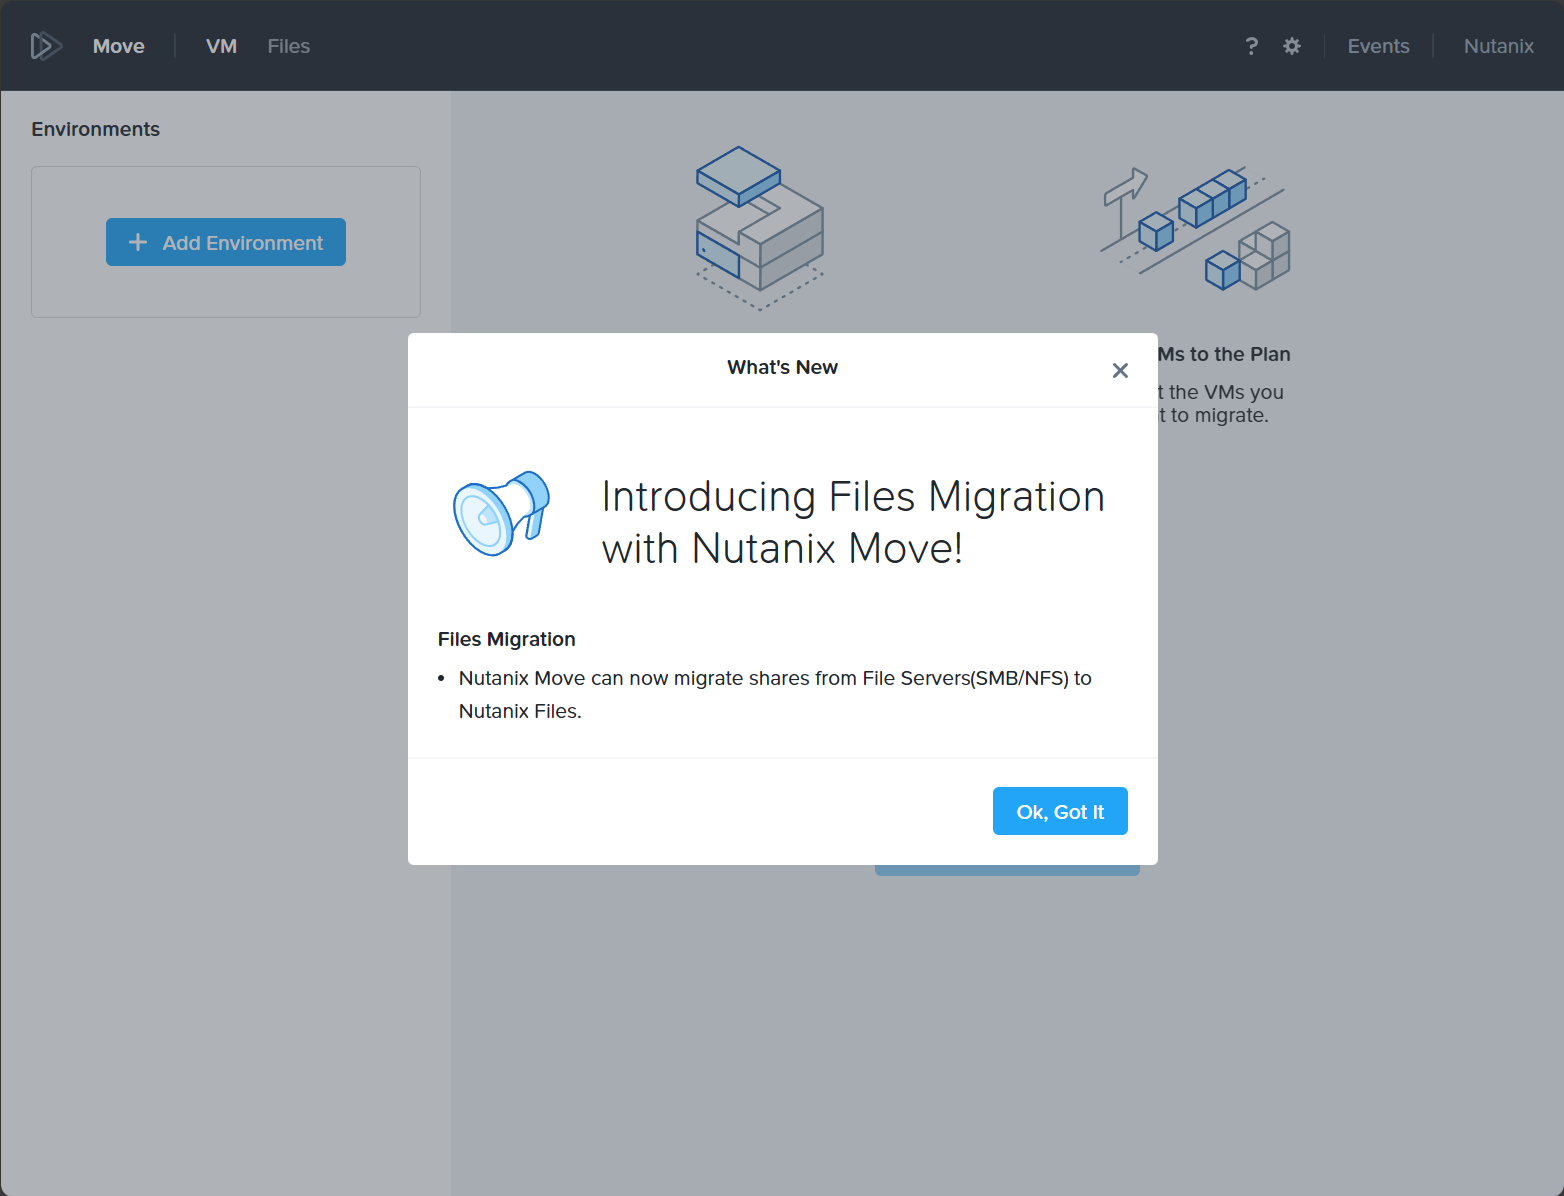
Now, we will be logged into the Nutanix Move utility. You will see the What’s New dialog box pop up. Click Ok, Got it.
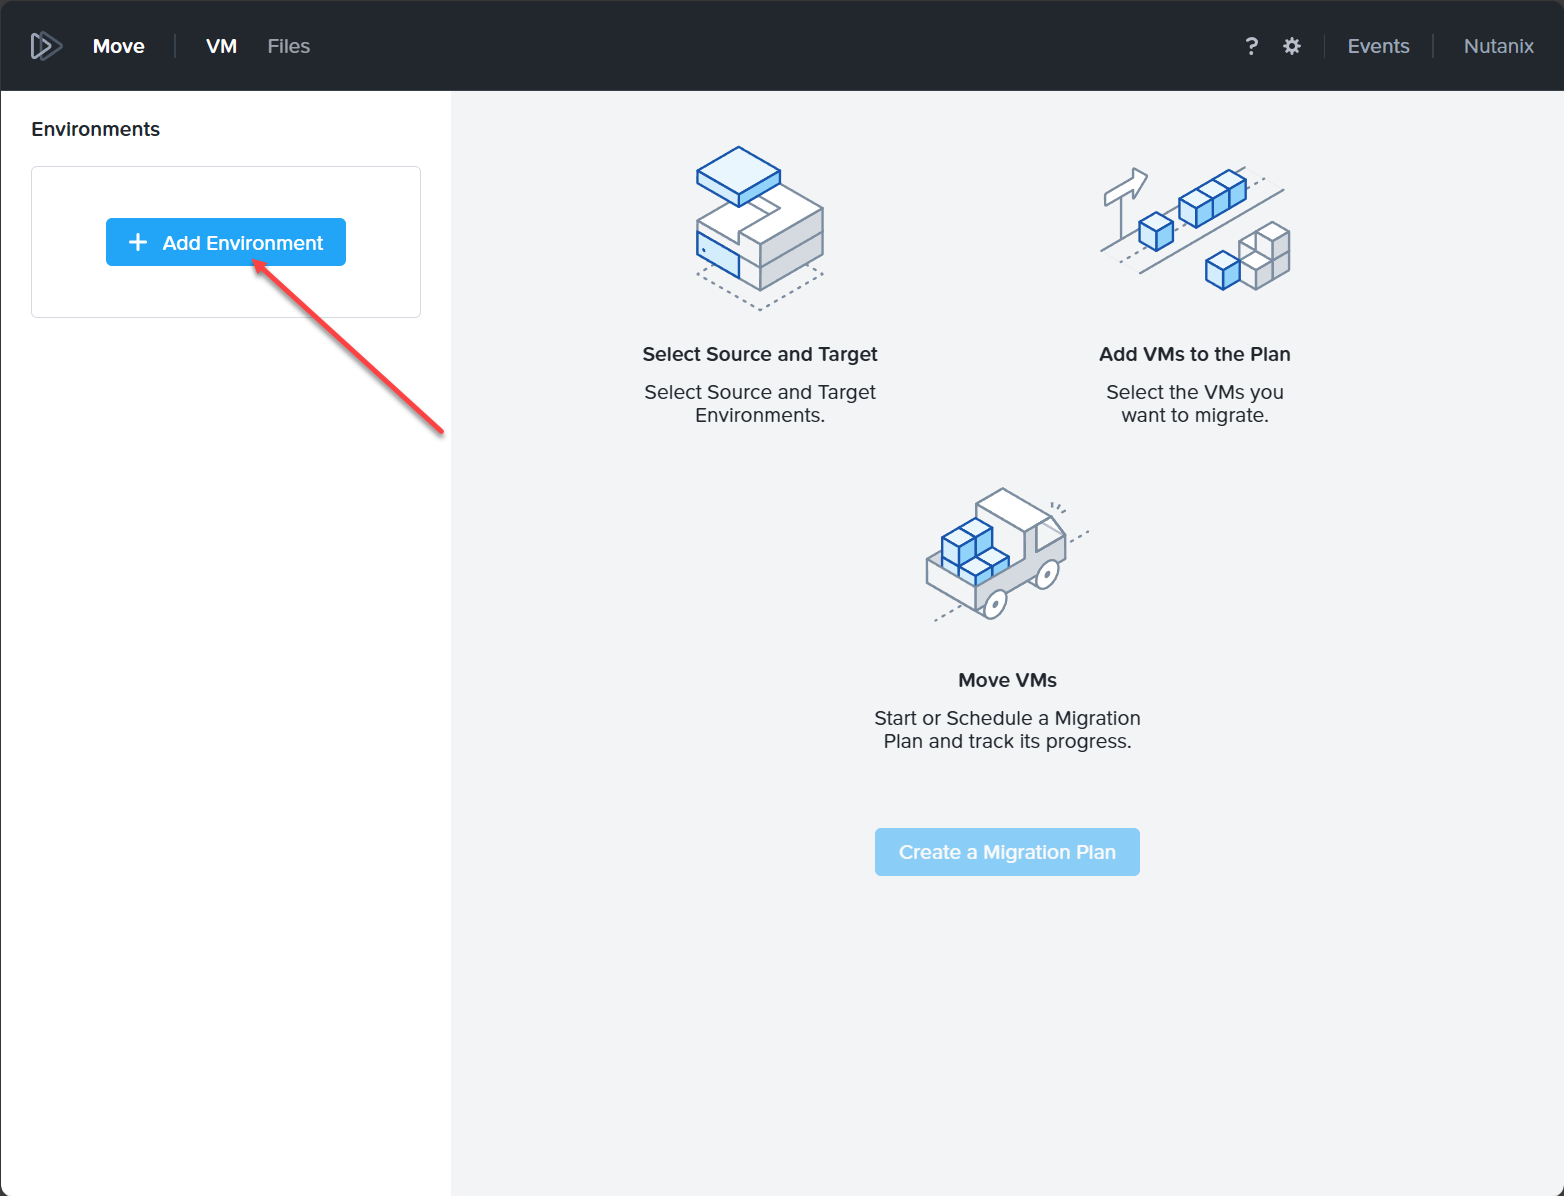
Adding Environments to Nutanix Move
The next step we need to take is to add our environments to Nutanix Move. You may have noticed, we said environments plural. The way this works is we add both our VMware ESXi environment and our Nutanix AHV environment to Move. It doesn’t automatically add the Nutanix environment where you are running the utility.
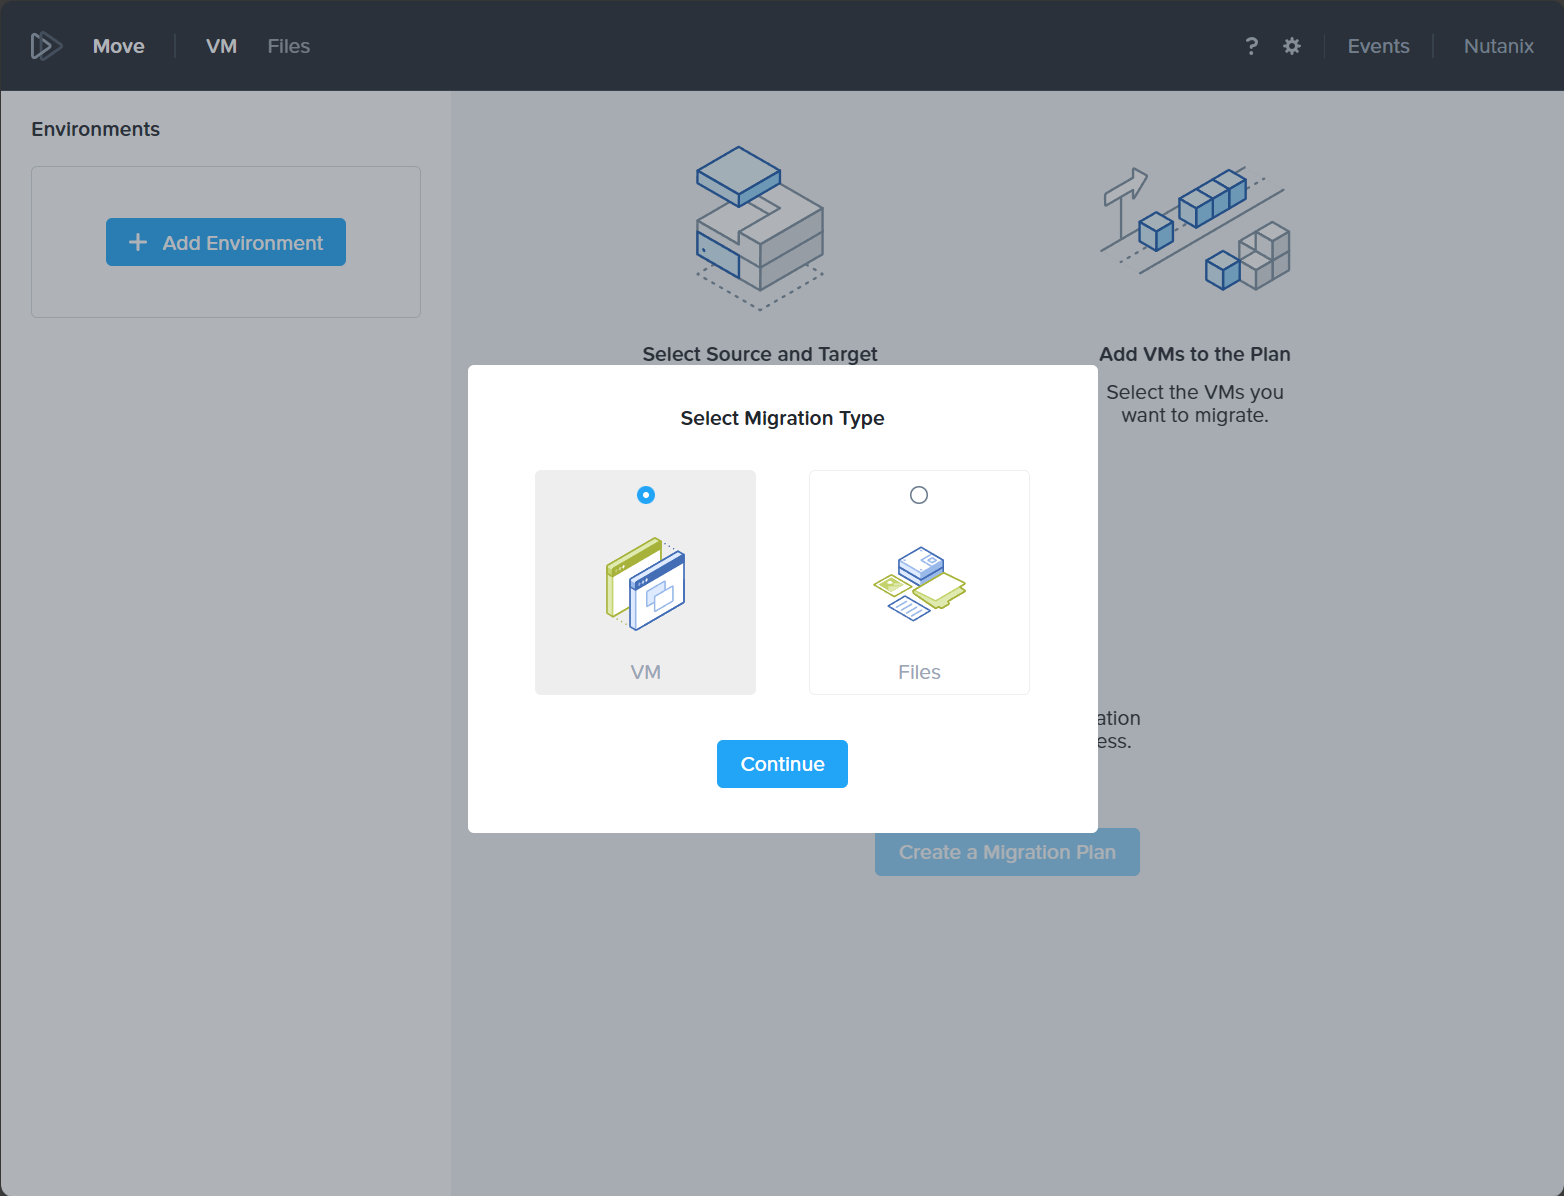
First, we need to configure the Select Migration Type. We will be using the VM migration, but you can see you also have the Nutanix Files option.
Click the + Add Environment button.
First we will add our VMware ESXi environment. Choose this from the dropdown.
Fill in the details of the VMware ESXi environment.
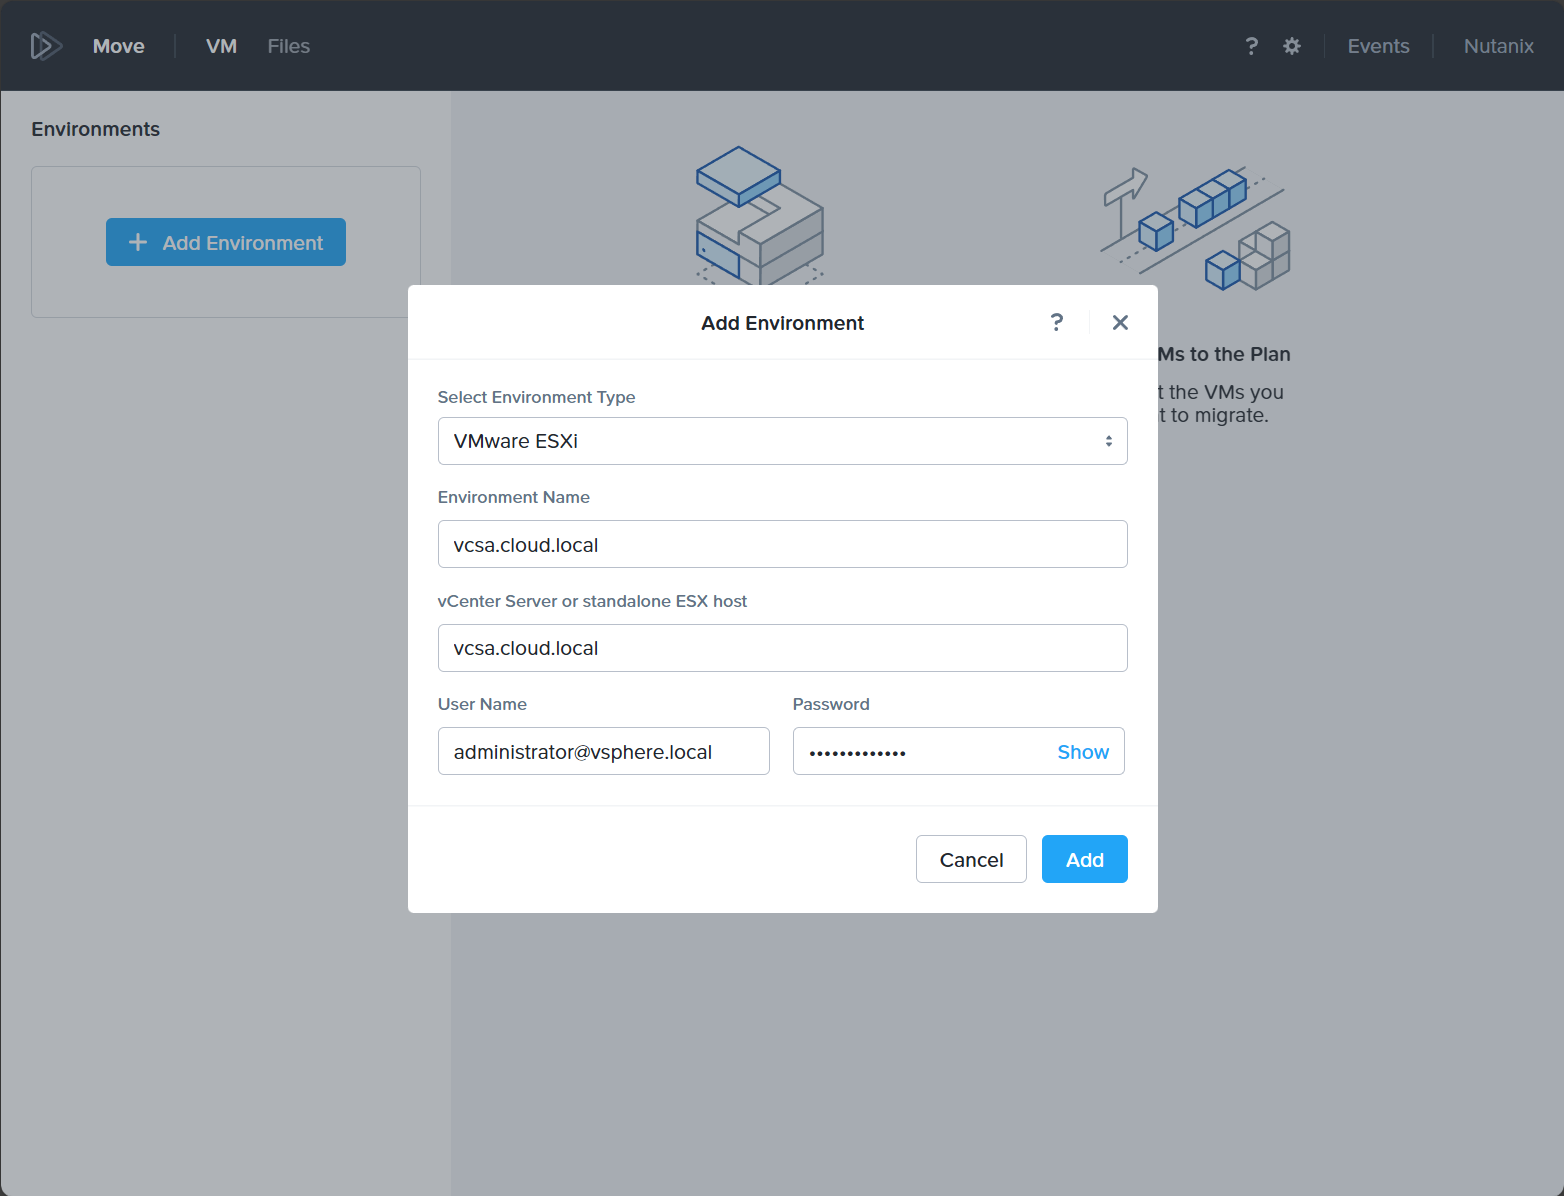
Now, we have the VMware ESXi environment added. Nutanix’s AHV ESXi configuration is smooth as butter.
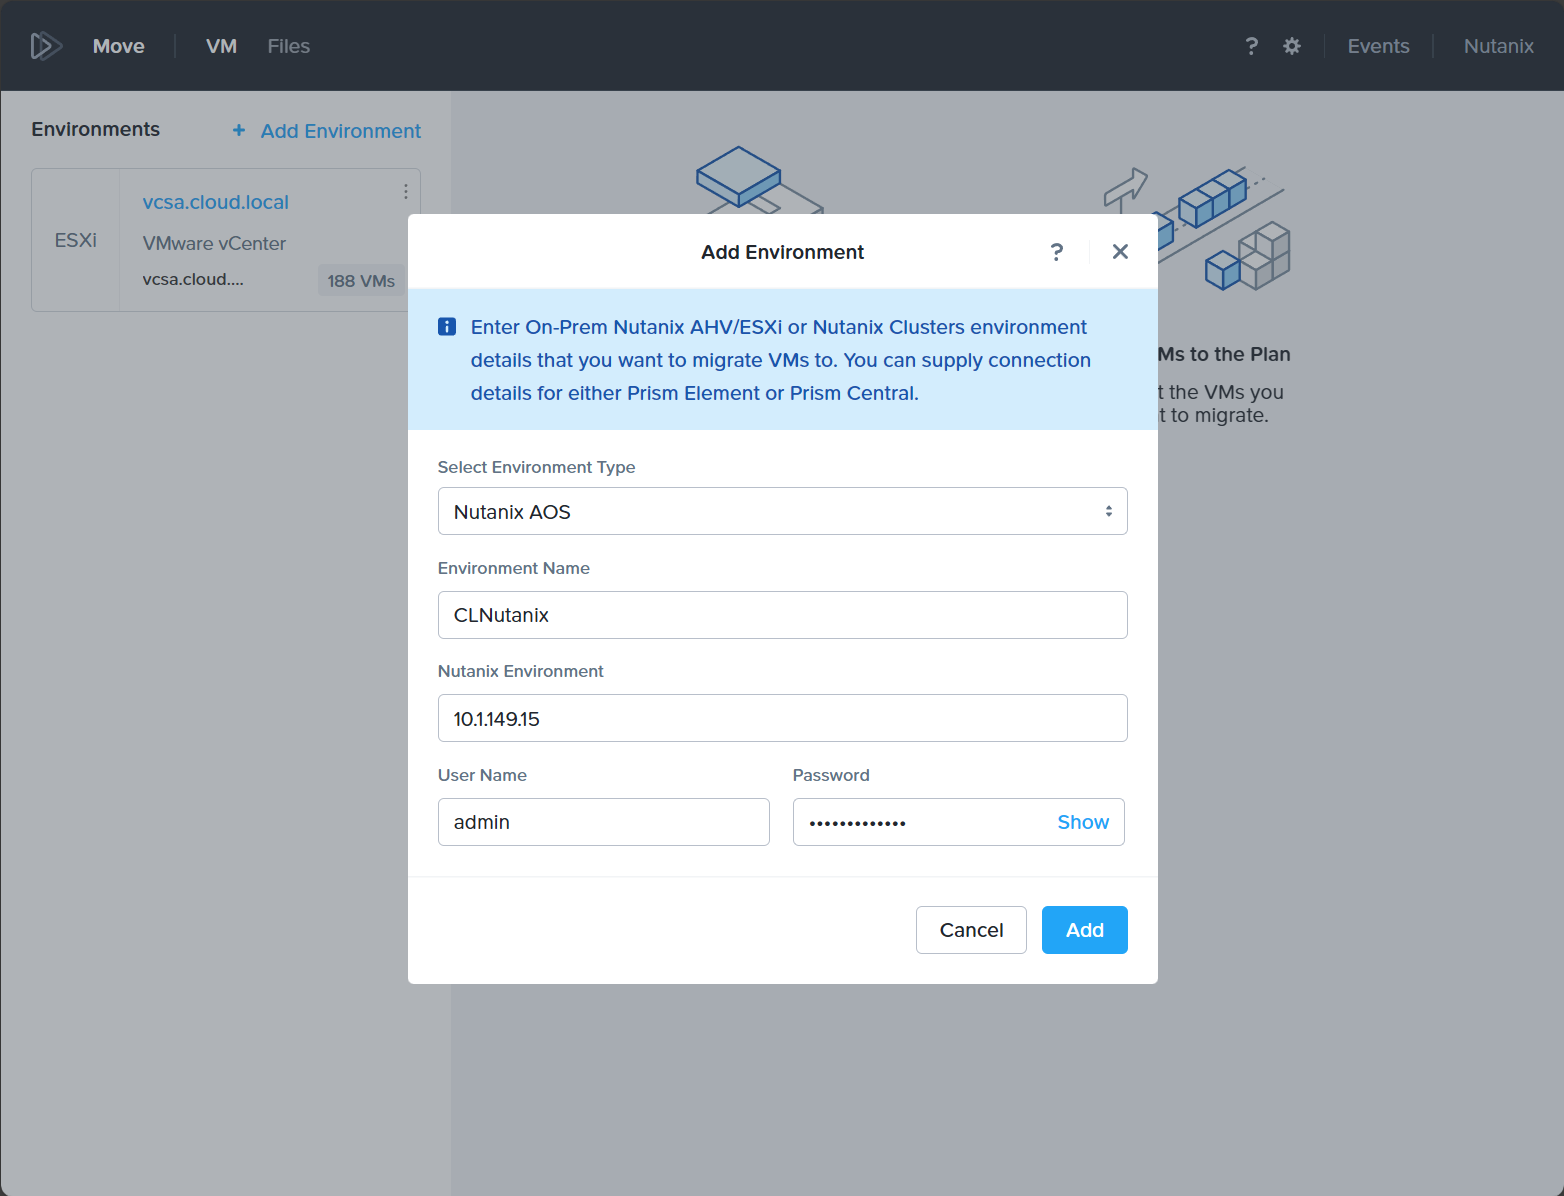
Next, we choose to add Nutanix AOS. Point to your Prism address.
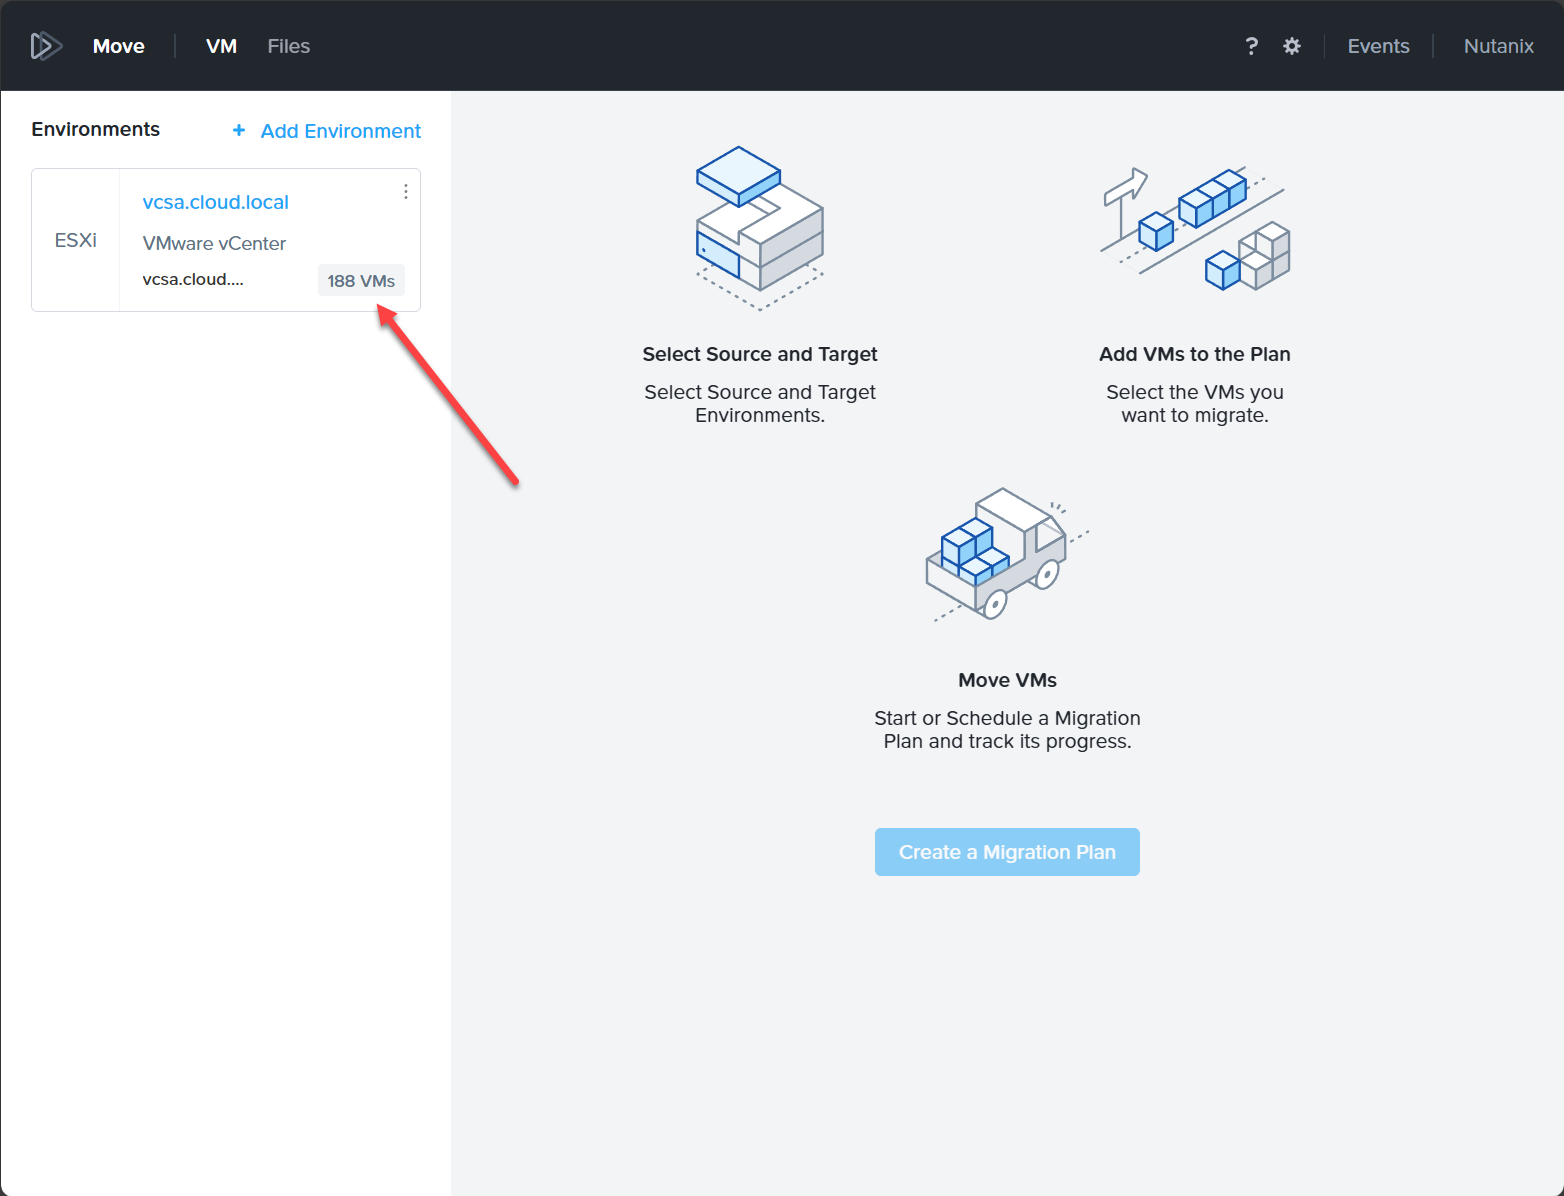
Now, we have both environments added to the Move utility.
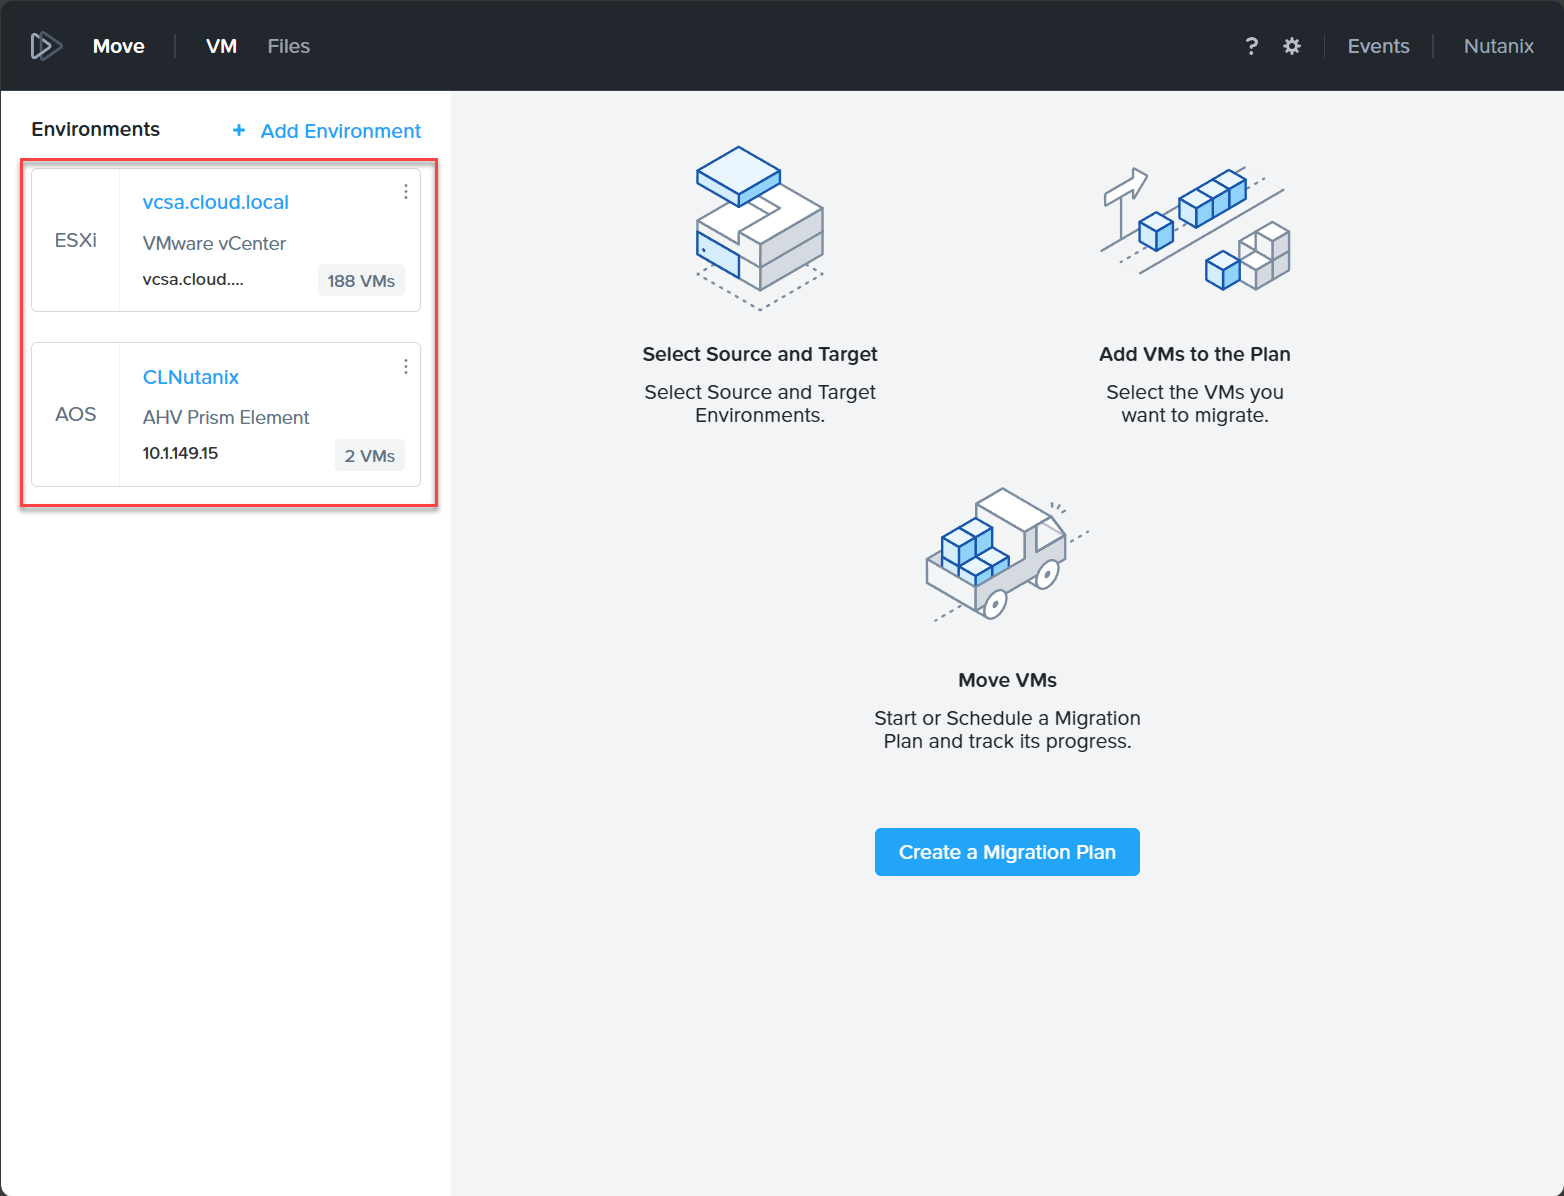
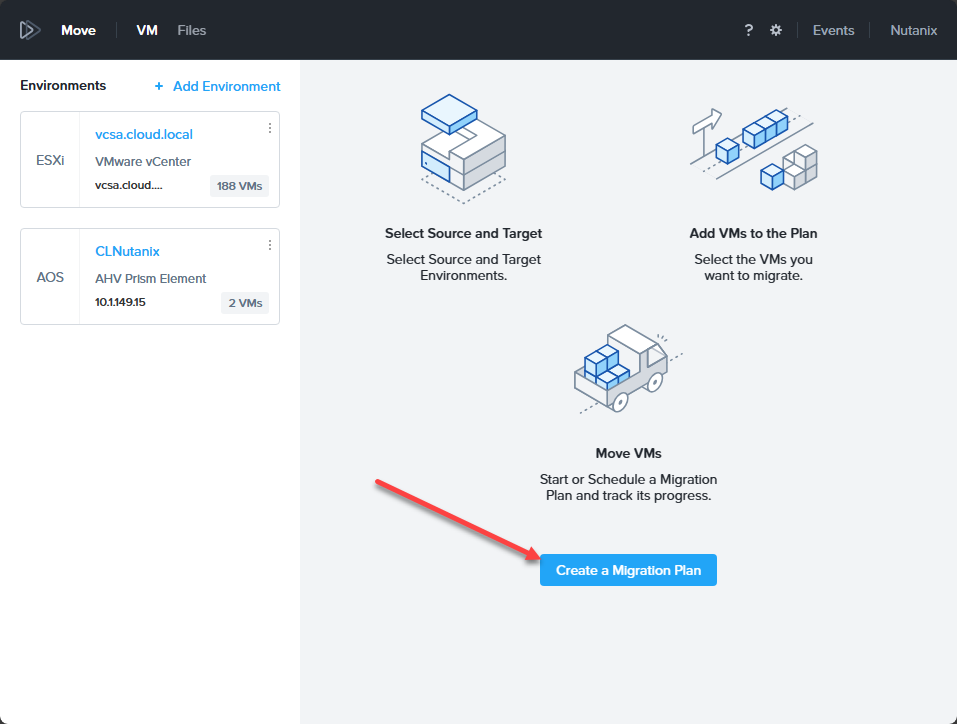
Create a migration plan
Now that we have the environments added, we create a migration plan. Click the Create a Migration Plan button.
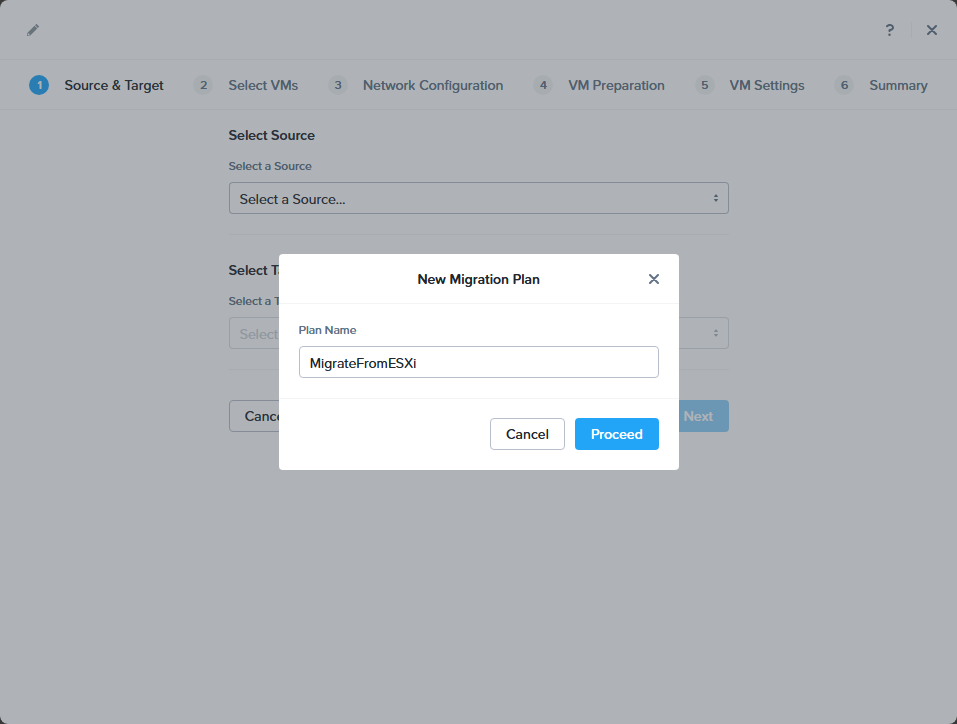
Name the plan and click the Proceed button.
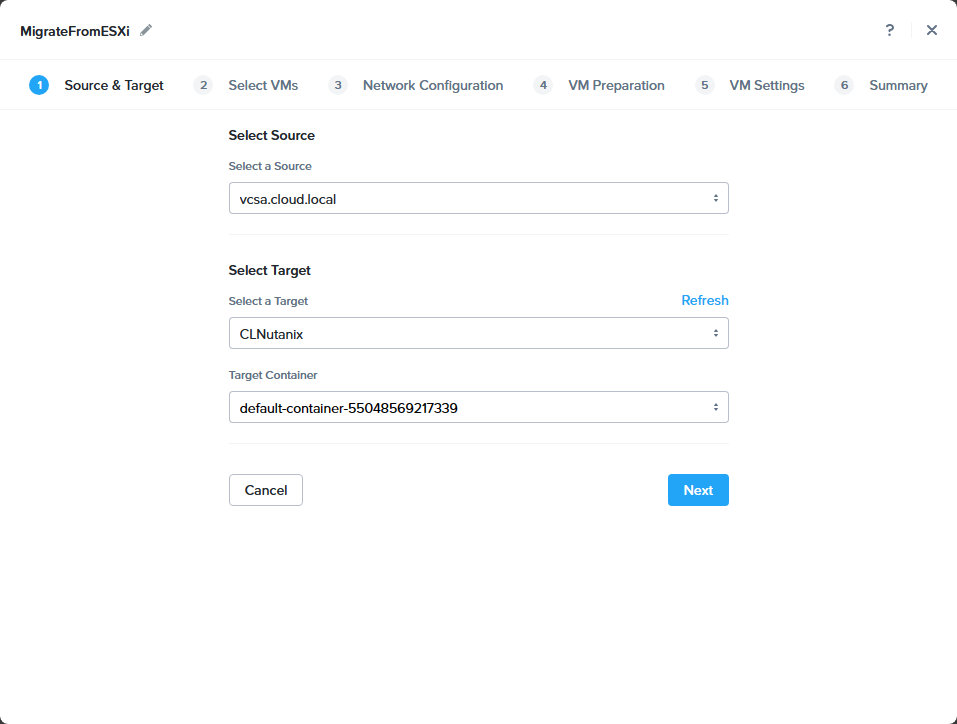
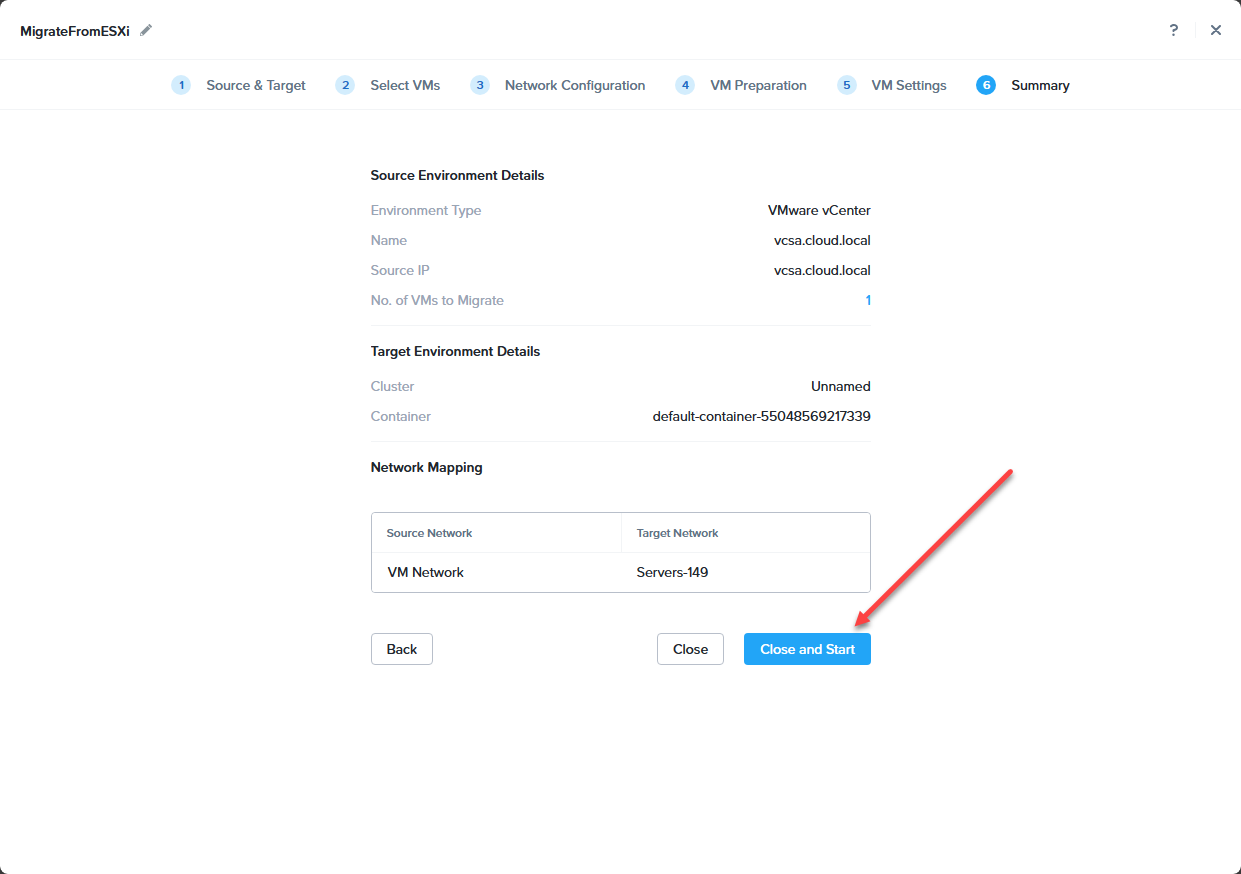
It now launches the Migration wizard that will step you through the process. On the Source and Target screen, we select the source of our migration and the target, along with the target container for storage, etc.
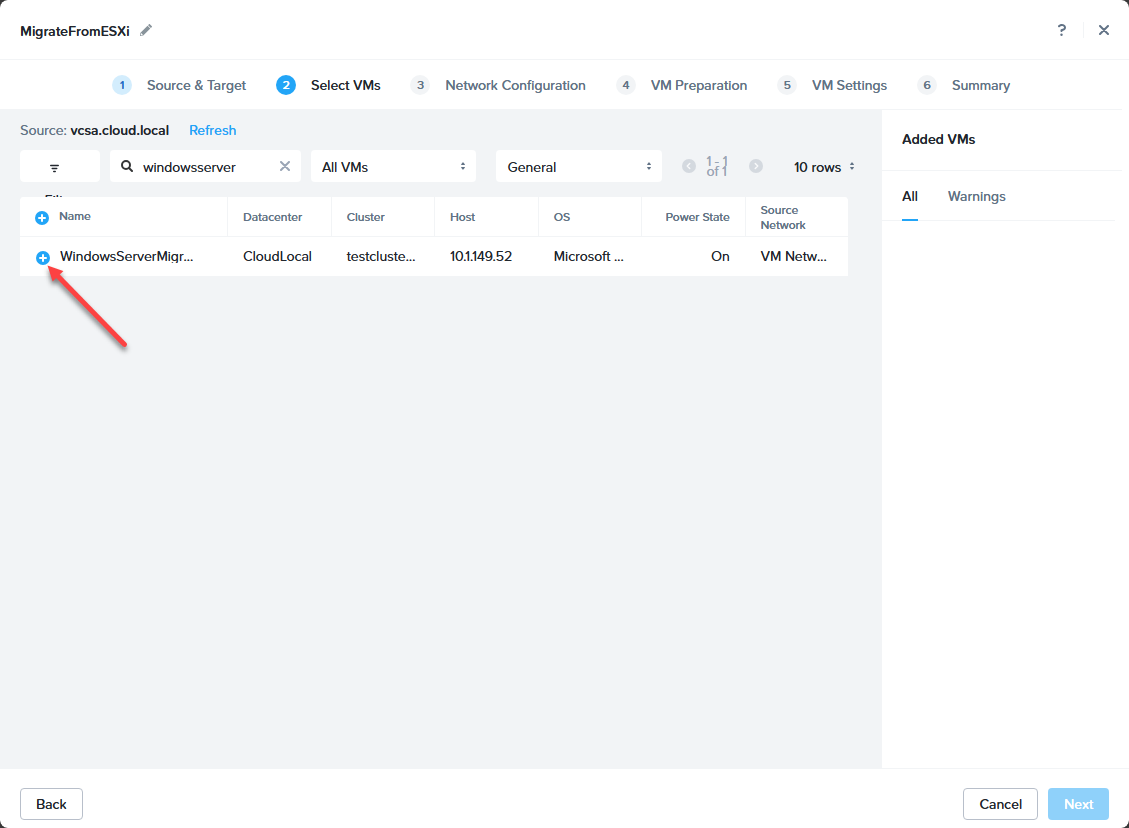
On step 2, Select VMs select your source VM from the list or filter the list to find it.
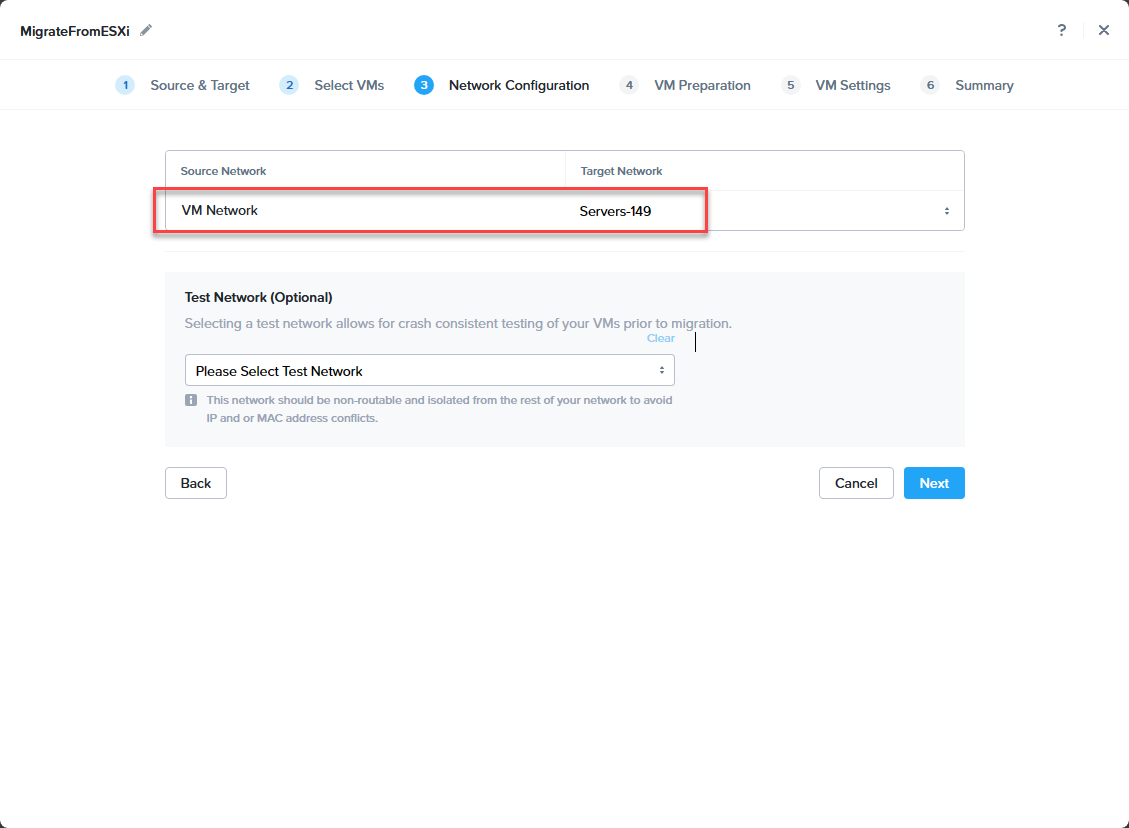
On the network configuration screen, choose the Target network for the resulting VM.
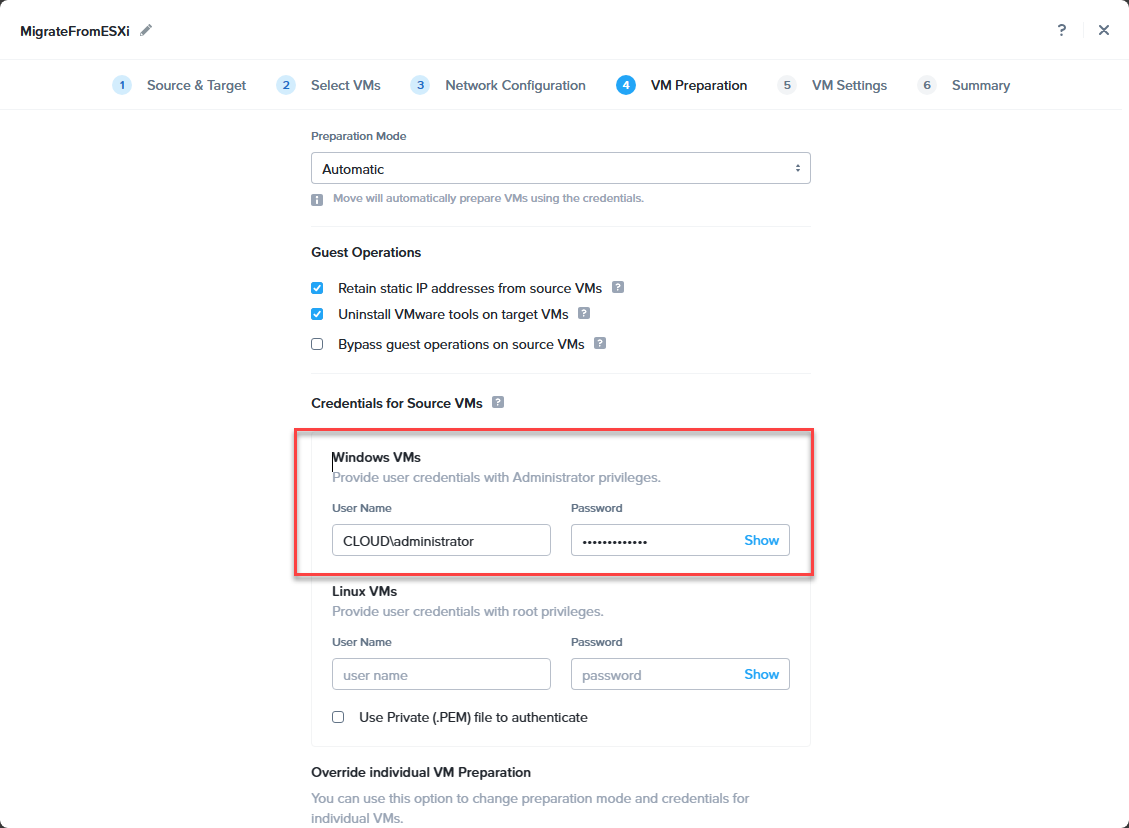
On step 4, VM preparation, you can configure many settings, including whether you want the move preparation to be automatic (which means you need to enter credentials for the utility to access the guest operating system). The automatic process will perform many tasks like uninstall VMware Tools, install VirtIO drivers
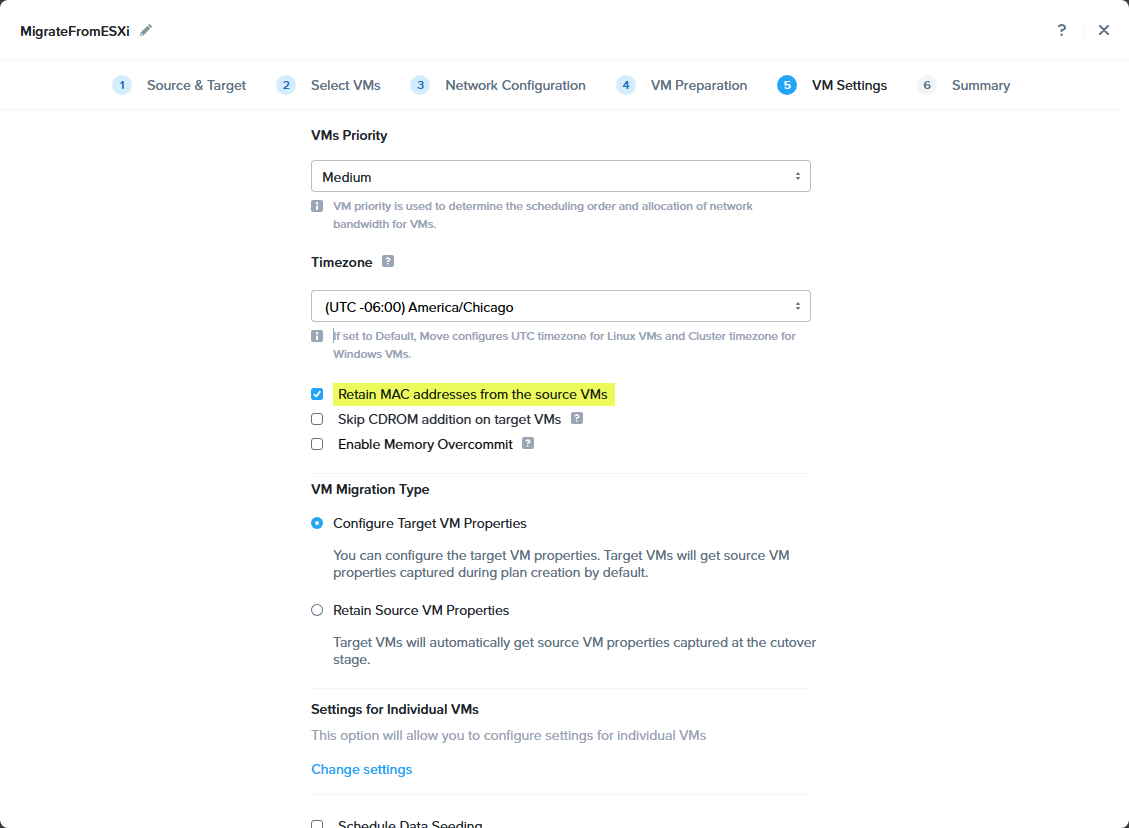
Step 5, VM settings, you can set the priority, time zone, and migration type for the target vm properties.
Finally, on the Summary screen, click the Close and Start button to begin the migration.
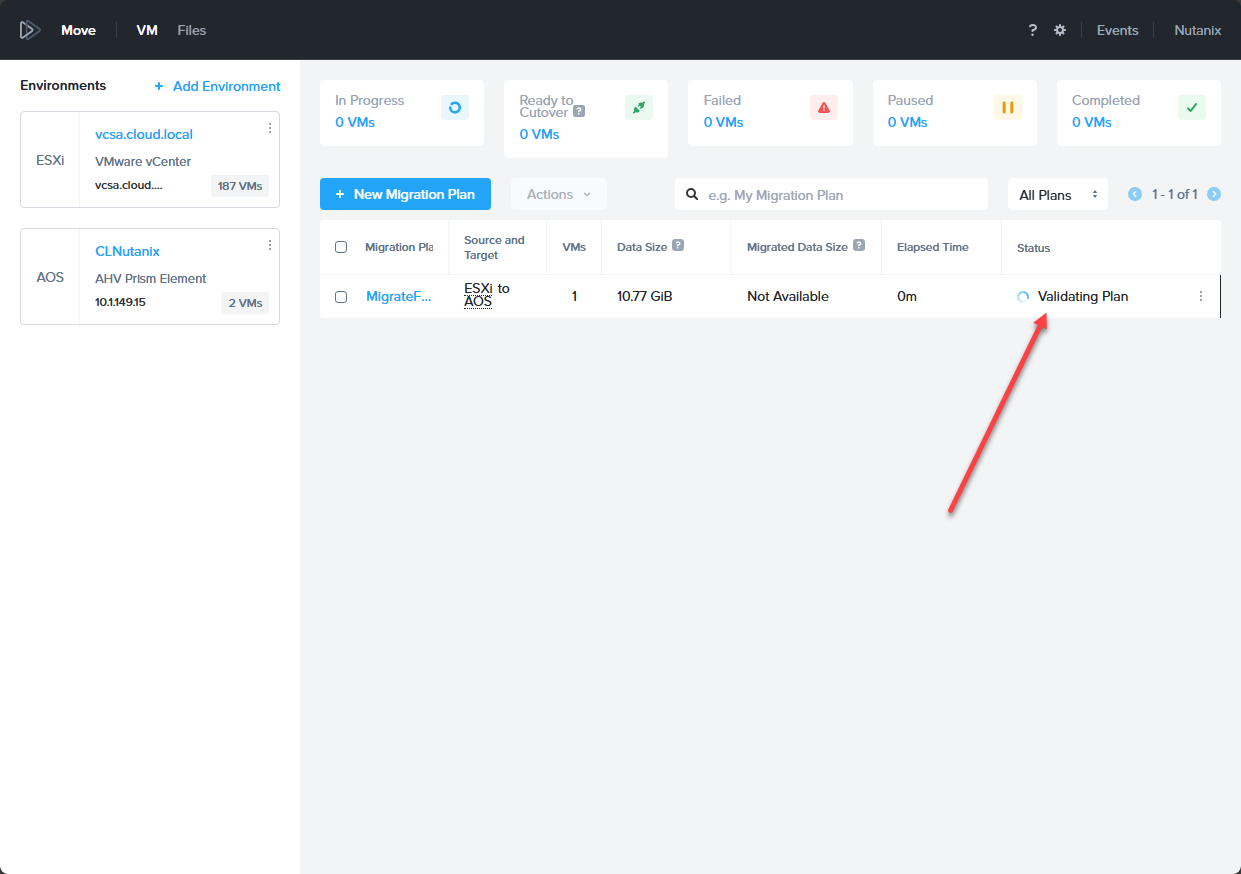
Monitoring the migration and Cutover
Now the migration begins. You will be taken back to the dashboard where you will see the progress for the migration plan. The first step you will see is Validating Plan.
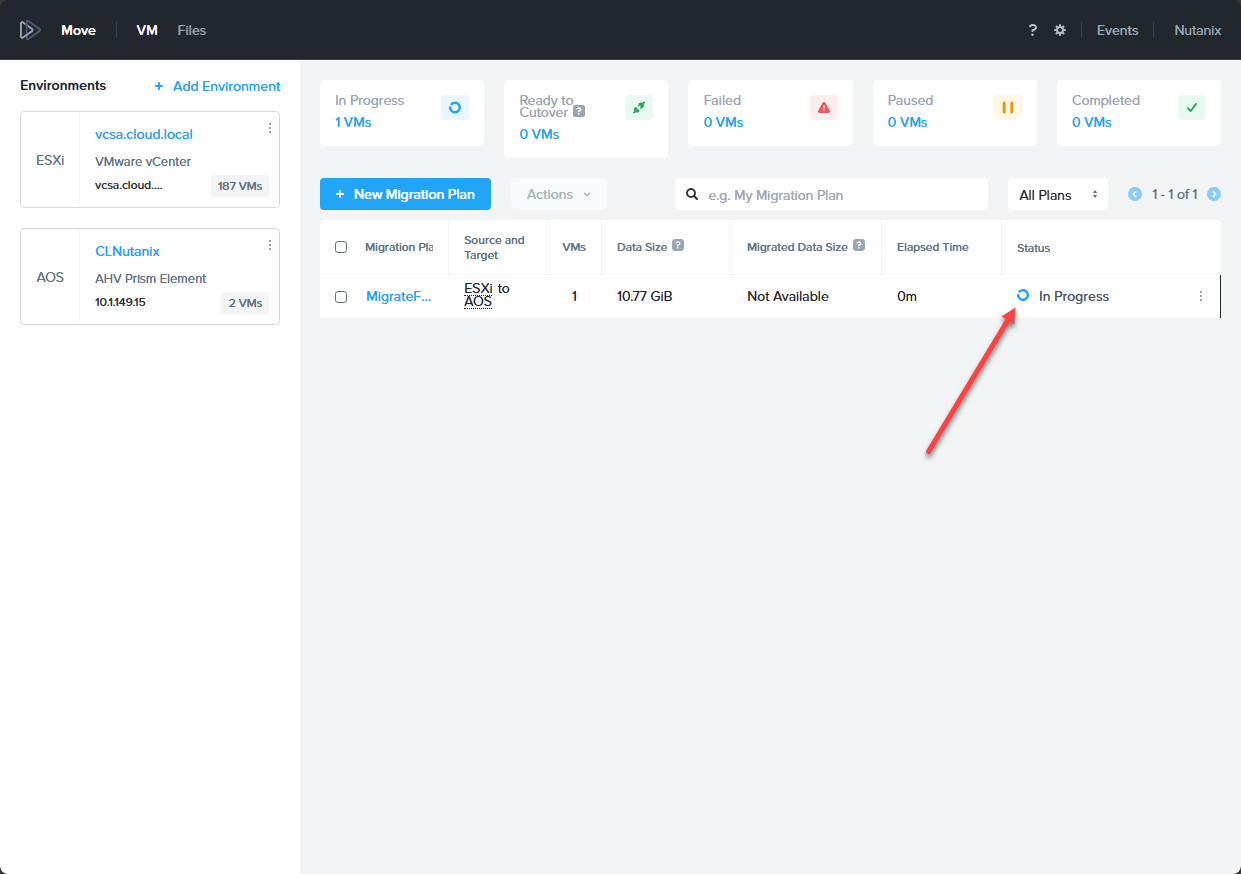
Next, it moves to In Progress.
Then you will see Seeding Data. Depending on the size of your source VM, the time it takes to migrate will vary.
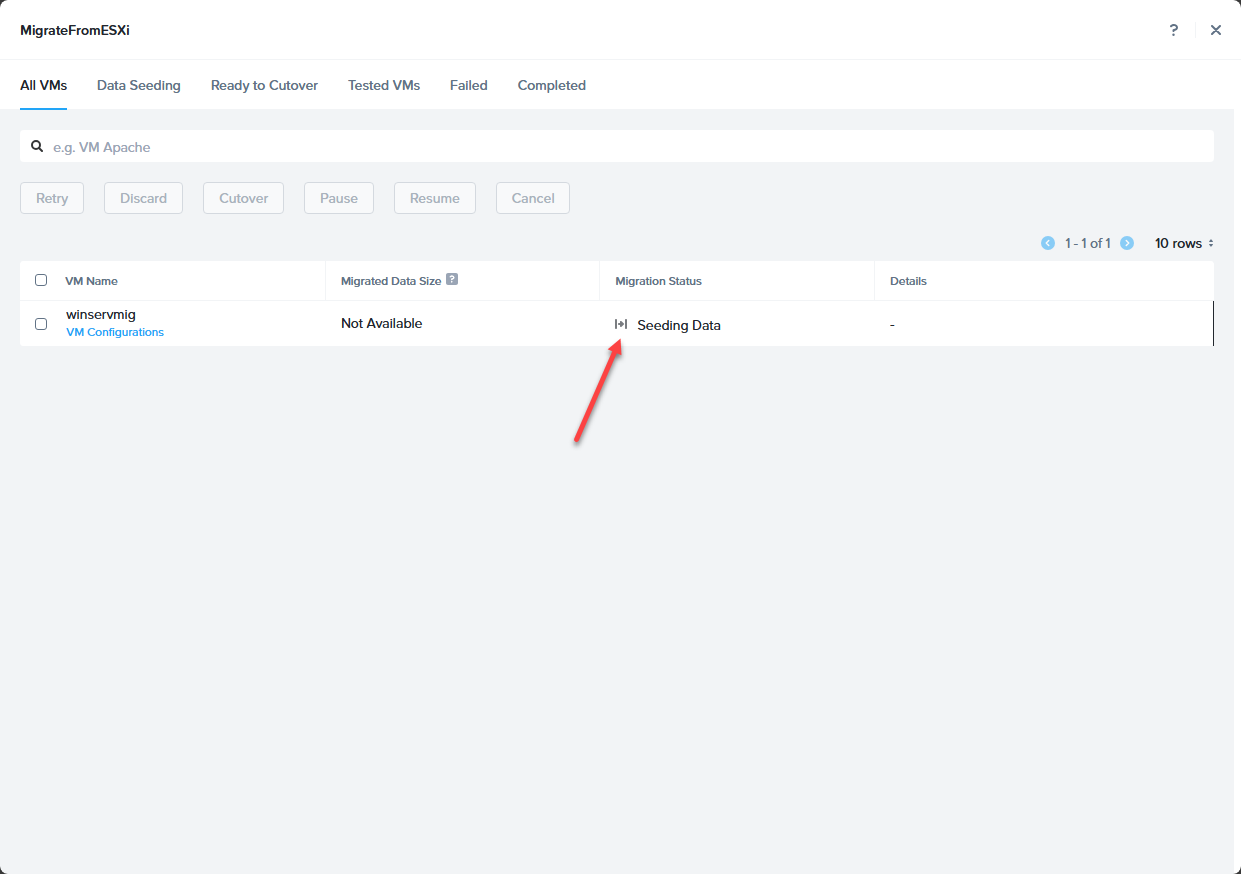
The Move utility will create a snapshot of the virtual machine in VMware vSphere so it can begin copying the underlying base disk.
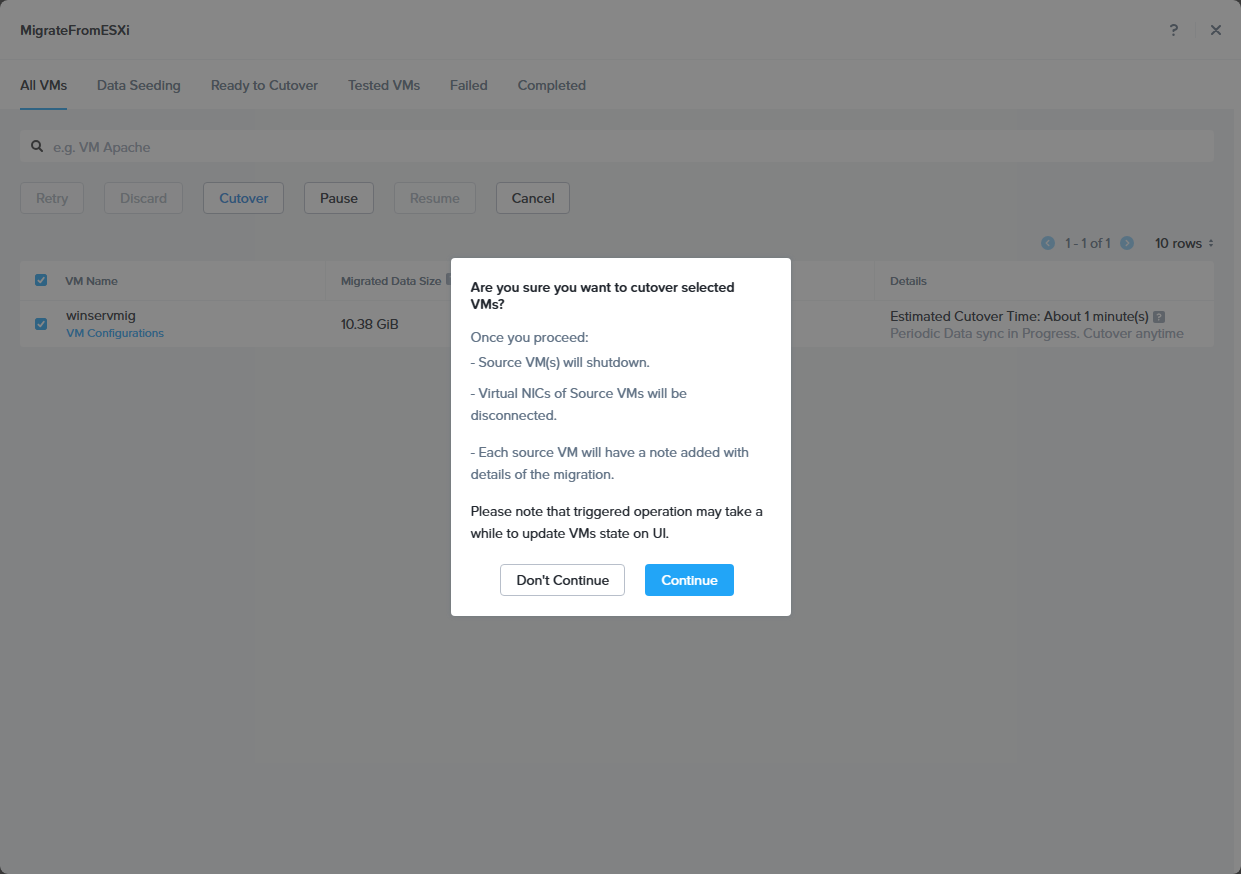
After the data seeding completes, you will see the option to Cutover. I will say I was honestly surprised at how quick it migrated the test VM in this task. Place a check by the virtual machine and then click the Cutover button.

Confirm that you want to cutover.
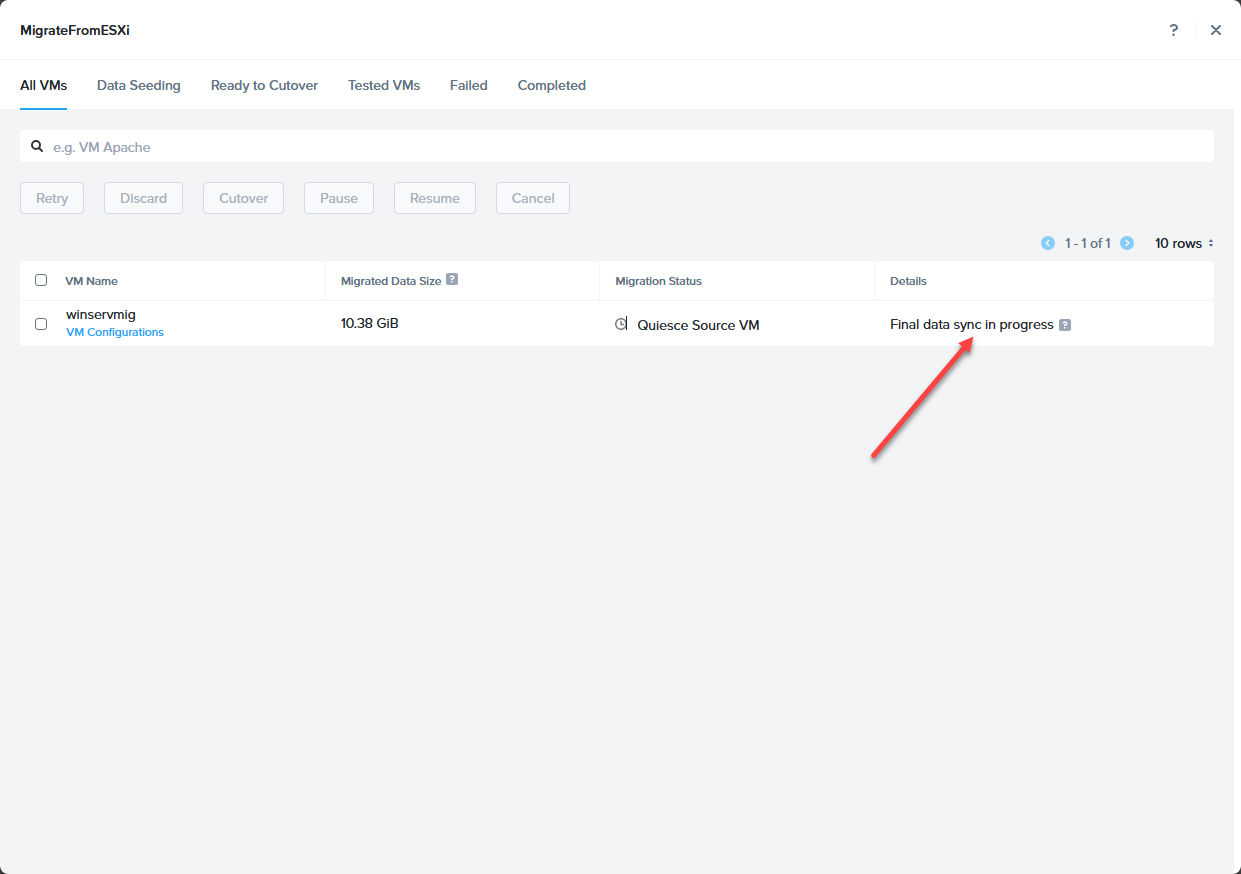
It will perform a final data sync.
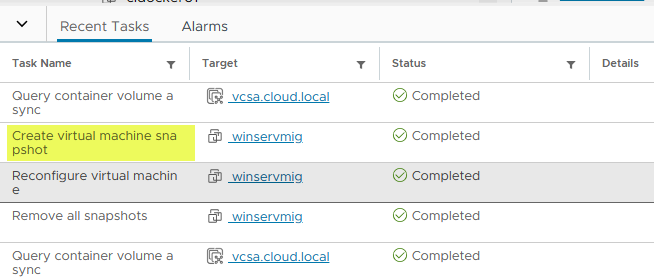
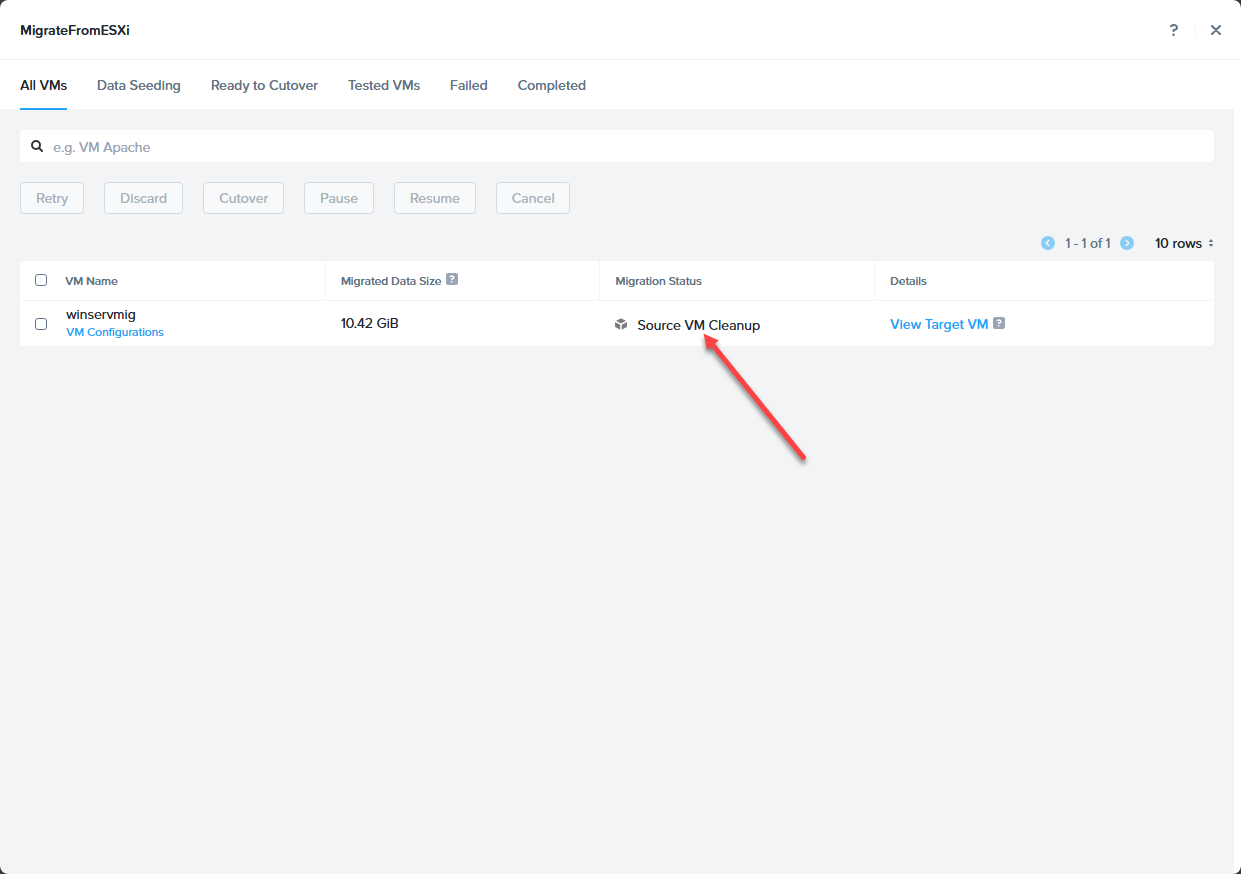
If you quickly flip back over to your vSphere environment, you will see the virtual machine powered off.
In the Migration status, you will see Source VM Cleanup. This amounts to the snapshot in VMware being rolled off the source VM.
Finally, the status changes to Completed.
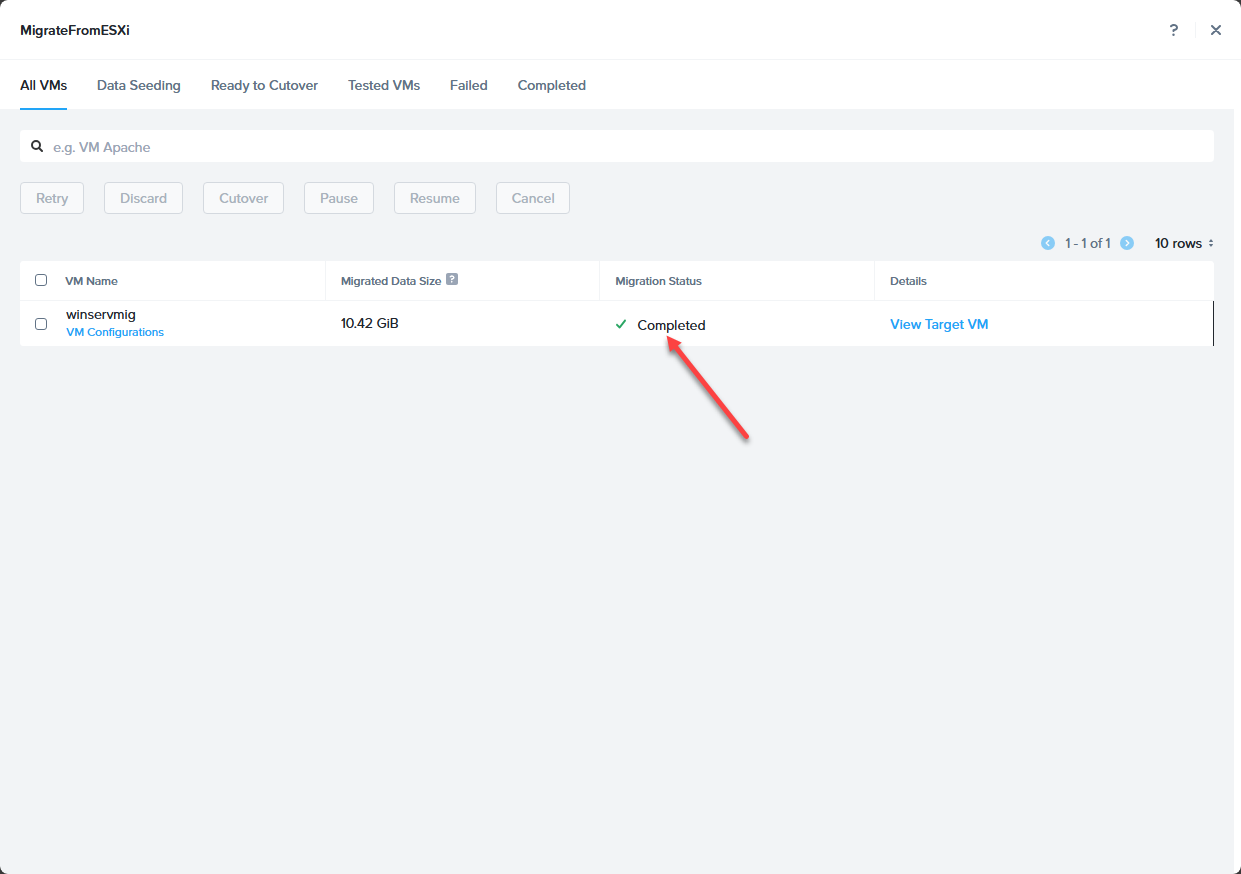
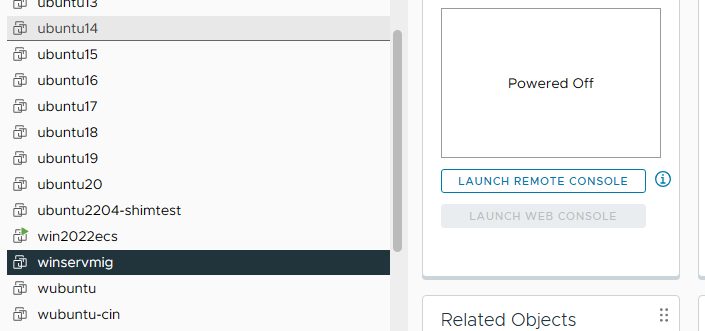
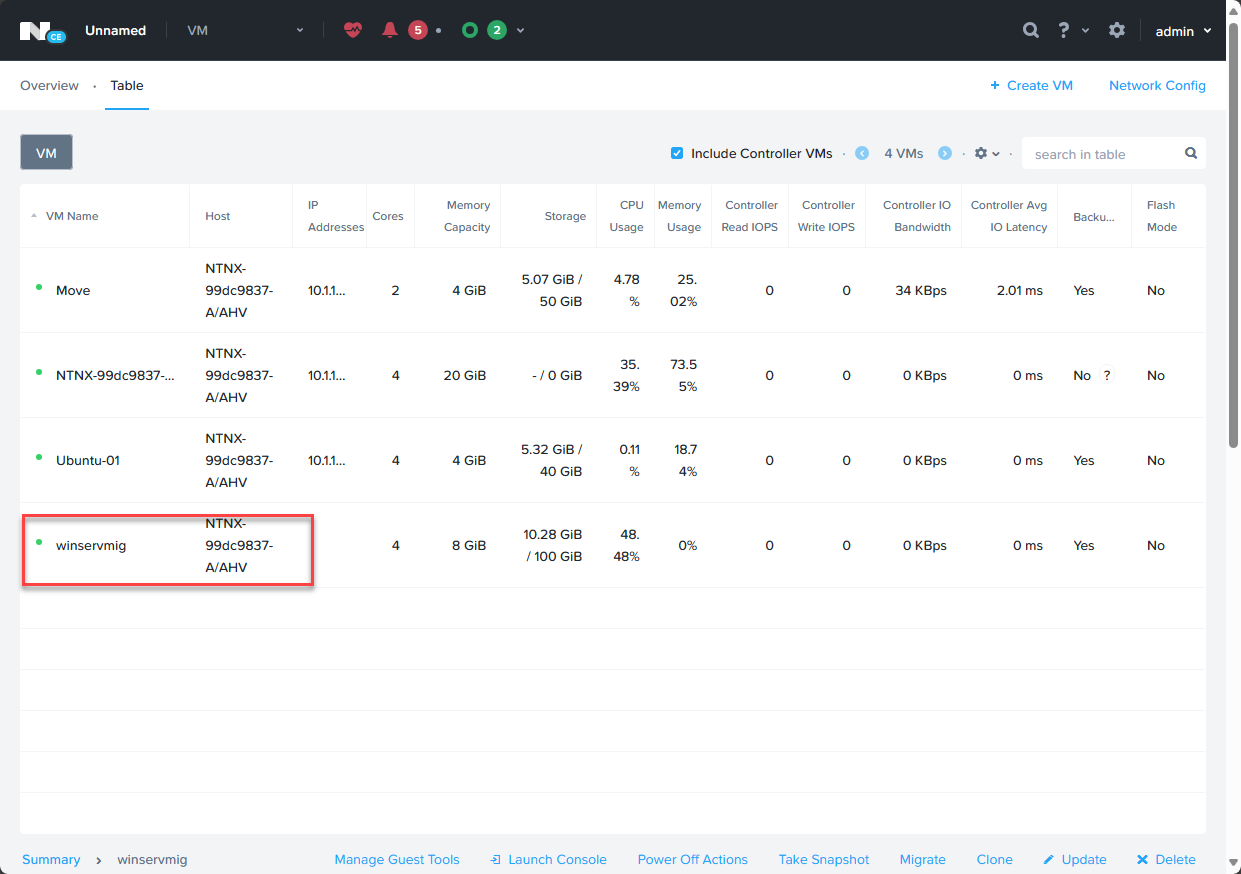
If you look back in the VM table, you will see your migrated virtual machine listed and running.
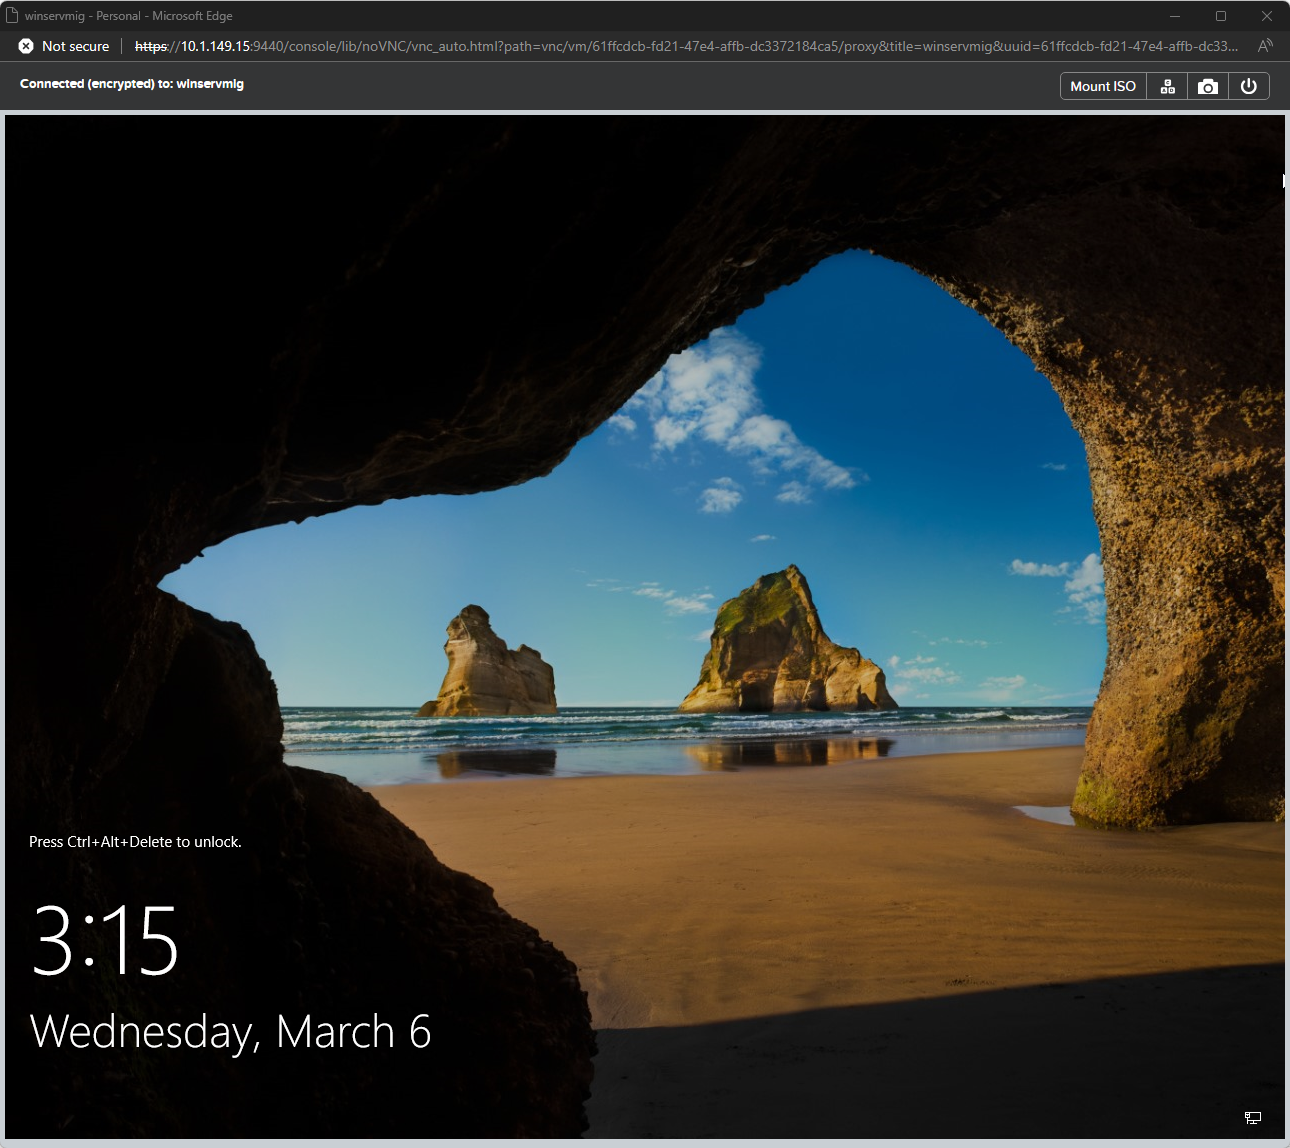
After opening a console session, I can see my Windows Server machine has been successfully migrated and has booted, containing all your configuration from your source VM, including data, Windows settings, network settings (if you chose this) and other details, NTP servers, etc.
Wrapping up Nutanix Move software
VM migrations with the Nutanix Move utility are very smooth in my testing. My only gripe at the moment with the Move utility is that it seems like Nutanix would want to make this more easily available for those who potentially want to try it out. Now is a golden opportunity with so many thinking about their virtualization strategy moving forward and what technology they want to use to run their workload machines and what they want to do with their VMware clusters and infrastructure moving forward.
I really think for home labs, EVERYONE should give Nutanix Community Edition a go as it is FREE and is really one of the only free enterprise hypervisors left that is available for download. And, the cool part is it is built upon open source virtualization underneath the hood, with of course Nutanix on top. When you pair Nutanix Community Edition with the Nutanix Move utility for a migration process for transfer automation, you have a winning combination. The great thing is you can use Nutanix Community Edition to gain skills with Nutanix for production has it is essentially the same.
Let me know if you like the Nutanix content and what your plans are in targeting another hypervisor for your lab or production hosts. Are you sticking with VMware, or are you going with another product for your virtualized workloads and apps?
More in this topic
Discuss this in the Community
Google is updating how articles are shown. Don’t miss our leading home lab and tech content, written by humans, by setting Virtualization Howto as a preferred source.
About The Author

2 minths ago, i was planning to upgrade to ESXi 8, but that is now in the bin… choices seem to be this, or Proxmox… couple of questions:
Can Nutanix use NFS for storing VMs?
What’s the best course for Backup?
Currently i use Synology ABB, but I guess that is out of the window Haswell.
K,
Definitely a bummer what is happening with VMware. Tons of tools out there for them, including ABB. Nutanix can use NFS storage for sure. Also, they have commerical support from most backup vendors. For home lab though, not sure how many VMs you are looking at protecting, but Veeam community edition license, NAKIVO, and Vembu all have some free options there for home.
Brandon
What do you think, I have 400 VMs on Vmware, my san is arrays. What’s the best thing to move to? I’m testing proxmox, but it doesn’t look like a solid solution for larger applications.
Karol,
Thank you for your comment! I think for that kind of scale, many are looking at XCP-ng. They have a free and open-source solution that is very “VMware-like” architecture with Xen orchestra management and support large scale environments. Also, they have 24×7 paid support available which as I understand, Proxmox does not. Also, Nutanix would also be a great alternative that is a closed source solution.
Brandon
Thank you Brandon,
I wonder because support is not the key thing for me, since 99% of things I solve myself without using support. Besides, I work in education :). Assuming support doesn’t play an important role, is proxmox adequate in performance and can it match VMware? Or is it more of a small business solution? I used to deal with Citrix Xen and had a lot of problems with it, especially with updates.
Best,
Karol
Karol,
Thank you for the comment. I think Proxmox is a great solution and haven’t seen any performance issues with it to be honest compared to other hypervisors. KVM underneath the hood is fairly rock solid. I will say that one thing I would say is the Nutanix Move utility is seamless as you would expect from an enterprise solution. The migration from Proxmox is not as seamless from VMware and will probably require quite a bit more downtime. Just keep that in mind as a consideration.
Brandon
Great:) Thank You.
Hi Brandon,
Good article, but I don’t find how Nutanix can usage external NFS storage to store vm disks.
It’s seem only HCI infrastructure, so the only storage that can usage for the vms is the space provided by itself.
Thanks
Giuseppe,
Thank you for your comment! Let me dig on this deeper to make sure I give you an accurate answer on that front.
Brandon
Giuseppe,
Thank you for your comment! After doing some more investigation, you are correct on that front. It looks like the options are limited to running on Nutanix AHV to external iSCSI targets from within a guest VM operating system itself. You could provision a small boot disk for your VM on Nutanix, and in your VM have external drives connected via iSCSI.
Also, it looks like with Nutanix Compute Only nodes, you can connect a Nutanix Compute Only server running AHV to a Nutanix iSCSI Volumes backend running either Nutanix HCI or Nutanix Storage Only nodes.
Thanks again for calling this out. I do believe they are working on a solution on this. However, I have not been able to get anyone at Nutanix to confirm or deny this unfortunately.
Doesn’t seem like the workaround to get Move works any longer.
Mike,
It has been a while since I have tried it. What are you seeing now?
Brandon