Many are familiar with VMware vSphere and open-source hypervisor Proxmox for home labs. However, more are learning about and want to experiment with XCP-ng. I want to take you guys through a few of the basics with XCP-ng and how you can use it for a home lab server build.
Why XCP-ng for Home Labs?
XCP-ng is a great hypervisor for home labs that many may feel is a little closer to a VMware-like experience with the Xen Orchestra interface that allows fairly easy management of your XCP-ng environment.
It allows you to host a virtual machine or many VMs to test Windows, Linux (Ubuntu Server as an example), and other operating systems. XCP-ng offers flexibility and scalability with many enterprise features like cloning, built-in backups, snapshots, XO SAN, etc., and connects these network devices effectively.

Home labs are great for testing and having a sandbox environment and running test labs in a contained environment like XCP-ng offers peace of mind. You can experiment without affecting your main production equipment or compromising your internet access.
The software can run on various hardware, from a Raspberry Pi to a high-end server. If you’re starting a Mini PC (often built as a gaming PC) is a great way to have a “server” and low power bills with power efficiency and have fairly easy cable management. Home lab servers running on mini PCs allow you to run a full-blown home lab with multiple VMs, media servers, web servers, and more and have these services available at all times without spending thousands of dollars.
Building the XCP-ng Home Lab: A Cost-Effective Venture
Beyond the initial hardware investment, considerations like power consumption come into play. You can monitor and manage your power bill effectively depending on the server and the number of virtual machines you run. But again, choosing efficient hardware is key to not having exorbitant electricity costs.
You can also download XCP-ng for free, install it on your home lab hardware in a few minutes, and start creating your first virtual machines.
Download XCP-ng from here: XCP-ng – XenServer Based, Community Powered.
With XCP-ng, you can always add more virtual machines, integrate additional network systems, add additional hosts, etc.
XCP-ng Home Lab Tips and Tricks
Let’s go through a few XCP-ng home lab tips and tricks to start building your home lab server.
Installation
Start with downloading the latest stable XCP-ng release. Once you’ve got it on a USB drive, booting up your server and following the instructions will set the core system in place.
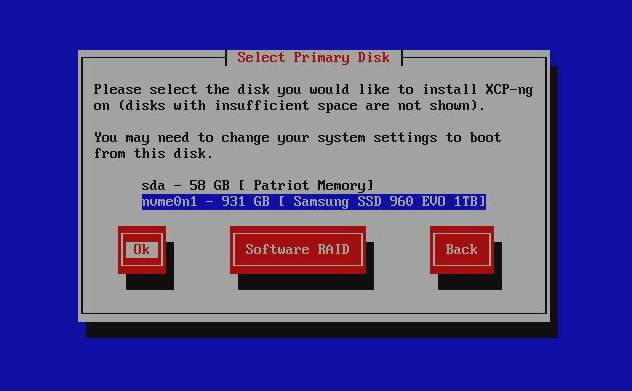
Here you see that I have an NVMe drive available for installation.
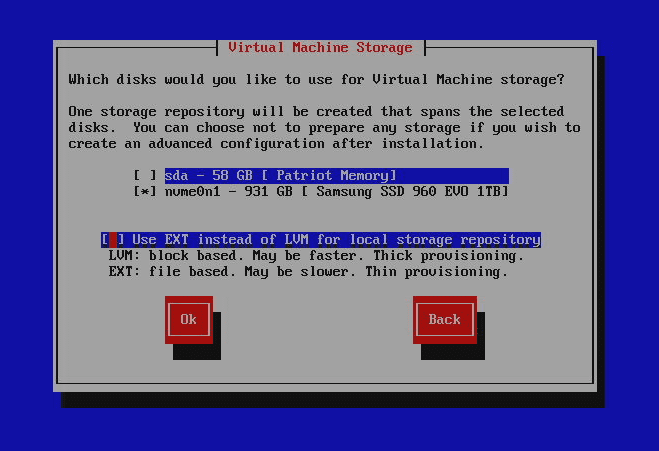
One of the choices you will be able to make is how you wat to setup your storage. You can choose between LVM and EXT. Note with EXT you can do thin provisioning but it is a little slower.
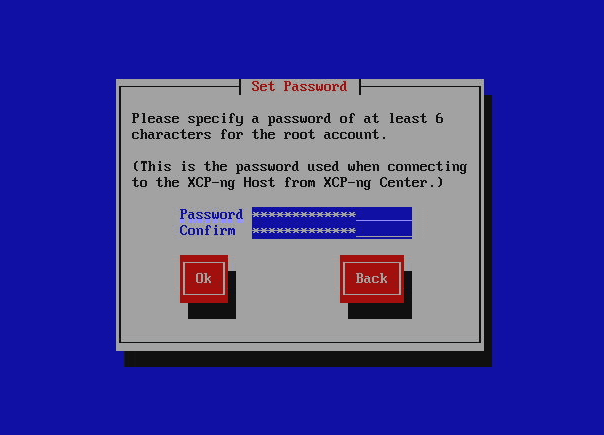
Setting up your XCP-ng password.
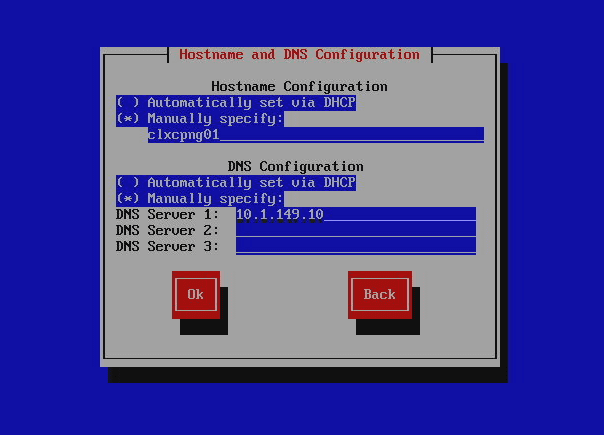
The network configuration screen.
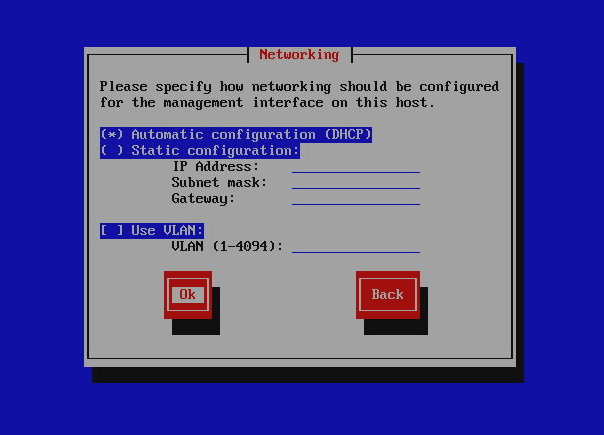
Setting XCP-ng to a static IP address.
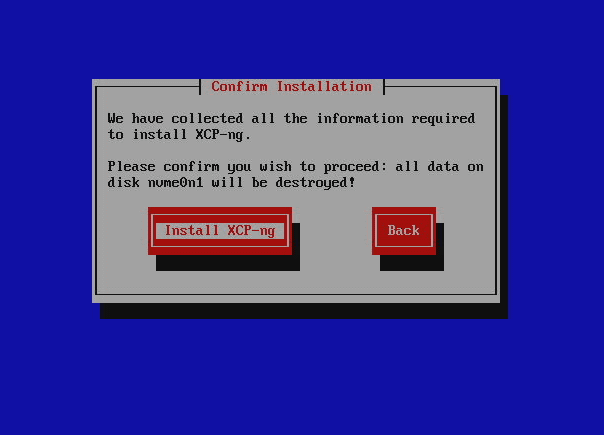
At the end of the installation and ready to install (Note I haven’t shown every single screen to the last screen but the installation is very intuitive).
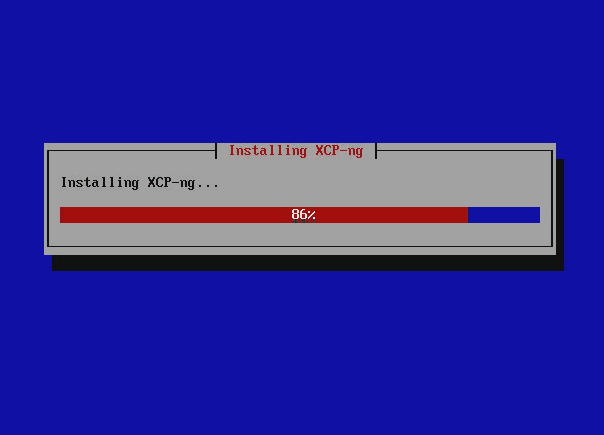
The installation begins.
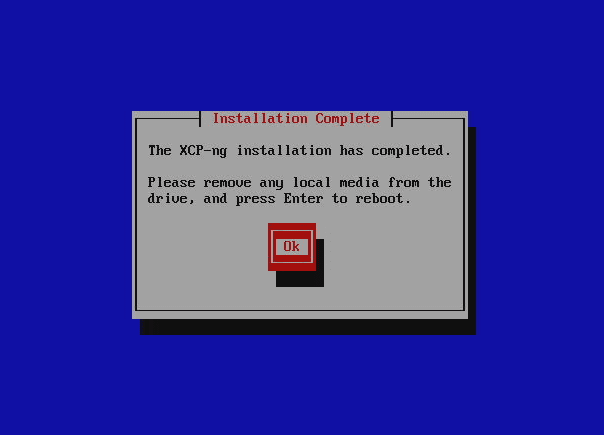
Remove the media and reboot the server to complete the installation.
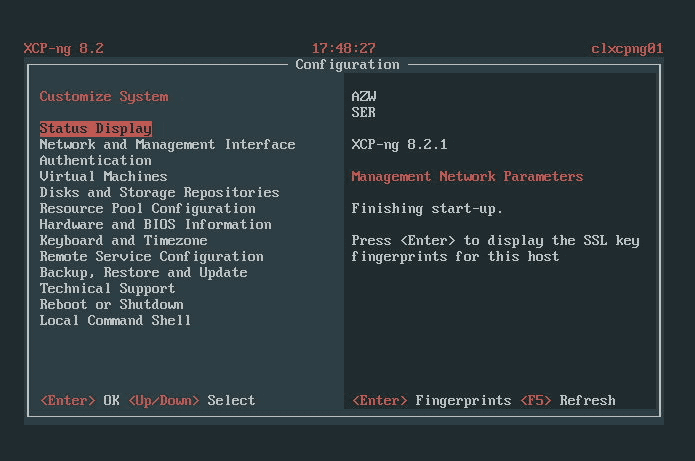
Below is a look at the console of the XCP-ng server.
Creating a Storage Volume
After XCP-ng’s installation, creating a storage volume becomes crucial. Whether you’re storing data for VMs or setting up a media server, ensure you’ve got ample storage.
Thin Provisioning
To maximize storage utilization, thin provisioning is the key. It ensures that virtual machines use only the storage they need, optimizing your resources. As mentioned earlier, you will want to use EXT for thin provisioning.

Installing Xen Orchestra (XOA)
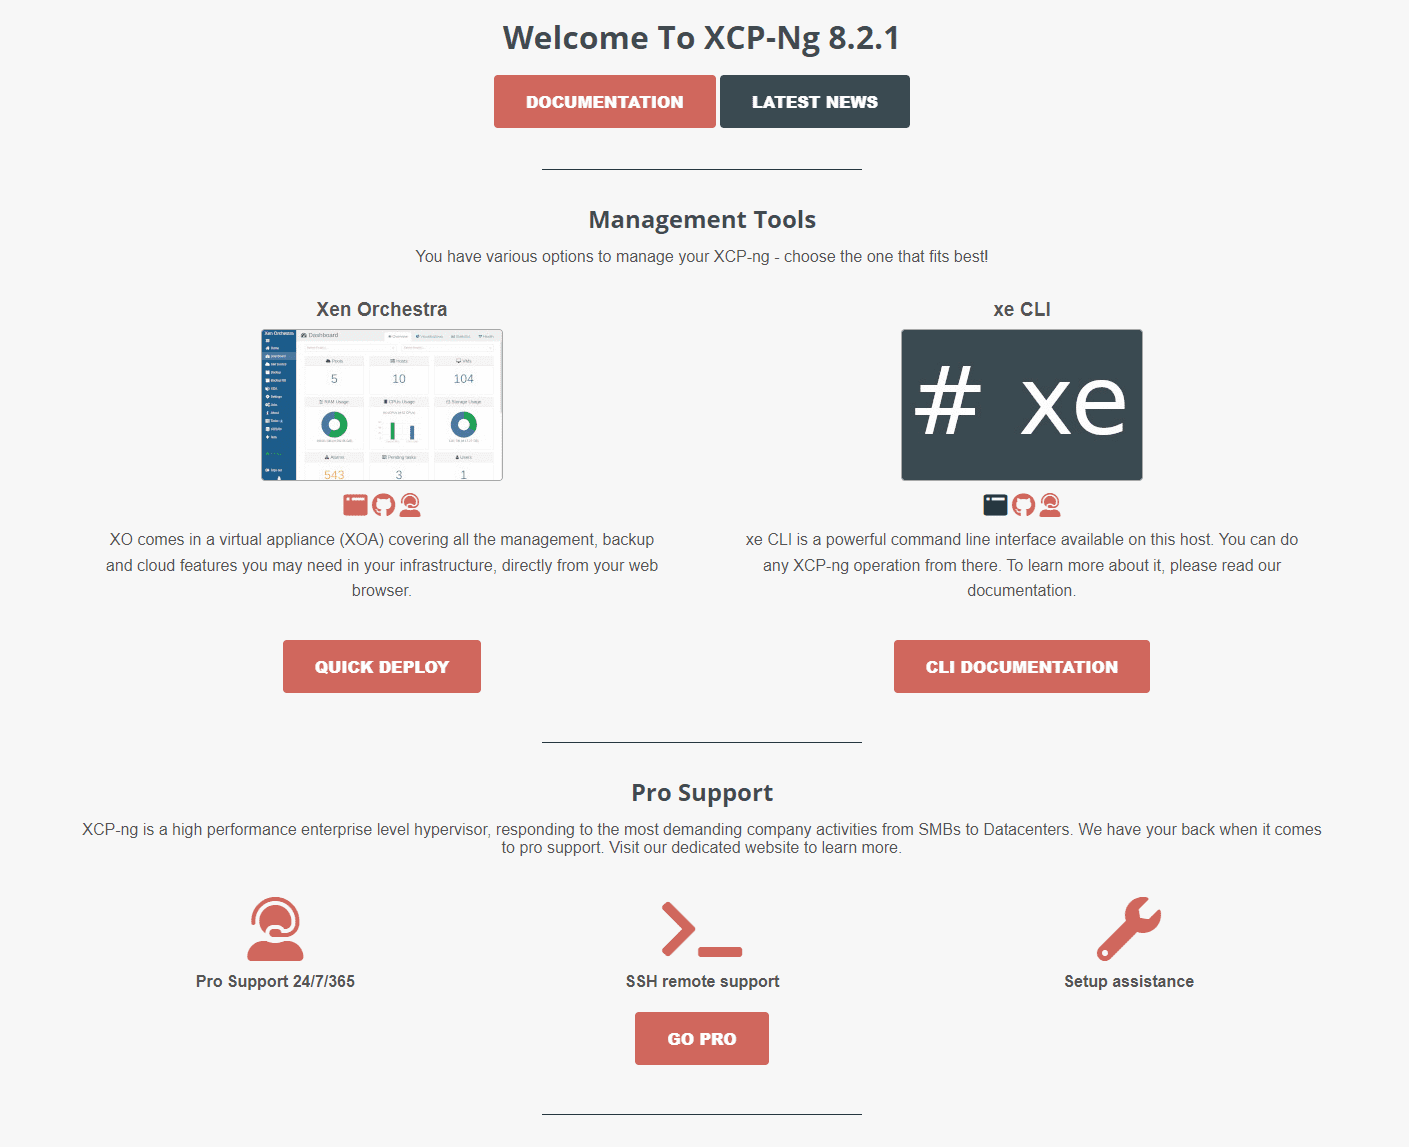
Xen Orchestra is crucial for managing your XCP-ng setup. The web-based interface provides an easy way to control, monitor, and test your VMs and servers. To install Xen Orchestra, the process is straightforward. Browse to the IP or FQDN of your XCP-ng server and pull up the page. You will see the option for Quick Deploy.
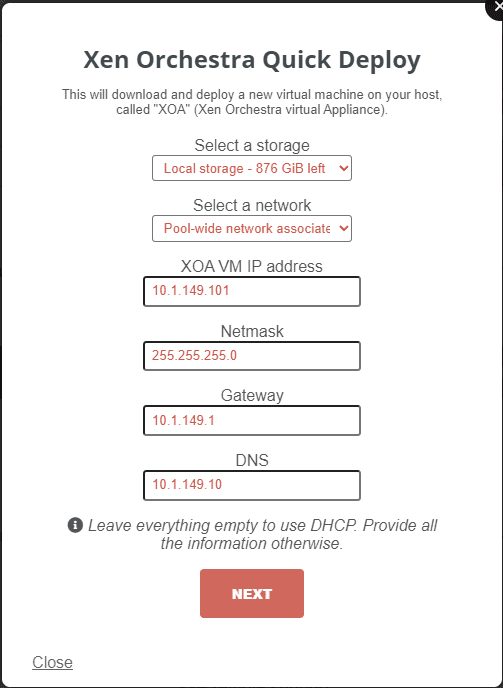
On the Quick Deploy page, set the configuration for the XO VM, including the storage and IP address information.
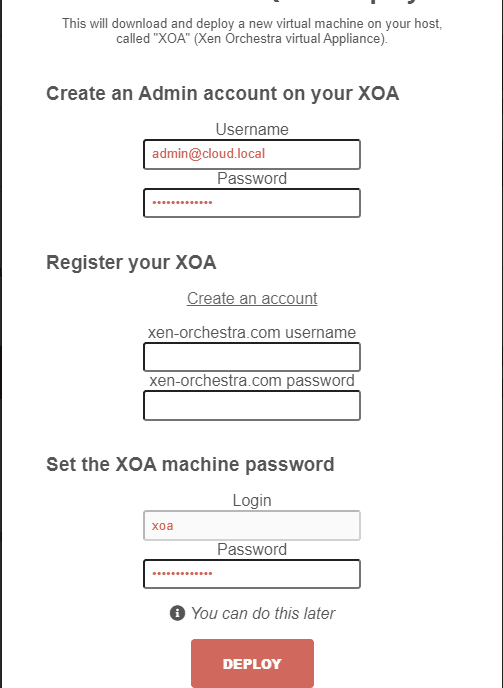
Set the user credentials.
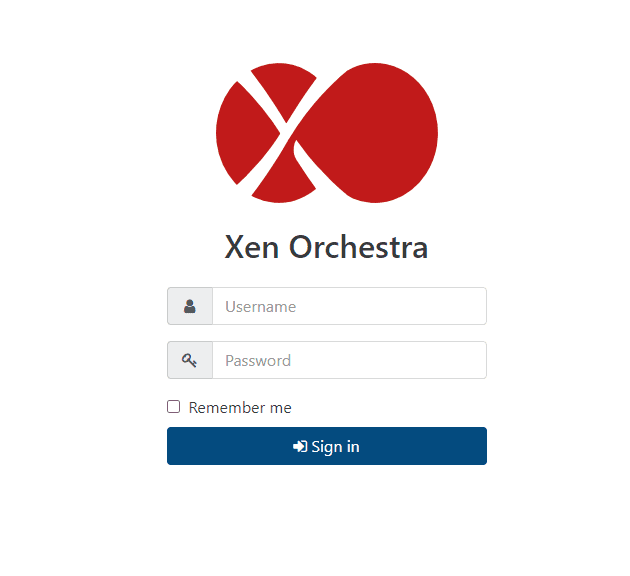
After XO is deployed, you can browse to the login screen.
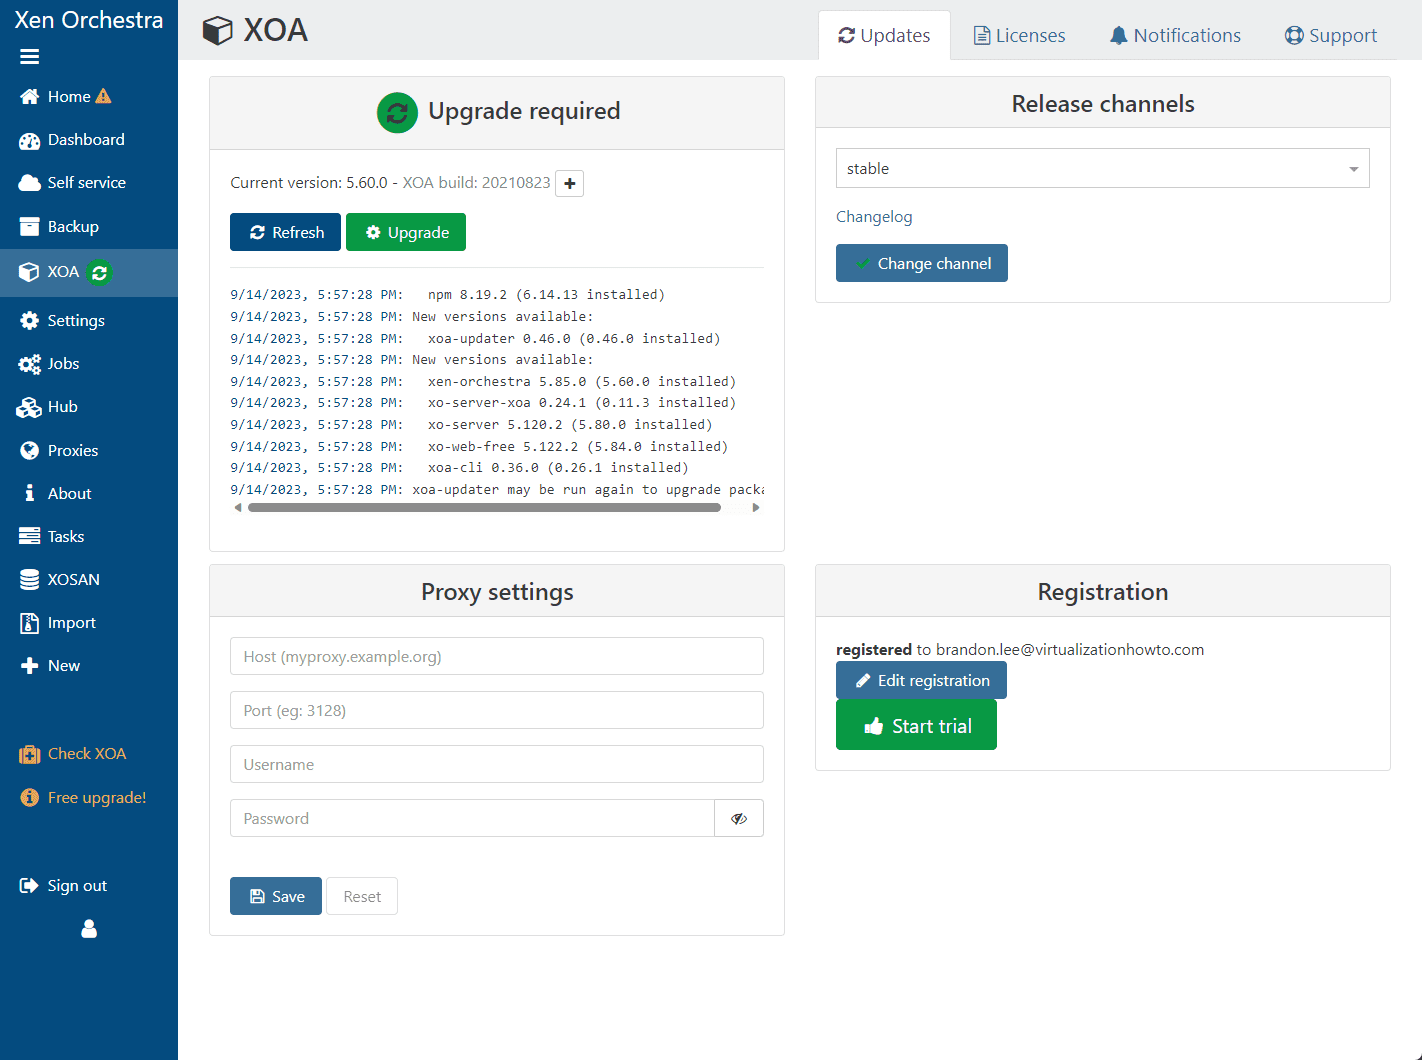
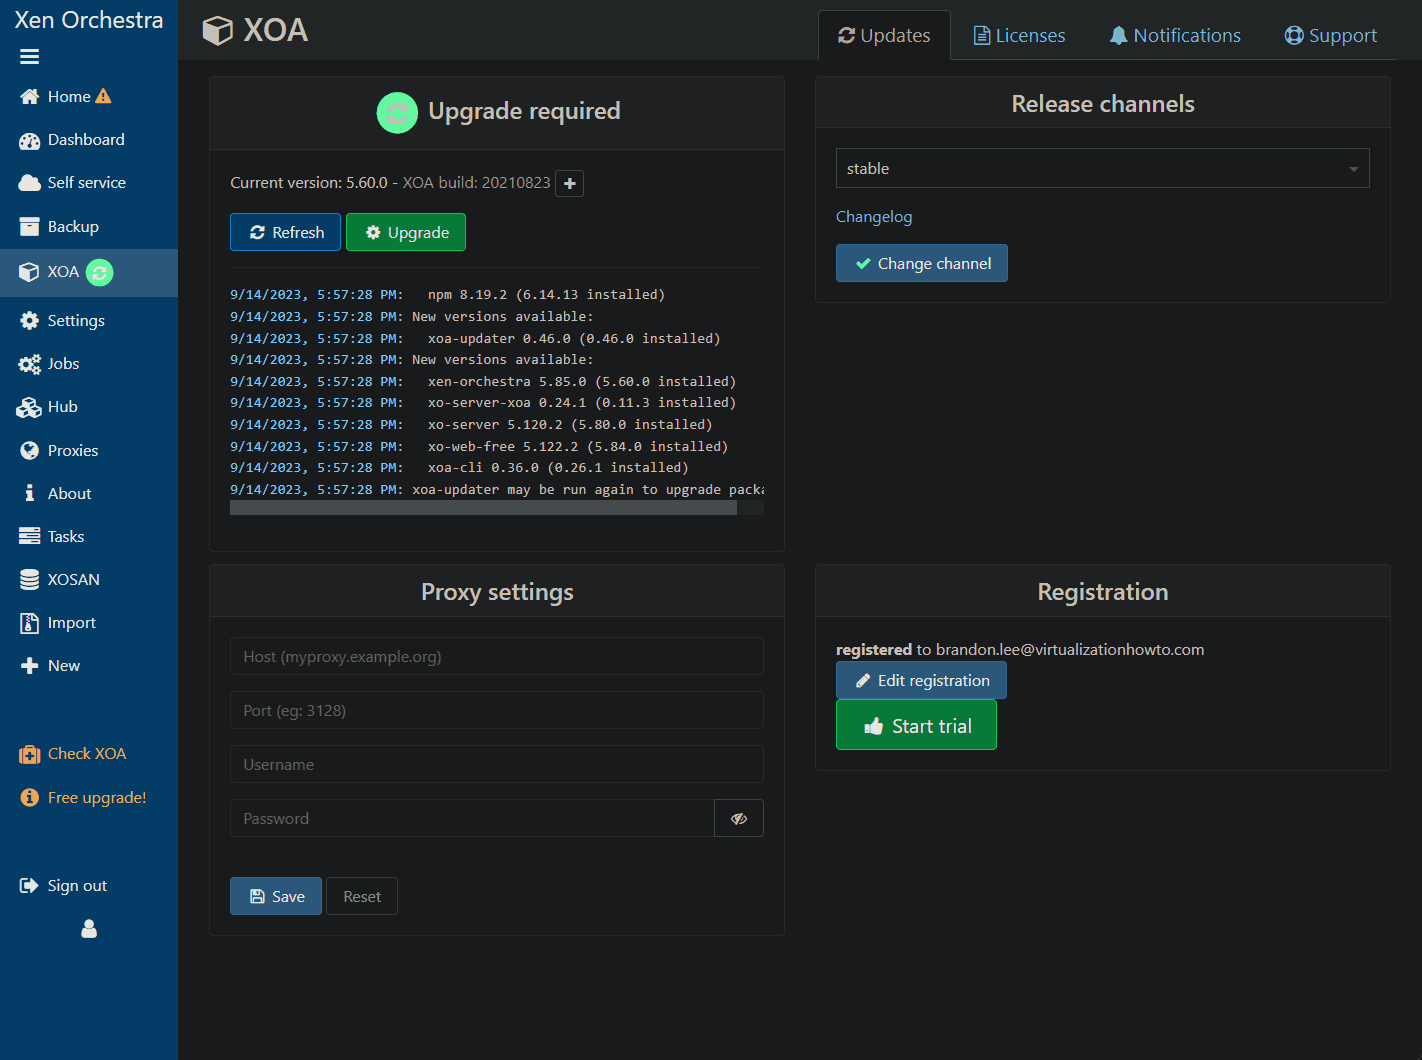
Running Xen Orchestra updates
Now we can login to XO and run any updates that are available. After logging into XO, you can navigate to the XOA screen and check for updates. Most likely, it will prompt you for this proactively. ***Note*** you do need to “register” with Xen orchestra to do this. Just follow the prompts to register and update.
While there isn’t a native dark mode, there are several plugins out in the store that will allow you to effectively be able to do this.
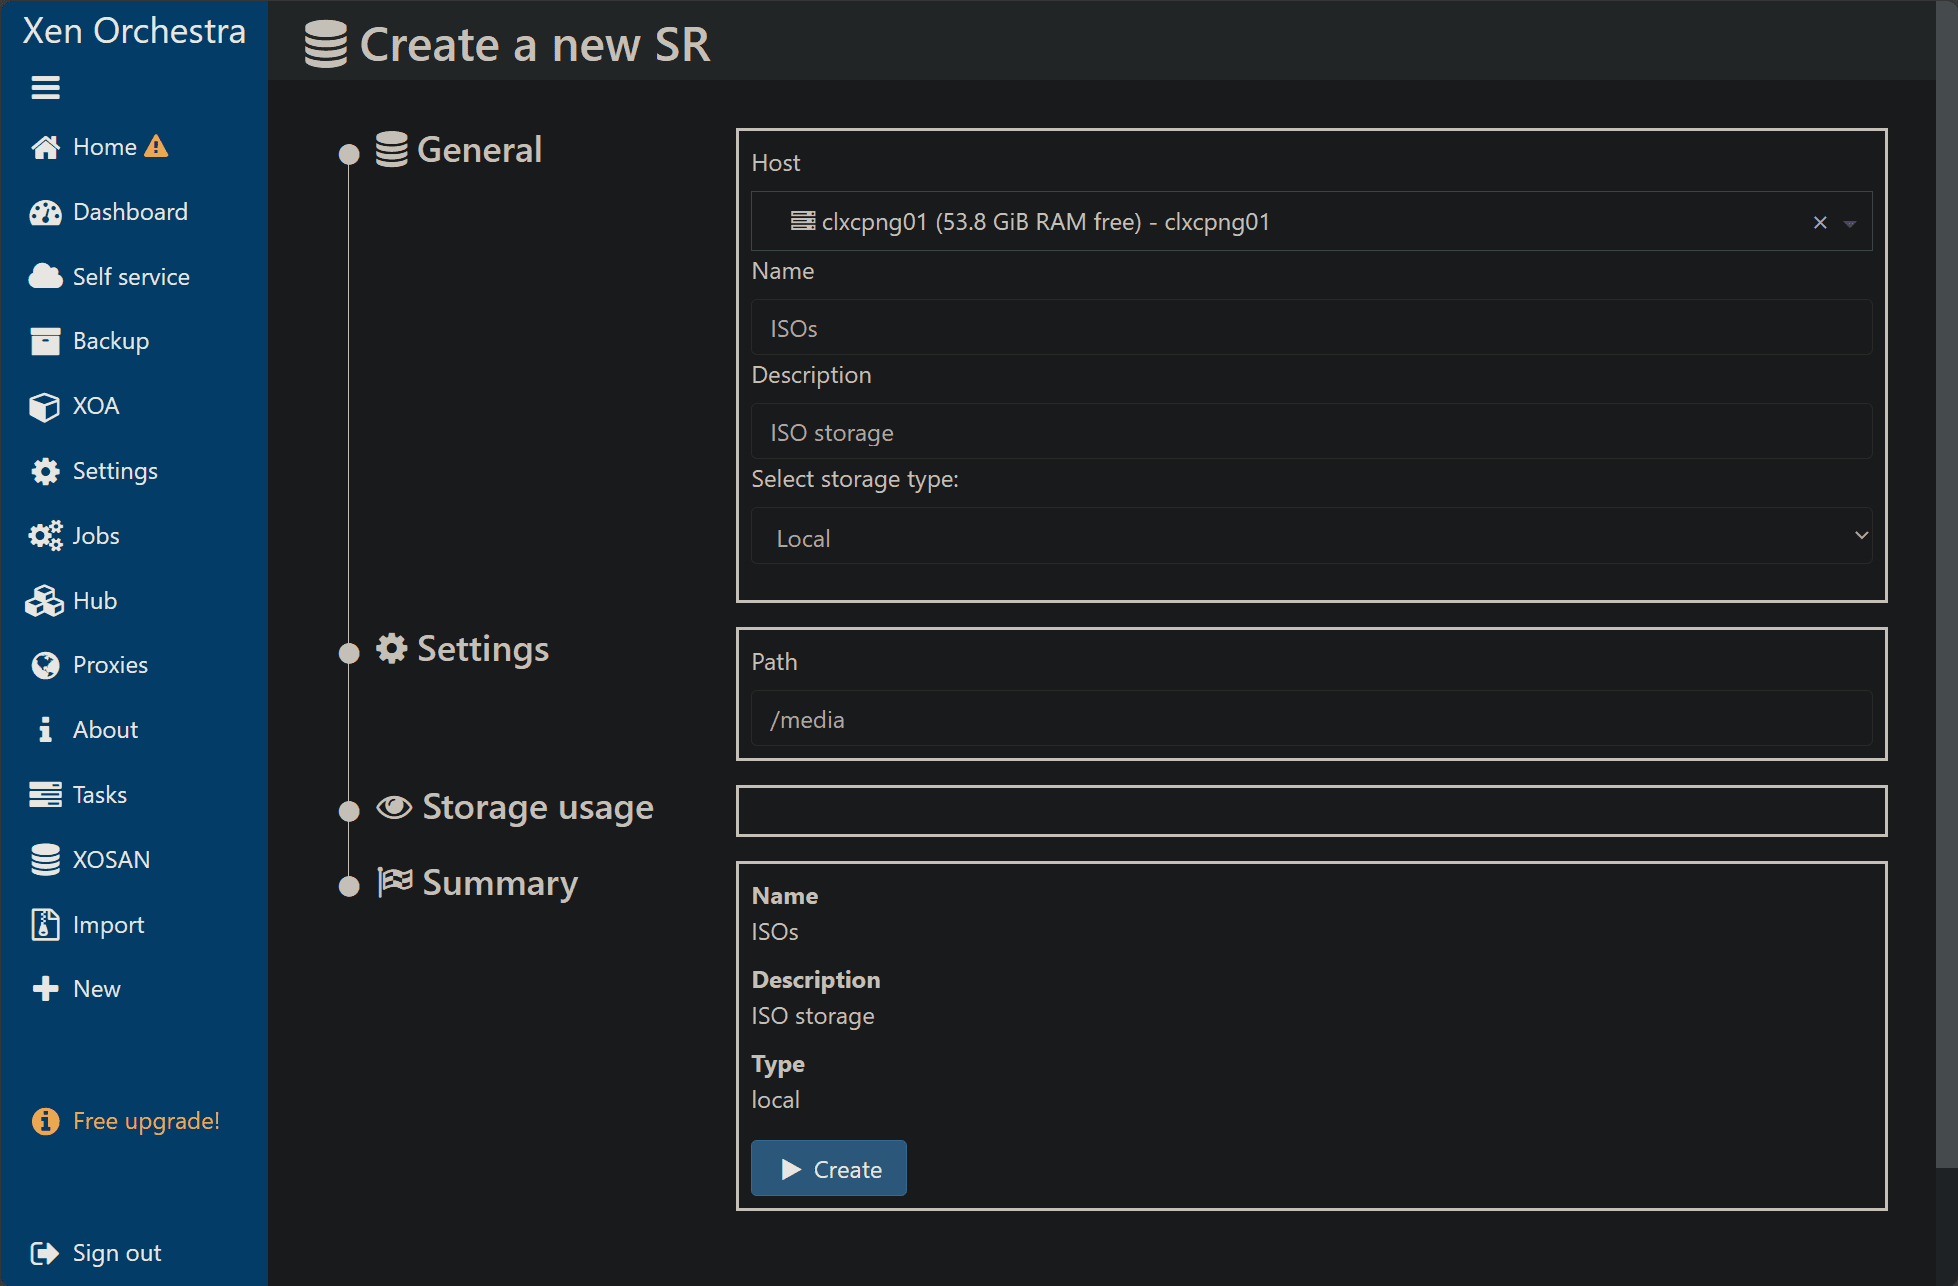
Creating ISO Storage
Often, you’d need to upload software or OS packages in the form of ISOs. Creating a dedicated storage for this streamlines the process.
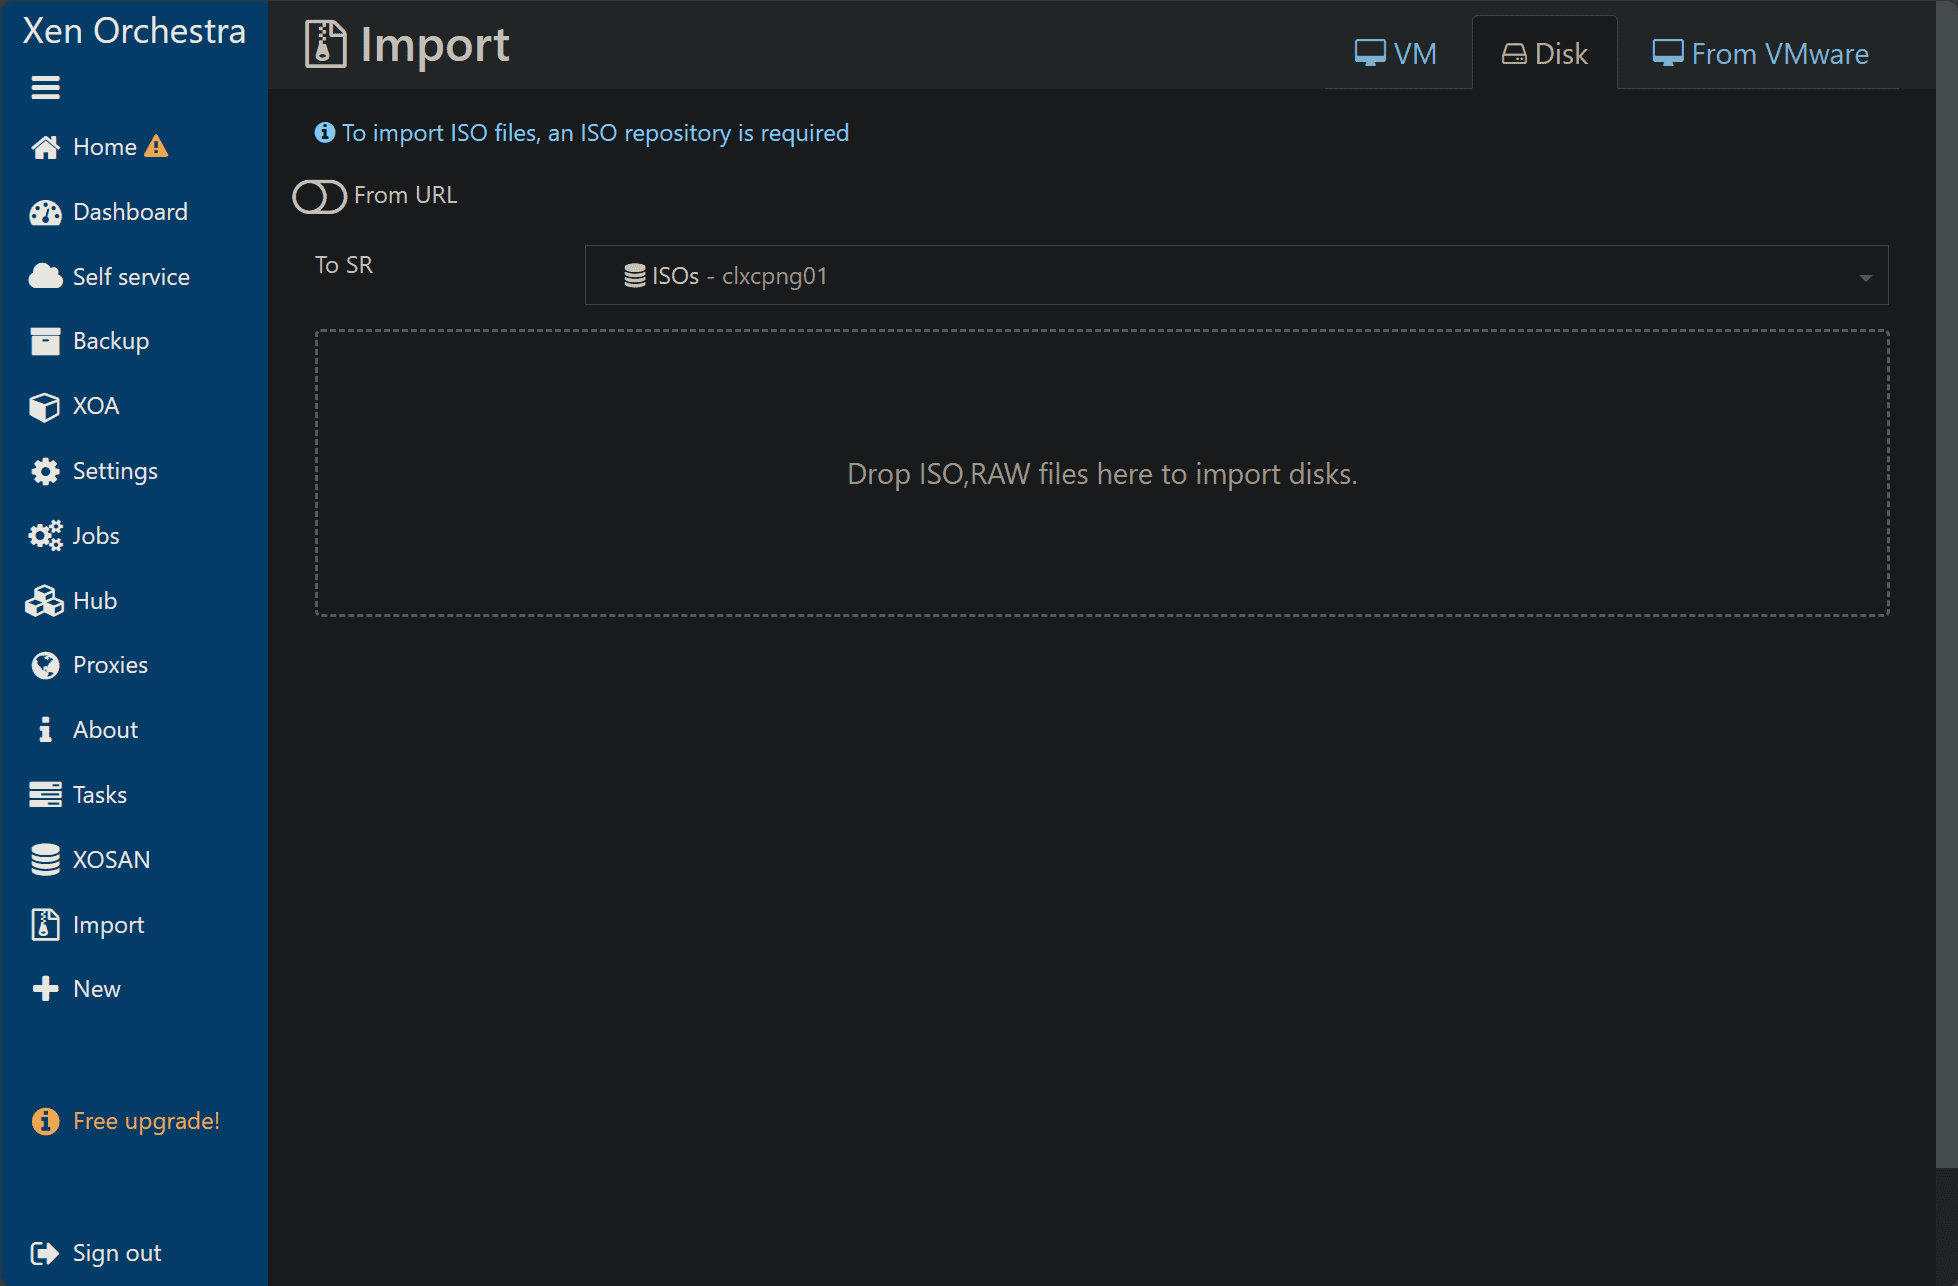
Uploading an ISO
With storage in place, uploading ISOs, whether it’s for Linux, Windows, or other systems, becomes a straightforward task.
Drag and drop your ISO in the box.
You will see the ISO ready to import. Click the Import button.
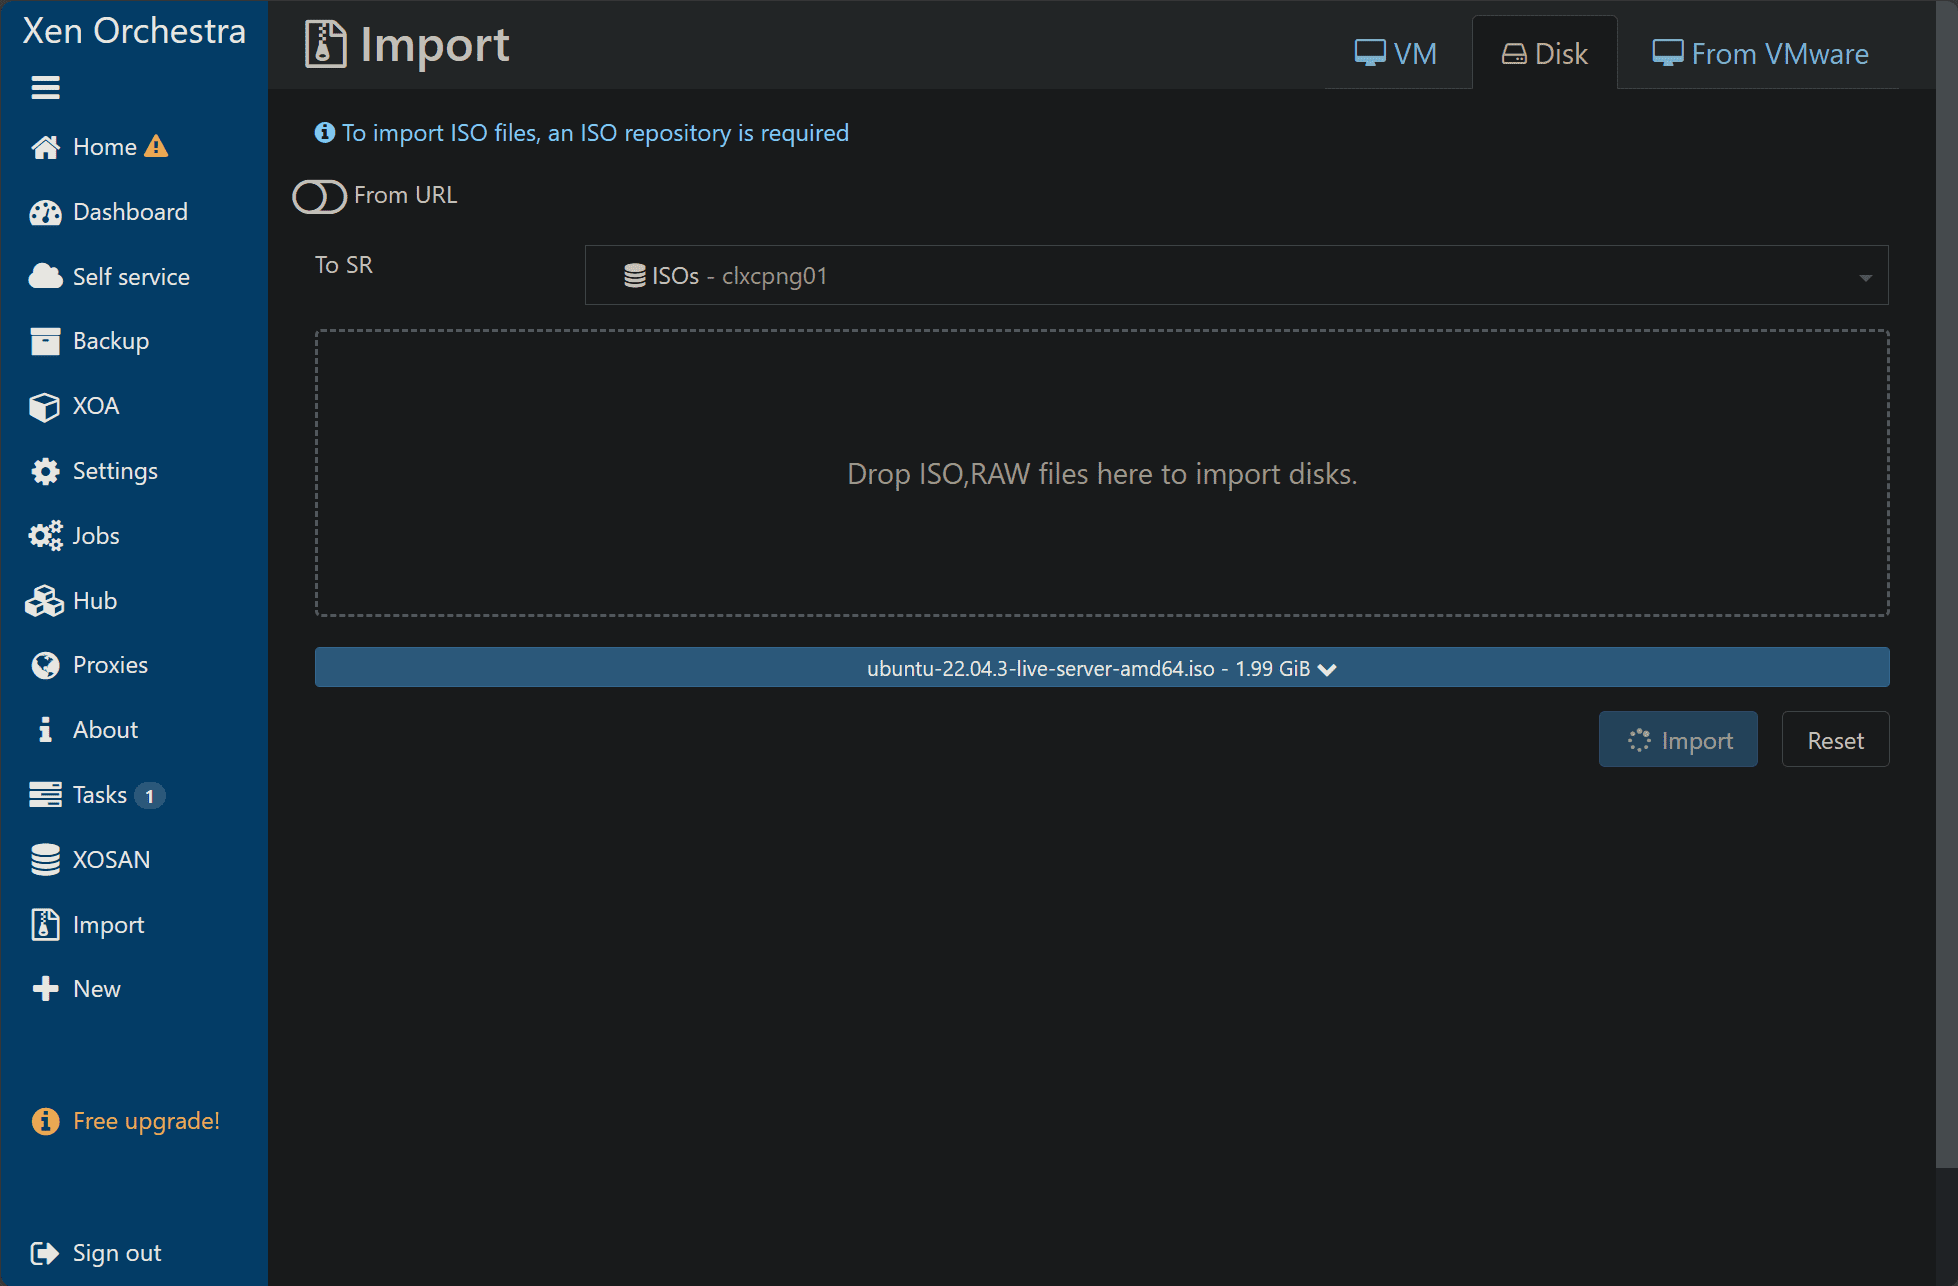
The ISOs are now uploaded to the ISOs repository.

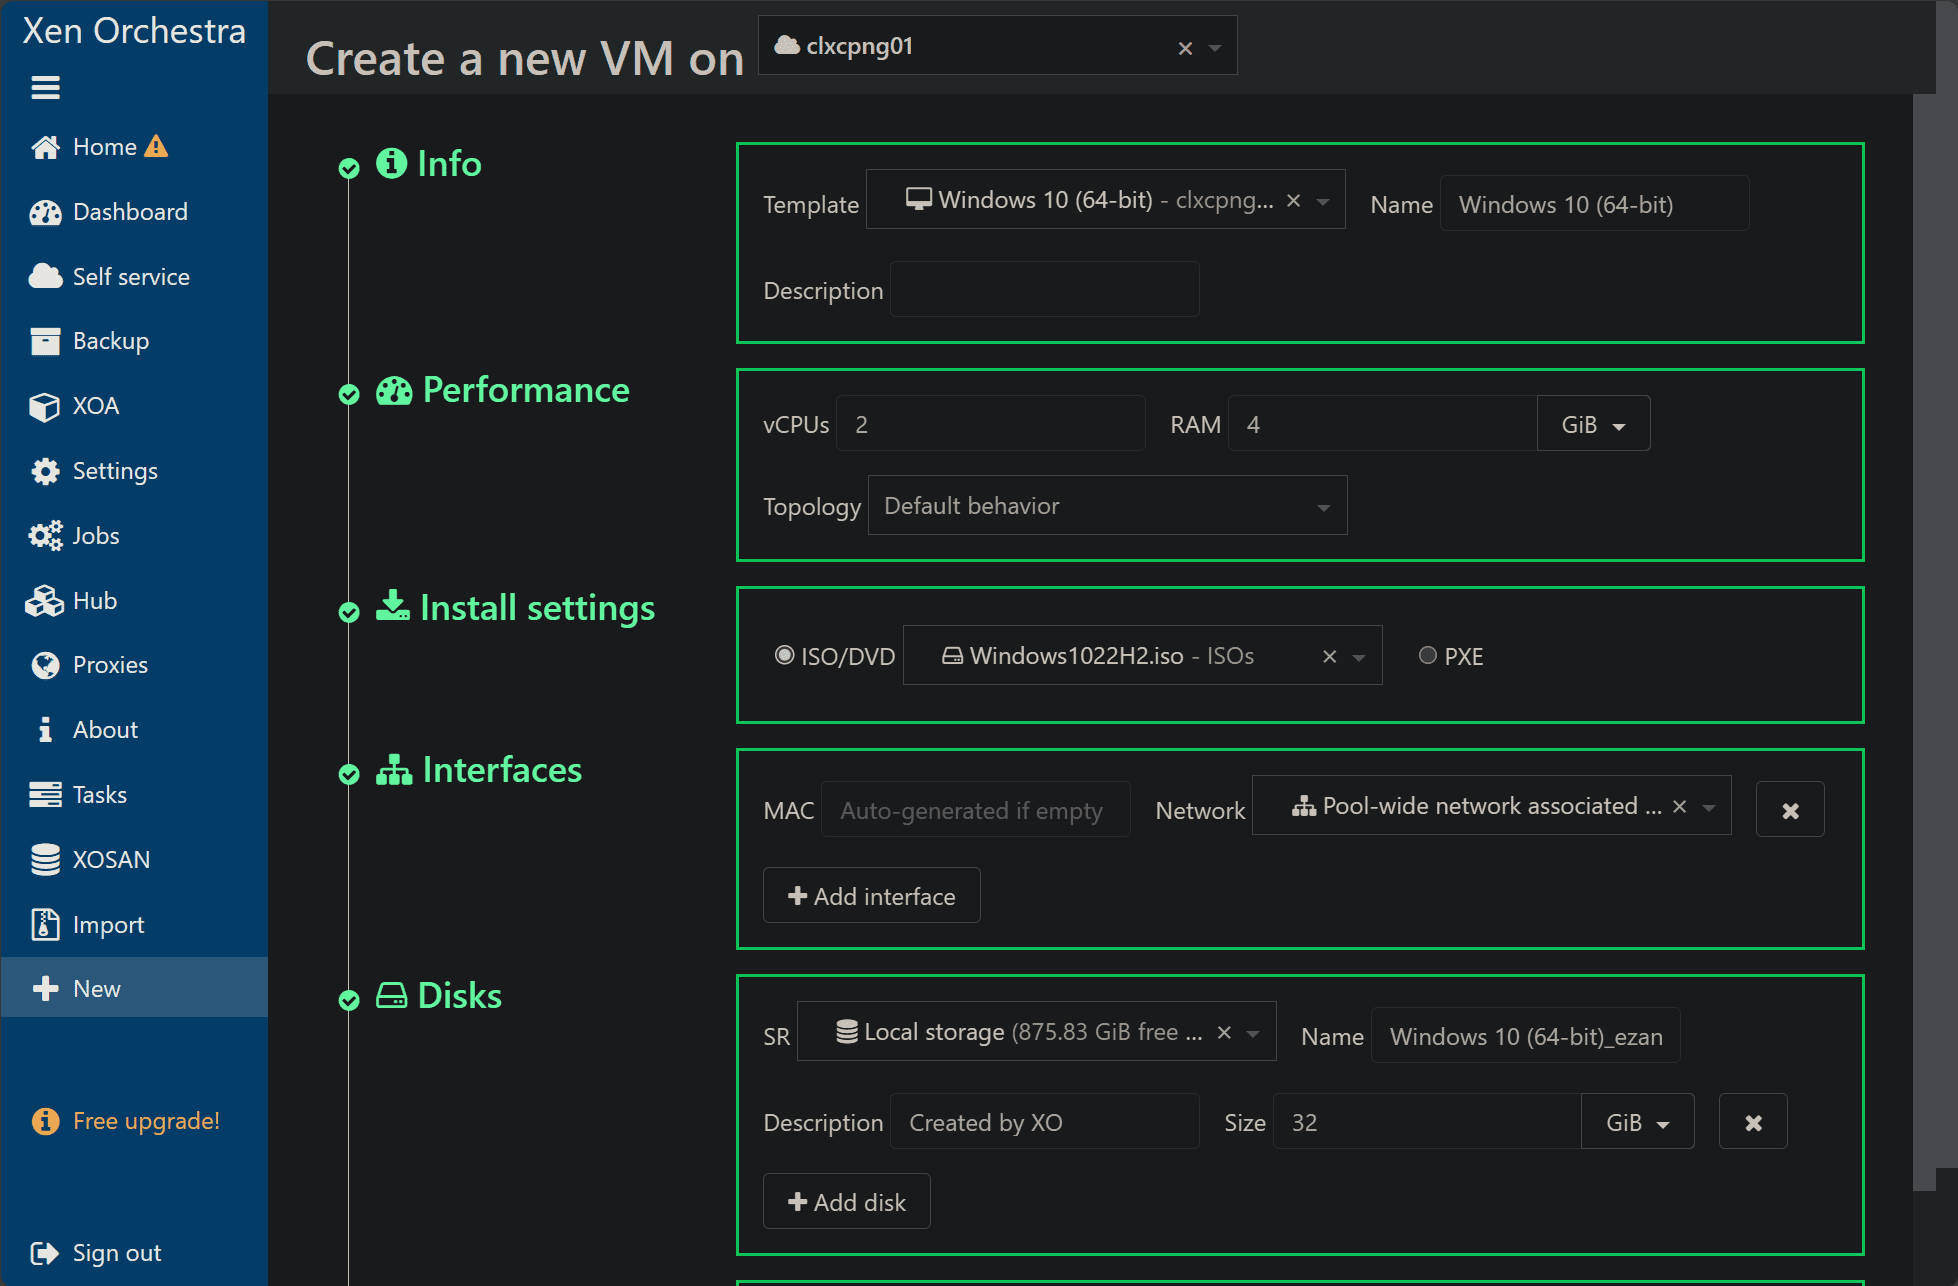
Creating new virtual machines
Below we are creating a new Windows 10 virtual machine.
LInux VMs are equally as easy. We are using the Ubuntu 22.04 ISO uploaded.
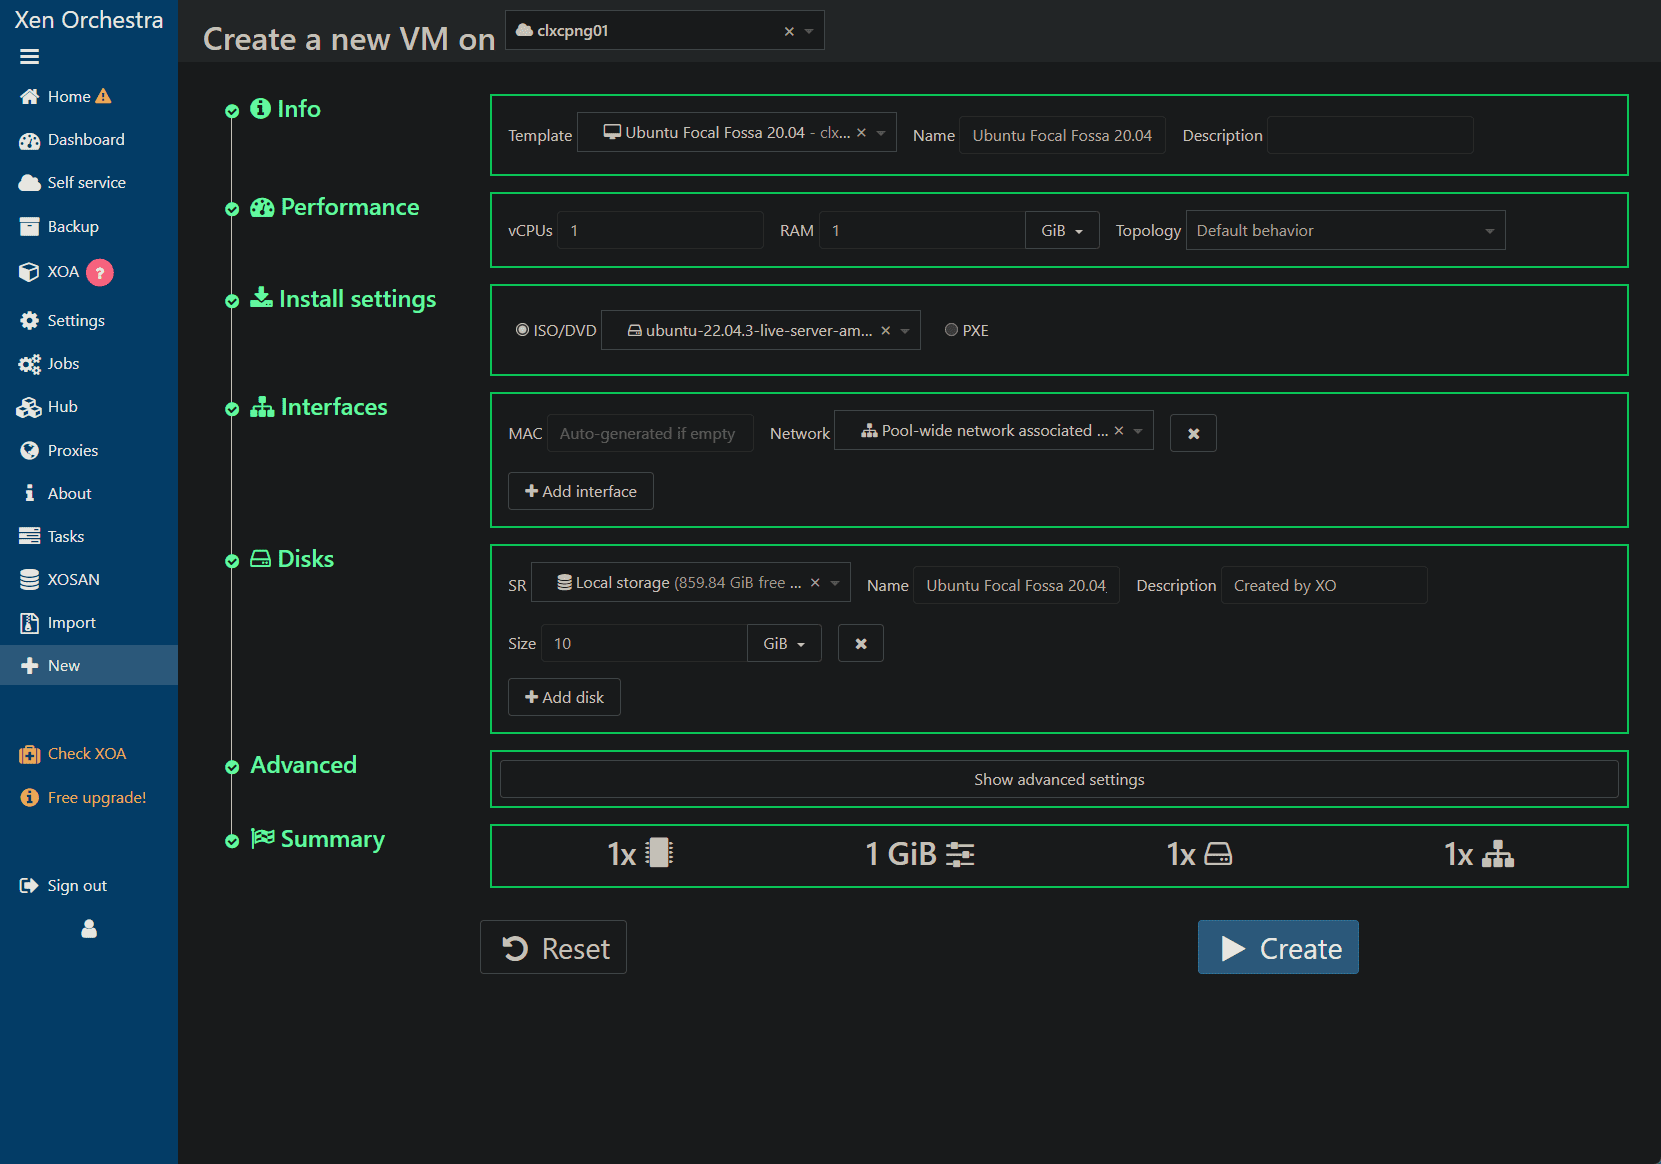
Installing Ubuntu Server.

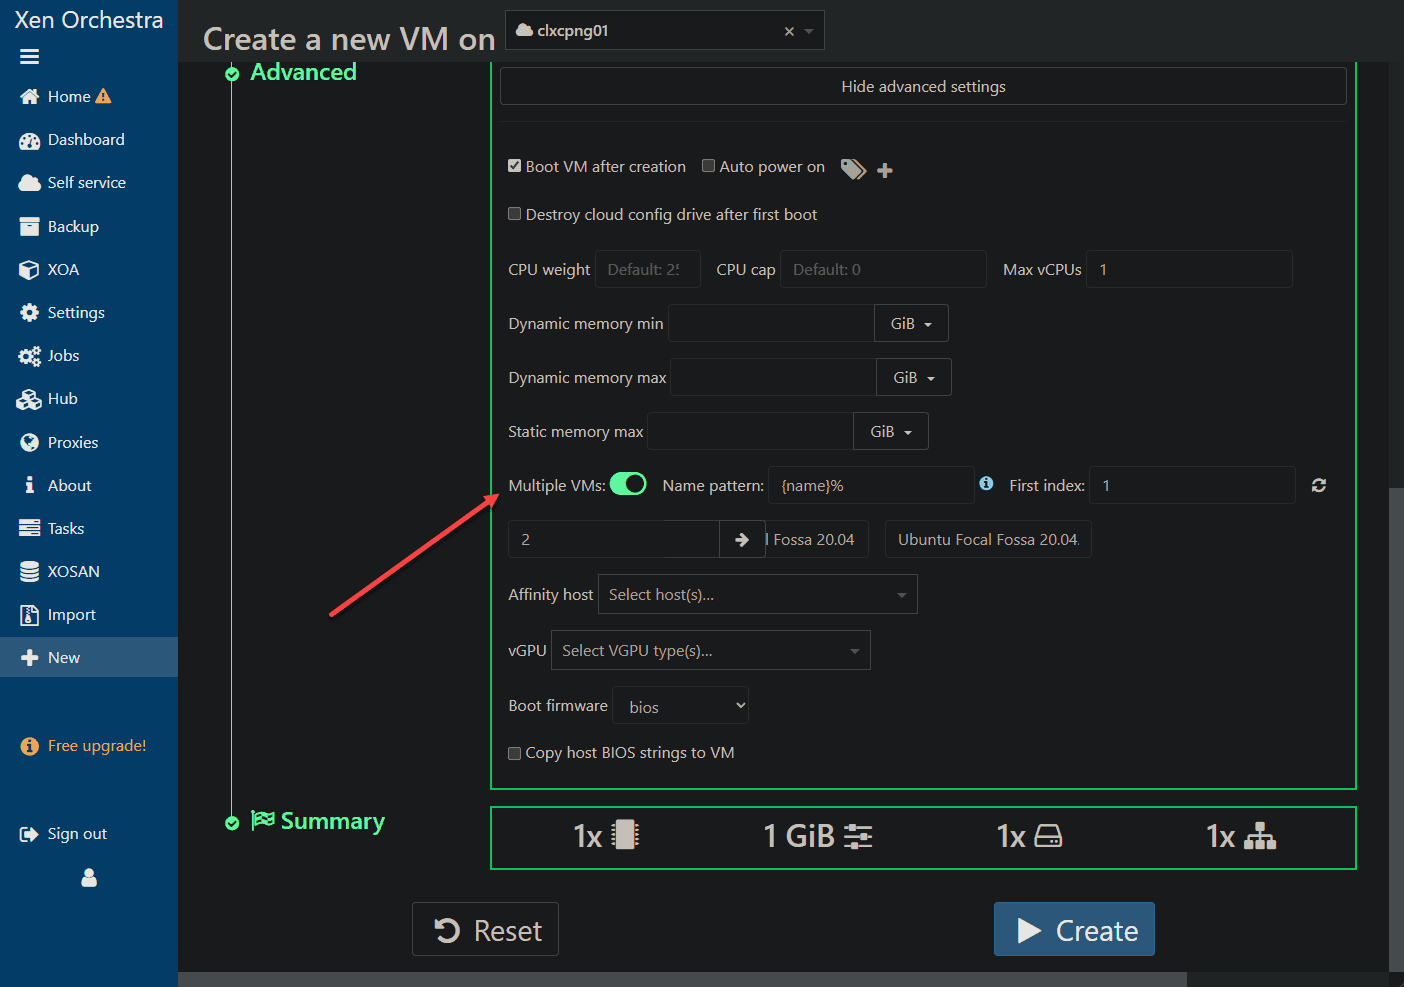
XCP-ng also has some interesting advanced options when creating new virtual machines. It has the options built into the GUI to create multiple VMs during the new VM creation process.
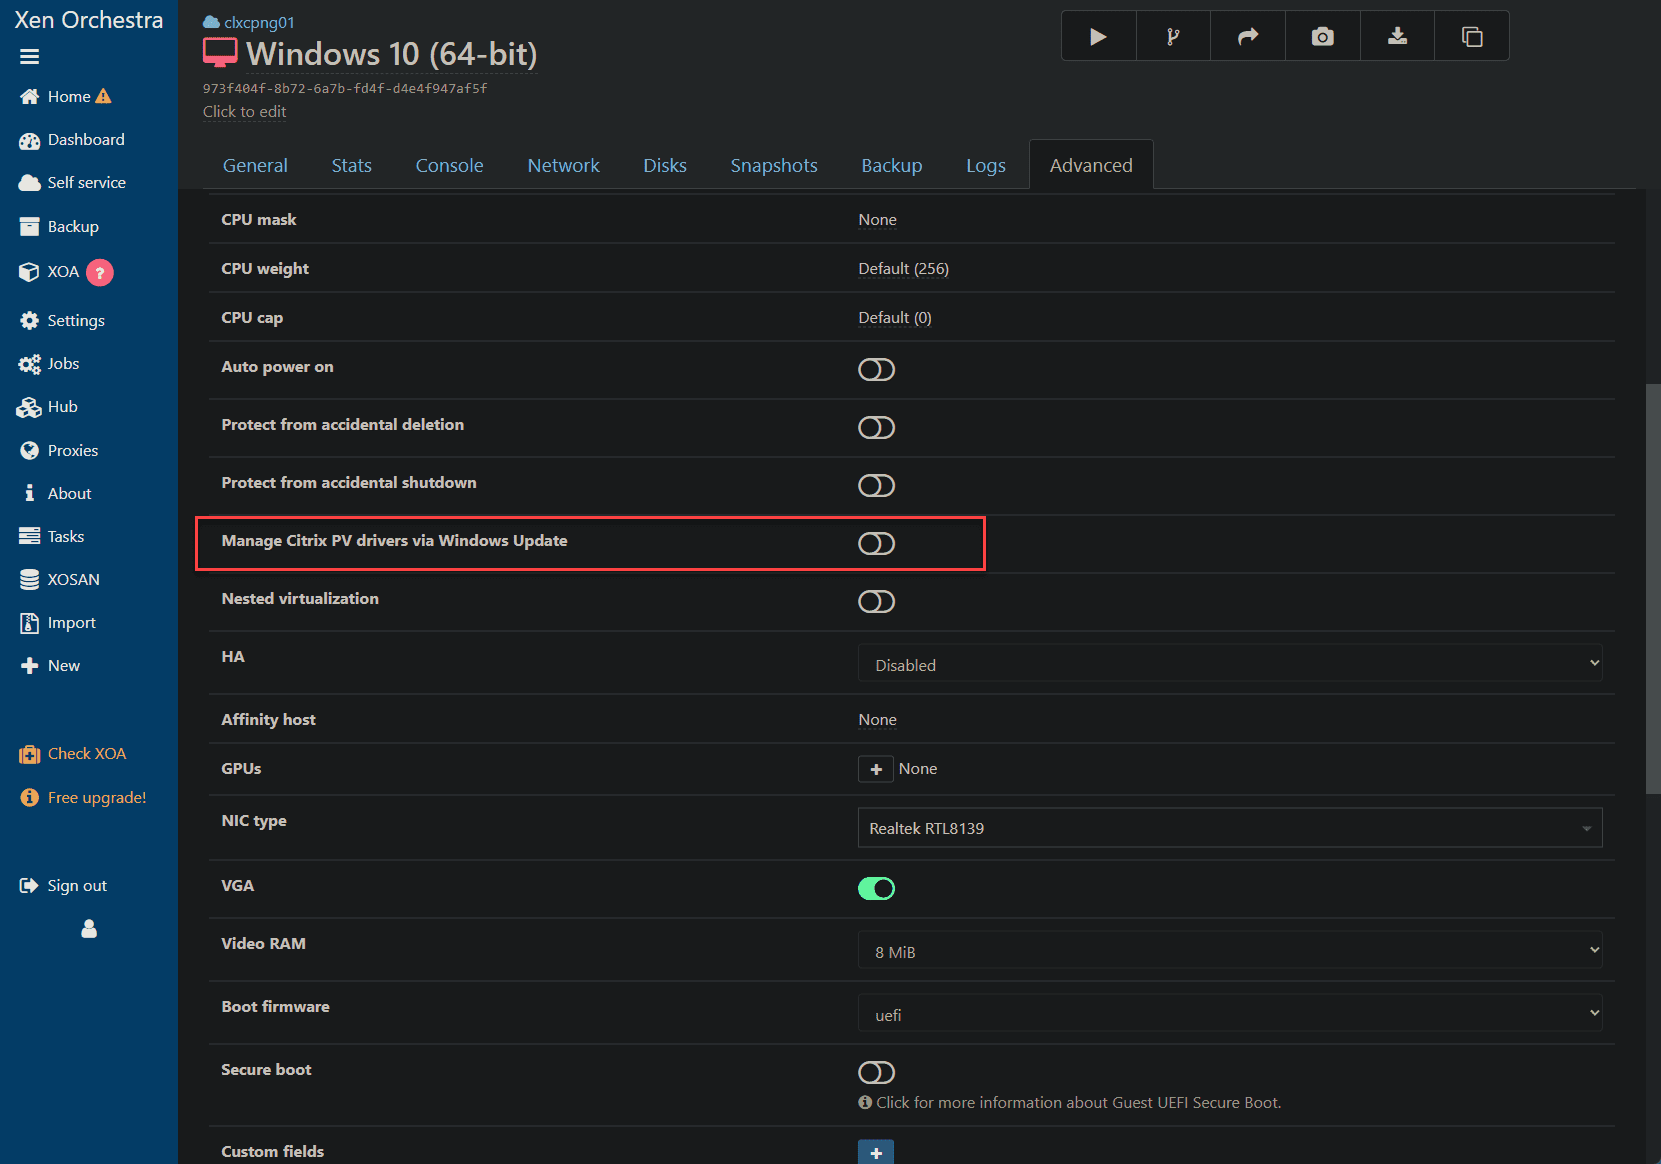
Installing XCP-ng Tools
These tools act as a bridge, enhancing the interaction between the host (XCP-ng) and the VMs. They play a critical role in ensuring smooth operations.
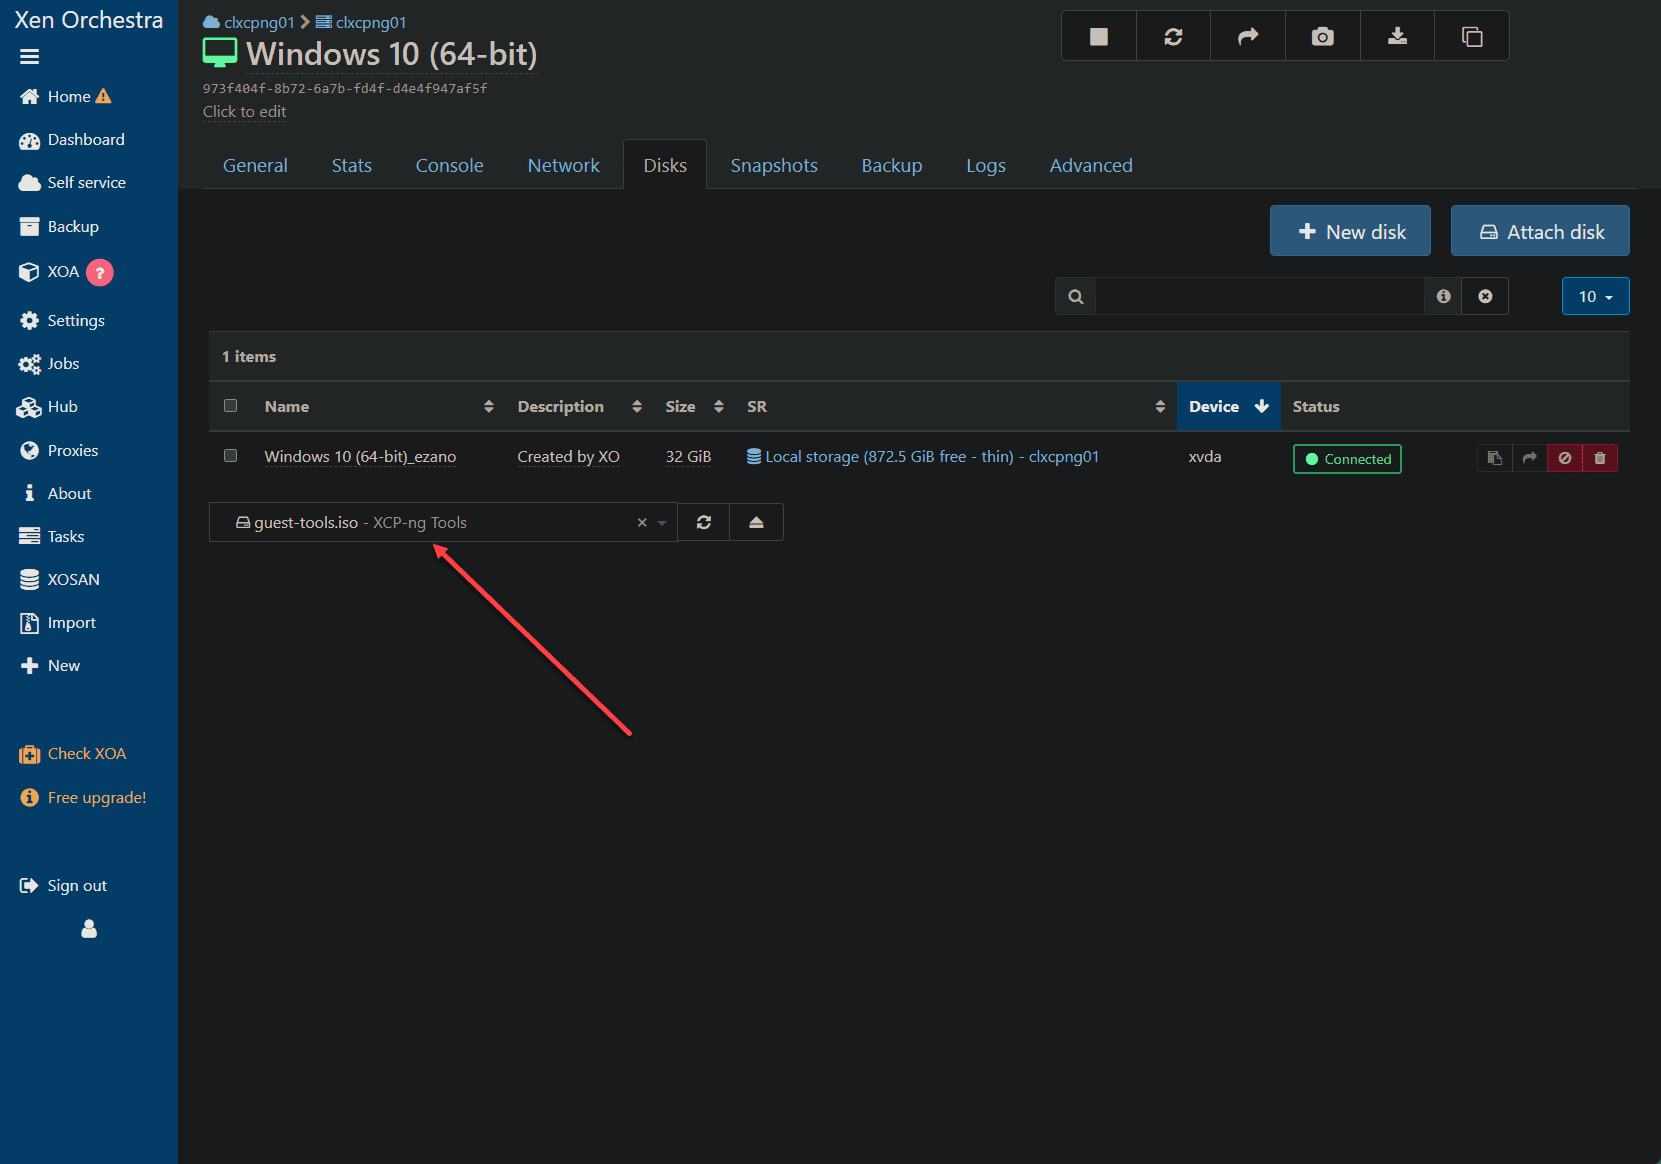
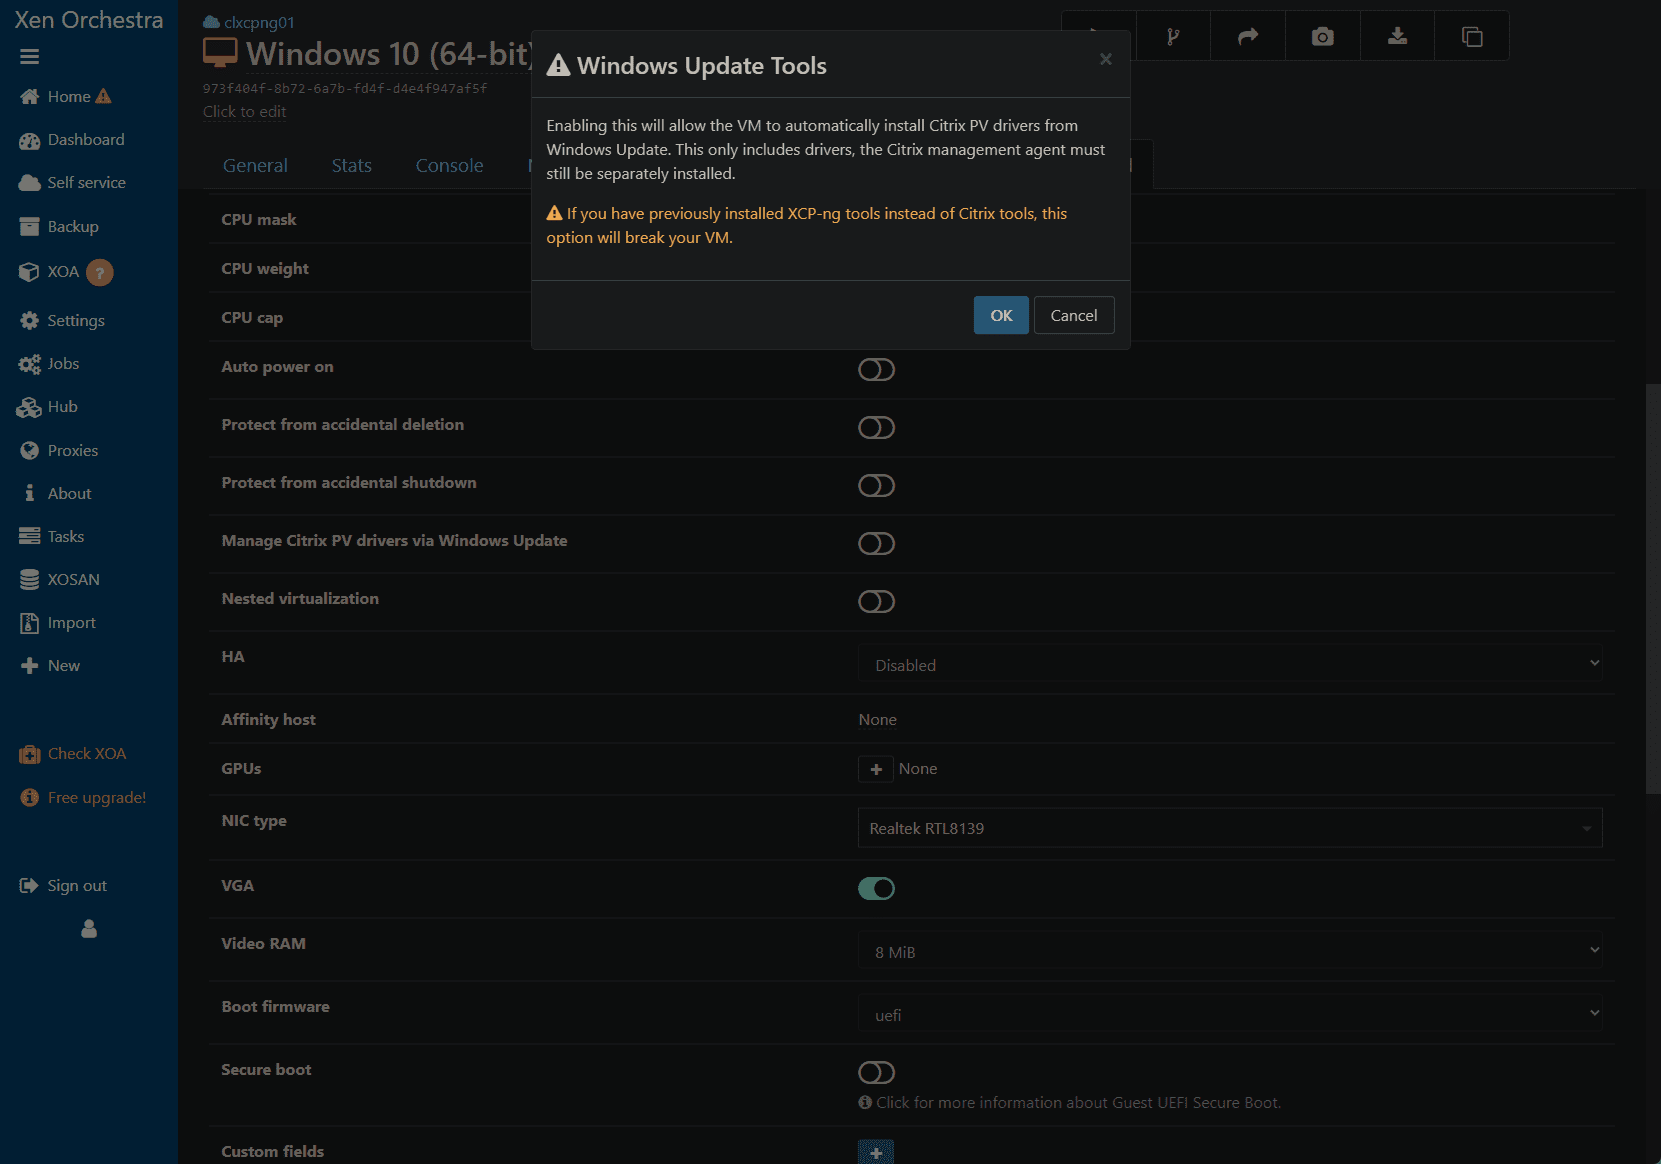
Flag on the option Manage Citrix PV drivers via Windows Update. This is how you install the drivers in Windows.
You will see the info dialog box pop up about using the Windows Update Tools option.
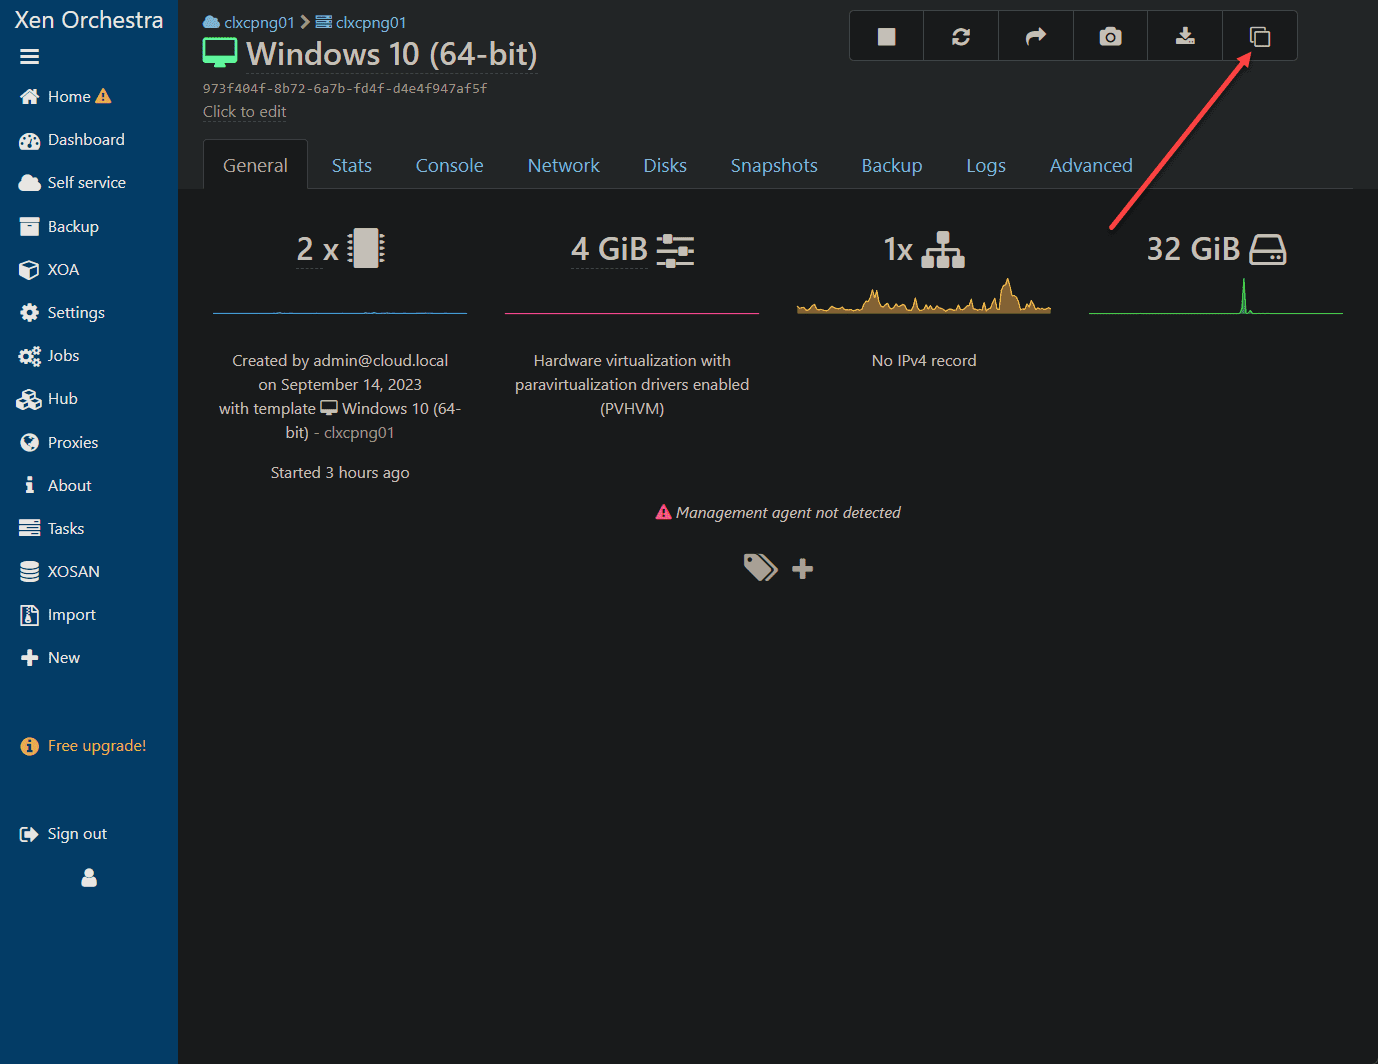
Cloning and copying virtual machines
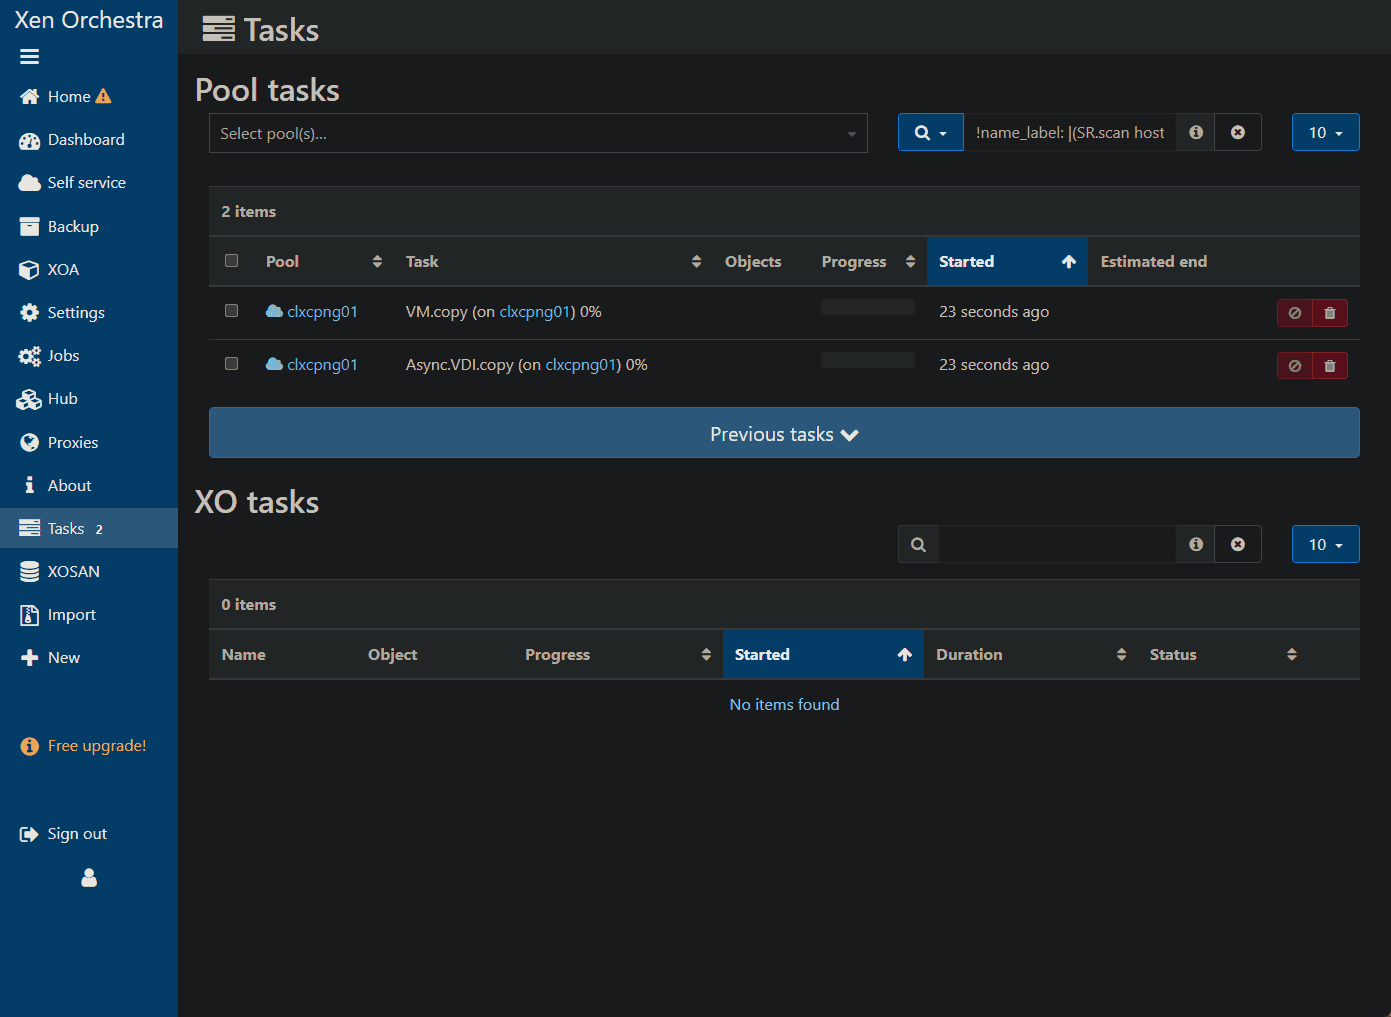
At the top right hand corner, click the double square icon to “copy” a VM. This is essentially cloning.
Here you can see the copy tasks associated with the operating after clicking the copy button.
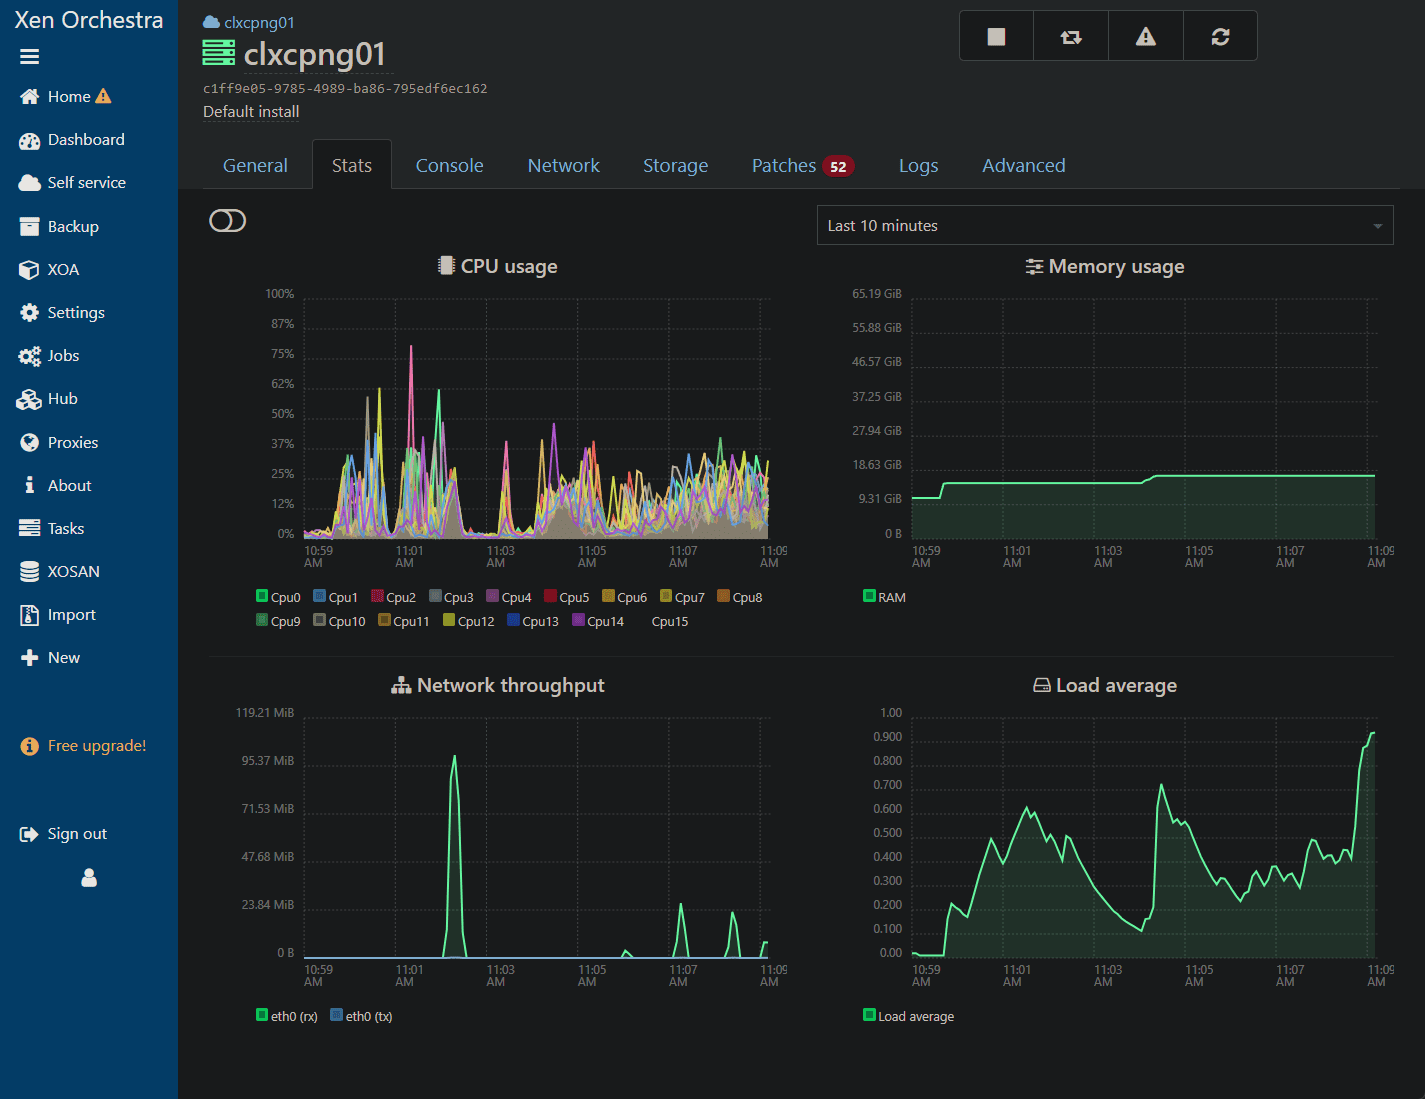
Viewing host metrics
You can view the host metrics in the Xen Orchestra dashboard.
Wrapping up
You will find that XCP-ng is a very capable and fully-featured open-source hypervisor for testing and running a home lab environment. It has many enterprise features and using Xen Orchestra provides an intuitive interface for operating things.
Building a home lab with XCP-ng is not just about the fun of seeing all the flashing lights or boasting about server racks. It’s a journey into virtualization, testing, and learning. Whether you’re a newbie getting your feet wet or an enterprise professional looking for a playground, XCP-ng is an excellent choice. And with the right tips and tricks, the virtualization world is at your fingertips.
More in this topic
Discuss this in the Community
Google is updating how articles are shown. Don’t miss our leading home lab and tech content, written by humans, by setting Virtualization Howto as a preferred source.
About The Author

Can you provide more detail about the dark mode plugin you’re using? Thanks for the guide!
Sure thing Joey, it is here: https://darkreader.org/. Thanks again for the comment!
Brandon