The storage layer is vital for having a high-performance, stable, and reliable virtualized environment. Specifically looking at VMware vSphere, there are specific storage best practices to note when architecting your storage for performance and reliability. If you are running VMware vSphere in production or your home lab, let’s consider the VMware storage top 15 tips 2023 for running your virtual machine workloads.
VMware storage technologies to know
There are many different types of VMware storage technologies that ones can use in their home labs and production environments. These include:
Traditional storage models
Raw device mapping
Virtual Volumes (vVOLs)
vSAN (software-defined storage models)
Top Tips in 2023 for VMware Storage
Note the following top tips for VMware Storage in 2023:
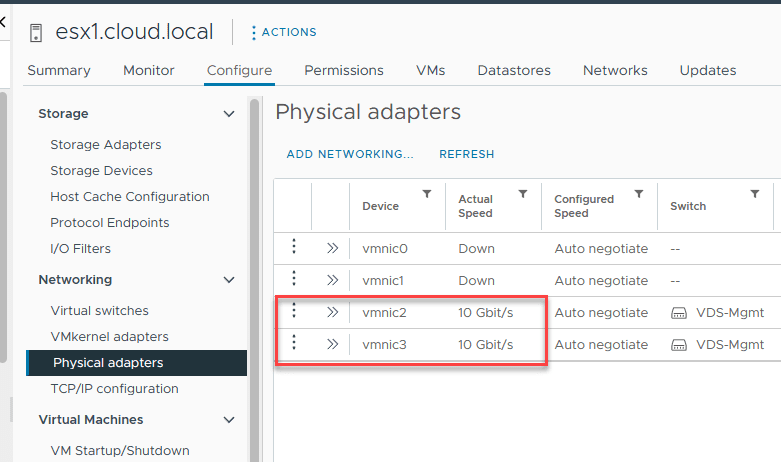
Use high bandwidth connections (10 Gbps and higher, even 25 Gbps is mainstream)
Flash storage is now mainstream – Use it where possible
NVMe is also very cost-effective
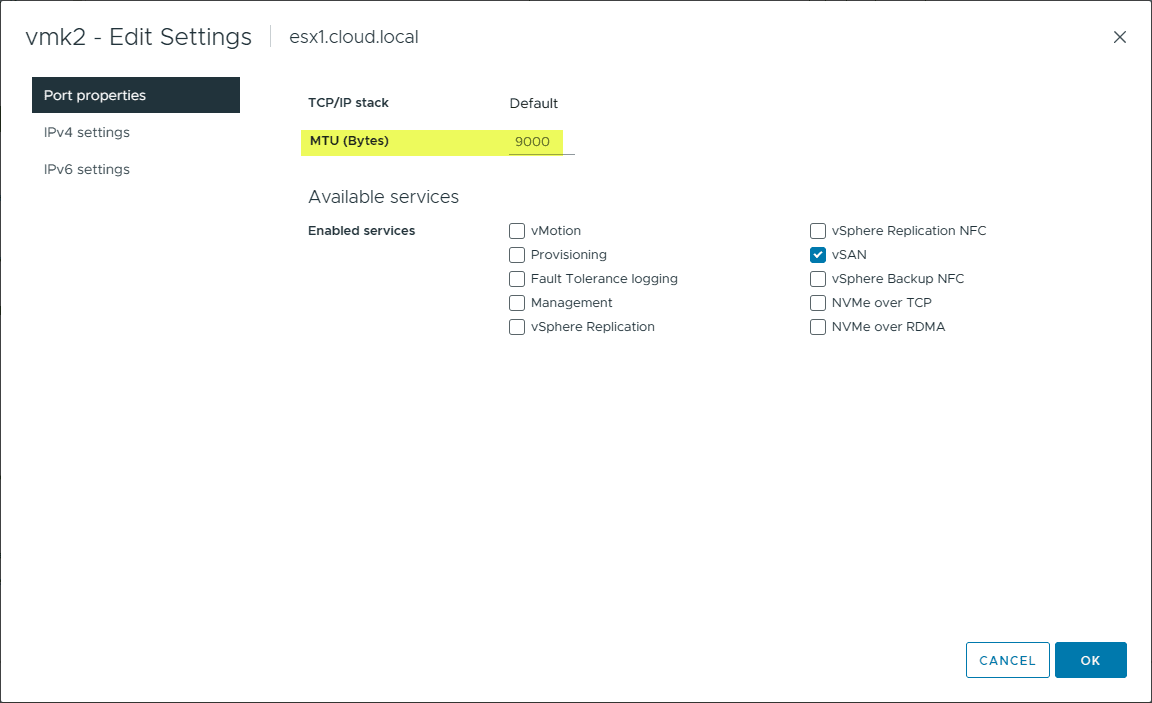
Don’t forget the basics with your network (jumbo frames, multiple uplinks, etc)
If using vSAN, ESA is now the preferred configuration over OSA
Architect for failure
Understand the differences in RAID levels and Erasure coding levels
Use the high-performance plugin (HPP) with NVMe
Use Storage I/O control for latency-sensitive workloads during peak performance
Use VMFS 6 and higher for best performance and automatic UNMAP
Understand thin, eager zero, and lazy zero thick provisioned disks
Use dependent, independent, and independent persistent disks when needed
Provision more LUNs with fewer VMs on each LUN for performance
Give attention to Power Management settings
1. Use high bandwidth connections (10 Gbps and higher, even 25 Gbps is mainstream)
One of the great things about networking advancements over the past few years is that storage directly benefits. Where 10 Gbp used to be considered on the fast end of the spectrum, 25 Gbps has now become mainstream across the board. Most organizations looking at hardware refresh cycles in 2023 will purchase servers with 25 Gbps network adapters and switches.
Whether you are provisioning traditional storage with a SAN or looking at VMware HCI storage using vSAN, 25 Gbps connections will offer tremendous performance benefits. These connections ensure that your virtual machines and network file system operate optimally, delivering superior performance and efficiency.
2. Flash storage is now mainstream and NVMe is also very cost-effective
Flash storage, once a luxury, is now mainstream in most commercial storage device configurations. Coupled with cost-effective NVMe solutions, it offers faster access to data and enhances the performance of virtual disks and virtual volumes. With the right configuration, VMware’s storage management benefits from this technological advancement.

In addition to high-performance flash storage, NVMe no longer has the ridiculous premium on its performance. It has become much more mainstream. In some cases, you can even find that NVMe storage is on par with other types of storage when configuring a new server build.
3. Use Virtual Volumes (vVOLs) on traditional storage configurations
Another solution for virtual disk storage is Virtual Volumes (vVOLs). Virtual Volumes have evolved from the early days, and most modern storage devices now support using them. vVols and vSAN share a unified storage operational approach.

Both use storage policy-based management (SPBM) to streamline storage provisioning and apply policies at the VM or VMDK level. Through SPBM, storage processes are configured in a way that aligns with business objectives, reducing the demand for specialized storage infrastructure expertise
4. Don’t forget the basics with your network (jumbo frames, multiple uplinks, etc)
Ensuring the efficient operation of virtual machines requires a solid foundation in network basics. Techniques such as employing jumbo frames and having multiple uplinks are more critical than ever. These methods aid in achieving an efficient operational model and enhanced data services.

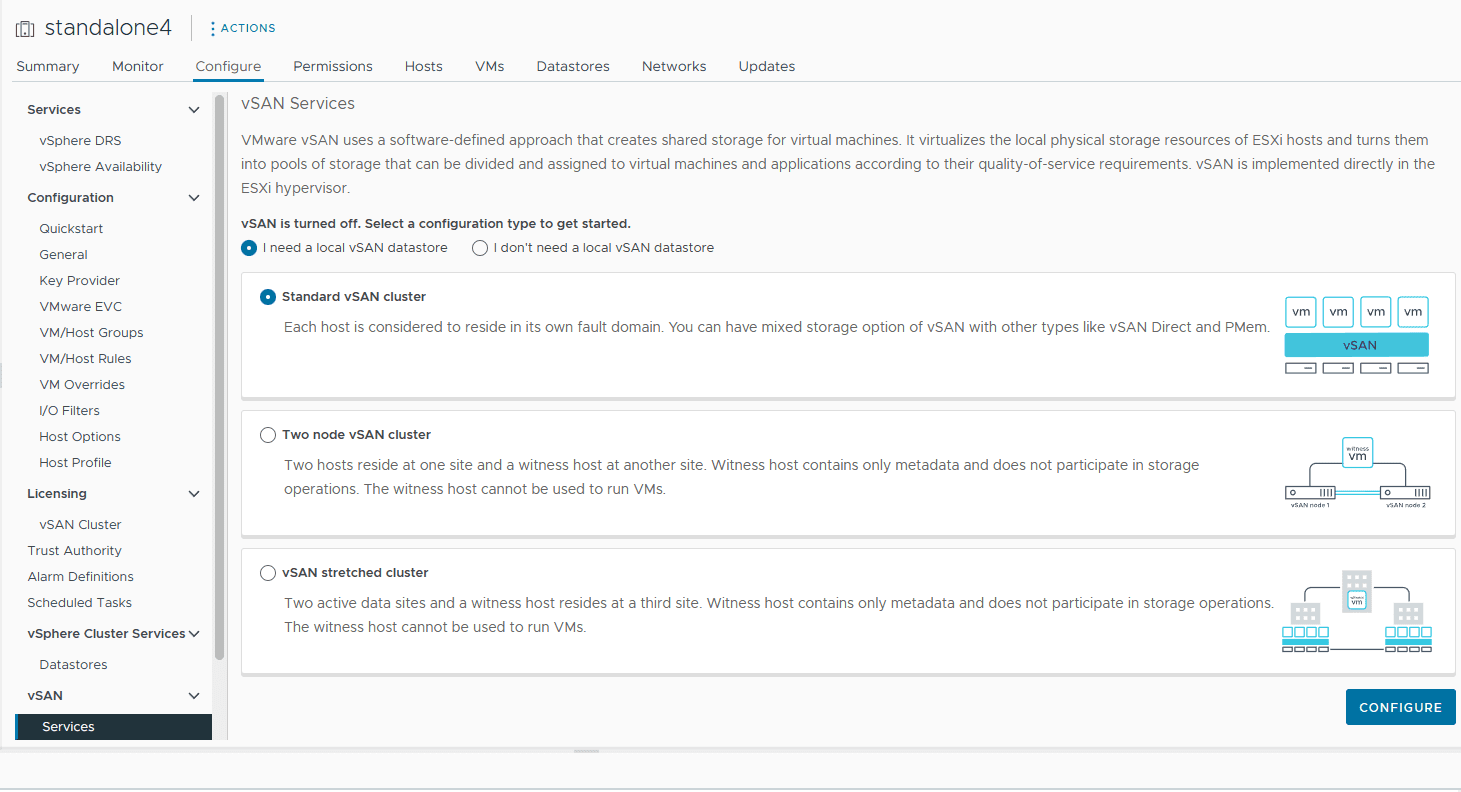
5. If using vSAN, ESA is now the preferred configuration over OSA
VMware vSAN is a modern hyperconverged storage solution that aggregates local storage from your ESXi hosts into a single storage pool shared between the cluster hosts. When you configure a VM, the virtual disk appears on the vsanDatastore.
For those utilizing VMware’s vSAN, the shift towards the Enhanced Storage Architecture (ESA) as the go-to configuration over the Original Storage Architecture (OSA) is a significant advancement with many benefits.
Along with adopting distributed switches, network I/O control, and vSphere storage capabilities, vSAN aggregates local resources more effectively, maximizing the performance of shared storage solutions.
6. Use distributed switches and network I/O control with vSAN
Distributed switches are managed from the vCenter Server level rather than at the ESXi hosts level. If you have multiple ESXi hosts, it makes consistent network management much more straightforward. They also can configure network I/O control that allows giving precedence to specific traffic types. This is key when prioritizing storage traffic, such as vSAN traffic.
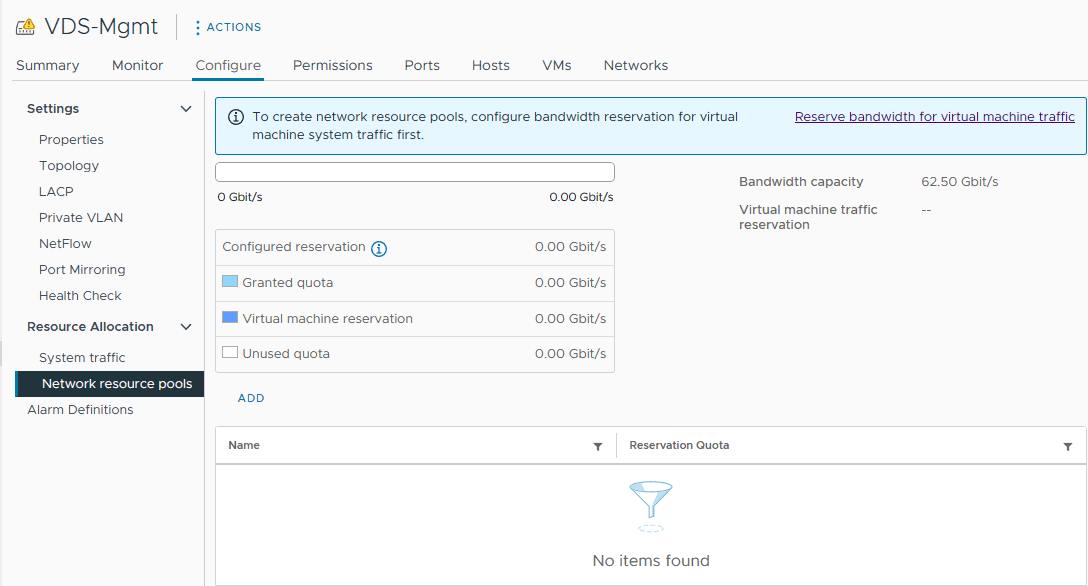
Many do not realize this, but if you buy a vSAN license, you also have a license for distributed switches. So, it makes sense to use them.
7. Architect for failure
When you architect your VMware storage solution, you need to give attention to fault tolerance and resiliency. It’s not a matter of if you will experience a failure at some point, but rather, a matter of when. Hardware failures and other types of disaster events can impact your vSphere cluster. So, having redundancy helps you architect for failure. This includes:
Multiple storage paths
Multiple power supplies
Multiple storage switches
Multiple nodes
Multiple fault domains
8. Understand the differences in RAID levels and Erasure coding levels
Navigating the world of RAID and erasure coding levels is pivotal for a storage administrator. Both play an influential role in how data is stored, accessed, and protected. Equipping oneself with this knowledge ensures seamless storage provisioning and maximizes data protection in the VMware environment.
9. Use the high-performance plugin (HPP) with NVMe
Considerations for Optimizing NVMe Performance:
Enable the high-performance plug-in (HPP) on your ESXi hosts for optimal throughput. You can check out the “VMware High-Performance Plug-In and Path Selection Schemes” section in vSphere Storage.
Utilizing HPP, tweaking the Disk.SchedNumReqOutstanding parameter to increase the maximum outstanding disk requests can potentially enhance performance. For more insights, check the VMware KB article 1268.
NVMe devices are designed for parallel operations. You’ll often achieve peak throughput when these devices support multiple virtual disks or several virtual machines.
The selection of virtual storage adapters for guest virtual machines is crucial. Typically, you’d go with PVSCSI or the newer vNVMe virtual adapter.
There are a number of esxcli commands that allow interacting with the HPP plugin configuration. Below, we are using the command:
esxcli storage hpp device list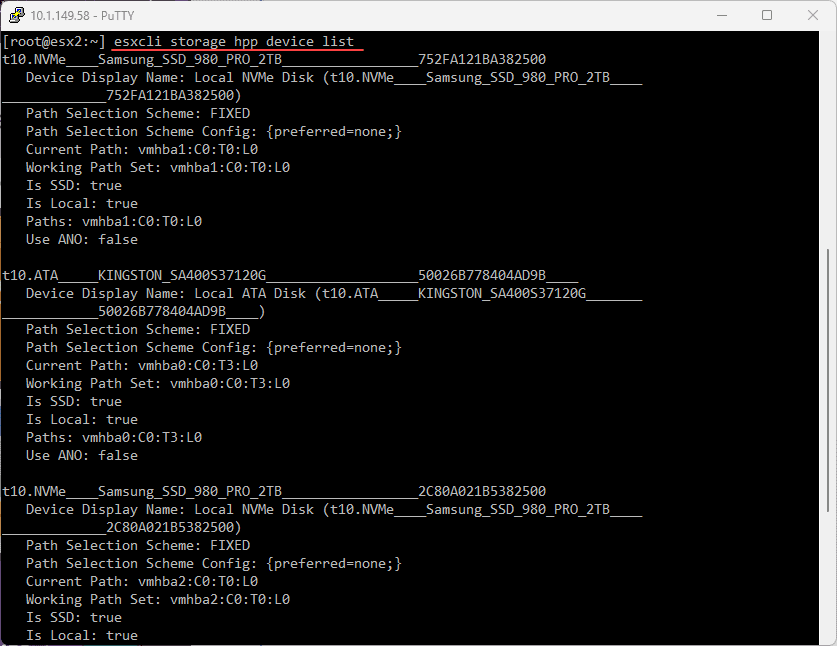
10. Use Storage I/O control for latency-sensitive workloads during peak performance
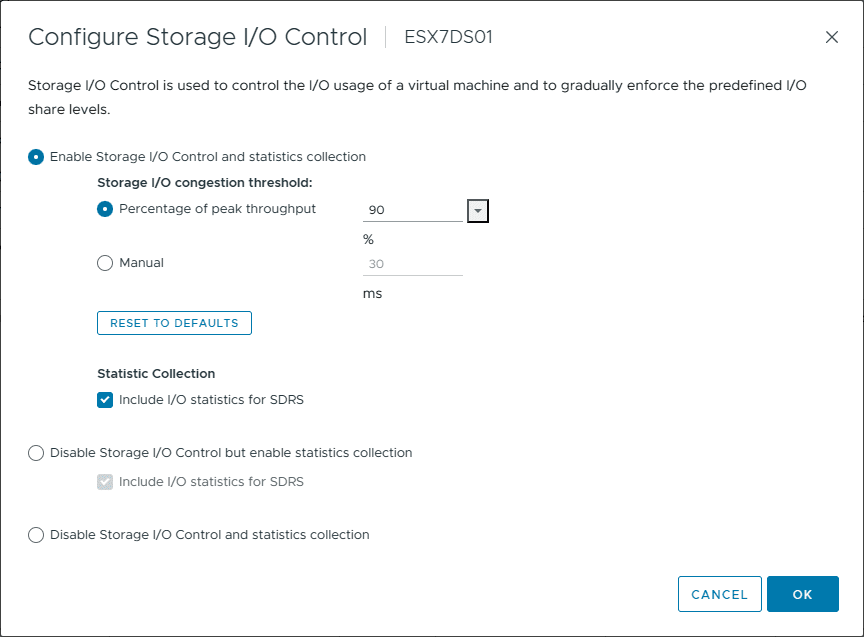
VMware storage in 2023 emphasizes the importance of Storage I/O control, especially for latency-sensitive workloads. VMware vSphere® Storage I/O Control offers a feature enabling the allocation of an entire datastore’s resources amongst the different virtual machines accessing that datastore. By default, when Storage I/O Control is off, each host accessing a datastore receives a resource share equivalent to the amount of the datastore’s total I/O workload originating from that host. Even when Storage I/O Control is on, it only springs into action upon sensing datastore congestion. The feature calibrates its trigger threshold to suit the specific data center environment.
To turn on Storage I/O Control:
Open the vSphere Client.
In the Navigator section, choose the Storage tab.
Pick a datastore and navigate to the Configure tab.
Click on General.
Beside Datastore Capabilities, hit the EDIT… button.
Check the “Enable Storage I/O Control and Statistics Collection” option.
Click OK to finalize.
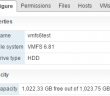
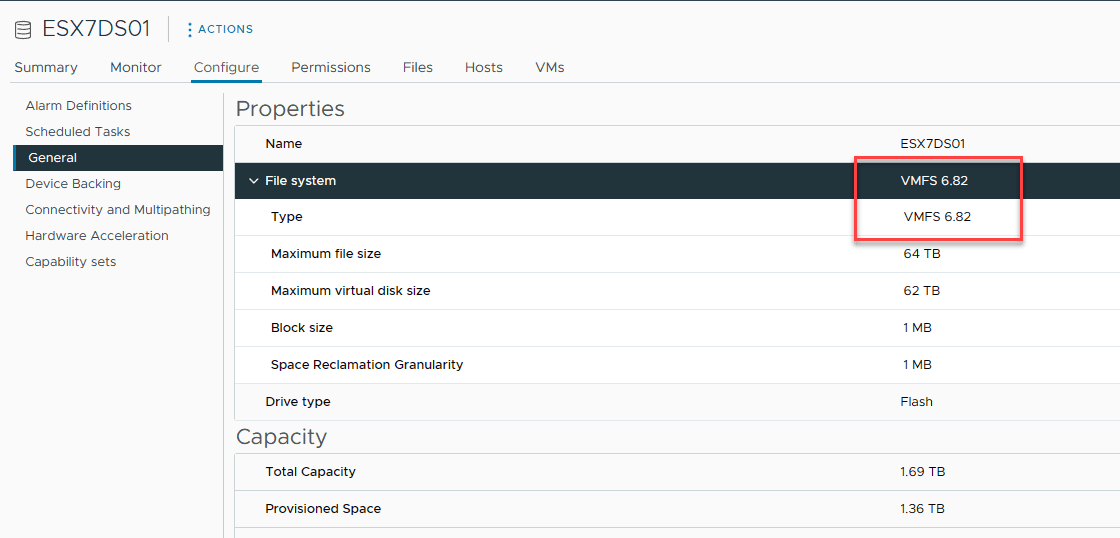
11. Use VMFS 6 and higher for best performance and automatic UNMAP
Alongside this, using VMFS 6 for your VMFS datastore ensures enhanced performance and an automatic UNMAP feature, catering to a file system that meets modern demands.
For VMFS6 datastores (compatible with vSphere 6.5 and subsequent versions), vSphere can reclaim space for thin-provisioned disks, known as UNMAP, automatically. With vSphere 6.5, users could determine the UNMAP priority, and vSphere 6.7 further introduced the option to designate the UNMAP speed.
These settings allow users to efficiently reclaim storage on high-speed arrays (particularly beneficial for all-flash arrays) or moderate the performance implications of executing a rapid series of UNMAP activities, which is beneficial for slower arrays.
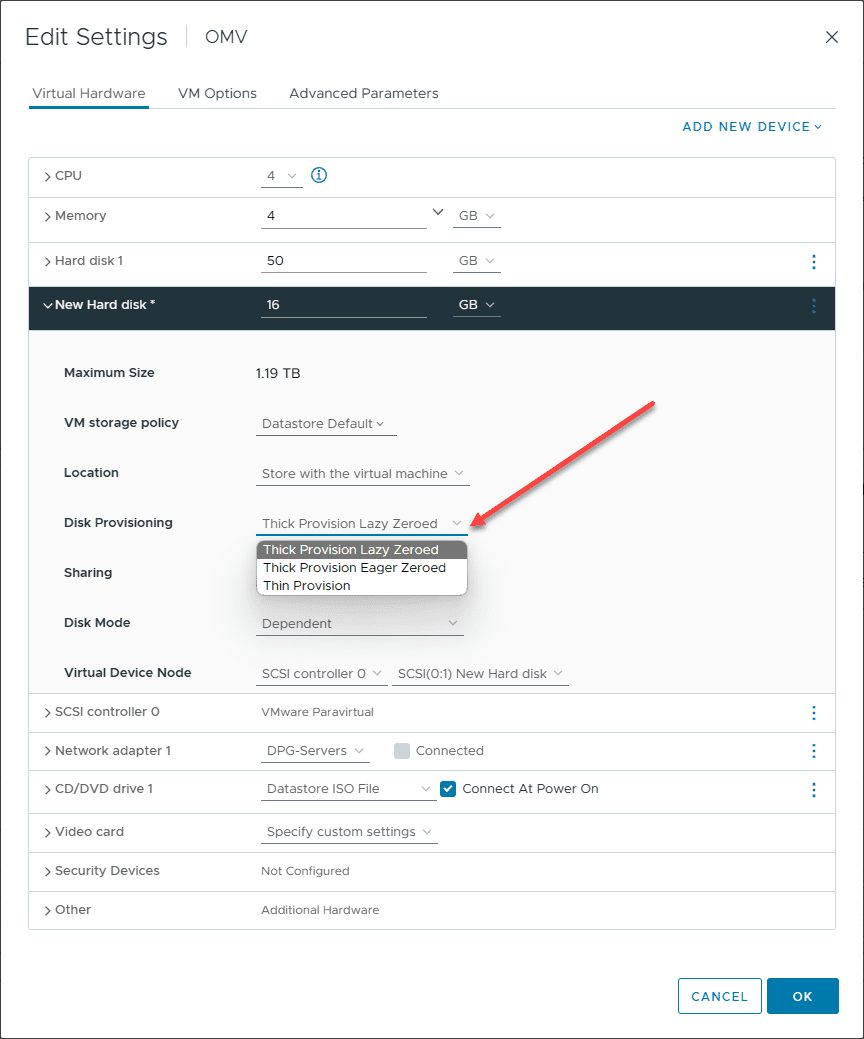
12. Understand thin, eager zero, and lazy zero thick provisioned disks
Dive deeper into understanding the distinctions between thin, eager zero, and lazy zero thick provisioned disks. Recognizing when to utilize each type is crucial for optimizing storage space and ensuring the seamless operation of guest operating systems.
ESXi offers a range of virtual disk varieties:
Thick Provisioned – These virtual disks allocate all their space right at the onset. They can be categorized into two kinds: eager-zeroed and lazy-zeroed.
Eager Zeroed – This type of thick disk ensures all space is not only allocated but also set to zero during its creation. While this process elongates the creation time, it guarantees optimal performance, even during the first block write.
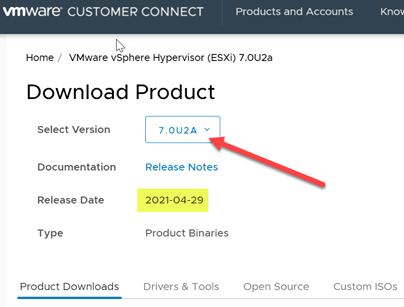
Lazy Zeroed – In contrast, the lazy-zeroed thick disk allocates all the space from the start when it is created but zeroes each block only when written for the first time. This method shortens the creation period but may slightly dip performance on the initial block write. Nonetheless, subsequent write speeds match those of eager-zeroed disks. Notably, the performance during the initial write for lazy-zeroed thick disks saw enhancements beginning with vSphere 7.0 Update 2, although eager-zeroed disks continue to top in initial write performance.
Thin Provisioned – For these disks, space is set aside and zeroed only during the initial write, rather than at creation. Its performance parallels that of the lazy-zeroed disks during the first write to a fresh file block, but this was notably improved in vSphere 7.0 Update 2. Following this, thin-provisioned disks perform at par with eager-zeroed thick disks for subsequent writes.
To configure these virtual disk types, use the vSphere Client: right-click the virtual machine > Edit Settings > Virtual Hardware tab > ADD NEW DEVICE > Hard Disk > expand the New Hard disk section > then pick the desired disk type.
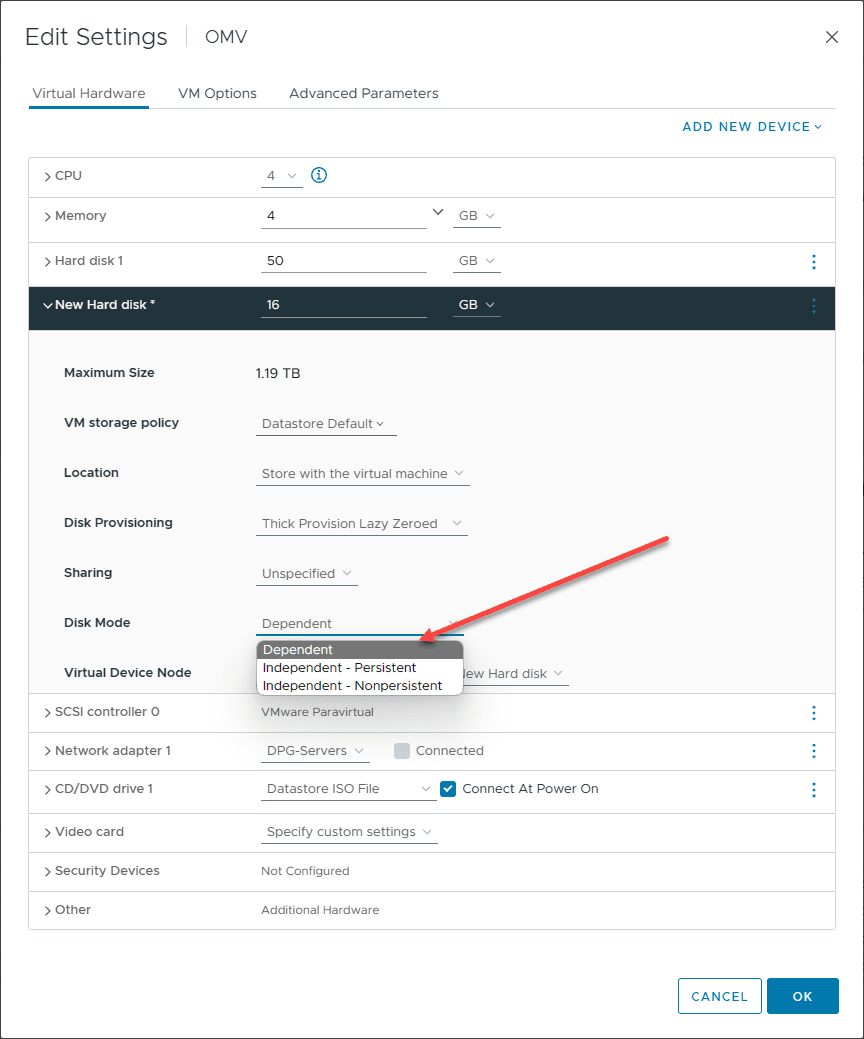
13. Use dependent, independent, and independent persistent disk modes when needed
ESXi offers three types of disk modes: Independent Persistent, Independent Nonpersistent, and Dependent. These settings can be understood as follows:
Independent Persistent – Within this setting, all modifications are continually saved to the disk, ensuring optimal performance.
Independent Nonpersistent – For this setting, any disk write actions get documented in a redo log. This redo log gets cleared when the virtual machine is powered off or when reverting to a snapshot, leading to the loss of all disk modifications. When the virtual machine reads from a disk set to the independent nonpersistent mode, ESXi initially examines the redo log (via a directory containing disk blocks in the redo log).
If relevant blocks are identified, that information is read; if not, the base disk of the virtual machine is accessed. Due to these redo logs, which monitor changes in the file system of a virtual machine and allow the option of committing or going back to an earlier point, its performance may not match that of disks in the independent persistent mode. NOTE: An independent disk isn’t affected by virtual machine snapshots. It means the disk is not affected by snapshot operations like creation, consolidation, or reverting snapshots.
Dependent – Under this setting, provided a snapshot exists, disk writes are saved to a redo log that remains even through power cycles. Consequently, the performance of dependent mode disks might not reach the heights of independent persistent mode disks, similar to the independent nonpersistent disks. However, without a snapshot, the dependent disks operate at speeds comparable to independent disks.
14. Provision more LUNs with fewer VMs on each LUN for performance
Provision more LUNs but place fewer VMs on each for optimum performance. This technique, combined with the recommended power management settings, ensures that your storage devices, whether direct-attached storage devices or shared storage arrays, provide good efficiency and deliver performance as expected.
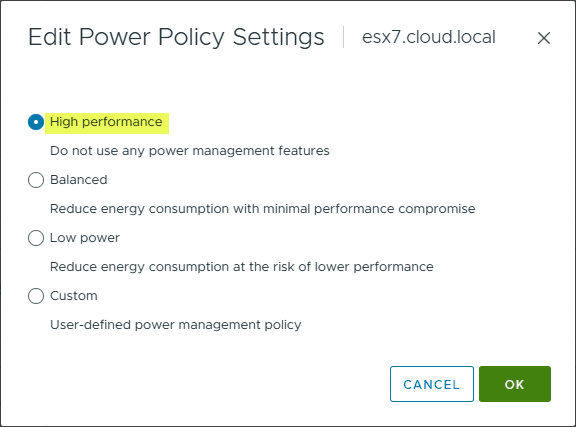
15. Give attention to Power Management settings
Modern servers have advanced power management features that can negatively impact storage performance. The following are recommendations from VMware:
Choose the ‘High performance’ power policy for the ESXi host. This is the recommended approach. You can also switch off power management via the BIOS. It’s important to note that both methods might lead to higher power usage.
Switch off C1E and other C-states in the BIOS. This action can also result in increased energy consumption.
Be sure to check out the performance best practices for VMware vSphere 8.0 here: Performance Best Practices for VMware vSphere 8.0.
Wrapping up
The world of storage has continued to progress over the past few years, and new storage technologies combined with much faster networking capabilities have resulted in blistering storage performance. However, there are specific best practices, as we have outlined, that can help make sure your VMware storage performs as expected and you minimize issues.
Google is updating how articles are shown. Don’t miss our leading home lab and tech content, written by humans, by setting Virtualization Howto as a preferred source.
About The Author