Mastering Ceph Storage Configuration in Proxmox 8 Cluster
Ceph Storage is an excellent storage platform because it’s designed to run on commodity hardware, providing an enterprise-level deployment experience that’s both cost-effective and highly reliable. Let’s look at mastering Ceph Storage configuration in Proxmox 8 Cluster.
Table of contents
What is Ceph Storage?
Ceph Storage is an open-source solution designed to provide object storage devices, block devices, and file storage within the same cluster. A key characteristic of Ceph storage is its intelligent data placement method. An algorithm called CRUSH (Controlled Replication Under Scalable Hashing) decides where to store and how to retrieve data, avoiding any single point of failure and effectively providing fault-tolerant storage
.
Install and configure Ceph in Proxmox
Start by installing the Ceph packages in your Proxmox environment. These packages include essential Ceph components like Ceph OSD daemons, Ceph Monitors (Ceph Mon), and Ceph Managers (Ceph Mgr).
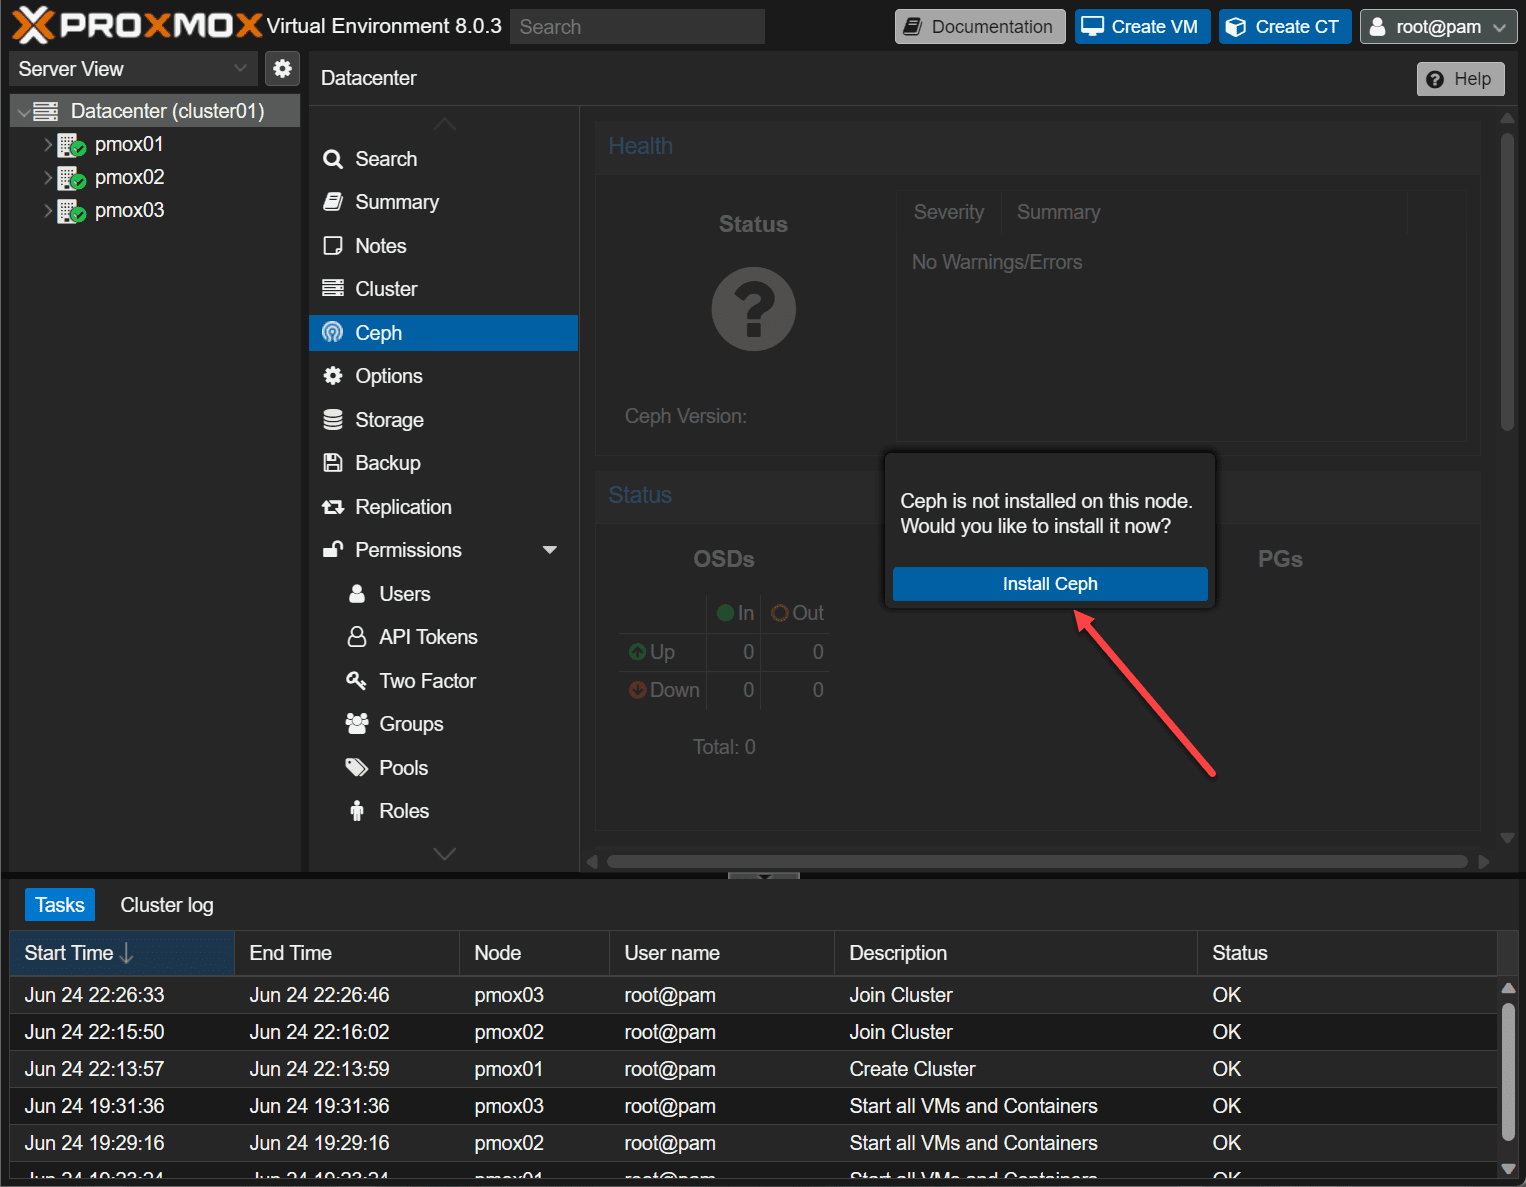
Click on one of your Proxmox nodes, and navigate to Ceph. When you click Ceph, it will prompt you to install Ceph.
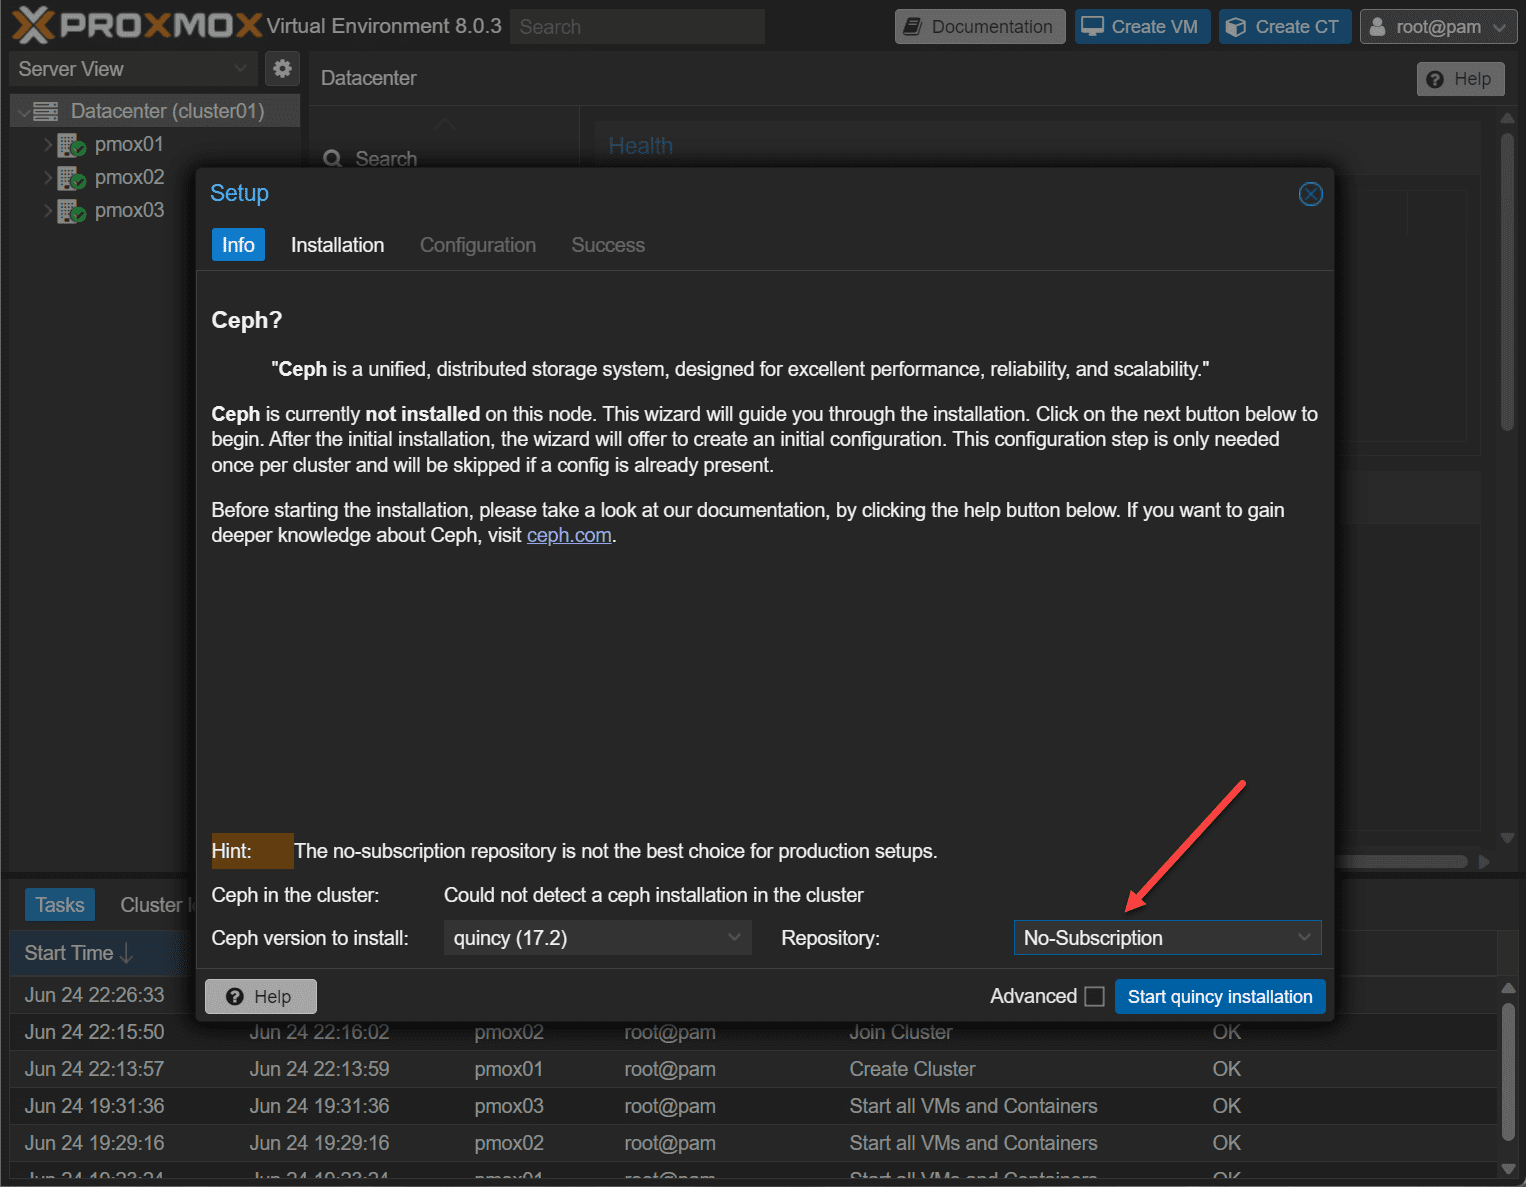
This begins the setup wizard. First, you will want to choose your Repository. This is especially important if you don’t have a subscription. You will want to choose the No Subscription option. For production environments, you will want to use the Enterprise repository.
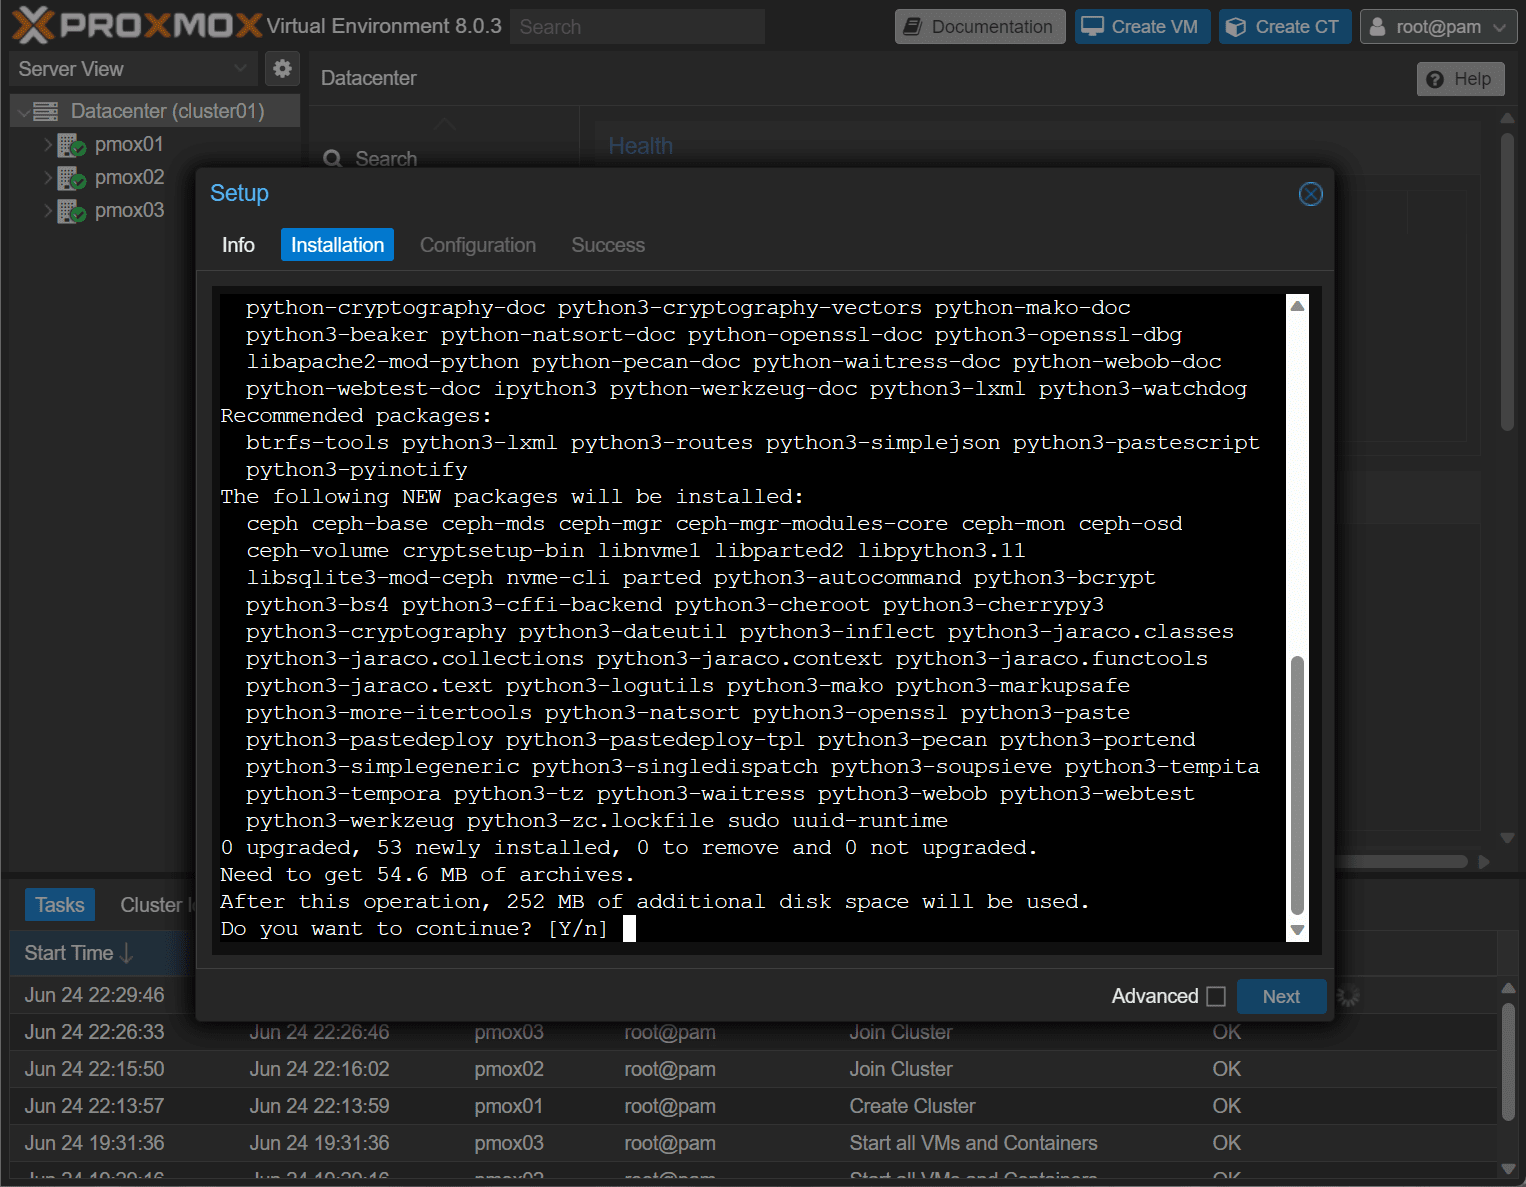
You will be asked if you want to continue the installation of Ceph. Type Y to continue.
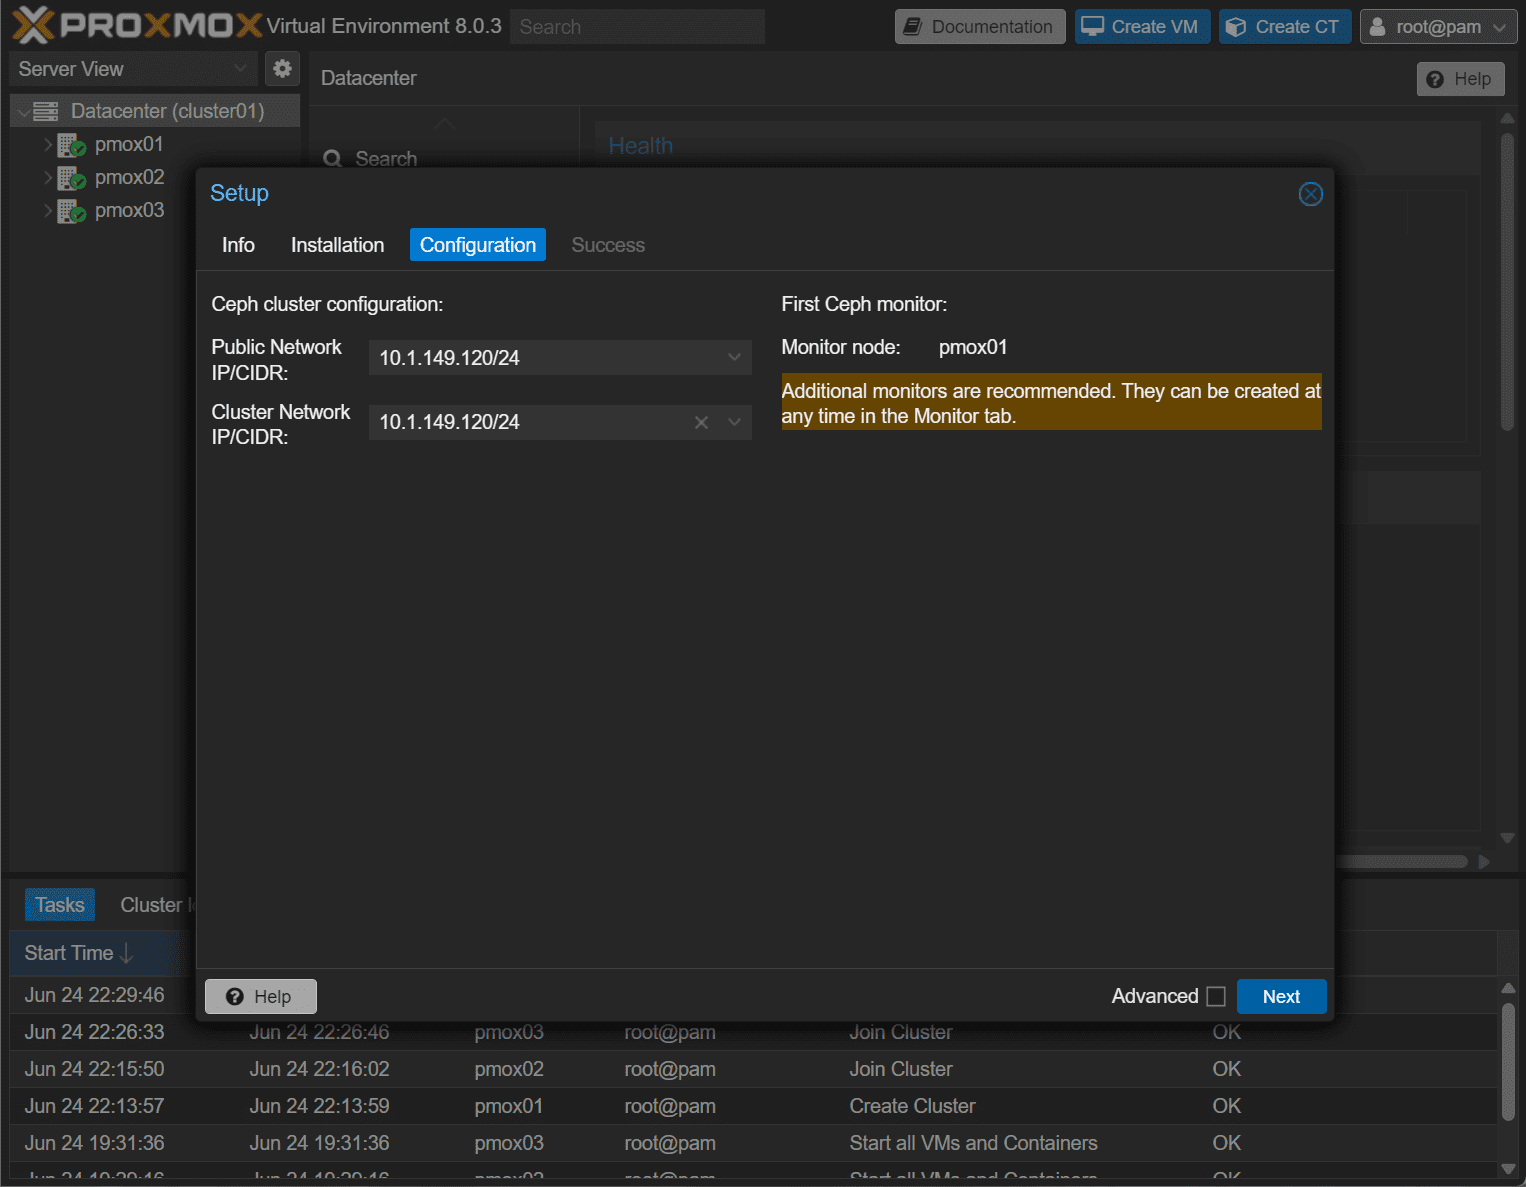
Next, you will need to choose the Public Network and the Cluster Network. Here, I don’t have dedicated networks configured since this is a nested installation. So I am just choose the same subnet for each.
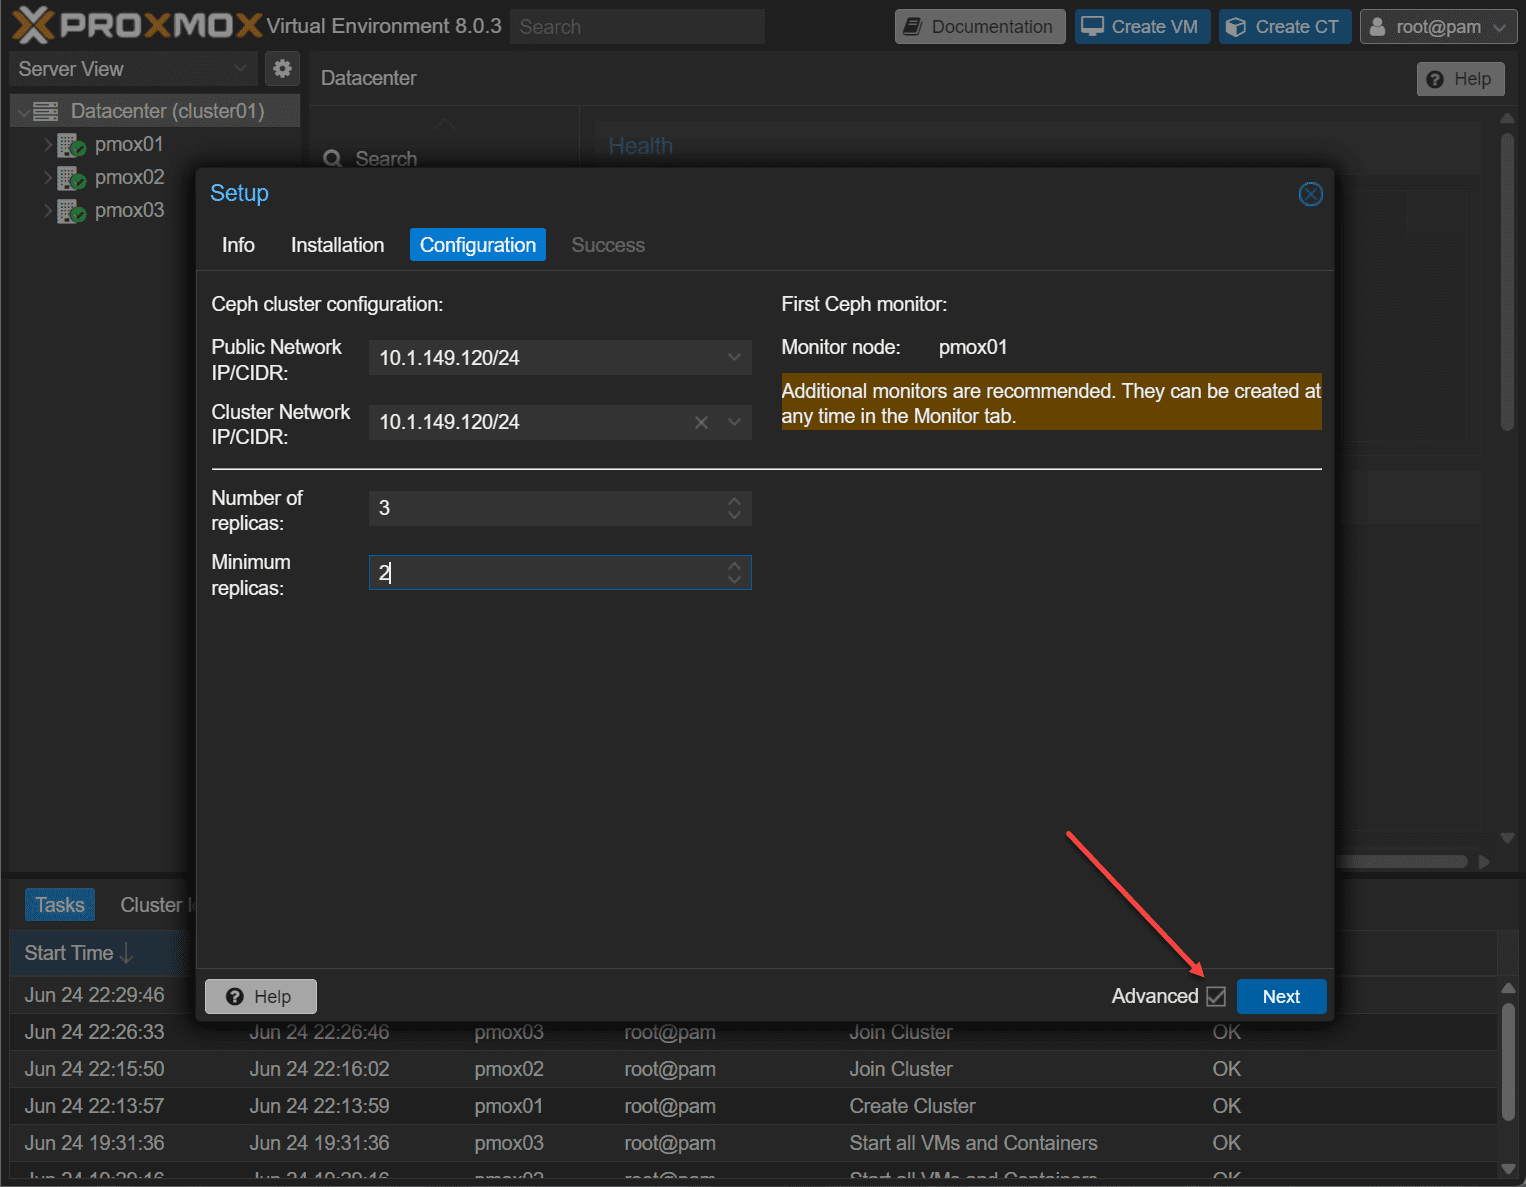
If you click the Advanced checkbox, you will be able to setup the Number of replicas and Minimum replicas.
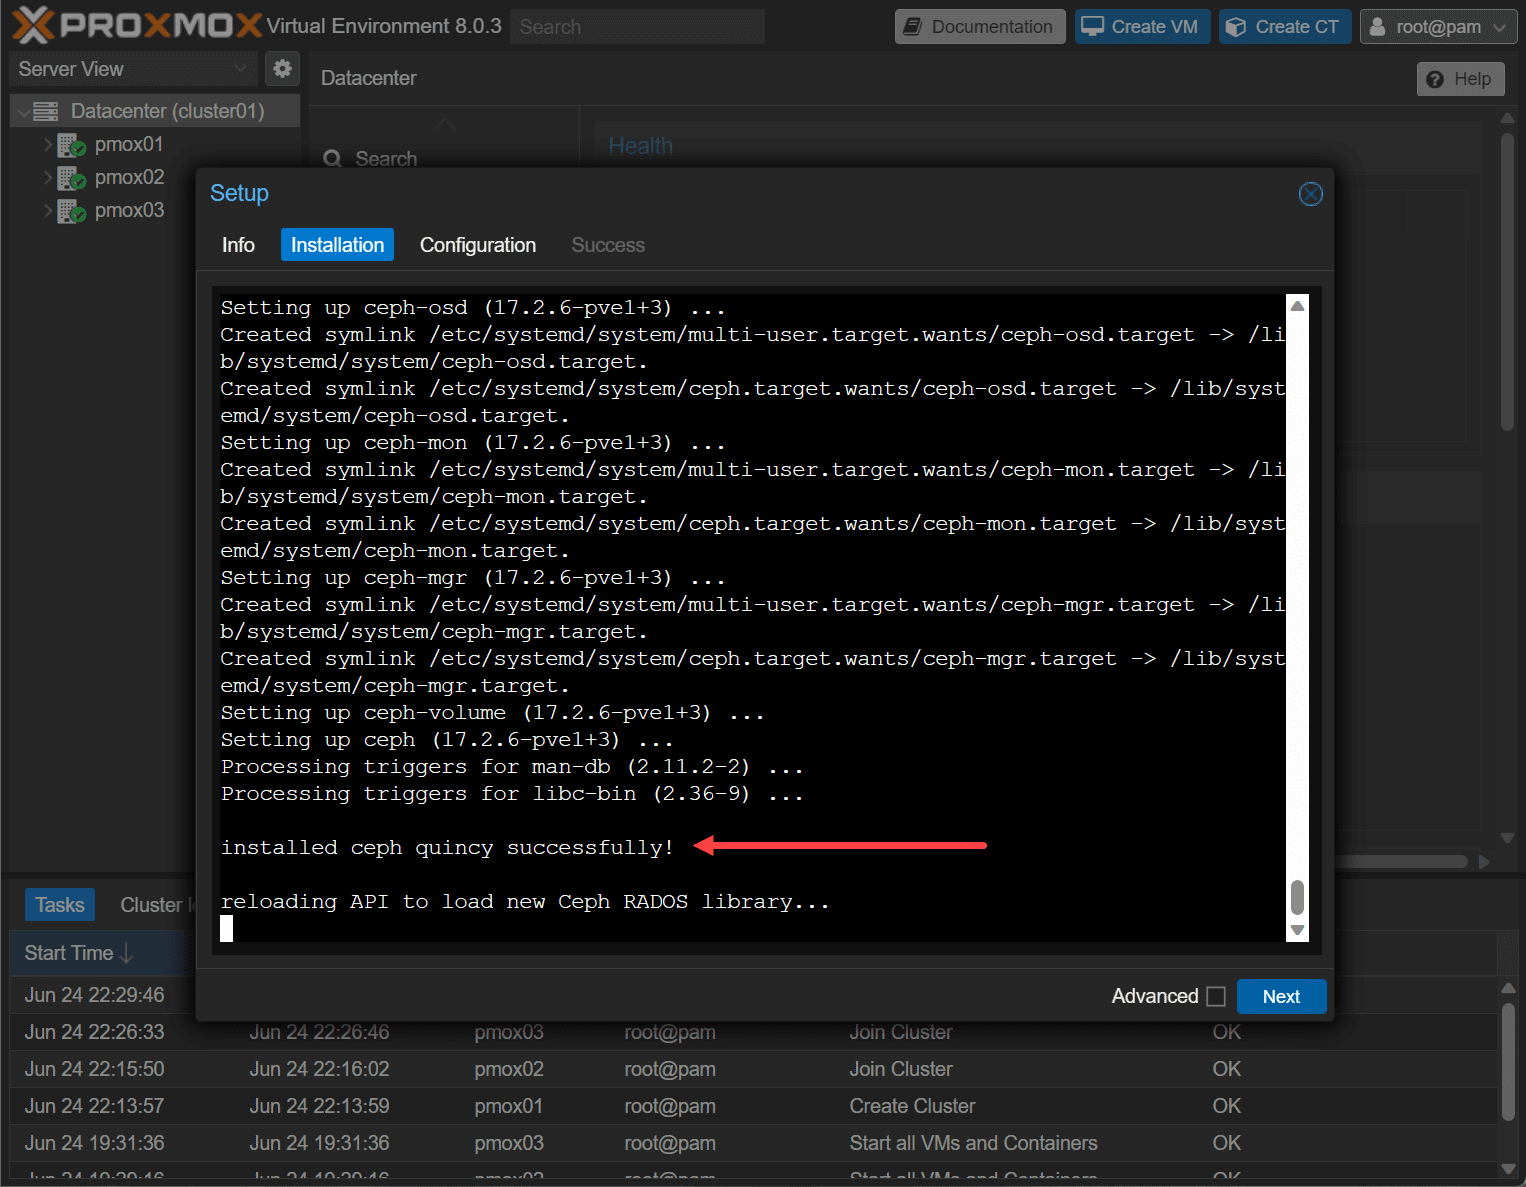
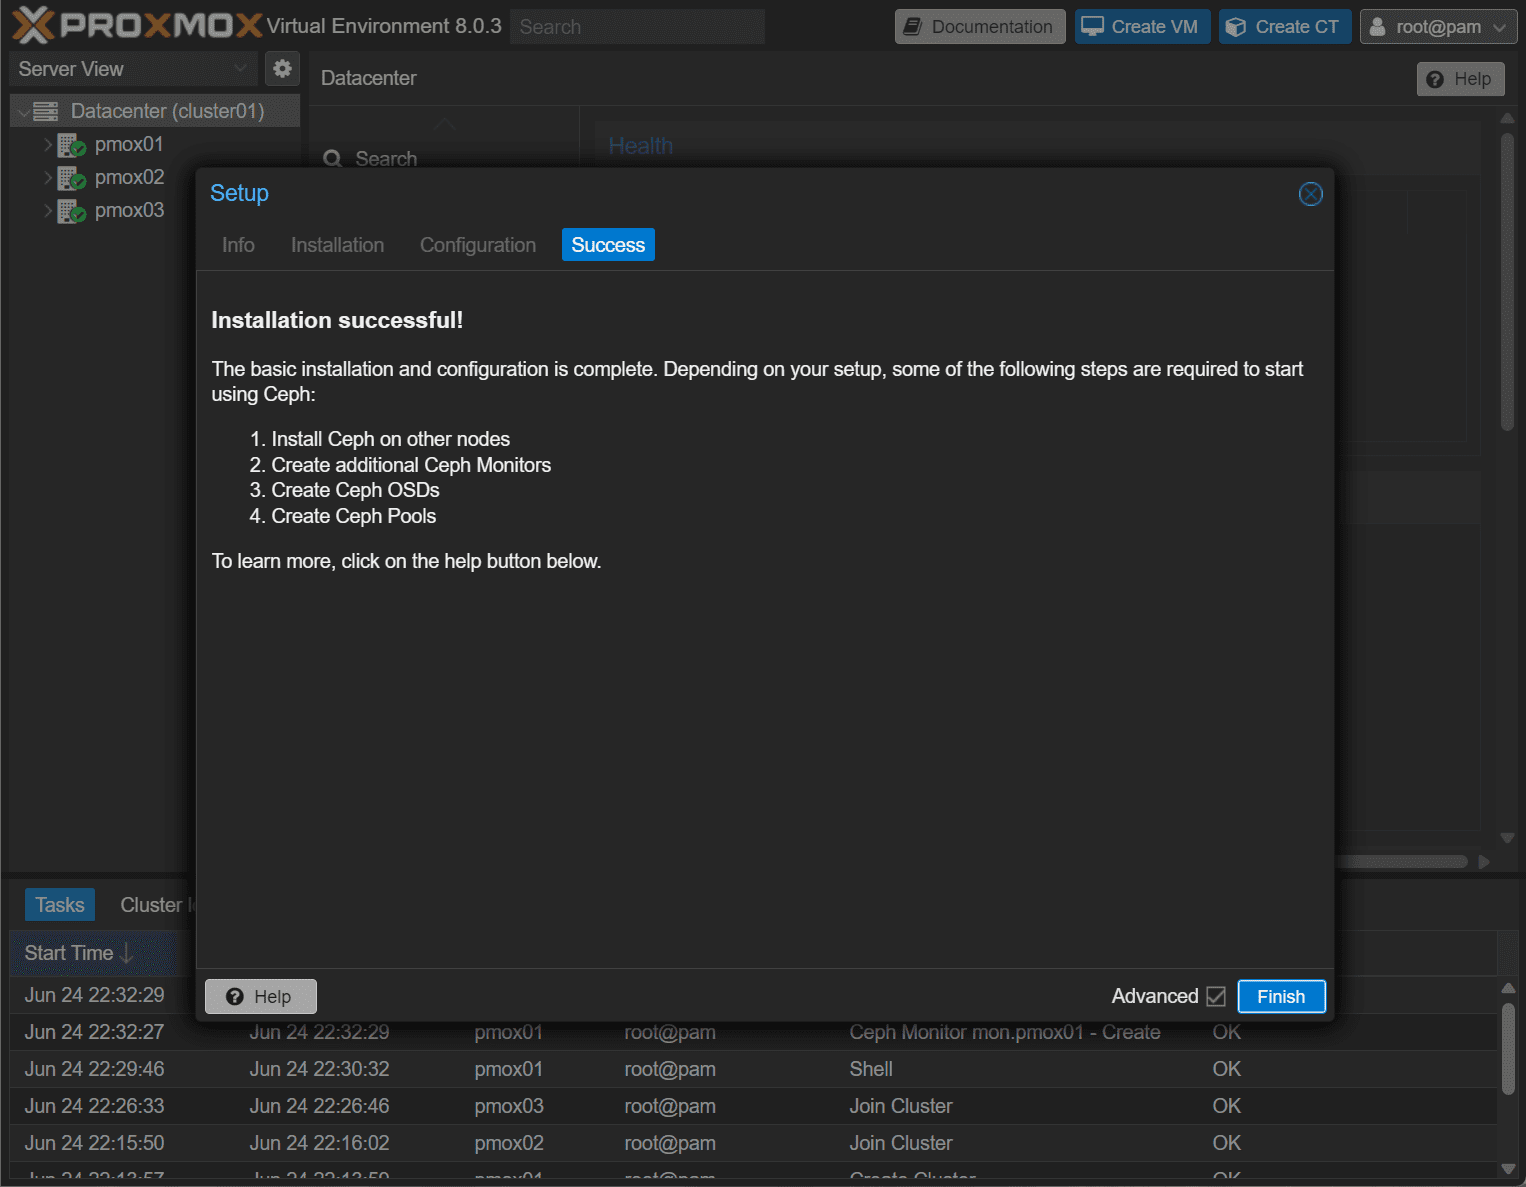
At this point, Ceph has been successfully installed on the Proxmox node.
Repeat these steps on the remaining cluster nodes in your Proxmox cluster configuration.
Setting up Ceph OSD Daemons and Ceph Monitors
Ceph OSD Daemons and Ceph Monitors are crucial to the operation of your Ceph storage cluster. The OSD daemons handle data storage, retrieval, and replication on the storage devices, while Ceph Monitors maintain the cluster map, tracking active and failed cluster nodes.
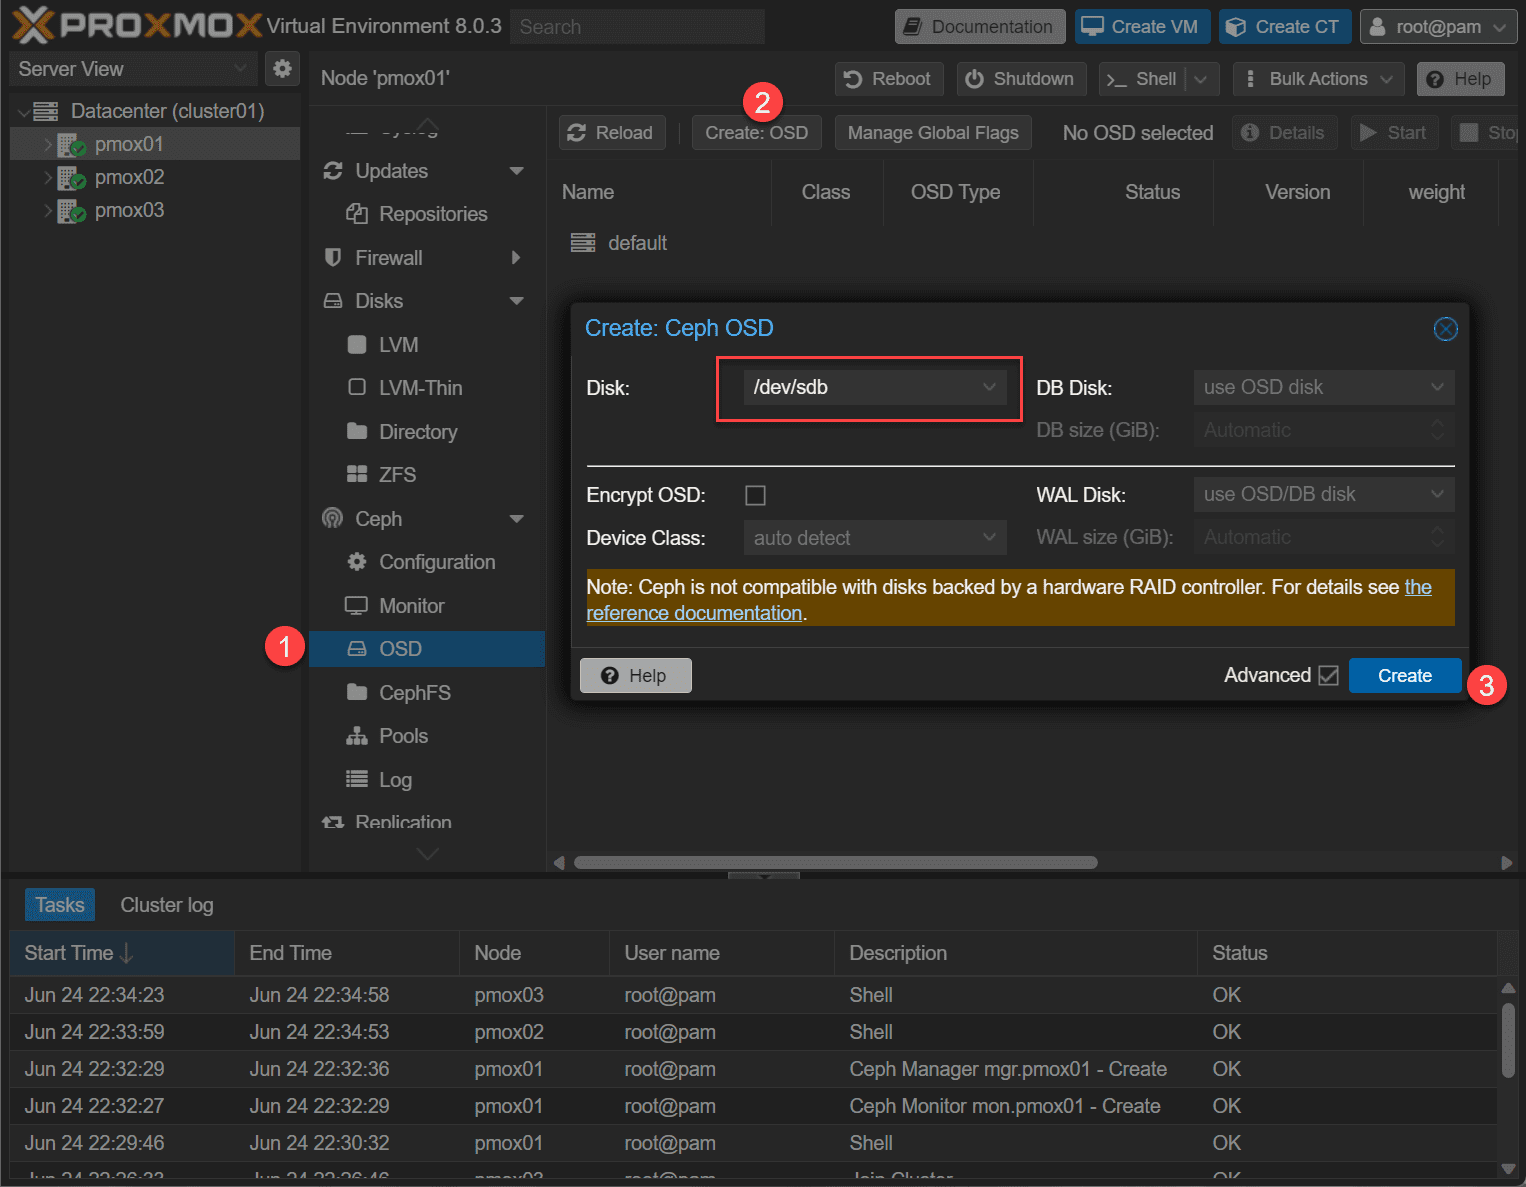
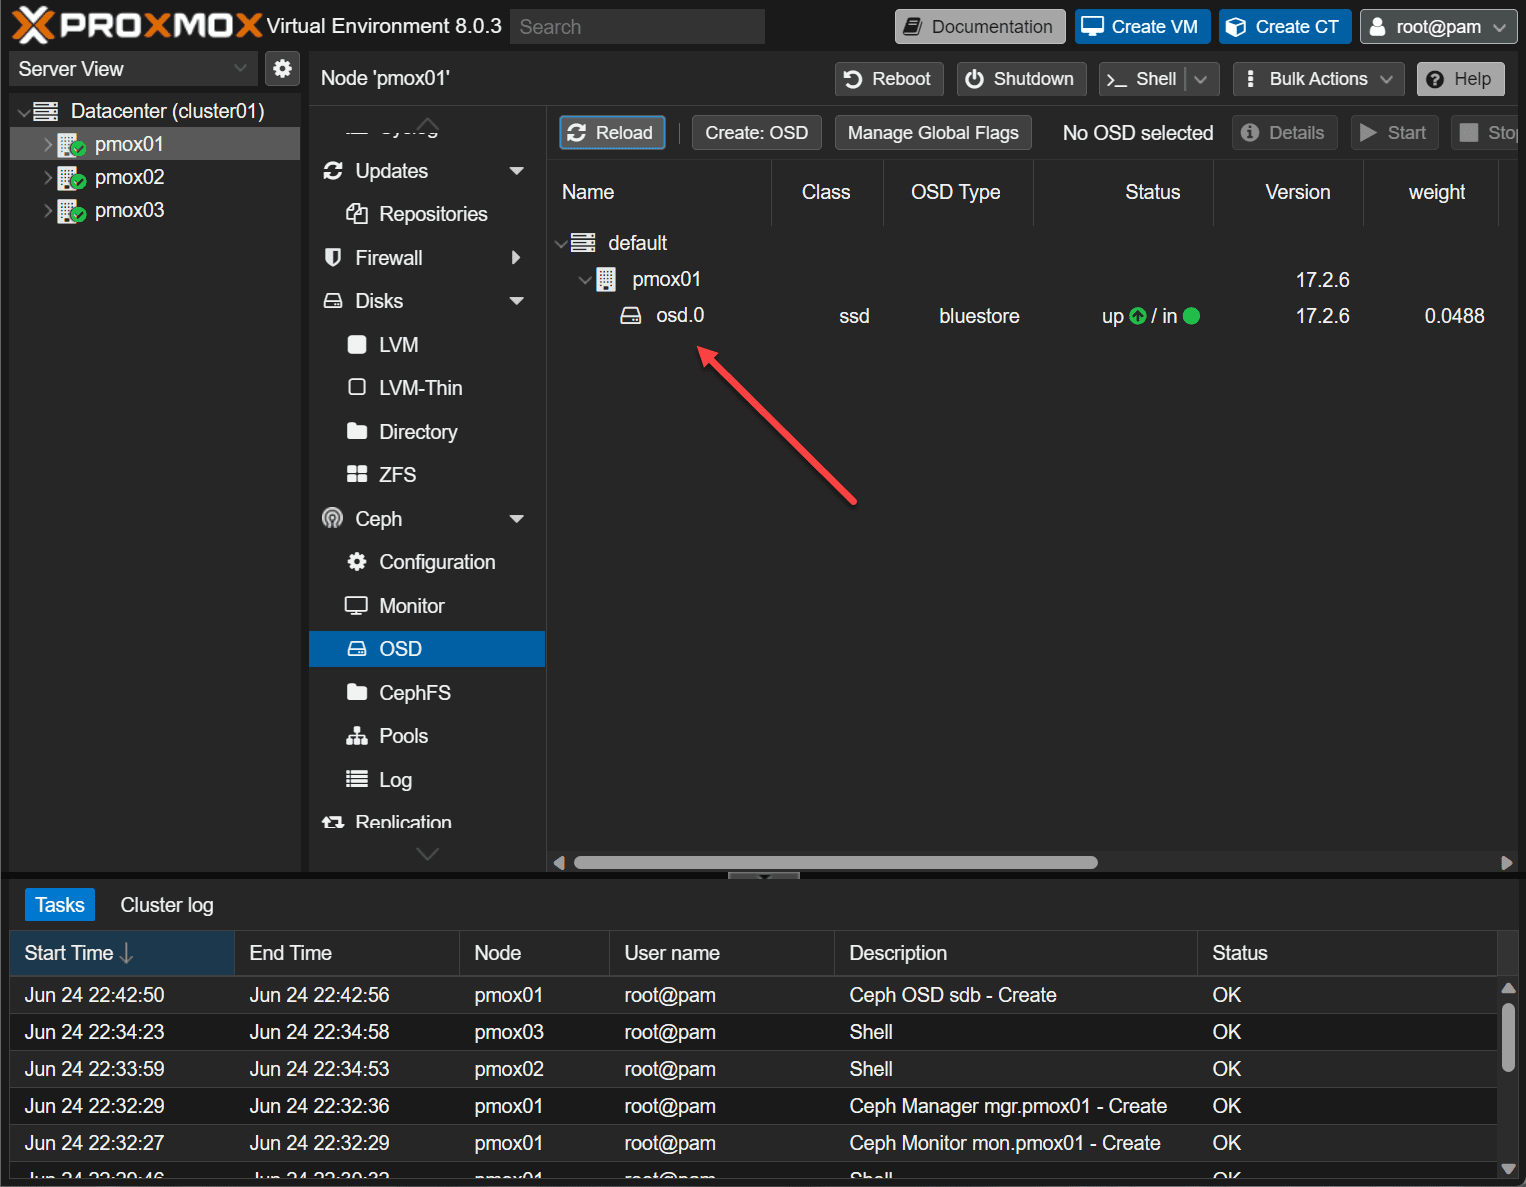
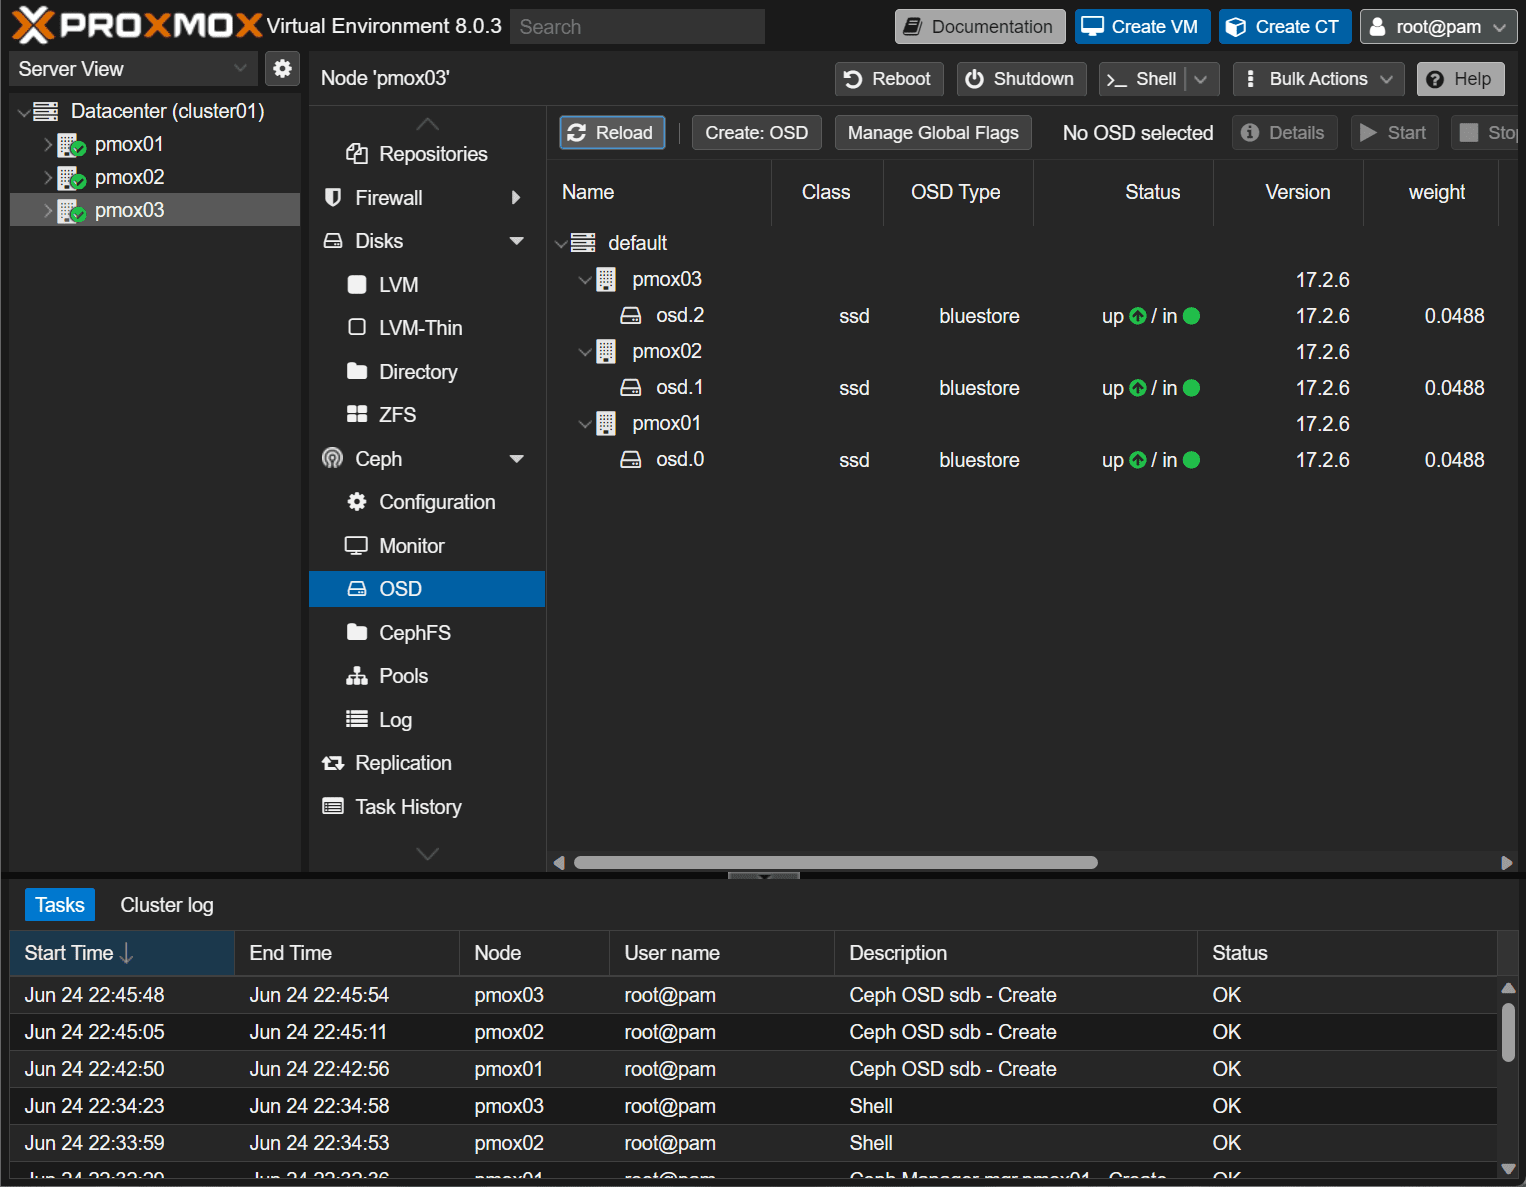
You’ll need to assign several Ceph OSDs to handle data storage and maintain the redundancy of your data.
Also, set up more than one Ceph Monitor to ensure high availability and fault tolerance.
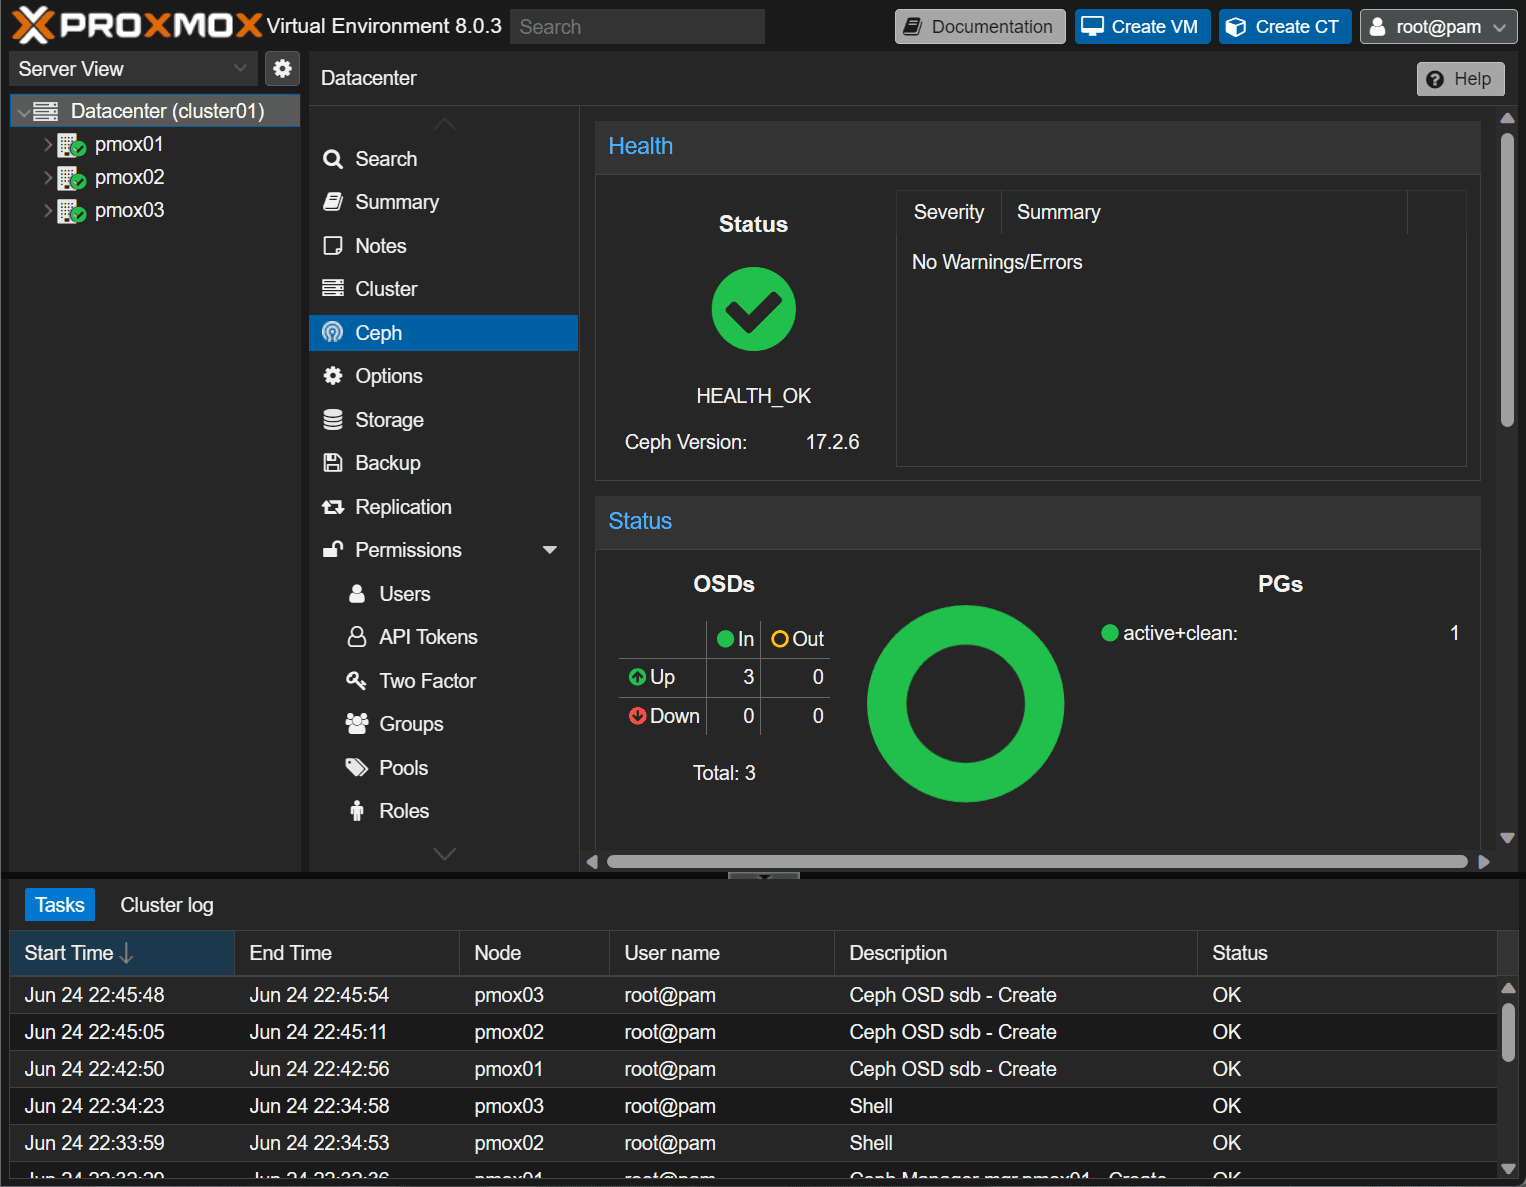
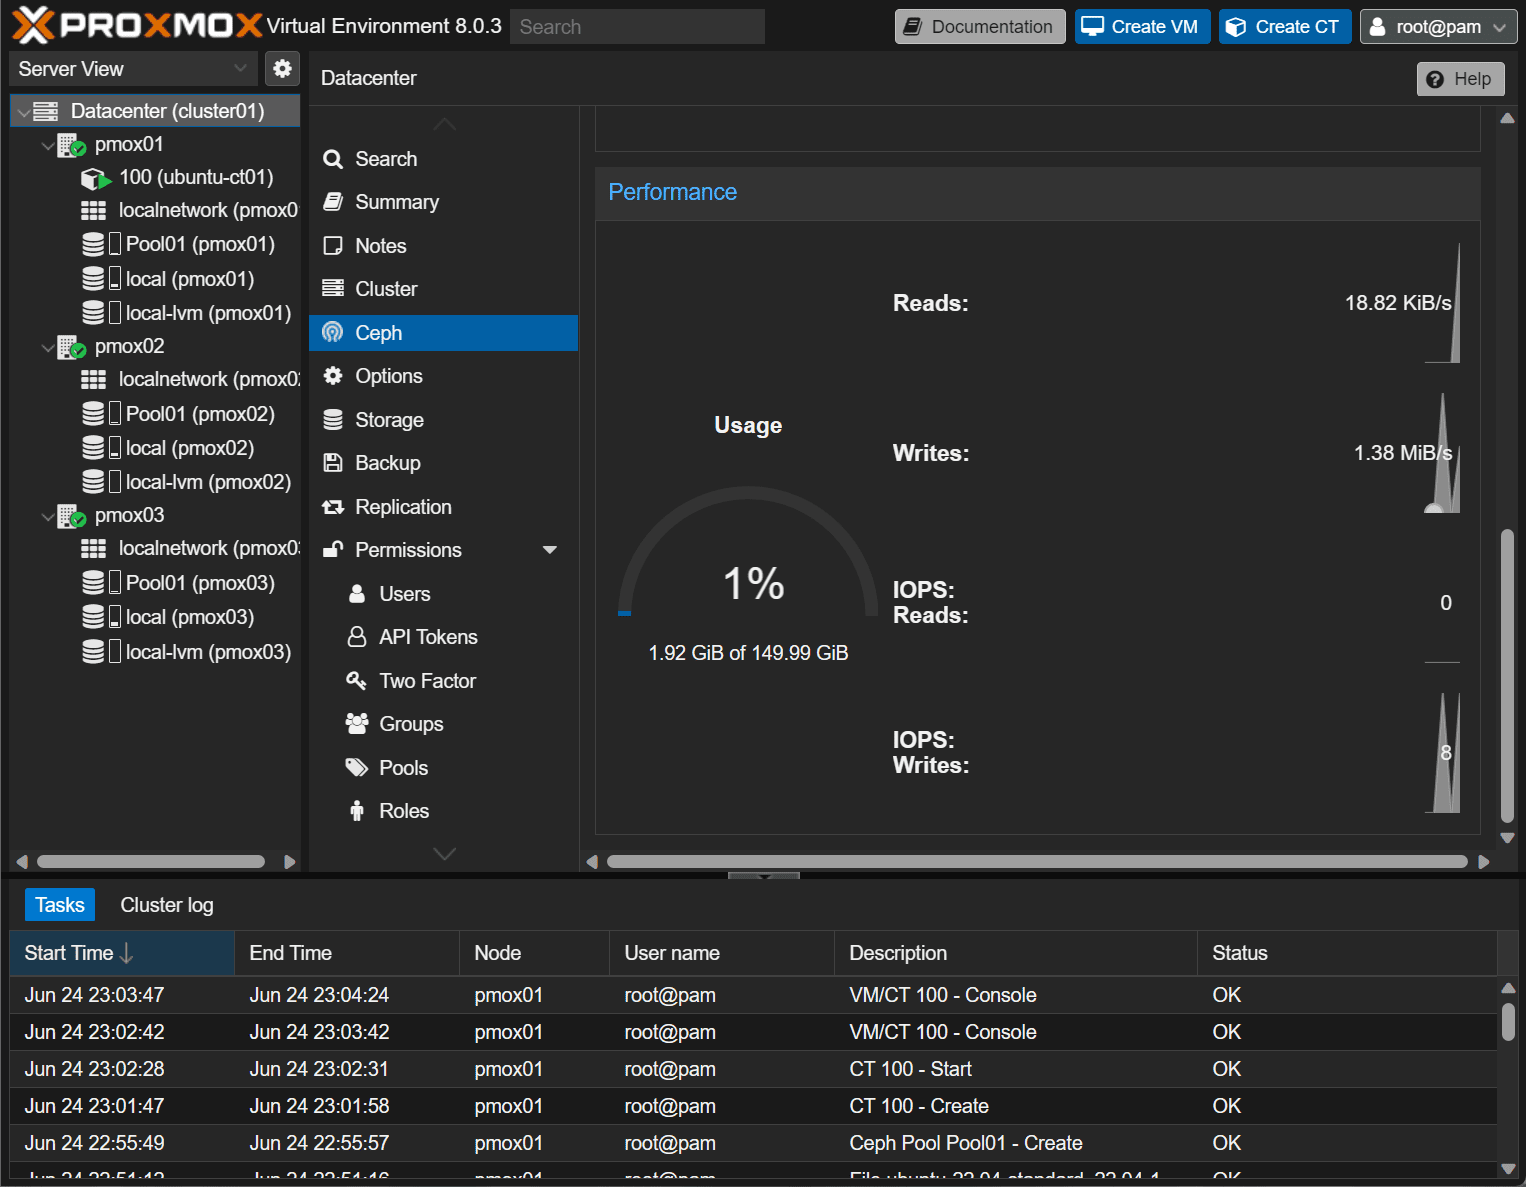
At this point, if we visit the Ceph storage dashboard , we will see the status of the Ceph storage cluster.
Creating Ceph Monitors
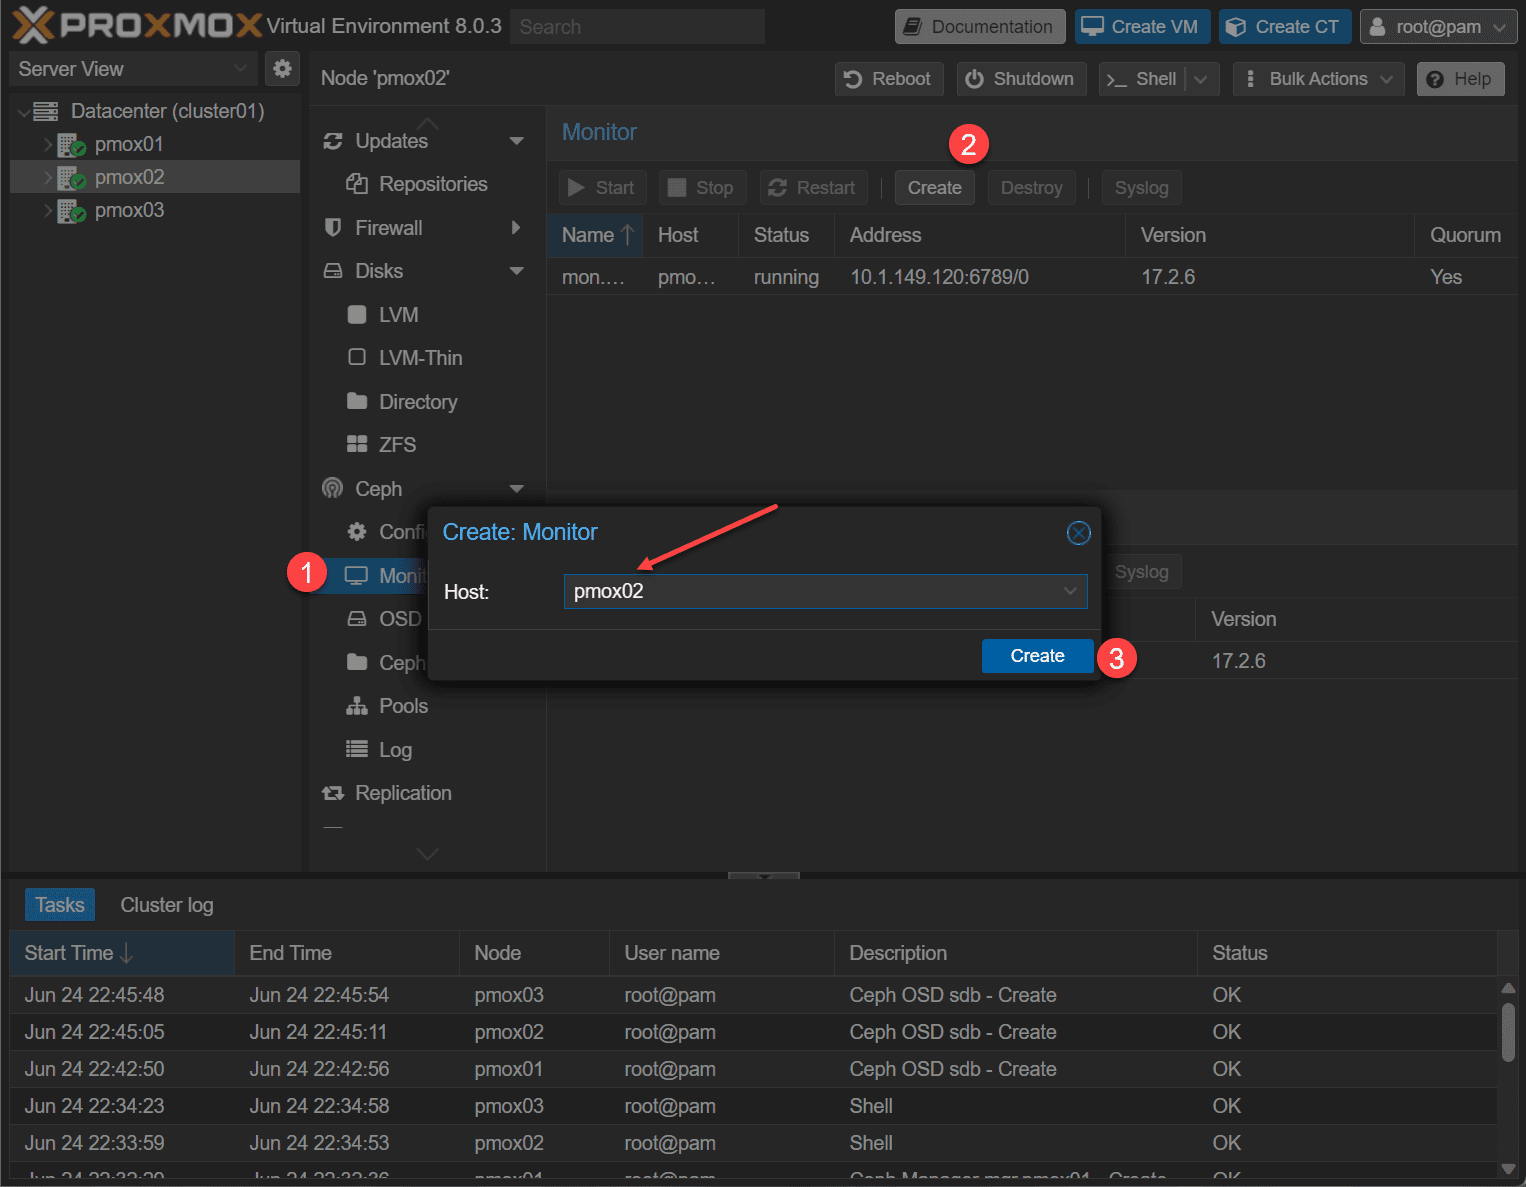
Let’s add additional Ceph Monitors, as we have only configured the first node as a Ceph monitor. Whatis a Ceph Monitor?
A Ceph Monitor, often abbreviated as Ceph Mon, is the part that maintains and manages the cluster map, a crucial data structure that keeps track of the entire cluster’s state, including the location of data, the cluster topology, and the status of other daemons in the system.
Here we are adding the 2nd Proxmox node as a monitor. I added the 3rd one as well.
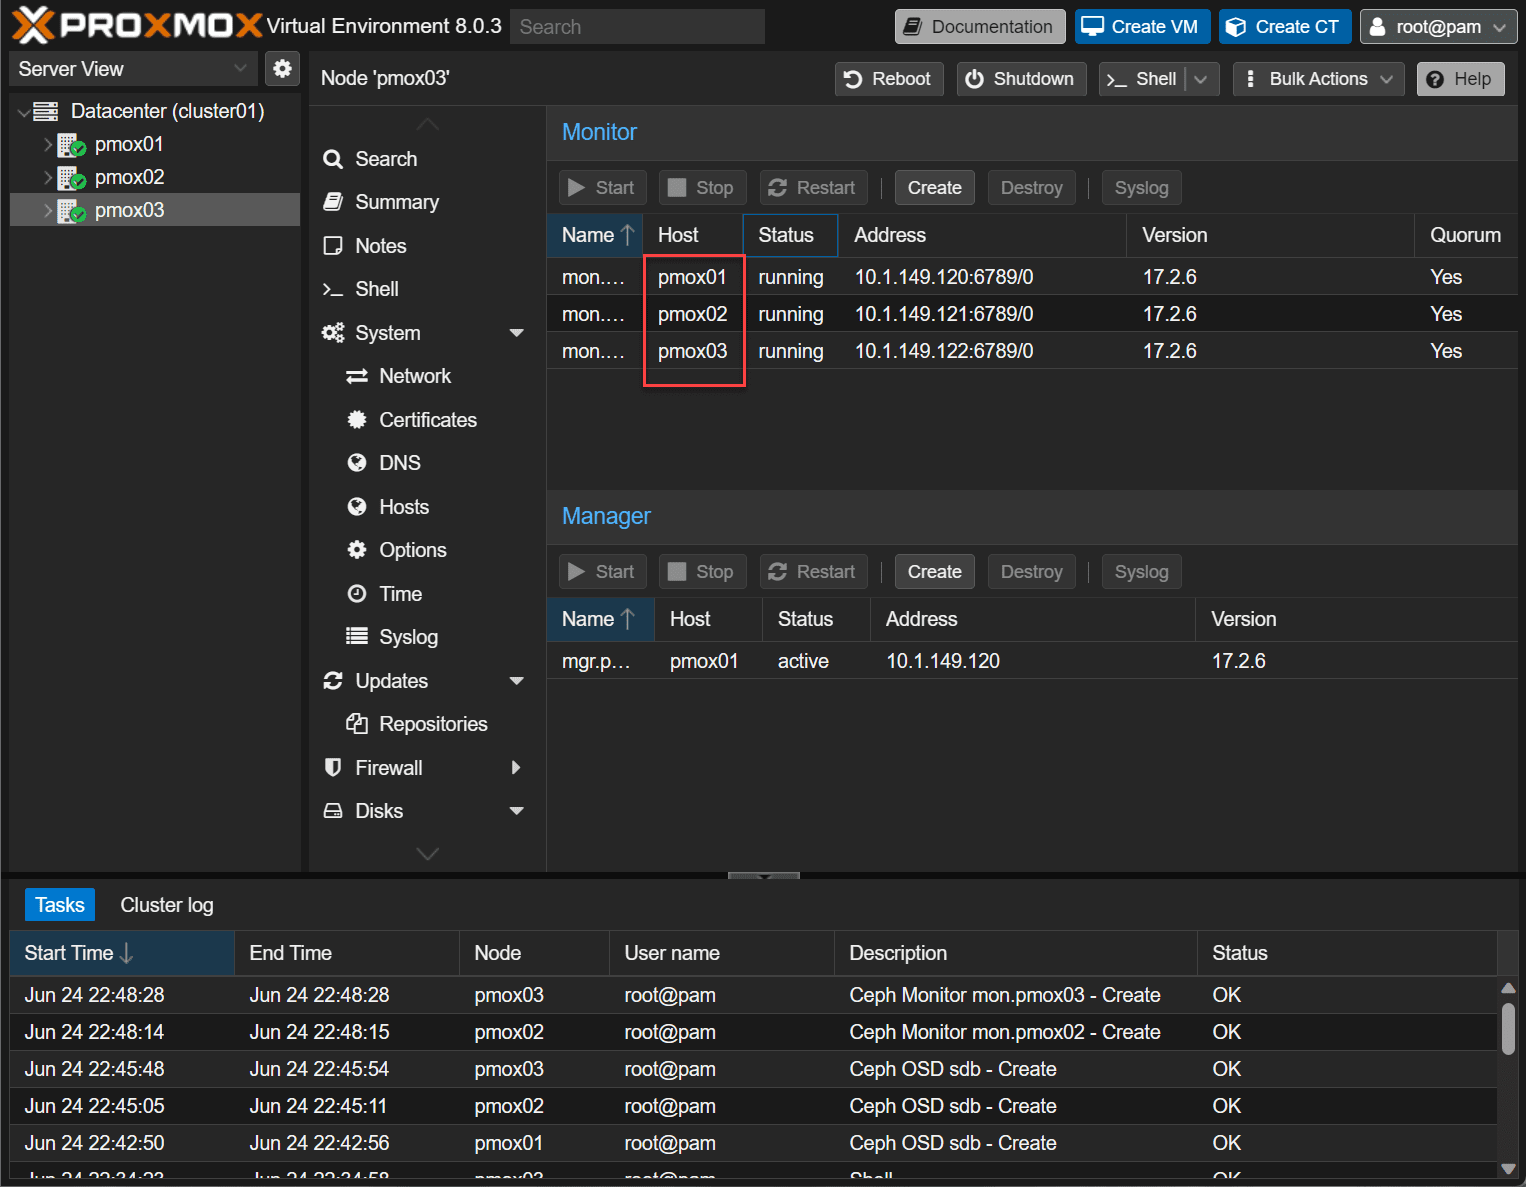
Now, each node is a monitor.
Creating a Ceph Pool for VM and Container storage
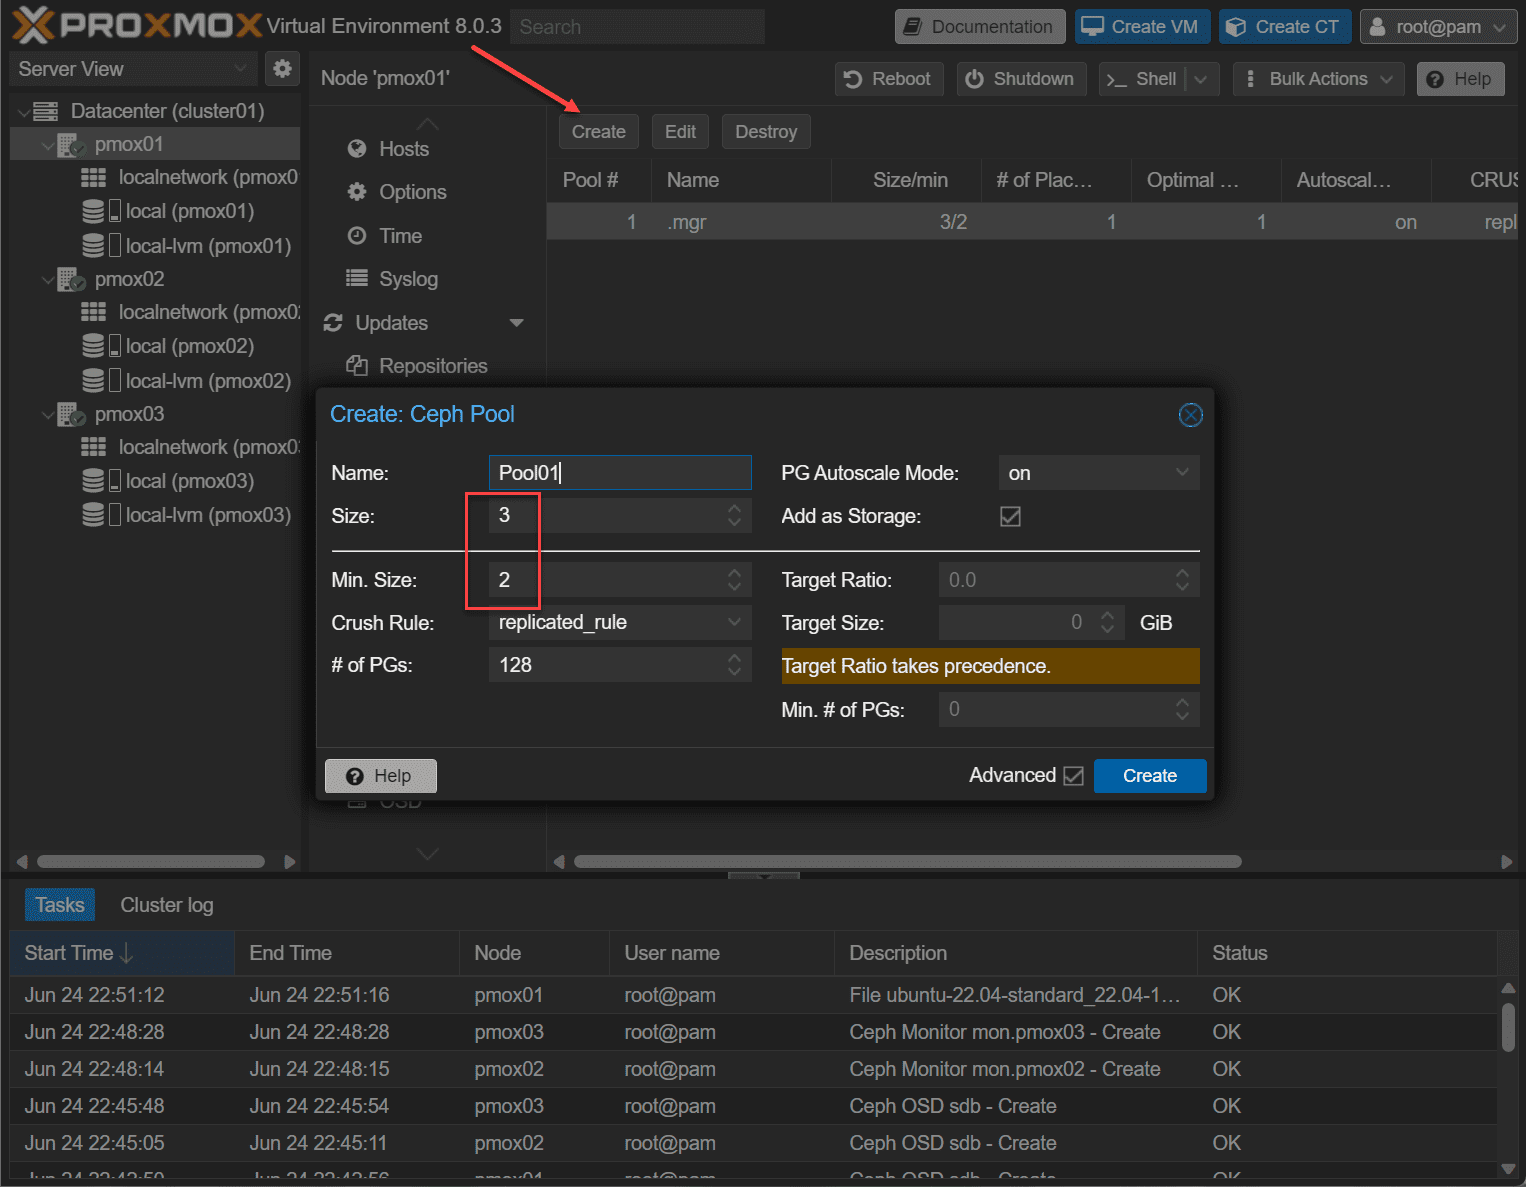
Now that we have the OSDs and Monitors configured, we can create our Ceph Pool. Below we can see the replicas and minimum replicas.
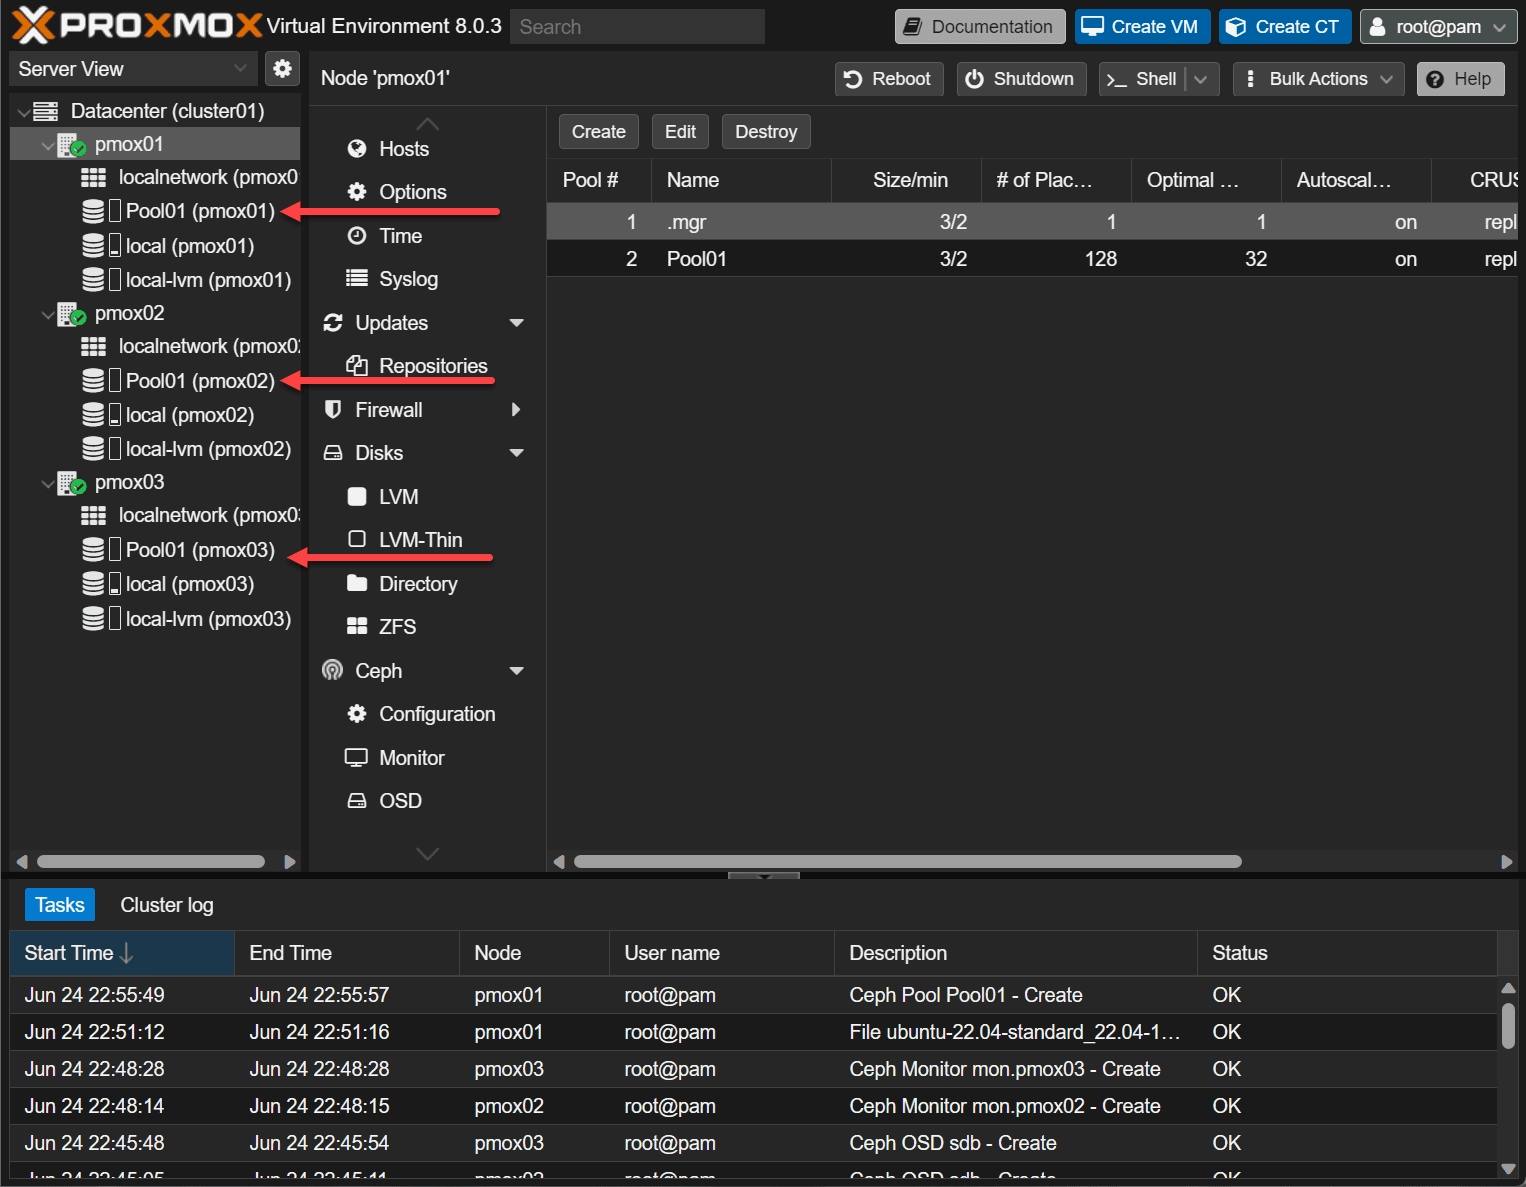
Now, the Ceph Pool is automatically added to the Prommox cluster nodes.
Utilizing Ceph storage for Virtual Machines and Containers
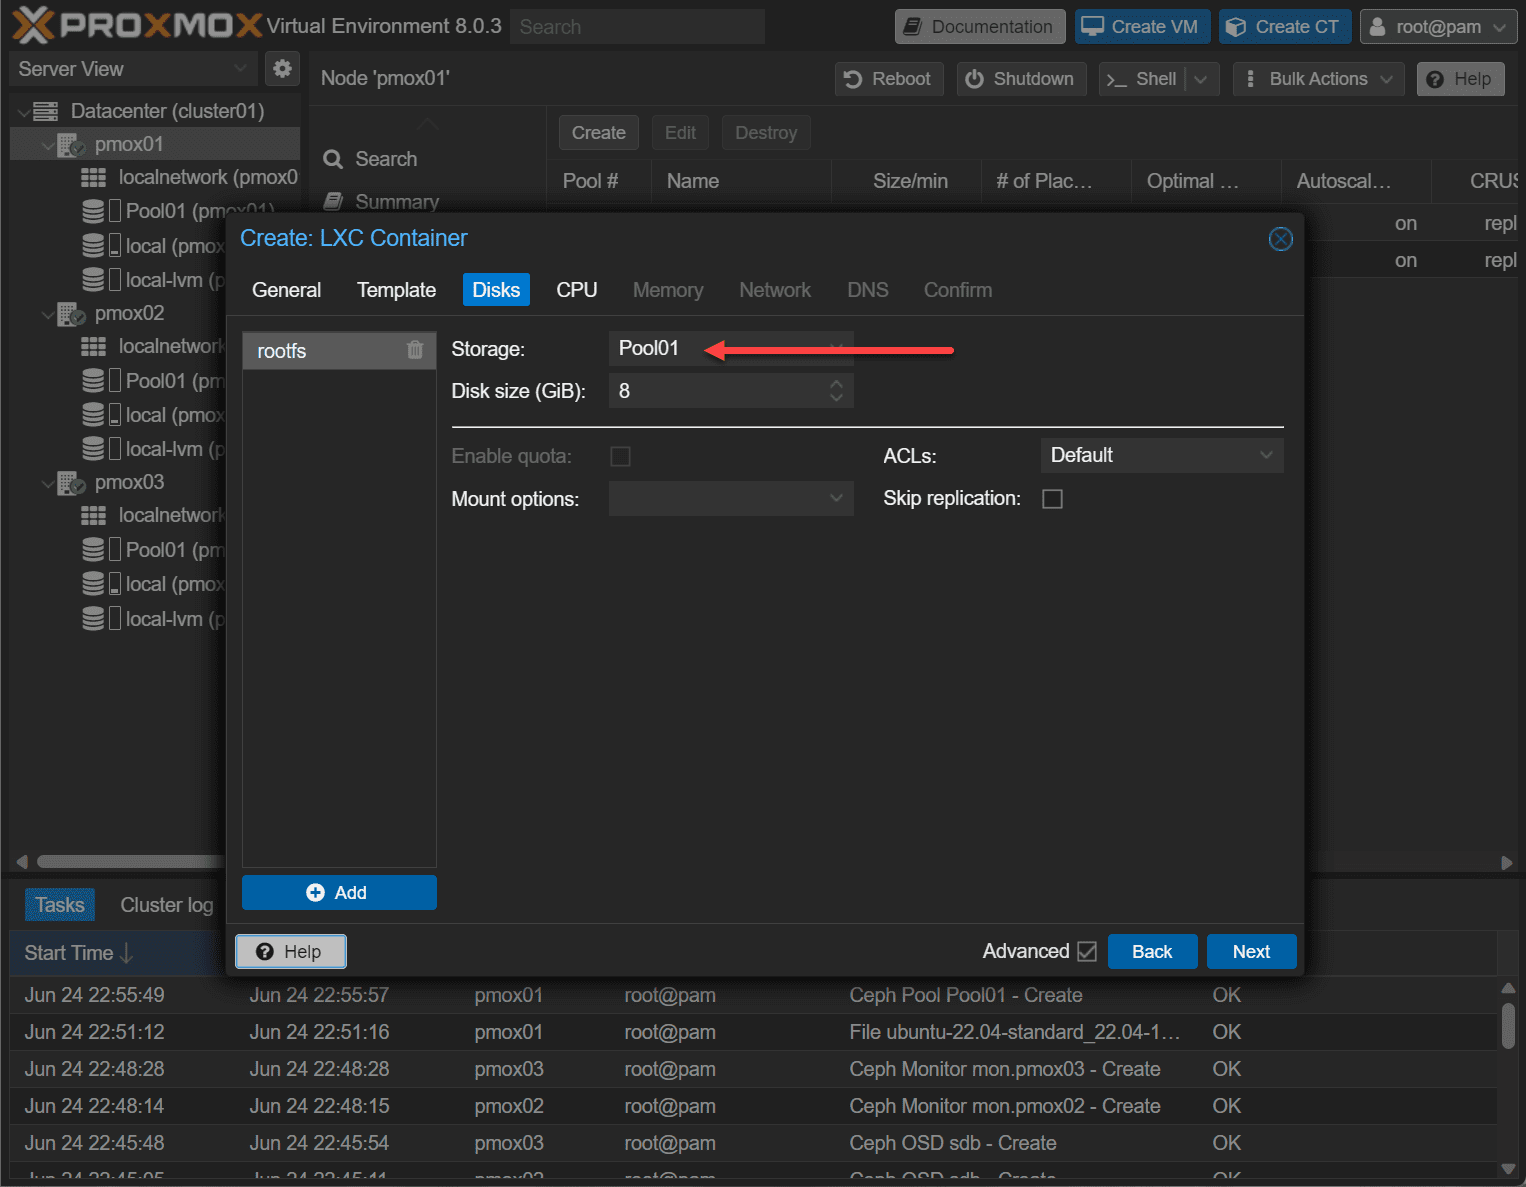
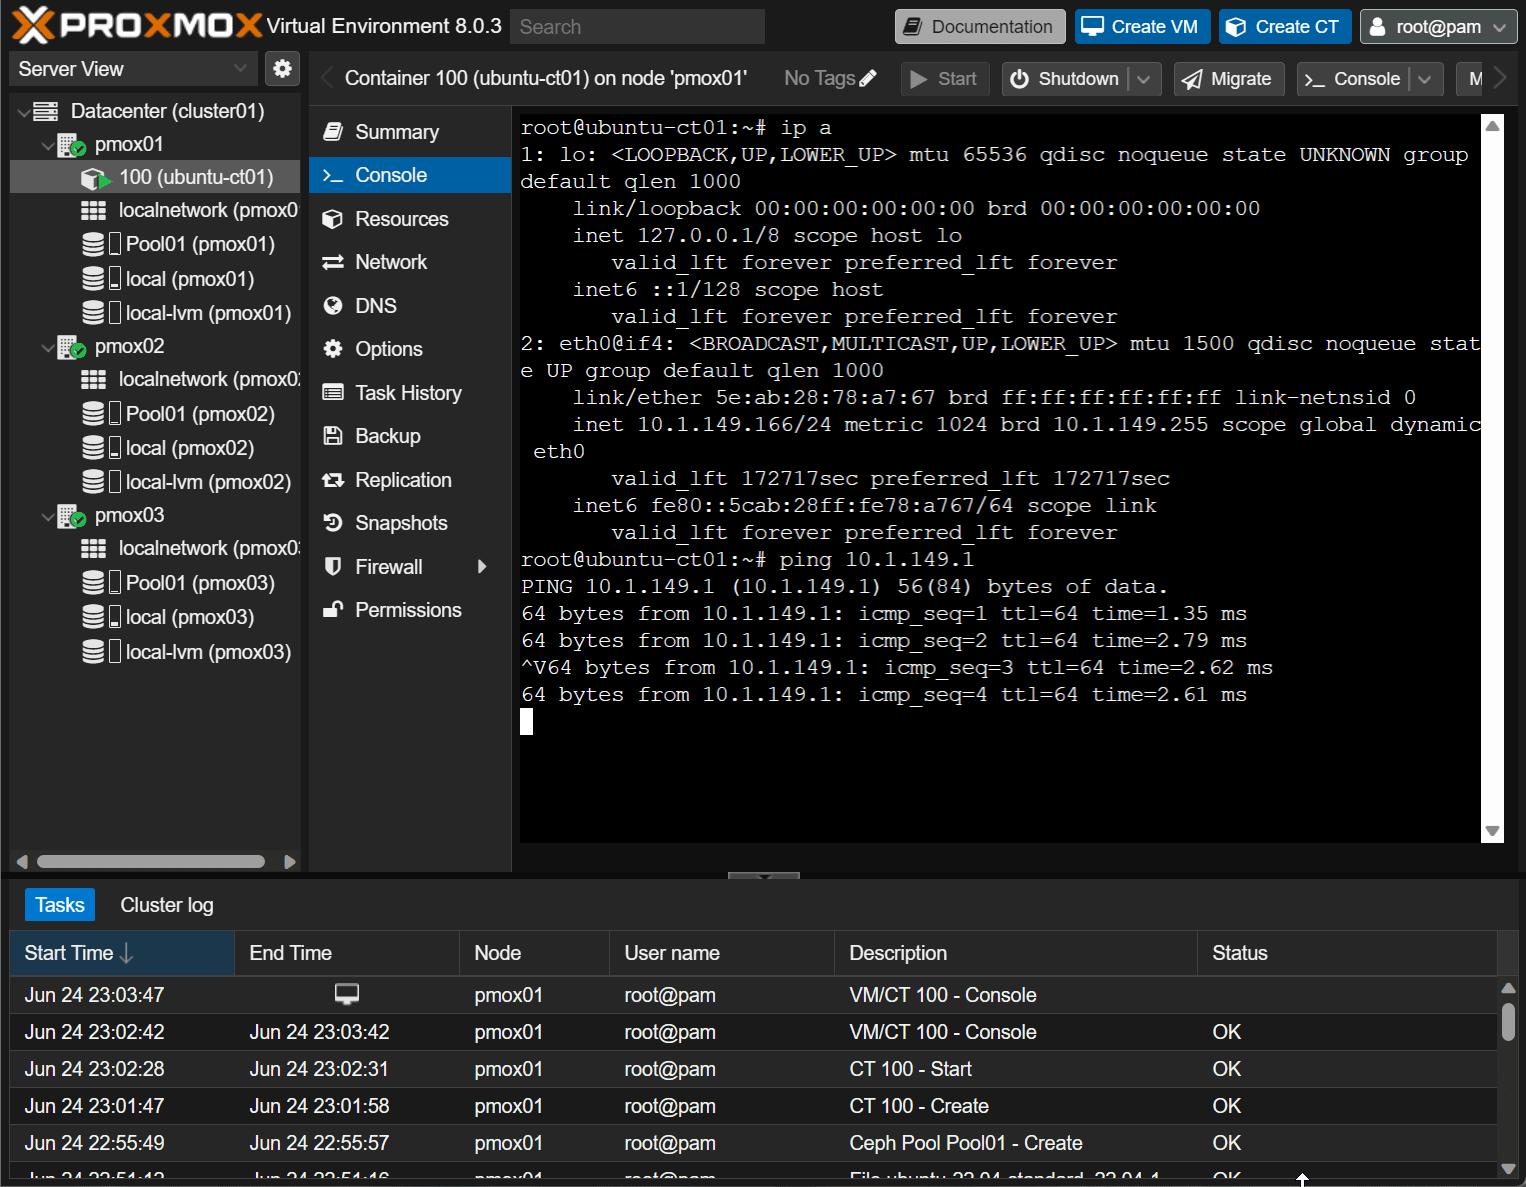
Now that we have the Ceph Pool configured, we can use it for backing storage for Proxmox Virtual Machines and Containers. Below, I am creating a new LXC container. Note how we can choose the new Ceph Pool as the container storage.
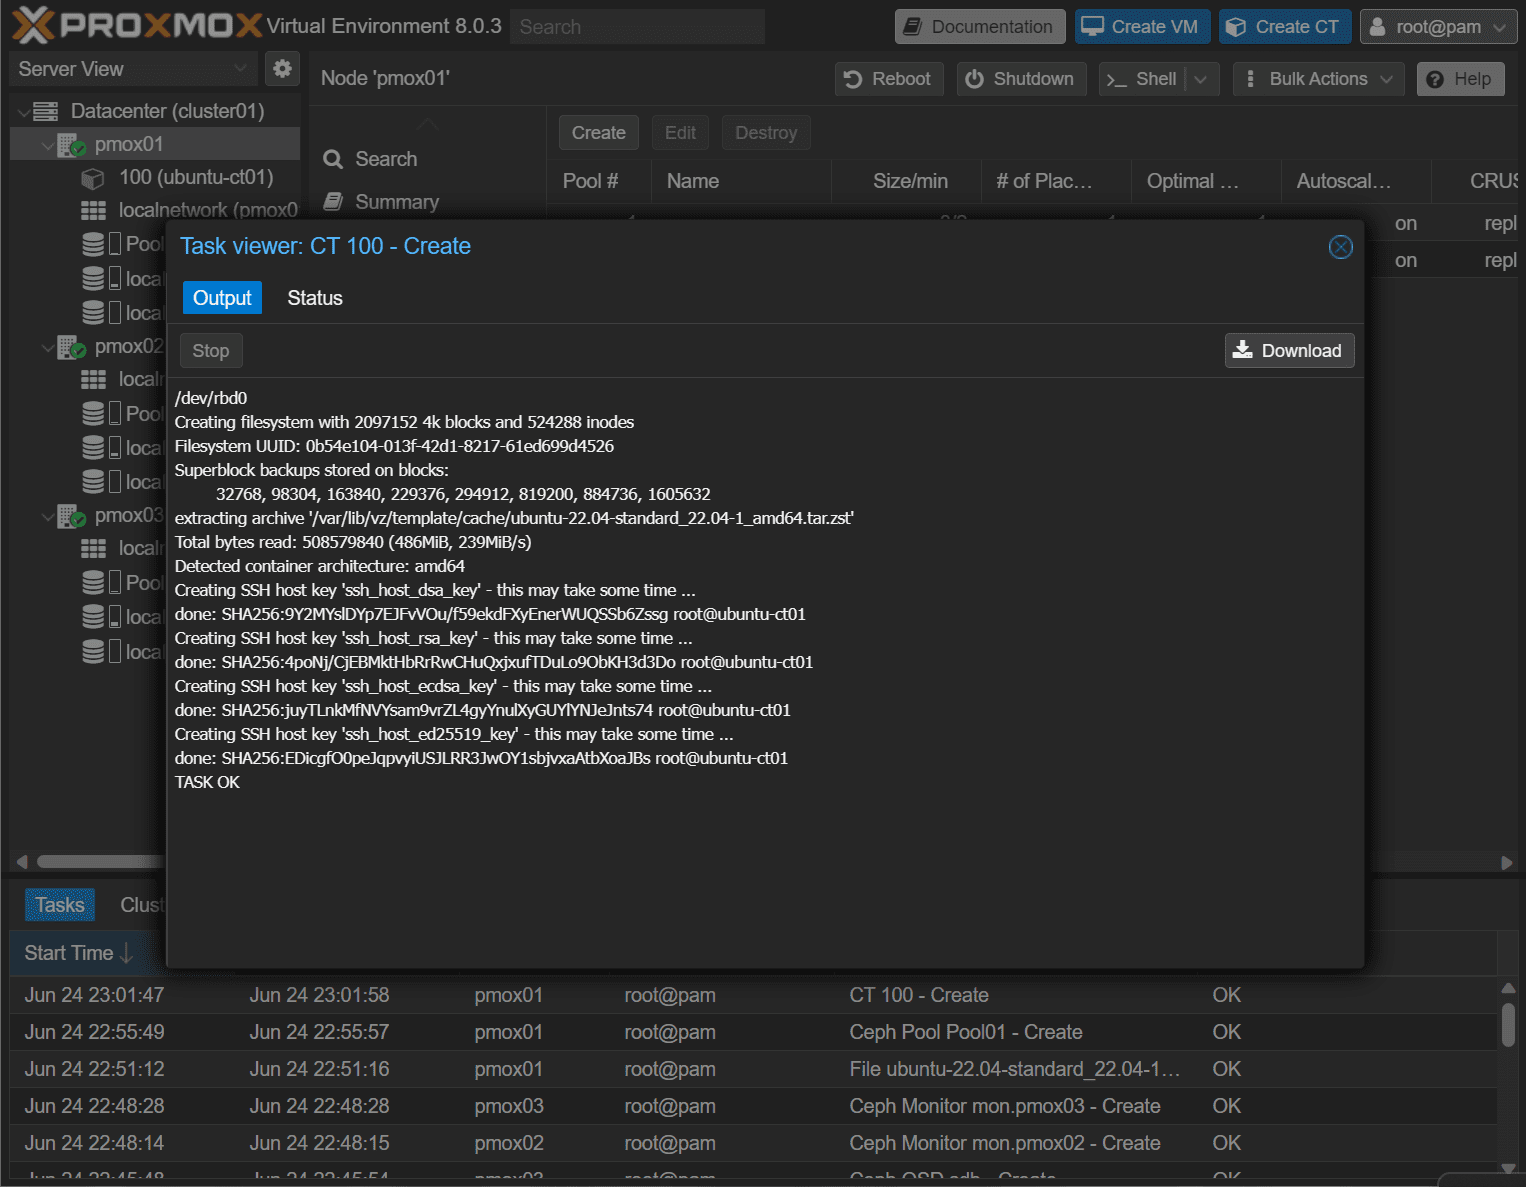
The LXC container creates successfully with no storage issues which is good.
We can see we have the container up and running without issue. Also, I was able to migrate the LXC container to another node without issue.
Video covering Proxmox and Ceph configuration
Wrapping up
Ceph is totally free HCI storage that you can install and configure in Proxmox. It provides a way for you to have HCI storage totally free and have resilient software-defined storage for your virtualization environment to make sure your VMs are resilient without having to have a storage shelf and making use of local storage on each Proxmox server host.





Very Interesting.
I’m planning to create a Proxmox cluster with 3 node with mini PC with 2×2,5 Gbps NIC and I want to implement Ceph as shared storage. But I have red about probably issue with non 10 Gbps NIC. For a small environment, do you think that 10 Gbps inteface is mandatory? I plan to execute VM for local DNS, 2x Windows 11 VM, a Nextcloud instance, a VM dedicated for MariaDB, a torrent server, 2x VM HAproxy, Graylog VM. Additional some other linux VM for test purpose (testing kubernetes, docker swarm, ecc.)…
Thanks in advice.
Alessandro,
Thank you for the comment! I don’t think there would be any issues with 10 Gbps connections as this would be the preferred. However, I will say there shouldn’t be any issues with 2.5 Gbps connections with a small Ceph environment. What type of mini PC are you using?
Thanks Alessandro,
Brandon
Hi