
Do you have a lot of ESXi hosts and maybe even multiple vCenter Servers on which you are constantly deploying resources like virtual machines, or need access to ISO files? The content library is a great way to solve this use case, especially with new features that have been added in recent vSphere versions is the Content Library. In the last post, what is VMware content library uses and creating, we looked an an overview of the content library and what it is, its use cases, and how you create one. However, in this post we will look at how to share files between ESXi and vCenter Servers using the content library publish function.
Publishing a Content Library
We learned in the last post, the content library is a container for all the resources you need to deploy and support virtual machines – OVA, OVF, ISO, and virtual machine templates. One of the great strengths of the content library is that you not only have a centralized repository, this repository can be shared across your vCenter environment and even outside of the vCenter environment it is created in. This is done by publishing your content library. Let’s see how to enable publishing on a content library and the options that are available to do this.
The first step to begin sharing files between ESXi and vCenter Servers is to create a library and enable publishing. We already stepped through the process to create a content library in the previous post, however, let’s take a quick look at a few screenshots to do this and enable publishing.
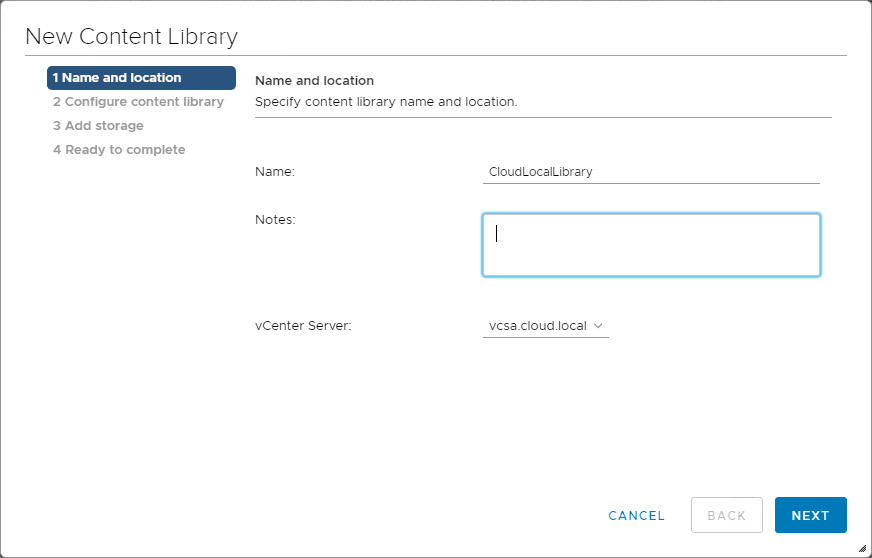
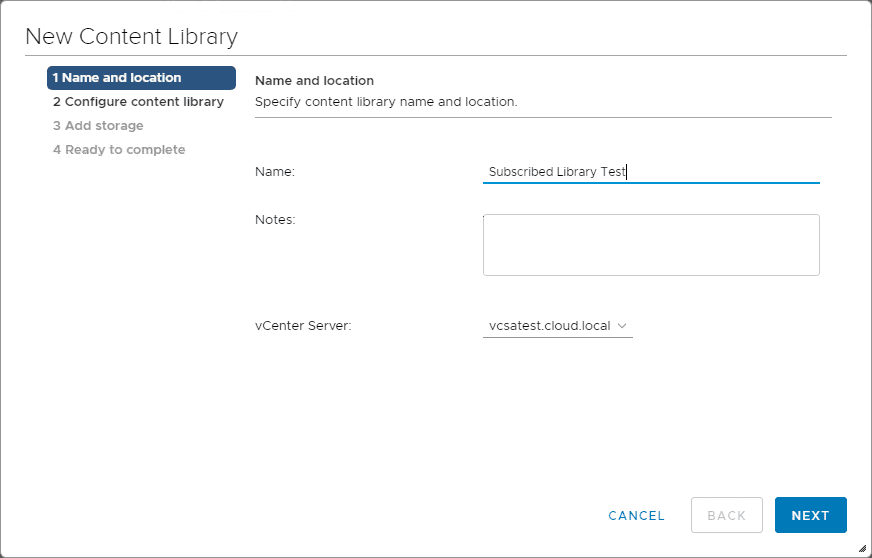
On the source vCenter Server or the vCenter Server that you are creating the content library on along with importing items, you create a New Content Library. Navigate to the Menu > Content Libraries and select the “+” sign at the top to begin creating a new Content Library. Name the new library and hit next.
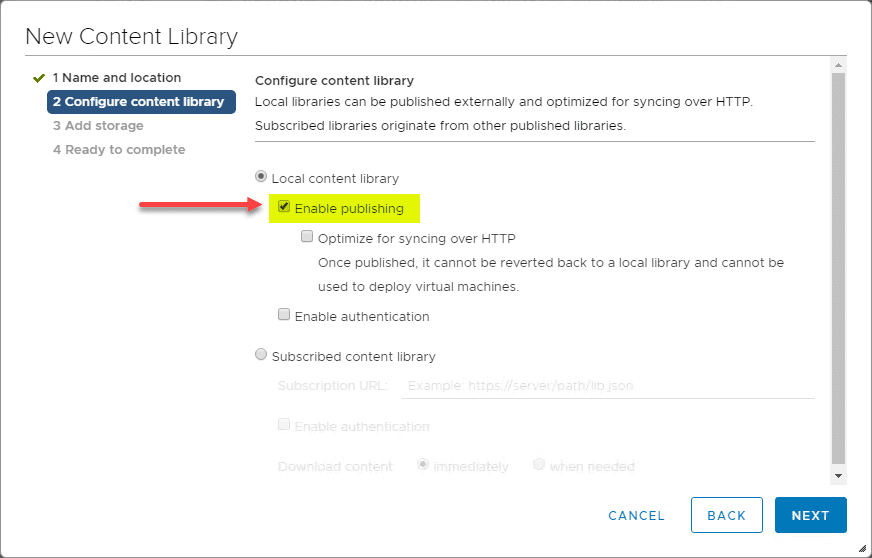
On the Configure content library screen, you Enable publishing. This is what allows publishing the content library via a web interface which allows external vCenter Servers to subscribe. Note the option Optimize for syncing over HTTP. Using this option as detailed by VMware:
This library is optimized to ensure lower CPU usage and faster streaming of the content over HTTP. Use this library as a main content depot for your subscribed libraries. You cannot deploy virtual machines from an optimized library. Use optimized published content library when the subscribed libraries reside on a remote vCenter Server system and enhanced linked mode is not used.
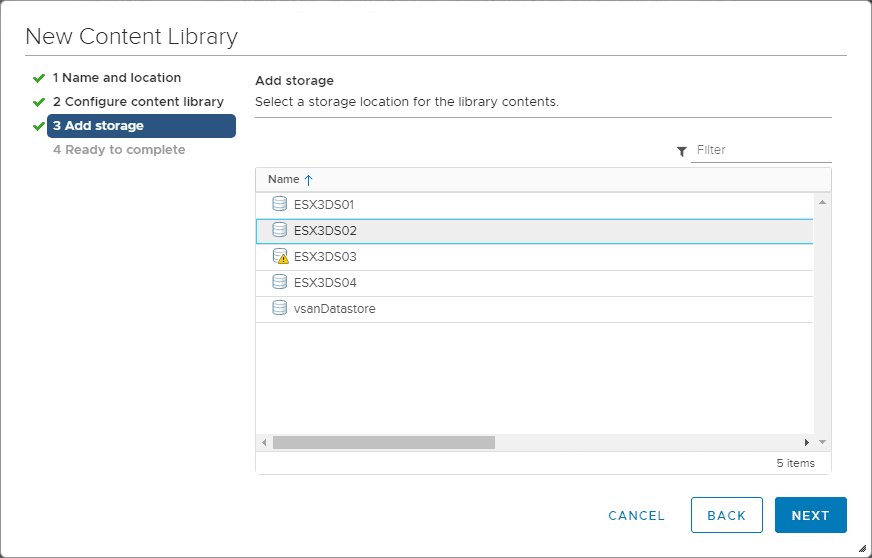
Next, you have to configure where the items hosted by the Content Library will be stored. Select the datastore you want to host the Content Library.
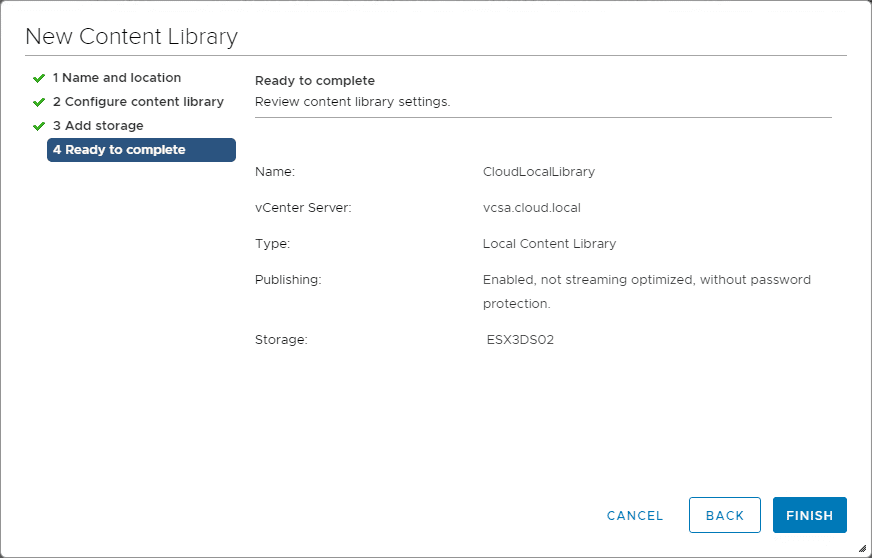
On the Ready to complete screen, click Finish.
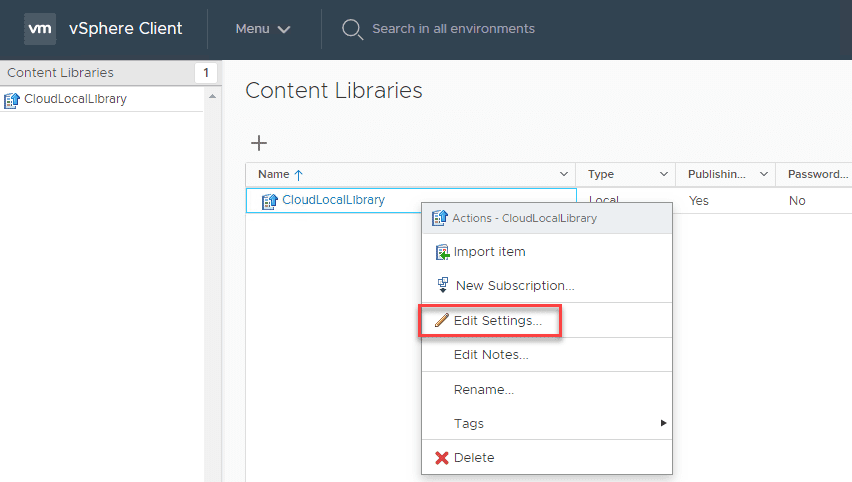
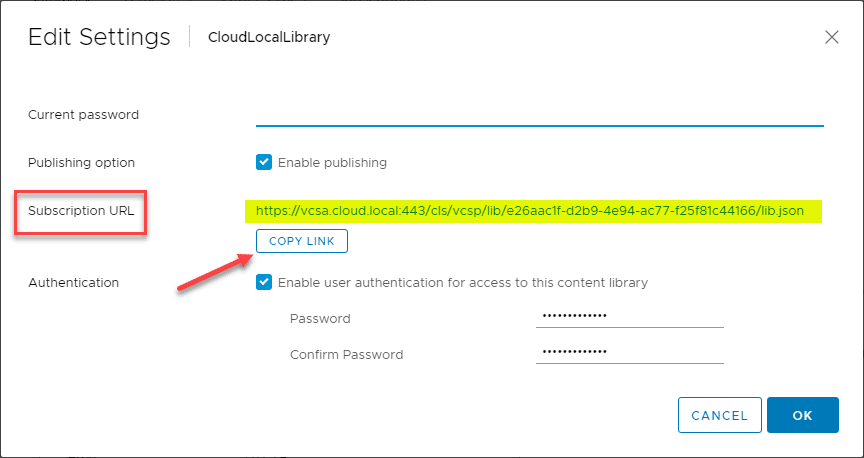
If you want to enable a password on the Content Library for extra security, right click the newly created library in the vSphere Client and select Edit Settings.
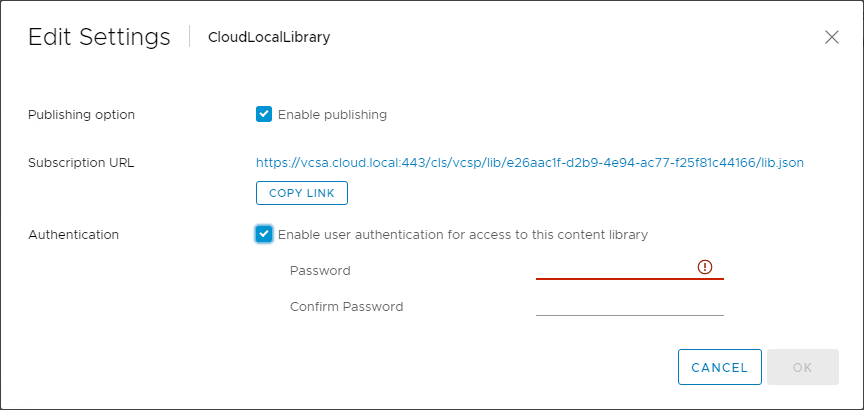
Note the Authentication section. Here you set a password and confirm it. Also note the Subscription URL. We will use this a bit later.
Share Files Between ESXi and vCenter Servers
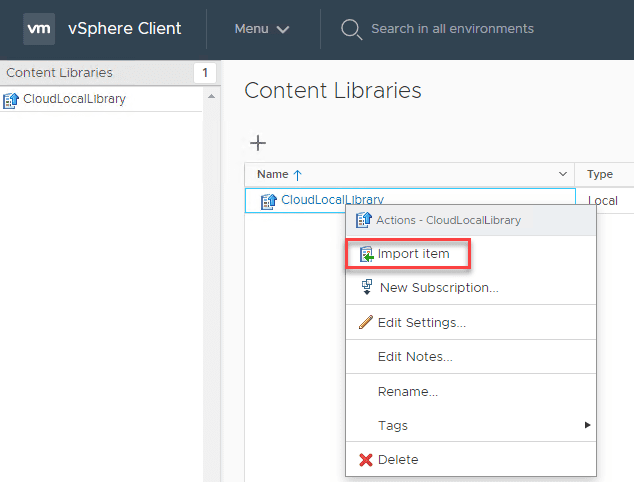
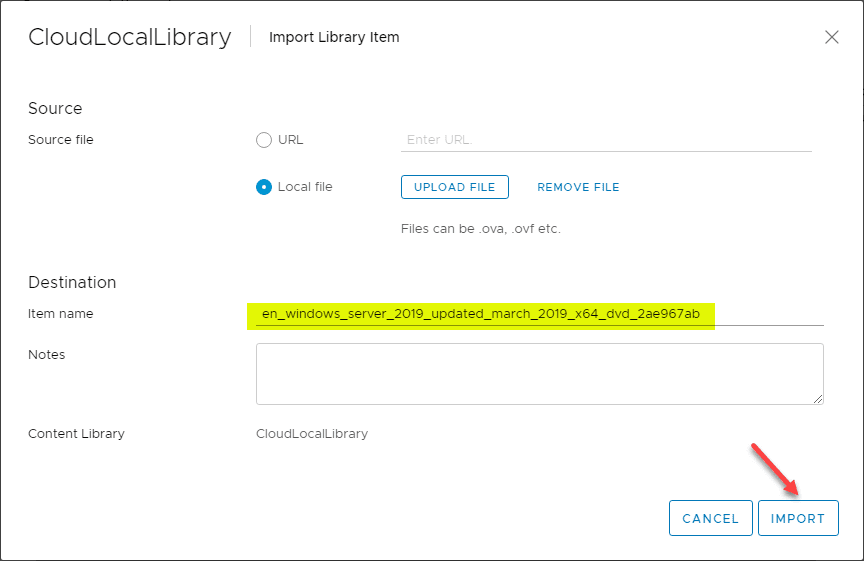
To share files between ESXi and vCenter Servers, we need the files to share. To add items to the content library, right click the Content Library and select Import Item.
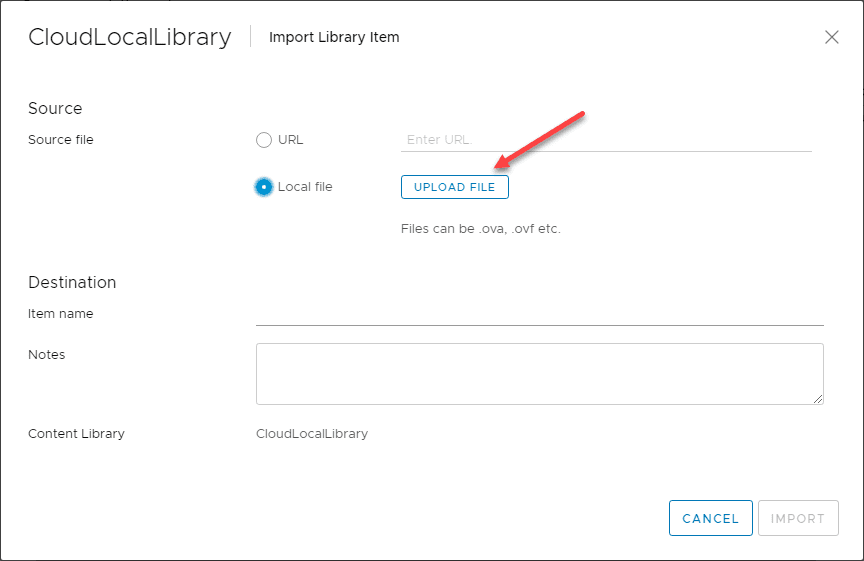
This opens the Import Library Item screen. You have the options of URL or Local file. I am wanting to publish an ISO file that is stored on my workstation. Here, select Local file and Upload File. This will open the normal Windows Explorer browse dialog box to allow you to select the file to upload.
The file to be uploaded is now listed in the Item name. Click the Import button to begin the upload of the file to the Content Library.
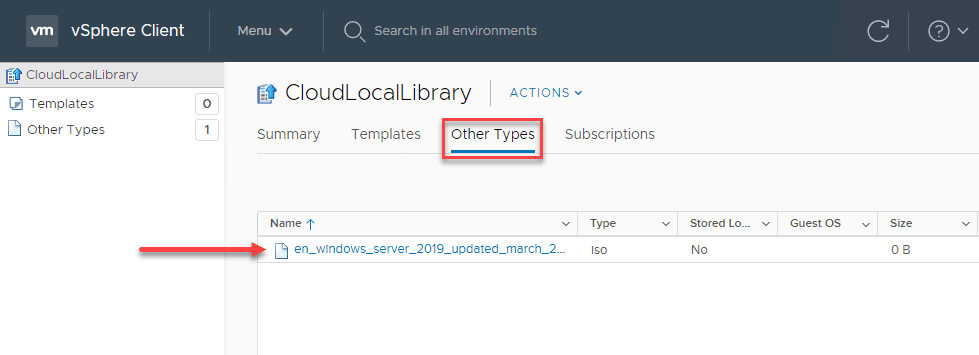
After the file uploads, it is listed in the Other Types section since it is an ISO file. Note in the screenshot, the Stored Locally column says No since the upload of the file hasn’t completed. The file will display before it is actually available.
Configuring the Subscribed Library
Now that you have a file that is hosted in the source Content Library that is published, we can create a subscribed library that allows subscribing another vCenter Server to this content.
Before moving on to the next screen, go back to your Source Content Library vCenter Server, edit the settings of the Content Library you have published, and you will see the Subscription URL. This is the URL we will need to use for subscribing to the content on the target vCenter Server.
Going back to the New Content Library wizard, on the Configure content library here we select Subscribed content library. In the Subscription URL, enter the URL that you copied from the source vCenter Server with the published Content Library. Also, enter your password if you have one configured for the connection.
On the Download Content option:
- Immediately – content is downloaded immediately to the target storage and starts consuming the full amount of space.
- When needed – content metadata only is downloaded. Space is saved since the content is not downloaded to the target storage until the resource from the published library is needed.

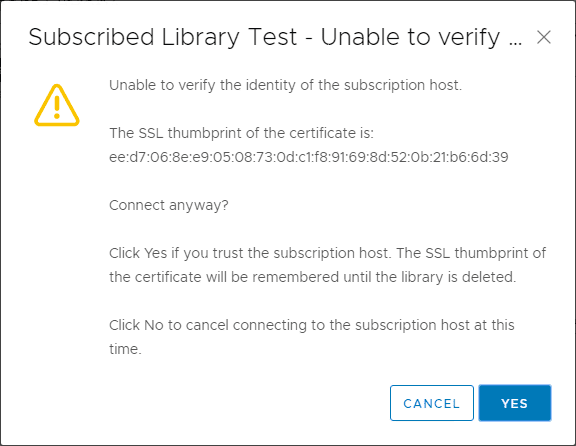
If you are using self-signed SSL certs, you will see a certificate warning you will need to verify.
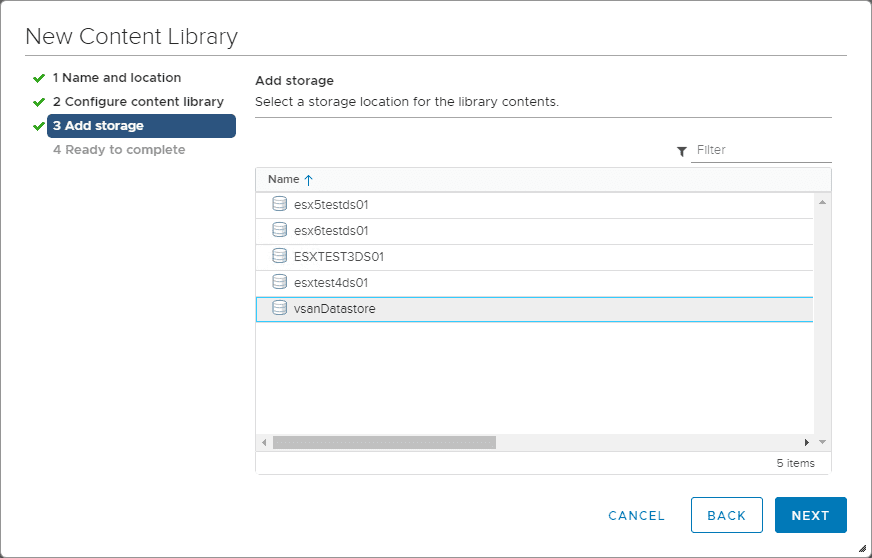
Select the target storage for the synchronized subscribed content library.
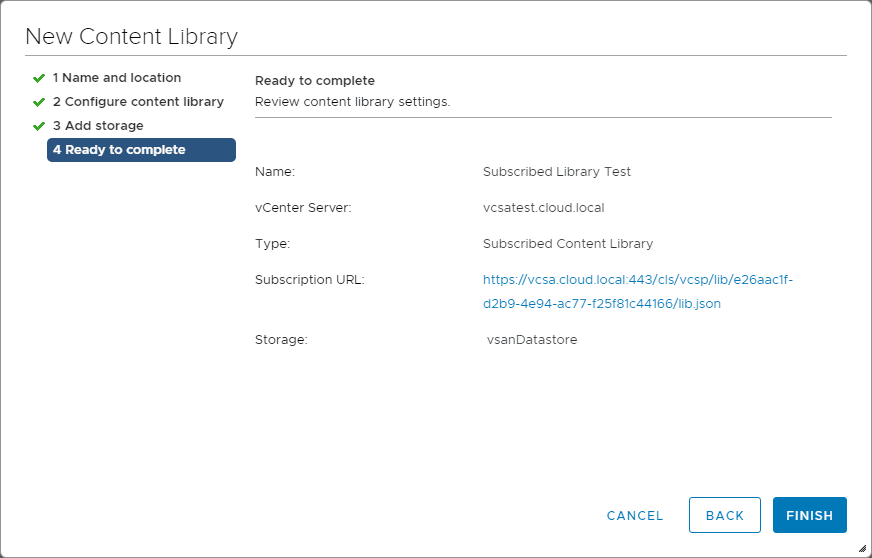
Confirm your configuration settings for the subscribed content library.
A new vCenter Server task will kick off on the target vCenter Server called Sync Library which means it is synchronizing the items, either full files or metadata, depending on the options chosen.

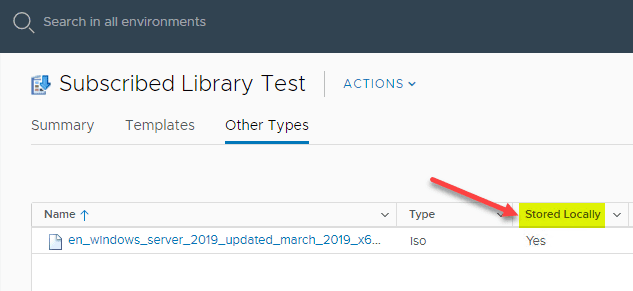
After the Sync Library task finishes, I now see the Stored Locally option showing Yes in the target vCenter Server. This means it has successfully pulled the Content Library items and has them stored locally in storage.
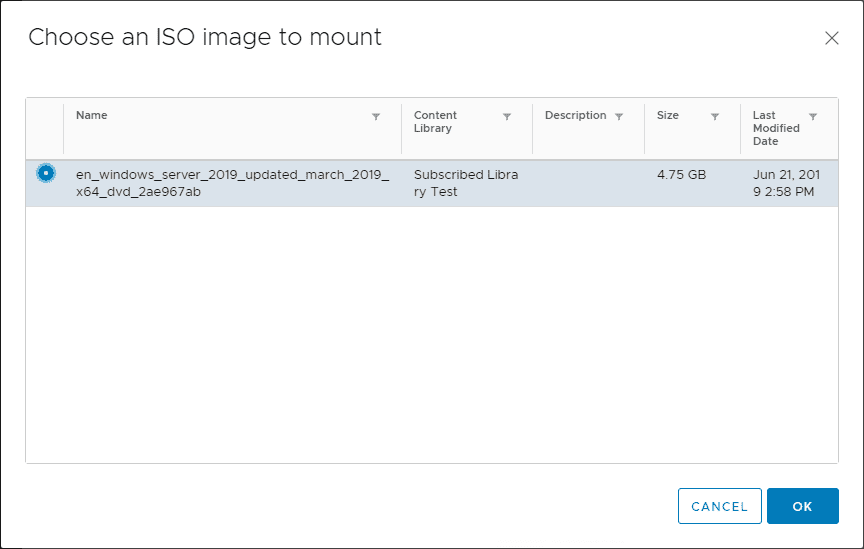
You can now use the Content Library ISO File option when building a new VM and make use of the subscribed items containing ISO files.
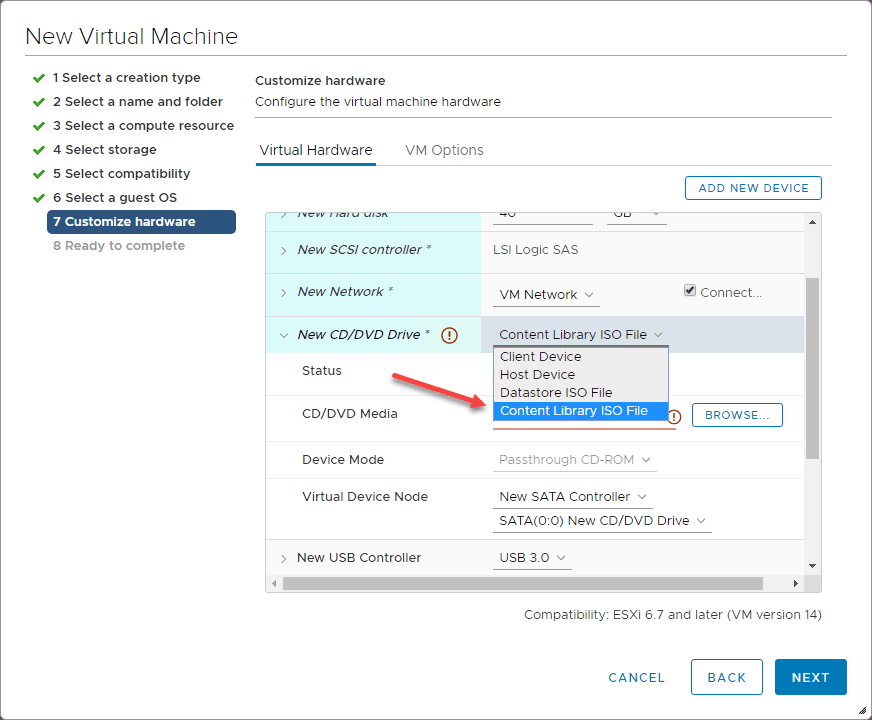
Choose the synchronized ISO file found in the subscribed Content Library.
Wrapping Up
As you can see the Content Library makes it easy to Share Files Between ESXi and vCenter Servers. In this way, you are not having to copy files between local datastores of ESXi servers and different vCenter Servers. The publish capability makes it easy to publish out a Content Library and have a target vCenter Server subscribe to the Content Library and synchronize its content. In this way, you can have one centralized repository where items are kept updated and the subscribed environments will continue to synchronize changes and updates to the Content Library so you don’t have to worry about doing this manually.
More in this topic

Discuss this in the Community
Google is updating how articles are shown. Don’t miss our leading home lab and tech content, written by humans, by setting Virtualization Howto as a preferred source.
About The Author
