


This week has been a blur of different projects and things I have tried out and tested in the home lab. But from it, has come a lot of really great projects that I would like to pass along if you are looking for something to learn and take your home lab to the next level. I have covered a lot of ground in the home lab this week. The home lab projects this week cover everything from Linux troubleshooting, VLANs, Proxmox self-service, TrueNAS shared storage, and Docker image security. There is a really good mix here. You can spend an hour on any of these projects and your home lab will benefit. Let’s look at the projects!
1. Scan your Docker images with Dockhand
I recently wrote about the fact that Portainer is changing their direction and they are no longer really investing heavily in the Community Edition of the product. They are all hands on deck focusing on the direction of Kubernetes. With this direction, I think they are less desirable for a home lab since, I think fewer home labbers are really taking advantage of Kubernetes.
So, many are on the hunt for their next Docker manager. I think with that, Dockhand is emerging as a “crowd favorite.” There are many forum posts out there where home lab users have switched and are very happy with what Dockhand can do. I am still rocking Komodo, but keeping an eye on Dockhand.
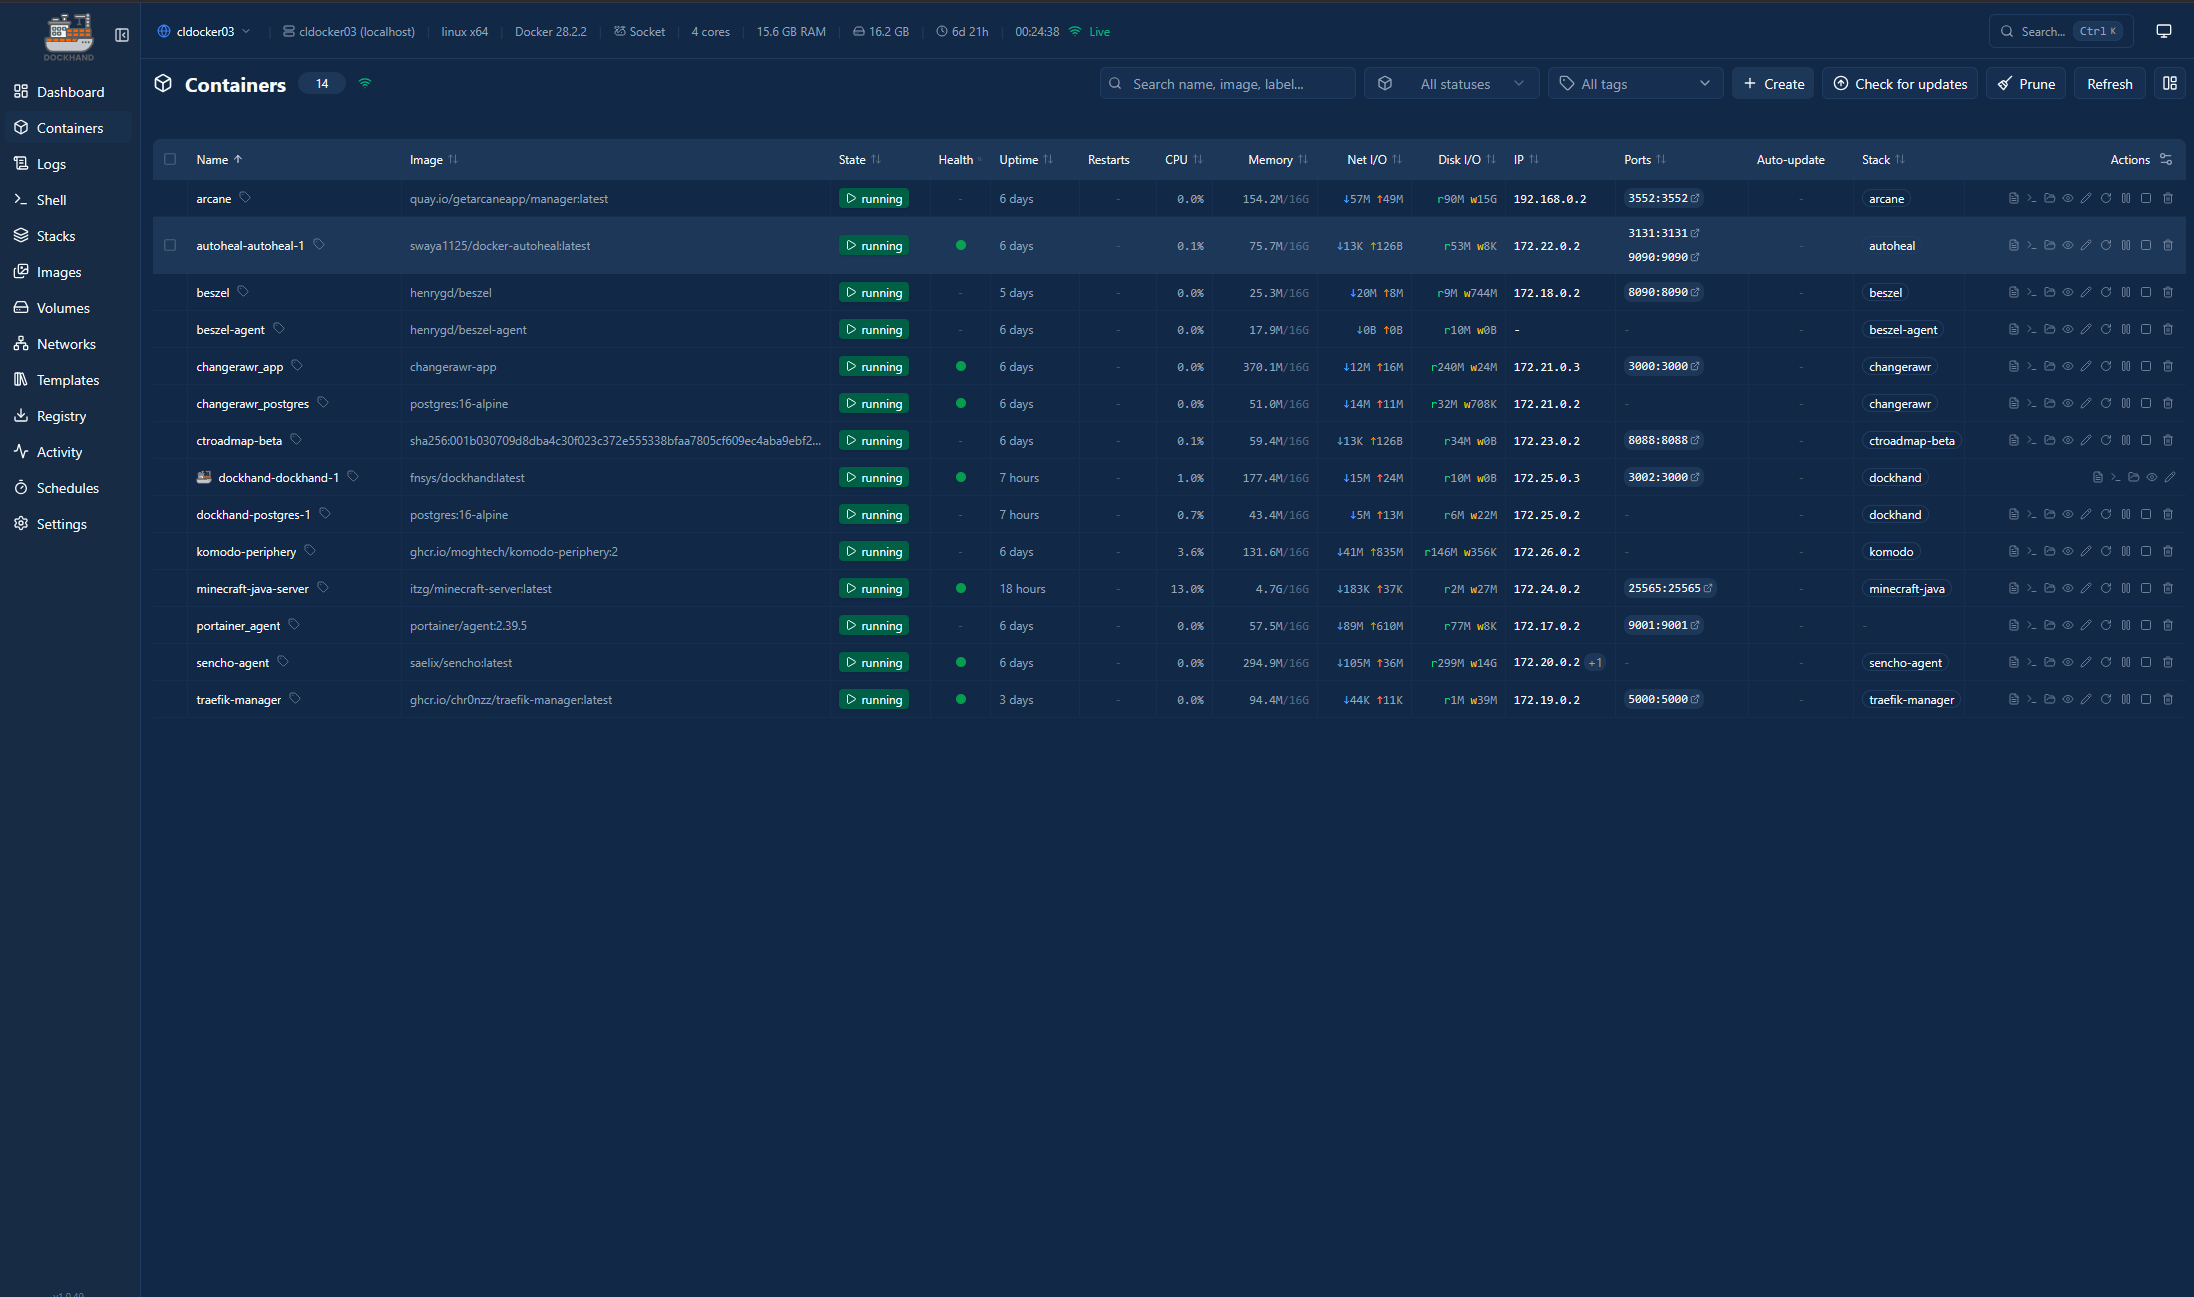
One of the features that it supports is image scanning with Grype, Trivy, or both even.
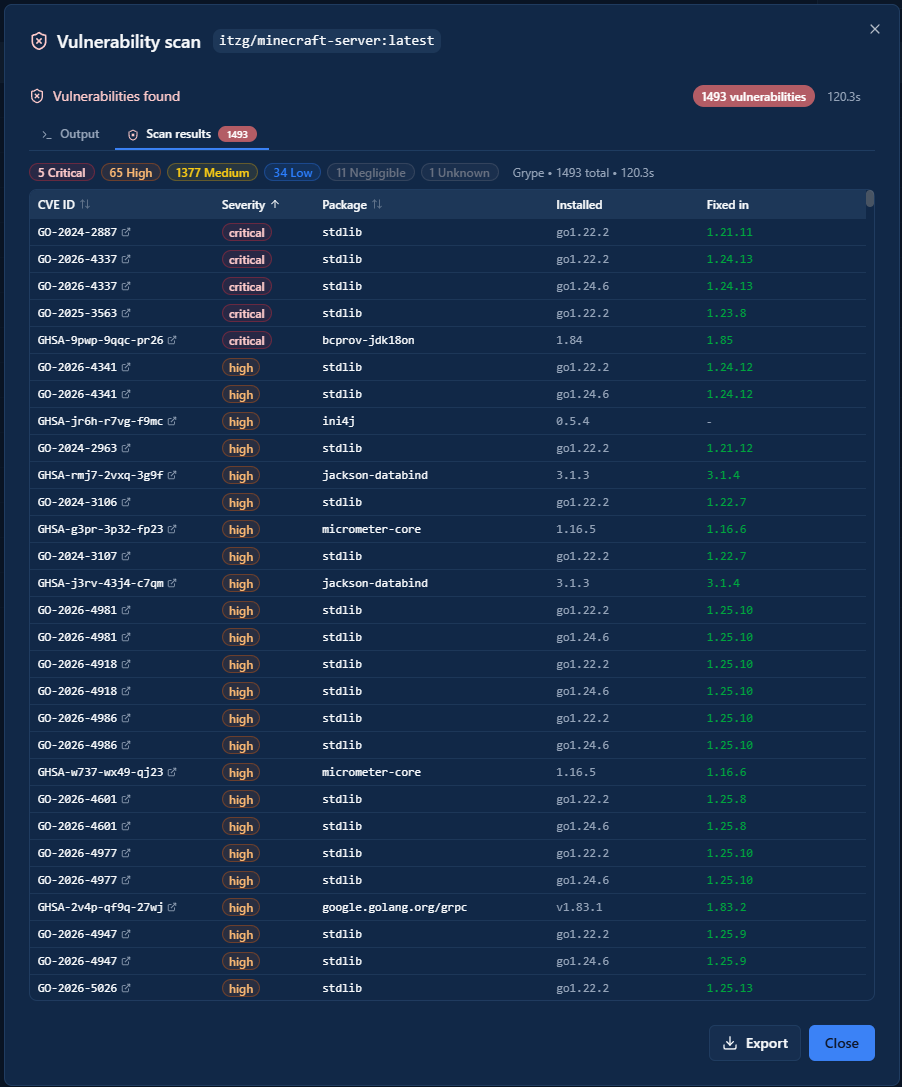
One of the cool things though that it can do along with that, is orchestrate updates based on the severity of the vulnerabilities that are found. You can even refuse updates based on the scan results.
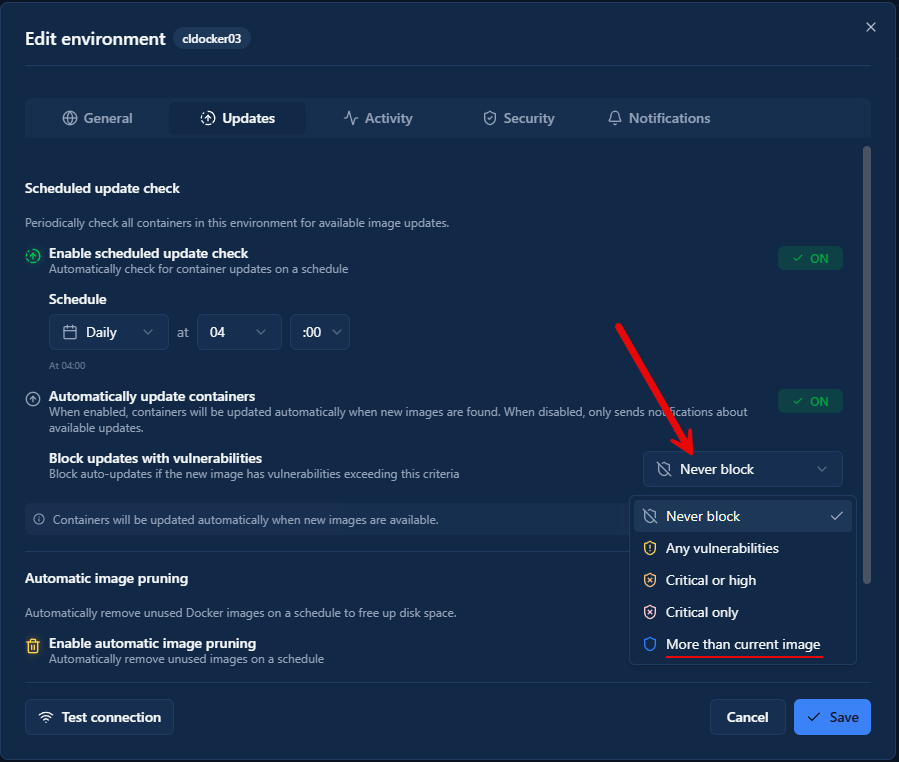
This weekend, I think a great project would be to stand up a Dockhand instance, especially if you haven’t fully decided on what direction you want to go from Portainer. Then, get familiar with the scanning feature. Look at the settings for orchestrating your updates based on the security scans.
You can read my full walkthrough on this feature set here where I covered security scanning and the ability to pass or fail updates based on it: The Dockhand Security Setting You Should Turn On in Your Home Lab Now.
2. Test your VLAN isolation
This is one that you might think sounds super basic. But let me tell you. Assumptions are what lead to data breaches and other issues where we assume that security is what it is supposed to be. Have you in a while performed an audit of how your traffic should flow? Have you verified that traffic from one of your insecure VLANs cannot route to one of your protected management VLANs?
You are probably like me and have already created separate VLANs for management, servers, and IoT devices. But, this would be a great weekend to actually see what can communicate between them. If you have just assumed that VLANs are a security barrier in and of themselves, this is an assumption that may get you into trouble.
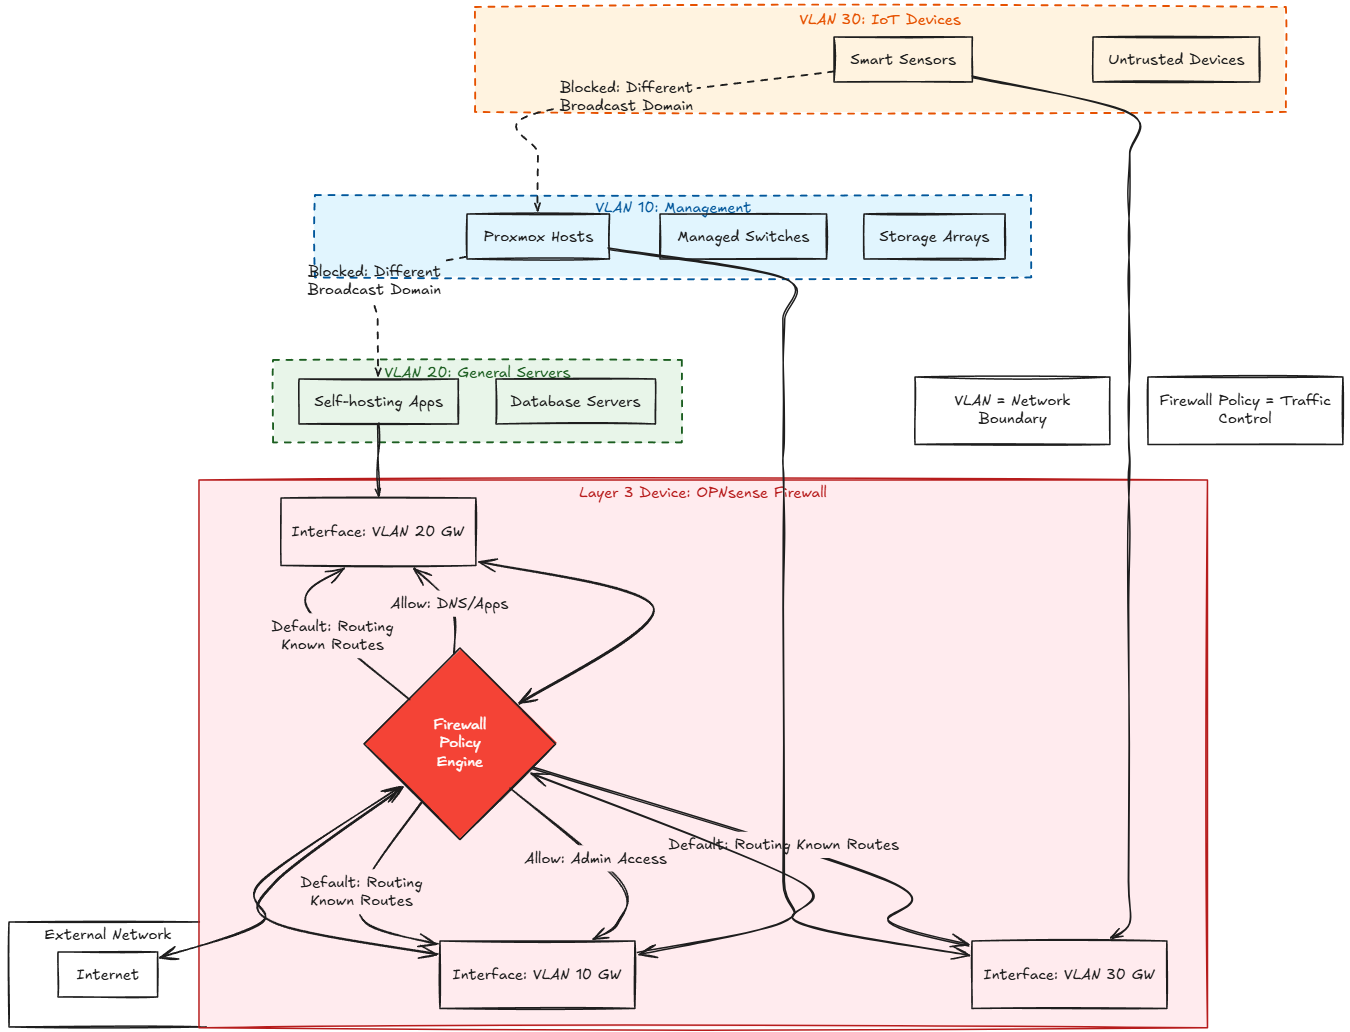
If you have a firewall or router attached, then that traffic has a “way” to get to other networks if it is using the router/firewall as the default gateway which is definitely the common configuration.
So, start with that question. Can a client on a less trusted network reach your Proxmox management interface as an example? Also, don’t just assume that because it fails that your security is working. You should want to see the filtering happening in a defined firewall log to make 100% sure that your filtering is working.
There are a LOT of nuances to how network traffic can be routed and it is definitely a point that you want to verify and make sure of. Read my full walkthrough of this home lab project that you can try out this weekend: Your Home Lab VLANs May Not Be Isolated Without This Firewall Configuration.
3. Add self-service to your Proxmox environment
In this home lab project, I tested out a solution called PVE Panel that offers the ability to do more than just do what most other dashboards do. It isn’t a dashboard that just allows you to manage your environment as an admin. It provides a dashboard and environment that provides secure self-service access that you can delegate to “someone else”. Very cool!
So, think a developer needs to be able to power on and power off a VM, create snapshots, etc. Or, in a home lab, you may want to collaborate with a friend who also runs a home lab and allow them to have access to resources in your home lab without giving them access to the Proxmox web UI.
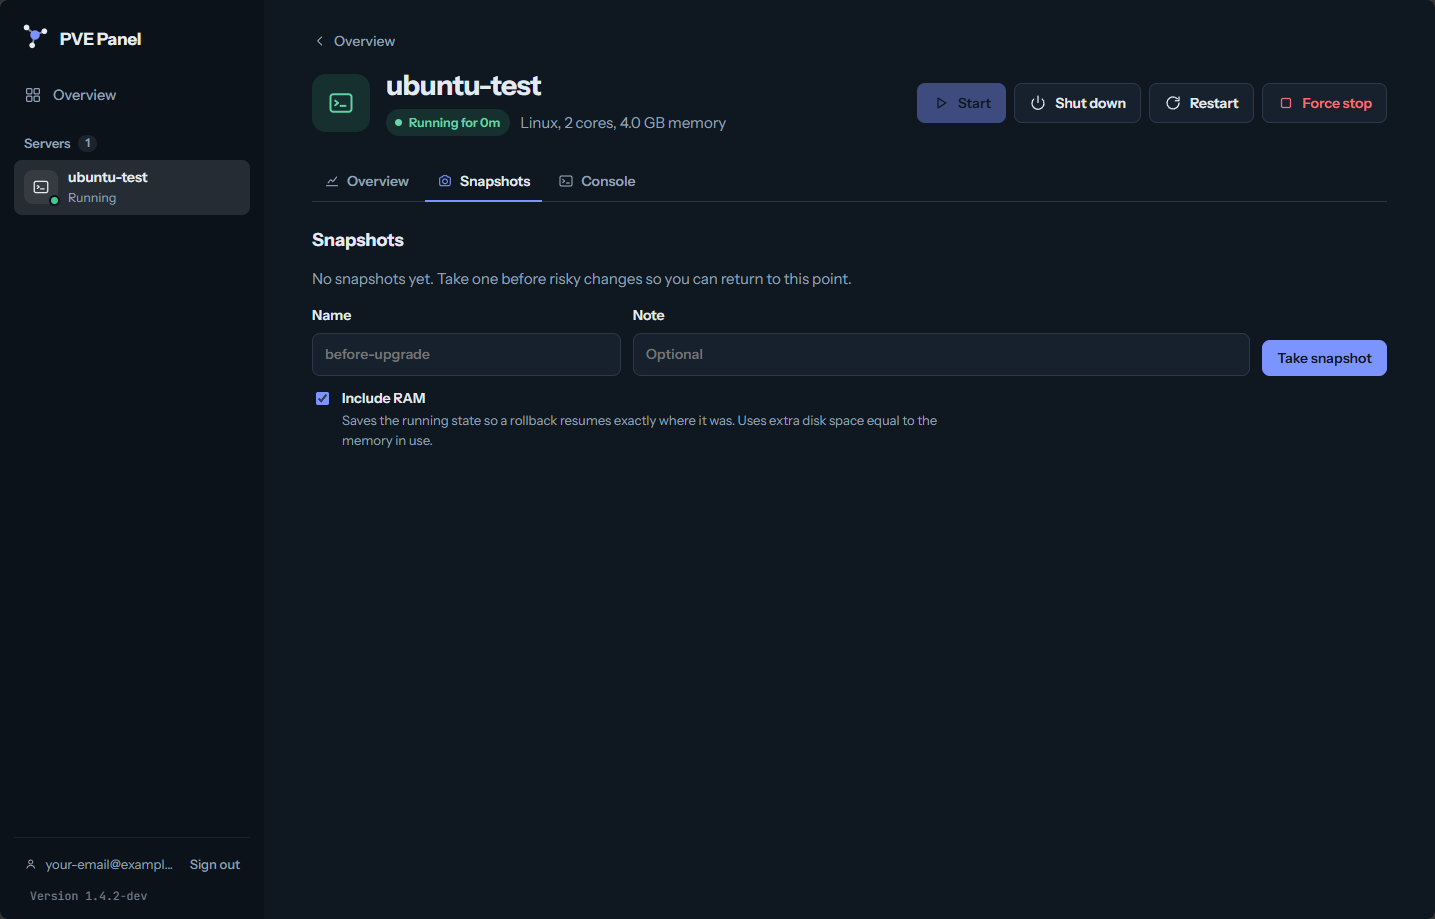
With PVE Panel, it also allows users that have been given delegation to resources the ability to even deploy and provision resources with approved templates. I also like the security aspect of the solution in that it only requires scoped permissions to a specific resource pool that it manages. Then, you don’t have to give line of sight access to your Proxmox web UI and you can just provide VPN access to PVE Panel.
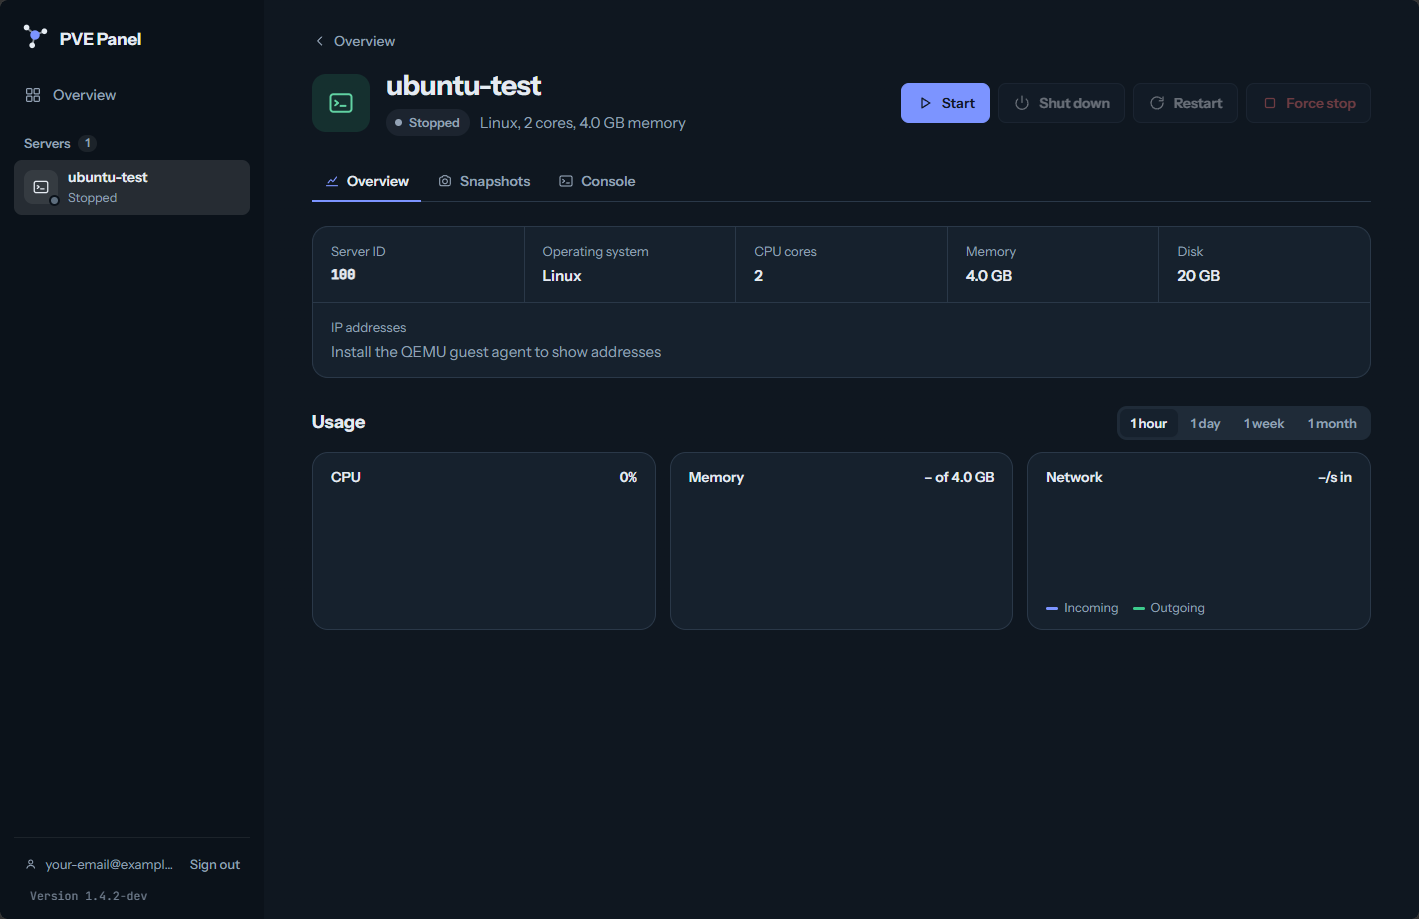
It also has Wireguard gateway built in and Tailscale functionality. So the developer has definitely thought about things the right way in the architecture and design of the solution. For a weekend home lab project, I would stand this up (can be provisioned easily inside Docker) and test out giving yourself access to the “customer” side and playing around with the permissions.
Read my full walkthrough here: I Tried This New Proxmox Dashboard, and the Self-Service Features Got My Attention.
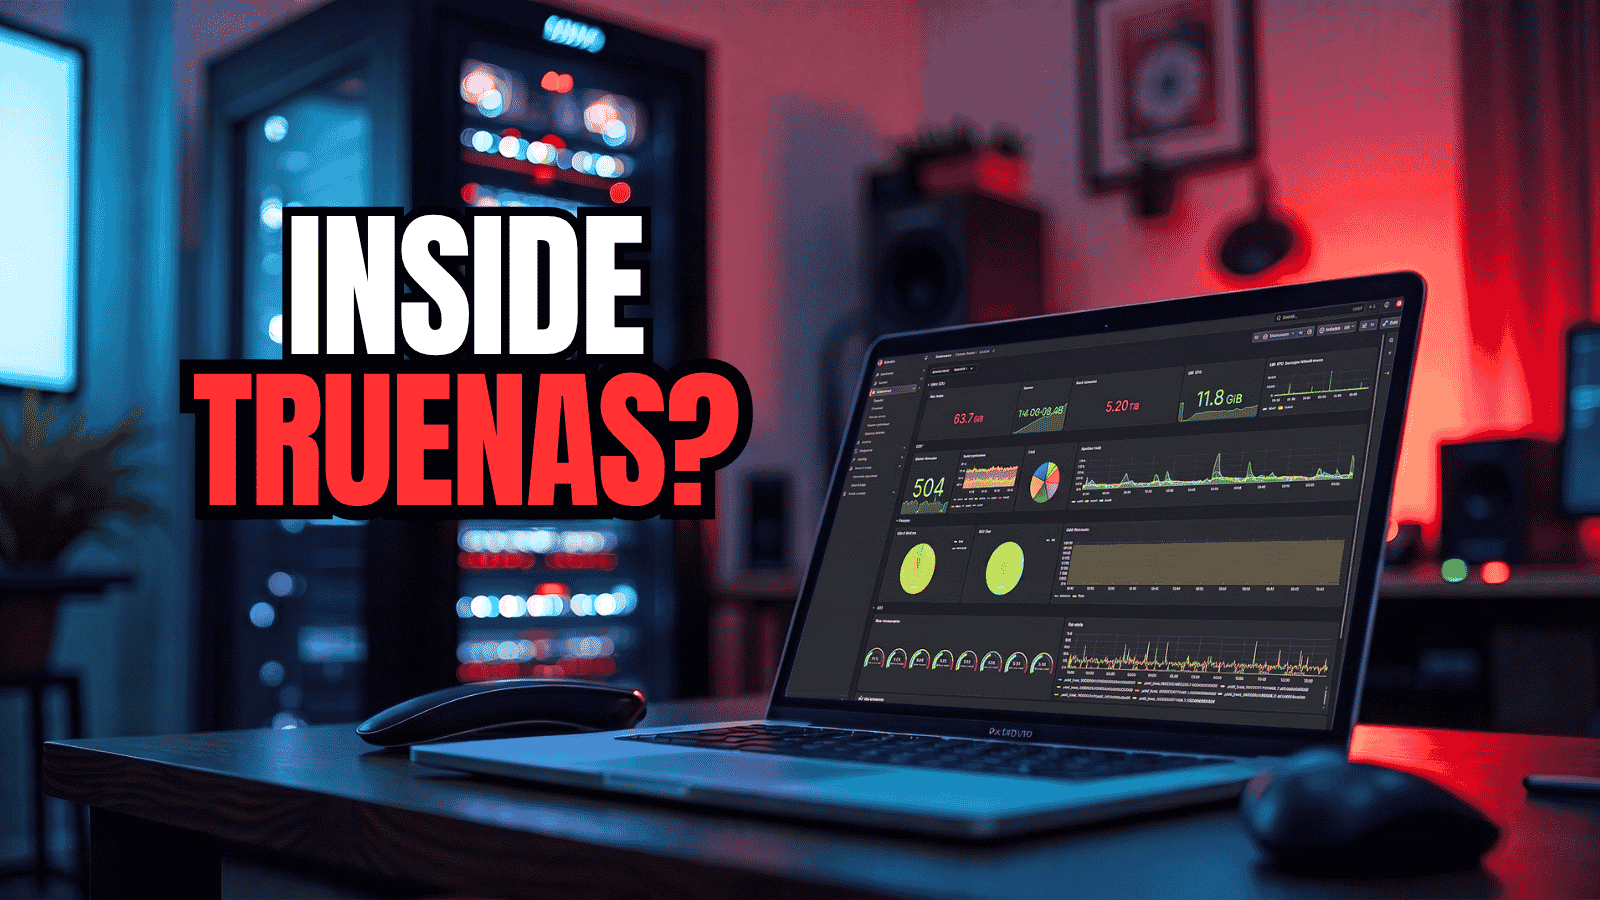
4. Monitor your TrueNAS instance with Grafana
If you are running TrueNAS in your home lab, are you currently monitoring it with anything? I would highly recommend monitoring with Grafana. Most of us have a Grafana instance that is running in our environment probably monitoring other things.
So, especially if you have Grafana already running, this is a pretty low effort home lab project that will yield good results when it comes to the value it gives back to you and visibility you get in return. It works in conjunction with the built-in Graphite exporter that is built into TrueNAS.
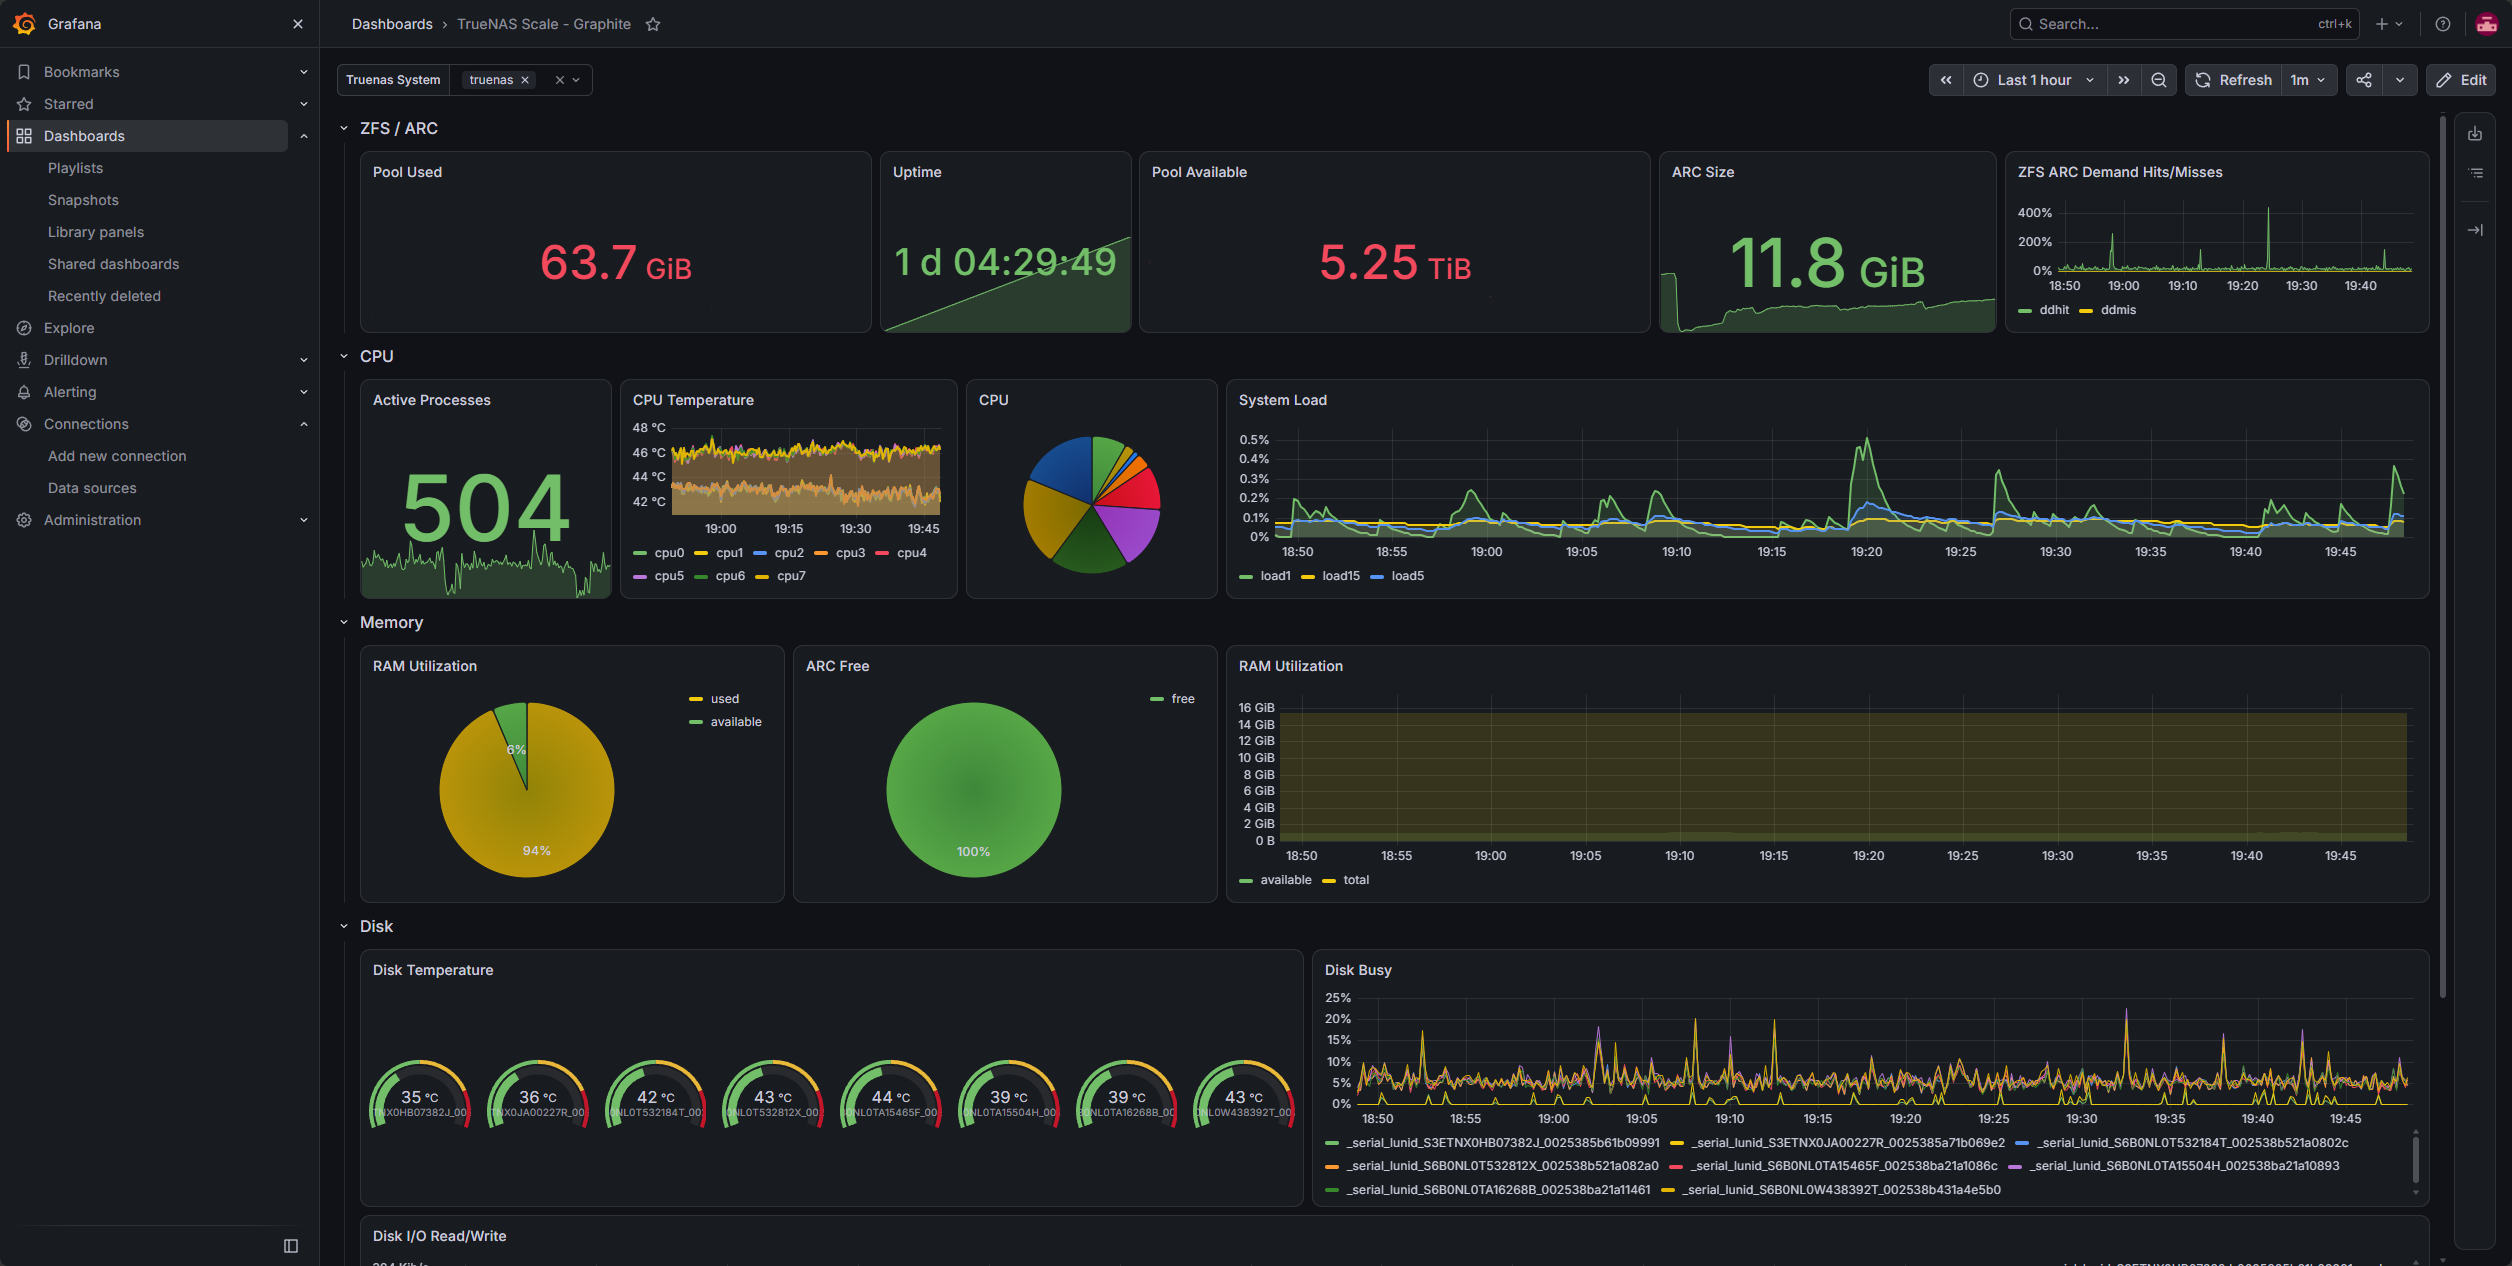
So, I was able to easily able to connect Grafana to that data source and then import one of the community dashboards that is out in the community dashboard marketplace. I did run into a few hurdles outside of the installation in regards to how data was being reported in the dashboard.
It displayed my ARC cache as 12 PB instead of 12 GB which turned out to be a value interpretation issue that wasn’t too hard to fix. There were a few other little kinks and hurdles that I wrote about in the dedicated blog post.
Read my full walkthrough of this weekend-worthy home lab project and see how you can reproduce my steps here: I Put TrueNAS on a Grafana Dashboard. Then It Showed 12.7 PB of ARC.
5. Use the new TrueNAS plugin for Proxmox to implement storage in your home lab
This is probably the biggest project in this week’s list. But all in all, it could easily be accomplished in a couple of hours work if you have a free NAS and some time to install the TrueNAS plugin on your Proxmox hosts in the home lab.
I had been testing this new plugin in the form of a nested Proxmox environment and a nested TrueNAS virtual machine that was used as the target. However, I decided that I was comfortable enough with it to implement this on my real Proxmox hosts.
I repurposed my Terramaster F8 SSD Plus NAS that I had previously used for VMware storage, and also more recently testing the StarWind Proxmox iSCSI plugin to instead use it for installing TrueNAS. That’s what I did. I installed TrueNAS on the F8 SSD Plus. Then I installed the plugin on my hosts and attached the storage to my host environment.
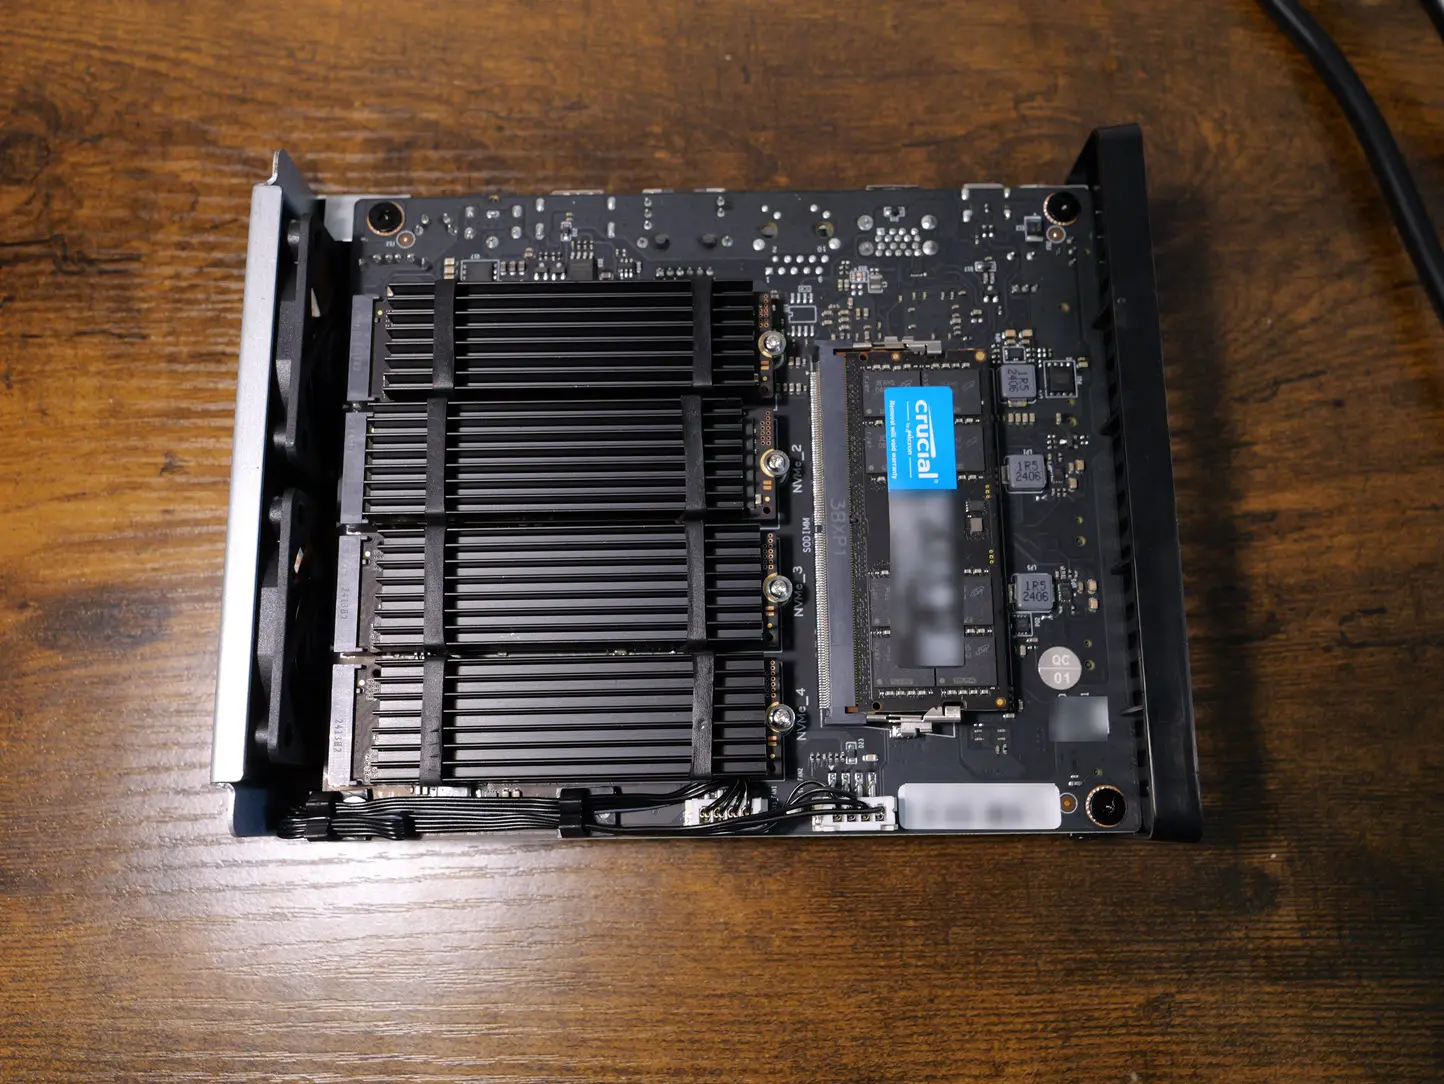
Keep in mind, you don’t have to reproduce my hardware to explore this design. This is just simply what I had available to me. I would start with spare equipment or a nested lab first if you have no face time with the new plugin. Create the environment and then place a test VM on the TrueNAS storage. Test and see how the VM storage is automatically provisioned, etc.
You can also do like I did and benchmark the storage environment with something like FIO. Record your numbers. Try out different disk configurations and see what works best with your Proxmox environment. In my build I had (6) Samsung 980 Pro NVMe drives to experiment with that allowed me to try out a (3) mirror (2) drive VDEV configuration that is performing really well.
Check out all of the details, including all of my benchmark results in my full walkthrough post here: I Built My Ultimate TrueNAS Storage Setup for Proxmox.
6. Learn and practice overlooked Linux commands
I ended the week with this project. Taking a look at standard Linux commands that most are late to get to know in their home lab environments. The seven commands that I took a closer look at to shed light on are ones that I think are pretty foundational to basic and even more advanced Linux troubleshooting from the command line.
This, I think, is one of the most useful long-term projects because it doesn’t really add anything “new” per se to your home lab, but it does help you to understand your servers and what they are doing or not doing for troubleshooting purposes.
Below is using the watch command in Linux to watch disk space:
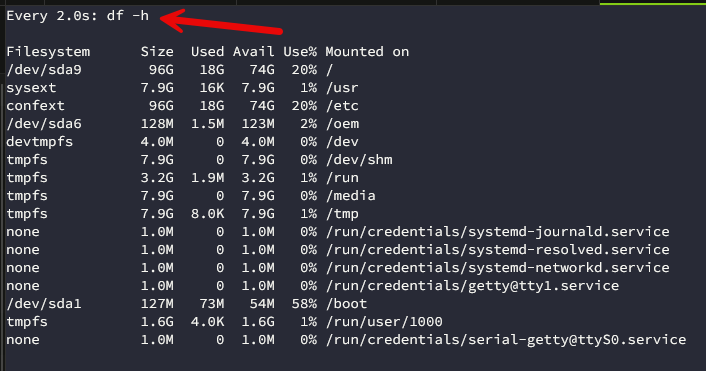
Start with a Linux VM or server that you already use and rely on. instead of running a bunch of commands randomly, give yourself a small little scenario to investigate. Something like, “how many errors have I seen with “x” service in the past 30 minutes?” “What process ID is holding on to port 3000 on my Linux server?”
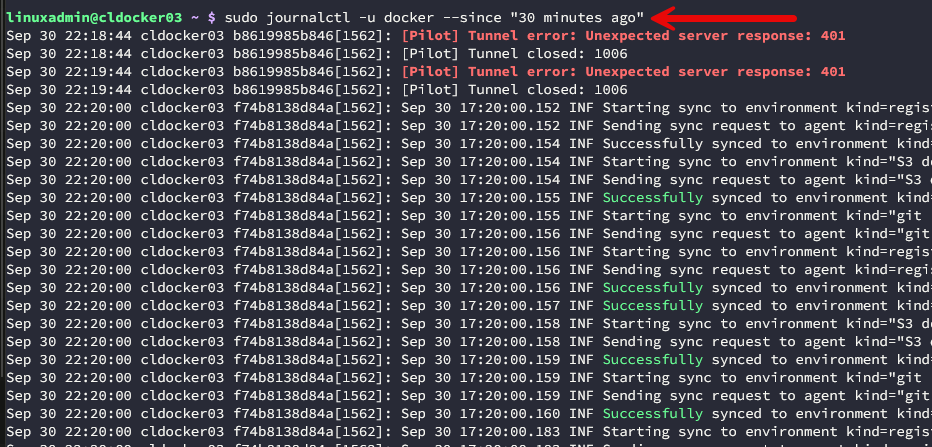
Then, use some of the 7 commands that we discuss to troubleshoot and investigate the scenario step by step to see if you can get more familiar with foundational Linux basics.
My weekend goal here would be to create the short troubleshooting session that each command can help with and give yourself hands on learning to investigate using the commands.
Check out the full post and the seven commands here: 7 Linux Commands Most People Discover Too Late in Their Home Lab.
Wrapping up
This has been another great week of learning for myself personally and I attribute just “getting my hands dirty” in the home lab with hands on projects as the biggest boost to knowledge that you can easily put into practice in ANY environment, not just a home lab. What about you? What home lab projects are you tackling this weekend? Let me know in the comments what you have decided on for this upcoming weekend.
More in this topic


Google is updating how articles are shown. Don’t miss our leading home lab and tech content, written by humans, by setting Virtualization Howto as a preferred source.
About The Author
