



It is that time of year again where school is starting for the kiddos and everyone is talking about back to school. If you have a home lab there is another kind of classroom that I think we are constantly involved with. But if you have taken a break on things across the board with your home lab, with this year’s back to school season, I wanted to approach home lab projects a little differently. Instead of just mentioning things to install or build, these are seven hands-on labs designed to teach you real infrastructure skills and troubleshooting. Let’s dive in.
1. Break DNS and learn how to troubleshoot it
This one is near and dear to my heart. If I could pick one technology that every IT pro and engineer should understand better, it would be DNS. We depend on DNS constantly and it is one of those technologies that operates behind the scenes, until it doesn’t and then everything else breaks and stops working.
For the first project I would recommend, build a DNS server maybe a test DNS resolver off to the side if you already have your “production” home lab DNS setup and working. Then point a test client to use this DNS server. Intentionally break it.
Check out a couple of my blogs on Technitium here:
- Stop Using Pi-Hole Sync Tools and Use Technitium DNS Clustering Instead
- I thought my Technitium DNS cluster was fixed. These settings were the real problem
You can use whatever DNS platform you already have. Technitium DNS, Pi-hole, AdGuard Home, BIND, Windows DNS, Unbound, or something else, that doesn’t really matter. The important part is learning how clients actually resolve hostnames. Start with a Linux VM and see which DNS servers it is using at the moment.
In Linux you can use this command to start looking at your DNS config:
resolvectl statusYou can also look at:
cat /etc/resolv.confNow perform a normal lookup to establish a baseline:
dig google.comThen you can query a simple record using one of your existing DNS servers or another public DNS servers like 1.1.1.1 or 8.8.8.8.
dig @1.1.1.1 google.comReplace that IP address with your DNS server that you stood up in the home lab network for learning. Your “learning” DNS server needs to have an upstream server for recursive queries, but in Pi-Hole or Technitium or something else, they have the ability to define what the upstream servers are:
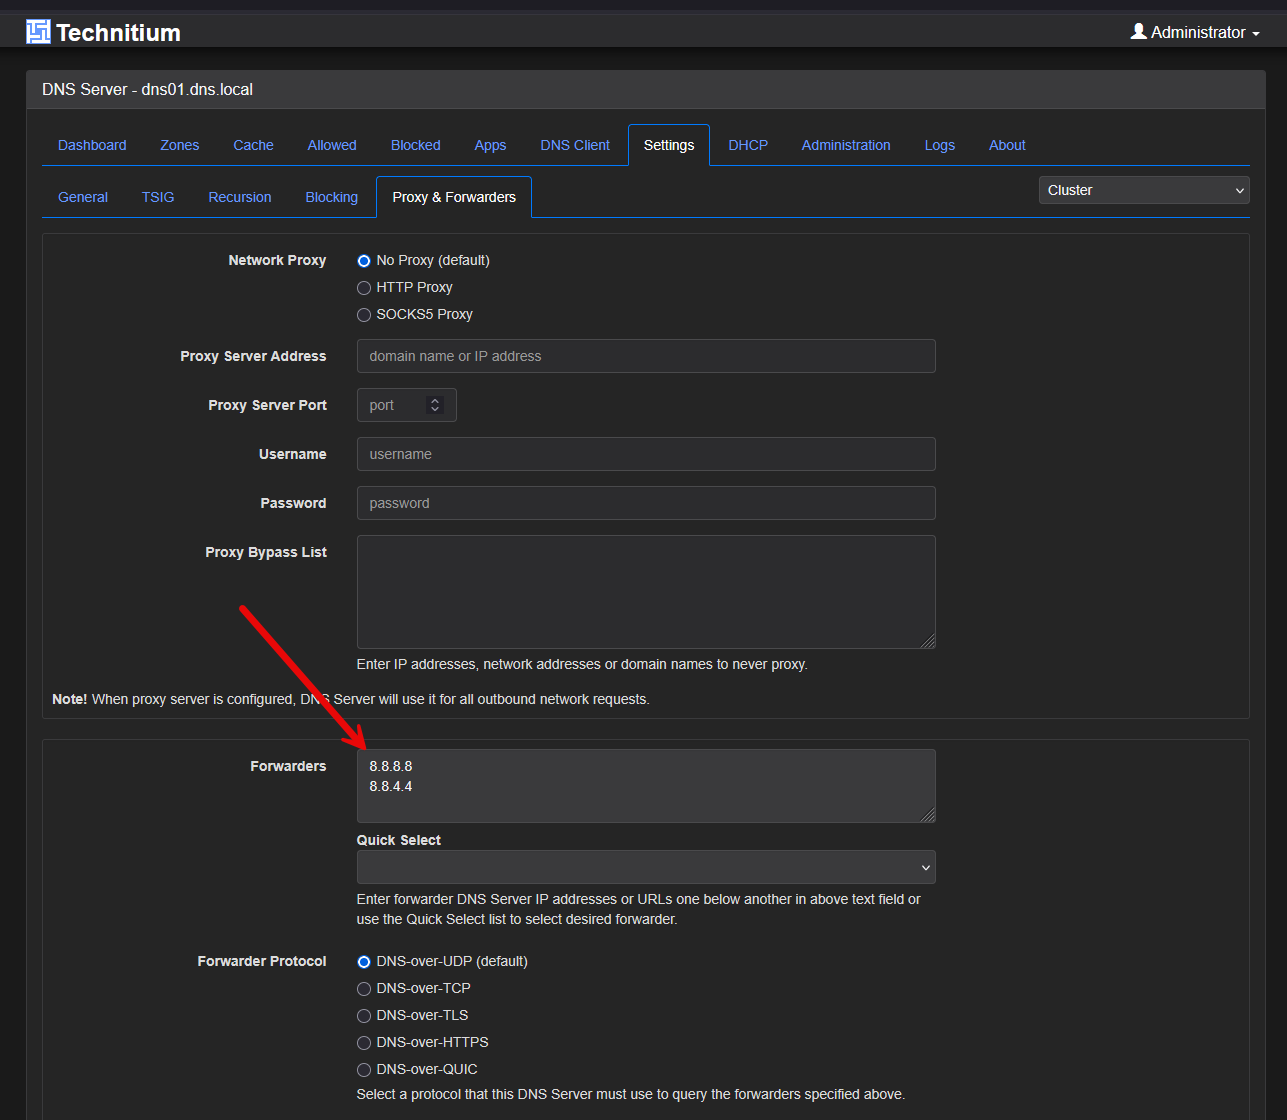
Now break it! One of the ways you can do this intentionally is change your upstream DNS server to an IP address , like 1.2.3.4 for your recursive resolver on your DNS server. Try resolving something again on your client that is pointed to your test DNS server. It will fail now since it doesn’t know how to recursively resolve anything.
You can also test local records, like creating something like:
server01.lab.exampleTry to resolve the record with your test DNS server. It should resolve the record since it owns the record for the host you added.
If you want to watch DNS traffic to and from your machine you can do this:
sudo tcpdump -ni any port 53Weekend assignment: Break your DNS on purpose on one VM and look at the problem without immediately looking at the configuration you changed. Use tools like dig, resolvectl, and tcpdump to see where the issues is and troubleshoot like you would in production.
2. Test isolated VLANs after building them
This is always a great way to learn VLANs better. I remember when I didn’t feel comfortable with VLANs years ago, I made myself just setup a lab where I did nothing but experiment with VLAN routing and segmentation and understanding how tagging and untagging worked, both on a physical port and in the virtual world.
Creating a VLAN isn’t the same thing as understanding network segmentation though and this takes it to another level of understanding when you can “control traffic” between your various VLANs. To work on learning the concepts, I recommend starting with two VLANs. These can be anything really. But as an example:
VLAN 10 - Clients - 10.10.10.0/24
VLAN 20 - Servers - 10.10.20.0/24
Create a virtual machine on each network. Or if you aren’t running something like Proxmox as of yet, you can just use physical machines like a desktop and a laptop. Before you configure firewall rules on your router that you are using, make sure each virtual machine you have created can hit its own gateway. So, on Linux I like to first start out checking the basics
Before adding or changing/creating firewall rules, make sure your VMs can hit their default gateways. On Linux, I like checking the basics first like pinging the gateway. ***Note*** just make sure your firewall allows pings on interfaces as this is usually an option from most vendors.
ping 10.10.10.1So, do that for both boxes. Then see if you can ping each box from each other. If no firewall rules are in play, the default behavior usually is that you can ping between VLANs that a firewall/router sits on.
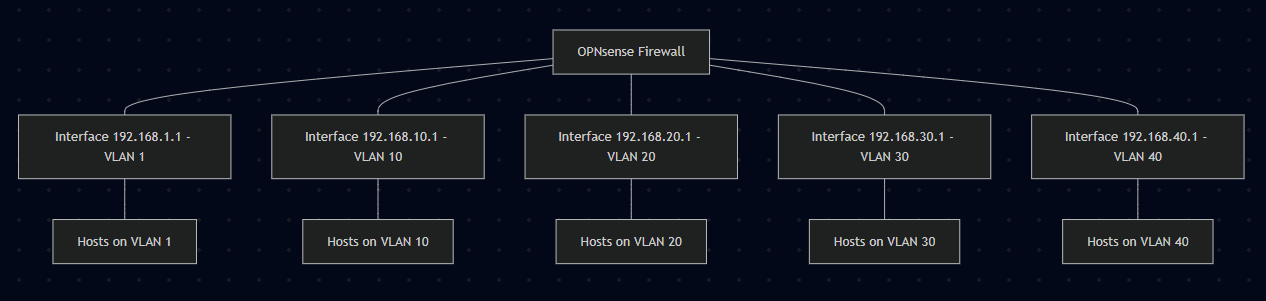
Now, if you are using a firewall where you can create a simple rule to start testing, create a rule to block traffic from one side or the other. Then, test your pings again. You should start to see it fail. Don’t just try ping tests, try another protocol like SSH between two Linux machines.
You can also test just at a port level if you don’t have SSH keys setup, etc, by using the nc command which a lot of times is easier:
nc -vz 10.10.20.10 22Weekend assignment: Build two VLANs, put a VM on each VLAN, block traffic between them. Then even play around with letting one service through like SSH or something else to see how you can scope down access to specific applications.
3. Build a Linux server with the CLI
Getting more familiar with the CLI is a great skill and it will help you in all aspects of troubleshooting and finding your way around a Linux server with no GUI. You won’t be intimidated like many are. For starters, create a “minimal” installation of Linux with Debian or Ubuntu Server. Once it boots into the CLI and you login, start exploring around and getting familiar with things.
Find your interfaces from the CLI:
ip -br addrCheck routing in Linux:
ip routeCheck your DNS (a little overlap from what we did in the 1st learning exercise but good for muscle memory):
resolvectl statusSee which services are listening and have open ports on your Linux box:
ss -tulpnNow learn how to create a “normal” admin user that has sudo privileges instead of doing everything as root and experience managing things using that user.
sudo adduser labadmin
sudo usermod -aG sudo labadmin
It is also really important to learn how to setup SSH properly to your Linux servers in the home lab. From your workstation you can do something like:
ssh-keygen
ssh-copy-id labadmin@server-ip
You can also see if you have any failed services, etc using the command:
systemctl --failedand also with journalctl with the following:
journalctl -p warning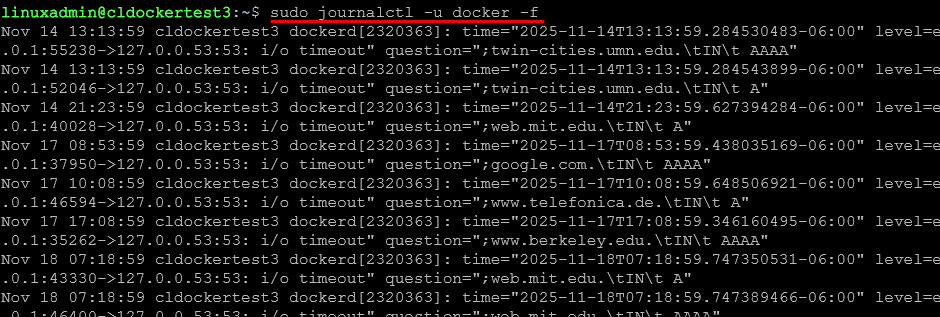
Learn how to install apts using the sudo apt command. Start out with something easy like Nginx:
sudo apt update
sudo apt install nginx
Learn to check your logs from the command line:
journalctl -u nginxWeekend assignment: Install a Linux box in your environment that you have setup and play around with the CLI looking at your networking, configuring services, installing apts, checking ports, logs, etc.
4. Trash a Docker container and learn to troubleshoot it
This is a fun one in my opinion to spin up a Docker container and then try to break it by stopping it, reconfiguring the network, maybe moving the persistent volume location without updating the configuration and learning what these types of problems lead to.
Also, learn what happens when you try to start a container mapped to the same port as another container. Docker can and will complain if you try to run two containers on the same port.
Start learning when and which commands to run for Docker troubleshooting. One of the first commands that I always run in a Docker environment is the following that shows you all running and stopped containers:
docker ps -aProbably my second favorite and used command is the command to view the logs for a specific container which I always do if I’m having issues with a container:
docker logs container-name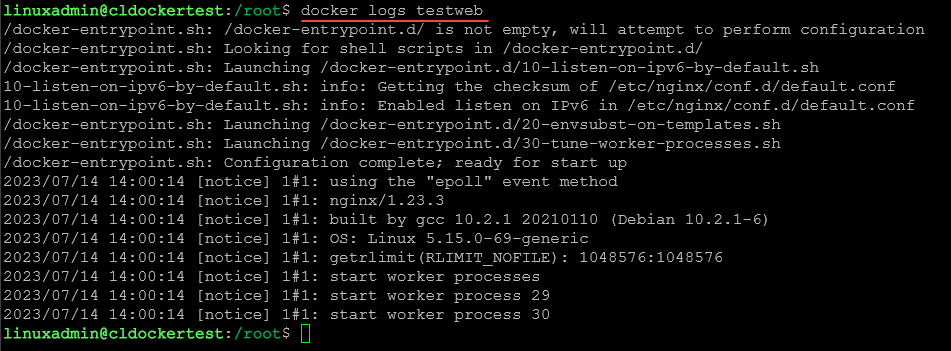
Inspect the container to view configuration settings of the container itself:
docker inspect container-nameYou can also jump inside a docker container to troubleshoot from within the container itself:
docker exec -it container-name shWeekend assignment: Break your docker compose in a couple of different ways and use Docker commands to troubleshoot.
5. Create an oversized VM and learn how to right size it
Oversized VMs is something that most of us are guilty of. It happens. We may create templates that have a certain amount of RAM configured and then clone that out without thinking about it. Sometimes we mistakenly think that adding more resources make a VM faster. But, this isn’t necessarily true. Right sizing things to match your applications is always the best move.
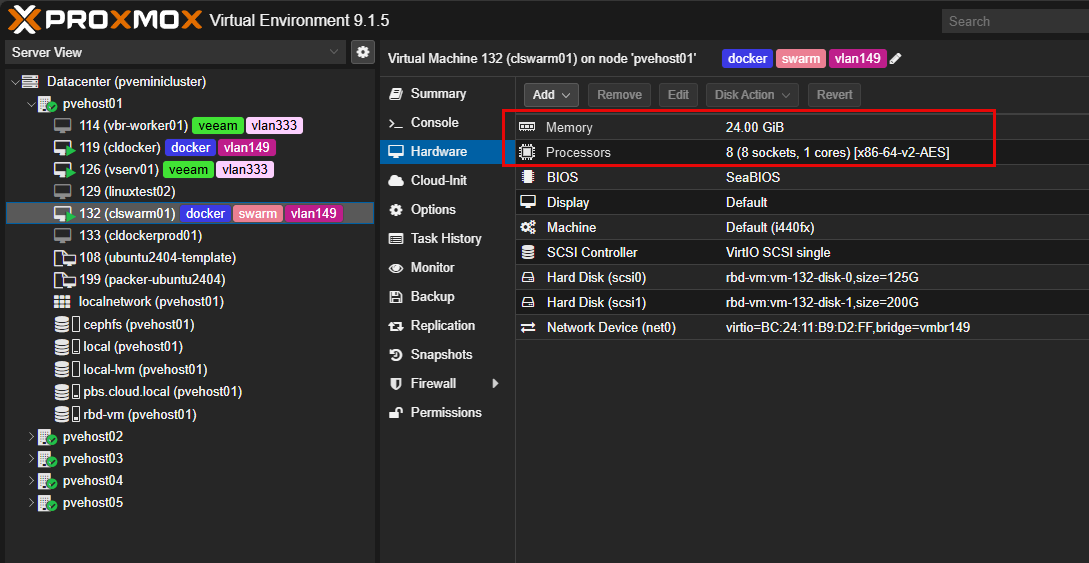
This is a good exercise to go through. Create a VM and intentionally oversize it. Give a very lightweight Linux virtual machine resources that are rediculous for what it is selfhosting. Maybe like 8 vCPUs and 16 GB of RAM.
Then use some of the Linux commands we have already talked about like:
free -hMonitor your CPU:
topOr, you can use something like btop:
btopI like to generate synthetic load to see how things work with something like stress-ng. You can install it with:
sudo apt install stress-ngThen run it with:
stress-ng --cpu 2 --timeout 60sWith this, we are only loading 2 CPUs on purposes. Now compare what the guest shows in your hypervisor. Drop the VM config from 8 vCPUs to something lower like 2 or 4. Then lower its memory to what the workload actually needs and see how it goes.
Weekend assignment: Intentionally oversize one of your VMs and test the resources assigned using stress utilities and see how things work and report in the hypervisor.
6. Build a backup, destroy a test workload, and then actually restore it
Getting more familiar with your backup and restore processes is always a good thing. If you are using Proxmox and have Proxmox Backup Server (PBS) up and running this is one of the most valuable learning projects you can do. Getting comfortable with restoring VMs or specific data from your backup solution and actually seeing that it works is super beneficial.
This learning project has you create a test VM and maybe copy some data to it. Get a backup of it in Proxmox Backup Server or whichever backup solution you are using, and then delete the VM, completely. Then restore the VM from PBS and make sure you see all of your data. Do it a few times. Then a variation of this isn’t to delete the entire VM, but delete some of the files you copied over to the VM. Then restore the files to the VM.
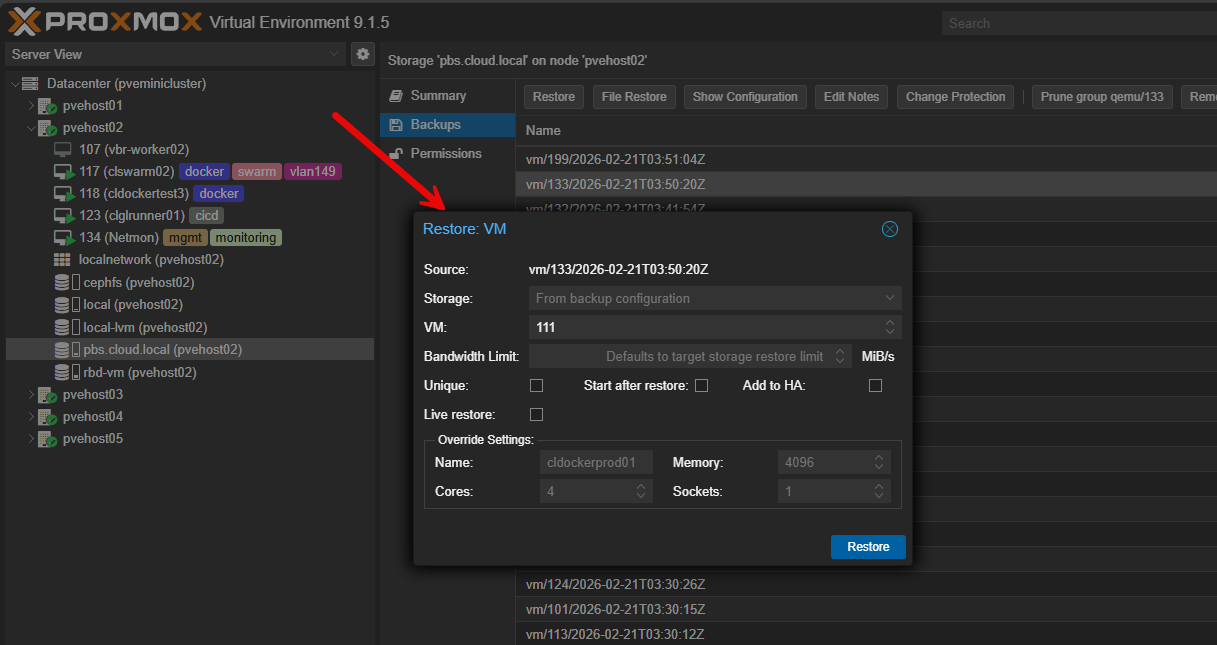
Weekend assignment: Create a test VM, copy some test data to it. Create a backup of the virtual machine, then delete the VM. Restore it from backup both as a full VM restore and also granular files restore.
7. Automate something that saves you time
Most of us have “a” process that we typically may do over and over again in the home lab and we tend to do this manually. Is it updating your container images? Is it applying system updates to Linux or Windows servers? Maybe it is cleaning up disk space on docker hosts.
The last learning project on the list is to pick a task that you typically do manually and automate it. There are tons of automation tools out there that can help you perform tasks in an automated way. Ansible is one that usually comes to my mind first, especially for many of the system tasks we mentioned above. It is fairly simple to get started and it is “agentless”, so much less lifecycle management with Ansible than other platforms.
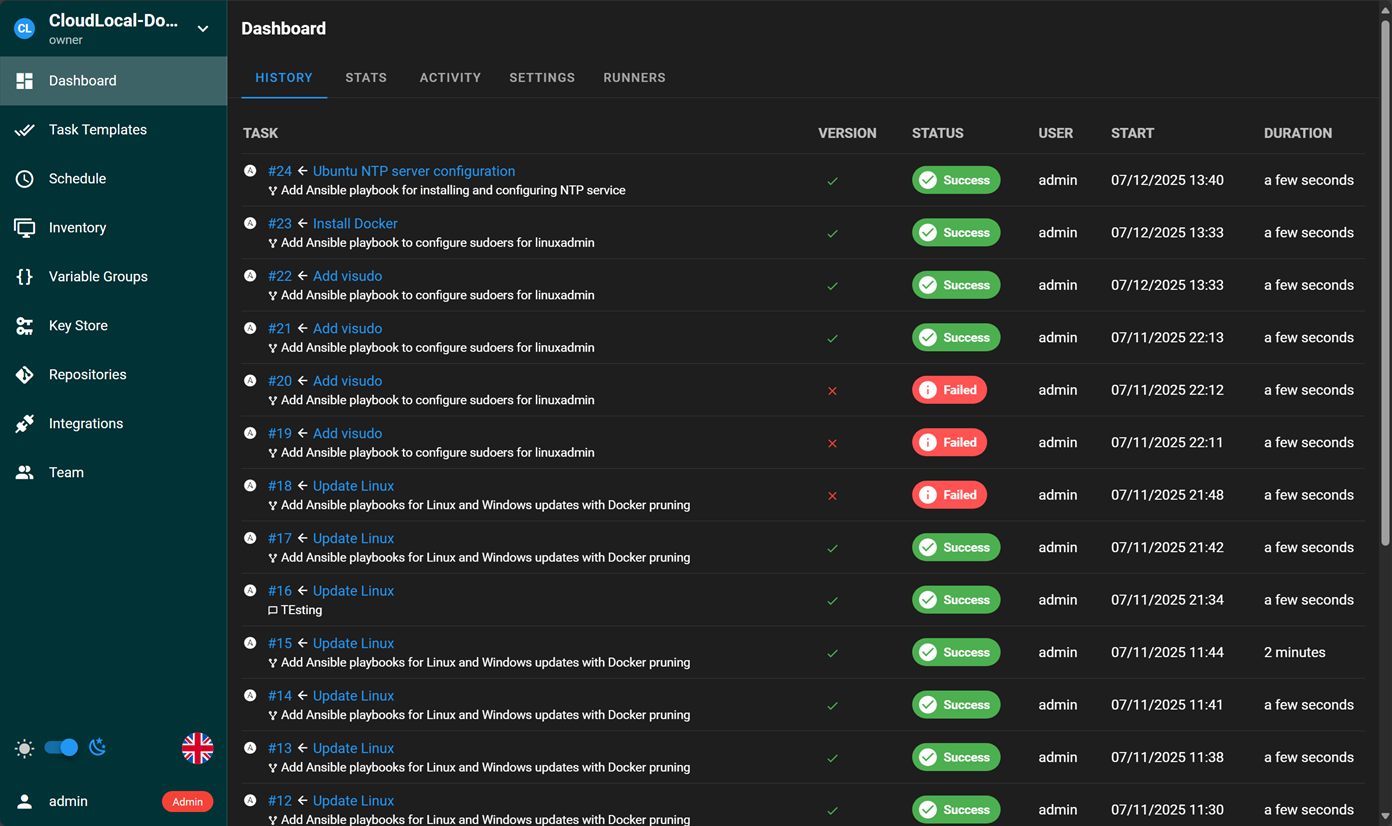
Create an inventory of your servers in Ansible:
[linux]
server01
server02
server03
Test connectivity from Ansible to the servers in your playbooks:
ansible linux -m pingOnce that works, run something simple across your servers. Something like the Linux command below:
ansible linux -a "df -h"This helps you get a feel for the workflow with Ansible and how it is able to perform commands across a fleet of Linux servers and do this in an efficient way.
Weekend assignment: Look for a task that you do by hand. Then automate that task, maybe using a test VM at first to play around with. Document the process and store your automation code in Git.
Wrapping up your best classrom
As you think about your learning journey in the home lab the rest of this year, projects focused on specific skills and tasks are often the best. They solve a real problem in your own home lab and they teach you skills you can apply to much bigger environments in your day job. One of the things I love about these as well is they save you time in the long run. The more proficient we are at troubleshooting and automation, the faster we can find root cause issues and move on with our day. What about you? Are you tackling any projects similar to these for your learning? Let us know in the comments.
More in this topic



Google is updating how articles are shown. Don’t miss our leading home lab and tech content, written by humans, by setting Virtualization Howto as a preferred source.
About The Author

Thank you for this article I get enough garbage posts about 25 things to do with my homelab and I never see a purpose so thank you for this. It will actually teach me how do create break understand and fix things.
Tim,
I really appreciate the kind words! Thank you again and enjoy your learning!
Brandon