


With all of the news lately with Portainer and a change of direction, many are revisiting which container management tool they are using in the home lab. There are definitely some great alternatives and options out there so I think this is at least a great time to make changes with all the options. One of the frontrunners with chatter in the community for Docker management in the home lab is a tool called Dockhand. I wrote about Dockhand at the first of this year where I covered installation, authentication, Docker management, and other settings. But, there is a capability of Dockhand that I think is a setting you should turn on in your home lab. That is image scanning and tying your image scanning to updates. Let’s see what Dockhand vulnerability scanning is and how it works.
Keeping your images updated is good but not the same as Security Scan
You definitely want to keep your Docker container images updated in your home lab environment. This helps to keep things running smoothly and does help with vulnerabilities that are known. As your container count grows in your home lab environment though, this can become a project in and of itself. If you are like me, you probably have dozens of containers running including reverse proxies, dashboards, monitoring tools, and other services.
All of these have their own releases that happen on different schedules, etc. When you have some type of update checker, this helps to keep things updated when a container image digest changes. But, this only tells you that the image is different. It doesn’t really tell us if the packages inside the image have less known security problems.
This is where tools that offer container vulnerability scanning to look at the components found in an image and compare them with known vulnerability data. This helps to give you really good information about the container image and what it contains, like:
- Affected packages
- Severity
- Fixed versions
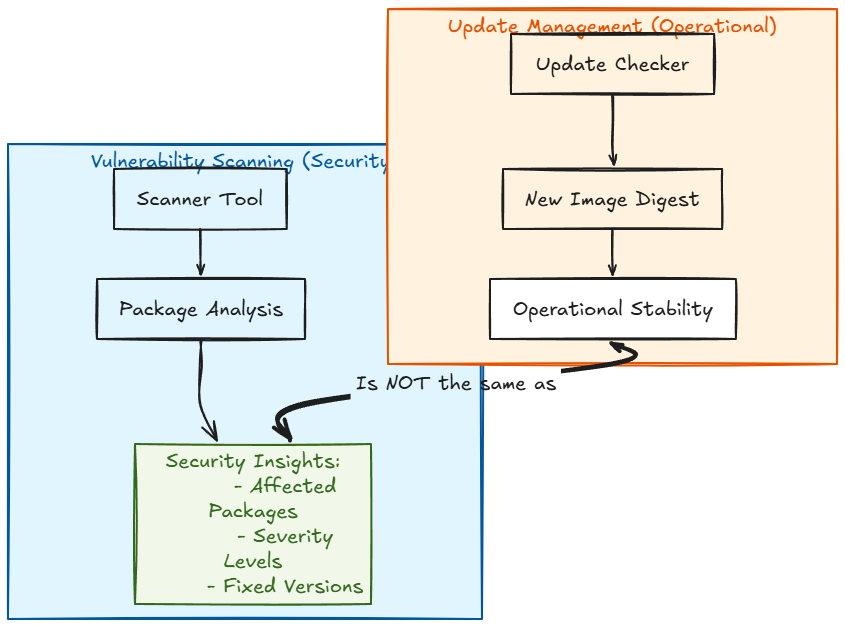
It isn’t a complete security assessment by any stretch but scanning your container images is one of the layers of the “security onion” that we all need to think about. And, importantly, even in our home labs, do we have a way to tie our updates and whether or not we accept a new image to the risk threshold that we want to have there?
Dockhand security scanning of your Docker environment
This is where Dockhand has a really great feature that we can take advantage of to do a lot of the heavy lifting for security scanning of container images in the environment. One of the first things to do is setup your environment in Dockhand. This is what it refers to the Docker hosts that you add for management.
Navigate to Settings > Environments and select the Docker environment I want to protect. Dockhand has the normal types of connectivity options here where you can add endpoints. You can directly speak to the Docker socket, or you can install the normal agent or edge agent to listen for incoming connections to your Docker host.
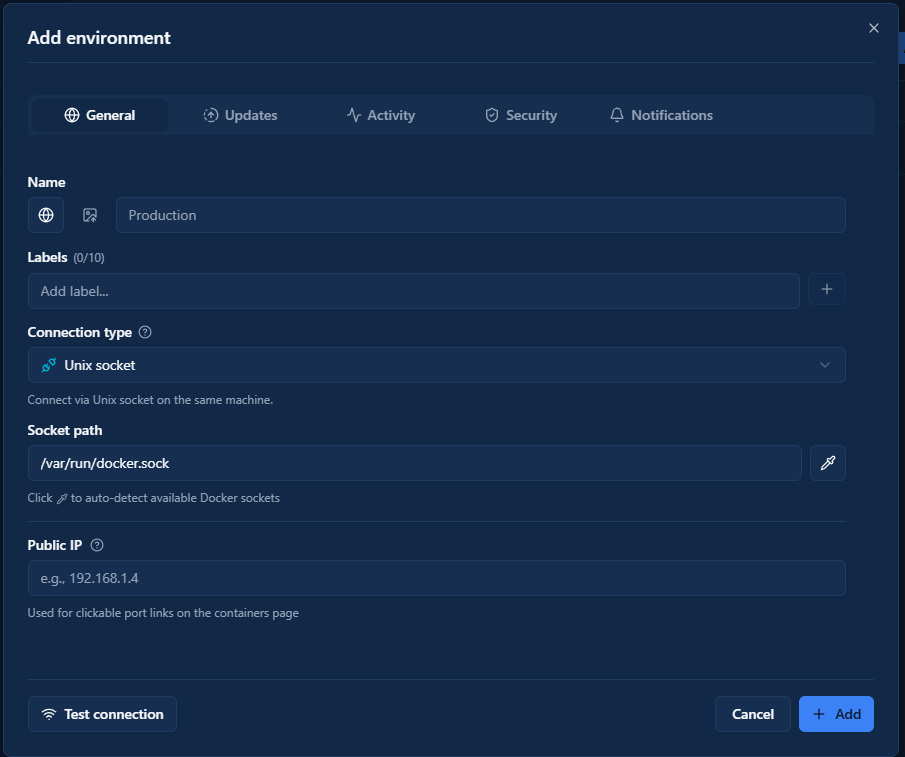
Here is where it starts to get more interesting. Dockhand builds in really good integraton on Security scanning for your containers. Under the Security tab for your “environment” Docker host, you can setup security scanning for your container images.
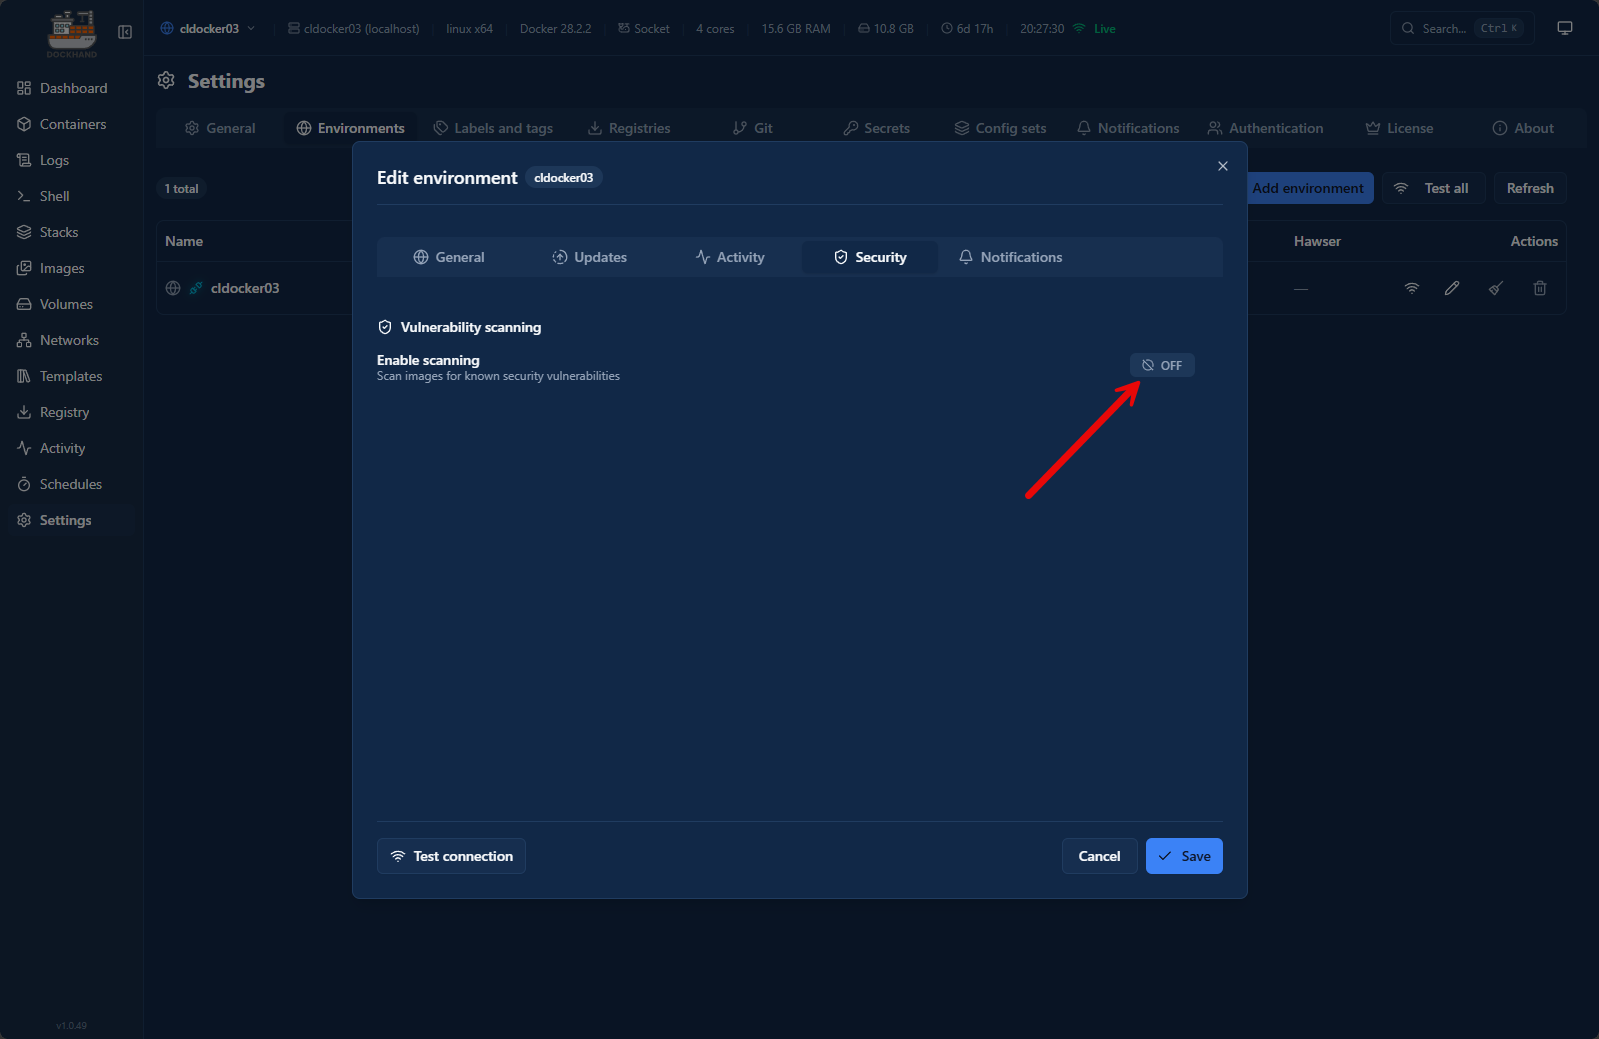
On this configuration page, you can set it to None, Grype, Trivy, or Both.
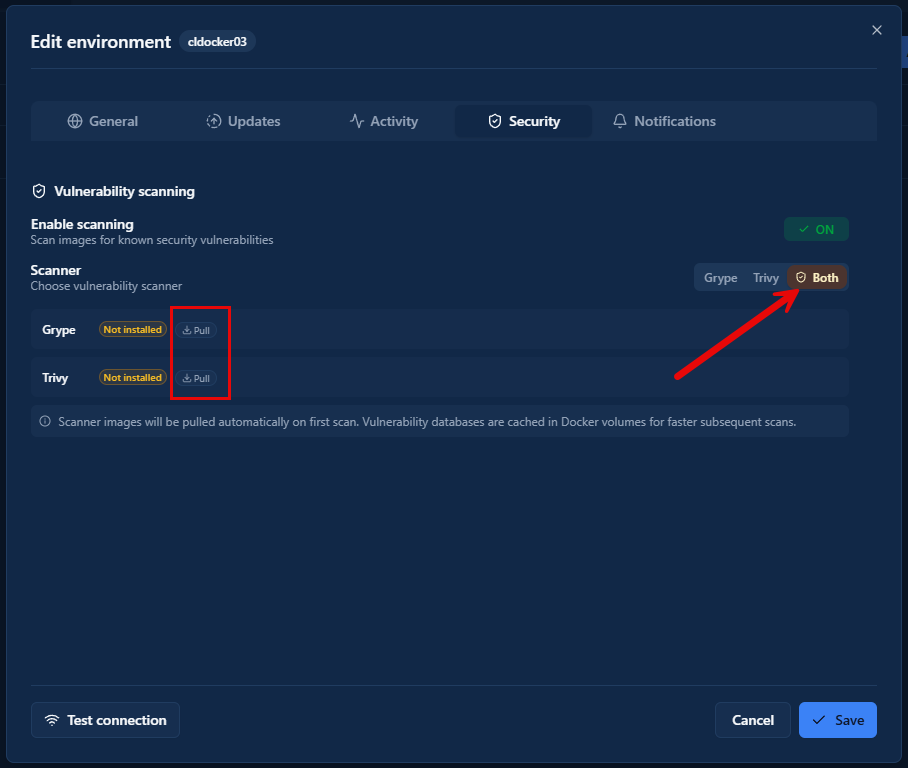
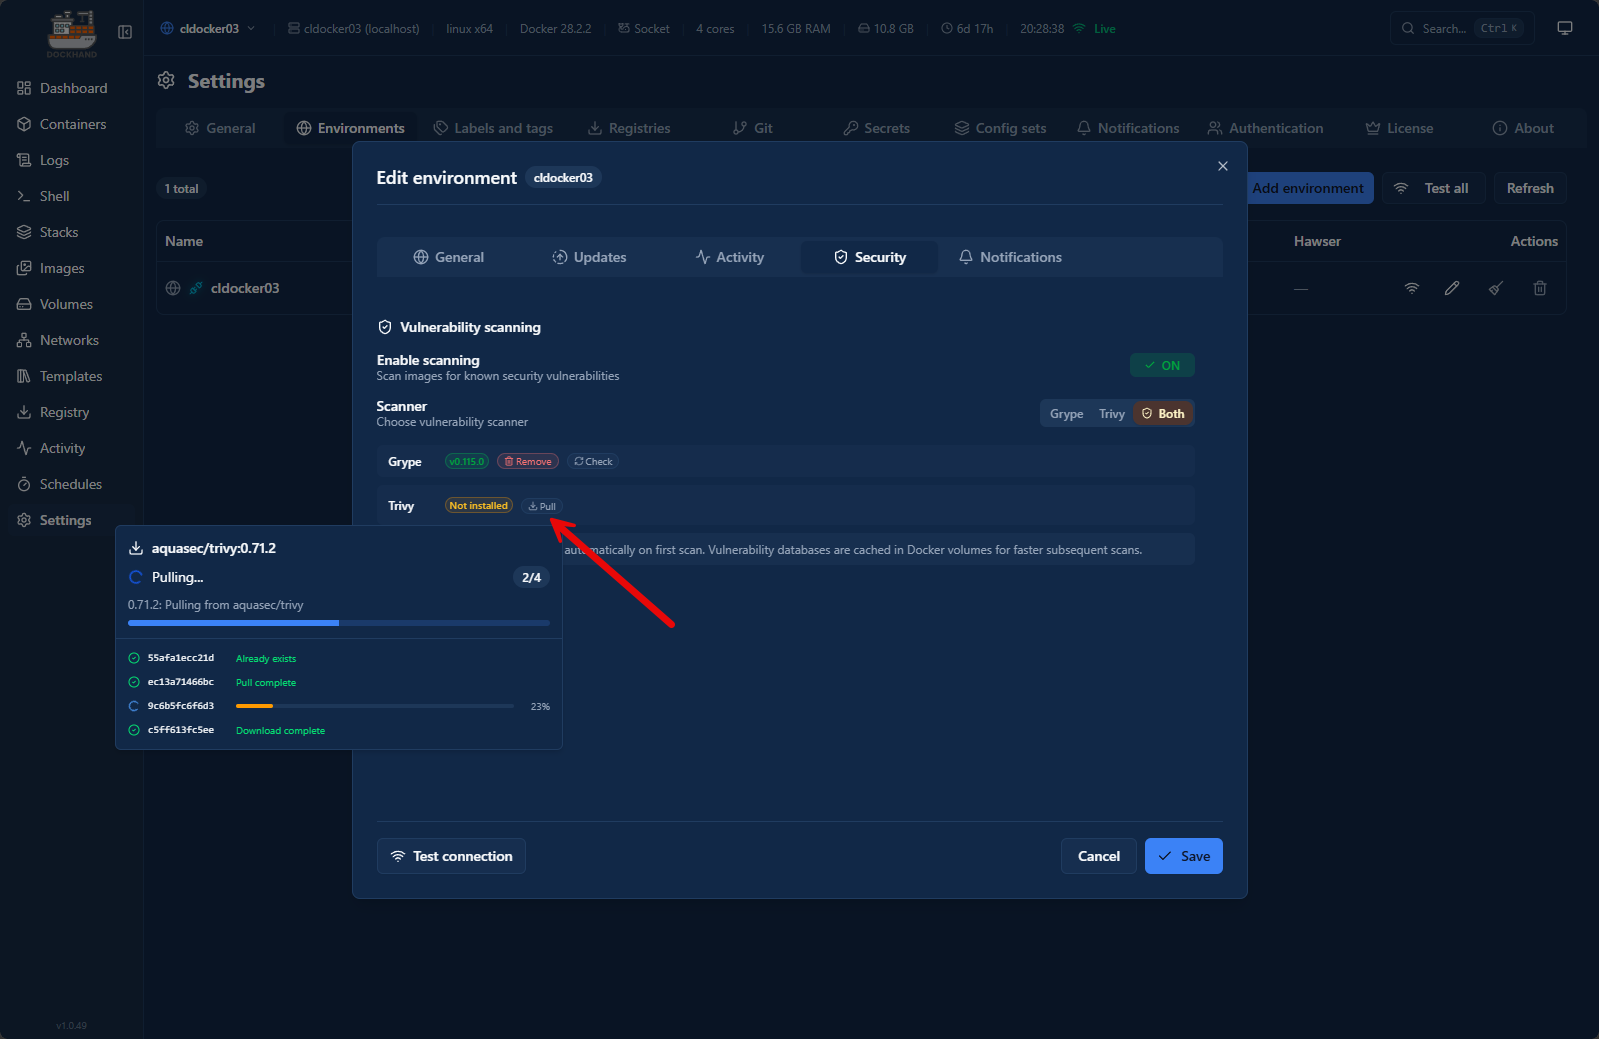
Here, due to licensing for those solutions, Dockhand has you manually pull down the images for those containers. Click the “pull” next to the security solution you want to use here. I am pulling down both.
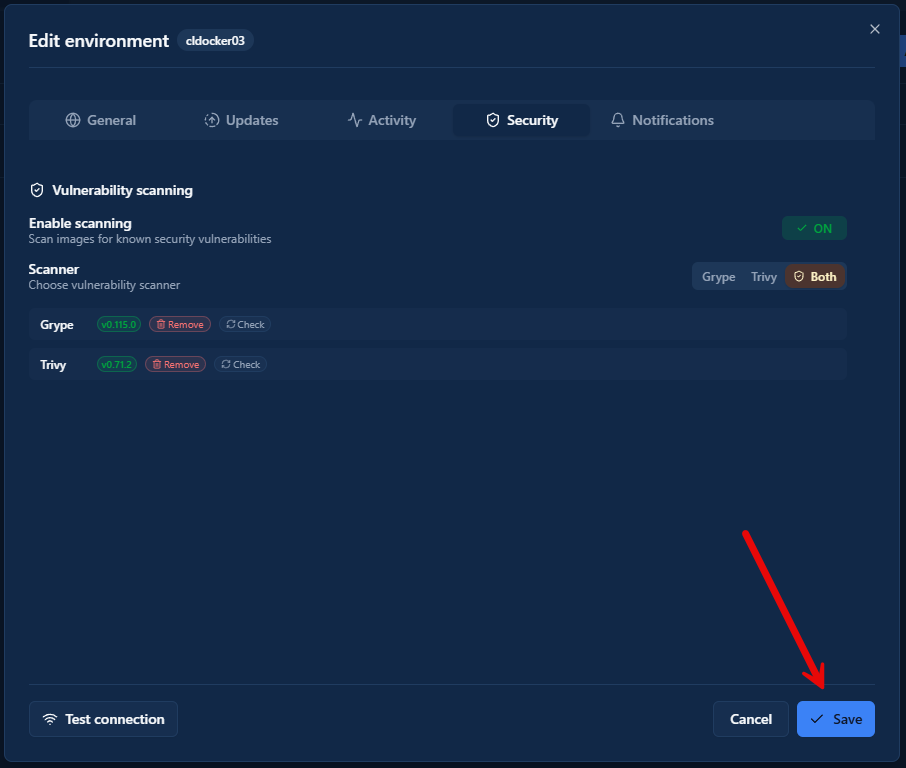
After pulling the images down, just click the Save button.
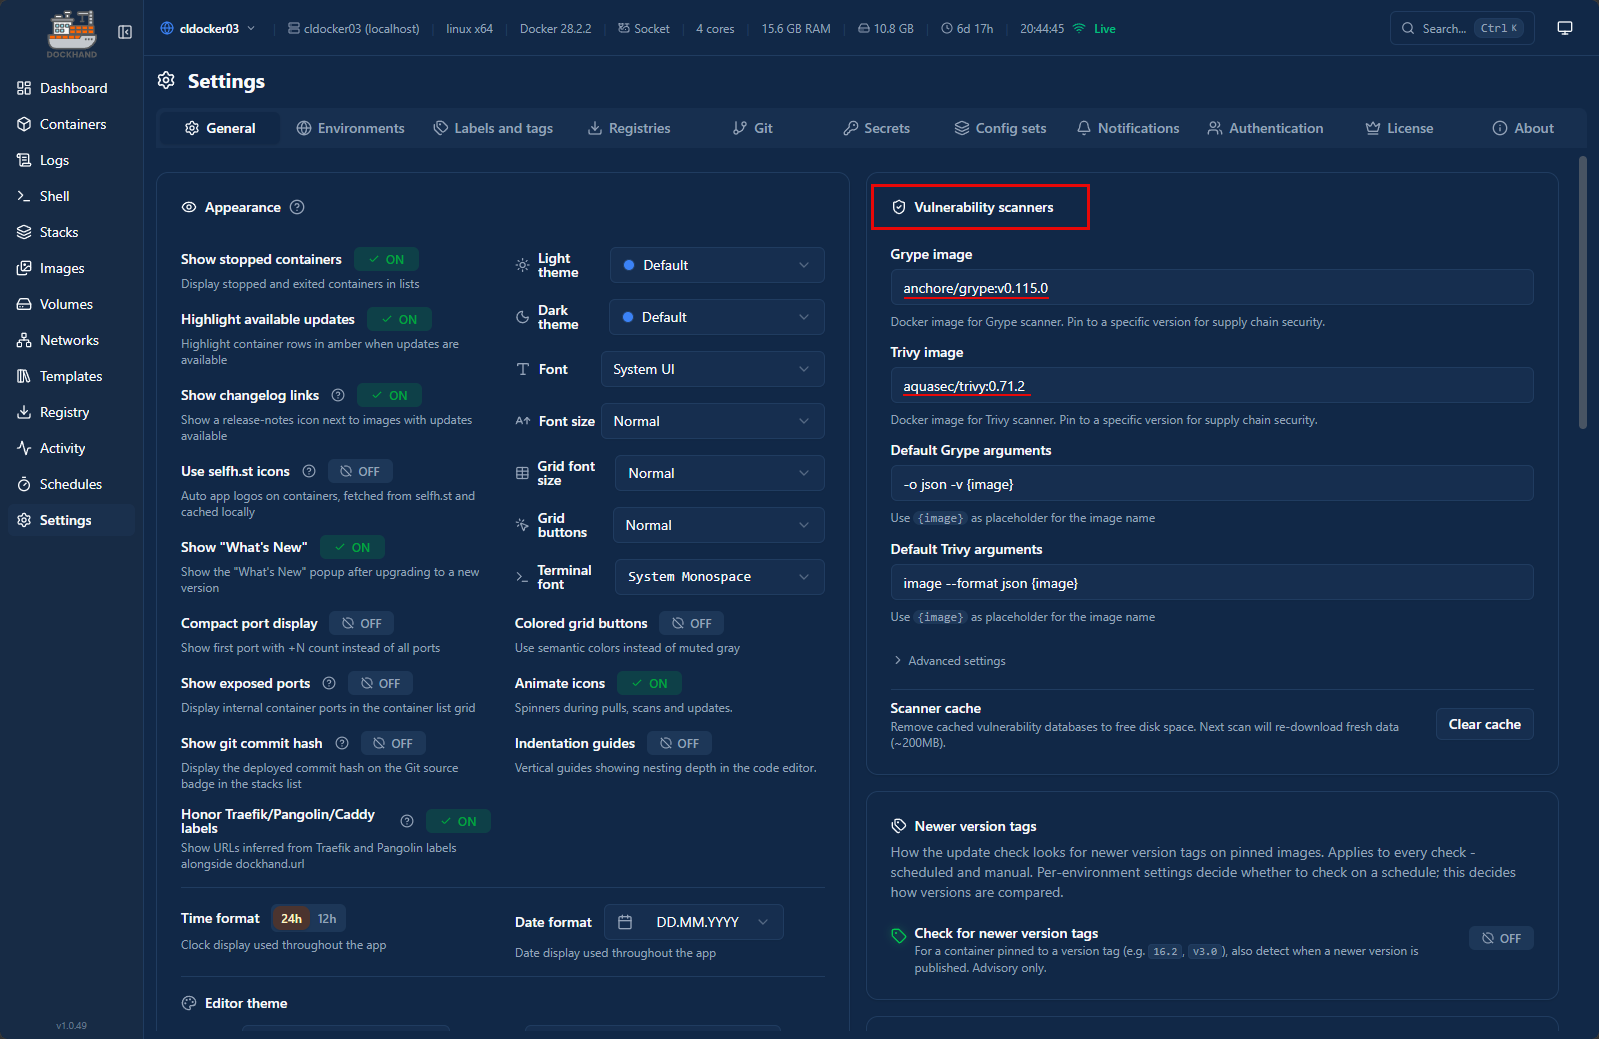
As a note here, you can also set Dockhand vulnerability scanning image defaults you want to use. You can find the defaults for the images, etc, under the Settings > General area under the global settings found in Dockhand.
Manually scanning container images
You can also manually scan container images if you want by opening the Images menu. On that screen, under Actions, you will see the little shield icon. Click this to launch an ad-hoc security scan of a container image.
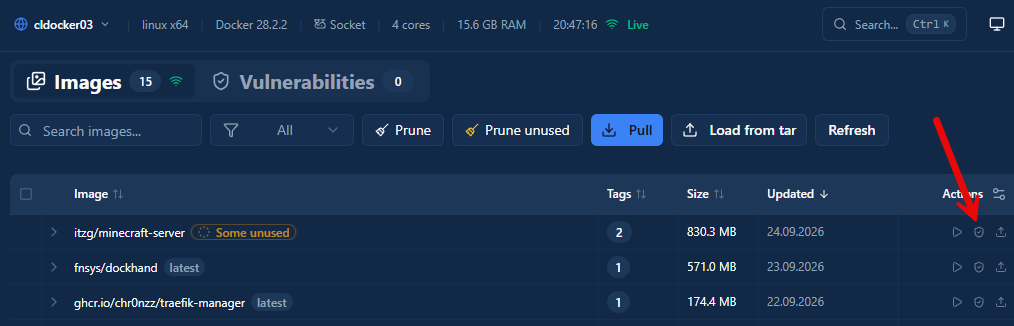
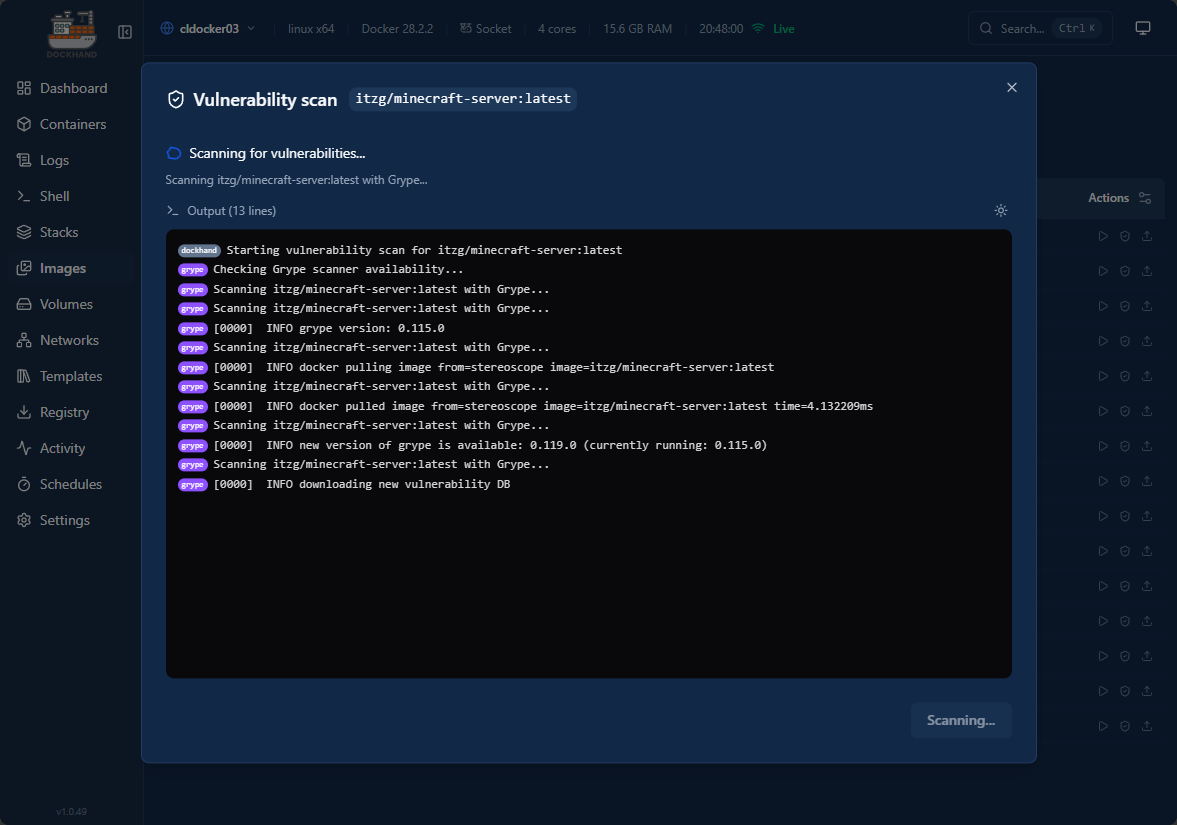
This will kick off the ad-hoc vulnerability scan. You will see the security solutions kick off and begin their scans of the specified container image.
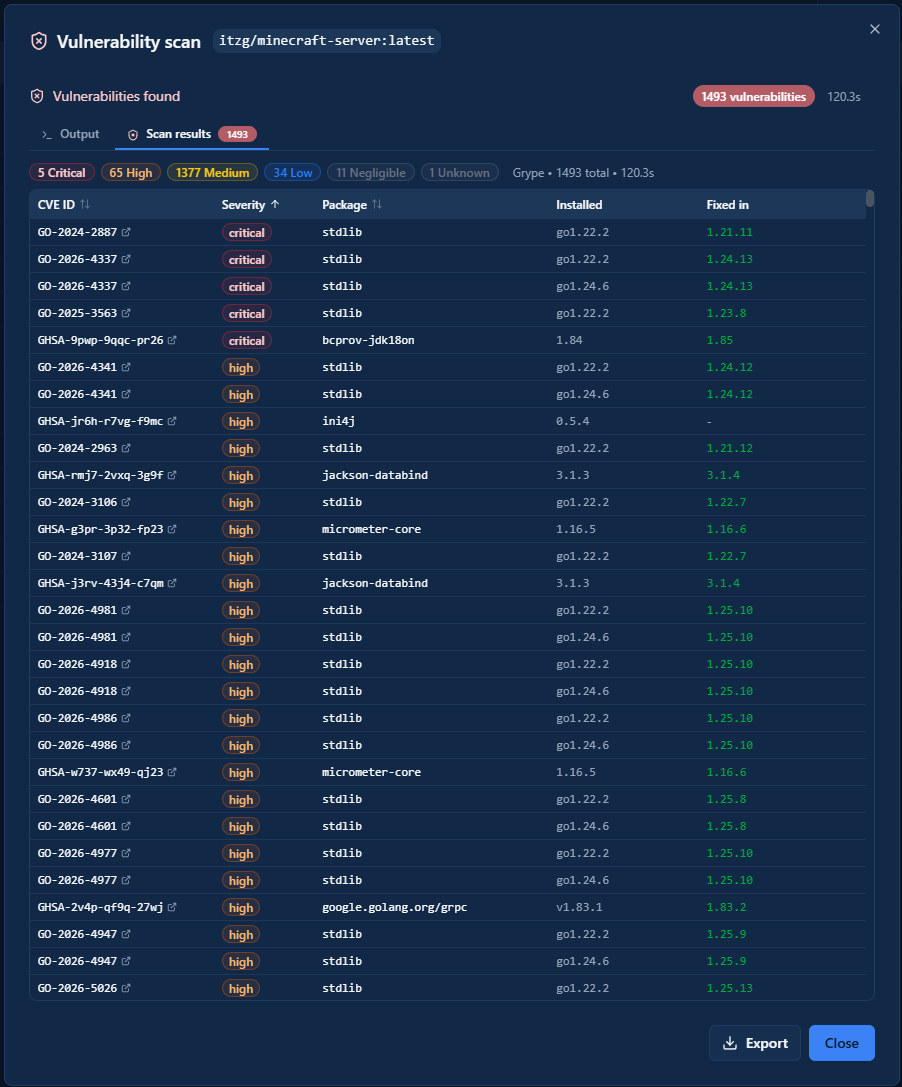
Once it completes, it will give you a summary screen of all the vulnerabilities that it found in the container image. Scanning your container images with Dockhand vulnerability scanning can be pretty eye-opening. Who knew an innocent little Minecraft server could have so many vulnerabilities?
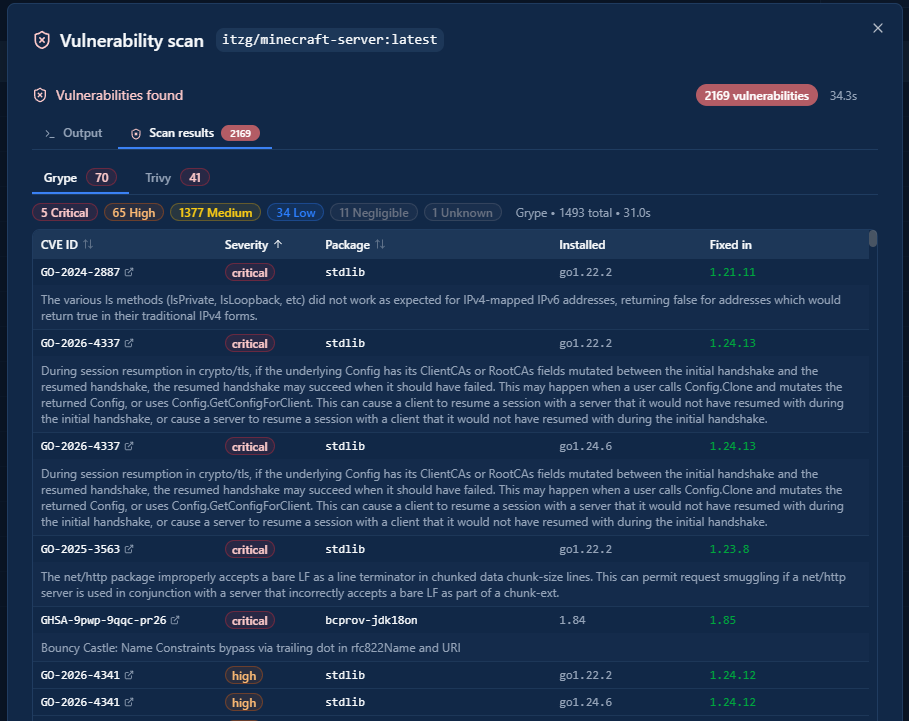
We can also expand the vulnerabilities found on this screen to get more details on the specific security details and how these can be exploited.
Exporting results
Another handy feature that you have with Dockhand is the ability to export the reults into multiple formats. You can use this to create reports, or to feed into another automated security workflow of some sort that can give you more control over various things.
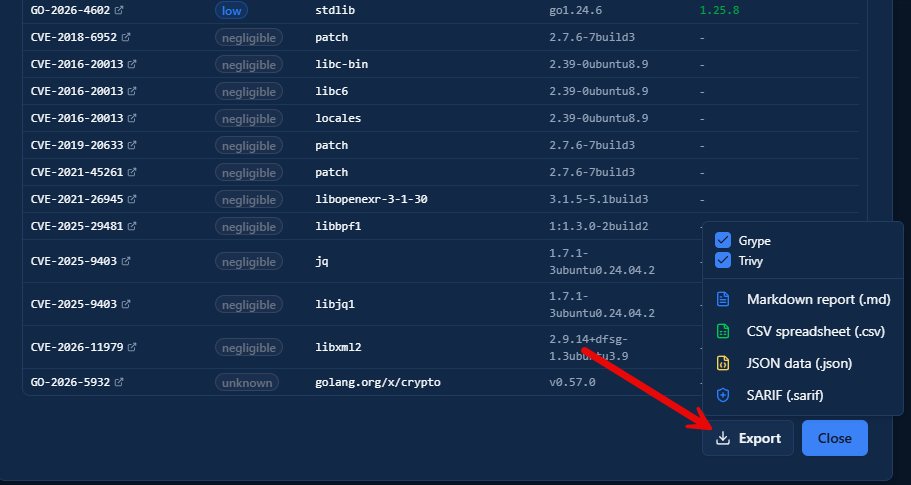
You can feed the .sarif reports into something like DefectDojo for application security posture management which would be a great project for a home lab.
Performance impacts to using this?
You may wonder if there are any impacts to running the vulnerability scans. There can be, but all in all, these should be fairly minimal. One thing to mention, the scanner images may need to be downloaded when first used. We have already seen that in the setup screenshots. Also, on a smaller Docker host, I would run the first scan at a time when a short burst of disk and CPU activity is acceptable.
Blocking updates that meet a certain risk score
This is the part that I find to be extremely useful and exciting when it comes to vulnerability management in your home lab with your Docker containers. Dockhand has built in the ability to gate your updates based on the vulnerability risk score that you accept for your updates.
To take a look at this functionality, under the Environments configuration for your container host, you click Updates. By default the automated updates for container images is turned off as you can see in the screenshot below. But we see the option for:
- Enable scheduled update check
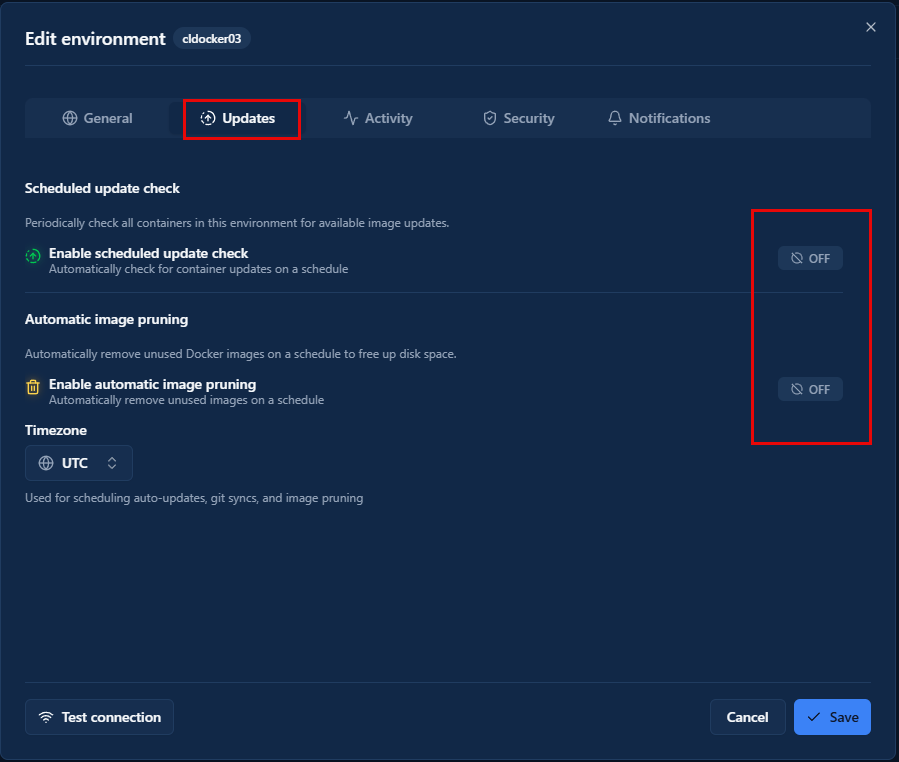
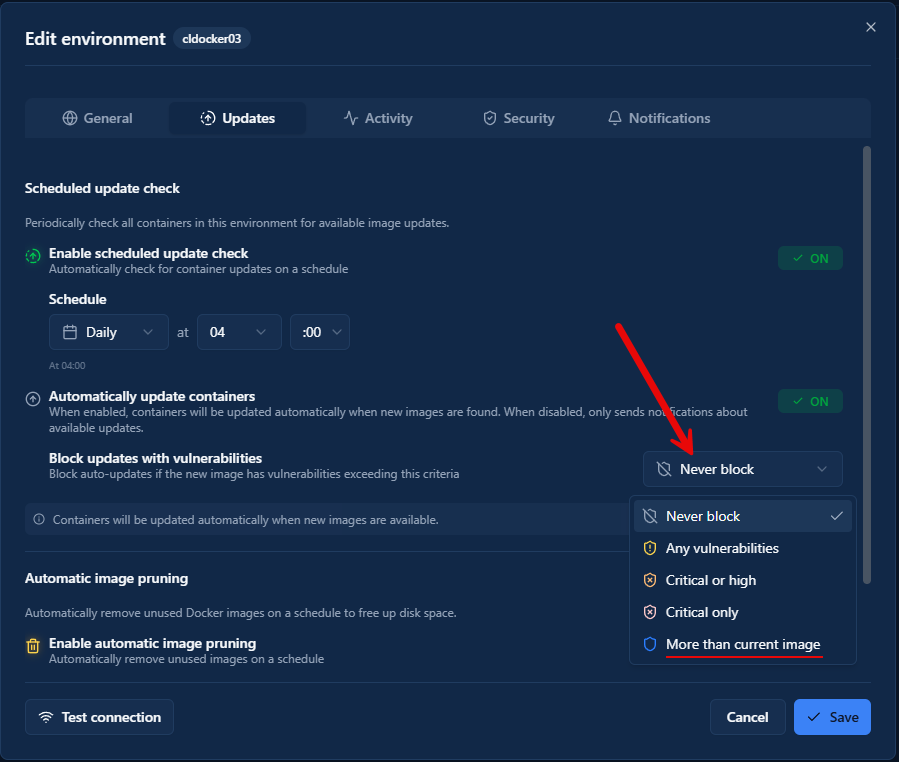
Once you toggle on the Enable scheduled update check you will see the option for Automatically update containers which we can flag to ON. But the most interesting option is below that. We can use the Block updates with vulnerabilities. This setting has the following options:
- Never block – This allows you to still have visibility with security scanning but not block deployments regardless
- Any vulnerabilities – Probably not realistic in most labs as there are going to be some type of vulnerabilities with most container images. If there is a single vulnerability this will block deployment.
- Critical or high – This blocks a candidate with findings at either of those severity levels and is pretty sensible
- Critical only – This permits high-severity findings and may be useful if you have a service where you want updates to keep happening and only stop if they are critical
- More than current image – It compares the total number of critical, high, medium, and low findings with the current running container and blocks if the new image has more
These are pretty self-explanatory as to what they do. But, I think they give us a wide range of options to decide on the risk profile for docker image updates. I really like the bottom option as well which is to block images that have More than current image vulnerabilities. So updated images are supposed to fix vulnerabilities. But, this setting makes sure that if there are more in the “updated” image, it won’t pull it.
Thoughts on how to use this
I think this is a great feature to add to your home lab. If you have been running containers in your home lab and haven’t given much attention to security scanning, this can be eye opening. It is a great way to take your security skills and also your visibility to the next level.
One shortcoming that I would like to see added with Dockhand is to have the ability to set the level of “blocking” in a granular way. I might want certain services to be especially restrictive in the vulnerabilities I allow in the lab. Whereas other services I might just want visibility on those. As far as I could tell, you can only set this level at the “environment” level which basically sets this for ALL containers running on a specific host. This would be an improvement I think that would be a nice feature.
Wrapping up
If you have already pivoted to using Dockhand in your home lab as an alternative to something like Portainer, this feature is one that is easy to miss, but is definitely worth the time and attention to understanding what it can do and how it can help improve the security of your containers running in your environment. Just having that visibility is eye opening and helps to understand risks that you would be blind to otherwise. How about you? Are you using Dockhand? Is this a feature you are actively using in your home lab? Let me know what settings you have settled on.
More in this topic

Google is updating how articles are shown. Don’t miss our leading home lab and tech content, written by humans, by setting Virtualization Howto as a preferred source.
About The Author
