I am always looking at solutions that can be considered as serious platforms for not only self-hosted solutions but also for production environments. In looking at what is out there, lately there is a name that is coming up more often and that is a solution from Canonical, called Microcloud. Canonical has quietly built a platform that combines virtualization, containers, software-defined networking, and distributed storage into a single private cloud stack that you can deploy in the home lab totally free. It approaches infrastructure differently than many of the tools we are familiar with. Rather than focusing on traditional virtualization first, it focuses on building a cloud environment from the ground up. Let’s take a look at Microcloud and why I think it is a strong contender in the home lab and even production space.
What is MicroCloud?
MicroCloud is Canonical’s lightweight private cloud platform. So, instead of requiring administrators to assemble a lot of different infrastructure components and put these together manually, MicroCloud combines several Canonical projects into a unified deployment workflow that makes standing it up super easy as we will see..
What components are included in Microcloud?
- LXD – for virtual machines and system containers
- MicroCeph – for distributed storage
- MicroOVN – for software-defined networking
- Ubuntu – as the underlying operating system
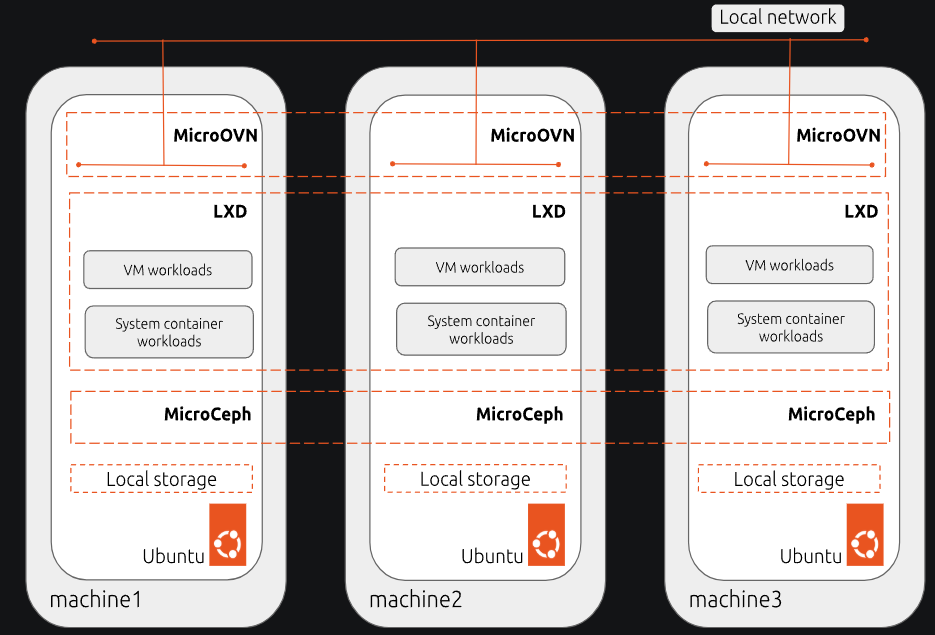
The goal of the project is to provide a cloud-like experience using a small number of servers while it lets you avoid much of the complexity around large and complex private cloud deployments. One of the most interesting distinctions when you compare MicroCloud to other solutions out there, it is not trying to be a hypervisor. It is trying to be a complete infrastructure platform.
That distinction matters. When most home labbers think about infrastructure, they often start with a hypervisor and then add storage, networking, clustering, backups, and automation later. MicroCloud starts from the opposite direction. It assumes you want all those components working together from the beginning, which is nice so you don’t have to circle back around to bolt things on later.
Installing MicroCloud
Let’s now look at the steps for installing MicroCloud to see what this involves. First, you will use the following command to install all the needed components on EVERY microcloud node that you plan to add to the cluster:
sudo snap install microcloud lxd microceph microovn
Next, you need to initialize the MicroCloud cluster. To do that, run the command:
sudo microcloud init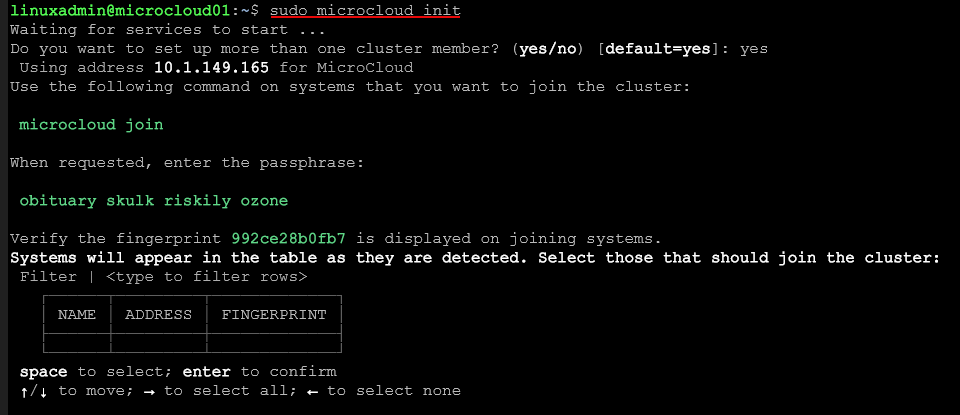
Joining cluster nodes in MicroCloud
The next step is joining your cluster nodes in MicroCloud. We can do that with the command on the other nodes:
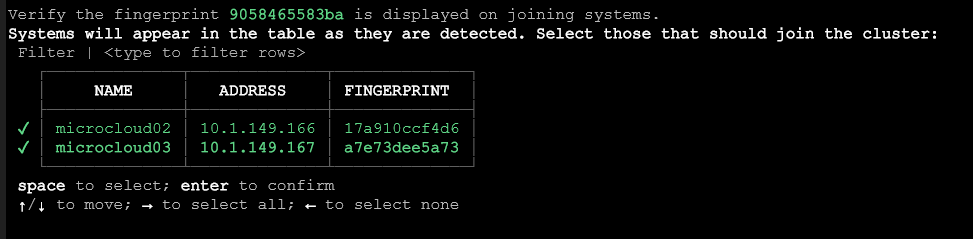
sudo microcloud joinYou will use the join passphrase that is displayed on the first node that you ran the microcloud init command on.
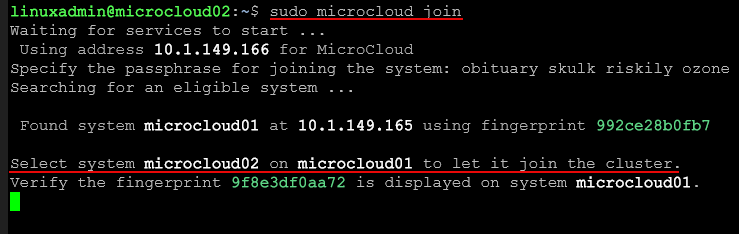
Select both of the nodes using the SPACE bar and then press ENTER to confirm.
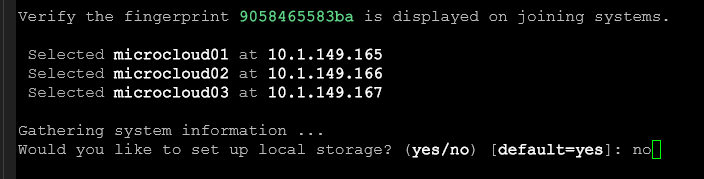
Now, we should see all three nodes (I am installing 3 but you will see the number you are installing here). Note the next question and configuration is Would you like to set up local storage? (yes/no). Here I am answering no. I want to use another disk that I have provisioned on my MicroCloud cluster nodes for distributed storage, not local storage.
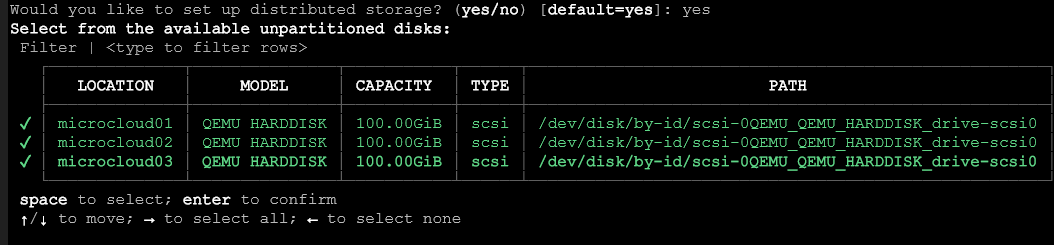
Here is what that screen (next screen) looks like after the local storage question. We answer yes to the Would you like to set up distrubuted storage? (yes/no).
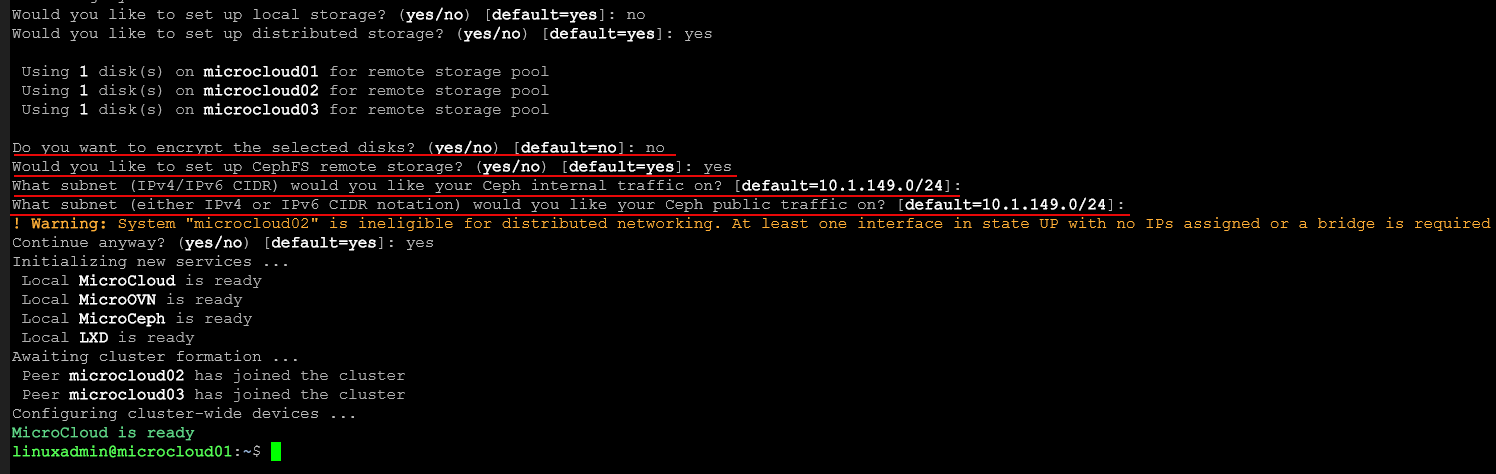
Below, I am finishing out the MicroCloud cluster configuration by answering the questions that are presented. These include networking questions around the public and private Ceph networks.
To view the LXD nodes and also access the MicroCloud UI which is functionally the same as the LXD UI, you can run the command:
sudo lxc cluster listNow, to manage your MicroCloud environment, you can navigate to these links on any of your nodes there. As you can see, you can access this on port:
https://<node IP or FQDN>:8443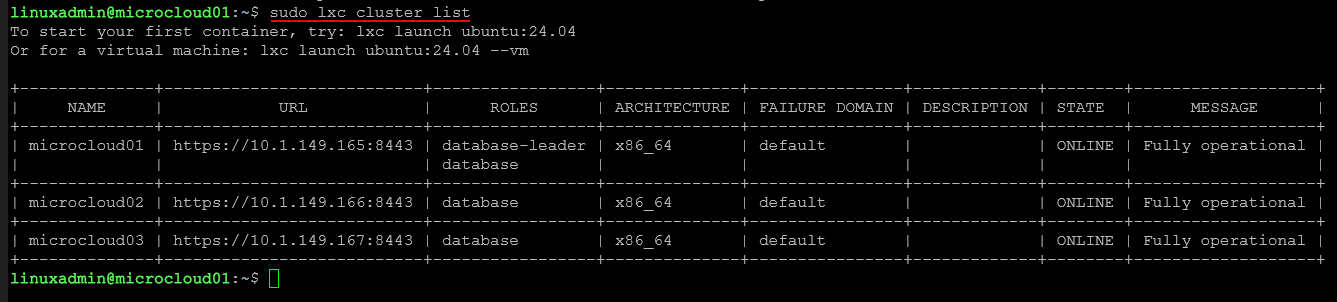
Requirements for logging in are special
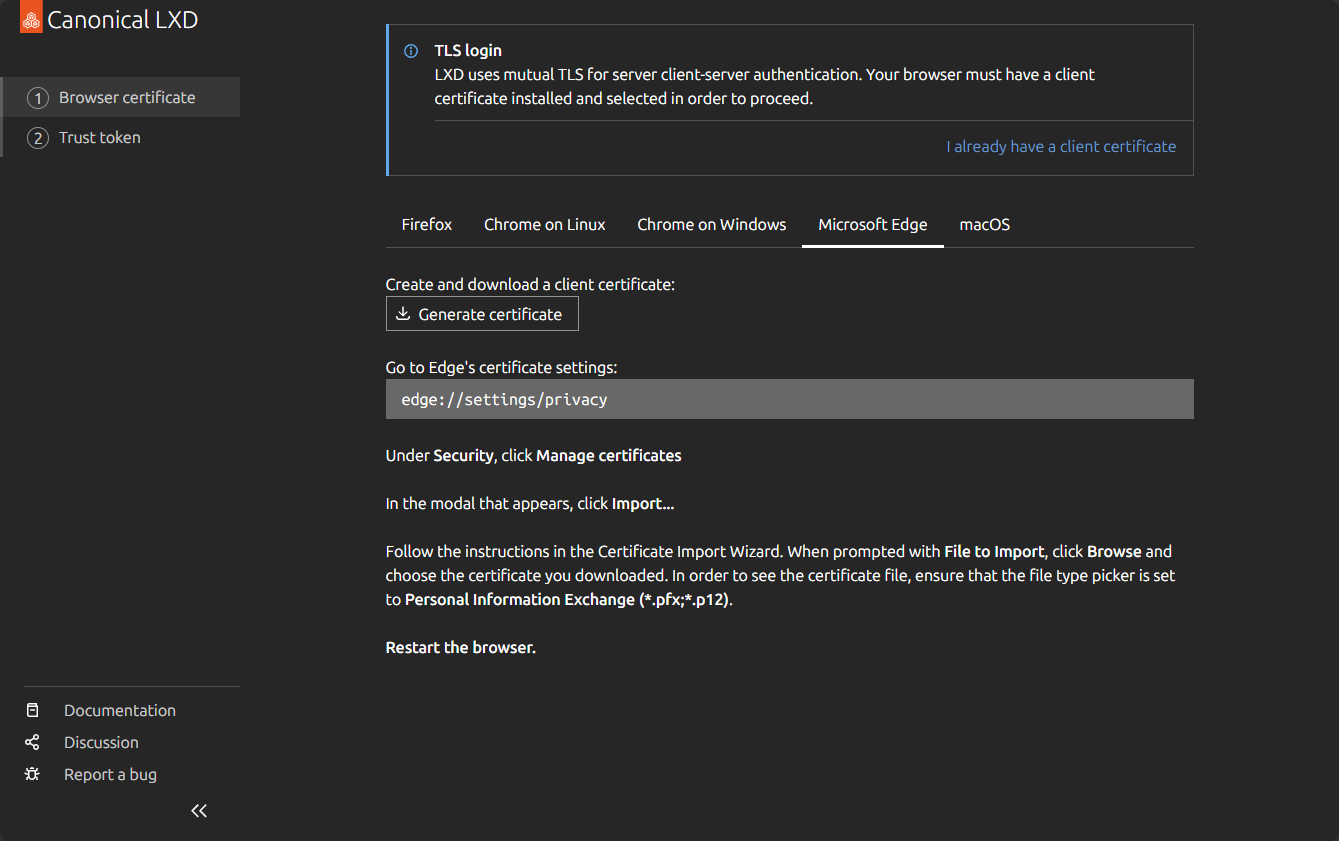
Now, to be able to access the LXD UI, the login requirements are a bit specialized since it uses mutual TLS for server client-server authentication. So, your browser must have a client certificate installed and selected to proceed with authentication. When you access the LXD port, it will ask you to validate your TLS certificate.
It will autodetect the browser you are using. Here I am on Microsoft Edge. Click the Generate certificate button to download the .PFX certificate you will need to access your LXD UI.
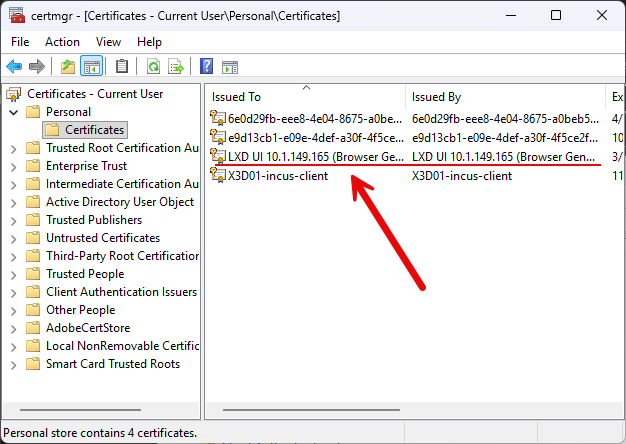
Import the .PFX certificate into the Current User > Personal > Certificates folder.
If you get asked to also validate using a token after you have selected your certificate in the browser session, you can generate the token it needs with the following command:
sudo lxc auth identity create tls/lxd-ui --group admins
After you validate the token, you will choose which certificate you want to use to authenticate. Here I am choosing the LXD UI certificate imported with the PFX:
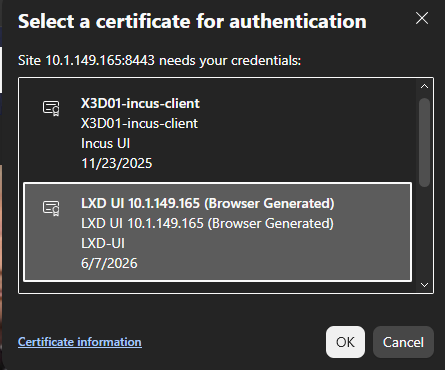
After validating your certificate and choosing it for login, you will be taken to the LXD UI.
Microcloud operations
Below, you can see the storage view where you see the Ceph and CephFS storage in the cluster.

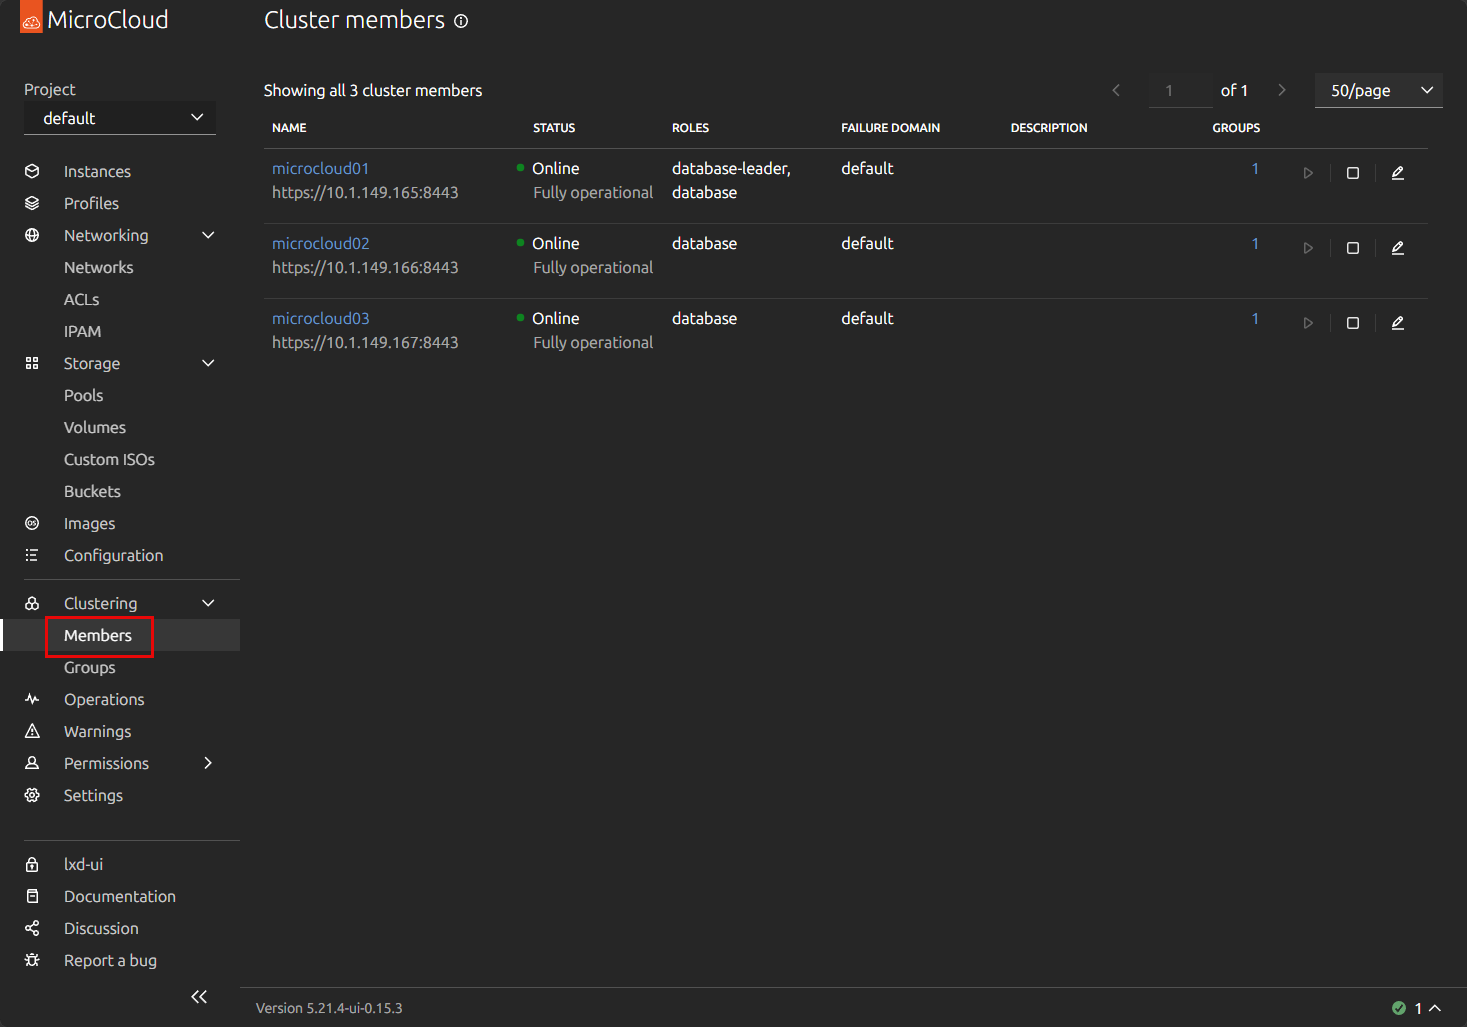
You can click on the Members menu option and you will see all the available cluster members in the MicroCloud cluster.
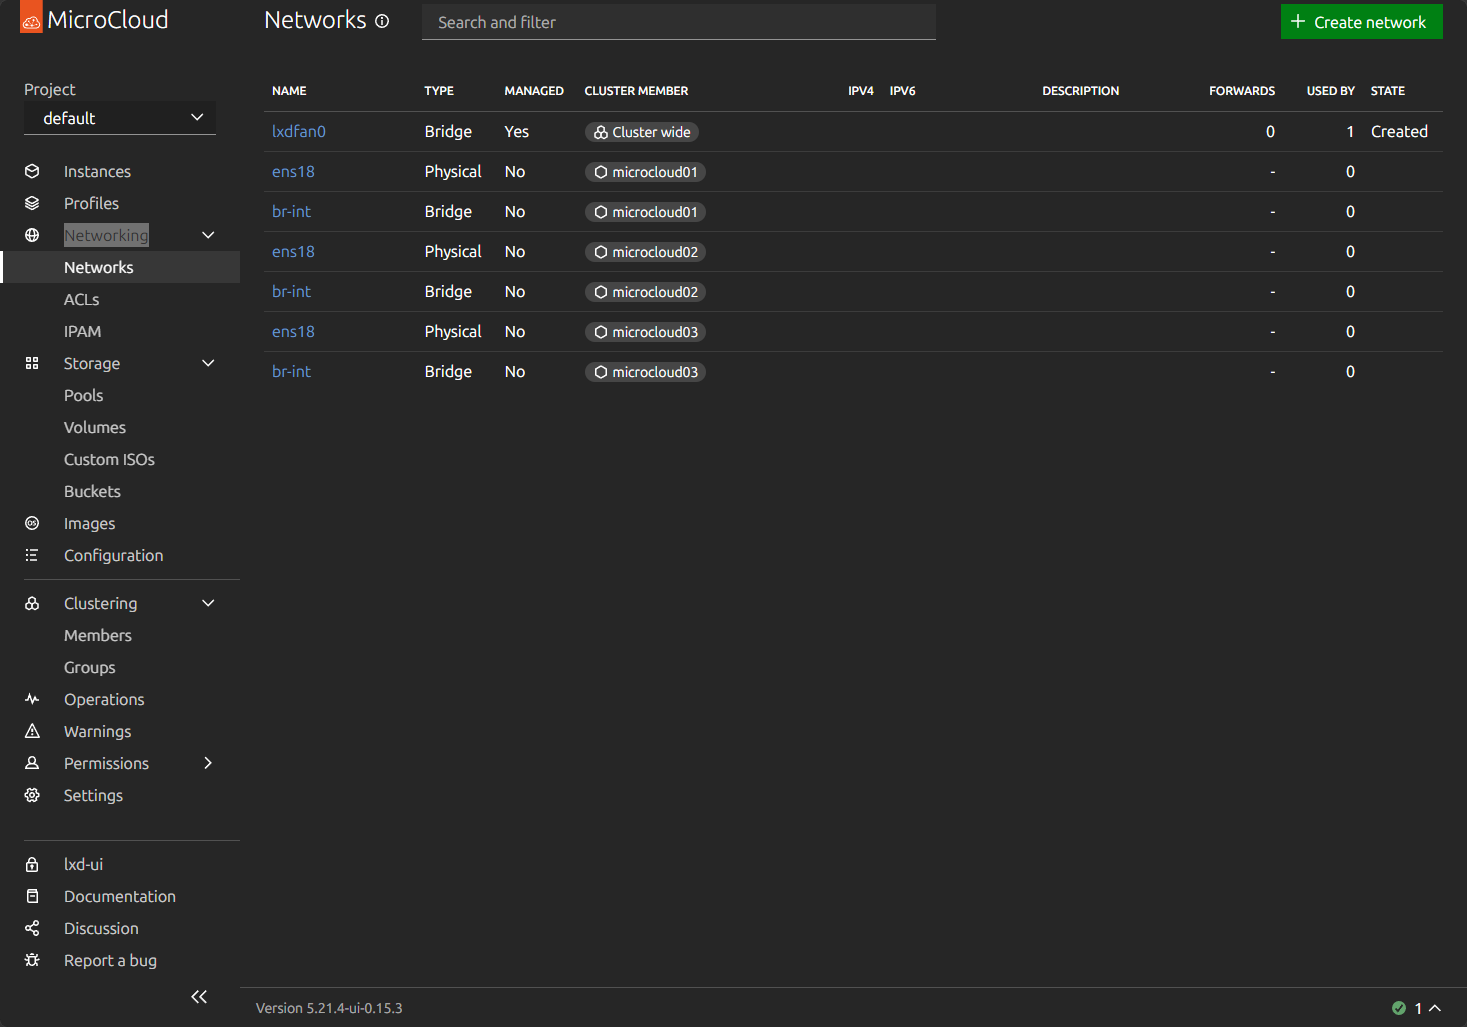
The Networking menu shows you all the available networks and their configurations.
Uploading an ISO for loading a virtual machine
You can add ISOs for installing operating systems in virtual machines. Click the Custom ISOs menu:
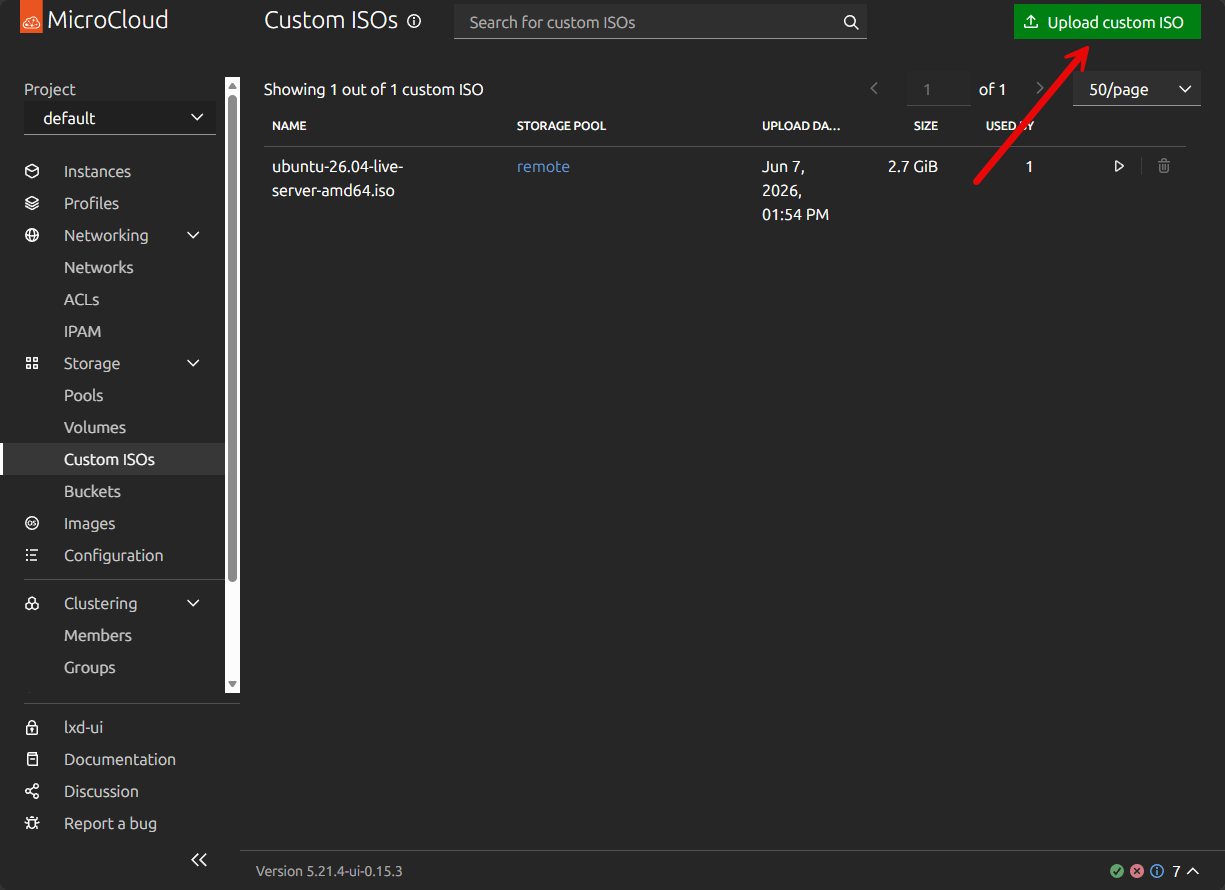
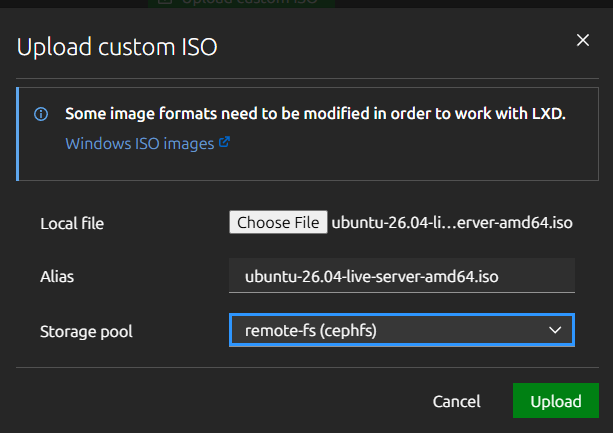
This opens the Upload custom ISO dialog box. Choose the ISO image you want to use. Then choose the Storage pool where you want it to be stored. Click Upload.
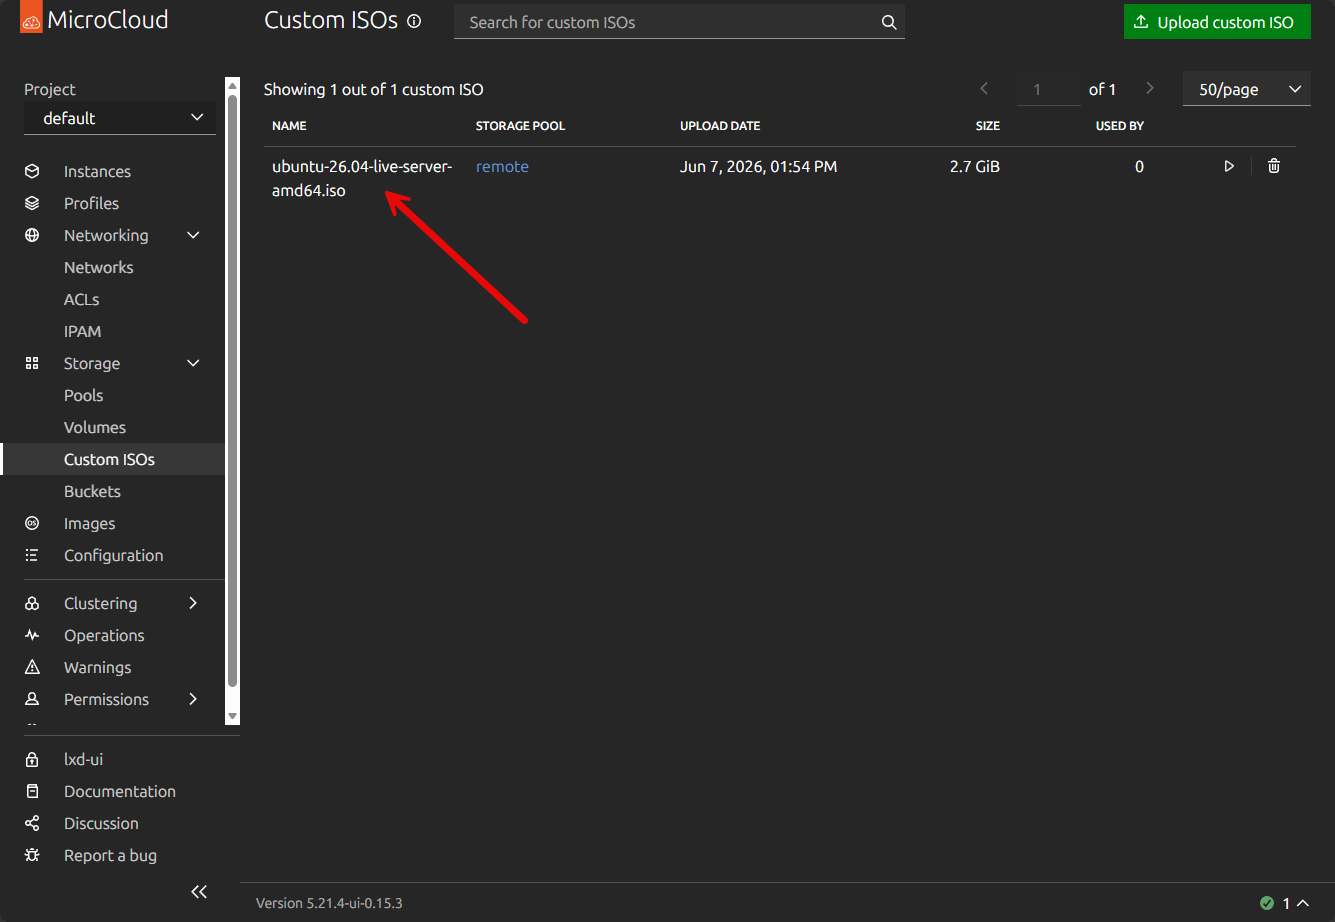
Here we see the Ubuntu Server 26.04 live server ISO uploaded successfully.
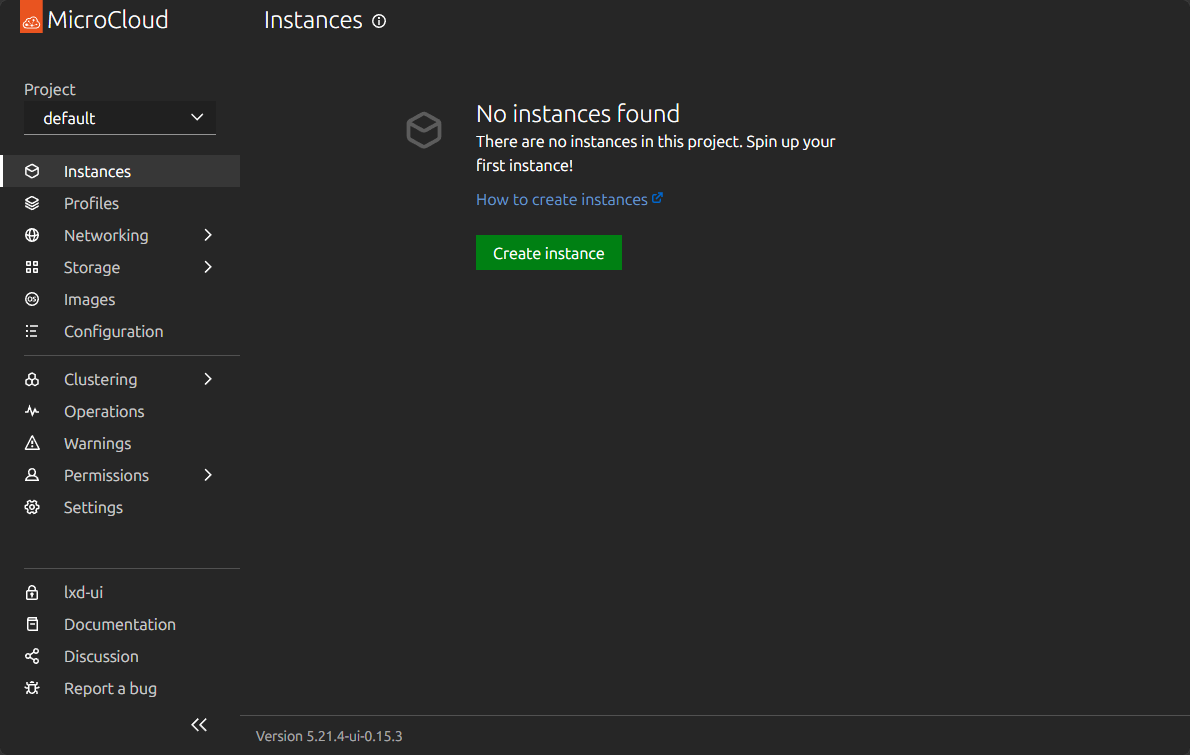
Creating a new “instance” in MicroCloud
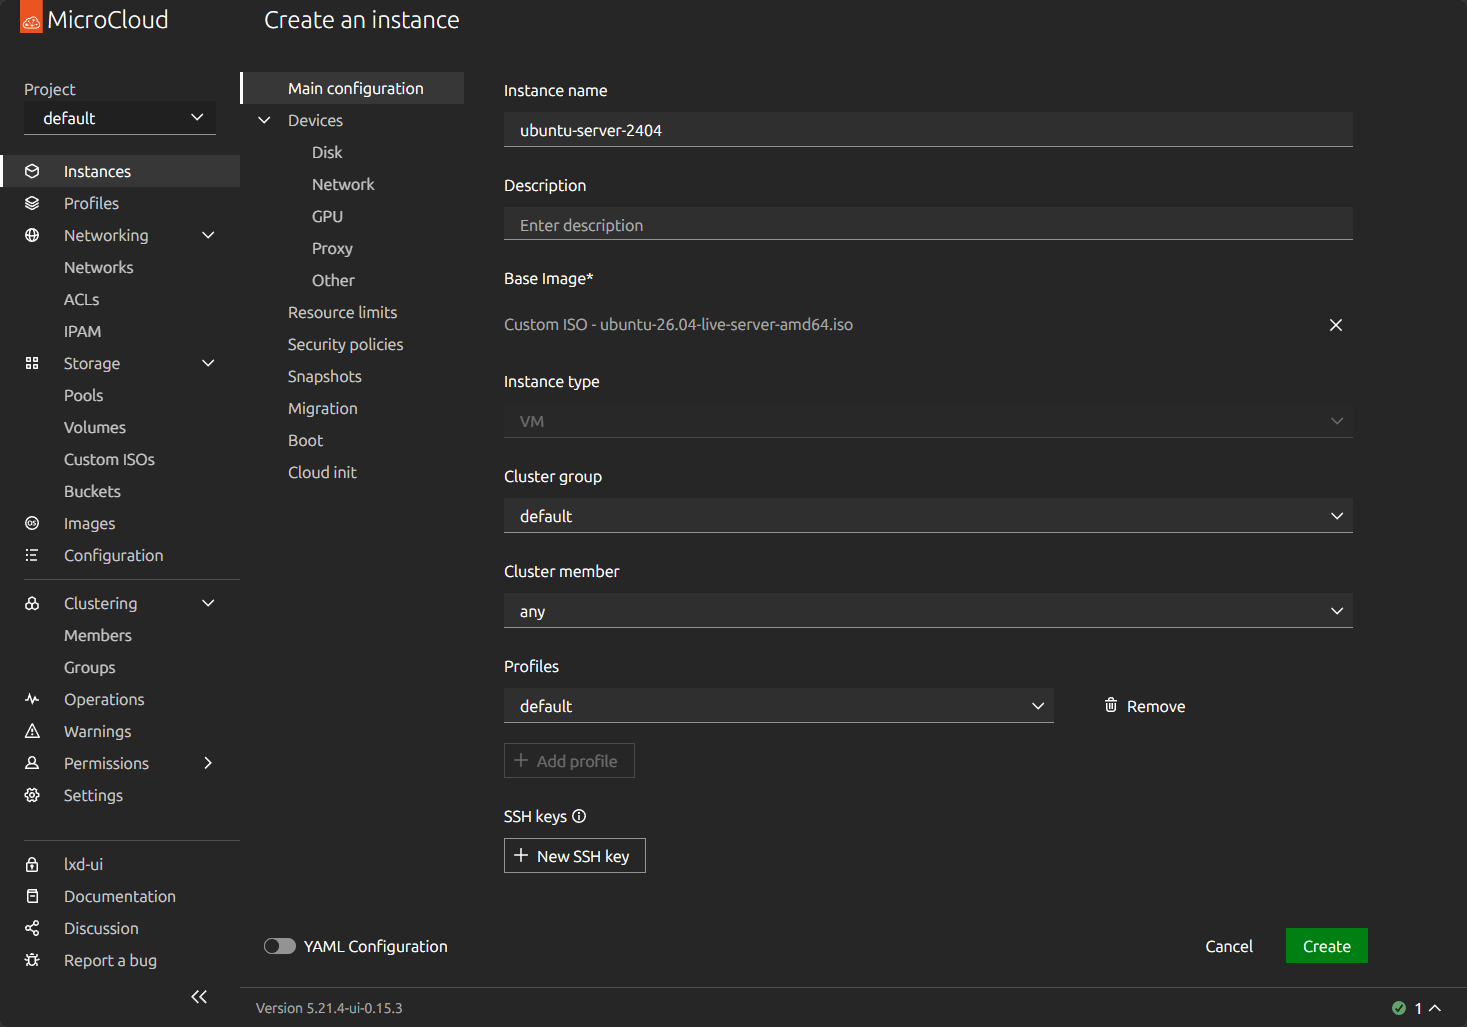
An instance can be a VM or a container running in MicroCloud. I like the nomenclature of how they designate things here as it “feels” like it is more “public cloud” oriented than a hypervisor like Proxmox. You give the instance a name, description (optional), define a cluster group (again can leave defaults here).
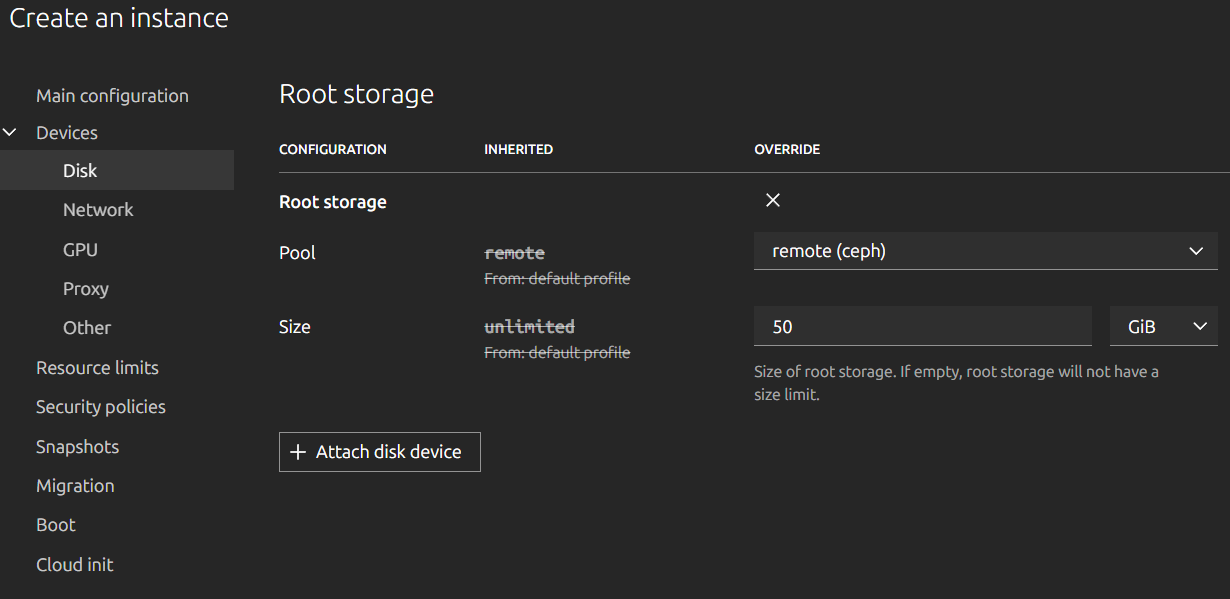
If you edit the Disk configuration, you can set a size for the disk and also the storage used.
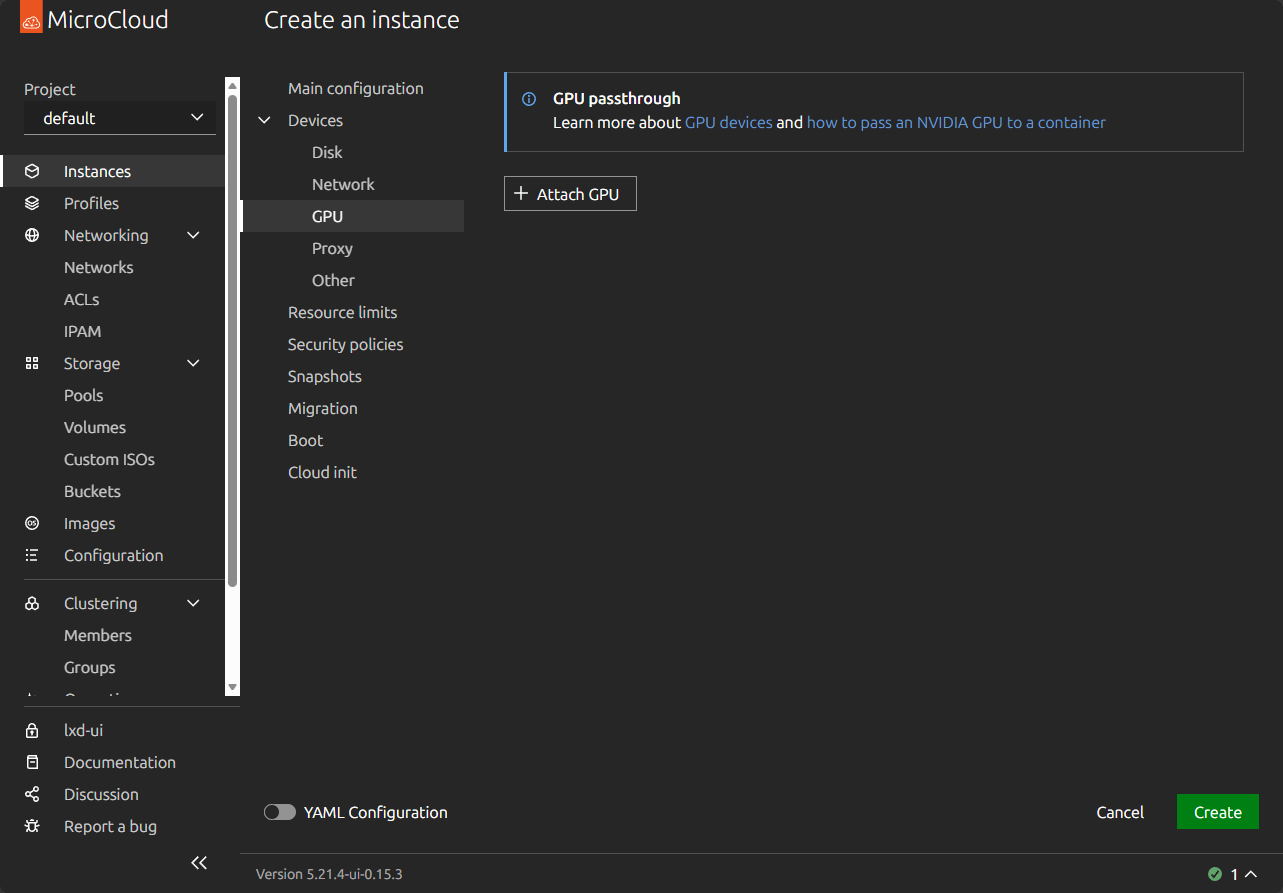
Also, it is nice to see the MicroCloud supports GPU passthrough as this is a big feature that many home labbers are interested in.
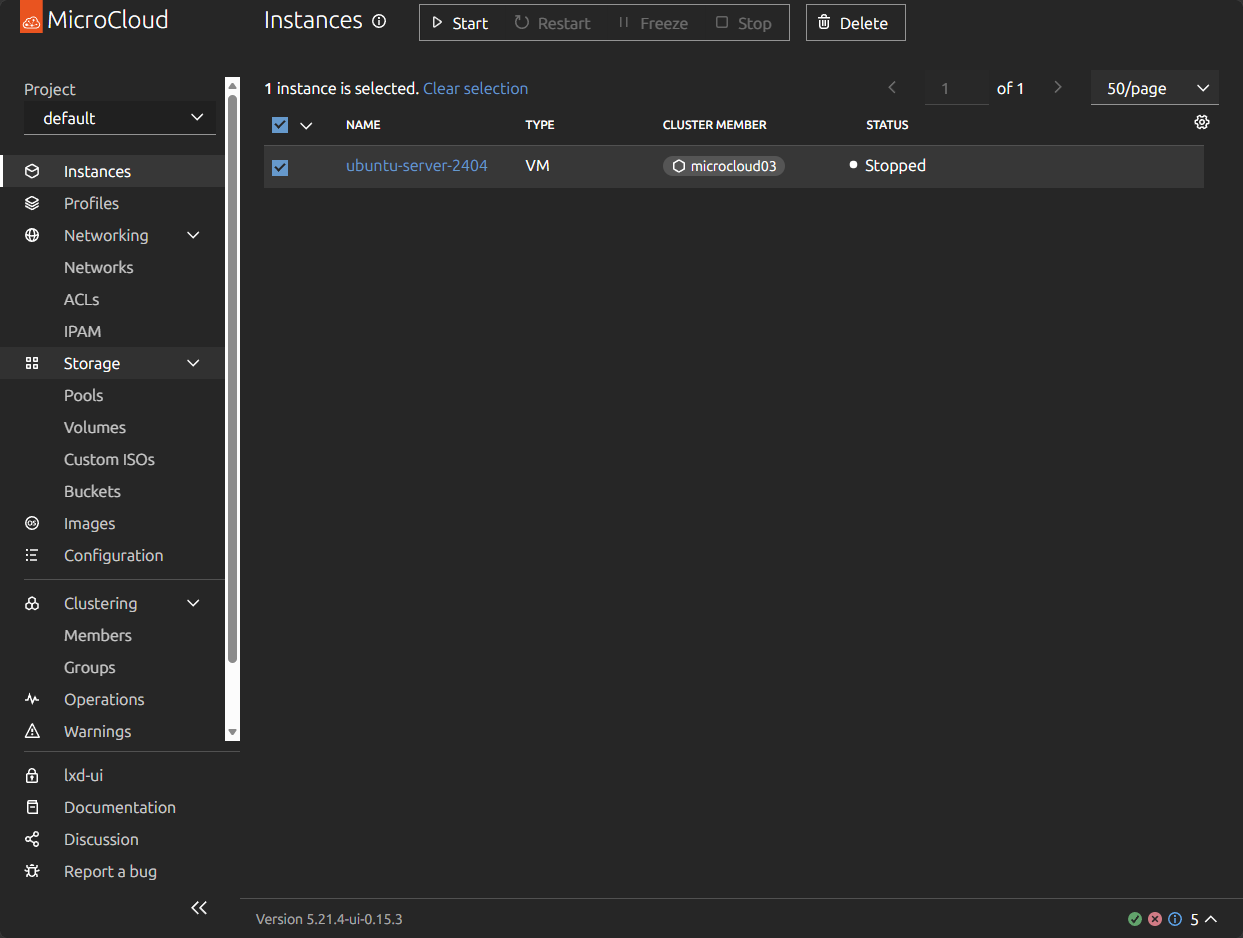
New virtual machine instance is created successfully.
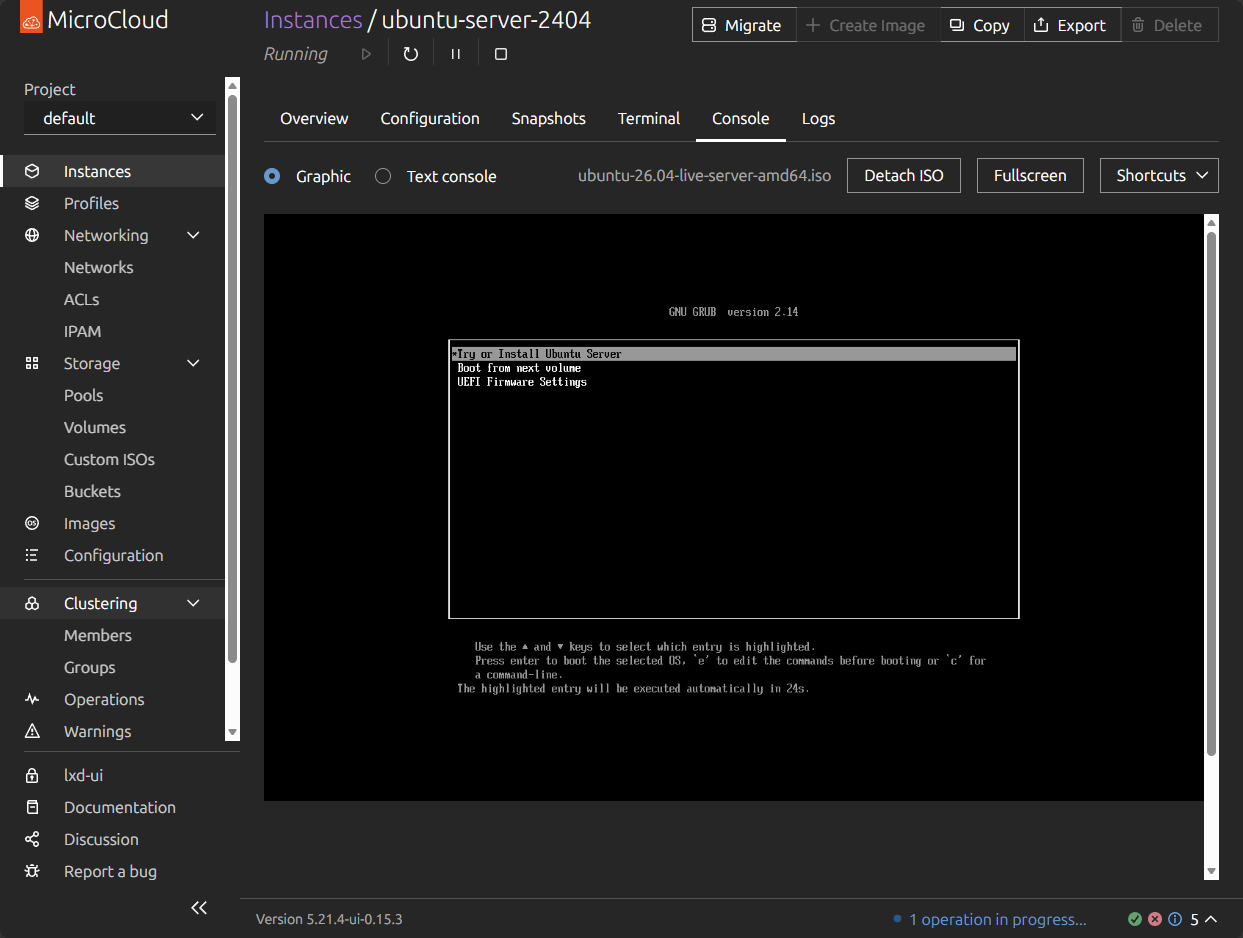
Powering on and starting to load Ubuntu Server 26.04.
LXC containers
You can also quickly spin up a new container “instance” in MicroCloud. If you don’t supply an ISO image, it assumes you are going to provision a container. You can choose to pull a base image from the existing catalog. Think about this like Proxmox allows us to do. You can search for the image you want and select it to be used for the new container instance.

After selecting the image and creating the new container instance. The LXC container image pulls down and starts.

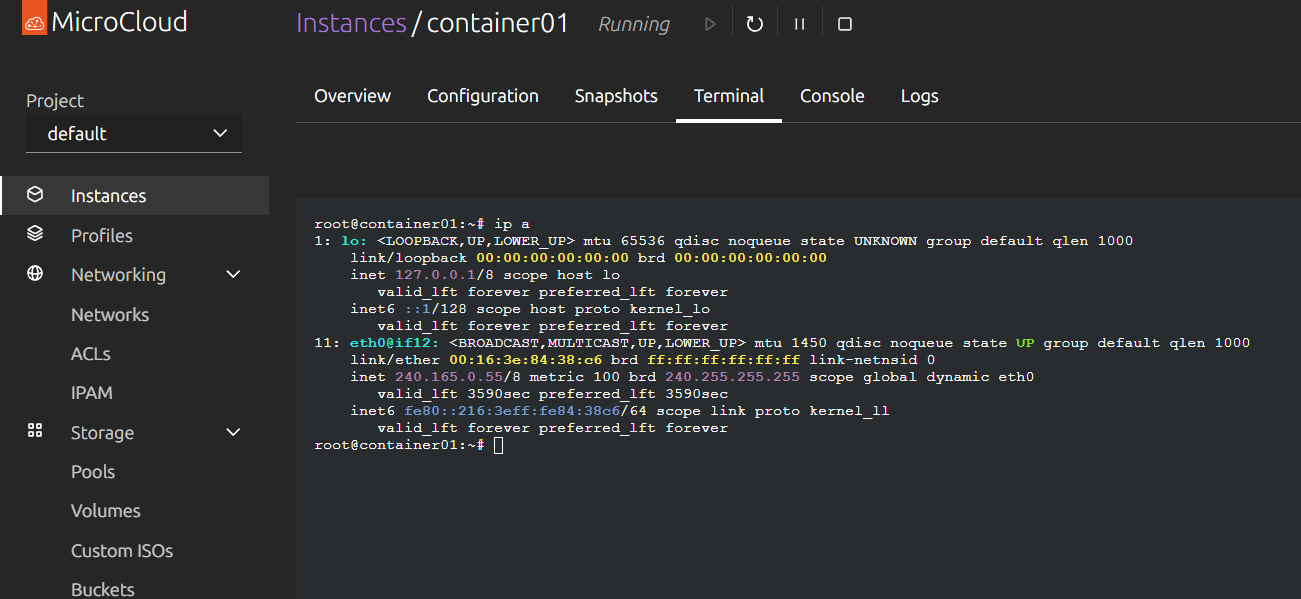
Below, I have logged into the LXC container and looking at the networking configuration.
How MicroCloud differs from Proxmox
I thnk we have already alluded to one of the biggest differences when comparing MicroCloud and Proxmox. Proxmox is a hypervisor first and a private cloud second. MicroCloud is a private cloud first and a hypervisor second.
MicroCloud instead of centering everything around the Proxmox hypervisor, it centers things around LXD as the engine. LXD provides both system containers and virtual machines through its unified management platform. It is by design a more cloud-native solution than a traditional virtualization environment.
So think of Proxmox like a modern virtualization platform with cloud features added and then MicroCloud is a cloud platform that happens to run virtual machines.
For most home labs, I think Proxmox is going to remain the virtualization platform of choice as it is easier to understand and manage. It feels more like what we are used to with VMware vSphere and has a HUGE ecosystem and community around it.
But, if your goal is learning private cloud technologies and distributed systems, MicroCloud is a really great platform that fits in with that. Especially if you are learning Kubernetes, this follows along with the modern approach to deploying apps.
Challenges and potential downsides
I think there are a few downsides to thinking about using MicroCloud in the home lab. Note just a few of these that I can think of when considering using it:
| Downside | Impact |
|---|---|
| Smaller community | Fewer guides and troubleshooting resources |
| LXD learning curve | Unfamiliar for many virtualization admins coming from something like VMware vSphere |
| Ceph complexity | Distributed storage still requires expertise that can be intimidating for day to day maintenance and admin work |
| More moving parts | Troubleshooting can be more involved |
| Platform depth | Understanding the underlying stack is important |
Wrapping up
I think the reason that more home labbers are starting to talk about MicroCloud is fairly simple. It fills a pretty interesting space for spinning up a “private cloud” compared to just spinning up a hypervisor. It has all the pieces and parts built-in that make this feel like what you see in public cloud offerings. The workflows feel familiar and have the same “as a service” type feel. I don’t think MicroCloud will replace something like Proxmox. But, some may prefer it in their home labs. It is built on a tried and true tech stack, including MicroCeph, LXD, MicroOVN, etc. Let me know in the comments if you have tried this out yet and what your thoughts are on MicroCloud as a home lab platform.
More in this topic
Discuss this in the Community
Google is updating how articles are shown. Don’t miss our leading home lab and tech content, written by humans, by setting Virtualization Howto as a preferred source.
About The Author

I have not tried this out, or any home lab yet, as I’ve been learning and preparing to build my first. Overall this seems very intriguing, and I’m glad to have found and read this article! I personally would have liked to read more about what components are included in Microcloud, more than the few words that describe each here. My inexperience also means no understanding of a core concept: is this, or any private cloud something that only works across multiple servers? I’d imagine that using only one server would defeat the purpose of a cloud, as it’d easily come offline upon hardware failure, etc.. This may not be a concept that’s quite aimed at first-timers; many thanks to the author for the knowledge, exposure, and rich material for further research and learning!
I’ve just saved 9 out of 10 of the author’s latest posts for further learning. Brandon, if you’re reading this, you’re a legend. I need to find a mentor like Brandon.