Since working with Ceph in Proxmox VE lately, one of the cool features that I wanted to try out was Proxmox CephFS, which allows you to work with your Ceph installation directly from your clients. It allows mounting file storage to your clients on top of your Ceph storage pool with some other really cool benefits. Let’s look at CephFS configuration in Proxmox and see how you can install and configure it.
Table of contents
What is CephFS (CephFS file system)?
CephFS is a POSIX-compliant file system that offers a scalable and reliable solution for managing file data. CephFS is not specific to Proxmox. However, in Proxmox environments when you configure a Ceph storage pool, it uses the same file system that Proxmox uses for writing file data blocks and keeping replica data for resiliency from top to bottom.
CephFS can handle vast amounts of file metadata and data and be installed on commodity virtualization hardware. It is an excellent solution for many use cases, especially when integrated with a Ceph storage cluster, as we can do in Proxmox.
CephFS configuration in Proxmox: An Overview of the lab
After you have a working Ceph cluster on top of a Proxmox installation, including Ceph mgr, cluster monitors (Ceph mon), Ceph OSDs, daemons, cluster network, and a Ceph storage pool, how do you enable the Ceph file system on top of that? It is super easy to do in Proxmox, especially since everything is integrated. We will see this integration in the menus below.
As a note, in this example I am running Proxmox VE version 8.1.3 and Ceph Quincy, which are the latest updates to the platform from the official site with various security enhancements and features. For the lab, I am running a simple 4 node member cluster (started with 3 but was doing other testing and added a node) in nested virtual machines on an SSD disk with 3/2 Crush rule. You can configure different rules based on your needs and infrastructure.
I set to replicated rule and a single NIC (multiple NICs and networks are recommended) for each machine running pveceph. In this small configuration, it leads to a significant amount of space used with replicas taking up 75% of the capacity in order to created the replicated data and additional writes with changes.
Installation steps
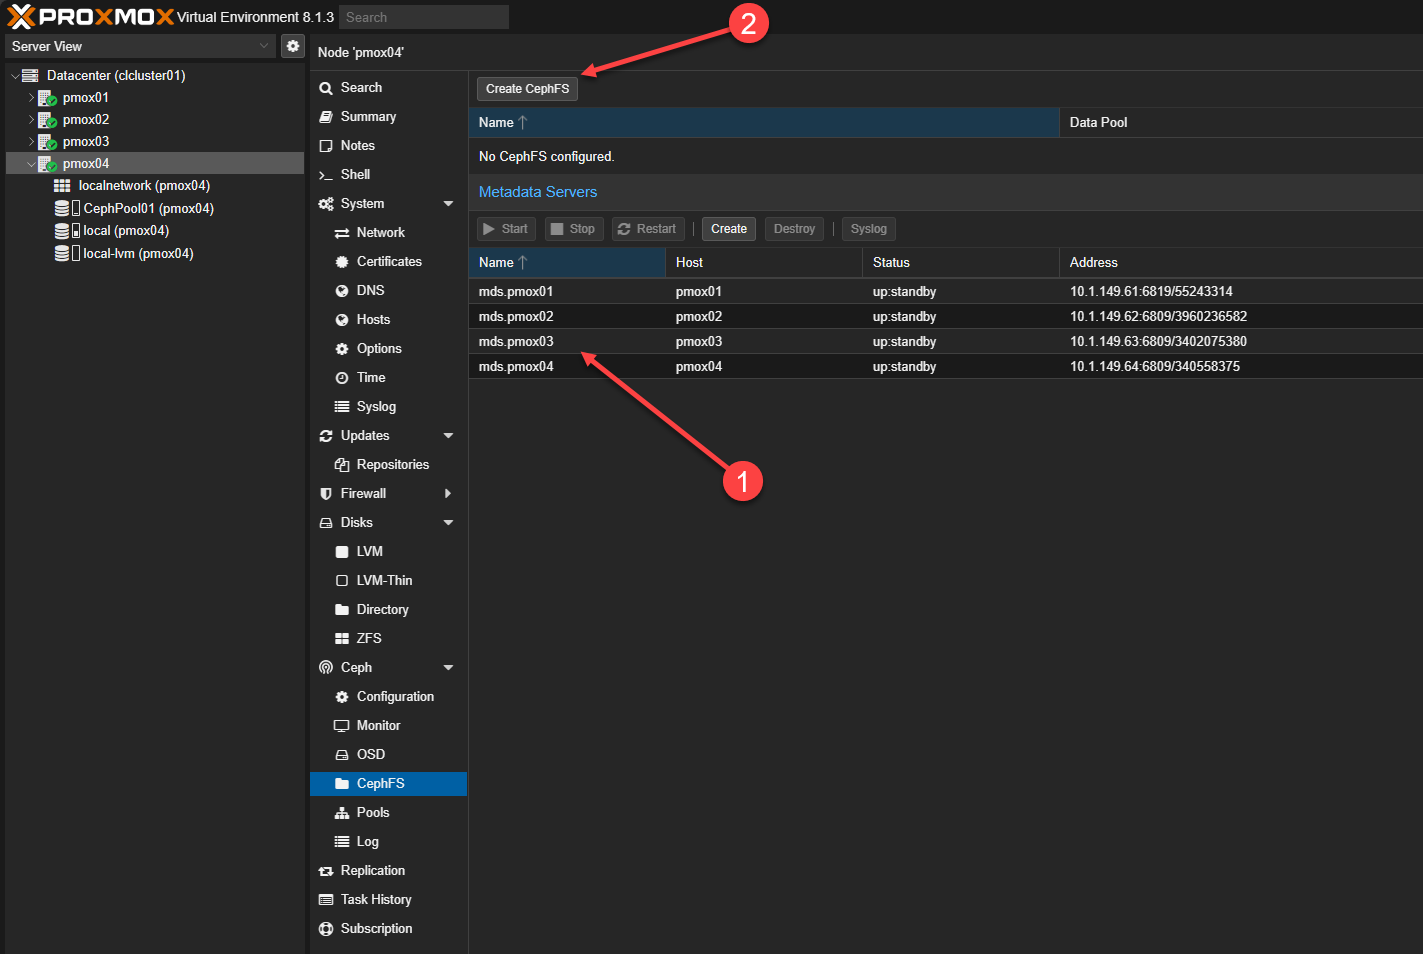
First, click the CephFS menu under Ceph for your Proxmox host. Next, you click the Create button in the Proxmox web app.
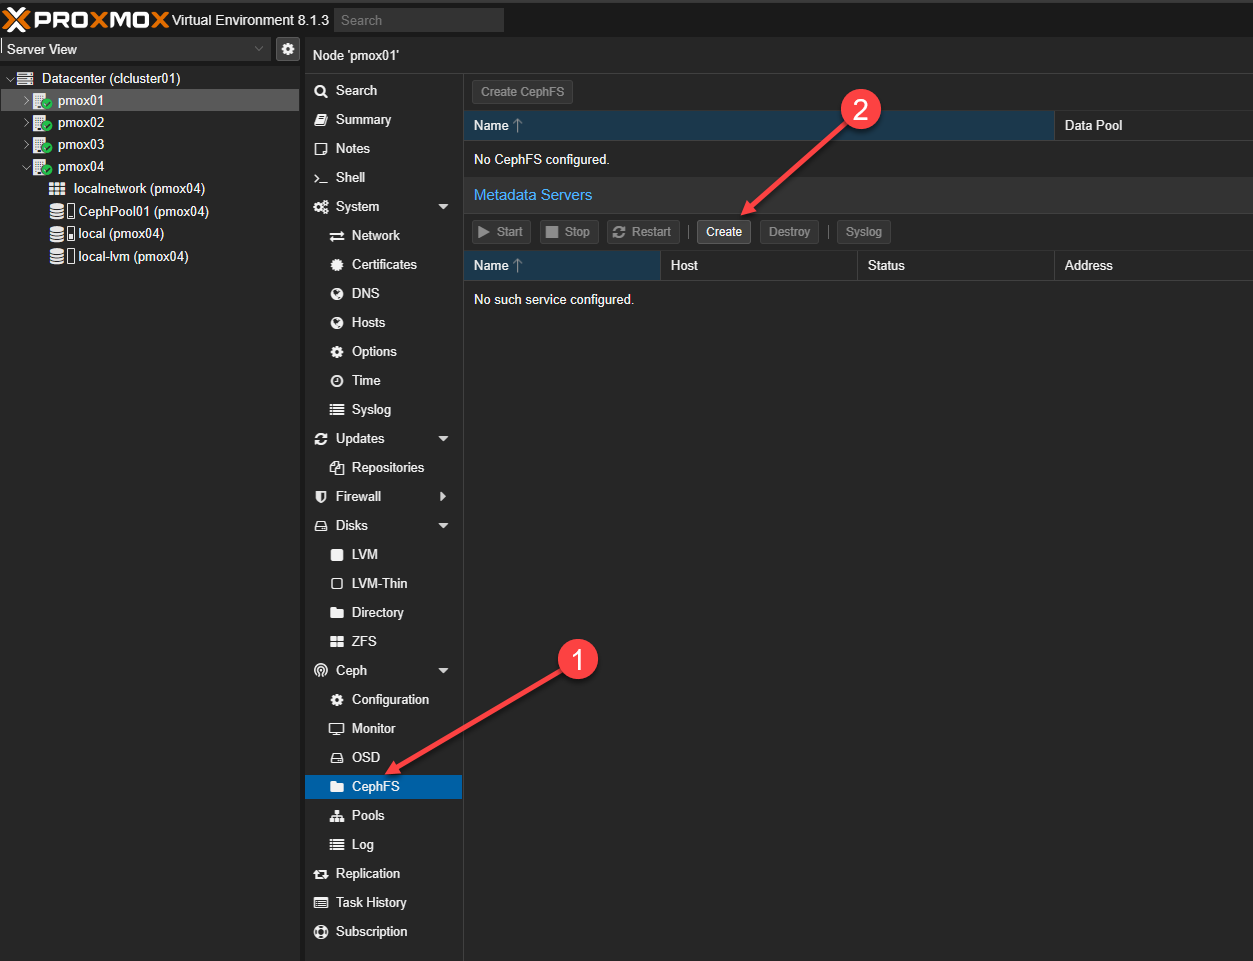
This will launch the dialog box to Create: Metadata Servers.
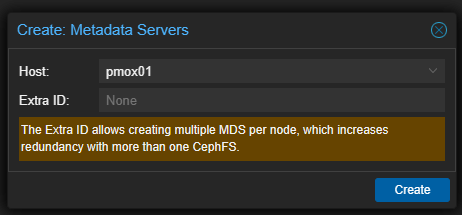
1) In my lab, I made each Proxmox host a Metadata server. 2) Click the Create CephFS button at the top.
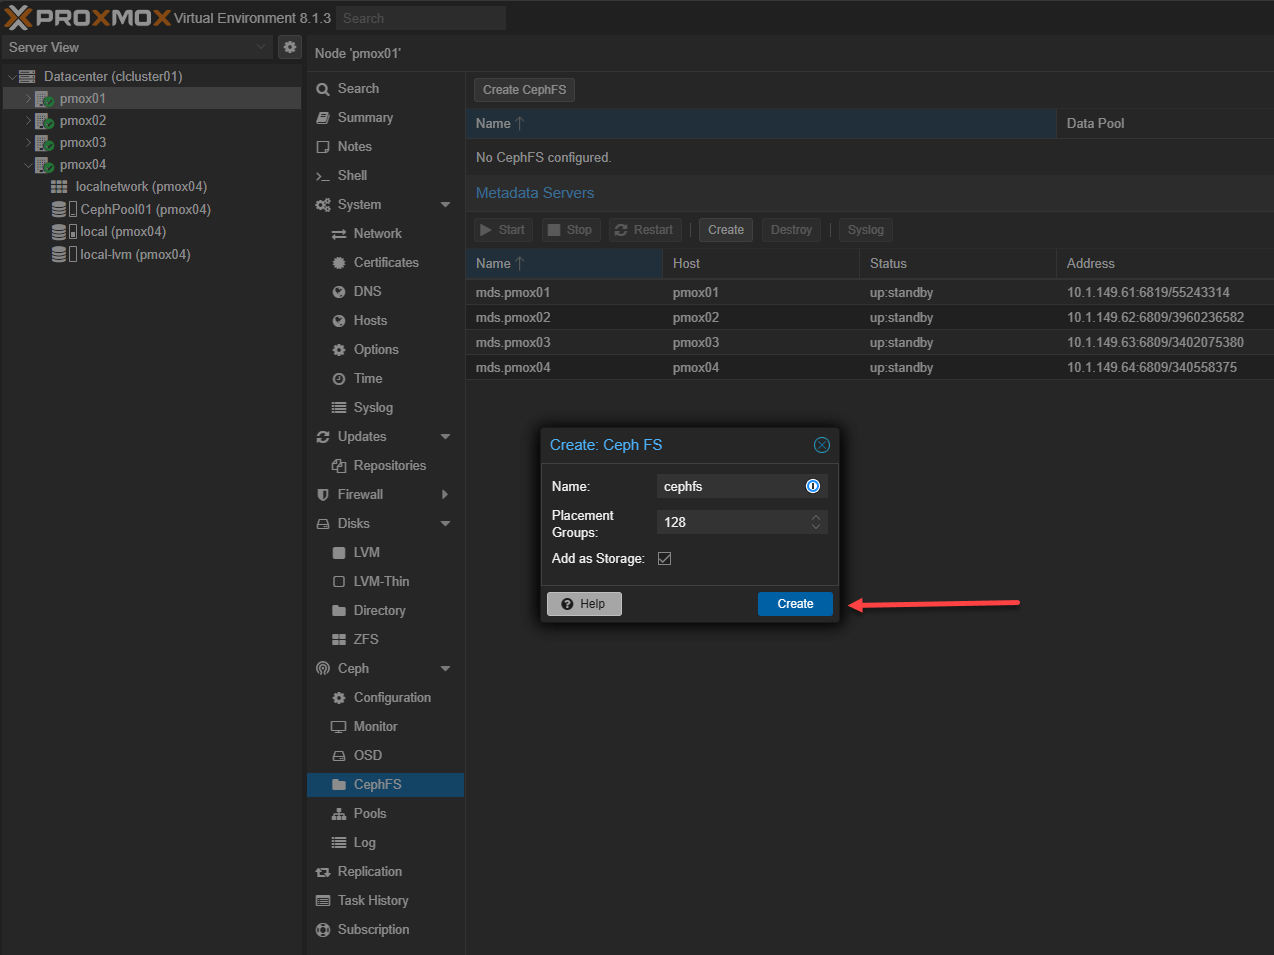
I left all the default options here:
- Name
- Placement groups: default 128
- Add as Storage checked
Click Create.
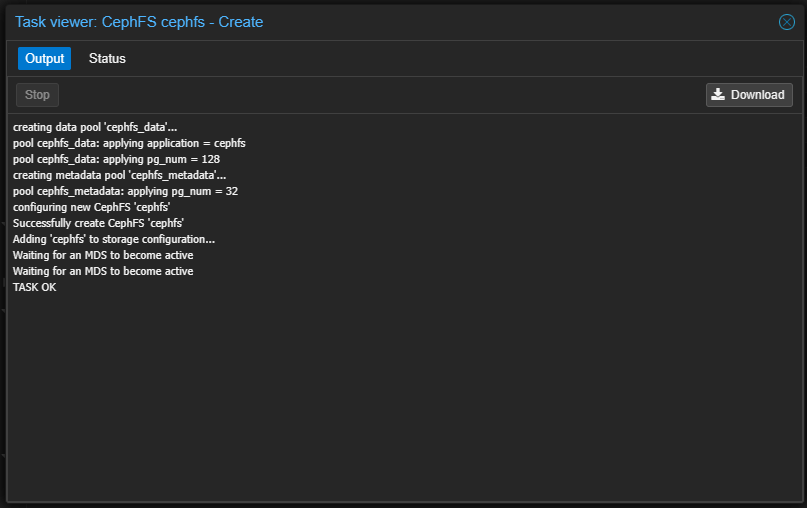
In the Task viewer you will see the status of the task which should complete successfully.
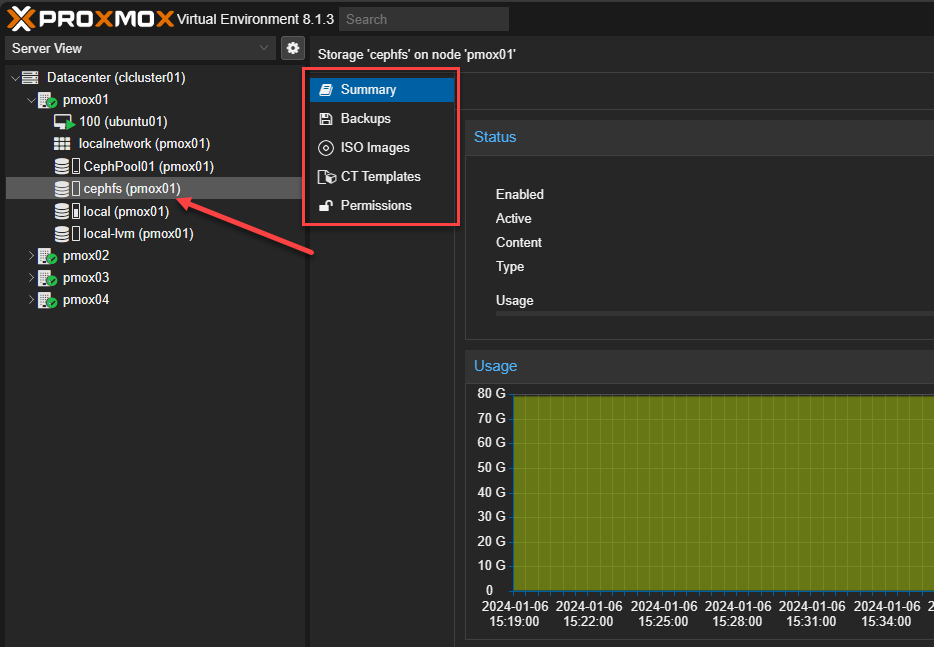
If you choose to mount as storage, you will see the CephFS storage listed under your Proxmox host(s). Also, the great thing about the CephFS storage is you can use it to store things like ISOs, etc on top of your Ceph storage pools. Note in the navigation, we see the types of resources and content we can store, including ISO disks, etc.
Installing Ceph client tools in Linux
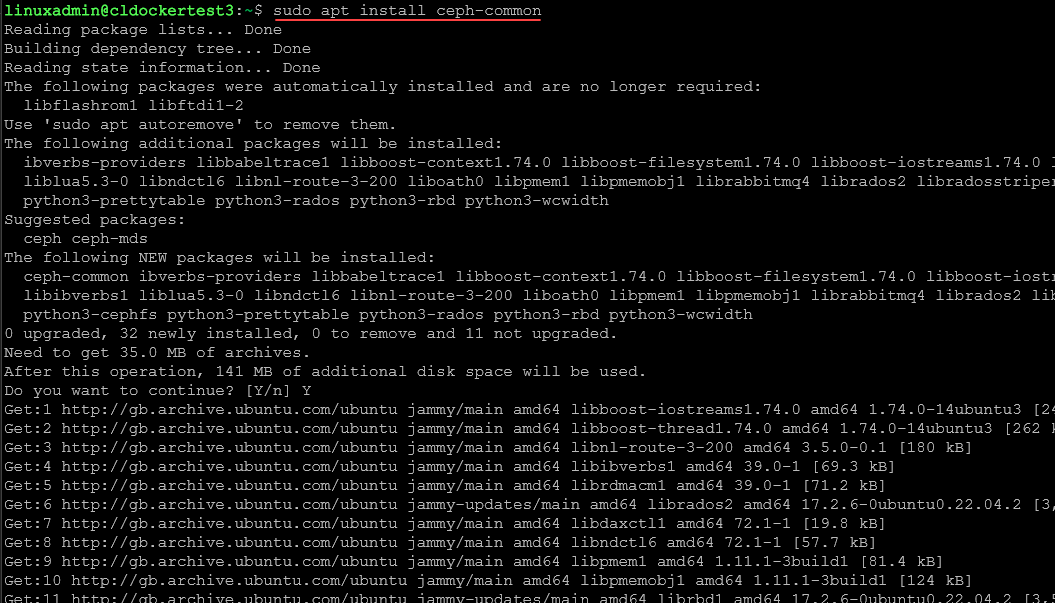
To work with Ceph FS on Linux client nodes (Ceph clients, you install the Ceph client tools software packages from the CLI.sudo apt install ceph-common
Ceph fuse
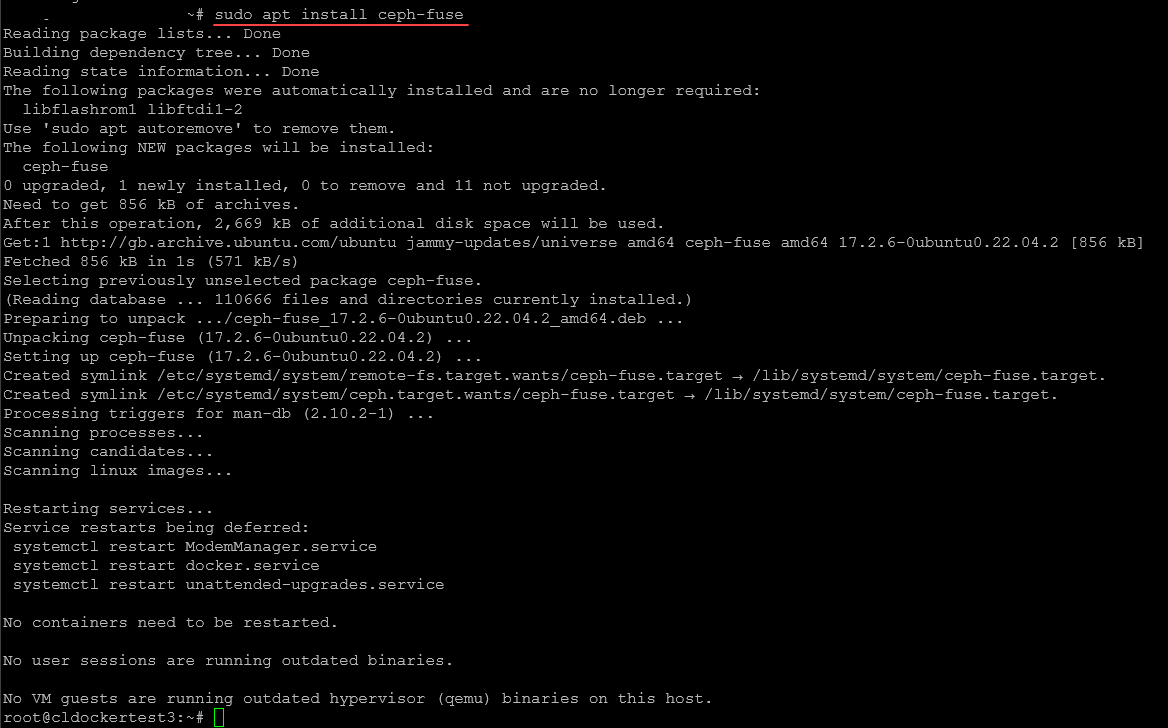
Also, you can install the ceph fuse package. The ceph-fuse package is an alternate way of mounting CephFS. The difference is it mounts it in the userspace. The performance of ceph-fuse is not as good as the more traditional mounting of a CephFS file system.
However, it does allow you to connect to a Ceph distributed file system from a user’s perspective, without the need to integrate it deeply into the system’s core.
You can specify which Ceph file system to connect to either through a command line option (-m) or by using a configuration file (ceph.conf). This tool mounts the Ceph file system at a designated location on your system.sudo apt install ceph-fuse
Things you will need for your CephFS configuration in Proxmox
There are a few steps you will need to connect to your Promxox CephFS installation:
- The admin keyring
- The name of the Ceph file system
- The monitor addresses of your CephFS servers
- A ceph.config file
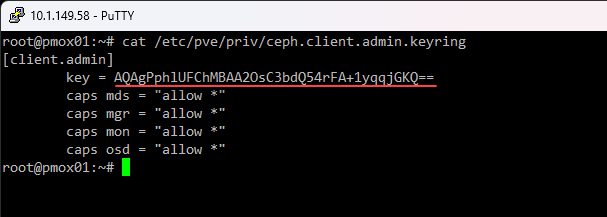
1. The admin keyring
To see the admin credentials that you need to mount the CephFS file system, you need to get your key from the ceph.client.admin.keyring file. To get this, run the command:cat /etc/pve/priv/ceph.client.admin.keyring
You will see the value in the key section of the file. Note the user is admin and not root.
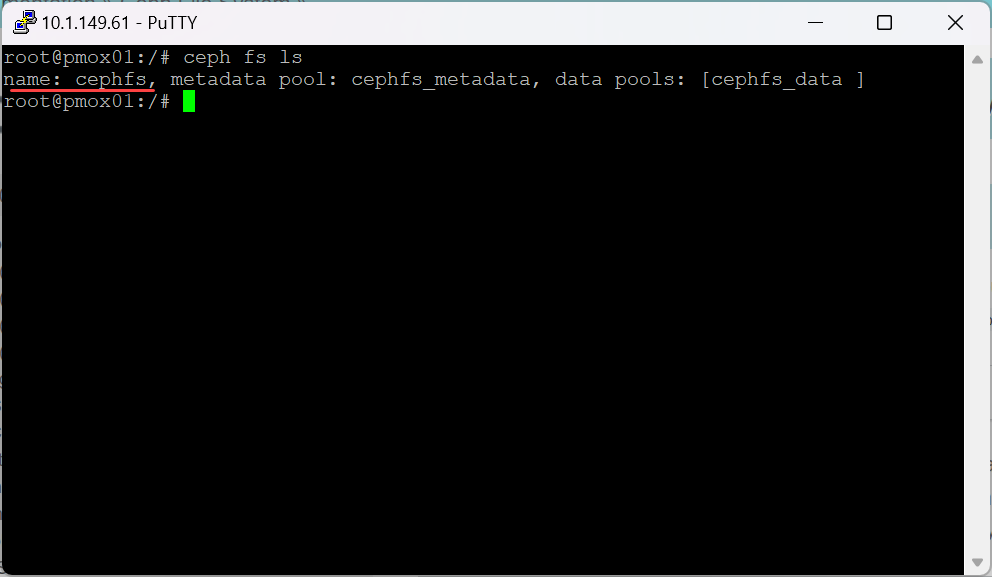
2. The name of the Ceph file system
The next piece of information you need is the name of the Ceph file system. To get that, you can run this command on your Proxmox host:ceph fs ls
You will see the name of the file system. The default name is cephfs.
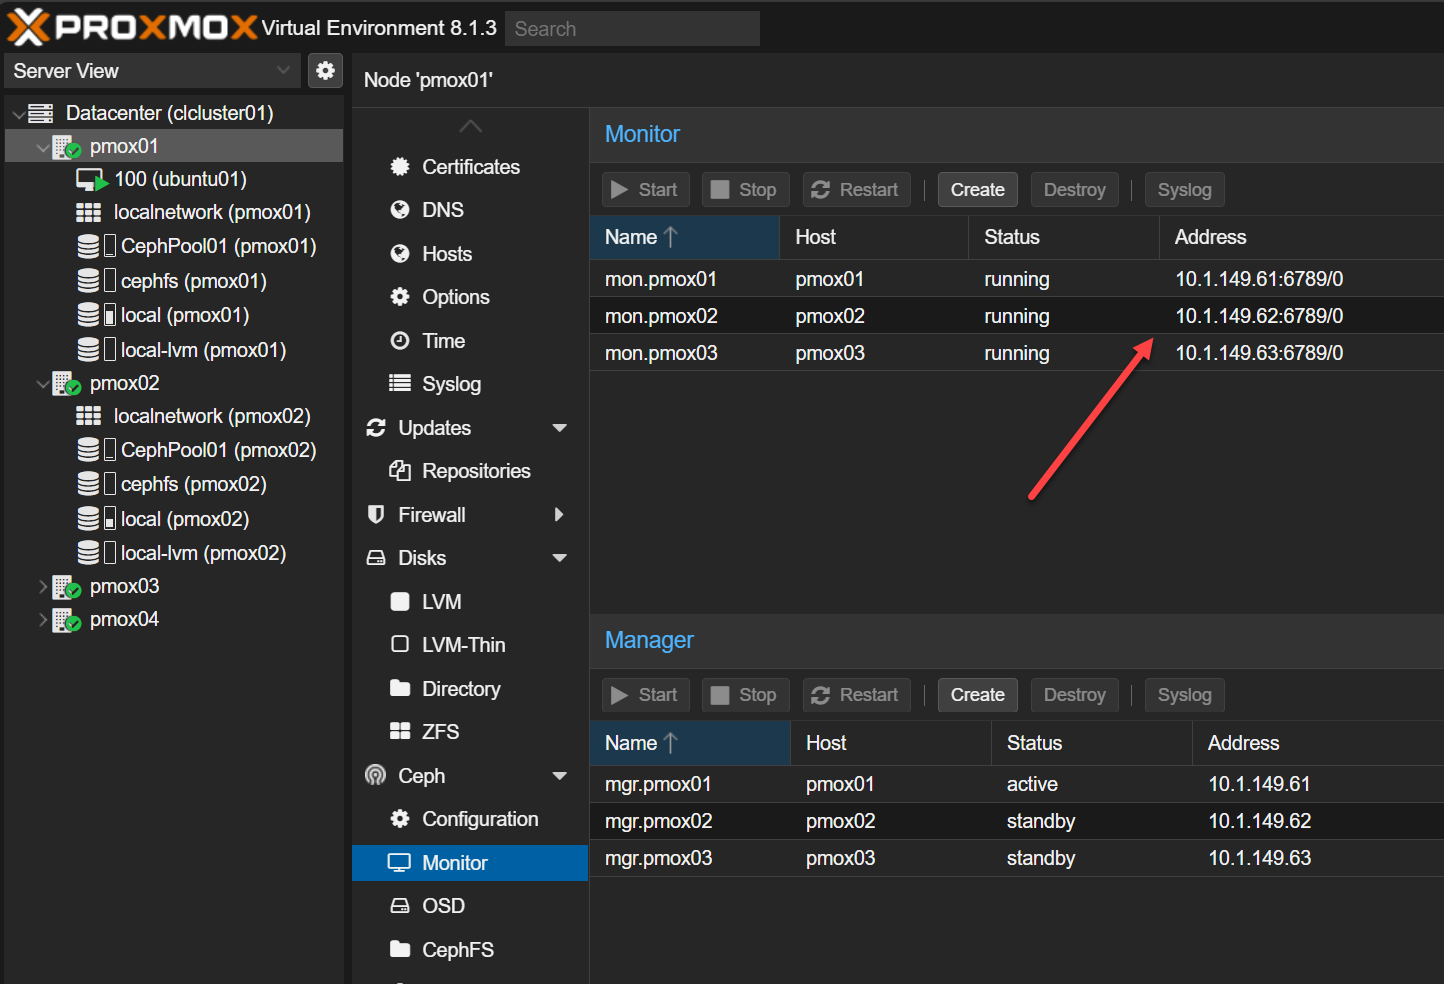
3. The monitor addresses of your Proxmox CephFS servers
You will need to have the Ceph monitor server addresses. There should be multiple servers configured as monitors for reliability and so you don’t have a single point of failure.
You can file these hosts addresses under the Ceph > Monitor menu in the Proxmox GUI in the browser. Make sure your router or routers have the routes configured to allow your client devices to have connectivity to these IP addresses and port configurations.
4. A ceph.config file
You will also need a ceph.config file. Like the admin keyring, we can also copy the file from the Promxox server. But we will trim some of the information out of the Proxmox server file. This file is located here on your Proxmox server:/etc/pve/ceph.config
Mine has the following contents for my Proxmox server environment.
[global]
     auth_client_required = cephx
     auth_cluster_required = cephx
     auth_service_required = cephx
     cluster_network = 10.1.149.61/24
     fsid = 75a2793d-00b7-4da5-81ce-48347089734d
     mon_allow_pool_delete = true
     mon_host = 10.1.149.61 10.1.149.63 10.1.149.62
     ms_bind_ipv4 = true
     ms_bind_ipv6 = false
     osd_pool_default_min_size = 2
     osd_pool_default_size = 3
     public_network = 10.1.149.61/24

[client]
     keyring = /etc/pve/priv/$cluster.$name.keyring

[mds]
     keyring = /var/lib/ceph/mds/ceph-$id/keyring

[mds.pmox01]
     host = pmox01
     mds_standby_for_name = pve

[mds.pmox02]
     host = pmox02
     mds_standby_for_name = pve

[mds.pmox03]
     host = pmox03
     mds_standby_for_name = pve

[mds.pmox04]
     host = pmox04
     mds_standby_for_name = pve

[mon.pmox01]
     public_addr = 10.1.149.61

[mon.pmox02]
     public_addr = 10.1.149.62

[mon.pmox03]
     public_addr = 10.1.149.63
Connect a Linux client to CephFS running on Proxmox
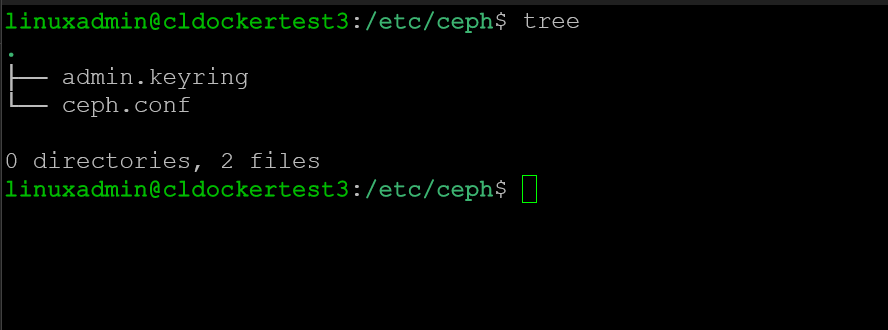
To connect a Linux client to our CephFS configuration in Proxmox, we need to create a couple of files. First, make the following directory:
mkdir /etc/cephIn that directory create the files:
- admin.keyring
- ceph.conf
In the admin.keyring file, just put the key value in the file, nothing else. It will be a value as we had shown above that looks similar to this:
AQAgPphlUFChMBAA2OsC3bdQ54rFA+1yqqjGKQ==Then, you will need the following in your ceph.conf file. As you can see below, I have updated the keyring location to point to our admin.keyring file.
[global]
auth_client_required = cephx
auth_cluster_required = cephx
auth_service_required = cephx
cluster_network = 10.1.149.0/24
fsid = 75a2793d-00b7-4da5-81ce-48347089734d
mon_allow_pool_delete = true
mon_host = 10.1.149.61 10.1.149.63 10.1.149.62
ms_bind_ipv4 = true
ms_bind_ipv6 = false
osd_pool_default_min_size = 2
osd_pool_default_size = 3
public_network = 10.1.149.0/24

[client]
keyring = /etc/ceph/admin.keyring
Run the mount command to mount the Ceph file system
We need to make a directory for the mount operation.
mkdir /mnt/cephfsNow that we have a directory, we can run the following command to mount the CephFS file system for a connection to the IP address of each monitor node.
sudo mount -t ceph [email protected]=/ /mnt/cephfs -o 'secretfile=/etc/ceph/admin.keyring,mon_addr=10.1.149.61/10.1.149.62/10.1.149.63'The command will complete without any return if it is successful. We can run the following to see our mounted Ceph file system:
df -h
Troubleshooting and support
Like any technology, there may be times when you need to troubleshoot something with CephFS. CephFS does not require a subscription license as it is free and open-source and can be pulled from the no-subscription repository.
Customers can of course, opt for enterprise support for your Proxmox cluster with the customer portal from the Proxmox team. If you still go the open-source route, the Proxmox support forum on the Internet is a great source of help for visitors across tens of thousands of threads thanks to activity members in the community. In addition, you can search forums for a wide variety of topics, instructions, question-answer type posts, etc.
There are a number of other home forums and websites, links, wiki sites and thread search titles where you can find people with experience to help with troubleshooting warning messages and errors, and share log data.
Wrapping up installing CephFS in Proxmox
CephFS configuration in Proxmox is an extremely powerful storage solution you can run in Proxmox for most dev and prod environments. However, not only does it allow you to have hyper-converged storage for vm instances and LXC container instances, it allows you to have file storage you can mount for clients that runs on top of the Ceph storage pool, with all the benefits that come with Ceph in terms of resiliency, scalability, and availability.
There are a lot of community support resources if you need help troubleshooting issues or figuring out the details and settings, even with the open-source no-subscription channels for Proxmox and Ceph Quincy.
Google is updating how articles are shown. Don’t miss our leading home lab and tech content, written by humans, by setting Virtualization Howto as a preferred source.
About The Author


Hello!
Very well written, thank you.
I am stuck on the “sudo mount -t ceph admin@…” part. I keep getting a “mount error: no mds server is up or the cluster is laggy” I have mds and I can ping the mon_addresses just fine. I am not sure what is going on. Do you have any thoughts?
Thank you in advance.
Branden,
I hope all is well and thanks for the comment! That error seems vaguely familiar to be honest and trying to remember if I have seen that before. Can you paste in the full command you are using to mount your Ceph storage?
Brandon
Brandon,
Sorry, It’s been a long month. I created a new VM to try on and it worked this time! Not sure what I have done different beside adding 10g NICs to the servers. I had deleted the other one so I will not be able to show you what I had done. Thank you so much for the response and being willing to help. I enjoy your content! Thank you again.
Branden
Thank you for a great article! I, too, am having issues with the mounting:
sudo mount -t ceph [email protected]=/ /mnt/cephfs/ -o ‘secretfile=/etc/ceph/admin.keyring,mon_addr=10.67.15.11/10.67.15.12/10.67.15.13’
source mount path was not specified
unable to parse mount source: -22
If I remove the extra forward slash:
sudo mount -t ceph [email protected]=/mnt/cephfs/ -o ‘secretfile=/etc/ceph/admin.keyring,mon_addr=10.67.15.11/10.67.15.12/10.67.15.13’
…I get:
can’t find in /etc/fstab.
Chris,
Thanks for the comment. Hey let me know if this command works for you instead. This may be the result of newer ceph versions. If so, I will update the post. Below is an example with ip addresses in my lab.
sudo mount -t ceph 10.1.149.126:6789,10.1.149.127:6789,10.1.149.128:6789:/ /mnt/cephfs -o name=admin,secret={your-secret}Also, if you are still stuck, create a forum post under the Proxmox help section and we can work through it.
Thanks Chris,
Brandon