Lately, I have been playing around a lot with Kubernetes in the lab and containers in general. I have been using full Ubuntu 20.04 virtual machines as Kubernetes hosts to serve as the master and worker nodes. However, as of late, I am pivoting a bit to using LXC containers with LXC for Kubernetes hosts. A full post on that front will be in the works. First though I would like to give you guys a good overview of LXC and LXD along with LXC container management gui installation and configuration.
What is LXC and LXD?
LXC and LXD actually rely on one another and are used together. LXD provides the REST API that connects to libxlc, which is the LXC library. LXD is written in the Go programming language and creates a daemon that apps can interact with.
A definition found here describes it this way:
LXD is a system container and virtual machine manager
With LXD you can run hundreds of containers of a variety of Linux distributions, apply resource limits, pass in directories, USB devices or GPUs and setup any network and storage you want.
LXD containers are lightweight, secure by default and a great alternative to running Linux virtual machines.
LXC vs LXD vs Docker
Again, we can’t really say LXC vx LXD. You can use LXC without LXD, however, LXD makes LXC much more robust and a solution that is actually feasible and viable to use. What about LXC and LXD vs Docker? They each have their purpose and strengths. Docker as a container runtime provides the ability to package applications and all the dependencies these require.
Docker is ephemeral, stateless, and a minimal container implementation that provides the minimal resources required to run an application. LXC/LXD sits in the middle of full virtual machines and container runtimes like Docker. They are heavier than the simpler Docker containers but much lighter than a full virtual machine.
They provides the full set of operating system files, unlike an application container like Docker. This makes them perfectly suited for lab environments which is my main use case. At this time, LXC is only for Linux operating systems. You can’t run a Windows container machine image on LXC.
LXC containers with LXD are meant for longer term images ran in an environment, whereas Docker containers are application containers that will never be upgraded. Rather these are replaced with a new container running new application components.
Also, to be considered is that LXD currently only supports Ubuntu. So, if you run another Linux distribution or a Windows Server environment, then LXC/LXD is probably not for you.
Install LXD
Installing LXD is a snap, with, well, “snap.” Use the following command:
sudo snap install lxdOnce installed, you will need to do a couple of things:
- Make sure your user is in the LXD group
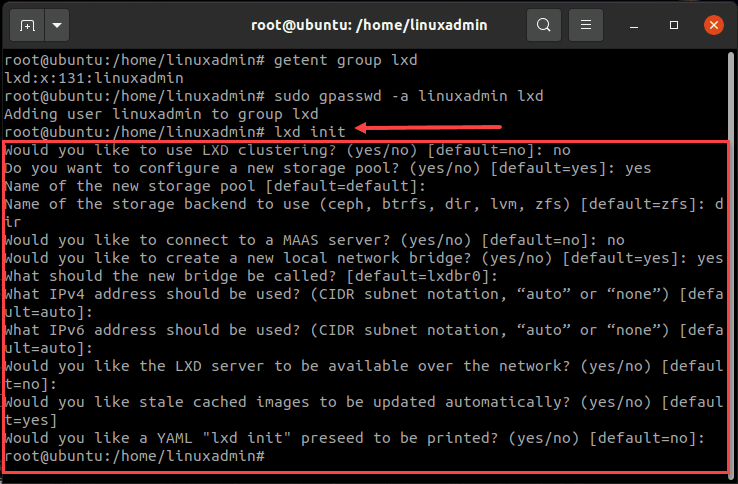
- Run LXD init
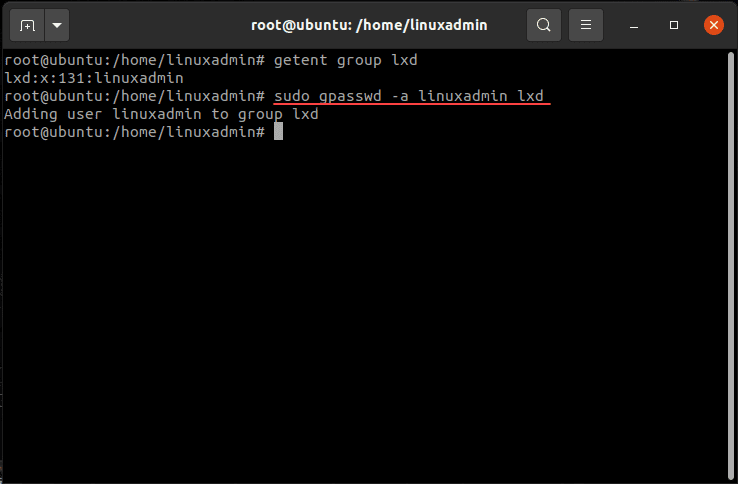
Once lxd is installed and you have your user you want to interact with lxd added as part of the lxd group, it is just a matter of initializing lxd. To do that:
lxd initYou will answer the following questions as part of the initialization:
- Would you like to use LXD clustering?
- Do you want to configure a new storage pool?
- Would you like to connect to a MAAS server
- Would you like to create a new local network bridge
- Would you like the LXD server to be available over the network
- Would you like stale cached images to be updated automatically?
- Would you like a YAML “lxd init” preseed to be printed?
Launching a new LXC system container
You can see the built-in remote repositories with the following commmand:
lxc remote list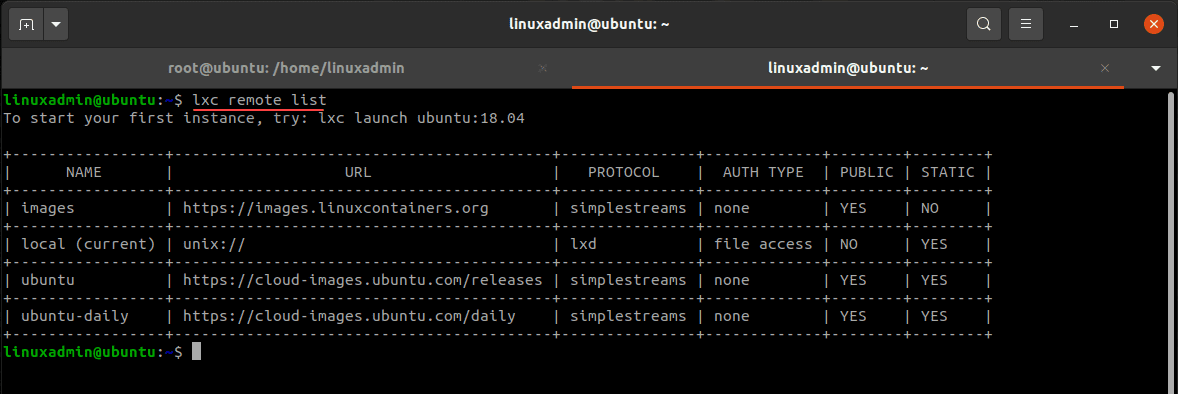
You can see which images are available with the command:
lxc image list images:<all or part of name>
lxc image list images:cent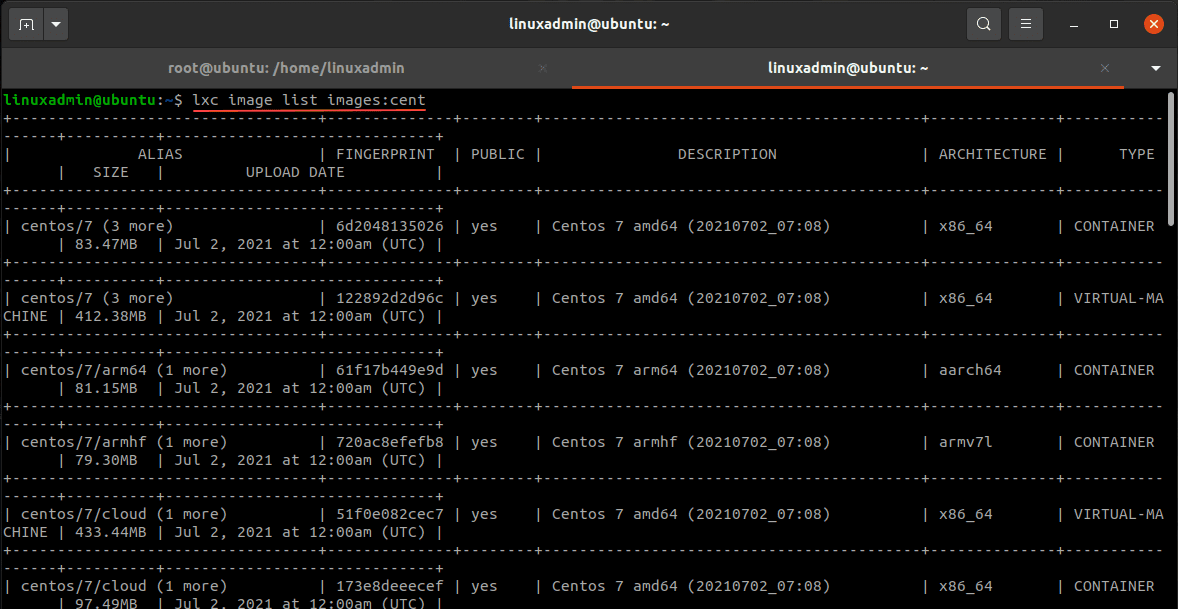
Launching a new LXC system container can be done with the following command. Note the example of the syntax.
lxc launch <image name> <name you want to use>
lxc launch ubuntu:18.04 ubuntu18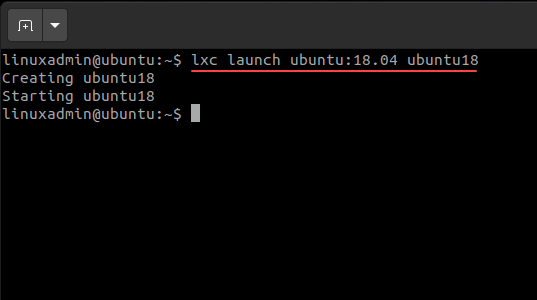
Viewing containers and network information
Below, you can see the commands used to view the running containers:
lxc listTo view IP address and network information:
ip a sWith the IP command, you can see the network bridge created during installation and also the virtual network adapter created for the now running system container.

Copying an LXC container
You can copy an LXC container very quickly. Once the image has pulled down, you can quickly copy a container to a new container. To do that, use
lxc copy <container name> <name of new container>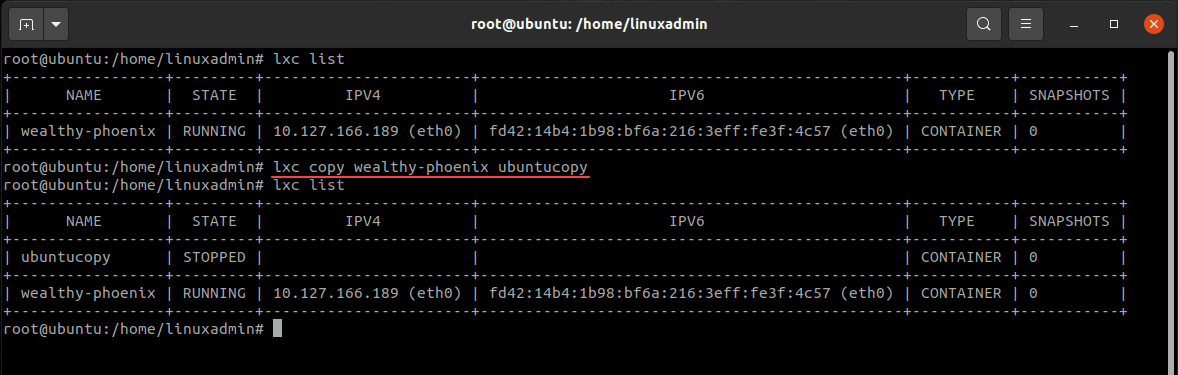
Connecting to the LXC container
You can connect to the LXC container and run commands with the following command:
lxc exec wealthy-phoenix bash
Viewing information about an LXC container:
To view information about an LXC system container, use the following:
lxc info <container name>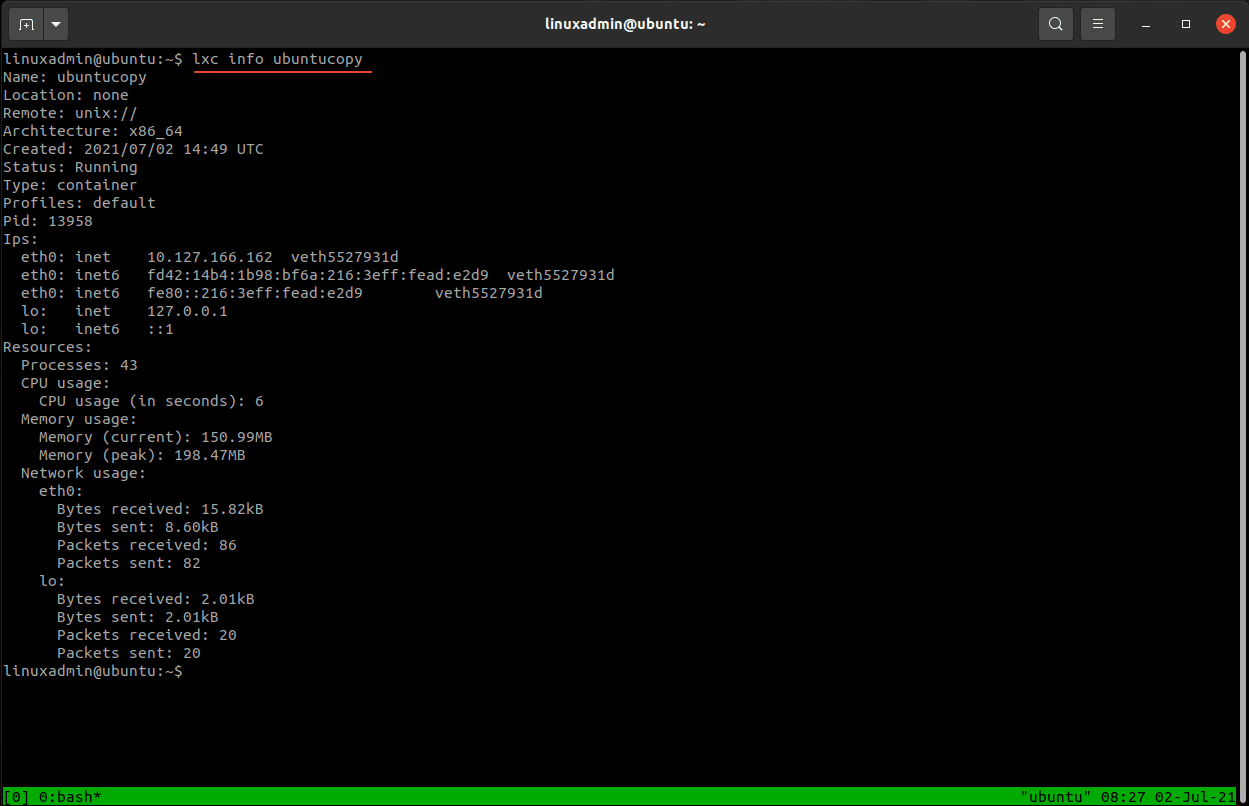
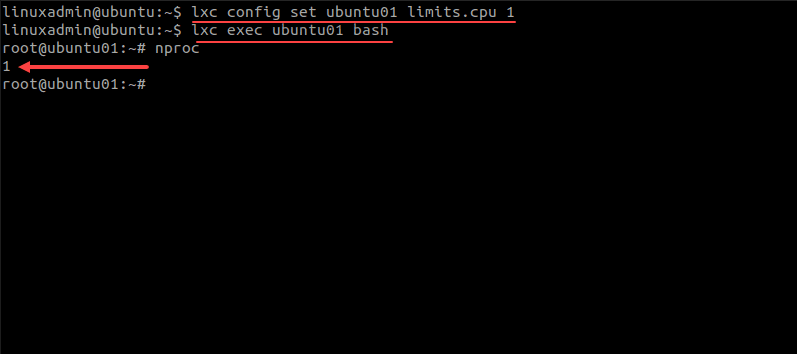
Dynamically setting memory and CPU limits in LXC
By default, your LXC system containers have access to all CPUs and memory that your host has physically installed. You can limit this both dynamically and by using profiles. First, let’s look at the dynamic approach:
lxc config set <container name> limits.memory <memory amount
lxc config set ubuntucopy limits.memory 512MB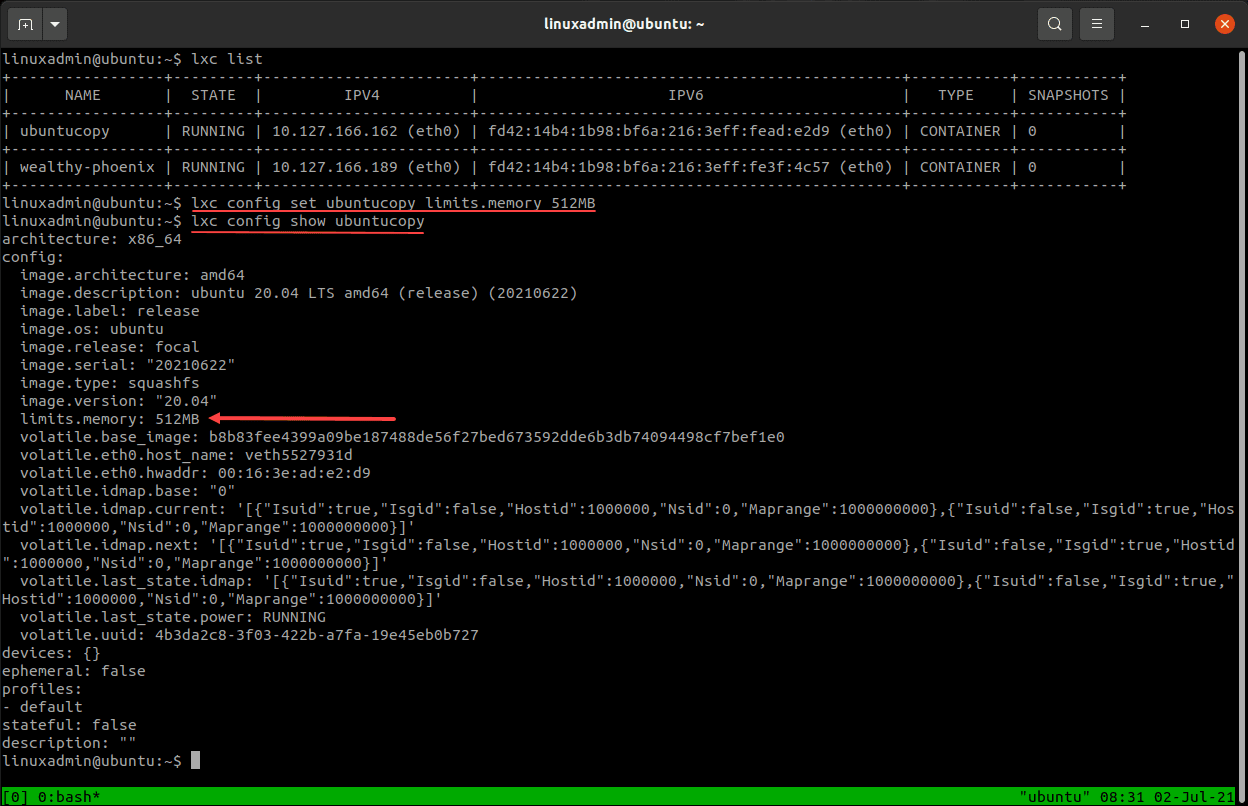
Copying and editing LXC profiles
There is a profile that exists after installation called default. You can easily copy the default profile and then edit it.

lxc profile edit <profile name>Below, we are setting a custom memory limit in the configuration for the custom-mem profile that was created.

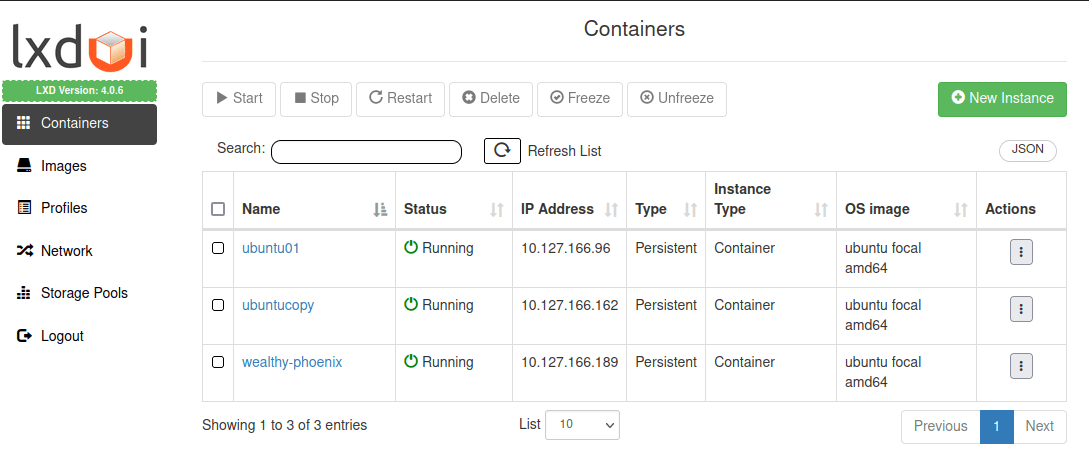
LXC container management GUI installation and configuration
Most everything we have done with LXC so far has been with the command line. Is there a GUI tool for use with LXC containers? Yes, there is an open source project called LXDUI which provides a really great web interface for your LXC containers running on your Linux host. You can view the official Github repository here: Installing LXDUI 2.0 · AdaptiveScale/lxdui Wiki · GitHub
The steps are very straightforward on the official Github repository.
Install
1. Install Prerequisites – here
2. Clone LXDUI from the GitHub repo:
git clone https://github.com/AdaptiveScale/lxdui.git
3. [Optional] Create a virtual environment for testing. Skip this step if you want to install it globaly on your system.
python3 -m venv mytestenv
Activate the virtual environment:
source mytestenv/bin/activate
4. Run the Installer (Setup)
You have a couple of options here. You can use pip or setuptools. Regardless of which way you chose to install it please make sure to upgrade pip first.
pip3 install --upgrade pip
To install with pip:
cd lxdui
pip3 install .
To install with setuptools:
cd lxdui
python3 setup.py install
Start LXDUI
At this point LXDUI should be installed and ready to start.
To start the app run: python3 run.py start
or use the new CLI: lxdui start
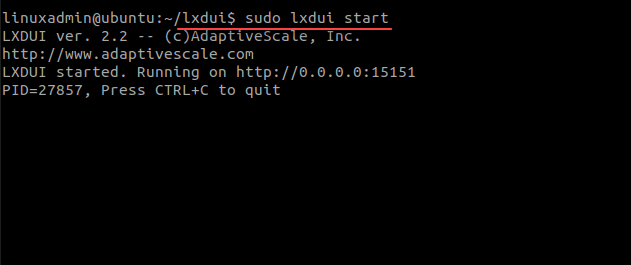
On your Linux host, simply connect to the loopback address, or use a remote host to hit the IP address of the host. The default port is 15151. As you can see in the screengrab below, there is quite a bit of functionality that exists in the web UI that makes interacting with LXC extremely easy in a point and click manner.
Concluding
It has been fun learning more about LXC and LXD and the great use case they fulfill, especially when working with multiple Linux machines in a lab environment. You can spin up new “VMs (system containers) in only a few seconds as opposed to provisioning and configuring a new virtual machine. LXC can be built as a proper HA solution with a clustered approach and the ability to migrate containers between LXC hosts.
Read other related posts here:
- Kubernetes Dashboard Helm installation and configuration
- Kubernetes Home Lab Setup Step-by-Step
- Install HAProxy in VMware vSphere with Tanzu Kubernetes
- Learning Kubernetes with VMware Kubernetes Academy Online
Google is updating how articles are shown. Don’t miss our leading home lab and tech content, written by humans, by setting Virtualization Howto as a preferred source.
About The Author