It is now easier than ever to try out a Palo Alto VM series firewall in your home lab environment if you are running VMware vSphere or KVM. Palo Alto now offers a 30-day trial of the VM series firewall so anyone can get their hands on one. This is a great development as it used to be difficult to get your hands on a Palo VM series firewall. You had to either know someone or work through your reseller to get one to play around with. In this post, we will look at Palo Alto VM series basic interface and routes configuration in ESXi to get up and running with a VM series firewall in the home lab, PoC, or other environments.
Virtual networking with the Palo Alto VM Series firewall
One of the added complexities with any type of virtual firewall is making sure you “plumb” in the virtual networking correctly. You will want to align your vSphere port groups to match the interface you have configured in the Palo Alto VM series.
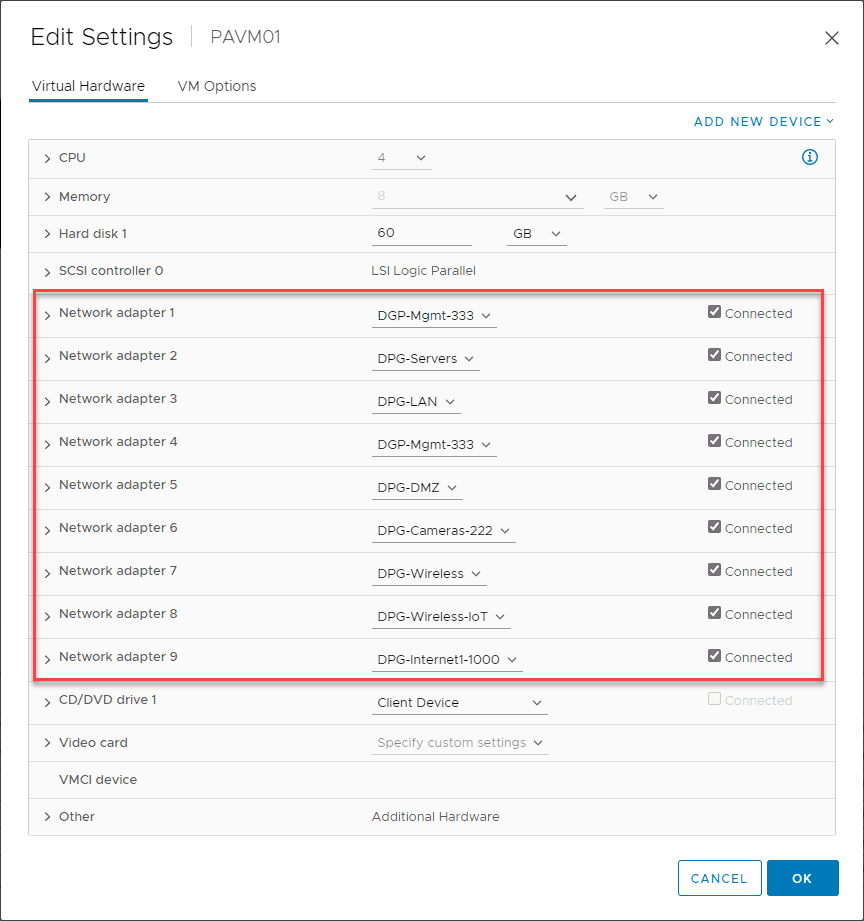
Below, you can see the port groups I have configured for the VM series. For simplicity, I have one virtual network adapter per port group. If you are allowing multiple VM tags on a port group, you can also have subinterfaces on the VM series firewall and tag subinterface traffic. Keep in mind you have to have your physical switches configured for trunking on the uplinks as well. You want to make sure your interfaces and any subinterfaces align with the correct virtual network adapter.
Also, one thing to note in the interface numbering. The special management interface for the VM series firewall will be the first virtual network adapter configured. The first network adapter listed in the Network > Interfaces configuration in the Palo Alto VM series firewall will actually be the 2nd interface configured in the properties of the virtual machine.
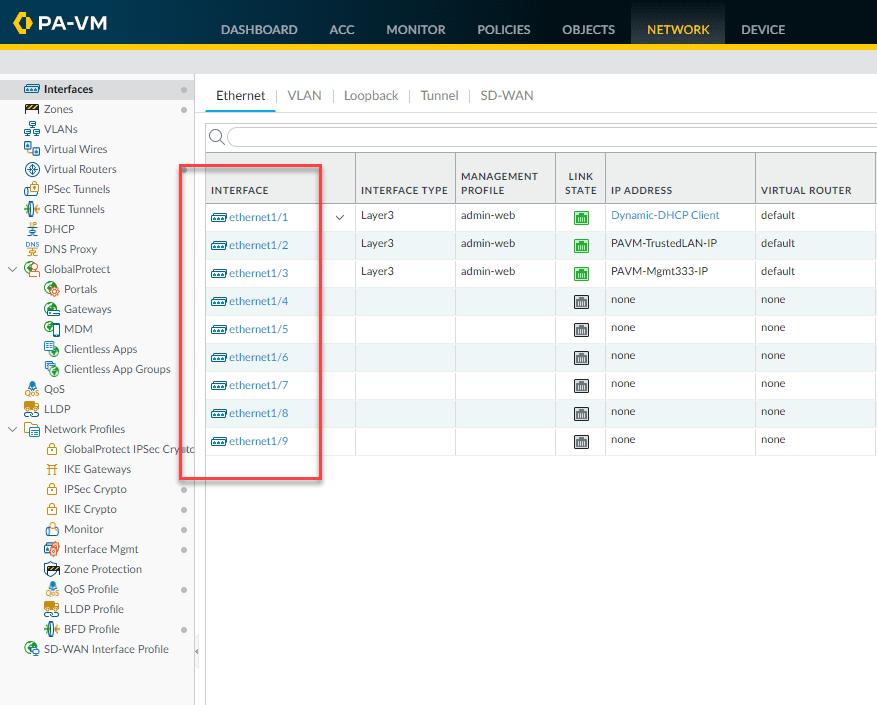
Below, is a look at the VM series interface with the 9 interfaces displaying that are configured in the properties of the VM series virtual machine. As you can see below, I have three configured in the screenshot. As noted, ethernet 1/1 is actually the second virtual network adapter attached to the VM series virtual machine.
Palo Alto VM series interface configuration
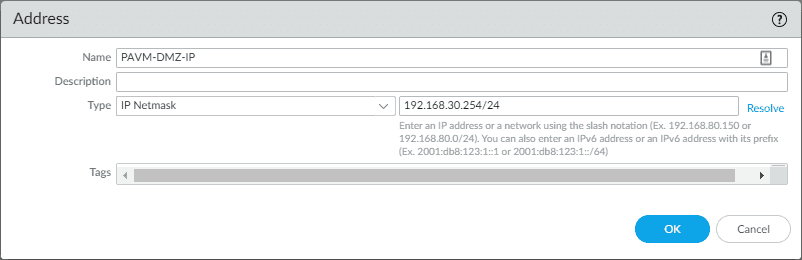
Before configuring a new interface, let’s create the IP address object we will use to assign an IP address to the VM series virtual machine interface. To create a new interface, navigate to Objects > Addresses > Add.
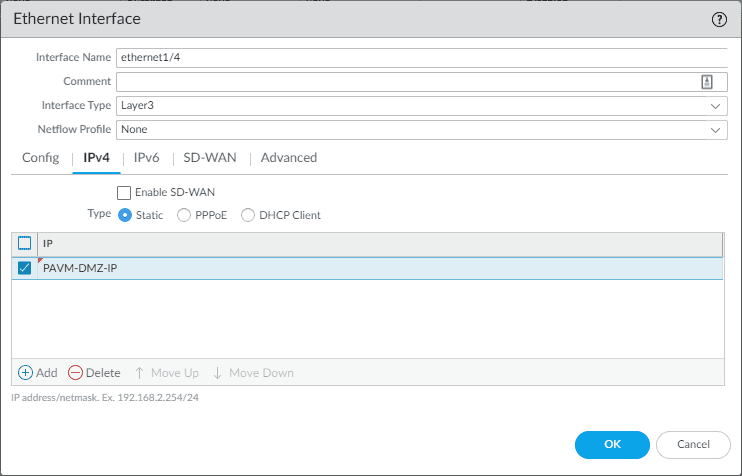
Let’s add another interface so you get the feel for the initial VM series interface configuration. Here, I have selected the Interface Type to be Layer3 since I want this to be a gateway address for a specific virtual network. Note the virtual router and security zone. Before we set those, let’s assign the IP to the interface as there is a quirk that won’t let you assign the interface to the security zone before you attach an IP to an interface.

Once you select the Interface Type as Layer3, you will have the option to assign the IPv4 or IPv6 information. Here I am assigning the IP address object we created earlier. Click OK to close out of the dialog box.
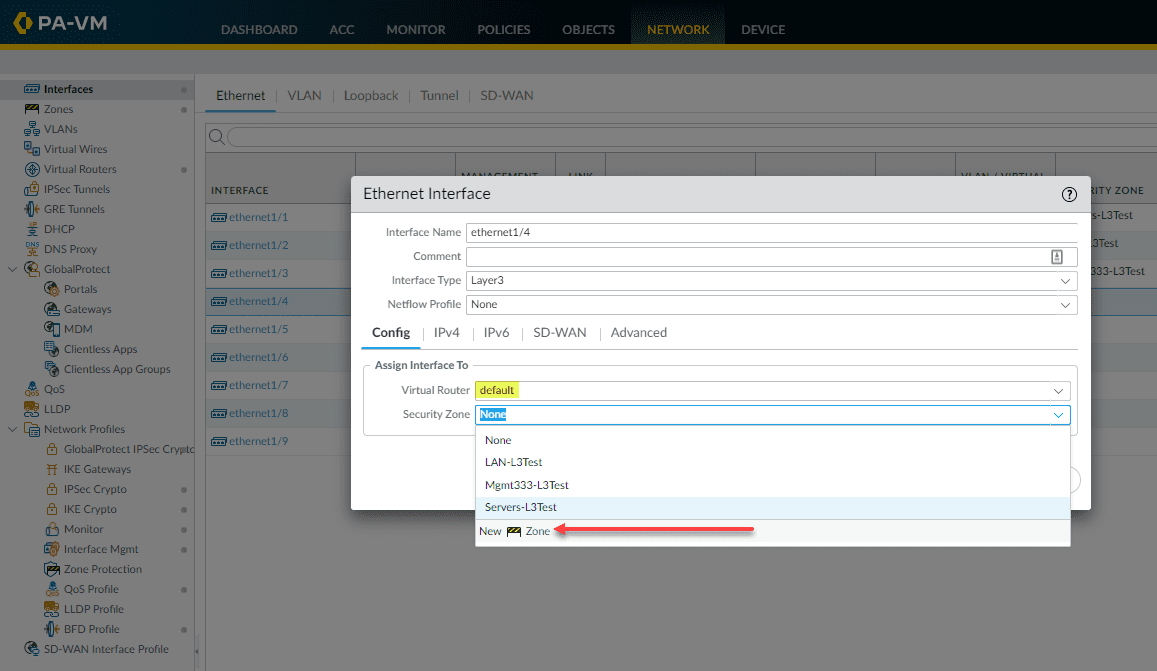
Now, click your interface for configuration again and select the Virtual Router default. Click the Security Zone dropdown and click New Zone.
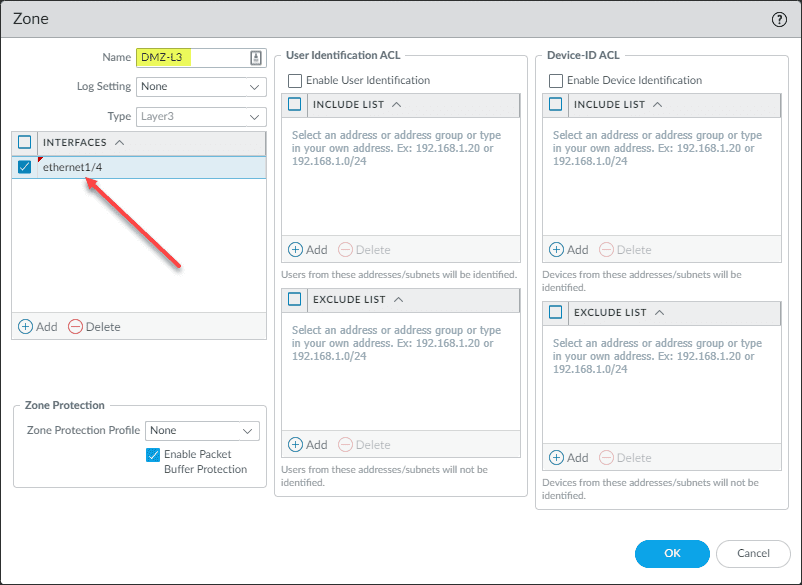
This brings up the new zone configuration. Name the zone and then select the interface to associate with the new security zone. Click OK.
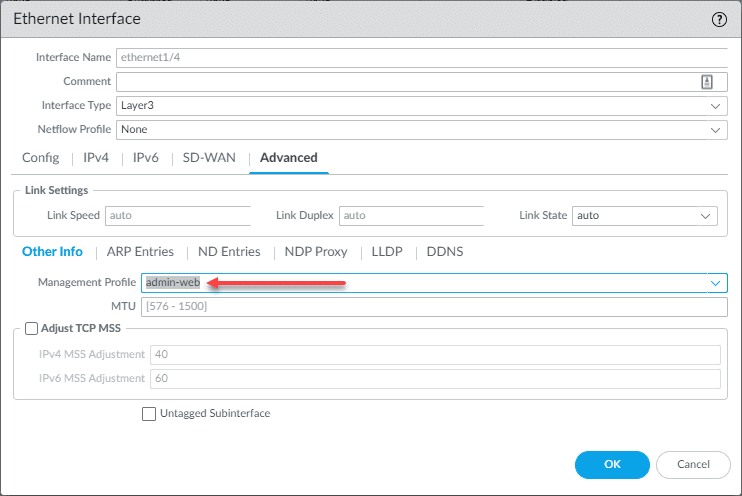
Go back into the configuration of the interface and click the Advanced tab. Note the Management Profile selection. The management profile configures the services that you want to “answer” on this interface. For example, do you want the interface to be pingable? Do you want to be able to get to the HTTPS or SSH management on this interface? With the management profile, you can configure that. If you don’t already have a management profile configured, you can click the dropdown and create a new one from the dialog box.
At this point, you should be able to commit your changes and ping the interface from the same VLAN, if you configured the management profile to allow ICMP.
Palo Alto VM series Routes configuration
Most likely you will want to configure your routing, default gateway, and other configuration related to traditional routing. If you configure one of your interfaces as your “WAN” type interface, you will most likely be pointing your traffic to the gateway supplied by the ISP. Some may even have a DHCP configuration from the ISP in a commodity Internet configuration, such as a cable connection, etc.
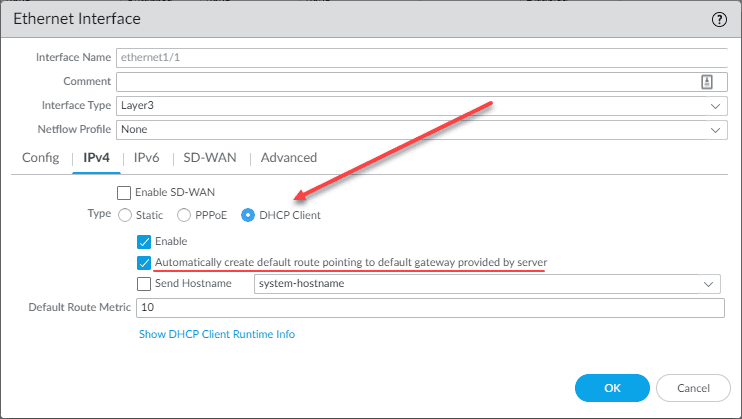
This makes lab environments and other POCs easy as well. You can configure one of the interfaces as a DHCP client for the interface pointed to your upstream router and the PAN-OS will automatically create default route pointing to default gateway provided by server. You can also uncheck this option.
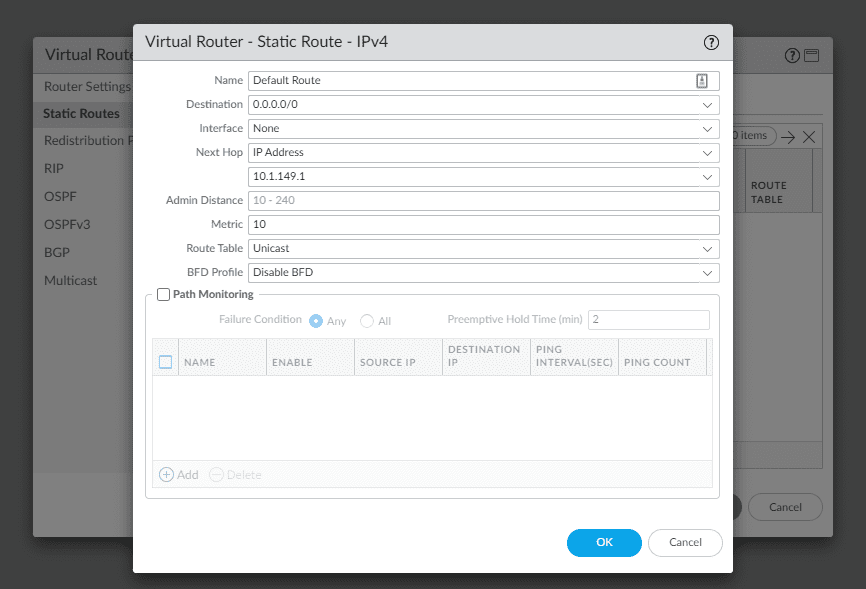
Alternatively, you can navigate to Network > Virtual routers > default and add a static route for your Default Gateway as well. For this, you will use the following:
- Destination – 0.0.0.0/0
Name it and choose the method of your next hop, whether this is an IP address, interface, etc.
Final Notes
Hopefully, this Palo Alto VM Series Basic Interface and Routes configuration in ESXi will help to get a basic configuration on your Palo Alto VM Series interfaces and establish basic routing for getting traffic moving in the environment. With the new Palo VM 30-day trials, anyone can download a VM Series for ESXi and start playing around with Palo Alto firewalling and routing in the home lab environment which is a great way to become familiar with the solution.
Learn about how to download the 30-day trial here:
Take a look at a few of my other Palo Alto Vposts:
- Palo Alto Initial Setup CLI
- Install Palo Alto VM Series in VMware vSphere
- VMware NSX Palo Alto Integration
Google is updating how articles are shown. Don’t miss our leading home lab and tech content, written by humans, by setting Virtualization Howto as a preferred source.
About The Author