Proxmox HA Cluster Configuration for Virtual Machines

If you are learning the Proxmox hypervisor or want high-availability cluster resources for learning and self-hosting services with some resiliency, building a cluster is not too difficult. Also, you can easily create Proxmox HA virtual machine clustering once you create cluster nodes. Let’s look at Proxmox HA virtual machine deployment and how to ensure your VM is protected against failure and increase uptime, much like VMware HA.
Table of contents
Proxmox cluster: the starting point
The starting point for a high availability solution with Proxmox is the Proxmox cluster. Most start with a single Proxmox server in the home lab. However, building a cluster requires a 2nd and third node. There are ways to increase the vote of one node if you have two Proxmox servers in a cluster if one goes down. However, for “production” Proxmox VE, having 3 nodes is the standard for configuring a minimum Proxmox clusters for scalability and avalability.
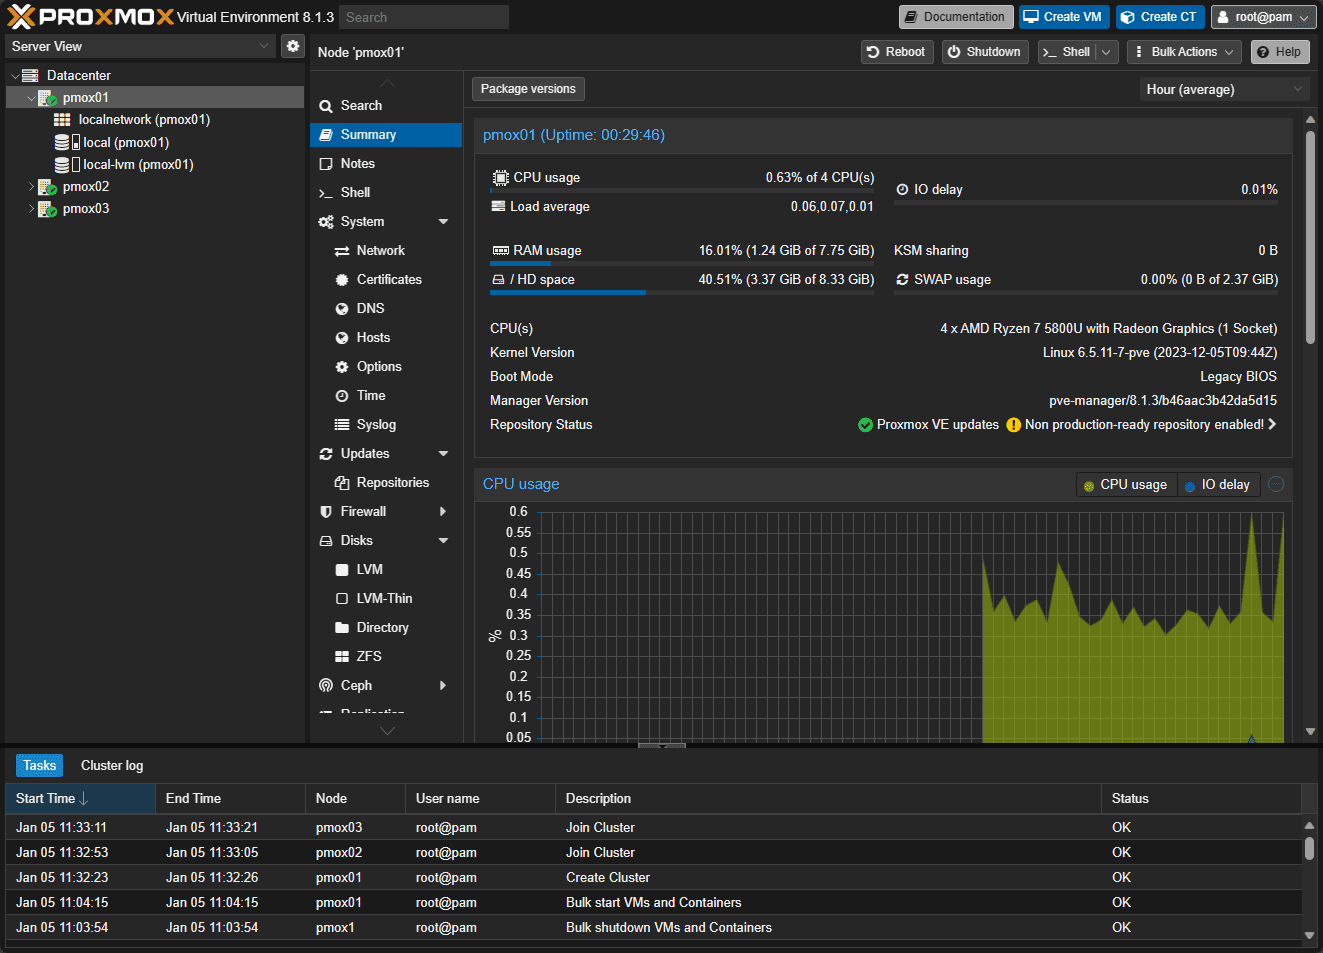
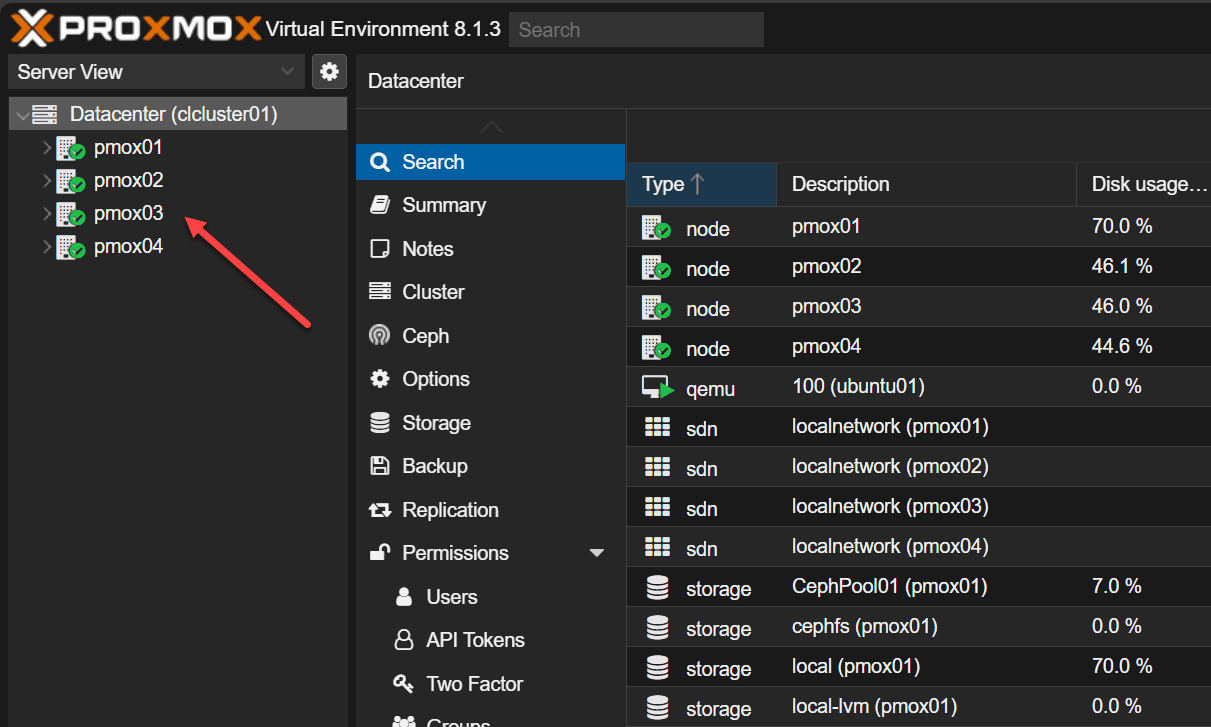
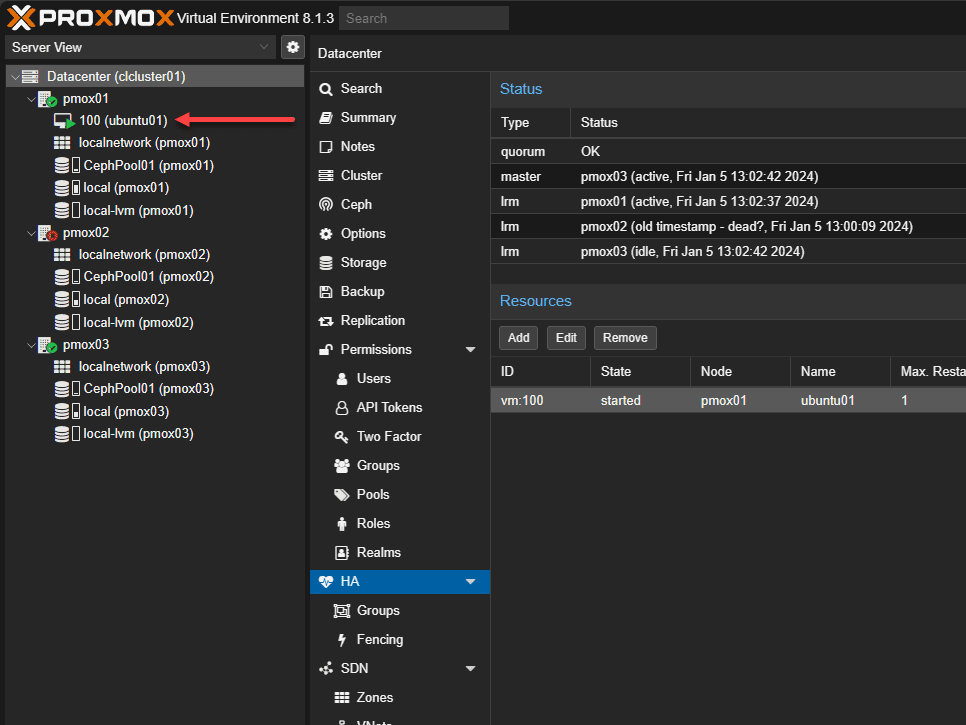
Below, I have three nodes in a Proxmox cluster running Proxmox 8.1.3 in the Proxmox UI.
A Proxmox cluster includes multiple Proxmox servers or nodes that operate together as a logical unit to run your workloads. Understanding how to set up and manage the PVE cluster service effectively is important to ensure your VM data is protected and you have containers hardware redundancy.
Remember that this doesn’t replace all the other best practices with hardware configurations, such as redundant network hardware and power supplies in your Proxmox hosts and UPS battery backup as the basics.
Shared storage
When you are thinking about a Proxmox cluster and virtual machine high availability, you need to consider integration with shared storage as part of your design. Shared storage is a requirement so that all Proxmox cluster hosts have access to the data for your VMs. If a Proxmox host goes down, the other Promox hosts can pick up running the VM with the data they already have access to.
You can run a Proxmox cluster where each node has local storage, but this will not allow the VM to be highly available.
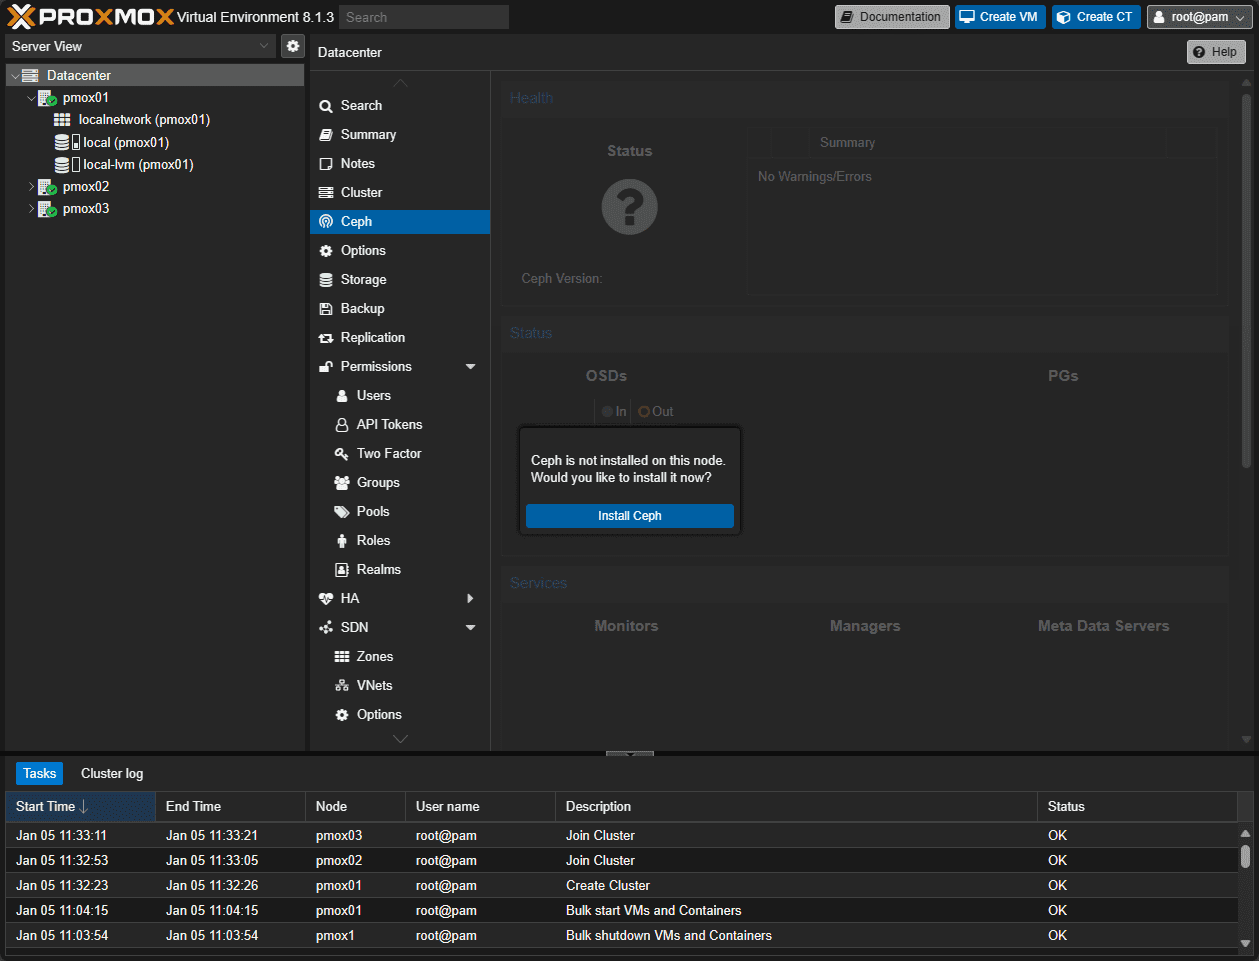
For my test cluster, I configured Proxmox Ceph storage. However, many other types of shared storage can work such as an iSCSI or other connection to a ZFS pool, etc. Below, we are navigating to Ceph and choosing to Install Ceph.
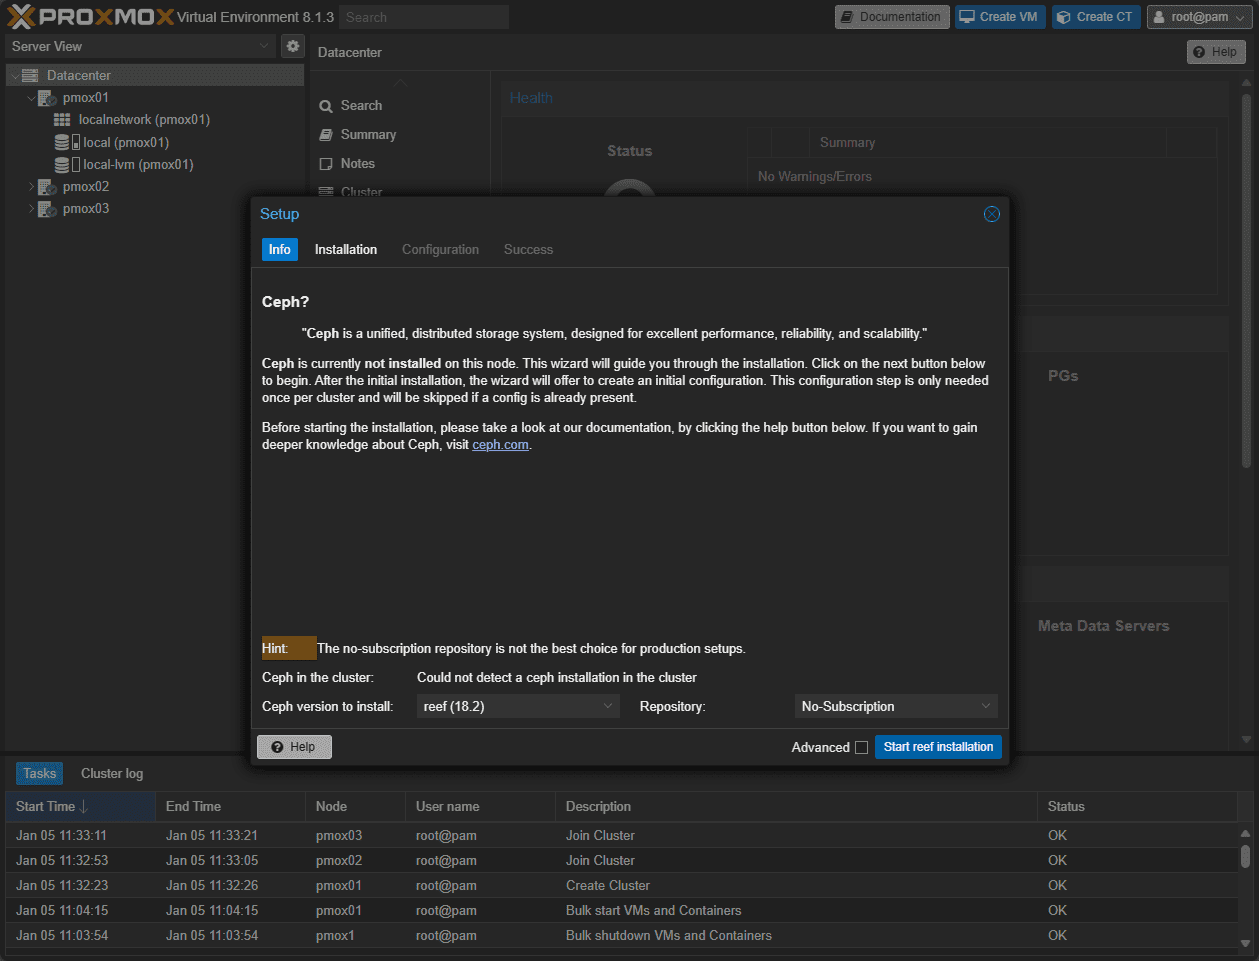
This launches the Info screen. Here I am choosing to install Ceph Reef and using the No-Subscription repo.
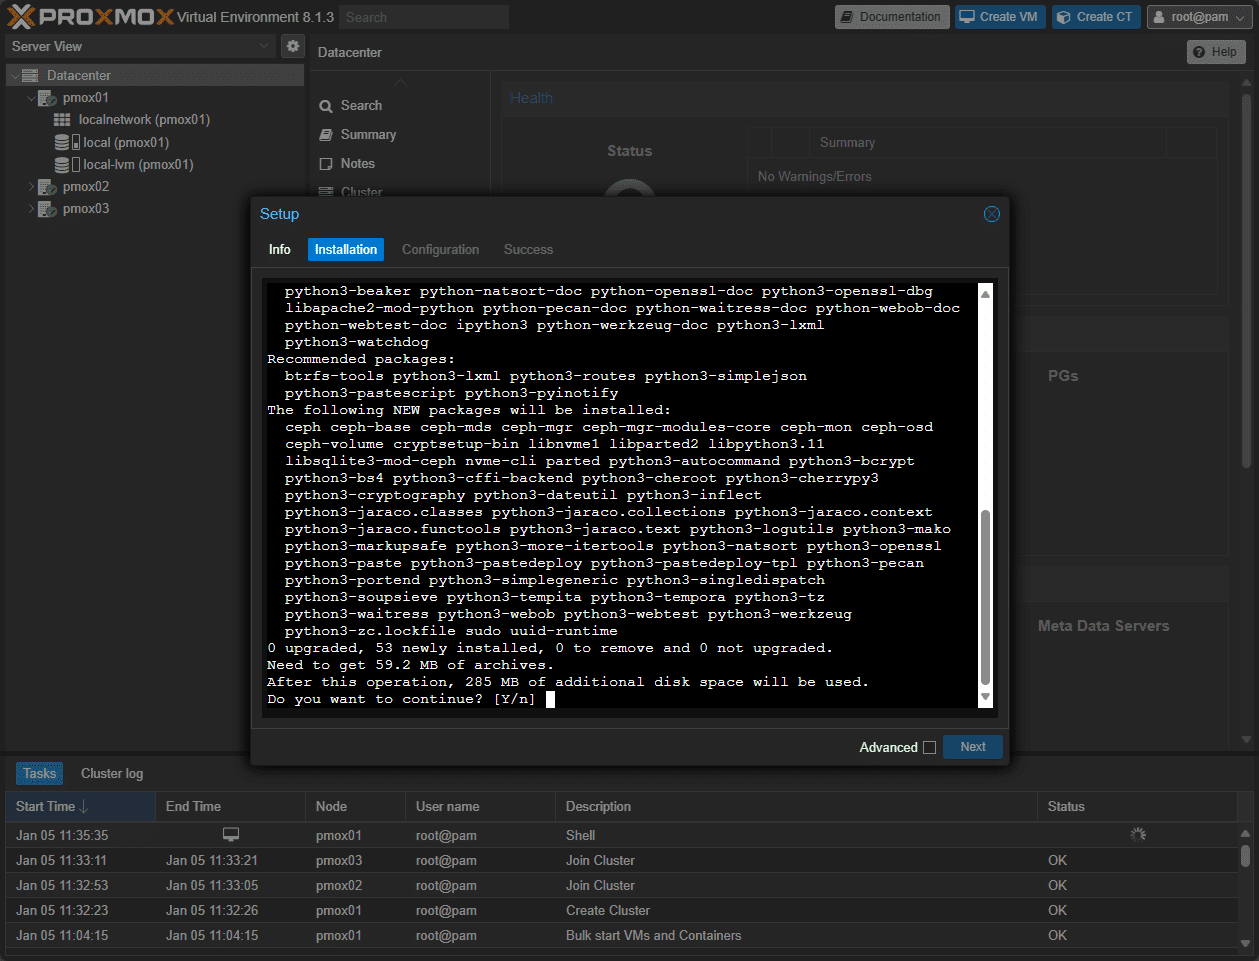
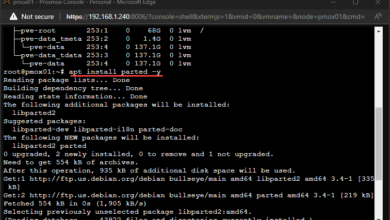
Type Y to begin the installation of Ceph.
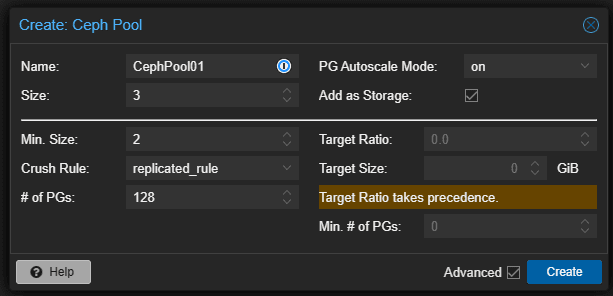
Create the Ceph Pool, including configuring the:
- Name
- Size
- Min Size
- Crush Rule
- # of PGs
- PG autoscale mode
Below is the default value for the configuration.
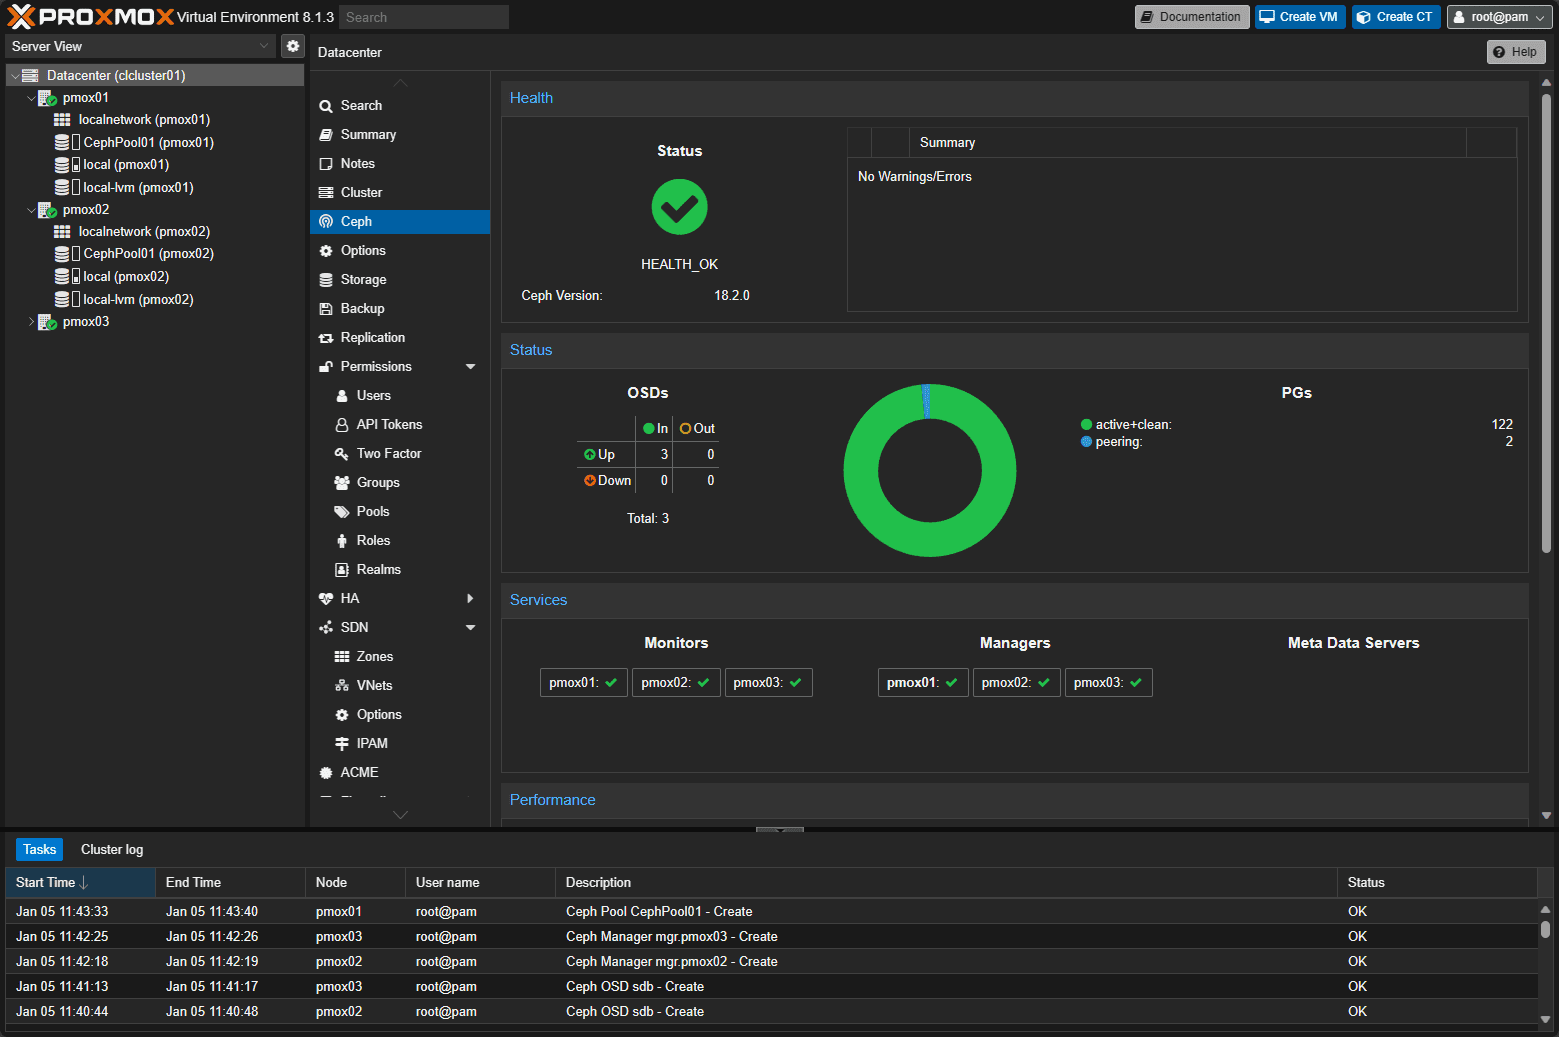
A healthy Ceph pool after installing Ceph on all three nodes, creating OSDs, Managers, Monitors, etc.
Setting Up Your Proxmox Cluster
The journey to high availability begins with the creation of a Proxmox cluster. Here, we’ll guide you through the process of joining multiple nodes to form a unified system. Each Proxmox node will contribute to the cluster’s overall strength, offering redundancy and reliability.
Key Steps in Creating a Proxmox Cluster
- Choosing Cluster Nodes: Selecting the right Proxmox nodes is the first step. Ensure that each node is equipped with redundant network hardware and adequate storage capabilities.
- Configuring the Network: A stable cluster network is vital. We’ll explore how to set up a network that supports HA, focusing on IP address configuration and avoiding common pitfalls like split brain scenarios.
- Cluster Formation: The process of forming a cluster involves initializing the first node and then adding additional nodes with the join cluster function. We’ll walk you through the commands and steps necessary to create your cluster.
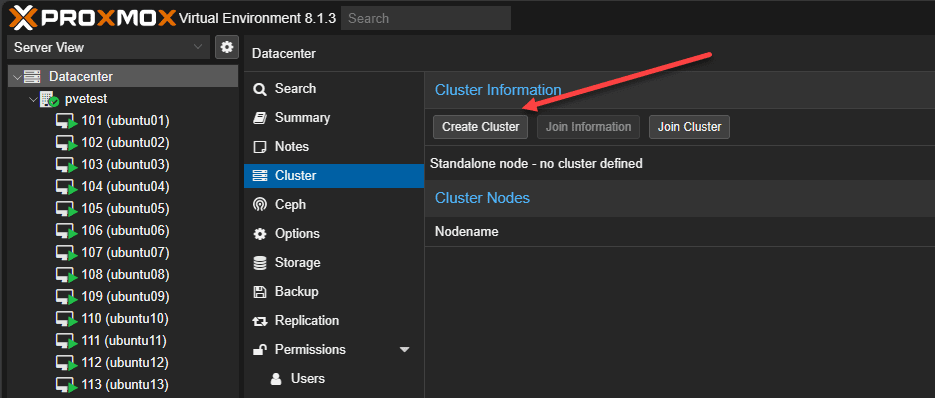
Let’s look at screnshots of creating a Proxmox cluster and joining nodes to the cluster. Navigate to Datacenter > Cluster > Create Cluster.
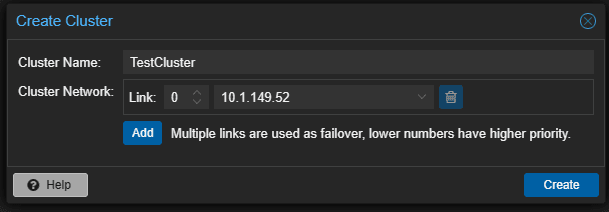
This will launch the Create Cluster dialog box. Name your cluster. It will default to your primary network link. You can Add links as a failover. Click Create.
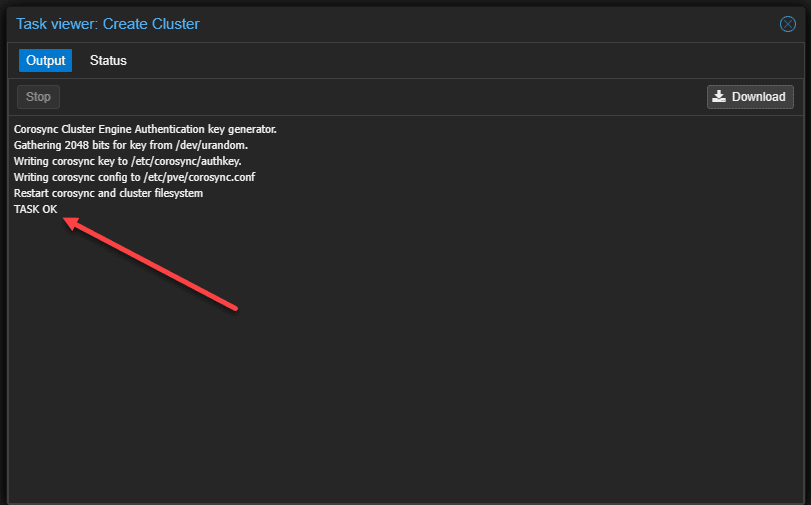
The task will begin and should complete successfully.
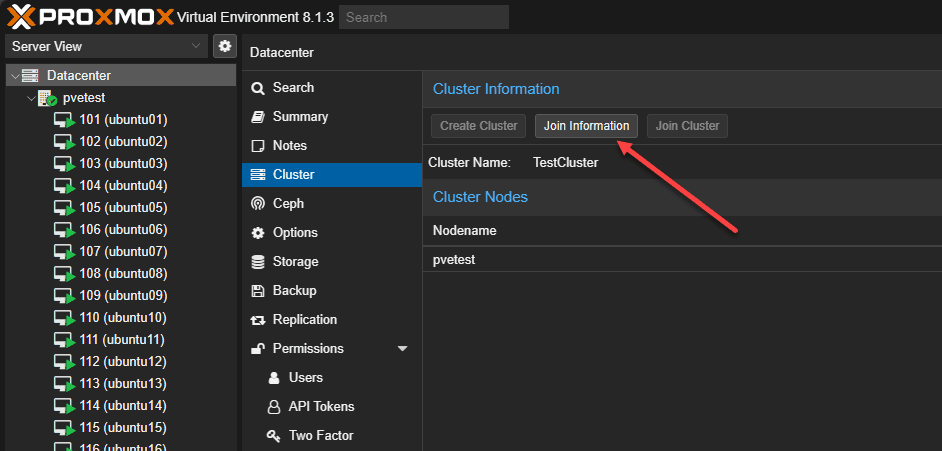
You can then click the Cluster join information to display the information needed to join the cluster for the other nodes. You can click the copy information button to easily copy the join information to the clipboard.
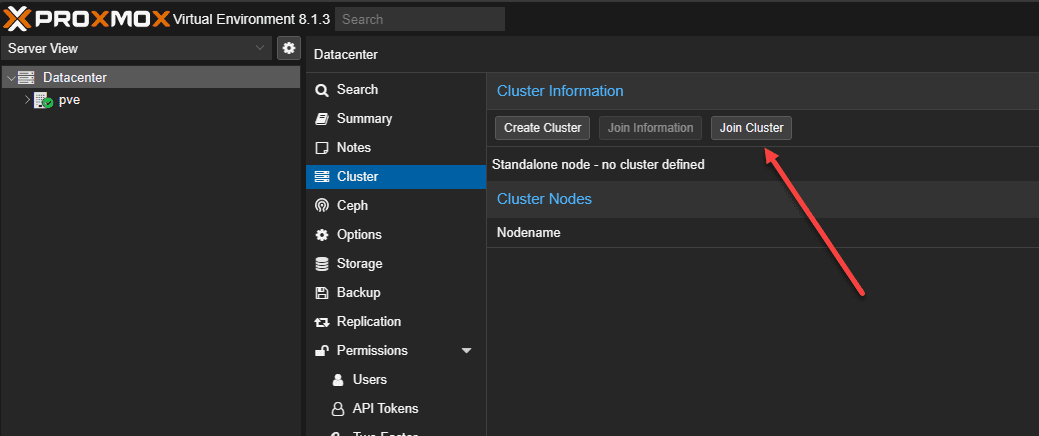
On the target node, we can click the Join Cluster button under the Datacenter > Cluster menu.
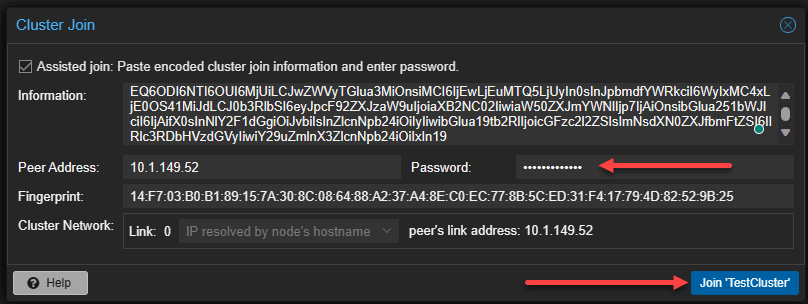
Now we can use the join information from our first node in the cluster to join additional nodes to the cluster. You will also need the root password of the cluster node to join the other Proxmox nodes.
Below, I have created a cluster with 4 Proxmox hosts running Ceph shared storage.
Configuring Virtual machine HA
Once your Proxmox cluster is operational, the next step is configuring HA for your virtual machines. The Virtual Machine HA config provides automation for restarting a VM that is owned by a failed host, on a healthy host. This involves setting up shared storage, understanding HA manager, and defining HA groups administration.
High Availability Setup Requirements
When provisioning Proxmox high availability, there are a number of infrastructure requirements.
- Shared Storage Configuration: For VMs to migrate seamlessly between nodes, shared storage is a necessity as we have mentioned above so data does not have to move during a failover.
- The HA Manager: Proxmox’s HA manager plays a critical role in monitoring and managing the state of VMs across the cluster. It works like an automated sysadmin. After you configure the resources it should oversee, such as VMs and containers, the ha-manager monitors their performance and manages the failover of services to another node if errors occur. Also, the ha-manager can process regular user commands, including starting, stopping, relocating, and migrating services.
- Defining HA Groups (optional) : HA groups determine how VMs are distributed across the cluster.
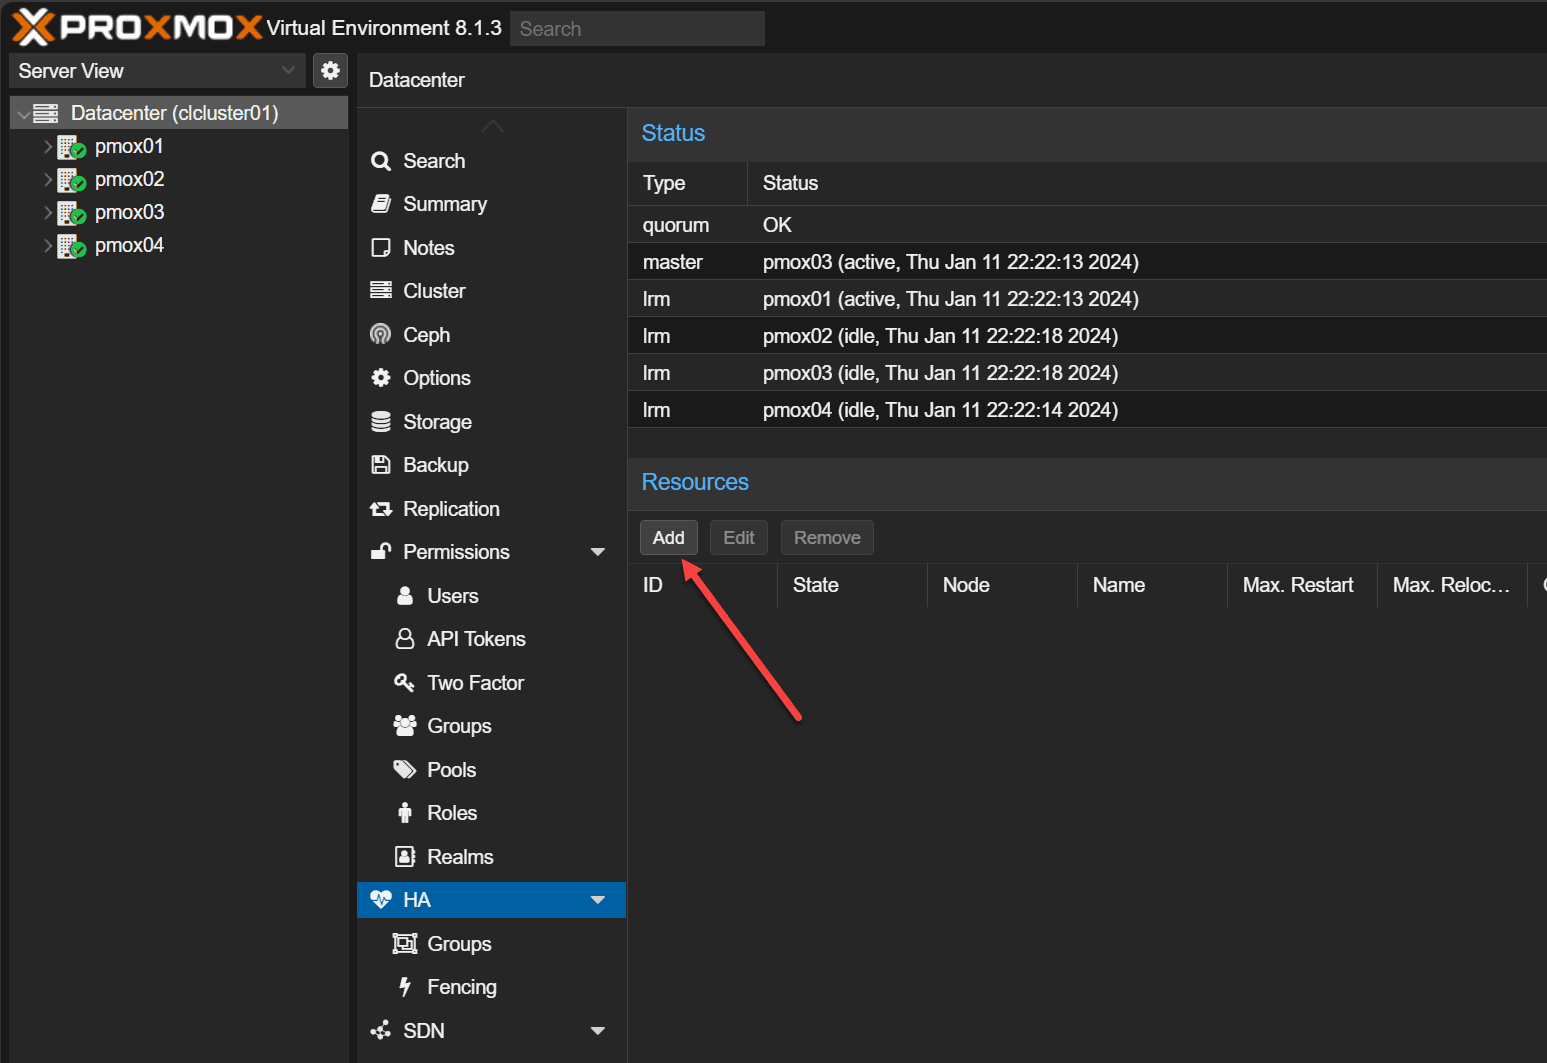
Let’s look at a basic example of configuring a single VM for high availability. Below, in the web interface we have navigated to the Datacenter > HA > Resources > Add button. Click the Add button.
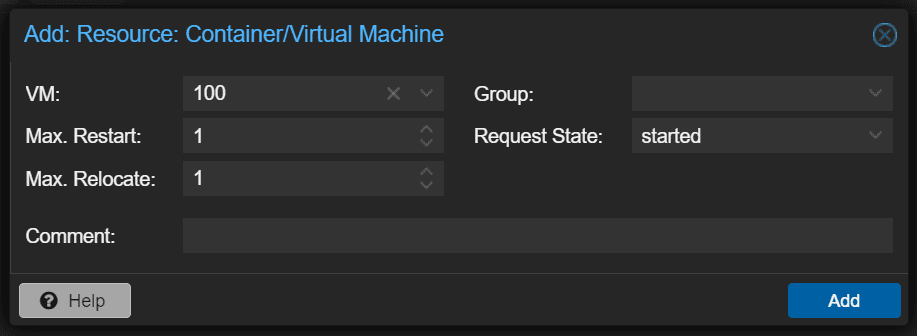
Select the VM ID to create the HA resource.
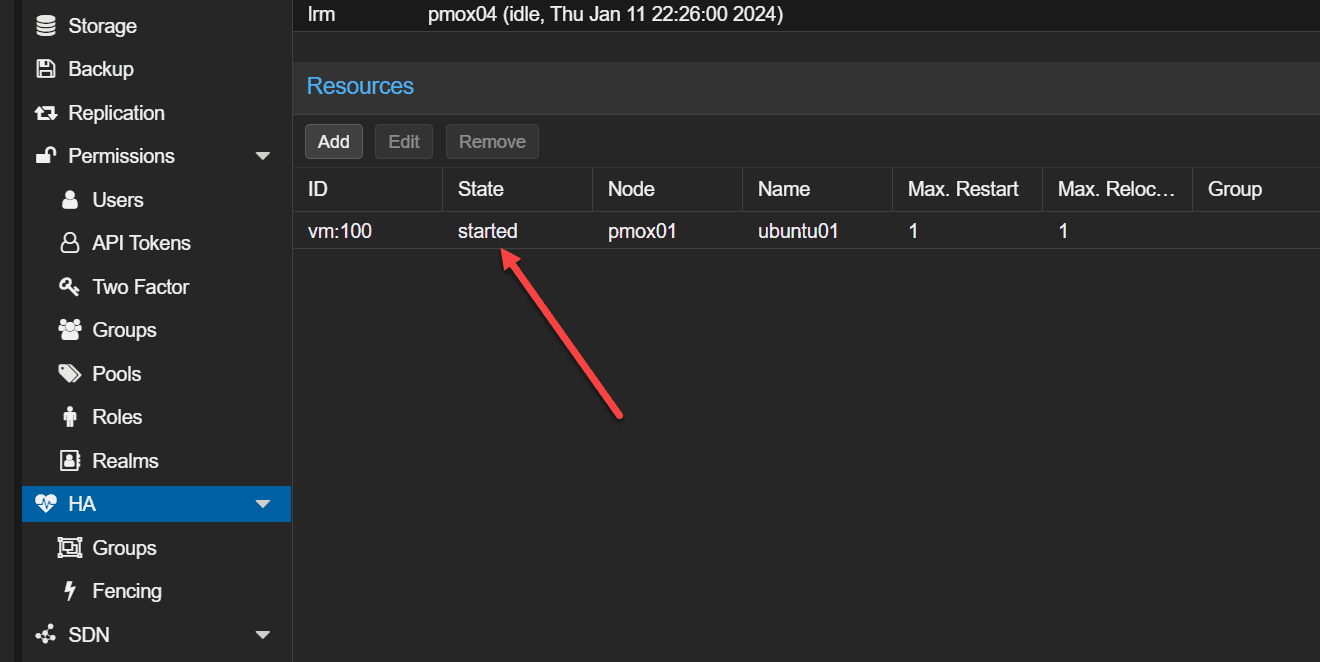
This will configure a service for the VM to make the VM highly available. The service will start and enter the started state. Now, we have the VM configured for HA.
Configuring HA groups (optional)
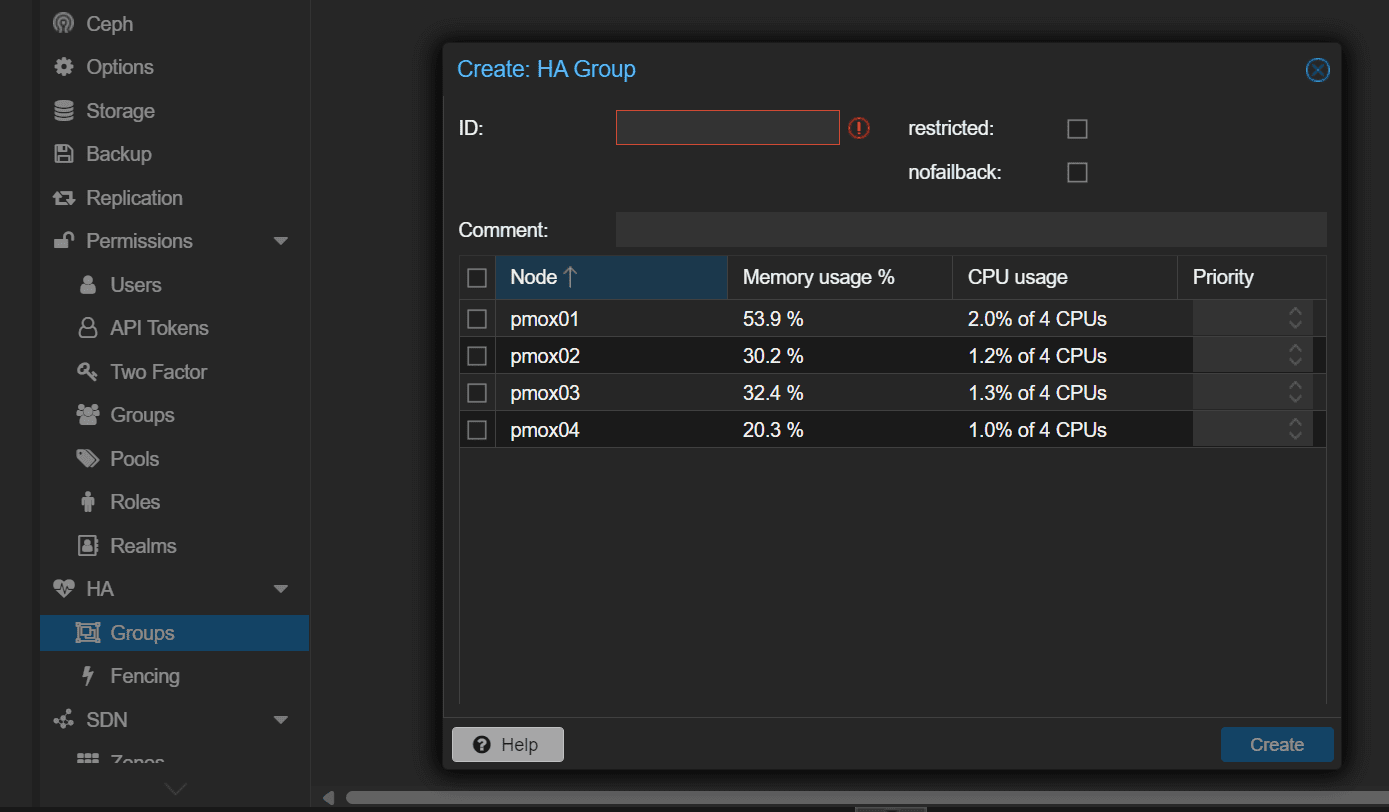
The HA group configuration file /etc/pve/ha/groups.cfg defines groups of cluster nodes and how resources are spread across the nodes in the cluster. You can configure resources to only run on the members of a certain group. You can use this to give priority to certain VMs, on certain hosts. Below is the Create HA Group configuration dialog box.
Fencing device configuration
Fencing is important for managing node failures in Proxmox VE. When a host goes down and is completely offline, it prevents resource duplication during recovery. Without fencing, resources could run on multiple nodes simultaneously which can corrupt data.
Unfenced nodes can access shared resources, posing a risk. For instance, a VM on an unfenced node might still write to shared storage even if it’s unreachable from the public network, causing race conditions and potential data loss if the VM is started elsewhere.
Proxmox VE employs various fencing methods, including traditional ones like power cutoffs and network isolation, as well as self-fencing using watchdog timers. These timers, integral in critical systems, reset regularly to prevent system malfunctions. If a malfunction occurs, the timer triggers a server reboot. Proxmox VE utilizes built-in hardware watchdogs on modern servers or falls back to the Linux Kernel softdog when necessary.
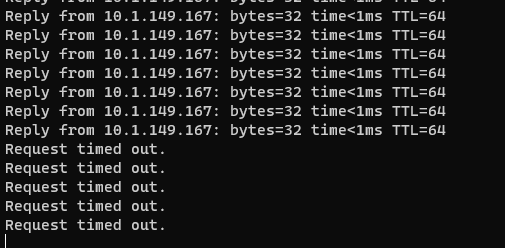
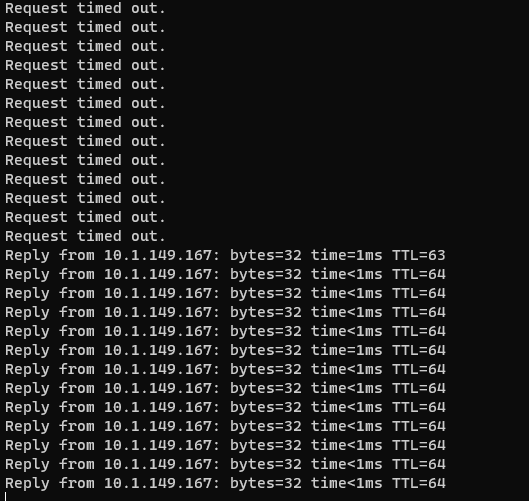
Now, I simulated a failure of the Proxmox host by disconnecting the network connection. The pings to the VM start timing out.
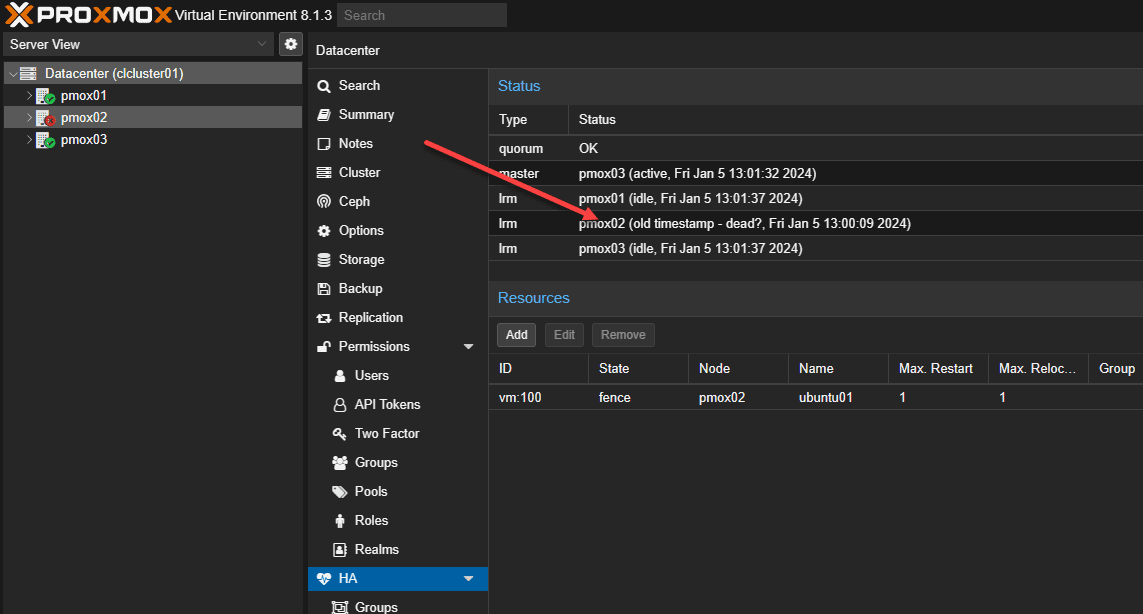
The host is now taking down the VM resource.
The HA process will restart the VM on a healthy host.
After just a couple of minutes, the VM restarts and starts pinging on a different host.
Best Practices for Cluster Health
- Regular Updates and Backups: Keeping your Proxmox servers and VMs up-to-date is critical. High availability is not a replacement for VM and container backup. Always protect your data with something like Proxmox Backup Server.
- Monitoring Tools and Techniques: Proxmox has several tools for monitoring the health and performance of your cluster. Keep a check on your cluster health. Make sure monitor your nodes from the GUI and ensure things like shared storage are in a healthy state.
- Handling Node Failures: Even with HA, node failures can happen. We’ll cover the steps to recover from a failed node and how to ensure minimal impact on your virtual machines.
- Documentation: Be sure to document the configuration of the cluster, including IPs, storage configuration, etc.
Rebooting Proxmox Servers running HA
If you want to reboot a Proxmox server for maintenance or other that is part of an HA cluster, you need to stop the following service on the node, either from the command line or GUI:
/etc/init.d/rgmanager stopWrapping Up
Proxmox virtualization has some great features, including high-availability configuration for virtual machines. In this article, we have considered the configuration of a high-availability Proxmox VE cluster and then configuring high availability for VMs. In the comments, let me know if you are running a Proxmox VE cluster, what type of storage you are using, and any other details you would like to share.


