Let’s look at the steps to upgrade your Proxmox host to Proxmox 8.1. In the example below, I will be upgrading an 8.0.3 host that I have running to 8.1 in the home lab.
Table of contents
New features
There are many new features to speak of in Proxmox 8.1. I just uploaded a post covering the new features. However, as a quick overview, the major new features include:
- Software-defined networking
- Secure boot
- New bulk actions
- Upgraded Linux kernel
- A new flexible notification system
- Upgraded Ceph Reef version
No enterprise subscription prerequisites
If you are running Proxmox in the home lab and aren’t running an enterprise subscription, which is how most home lab enthusiasts will be running, you need to reconfigure your update repositories. You may have already done this earlier for a lower-level Proxmox version. However, if you haven’t already updated it to the “bookworm” repo, we will need to make that change, and then also change to the Ceph “reef” repo.
Update the following files in the comment lines:
#/etc/apt/sources.list.d/pve-enterprise.list

From: deb https://enterprise.proxmox.com/debian/pve bookworm enterprise
To: deb http://download.proxmox.com/debian/pve bookworm pve-no-subscription

#/etc/apt/sources.list.d/ceph.list
From: deb https://enterprise.proxmox.com/debian/ceph-quincy bookworm enterprise
To: deb http://download.proxmox.com/debian/ceph-reef bookworm no-subscription
Proxmox 8.1 upgrade steps from the GUI
After you have reconfigured the files above, you will need to refresh your updates. The following are Proxmox 8.1 upgrade steps using the GUI web interface.
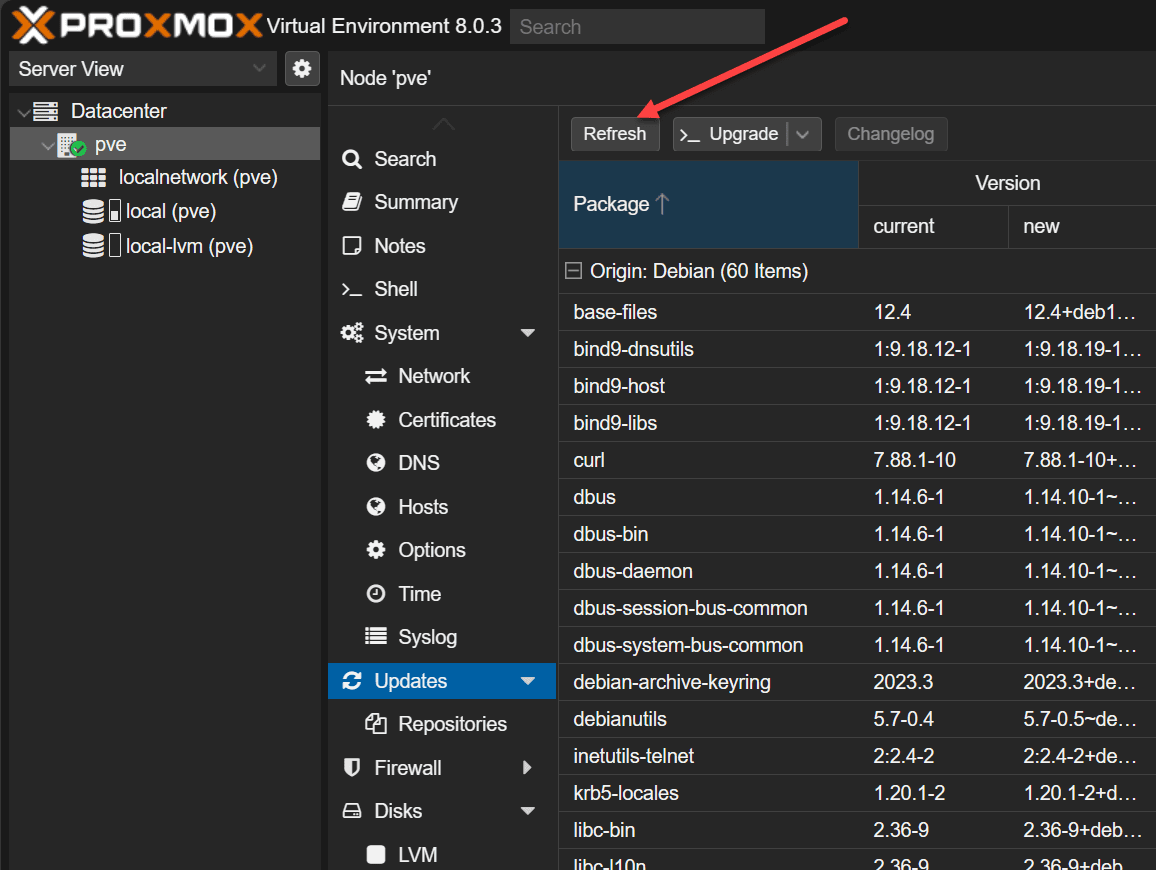
First, click your Proxmox host in the GUI. Navigate to System > Updates > Refresh. When you click Refresh, it runs an “apt-get update”.
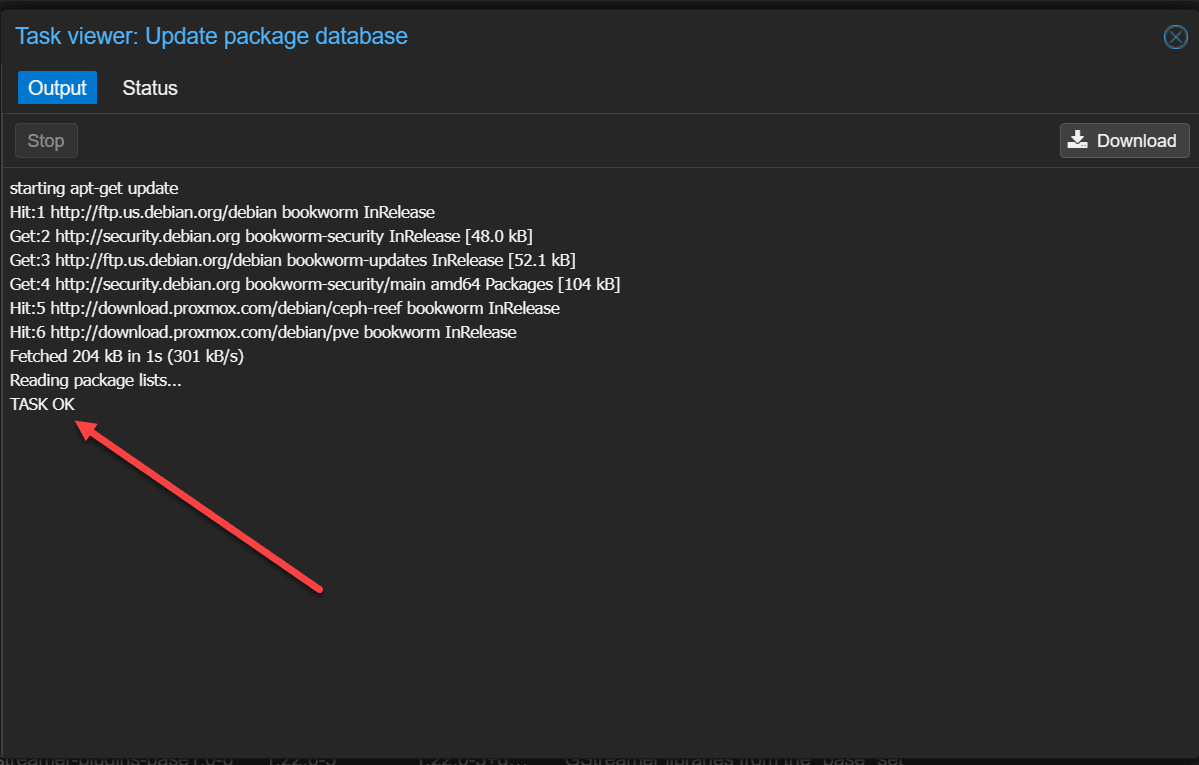
You will see the Task viewer display the status of the apt-get update.
After refreshing the updates, you can click the Upgrade button.
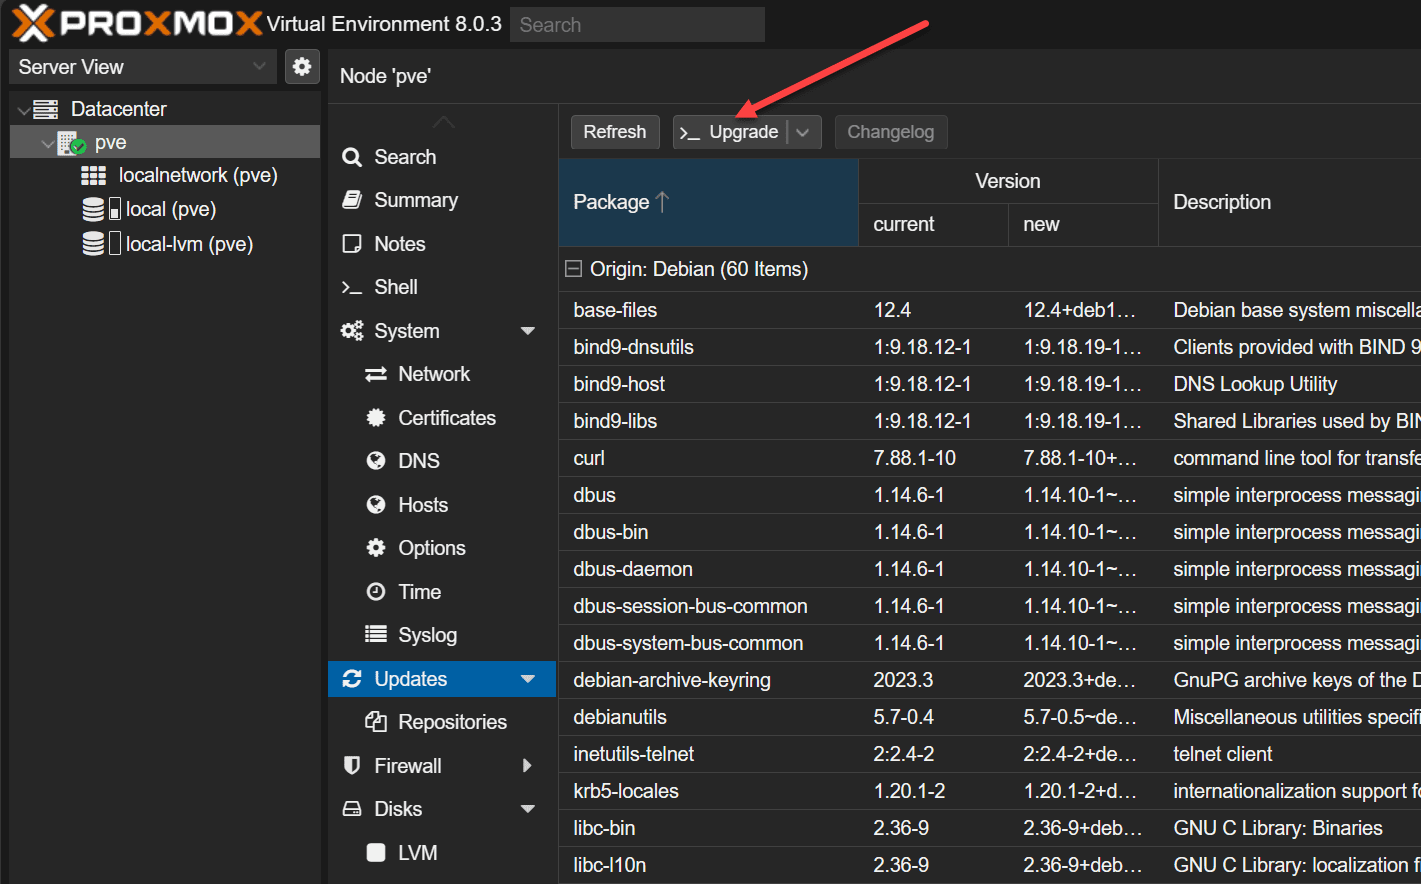
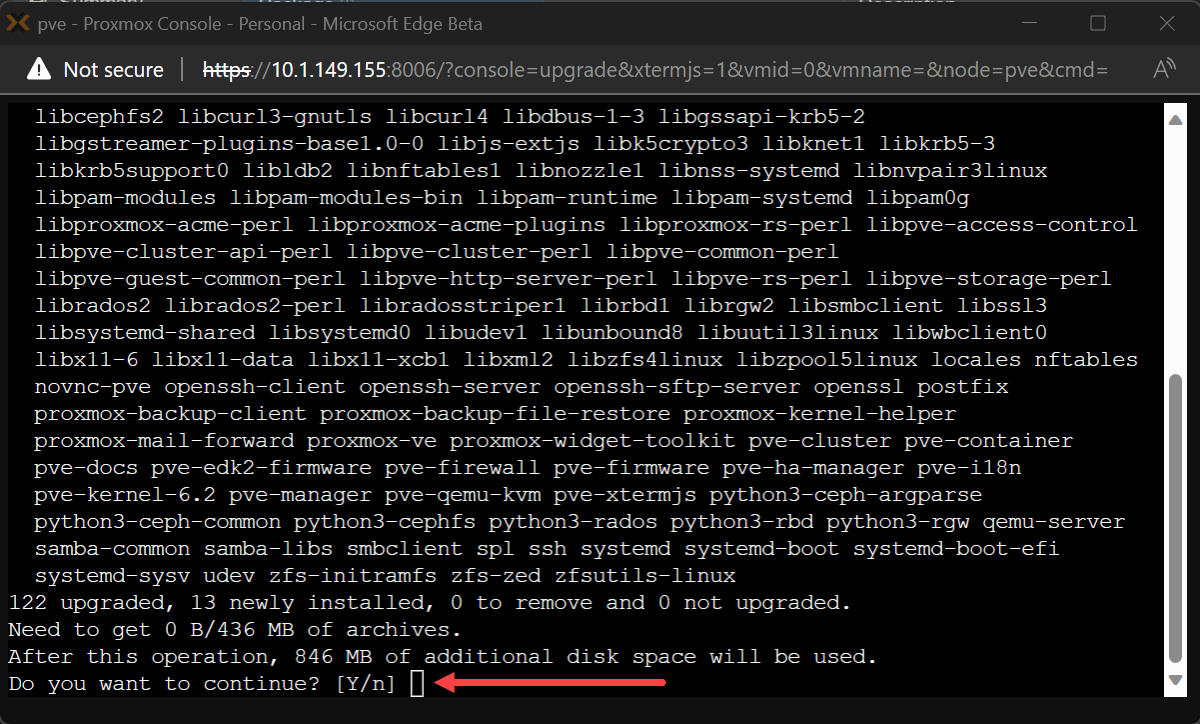
It will launch another browser window displaying the prompt for you to enter Y to confirm you want to continue the upgrade process.
After all the upgrade process is complete, you will see the note that a new kernel was installed and a reboot is required to instantiate the new kernel. Here I am typing reboot from the window.

Proxmox 8.1 upgrade steps from the command line
The upgrade steps from the command line are very simple. We just run the commands the GUI runs for us from the command line.
First we refresh the updates after we have updated the repository URLs. To do that, run the following commands:
apt update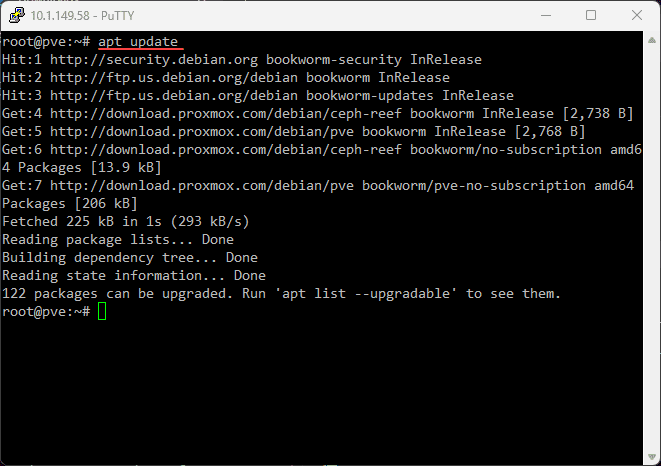
Next, we run the following command:
apt dist upgrade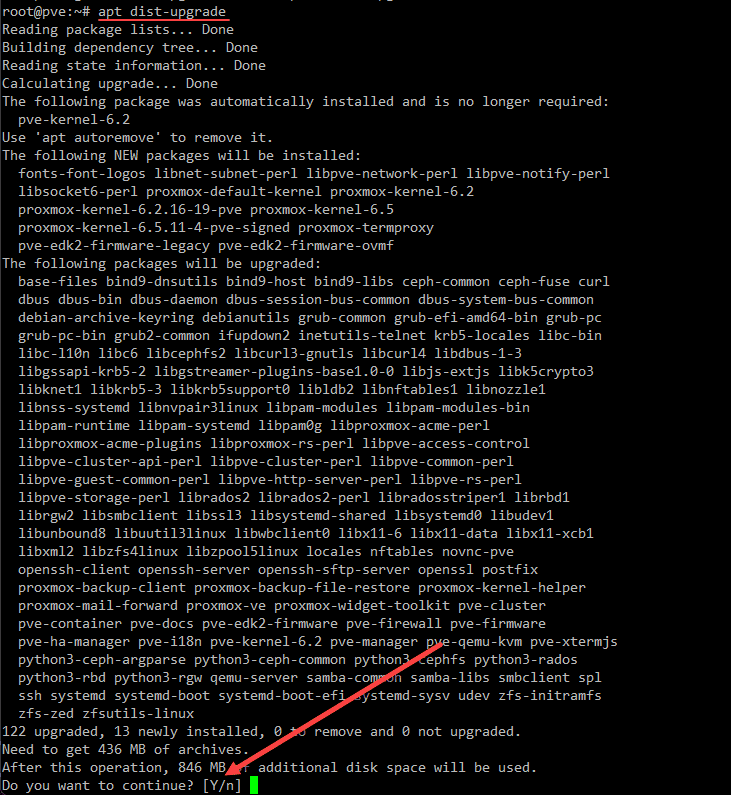
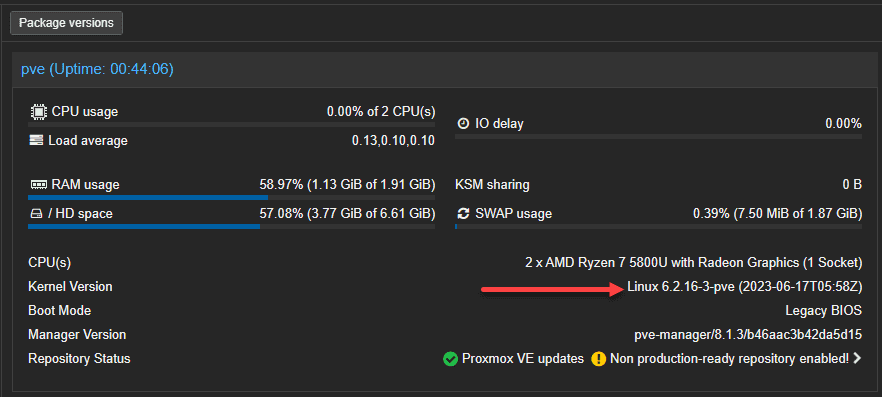
After the upgrade is successful from the command line, if you look at your Proxmox host summary, you will see it has upgraded to 8.1.3, but the Linux kernel is still at version 6.2. So, we need to reboot.
From the command line issue the reboot command:
reboot
Now, we can check the kernel version again and we see the Linux 6.5 kernel has been installed.

Steps to upgrade from Proxmox 7.4 to Proxmox 8.1
The steps to upgrade from Proxmox 7.4 to Proxmox 8.1 are fairly straightforward. However, it does involve more steps if you are currently running Ceph Quincy.
First, you will need to upgrade Ceph from Pacific to Quincy. The next step involves upgrading Proxmox VE from version 7.4 to 8.1. In the last step, once you have Proxmox VE 8.1 running, you will upgrade your Ceph installation to Reef.
Here are the links to the official documentation on those specific steps:
- Ceph Pacific to Quincy Upgrade Guide
- Upgrading from Proxmox VE 7 to 8
- Ceph Quincy to Reef Upgrade Guide
Mini PC running Proxmox
If you are looking for something to run Proxmox, you can easily install it on a Mini PC to get your feet wet in the home lab. Check out the video below:
Wrapping up the Proxmox 8.1 upgrade steps
As shown, the upgrade to Proxmox 8.1 can be accomplished using the Proxmox GUI and the command line. The steps involve changing the update repositories if you aren’t running with a Proxmox subscription. Once you have the repositories updated, you can refresh the updates and install the available updates, including the upgrade to Proxmox 8.1.
Google is updating how articles are shown. Don’t miss our leading home lab and tech content, written by humans, by setting Virtualization Howto as a preferred source.
About The Author


Excellent write up… one thing that appears to be missing, you need to consider the upgrade any zfs pools (if used) afterwards with the following:
zpool upgrade -a
See zpool-upgrade(8) to understand the ramifications and to decide if any of the new zfs features will be used.
Bob, awesome. Thank you for sharing the info on upgrading ZFS pools. I will retroadd this to the blog.
Good writeup, thanks! I have to upgrade my Proxmox cluster from 7.4.3 to 8.1 and I figured you’d have an article up on it. I wasn’t disappointed.
I’m looking around to see if there are any “gotchas” when upgrading nodes in a clustered environment.
Also, I noticed the link in this article to “Proxmox 8.1 upgrade steps” points to a pfSense article – you may want to fix that. Did you mean to point to this link? https://pve.proxmox.com/wiki/Upgrade_from_7_to_8
Cheers,
Jason
Jason,
Great catch! Thanks for the heads up on the link. I have updated it to point to the correct official documentation from Proxmox. I really enjoyed your writeup on moving across from VMware to Proxmox. Let me know if you uncover anything missed here in your upgrade and how things go. Thanks again Jason!
Brandon