



As you all know if you have been following here, I have been knee deep with TrueNAS with the new Proxmox plugin the last couple of weeks and have been having a blast testing out and trying new things with it. I had been running the first installation in my home lab on a nested virtualization setup that allowed me to try things out with the benefit of snapshots to rinse and repeat if needed. But since I was fairly comfortable with the solution, I decided to load TrueNAS on my TerraMaster F8 SDD Plus storage that I had been using previously with just traditional iSCSI LUN storage on top of Terra OS. I think this could be my ultimate TrueNAS storage setup for Proxmox in the home lab and really happy with how it is performing. Let me show you the details.
Terramaster F8 SSD Plus for TrueNAS
First, just a brief overview of the NAS I am using for the TrueNAS Proxmox plugin. I first wrote about the F8 SSD Plus about two years ago. You can read my initial post on this little all NVMe NAS here: Terramaster F8 SSD Plus Review: All Flash NAS with NVMe. I have really enjoyed this little NAS and even though you don’t get full speed out of the PCI lanes for the NVMe drives, I have still found performance to be really good with the unit since it has 10 gig networking and all NVMe.
- You can buy it here: https://geni.us/0Vp7GM
I have ran VMware vSphere environments on this NAS as well as traditional Proxmox iSCSI on top of TOS from TerraMaster. But, since I have been experimenting a lot with TrueNAS with the new plugin, I wanted to load it up with TrueNAS and put it through the paces there.
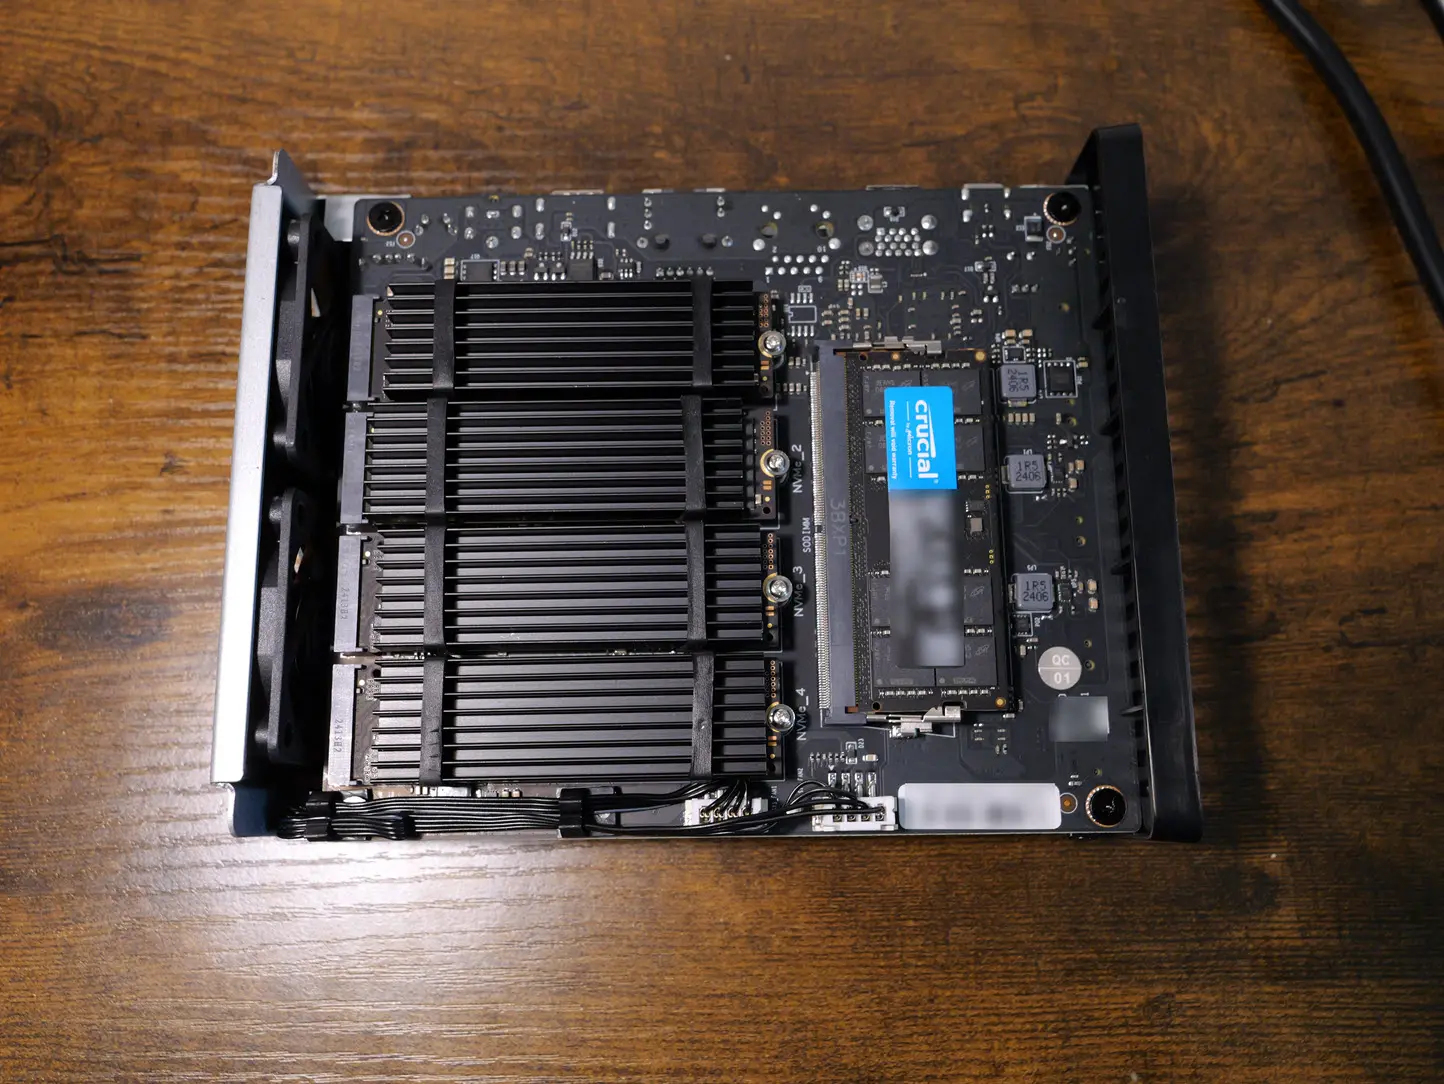
Also, what I like about the F8 SSD Plus is that it is not a huge, power hungry NAS device. It sips power very efficiently which is cool to think you can have a low wattage NAS that can deliver 50-75K IOPS!
My TrueNAS setup
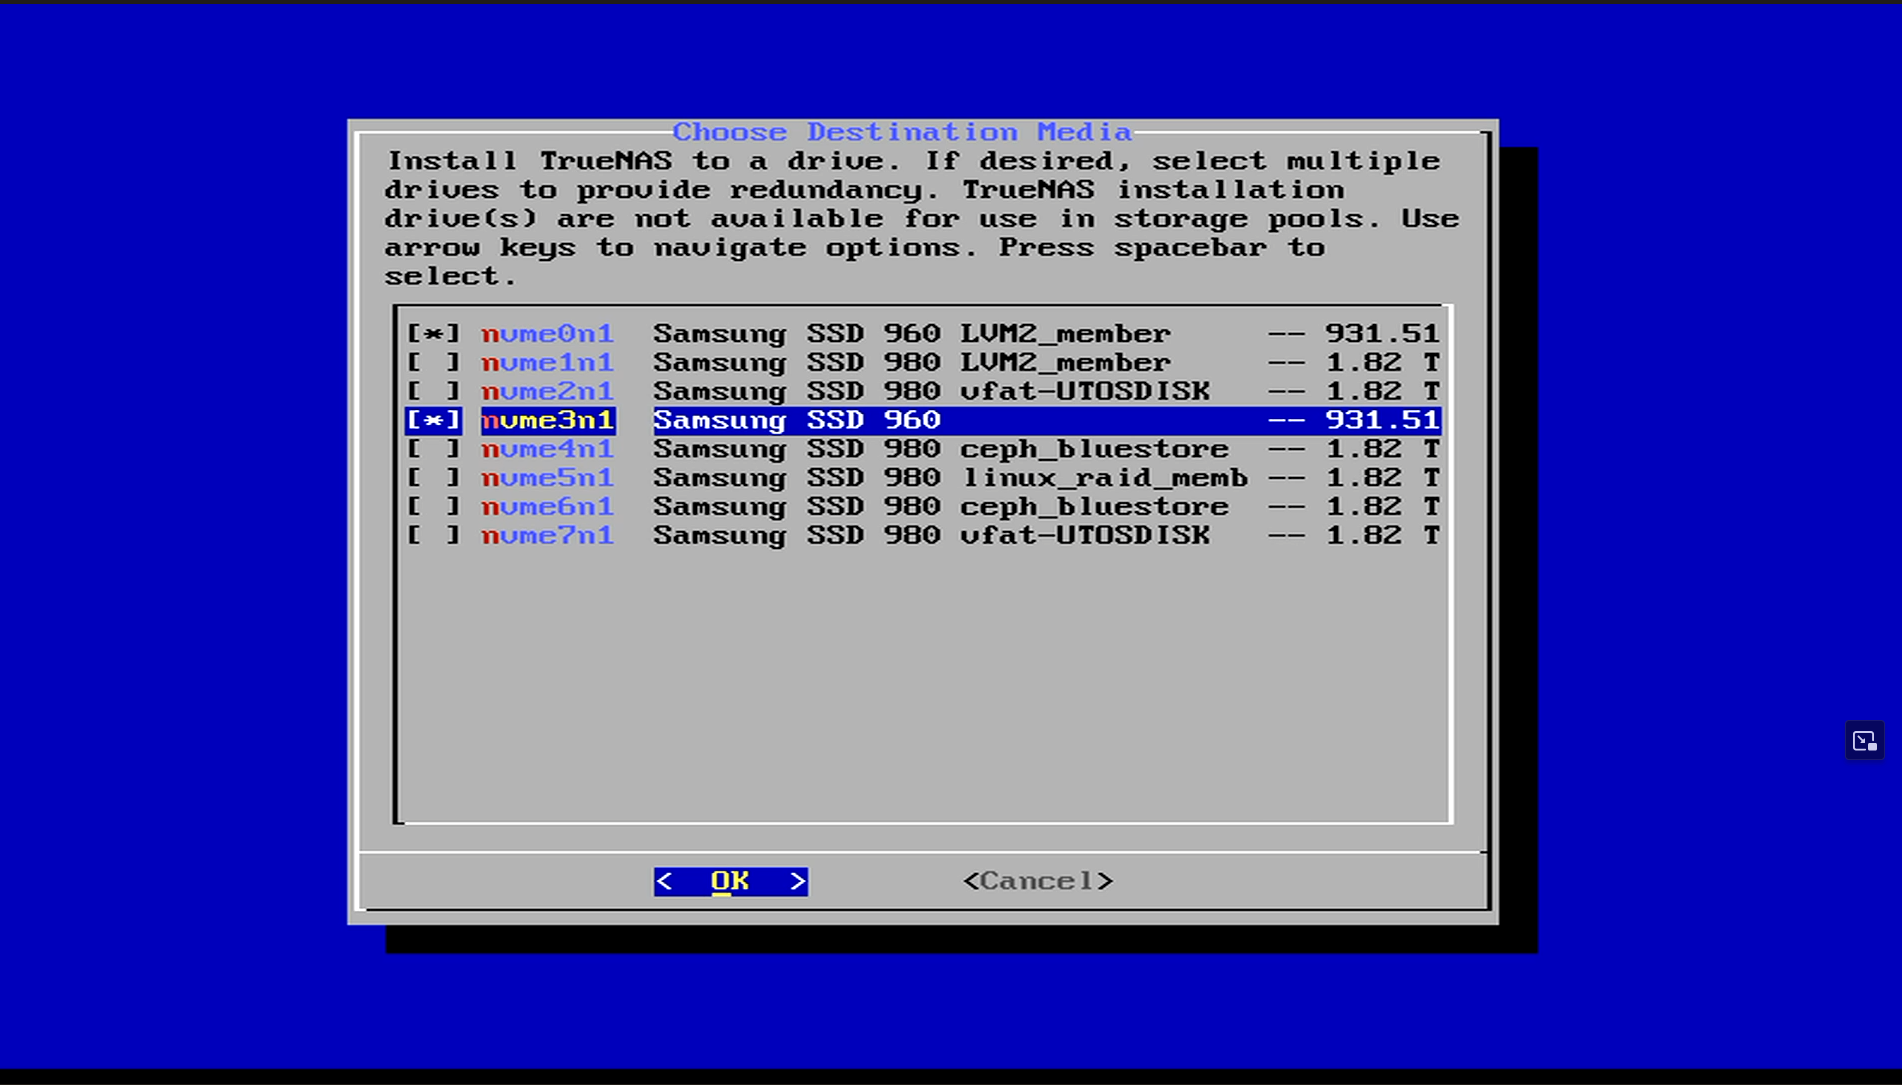
Inside of the F8 SSD Plus, I have (8) drives configured. I have two older Samsung 960 EVO 1TBs for the TrueNAS installation. Then I have (6) Samsung 980 Pro 2TB drives for the data pool. Here is how I configured everything.
This is during the installation process on the Terramaster F8 SSD Plus:
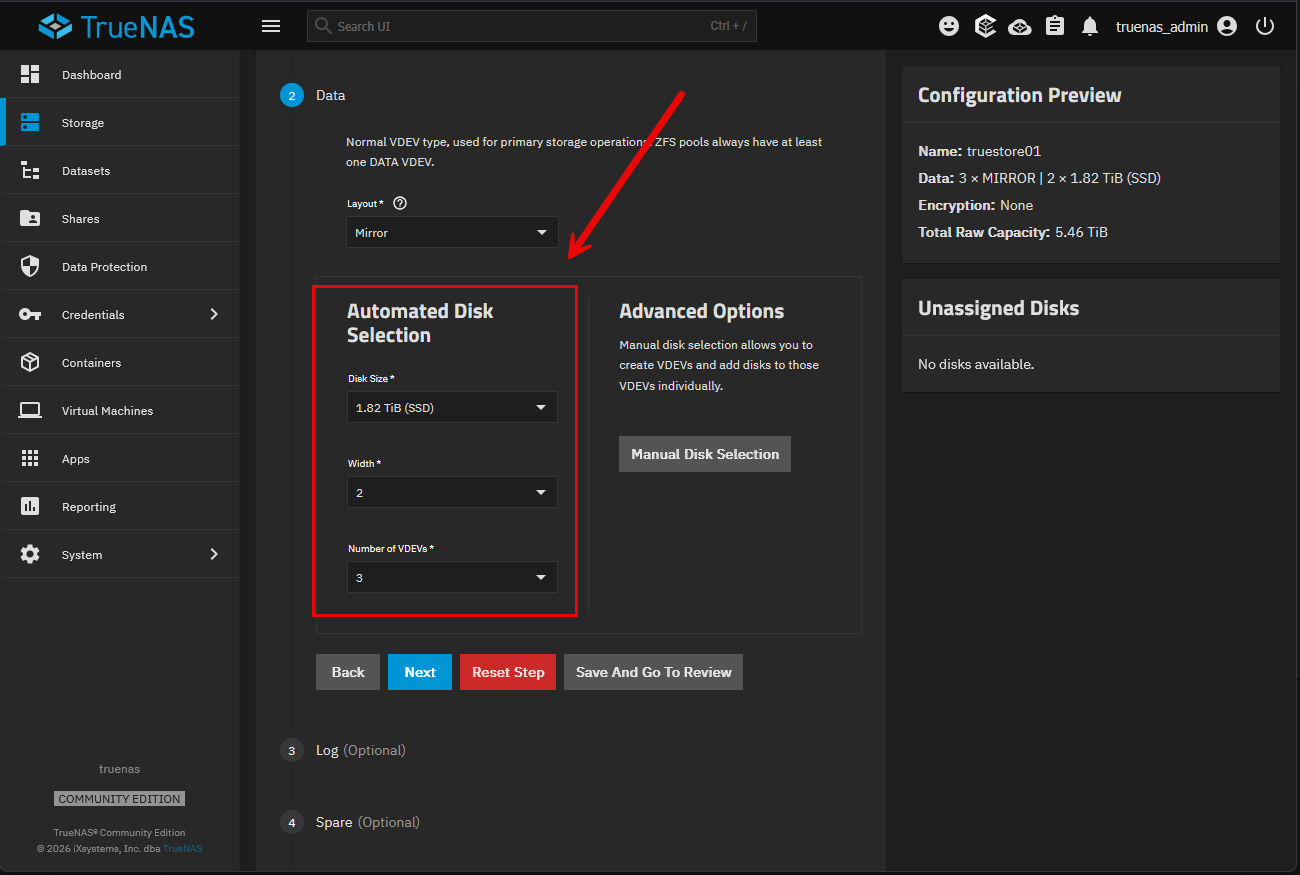
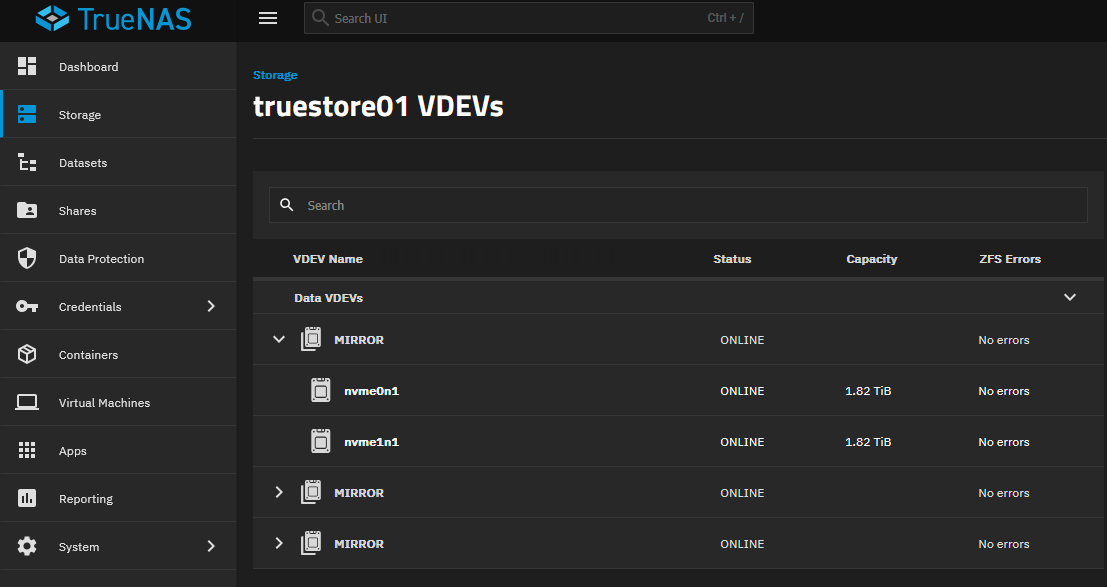
After getting TrueNAS installed and getting the network configured on my storage VLAN, I logged in and started configuring the storage that would be used for Proxmox VMs. So, I decided on (3) two-drive mirror VDEVs.
I chose this because this TrueNAS pool is going to be used only for Proxmox VM disks. With this, I want to make sure I have the most responsive random I/O capabilities. This is where the mirrors really shine. I am not as worried about maximum capacity out of the drives. ZFS can also spread work across the three mirrors. It gives me about 6TB of useable storage that is geared towards performance.
Also, in case you are wondering, it shows up as one pool with three mirrored VDEVs, so Proxmox sees one storage location through the plugin, not three.
Why not just put all the drives into a RAIDZ array for more space? Well again, for Proxmox workloads, three mirrored VDEVs give your ZFS more places to handle the types of small random VM reads and writes that happen, when you compare this to a single six-drive RAIDZ VDEV.
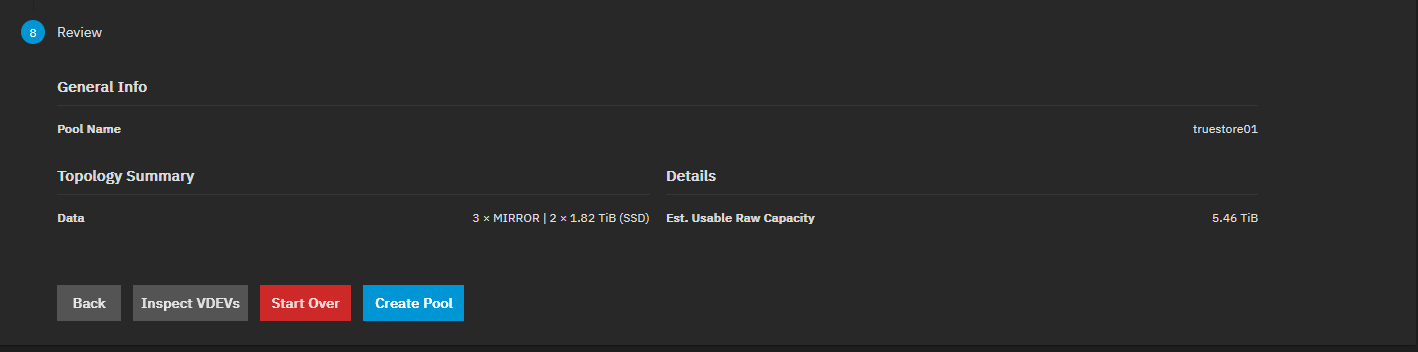
One of the things I like also about mirrors is they make replacing and resilvering a failed drive easier. I don’t mind to give up the capacity to get those benefits: a six-drive RAIDZ layout would hold more data, but the mirrors better match my priority of responsive VM storage
Loading the TrueNAS plugin on my cluster
You may have seen my detailed blog post on this, so I am not going into all the details of installing the plugin. I just went through the plugin TUI workflow on all (5) of my cluster nodes in the home lab.
Check out the full blog post on the walkthrough here: I Installed the New TrueNAS Proxmox Plugin in My Home Lab. Here’s the Setup.
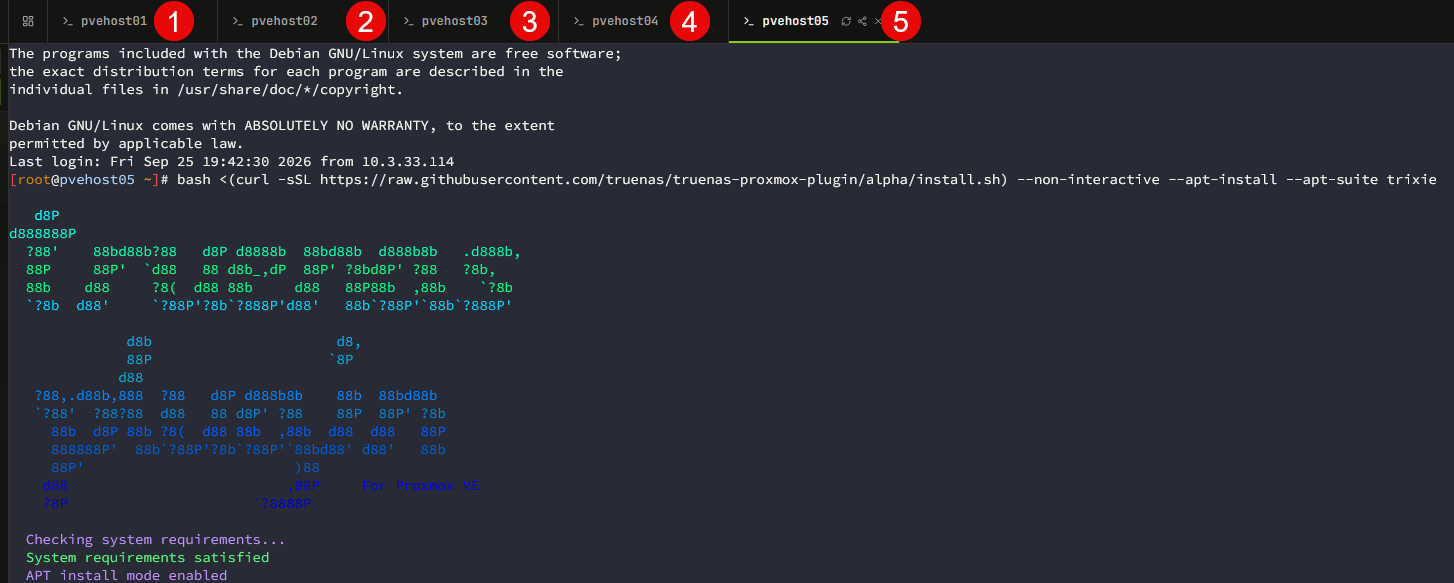
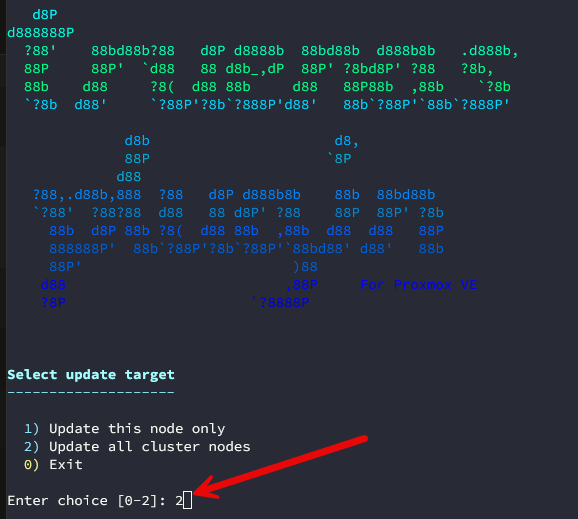
Be sure also to update your TrueNAS plugin to the latest version. The cool thing is it has a built in menu choice to update the plugin and it will do it across all of your cluster nodes as well.
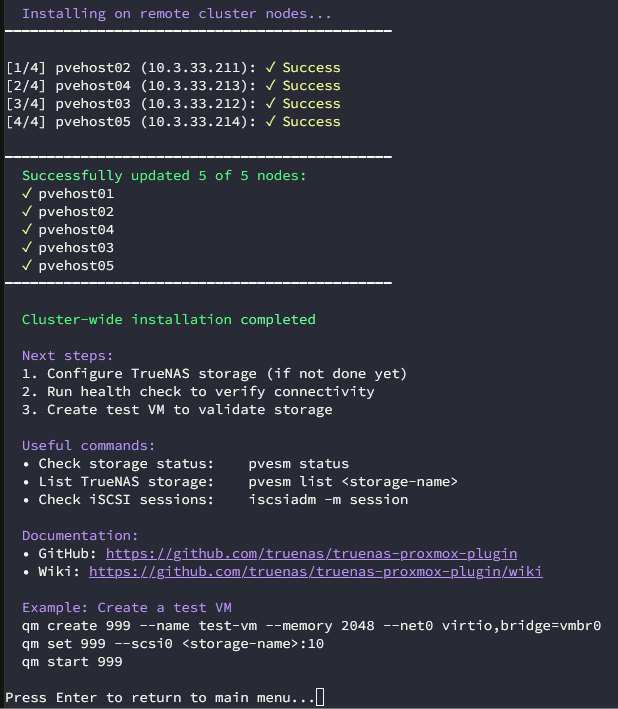
After updating all the cluster nodes and clusterwide installation complete.
Provisioning the TrueNAS storage as NVMe/TCP (modern, lower latency) storage. I wanted to try this, especially on the all NVMe NAS.
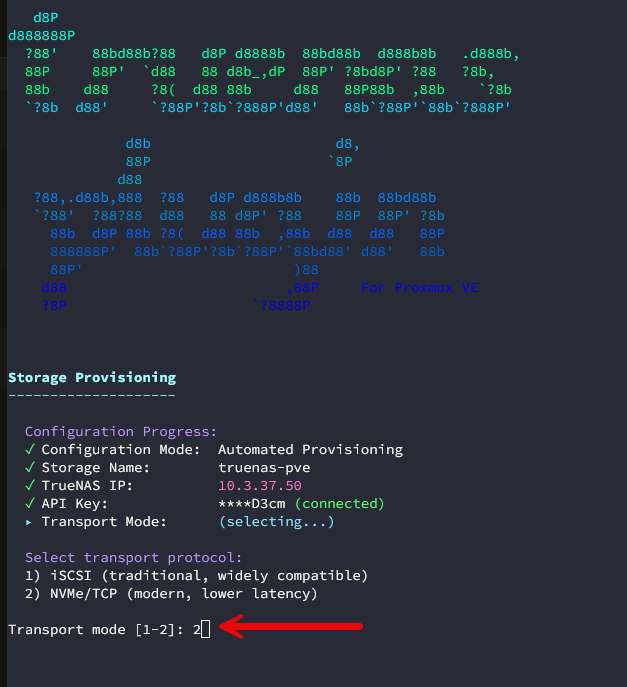
Final storage configuration overview of the new storage provisioned in my proxmox cluster.
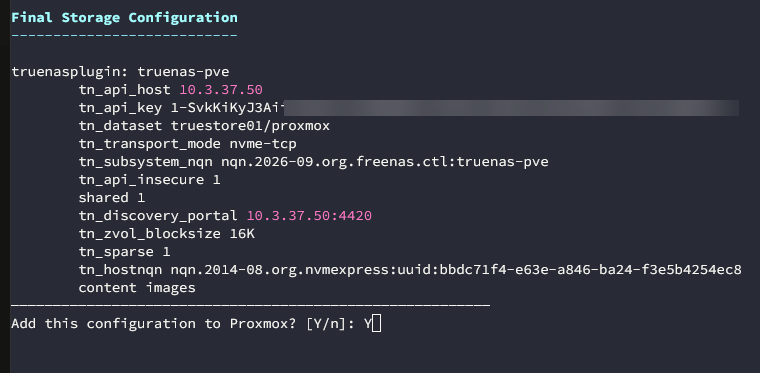
The storage configuration is finalized.
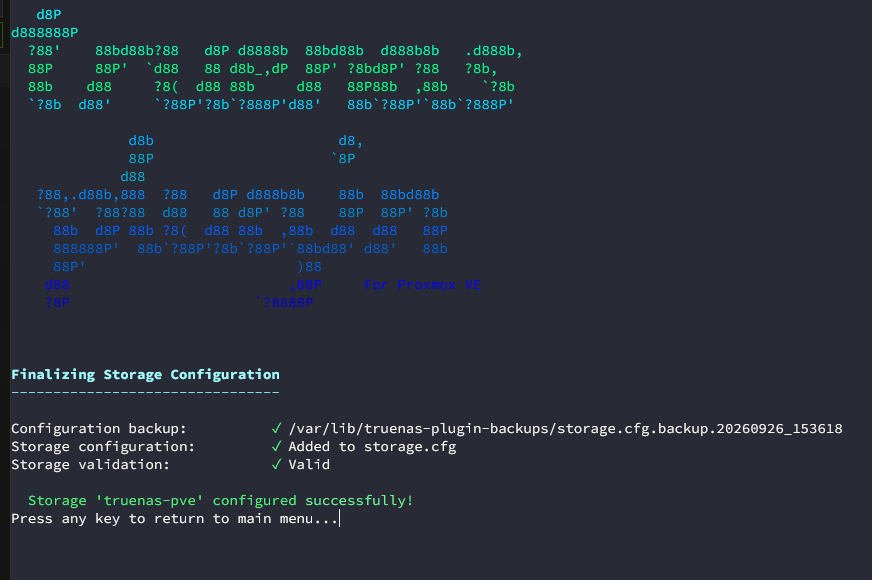
One detail I missed or the auto provisioning got wrong?
One of the details I missed or that the storage plugin should do but doesn’t is when I tried to create a virtual machine in Proxmox, even though it was successful in adding the storage, etc. It failed with the following: “TrueNAS NVMe-oF service is not running…. This was interesting since I hadn’t seen any other errors.
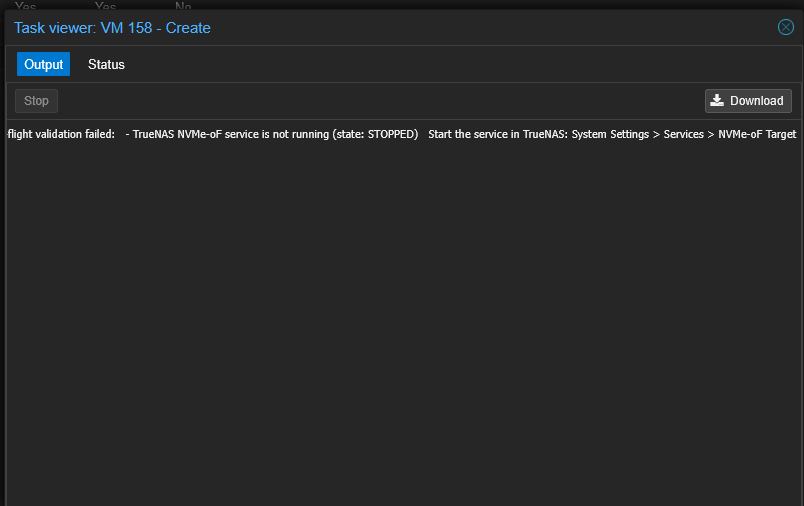
So, I went back over to TrueNAS and started the NVMe-oF service.
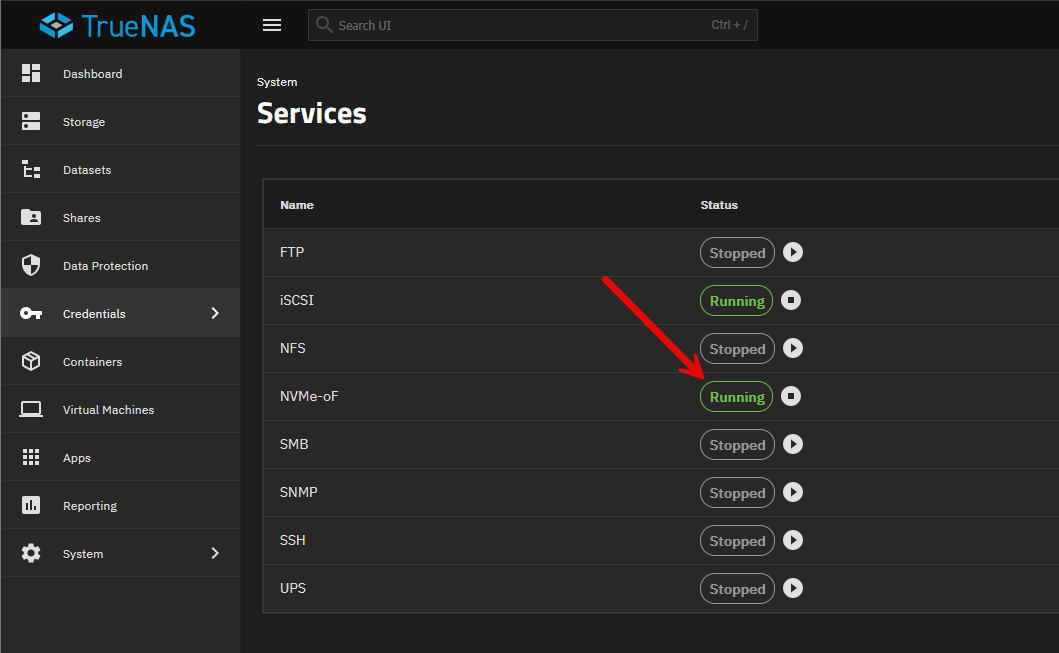
Benchmark test
After starting the service, I returned back over to Proxmox and was able to create the VM without any other issues. Here are the details fo the virtual machine that I created.
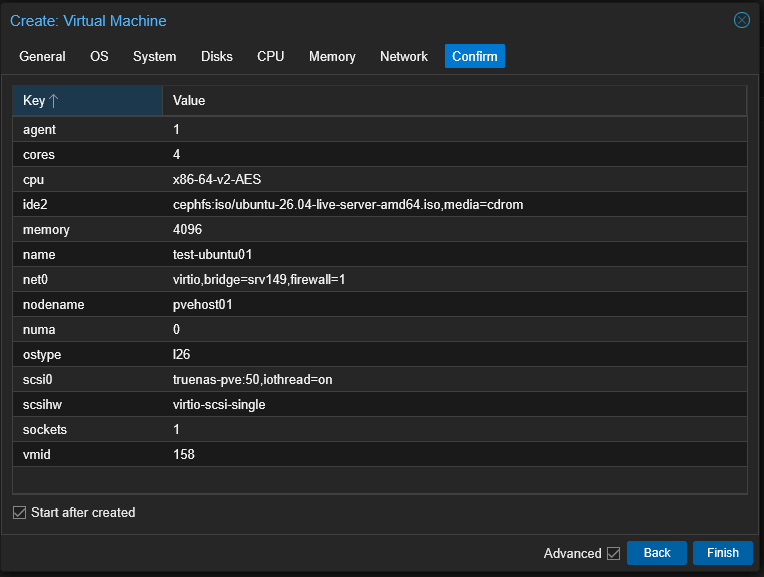
The next thing I did after intalling Ubuntu 26.04 in the virtual machine I created was login to Ubuntu and install fio for benchmarking purposes:
sudo apt install -y fio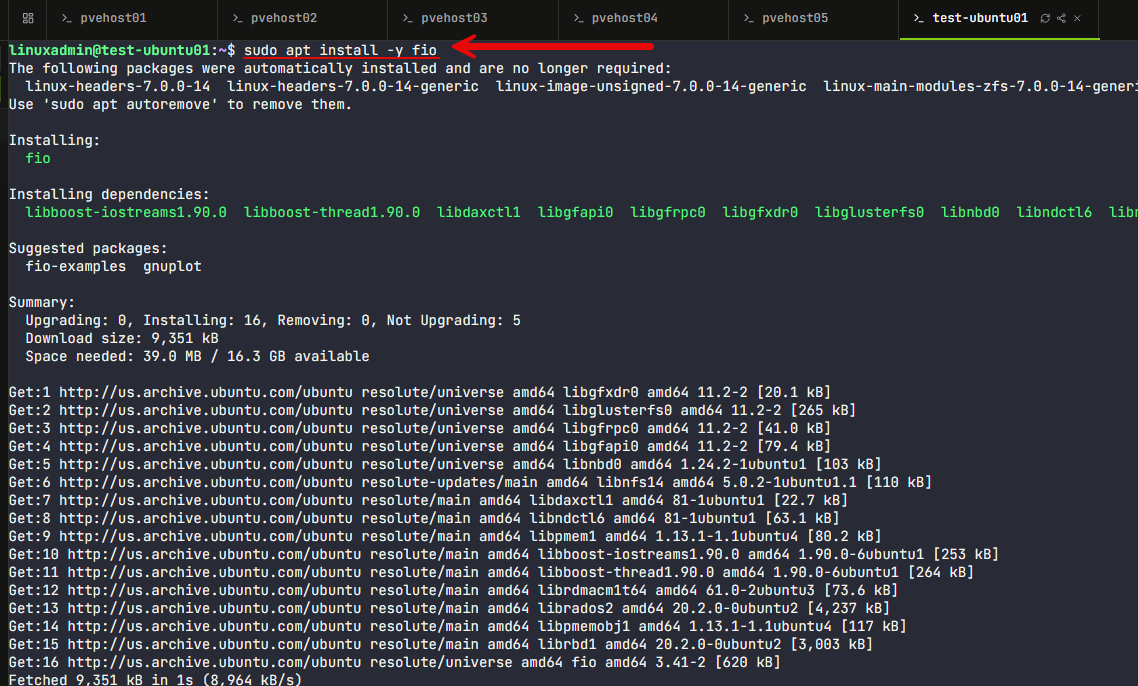
The tests that I ran inside the VM
First, I ran a 70/30 mixed random test, which is a really typical mix for VM workloads.
fio --name=vm-mixed --filename="$HOME/truenas-benchmark/testfile" \
  --size=4G --rw=randrw --rwmixread=70 --bs=4k \
  --ioengine=libaio --iodepth=16 --direct=1 \
  --time_based --runtime=60 --ramp_time=10 --group_reporting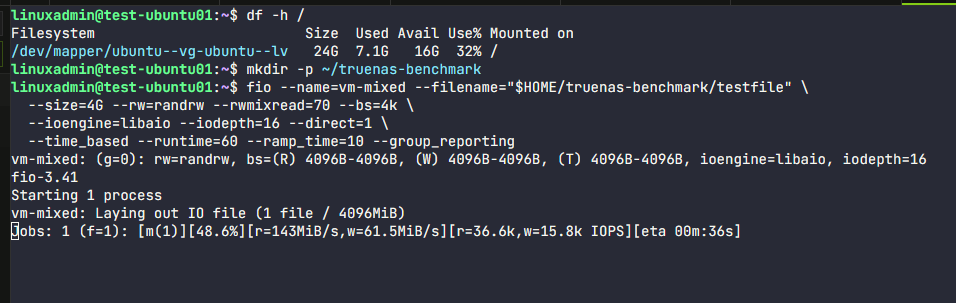
Next, I ran a sequential write test:
fio --name=seq-write --filename="$HOME/truenas-benchmark/testfile" \
  --size=4G --rw=write --bs=1M --ioengine=libaio --iodepth=16 \
  --direct=1 --end_fsync=1 --group_reporting
Finally, a sequential read test:
fio --name=seq-read --filename="$HOME/truenas-benchmark/testfile" \
  --size=4G --rw=read --bs=1M --ioengine=libaio --iodepth=16 \
  --direct=1 --readonly --group_reporting
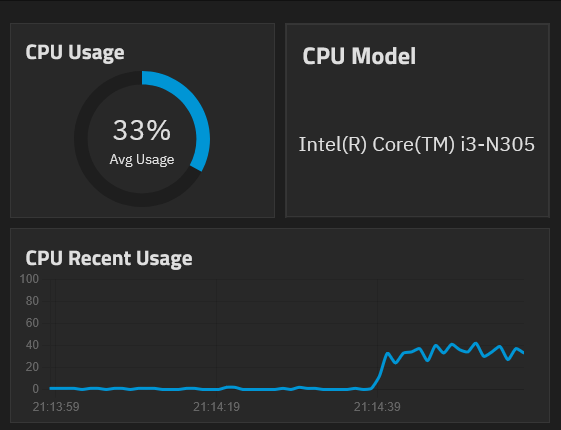
During testing, this is what I saw with the CPU:
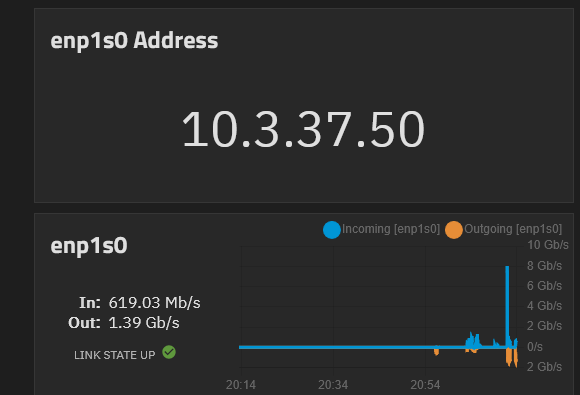
This was networking during the random mix IO test:
Benchmark results measured from the TrueNAS pool
The first test as I showed above with the FIO command was a 4K random I/O test. This consists of 70% reads and 30% writes in a mixed test. The queue depth is 16 and I tested with a 4 GB file. Each run I did lasted for 60 seconds. What were the results?
- The first run delivered 36,400 read IOPS and 15,600 write IOPS, or about 52,000 combined IOPS.
- A second run came in at 35,200 read IOPS and 15,100 write IOPS, or about 50,300 combined IOPS.
Both runs happened without any I/O errors. And both kept average read and write latency around 0.3 milliseconds which is awesome. At the 99th percentile, latency stayed below 0.9 milliseconds in the second run. There were a few slower requests, but the overall result looked strong for a single VM accessing the TrueNAS network storage.
I then looked at testing sequential throughput using 1 MB blocks. So, with this test, writing the 4GB test file averaged about 857 MiB/s, or 899 MB/s. Reading it back averaged bout 1,113 MiB/s, or 1,167 MB/s. This number is roughly 93% of the theoretical 1,250 MB/s carried by a 10GbE link before protocol overhead.
Here is a table that helps to show the test results in a bit easier to read format.
| Test from the Ubuntu VM | Result |
|---|---|
| 4K random I/O, 70% read, first run | Around 52,000 combined IOPS |
| 4K random I/O, 70% read, second run | Around 50,300 combined IOPS |
| Average random I/O latency | Around 0.3 ms |
| Sequential write | 857 MiB/s (899 MB/s) |
| Sequential read | 1,113 MiB/s (1,167 MB/s) |
The limitation with the F8 SSD Plus is that it has PCIe 3.0 x1 connections to its NVMe slots. So my Samsung 980 Pros can’t run at their PCIe 4.0 capable speeds in the NAS. It also has a single 10GbE port, which gives you a hard limit on traffic potential between the NAS and Proxmox. All in all though, I think these benchmark results are really good for a single VM considering but they don’t really show the potential across several VMs. However, I have experience with this NAS running multiple VMs in the past, and it works well.
Keep in mind too, my test file was 4 GB, and my F8 SSD Plus came with the stock 16 GB of RAM. TrueNAS may have served some of the reads from ARC cache instead of from the SSDs just as a note. The sequential tests also finished in under five seconds each, so they show the short-burst throughput instead of the performance over a long transfer.
I am happy with the results and what I am seeing. The workloads on this little NAS “feel” snappy. The plugin provisioned disk is giving my Ubuntu VM roughly 50,000 to 52,000 mixed 4K IOPS with low average latency. The sequential benchmarks also helped to stress the networking to the limit of what the 10 GbE can do.
Wrapping up
Honestly, I am liking my iSCSI configuration and setup with Proxmox VE Server and TrueNAS better than when I was running this NAS with VMware vSphere. To me, the layers have come together in a way that we haven’t seen before now with Proxmox and TrueNAS storage. And I think the admin side of things now is getting much smoother for running shared storage between your Proxmox VE Server cluster nodes. Also, I like the flexibility with the 8 slots that I get with the F8 SSD Plus since I can do things like creating 3 mirrors of 2 drives each for 3 VDEVs which give you better performance for virtual machine workloads. What about you? Are you rethinking your TrueNAS configuration? Definitely check out running TrueNAS on your NAS with the new TrueNAS plugin.
More in this topic




Google is updating how articles are shown. Don’t miss our leading home lab and tech content, written by humans, by setting Virtualization Howto as a preferred source.
About The Author
