I recently wrote a blog post about replacing traditional Windows scheduled tasks with a CI/CD pipeline and the automation it provides. There are so many advantages to running something like Gitlab in your home lab to centralize your automation and help with bringing one-off scripts into source control with Git. I wanted to share with you guys a cool project I have been working on to bring my Linux server patching into a Gitlab pipeline. Let’s look at home lab server update automation with Gitlab and see how this can be done.
Table of contents
- Automating Updates with GitLab CI/CD pipelines
- Real-world use cases for Home Lab Server
- Why not use Ansible Semaphore?
- Automatically update Linux VMs
- Prerequisites and requirements
- 1. Use PowerCLI to get all Linux VMs and write Ansible inventory
- 2. Use Ansible to apply updates to Linux hosts found in the environment
- 3. Create the gitlab-ci.yml pipeline file
- Gitlab runner
- Pipeline variables
- Improvements to make
- Test test test
- Automating your homelab setup is something you won’t regret
- Wrapping up
Automating Updates with GitLab CI/CD pipelines
There are many CI/CD platforms available out there, including Jenkins, Bitbucket, Gitlab and others like Gitea, etc. I have been using Gitlab the longest personally, so it is the most familiar to me and the one I prefer for now. However, the principles of CI/CD and what you can do with it can be accomplished with most of the solutions you can self-host, like Gitlab and Jenkins.

With something like a GitLab CI/CD (continuous integration continuous deployment) pipeline, you can version code changes each time you commit a new version as a new release (version control), merge your code requests into your Git repository hosted in Gitlab, Jenkins, etc, and deploy your code using automation to control and configure infrastructure.
Real-world use cases for Home Lab Server
However, I think one of the hurdles to automation in the beginning is many struggle to come up with real-world projects to actually take advantage of what a CI CD pipeline can do for you, especially with a Home Lab Server. I am hoping some of my projects in this realm will spark enthusiasm and interest from some who might not have realized that CI CD is not just for developers or even DevOps professionals.
You can use it for real IT administration tasks in the traditional sense to handle things that we would otherwise create Windows task scheduler tasks for or use other traditional tools for file servers, web servers, Linux, containers, etc using normal scripting management and workflows.
Why not use Ansible Semaphore?
An awesome Ansible project is Ansible Semaphore. I have blogged about this in the past. You can check out my blog post covering Semaphore here:
Why not just use Ansible Semaphore for updating Linux VMs running on a home lab server? Well, I am sure there is probably a way to do what I am doing with Ansible Semaphore. However, I think Gitlab with a CI CD workflow allows you to more easily use different technologies together to come up with a solution. Semaphore is Ansible-centric. So, with that, you won’t be able to easily do what I am doing with running PowerCLI scripts (someone will probably prove me wrong in the comments).
I just like the way you can stitch things together better with Gitlab CI/CD and use various types of containers for easy access to different technologies like PowerCLI and Ansible.
Automatically update Linux VMs
The plan is this. We will have 2 stages or steps to the pipeline and a gitlab-ci.yml file to bring it all together:
- Use PowerCLI to query for Linux VMs in the environment and output the inventory.yml file
- Use Ansible to apply updates to Linux hosts found in the environment using the inventory.yml file that is dynamically created
- Create a gitlab-ci.yml file to bring together the various stages of the update process
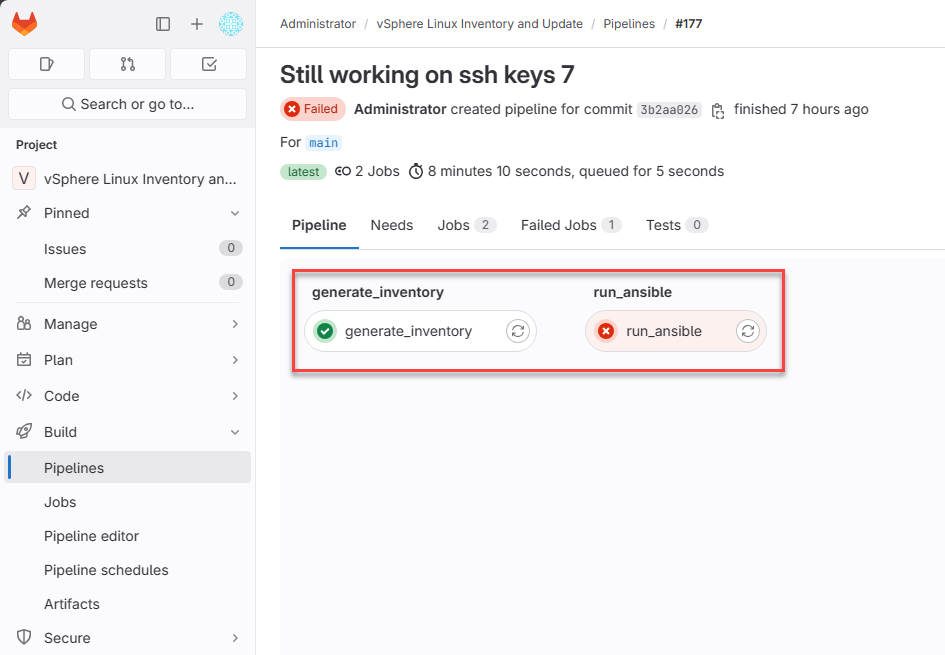
Below you can see the two stages of the pipeline.
As a note, I am keeping things simple with a single main branch (master branch) and not using a merge request or merge commit between branches. I am simply making commits to the main branch and pushing new code to the main branch.
Prerequisites and requirements
You need to have:
- Some type of CI/CD platform, like Gitlab or another solution
- A git repository
- An SSH keypair that you can use for communicating from the pipeline Ansible container (control node) and the servers you are going to be running updates on
- An account to communicate with your vSphere virtualization environment for using PowerCLI
- Keep in mind you don’t have to have a virtualized enviornment. It can be physical Linux nodes like a Raspberry Pi device or another computer you use for labbing
1. Use PowerCLI to get all Linux VMs and write Ansible inventory
The first part of my CI CD pipeline uses VMware PowerCLI to query my vCenter Server environment running on my home lab server and get all Linux VMs (could do something similar for Proxmox, etc). To accomplish this, we first need to create a PowerCLI script to query the environment.
After it queries the environment, we need it to properly format an inventory.yml file that can be used with the rest of the pipeline.
Below note the following:
- We are setting the CEIP and SSL configuration settings
- We log into vCenter Server
- We then query for Linux VMs. Note I am excluding cldockertest2 which is my control machine running GitLab and Docker runners
- Then we prepare the inventory content with the formatting we need for the inventory.yml file
- Next, we loop through all the VMs and add these to the inventory array with the commands
- Finally, we output this to an inventory.yml file.
# Setting CEIP options
Set-PowerCLIConfiguration -InvalidCertificateAction Ignore -ParticipateInCeip $false -Confirm:$false
# Logging into vCenter
Connect-VIServer -Server $env:VSPHERE_SERVER -User $env:VSPHERE_USER -Password $env:VSPHERE_PASSWORD
# Retrieve powered-on Linux VMs, excluding "cldockertest2"
$linuxVMs = Get-VM | Where-Object { $_.PowerState -eq "PoweredOn" -and $_.Guest.OSFullName -match "Linux" -and $_.Name -ne "cldockertest2" } | Sort-Object
# Preparing the inventory.yml content
$inventoryContent = @("all:", " hosts:")
# Adding each VM to the inventory content
foreach ($vm in $linuxVMs) {
$inventoryContent += " $($vm.Name):"
}
# Outputting the inventory content to inventory.yml
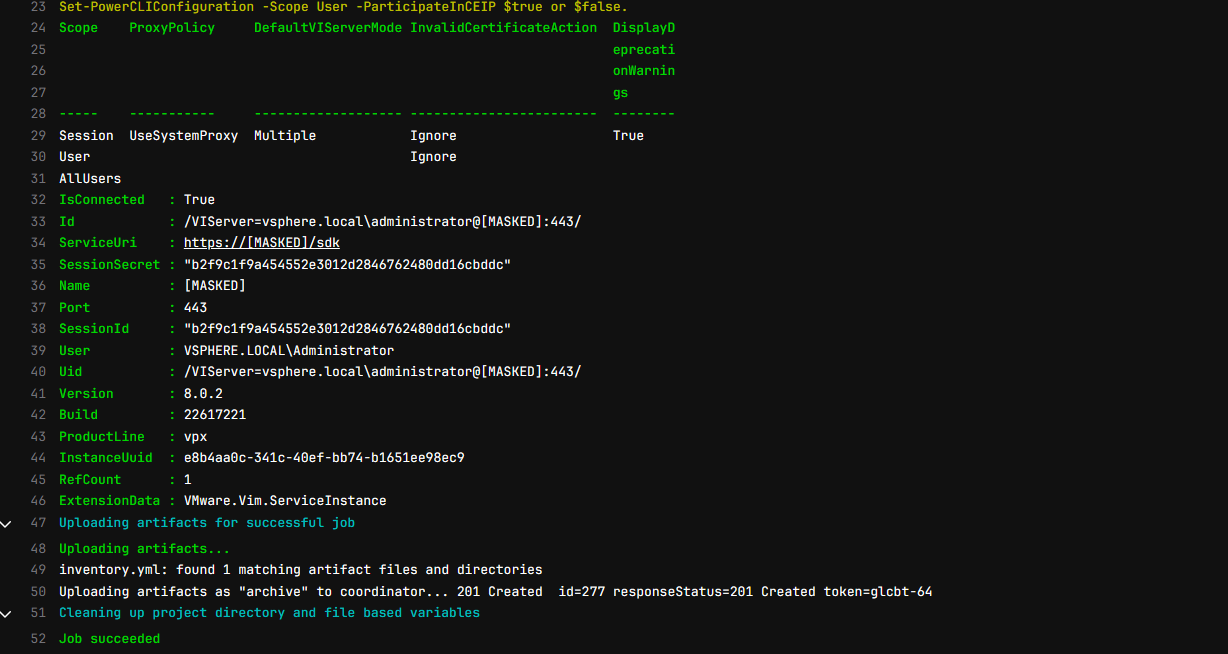
$inventoryContent | Out-File -FilePath inventory.yml -Encoding UTF8The PowerCLI stage runs successfully.
2. Use Ansible to apply updates to Linux hosts found in the environment
The next stage of the pipeline will be taking the inventory.yml file and the hosts found within that resource and applying updates to those Linux hosts on the network.
What does the Ansible file look like? Note the following:
- Hosts and Variables:
- hosts: all: Targets all hosts in the inventory.
- vars: Defines variables applicable to this play.
- ansible_host_key_checking: false: Disables SSH host key checking to prevent prompts about host authenticity.
- become: true: Escalates privileges, typically to become root, ensuring tasks that require higher privileges can execute successfully.
- Tasks:
- Update the package cache:
- Uses the apt module to update the package cache of Debian/Ubuntu systems.
- Upgrade all packages:
- Also utilizes the apt module to upgrade all packages to their latest versions.
- upgrade: dist: Specifies that a full distribution upgrade should be performed.
- register: upgrade_output: Stores the task’s output in a variable named upgrade_output for later use.
- ignore_errors: true: Continues execution even if this task fails.
- Debug upgrade output:
- Uses the debug module to print the contents of the upgrade_output variable. This action helps in logging what changes were made during the upgrade.
- Check if restart is recommended:
- Utilizes the stat module to check if the file /var/run/reboot-required exists, which indicates a restart is recommended on Debian/Ubuntu systems.
- register: reboot_required: Saves the result of the check in a variable named reboot_required.
- Report recommended restart:
- Another use of the debug module to print a message indicating that a restart is recommended.
- when: reboot_required.stat.exists: This message is only shown if the /var/run/reboot-required file exists, as determined by the previous task.
- Update the package cache:
---

- hosts: all
  vars:
    ansible_host_key_checking: false
  become: true

  tasks:
    - name: Update the package cache
      apt:
        update_cache: yes

    - name: Upgrade all packages to the latest version
      apt:
        upgrade: dist
        update_cache: yes
      register: upgrade_output
      ignore_errors: true

    - name: Debug upgrade output
      debug:
        msg: "{{ upgrade_output }}"

    - name: Check if restart is recommended
      stat:
        path: /var/run/reboot-required
      register: reboot_required

    - name: Report recommended restart
      debug:
        msg: "Restart is recommended by the system."
      when: reboot_required.stat.exists
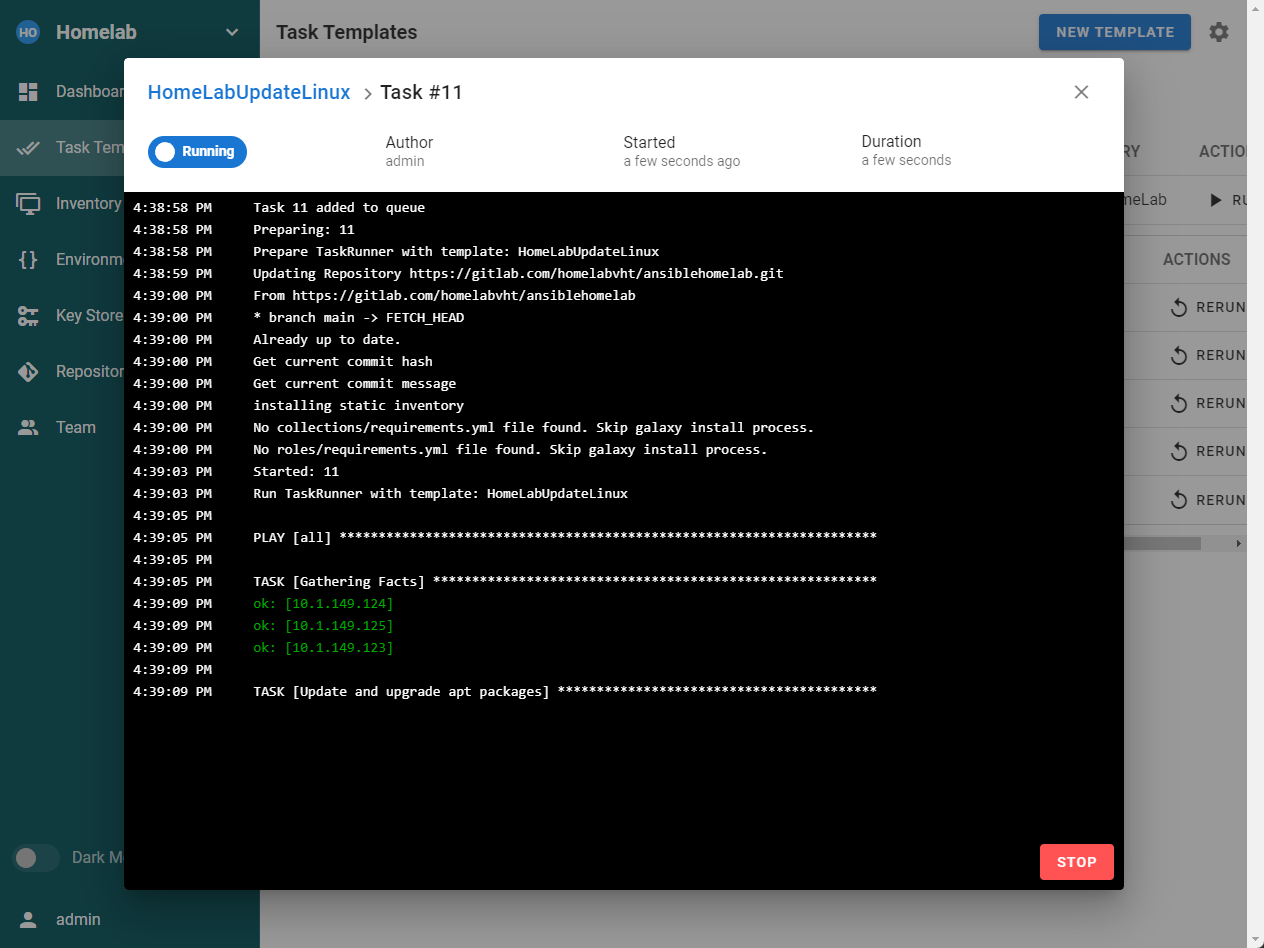
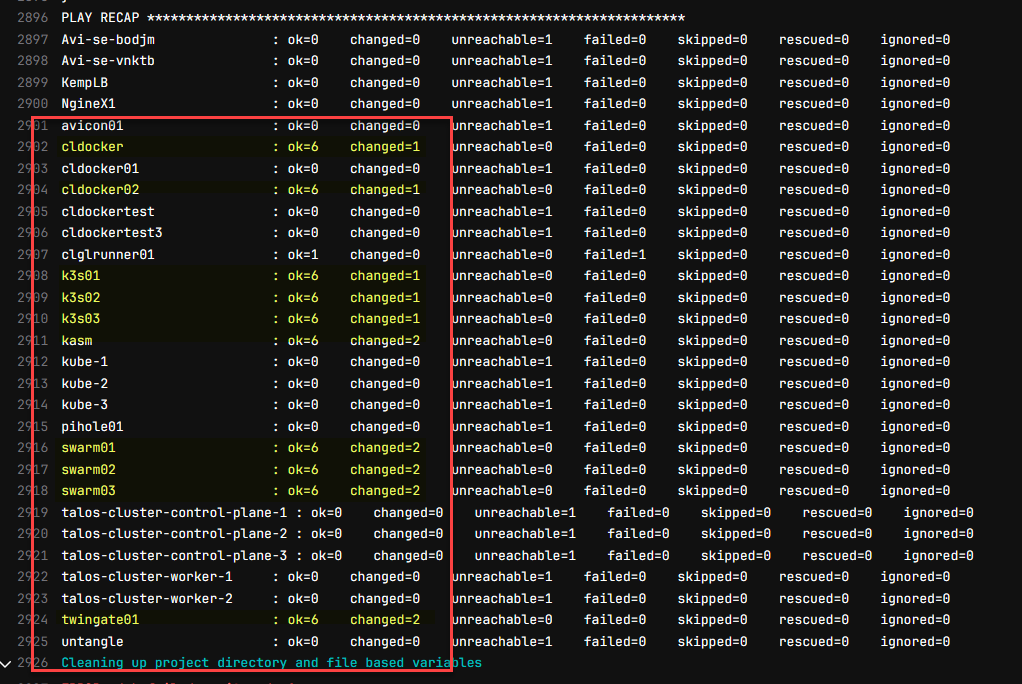
The Ansible stage completes with a failure, but due to several VMs that I don’t have the SSH key configured properly for. However, you can see the ones that I do have configured properly are updated successfully. And, the cool thing is the inventory is created dynamically for the deployments and installation of updates on the target servers.
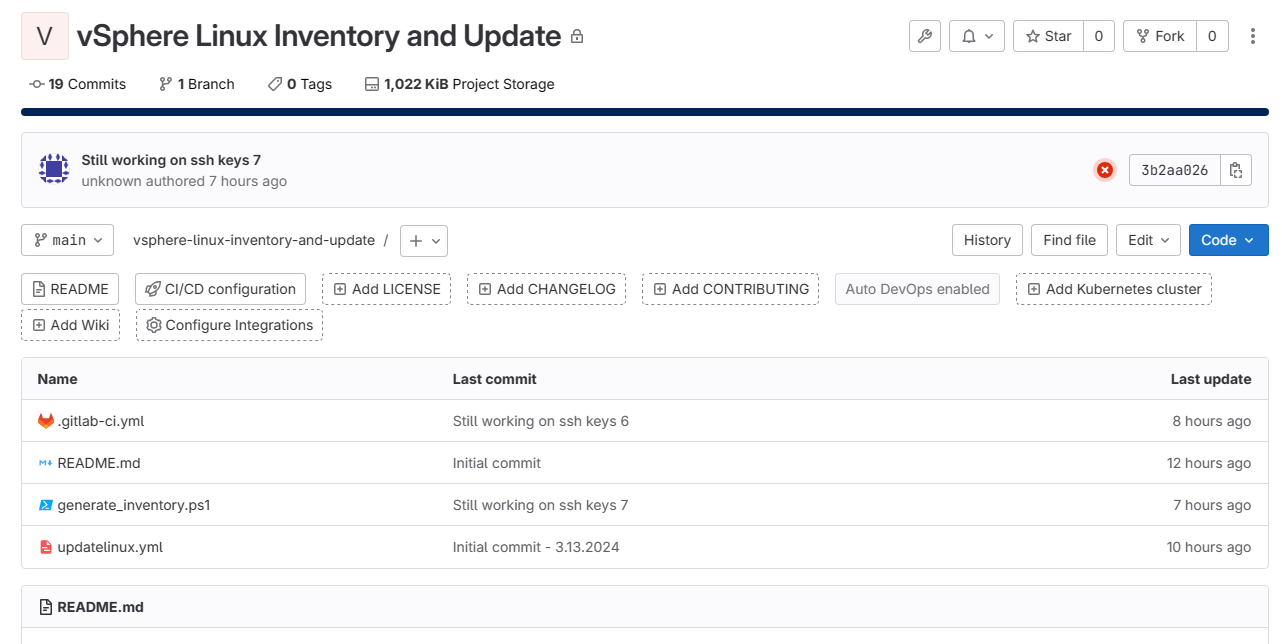
3. Create the gitlab-ci.yml pipeline file
Finally, we create the gitlab-ci.yml file which is the pipeline file for our Gitlab CI/CD pipeline. When commit this file to your repository, it flips the switch to tell Gitlab that you are enabling the repository and project with a pipeline.
Below, you will notice the pipeline configuration:
- We have two stages for the pipeline
- In the generate_inventory stage, we are running the PowerCLI PS1 file and querying for all Linux machines running in the vSphere environment
- We are using the vmware/powerclicore container image
- You will note the inventory.yml artifact that we collect from this pipeline stage
- In the 2nd stage of the pipeline, we are running our Ansible script.
- However, before we do, we need to do quite a few things with our vanilla ubuntu image
- I am not using the built-in container registry, but rather pulling images from Docker hub
- We install Ansible for one
- We use the ssh-agent to pass along the private key which is a Gitlab CI/CD variable
- We temporarily write this locally to the container
- Then we run the ansible playbook based on the inventory.yml file that we created in the first stage
stages:
  - generate_inventory
  - run_ansible

generate_inventory:
  stage: generate_inventory
  image: vmware/powerclicore
  script:
    - pwsh -File generate_inventory.ps1
  artifacts:
    paths:
      - inventory.yml

run_ansible:
  stage: run_ansible
  image: ubuntu
  before_script:
    - apt-get update
    - apt-get install -y ansible
    - eval "$(ssh-agent -s)"
    - echo "${SSH_PRIVATE_KEY}" | tr -d '\r' > /tmp/ssh_key
    - chmod 600 /tmp/ssh_key
    - ssh-add /tmp/ssh_key
    - rm /tmp/ssh_key
    - mkdir -p ~/.ssh
    - chmod 700 ~/.ssh
    - echo "StrictHostKeyChecking no" > ~/.ssh/config
    - chmod 644 ~/.ssh/config
  script:
    - ansible-playbook -i inventory.yml updatelinux.yml
  dependencies:
    - generate_inventory
Gitlab runner
Just a quick section about the Gitlab runner environment. I have (2) runners defined in my current home lab server setup, a full Linux shell runner, and also a gitlab Docker runner. The only reason I have a full Linux shell gitlab runner is I ran into problems with another project using packer and a few quirks with the local server that Packer sets up for building out a machine. The networks and differences between them and some firewall hurdles was just easier with a traditional runner.
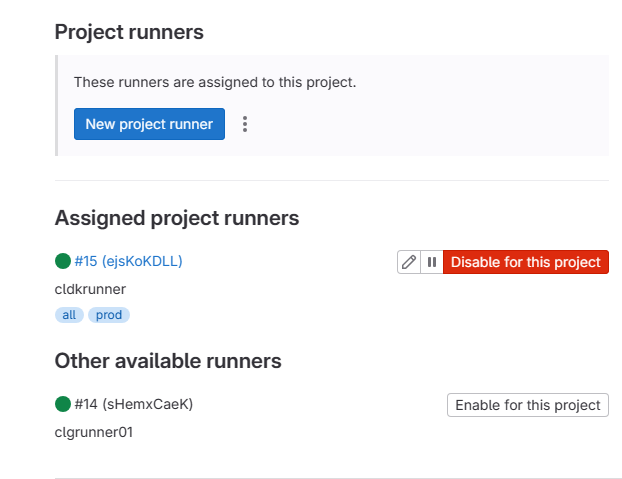
It is a good idea to have different types of runners for different use cases and quick access to what you need for various projects. Creating new runners is extremely easy. Below you will see the project runner configuration.
Pipeline variables
You will notice in the above code sections, I am using all CI CD variables for secrets and other sensitive information and not simple environment variables. This is one of the quick wins when pivoting from scheduled tasks and other traditional tools since you have the problem of how to deal with secrets.
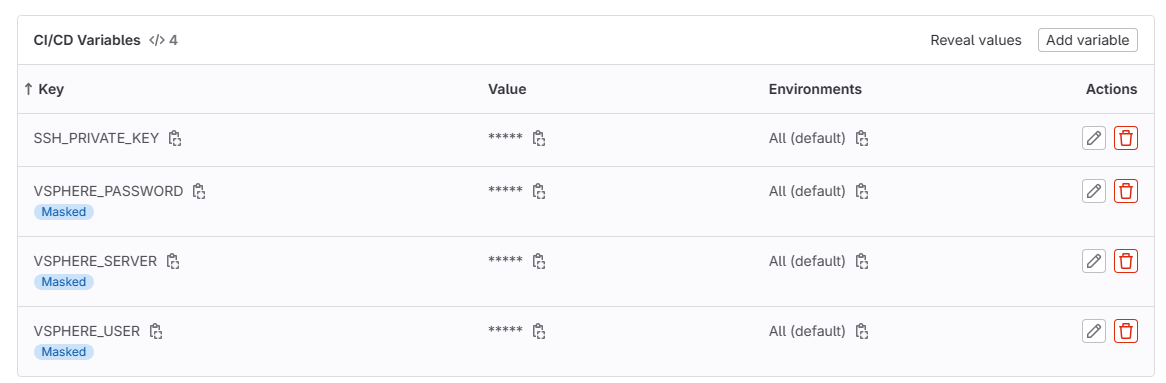
You can see for this project, I am using 4 variables referencing things specific to my home lab server:
- SSH_PRIVATE_KEY – contains the private key for the SSH connections for authentication to servers
- VSPHERE_PASSWORD – the password for vCenter Server
- VSPHERE_SERVER – the vCenter Server
- VSPHERE_USER – the vCenter Server user for connecting and getting inventory
Improvements to make
I plan on adding linting to this pipeline for code quality purposes. In case you haven’t heard about linting, check out my post on how to lint PowerShell code here:
Linters like the PSScriptAnalyzer allows you to have a rules section that determines how code should look and the quality required to weed out errors and other unwanted code “smells” it may find in testing.
Also, I am going to work out scheduling the pipeline in the environment along with some monitoring of the maintenance period during the updates.
Test test test
Automation brings powerful benefits for your home lab server. However, any automation that you plan on introducing, including automating updates to your Linux server environment, make sure you test your updates and vet any changes that are made to production environments.
Automating your homelab setup is something you won’t regret
Automation is a great way to get where you want to go quickly and consistently without human error. It can apply to any situation you need as well, no matter if you are running a web server, a Minecraft server, or experimenting with virtualization platforms.
Wrapping up
I love experimenting with new tools and techniques when it comes to doing things better, faster, and easier on my home lab server. DevOps is a great approach to take running your home lab. Embracing the principles of automation means you can ensure home labs remain running smoothly and in a consistent way which is the same principles that we want to apply to production environments.
Google is updating how articles are shown. Don’t miss our leading home lab and tech content, written by humans, by setting Virtualization Howto as a preferred source.
About The Author