Remote connectivity to your Windows Servers is a prime capability that is required by administrators to be able to control, manage, and administer their environments. With Windows environments, I feel like most of us that remote command-line access is much more difficult than it needs to be, especially with the bane of our existence WinRM to have to deal with and configure for remote PowerShell access. Recently, in the lab, I have begun the process of OpenSSH Server Windows 10 Install with Public Key authentication. What does that process look like? Let’s look at how you can get OpenSSH server up and running with Windows Server 2019.
OpenSSH Server Windows 10, Windows 11 and Windows Server 2019 & 2022
Thankfully, Microsoft has included the ability in Windows Server 2019 and Windows 10 to install both the SSH client and SSH server natively in Windows. This can help administrators to standardize on the connection technology they are using between both Linux and Windows for remote administration and security.
One of the great things that I like about SSH is its ability to use PublicKey authentication which is a secure way to connect to remote systems as is demonstrated by its use with AWS EC2 systems and other cloud environments. Also, many of the native automation technologies that were built for Linux environments initially such as Ansible makes standardizing your automation tools on a single connection protocol, even though Ansible now works well with WinRM.
Install OpenSSH Server Windows 10 and 2019
Before looking at the configuration instructions and setup to get PublicKey authentication to work on your system, let’s look at the process steps to install OpenSSH Server in a Windows Server 2019 host. Since this is now a native component of Windows Server 2019 and Windows 10, there are no external packages or install files that you have to download to get started. The installation of OpenSSH can be initiated by using the following command.
Add-WindowsCapability -Online -Name OpenSSH.Server~~~~0.0.1.0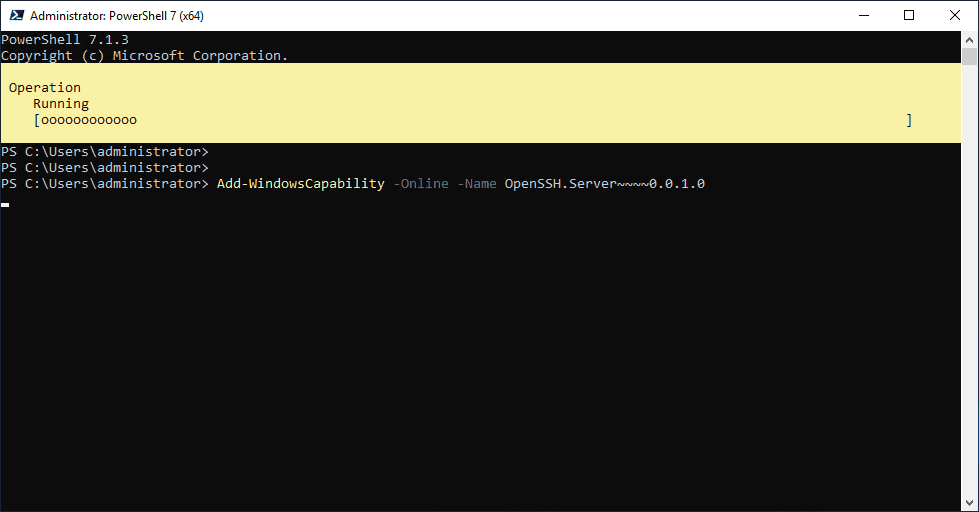
After a few moments, the OpenSSH server component should install successfully.
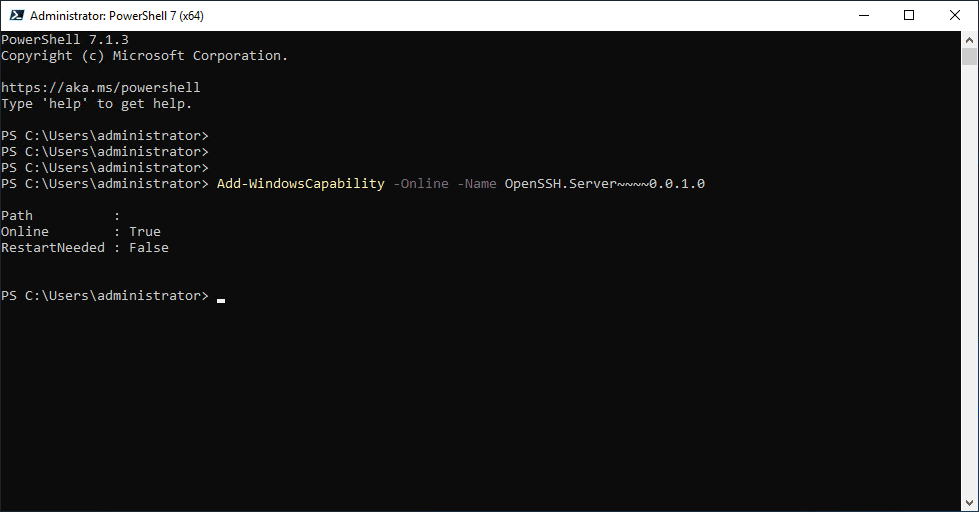
Some installation documentation for installing OpenSSH in Windows Server 2019 depending on how old the documentation is notes that you should install the package:
Install-Module -Force OpenSSHUtils -Scope AllUsersHowever, this is an outdated package that is no longer installable as you will receive the following error. However, you will find that this isn’t a hindrance in getting OpenSSH installed on your computer or generating SSH keys for use in connectivity.
After installing the OpenSSH component in Windows Server 2019, you can check the version of OpenSSH as needed using the command:
ssh -V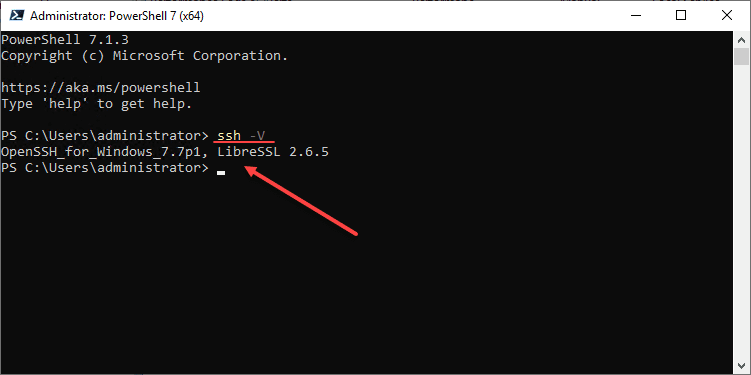
After you install OpenSSH in Windows Server 2019, the service is not automatically configured as the Startup type: Automatic. You can set the startuptype as Automatic and then start the service. You can also use the set-service PowerShell cmdlet to set the startup type.
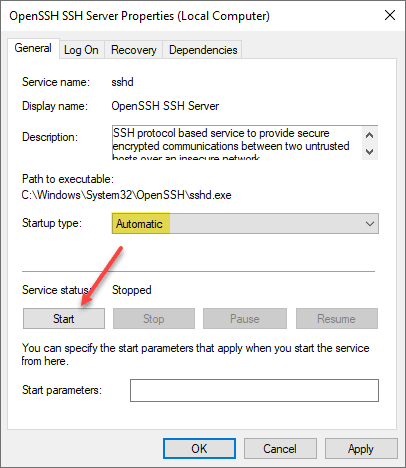
You will want to start both the OpenSSH Authentication Agent and the OpenSSH SSH Server. Starting the authentication agent creates the authorized_keys file among other things in the Programdata\ssh directory.

Allow OpenSSH Server Firewall Exception
You will need to allow OpenSSH Server firewall exceptions for OpenSSH connectivity in Windows 10 or Windows Server 2019. SSH connectivity is on TCP port 22. You can easily do this with the following commands from the command line with the netsh command for adding the firewall rule.
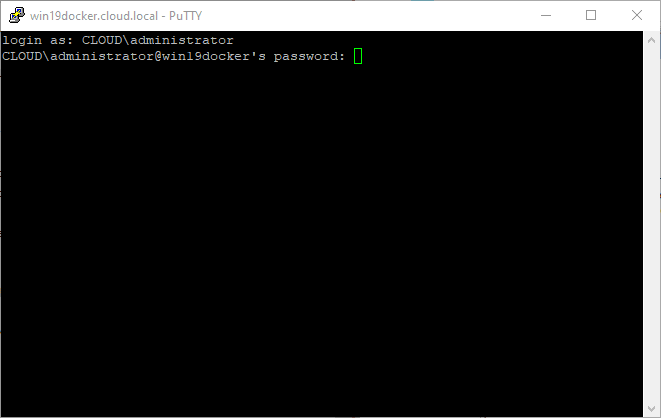
netsh advfirewall firewall add rule name="SSH PORT 22" dir=in action=allow protocol=TCP localport=22At this point, you should be able to connect to the OpenSSH server hostname using a Putty session or terminal tool of your choice. You should even be able to use something like WinSCP to SSH into your Windows box for file management. By default, password authentication is allowed. Enter the user account for authentication and password. Below, I am using a domain account to login to the IP address or hostname of the endpoint.
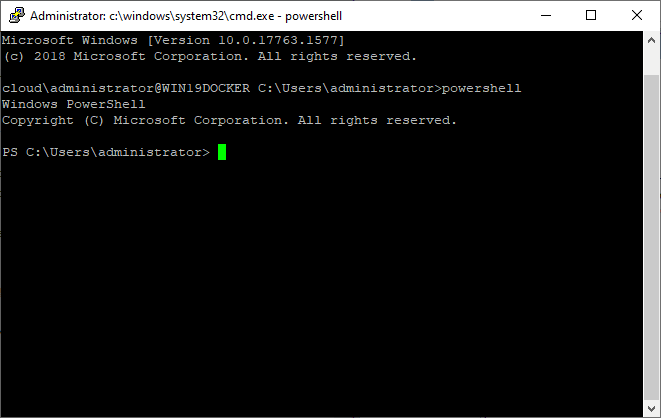
Successfully authenticated and changing to a PowerShell prompt over SSH. Cool stuff.
OpenSSH Server Public Key authentication
Public key authentication is a much more secure means of authenticating to SSH than using a password. With public key authentication with OpenSSH, you have to possess the private key component of an SSH key pair. It is a pair since the OpenSSH server must have a copy of your public key. When you authenticate, you are proving you have the matching private key component of the pair so authentication can be successful. You can even protect your SSH key with a password for another factor of authentication.
Enabling OpenSSH Public Key authentication
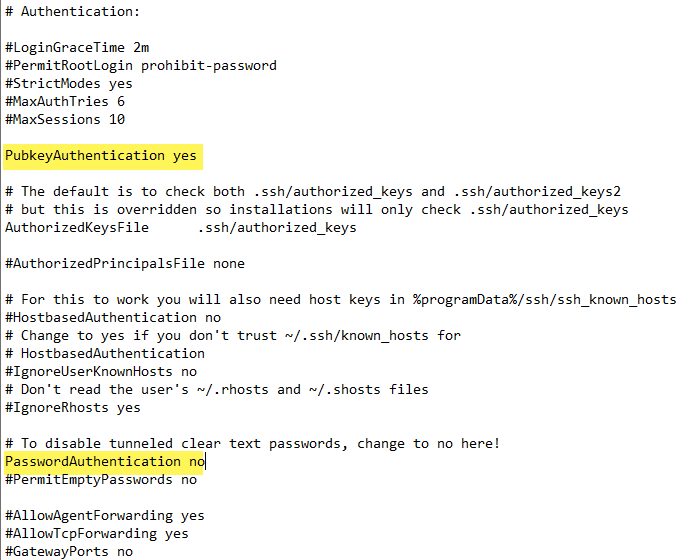
To enable OpenSSH public key authentication, there are a couple of settings and permissions you need to change in the sshd_config file. Where is this filename location?
C:\programdata\ssh\sshd_configEdit the sshd_config configuration file and change the following configuration values as shown in the example:
PubkeyAuthentication yes
PasswordAuthentication no
Below shows the file with the settings changed.
How do you generate the SSH key pair in Windows? This is easy to do. From a PowerShell prompt, type in the command:
ssh-keygenFrom a PowerShell prompt, type in the command and you will be asked to create the key pair and if you want to use a password (passphrase) for the key pair identification. By default, in Windows, this is saved in the user profile under a hidden directory as noted below. The .pub key of course is the public key.
c:\users\<username>\.ssh\id_rsa
c:\users\<username>\.ssh\id_rsa.pub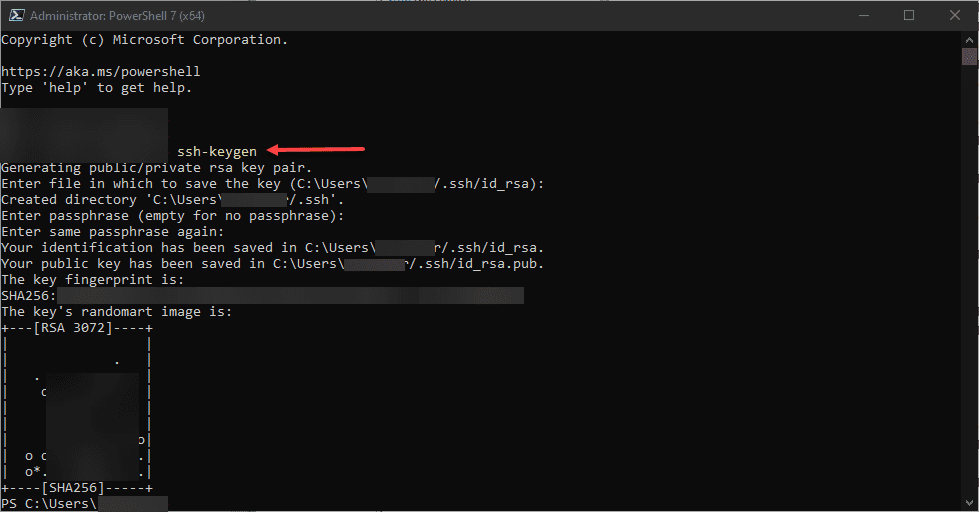
If you want to use Putty to connect to your OpenSSH server running in Windows Server 2019, you need to generate a .ppk file that is the Putty-formatted version of the private key. Open Putty Key Generator and open your current private key (id_rsa) and then choose to Save private key. This will save the private key fingerprint.
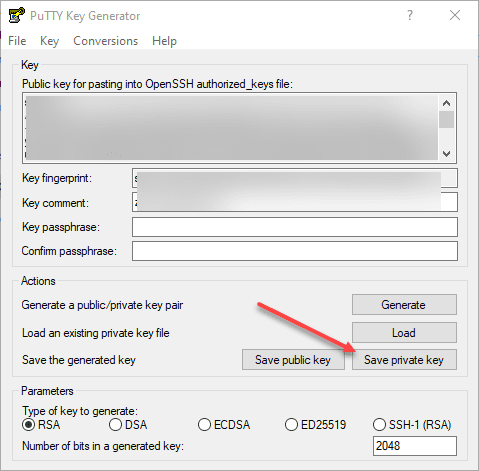
Now you should have a .ppk file that can be used in the Auth properties of the SSH session to authenticate with public key authentication.
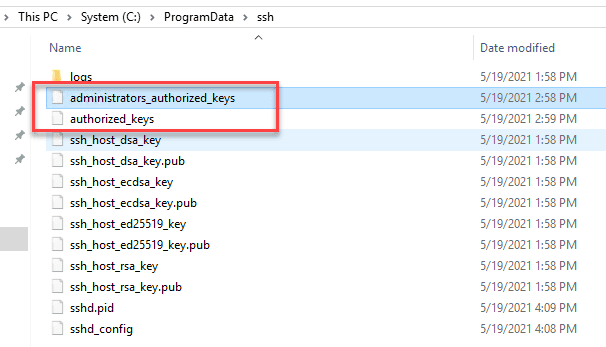
An important part of public key authentication is the actual public key that the OpenSSH Server has possession of. How do you get the public key to the OpenSSH server? Remember the files created with the ssh-keygen command? The .pub file that is created and the contents within, are the contents you need to copy to the OpenSSH Server. Where are these copied?
There are two files that are used with public key authentication:
administrators_authorized_keys
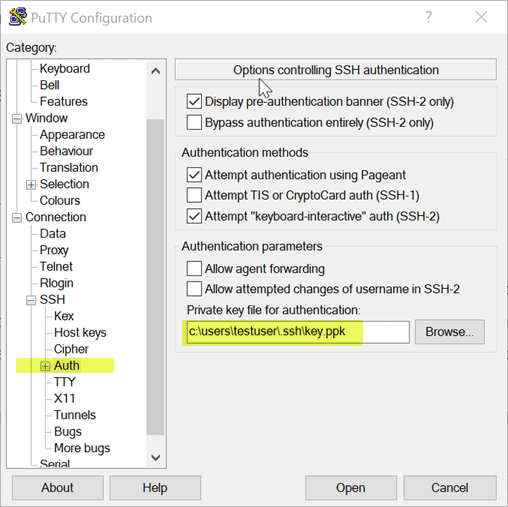
authorized_keysIf the user you are trying to authenticate with is an administrator on the Windows 10 or Server 2019 OpenSSH server, you place the contents of the public key of the user in the administrators_authorized_keys file. If they are a standard user, you place the public key in the authorized_keys file. Then when creating the Putty connection, you use the private key .ppk file in the Auth configuration the session in Putty.
Change the default shell to PowerShell
You can change the default shell of an OpenSSH connection to Windows 10 or Windows Server 2019 by using the following command:
New-ItemProperty -Path "HKLM:\SOFTWARE\OpenSSH" -Name DefaultShell -Value "C:\Windows\System32\WindowsPowerShell\v1.0\powershell.exe" -PropertyType String -ForceAllowGroups, AllowUsers, DenyGroups, DenyUsers
You can control the users and groups allowed to connect to the server. This is done using the DenyUsers, AllowUsers, DenyGroups, and finally AllowGroups. They are processed in the order just listed. It is important that all account names are specified in lower case.
Examples for domain users and groups
DenyUsers domain\[email protected] : blocks contoso\admin from 10.1.1.37
DenyUsers domain\* : blocks all users from "domain" domain
AllowGroups domain\sshusers : only allow users from domain\sshusers group
Examples for local users and groupsCopy
AllowUsers [email protected]
AllowGroups sshusers
Wrapping Up
OpenSSH Server Windows 10 Install with Public Key authentication is a great way to connect to your Windows 10 or Windows Server 2019 hosts. It helps to standardize connectivity protocols for both Windows and Linux hosts alike. This includes not having to deal with the frustrations of WinRM and configuring this for connectivity. Hopefully, this guide will help any who are wondering how OpenSSH is configured with Windows 10 or Windows Server 2019. Let me know in the comments if you have any questions or create a forum post in the VHT forums if you would like more detailed help or troubleshooting from myself and those in the community.
Google is updating how articles are shown. Don’t miss our leading home lab and tech content, written by humans, by setting Virtualization Howto as a preferred source.
About The Author