Upgrading to VMware vCenter Server VCSA 6.7
We have covered looking at new aspects of vSAN 6.7 as well as vSphere 6.7 and the process of installing vCenter Server as well as Installing and Upgrading ESXi server. Let’s now take a look at the process to upgrade an existing vCenter Server (6.5 in this case) up to vCenter Server 6.7 and the process involved to do that. VMware has made the upgrade process for vCenter Server dead simple with the ISO installer utility and the process really hasn’t changed from the one we saw with the 6.5 upgrade. In this post, we will cover Upgrading to VMware vCenter Server VCSA 6.7 and take a walk through the process from start to finish.
Upgrade Considerations and Upgrade Process
Before upgrading your VMware vCenter Server VCSA appliance to version 6.7, there is a very important “order of operations” that you need to follow when upgrading to this latest release of vCenter. We typically may think of the vCenter Server upgrade as the very first step, however, if you have other VMware products in your environment, VMware has published a workflow KB article addressing the order that upgrades need to take place in. Also, keep in mind at this point that certain products such as NSX are currently not supported with vCenter 6.7 at the time of this writing. The order of the upgrade operation as published by VMware is as followings. As you can see, vCenter Server is quite far down the list of upgrades.
- vRealize Automation (vRA)
- vRealize Orchestrator (vRB)
- vRealize Business for Cloud (vRBC)
- vRealize Operations (vROps)
- vRealize Operations Manager End-Point Operations Agent
- vRealize Log Insight (vRLI)
- vRealize Log Insight Agent
- VMware vSphere Storage APIs – Data Protection (vADP)-based Backup Solution
- NSX for vSphere (NSX-v)
- Platform Services Controller External (PSC)
- vCenter Server
- vSphere Update Manager (VUM)
- vSphere Replication (VR)
- Site Recovery Manager (SRM)
- ESXi
- vSAN
- Virtual Hardware
- VMware Tools
Also, the upgrade considerations KB article by VMware mentions several other notables before upgrading that you definitely want to consider:
- Update sequence for vSphere 6.7 and its compatible VMware products
- vCenter Server upgrade fails if it contains Host Profiles lower than version 6.0.0
- vCenter Server and Platform Services Controller Deployment Types
- Repoint vCenter Server to External Platform Services Controller in a Different Domain
- Best practices for upgrading to vCenter Server 6.7
- Deploying vCenter Server Appliance 6.7 fails with the message “The installation of vCenter Server failed due to an internal error.”
Once you have carefully went over the upgrade plan, and have decided to perform your upgrades in the proper order and have then made it to the vCenter Server VCSA 6.7 Upgrade step, let’s take a look at what upgrading a VCSA 6.5 appliance to 6.7 looks like.
Upgrading to VMware vCenter Server VCSA 6.7
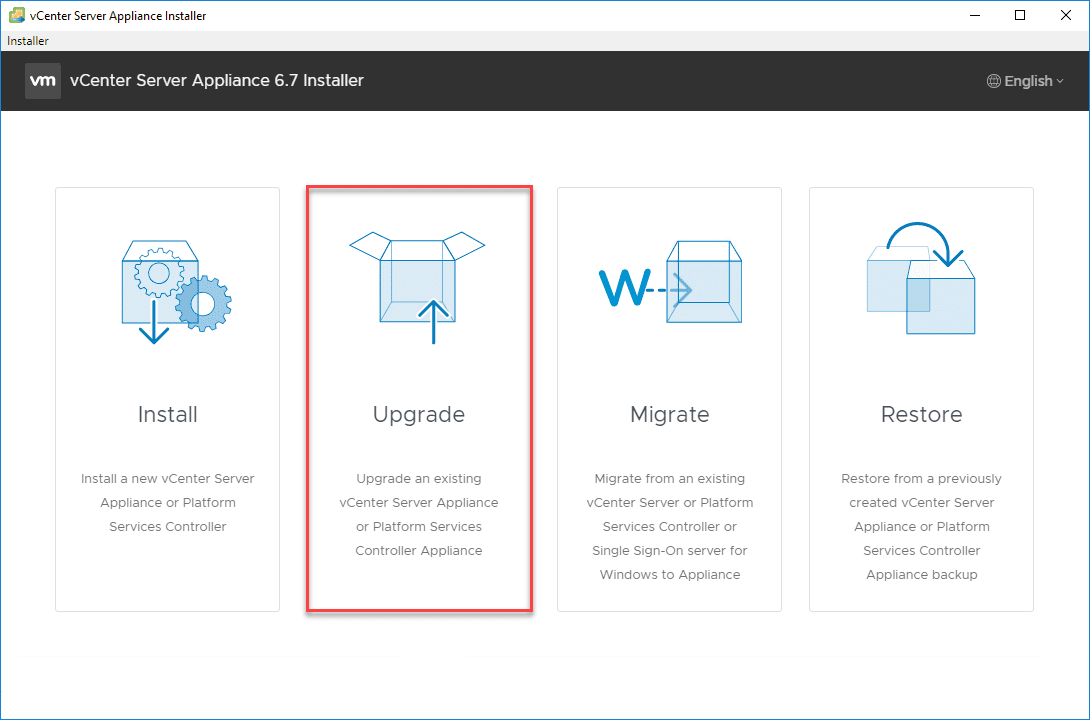
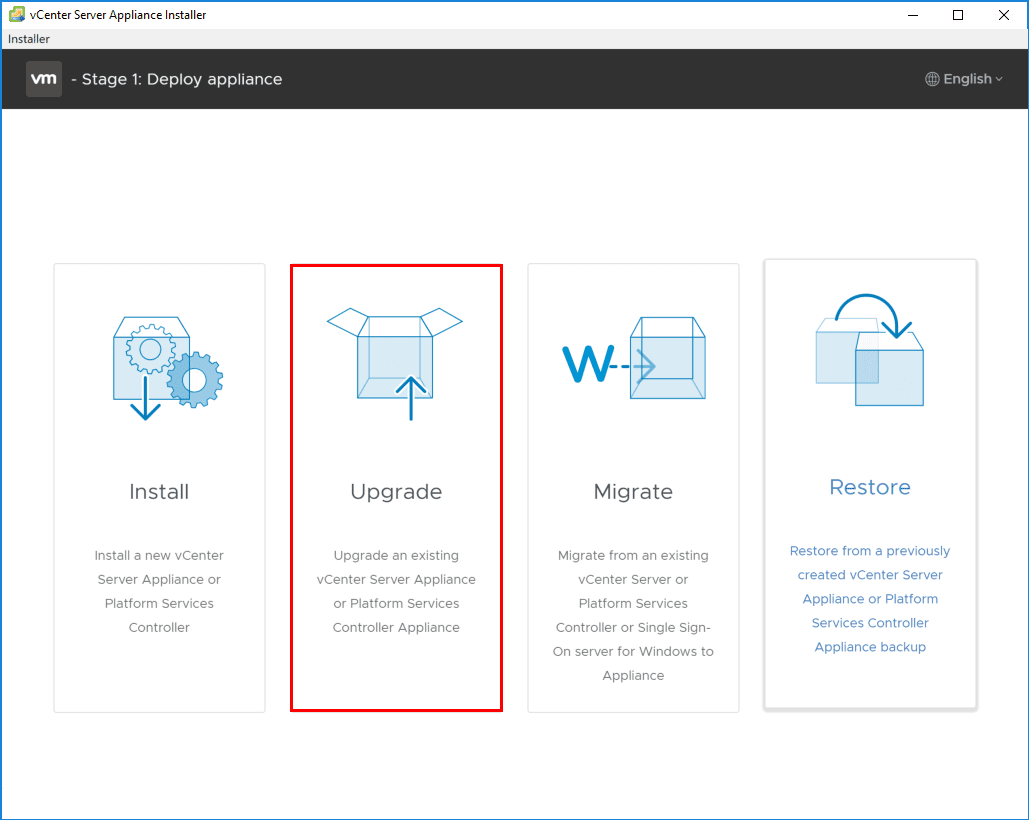
After launching the installer.exe from the new vCenter Server 6.7 ISO, choose the Upgrade option to upgrade an existing VCSA appliance to VCSA 6.7.
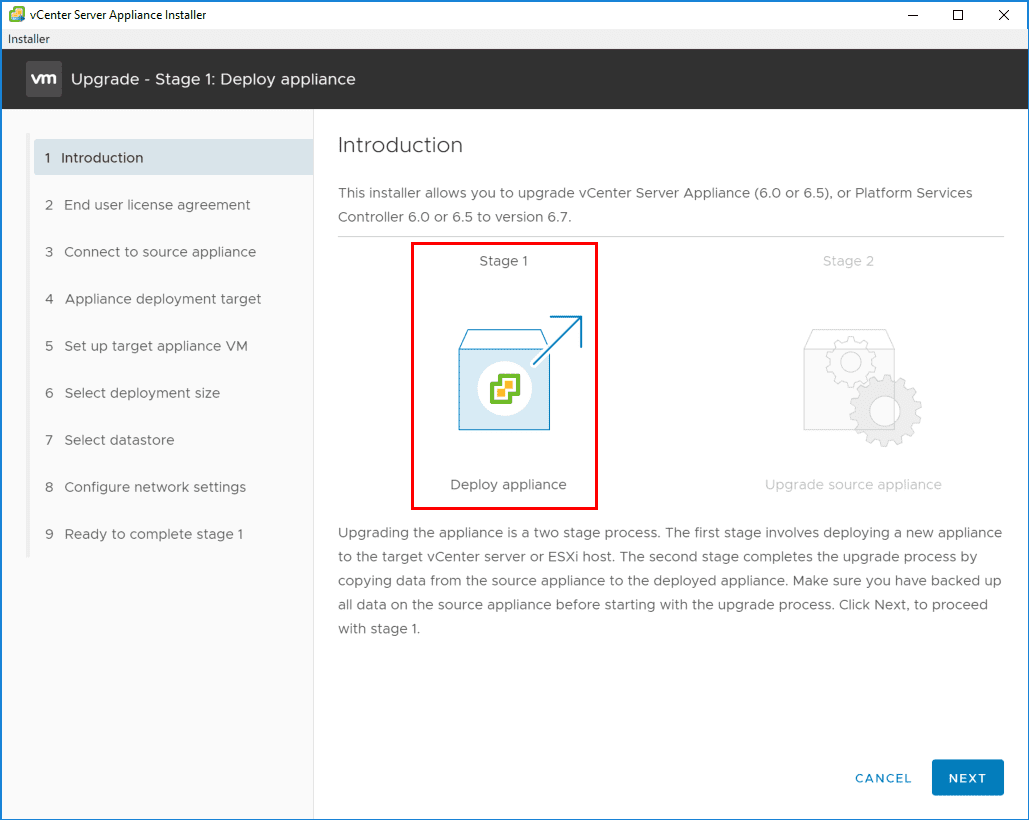
The process to upgrade to the VCSA 6.7 appliance involves a two stage process as described by VMware in the installer:
- Upgrading the appliance is a two stage process. The first stage involves deploying a new appliance to the target vCenter server or ESXi host. The second stage completes the upgrade process by copying data from the source appliance to the deployed appliance. Make sure you have backed up all data on the source appliance before starting with the upgrade process.
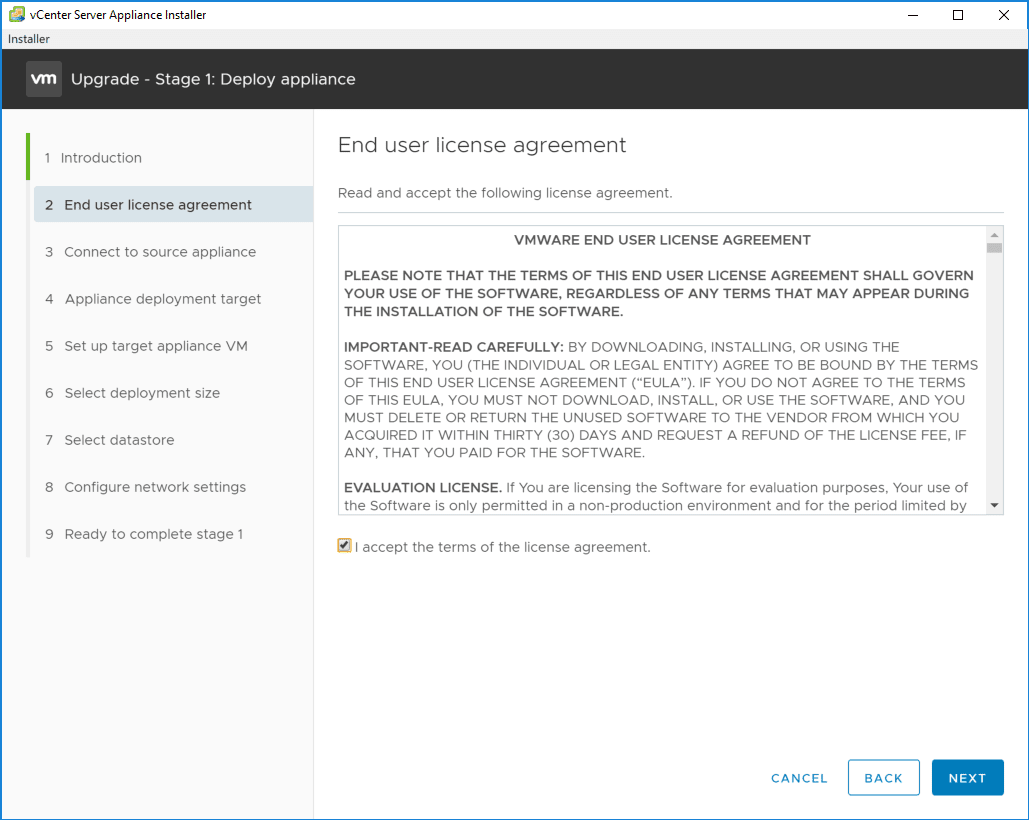
First things first, accept the EULA.
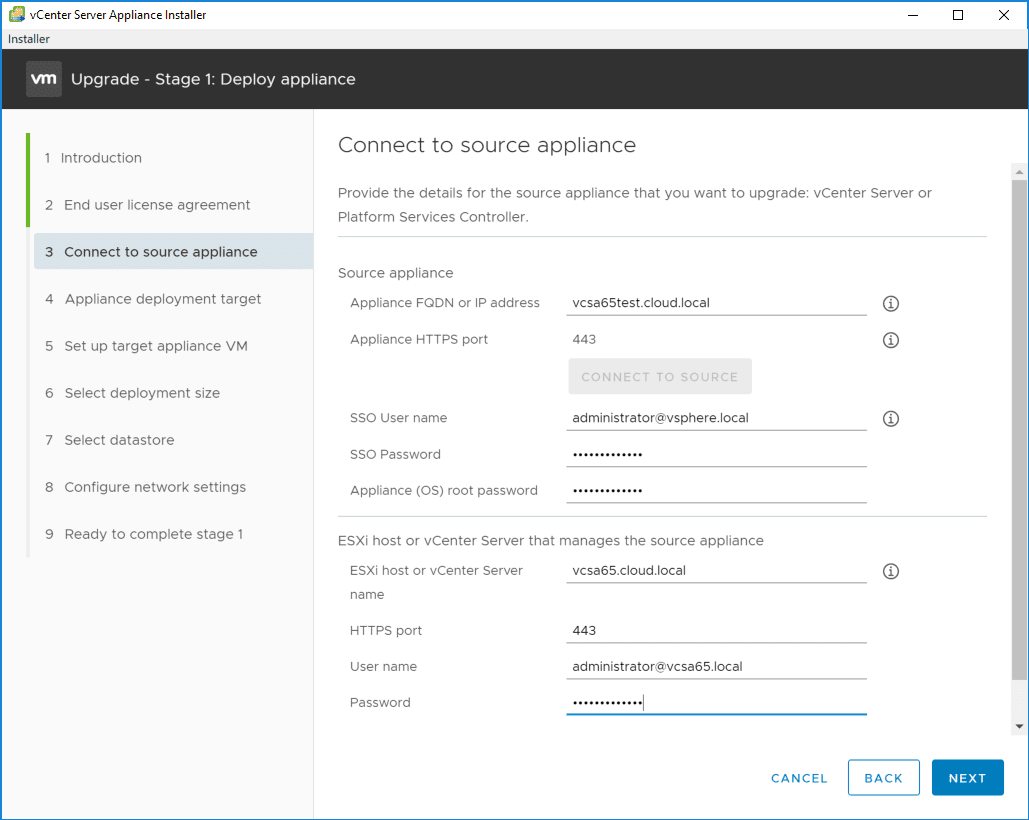
The first connectivity configuration that is made is connecting to the source VCSA appliance that you want to upgrade. In my case in the home lab test environment, I have a test VCSA 6.5 U1g appliance that I am going to upgrade to VCSA 6.7.

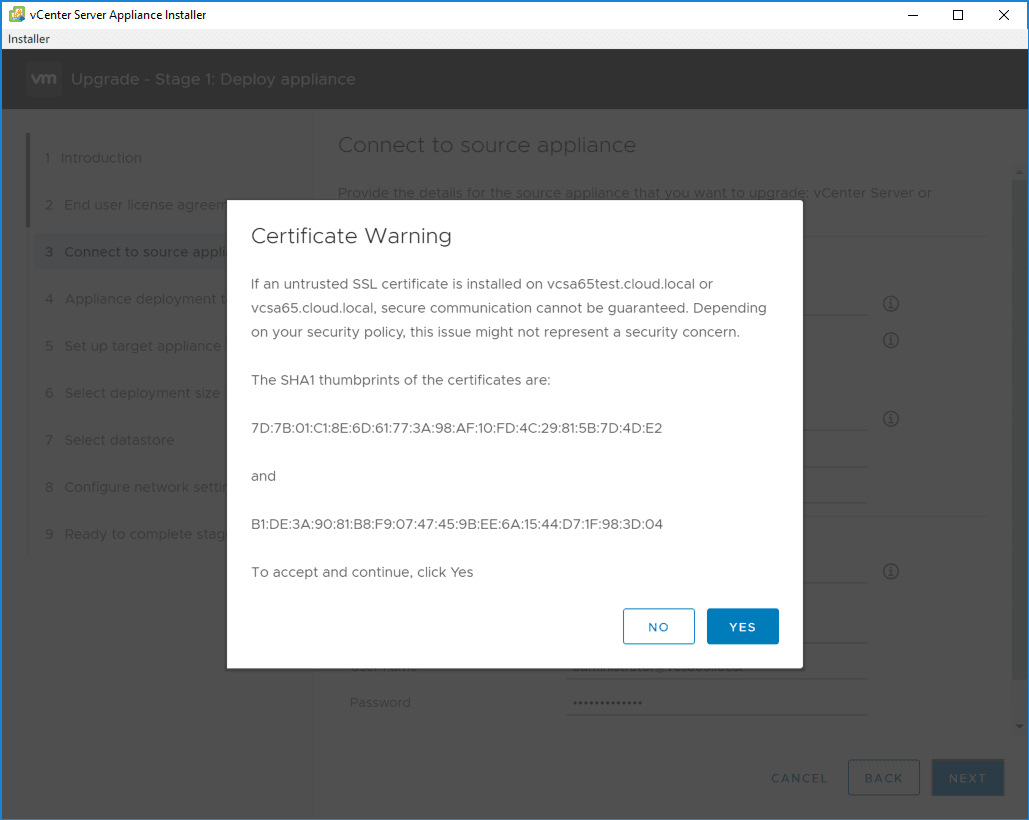
Once you click to Connect to Source, you will provide the login credentials for the source VCSA appliance as well as the login credentials for the ESXi host or vCenter Server that manages the source appliance.
Most likely if using self-signed certificates, you will see a certificate warning.
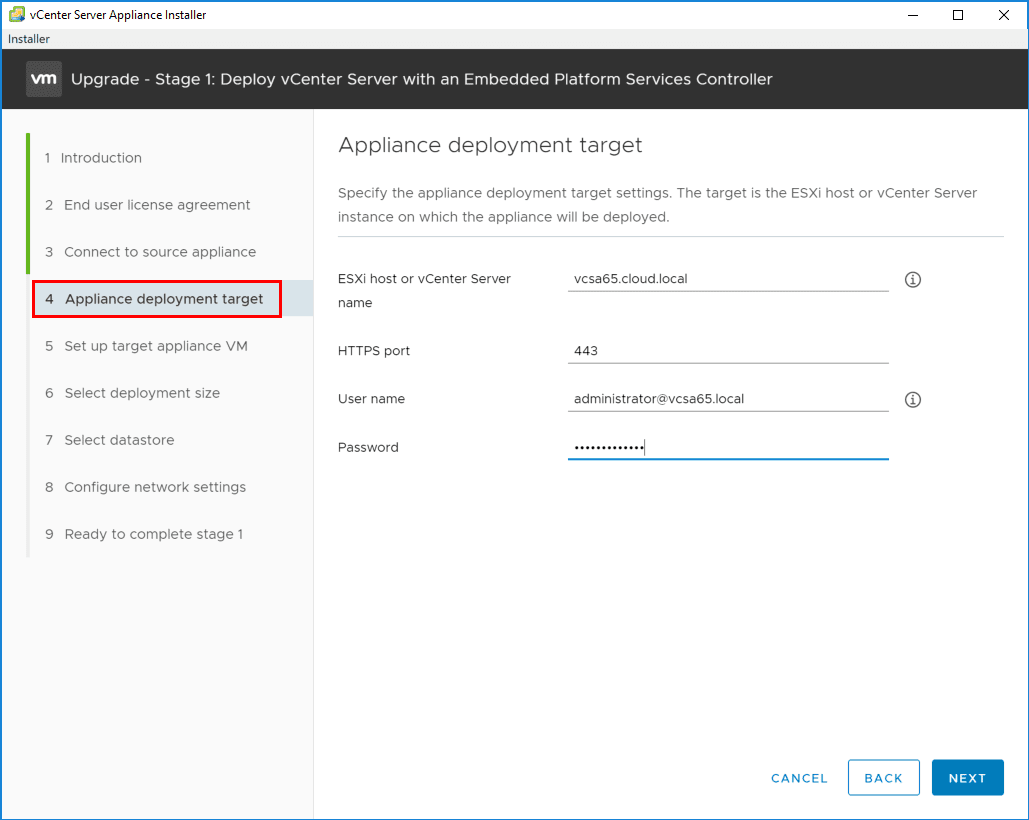
For the deployment target configuration screen, provide the connection information for the destination ESXi host or vCenter Server instance on which the new VCSA 6.7 appliance will be deployed.
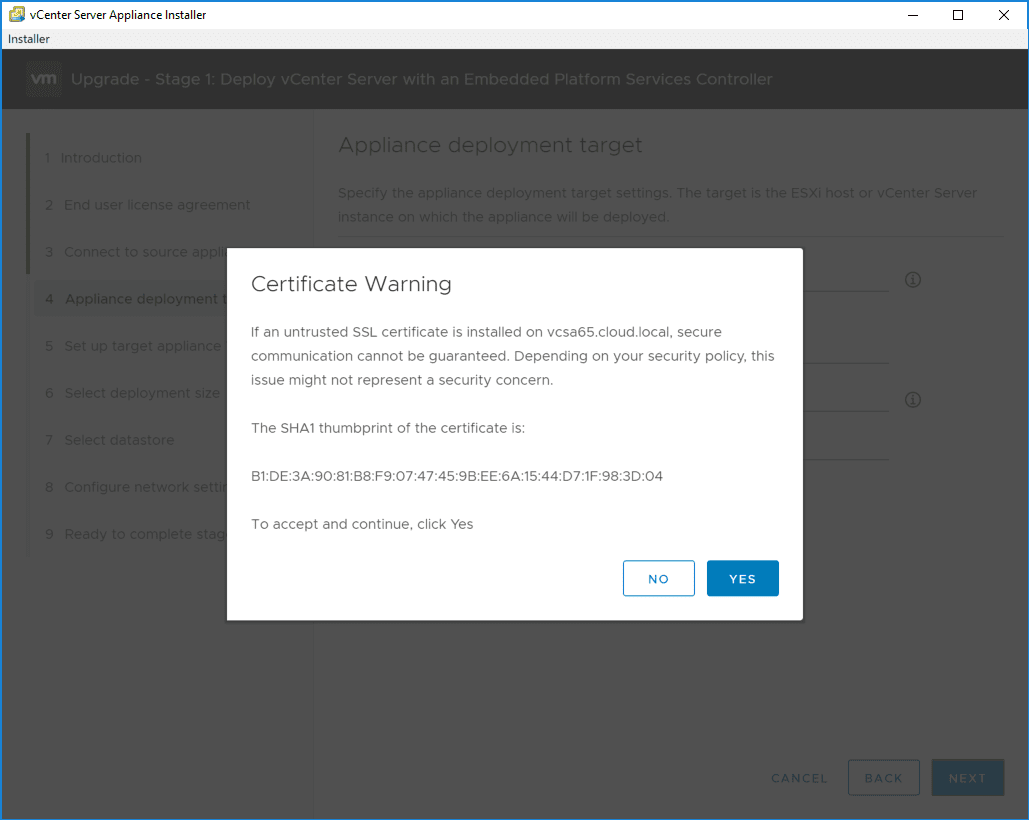
Again, here you will see a certificate warning with self-signed certificates on the destination vCenter Server.
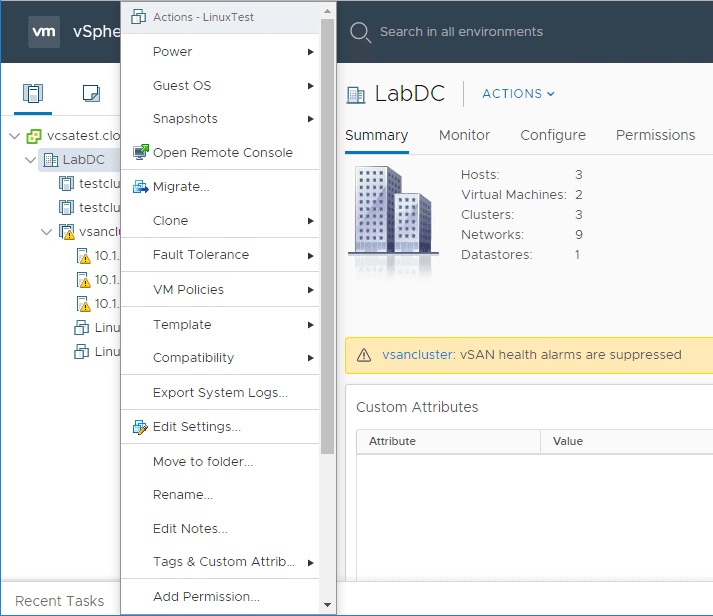
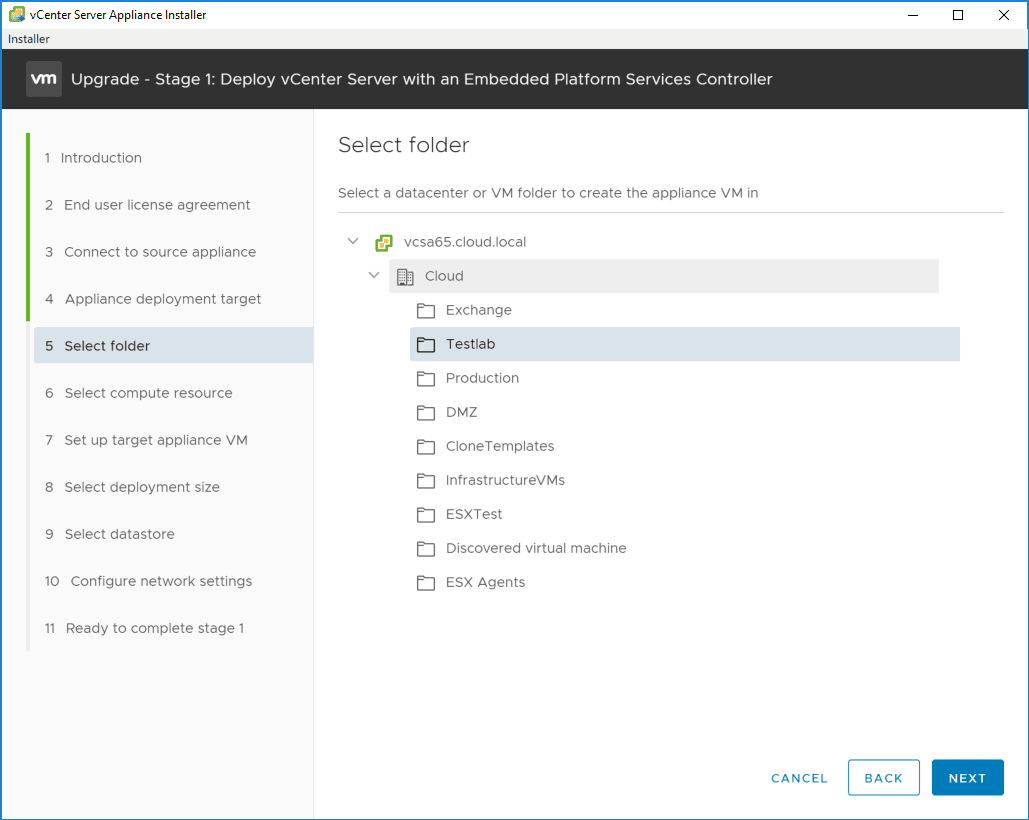
Choose the destination location, either a datacenter or VM folder.
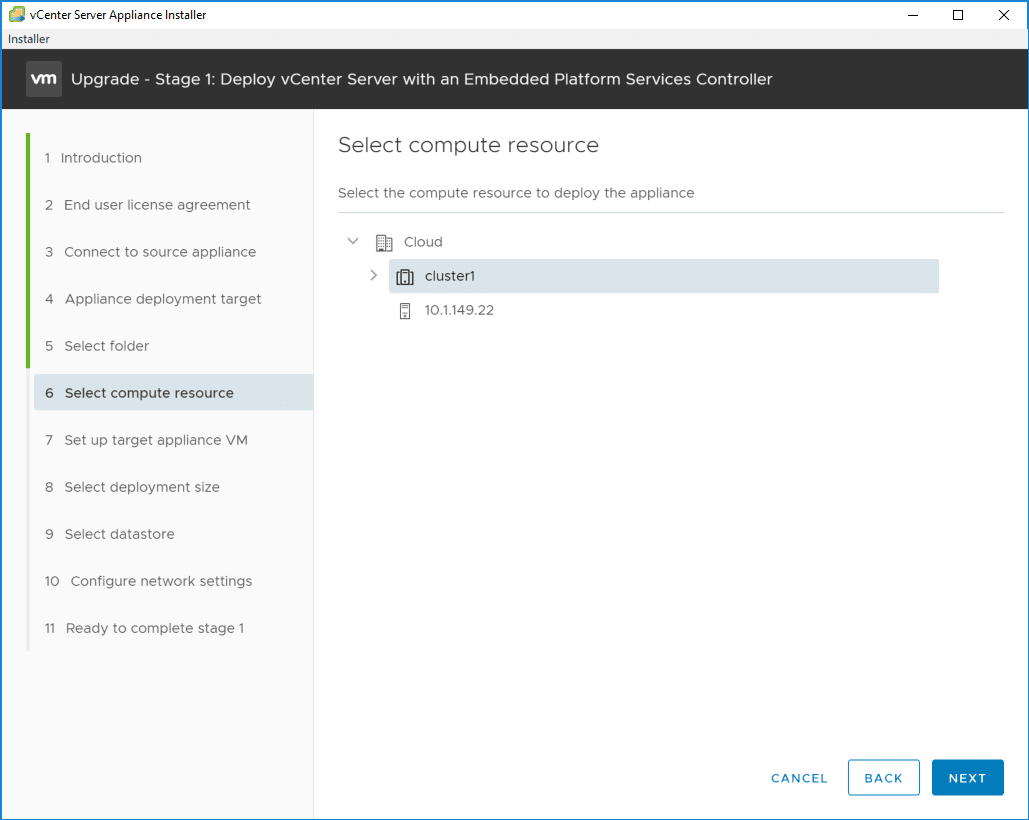
Select the compute resource on which to deploy the new VCSA 6.7 appliance.
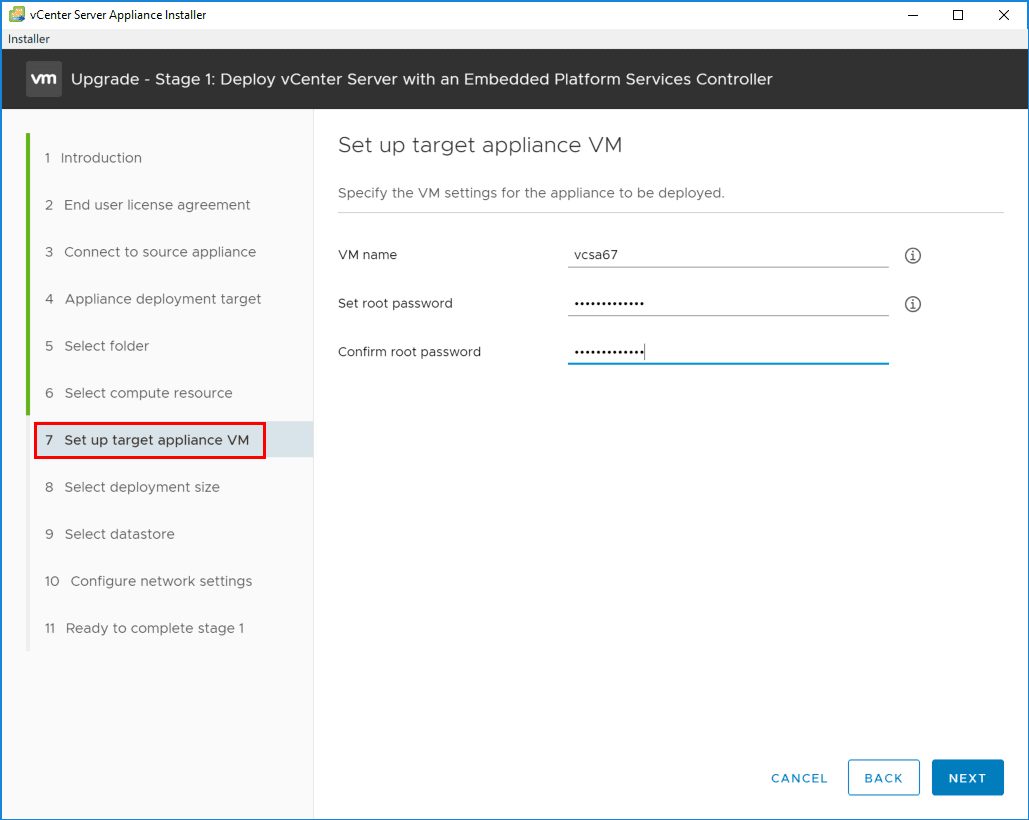
Now, we configure the target VCSA 6.7 appliance name for the vSphere inventory as well as set the root password.
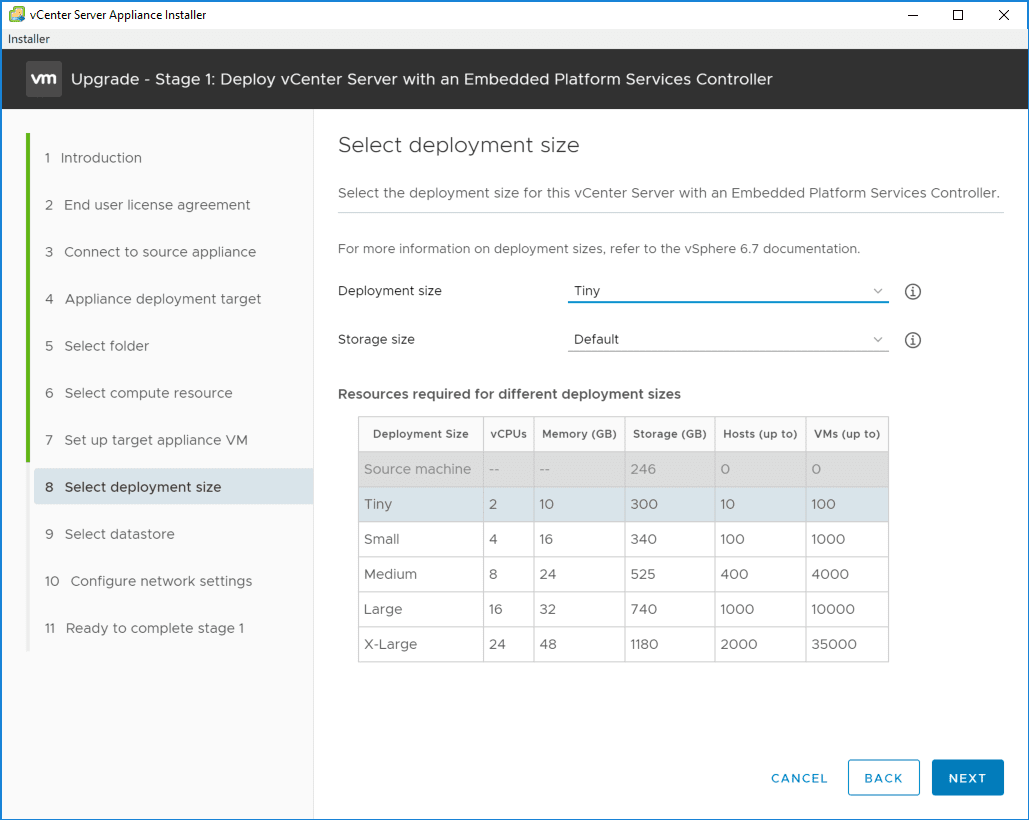
Similar to VCSA 6.5 deployment, you can plainly see the deployment size options. Here for home lab purposes, we are deploying the Tiny deployment.
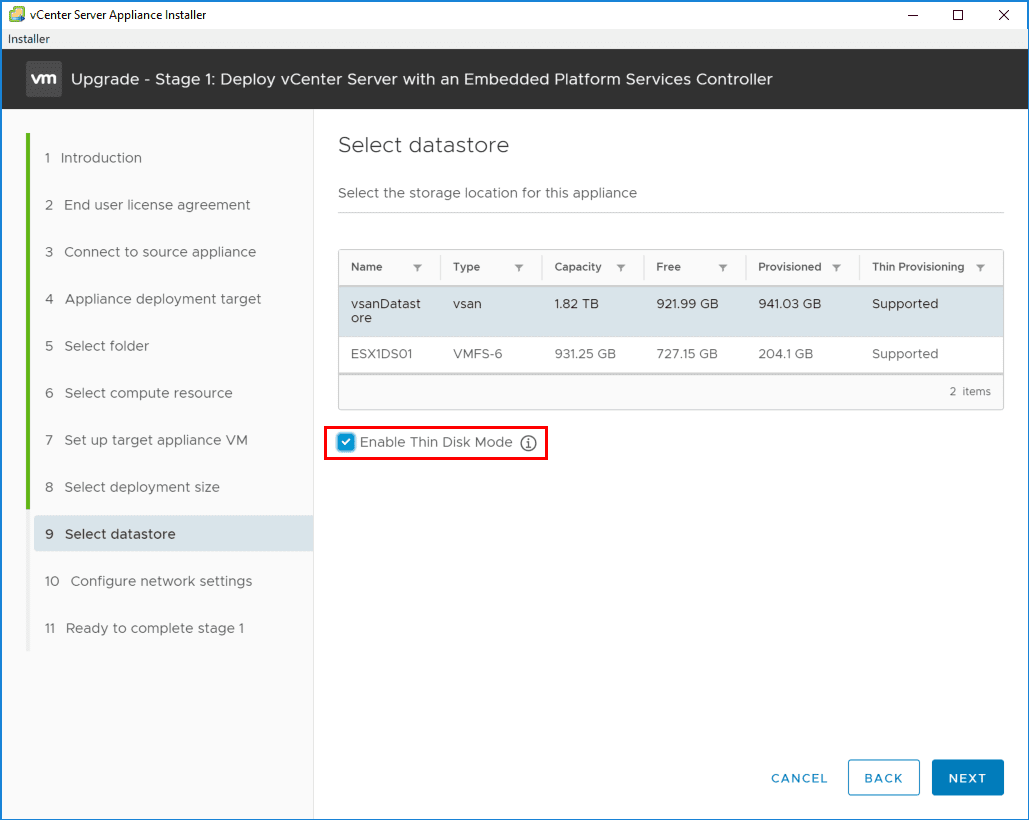
Next, we select the target storage for the destination VCSA 6.7 appliance. Also, you have the option on this screen to enable the Thin Disk Mode for thin provisioning the VCSA 6.7 appliance disks.
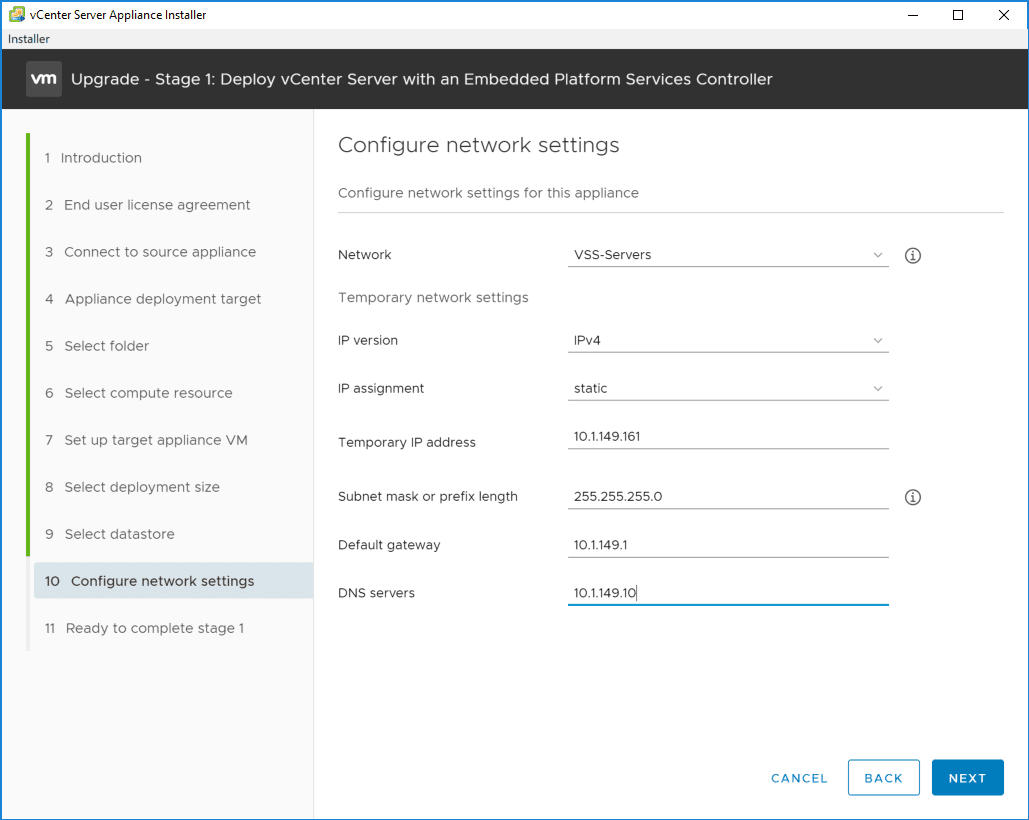
On the Configure Network Settings screen, select the network vSwitch you want to use as well as the IP address information for a temporary IP address. Remember with the upgrade, the resulting VCSA 6.7 appliance will assume the IP address of the source VCSA appliance once the upgrade process has made it to the point of powering off the source appliance and assuming identity. Here we simply need to provide a temporary IP address to allow network communication to copy over the data from the source VCSA appliance.
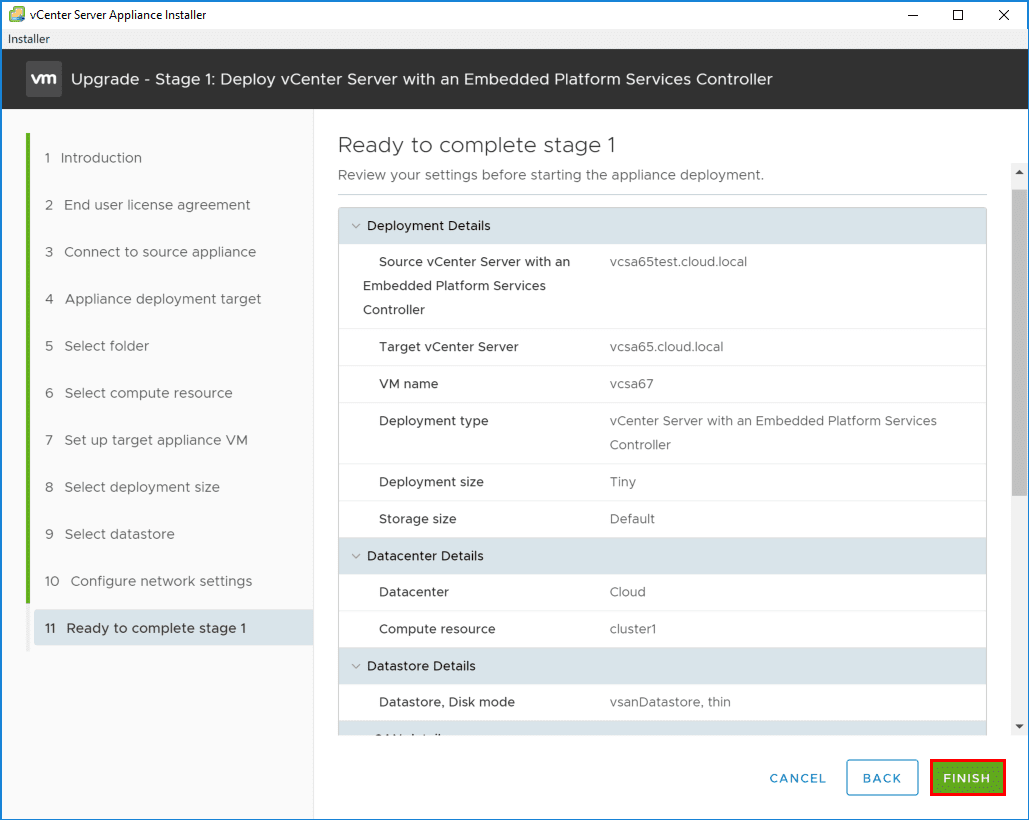
On the summary screen for Stage 1, be sure to review the configuration options and click Finish to begin the Stage 1 process of actually deploying the VCSA 6.7 appliance using the configuration options set in the preceding steps.
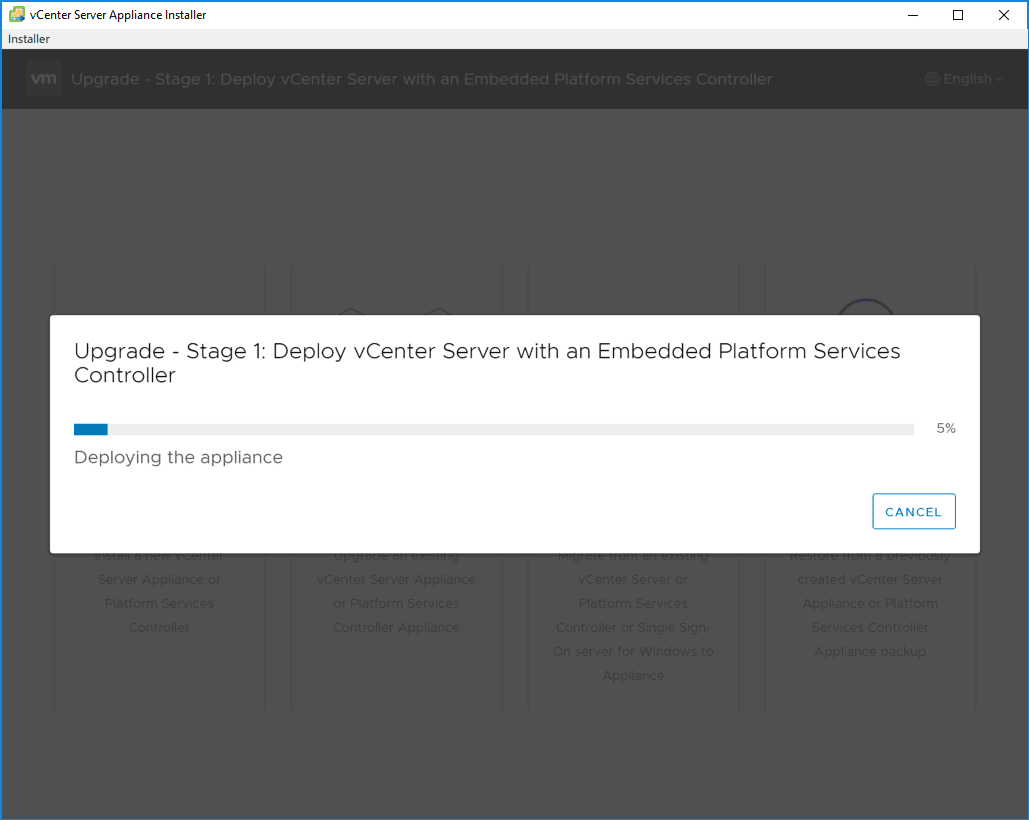
The process begins and proceeds forward.
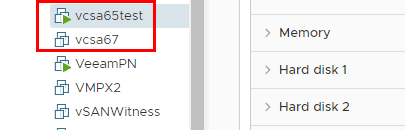
You will see the new appliance provisioned in the vSphere inventory along with your current VCSA appliance that will eventually be powered off.
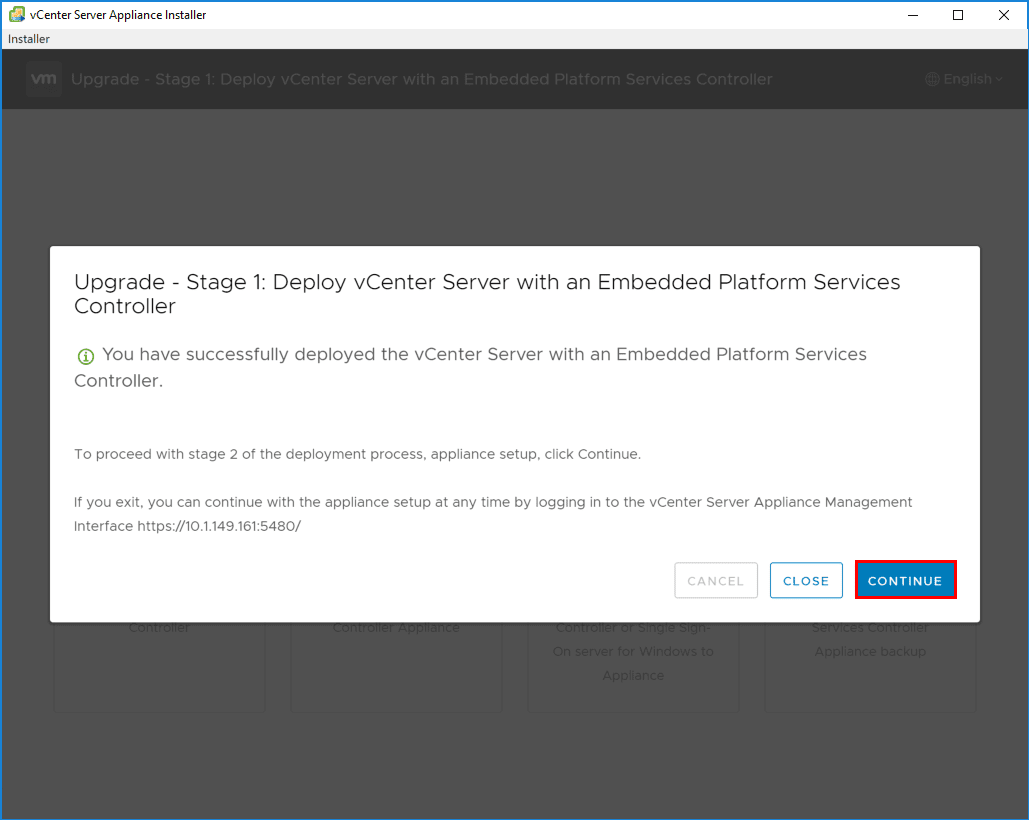
The Stage 1 process will eventually complete after the appliance is provisioned. Click Continue to proceed forward with Stage 2.
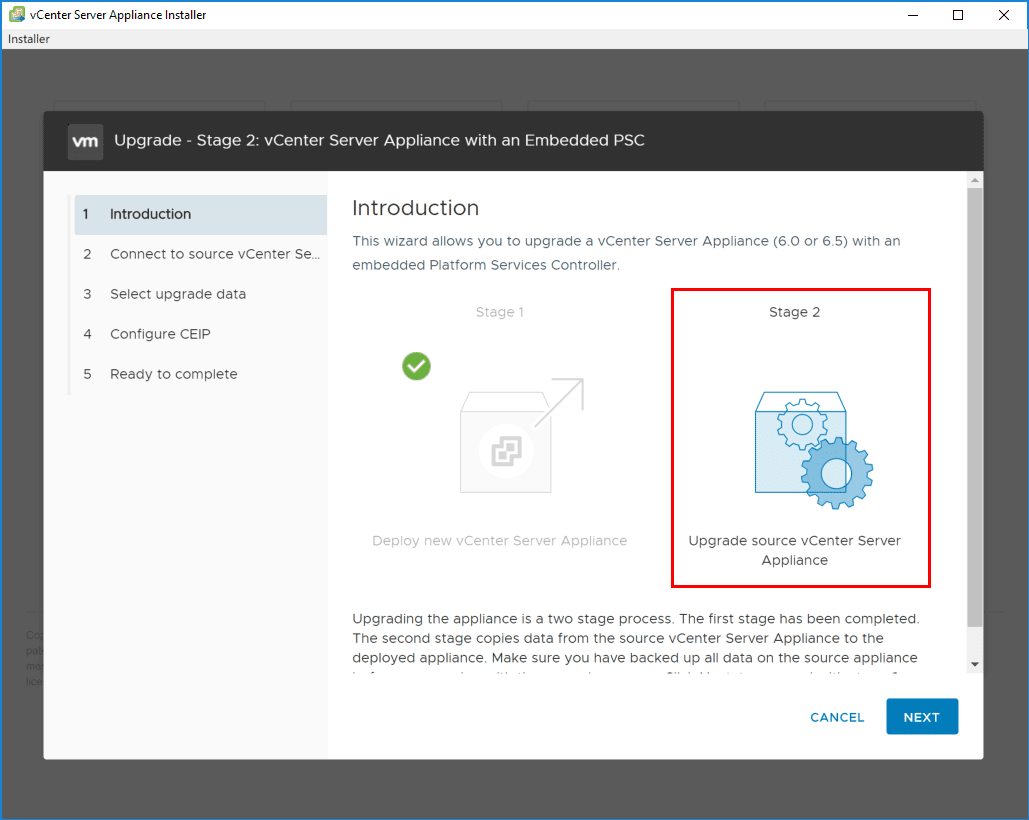
Stage 2 copies data from the source vCenter Server Appliance to the deployed appliance as explained by the installer introductory screen.
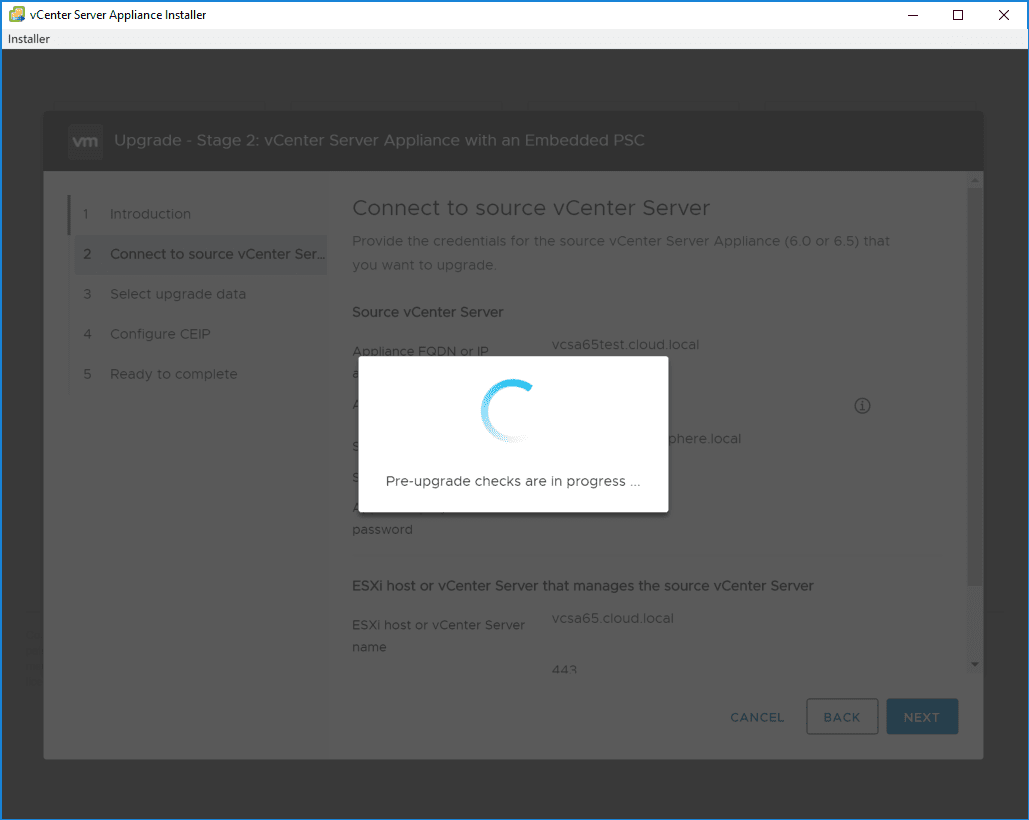
VMware has our backs here, pre-upgrade checks will check the environment to make sure everything is at least verified to work as expected.
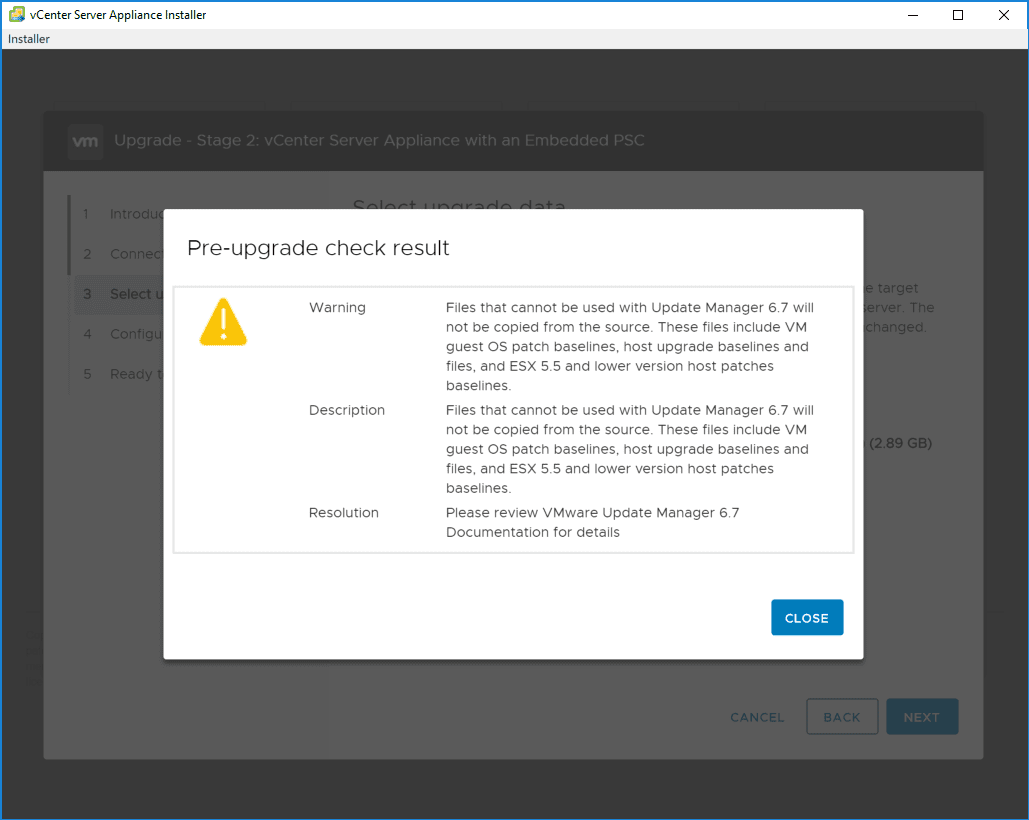
Any findings from the pre-upgrade checks will be displayed on the Pre-upgrade check result screen.
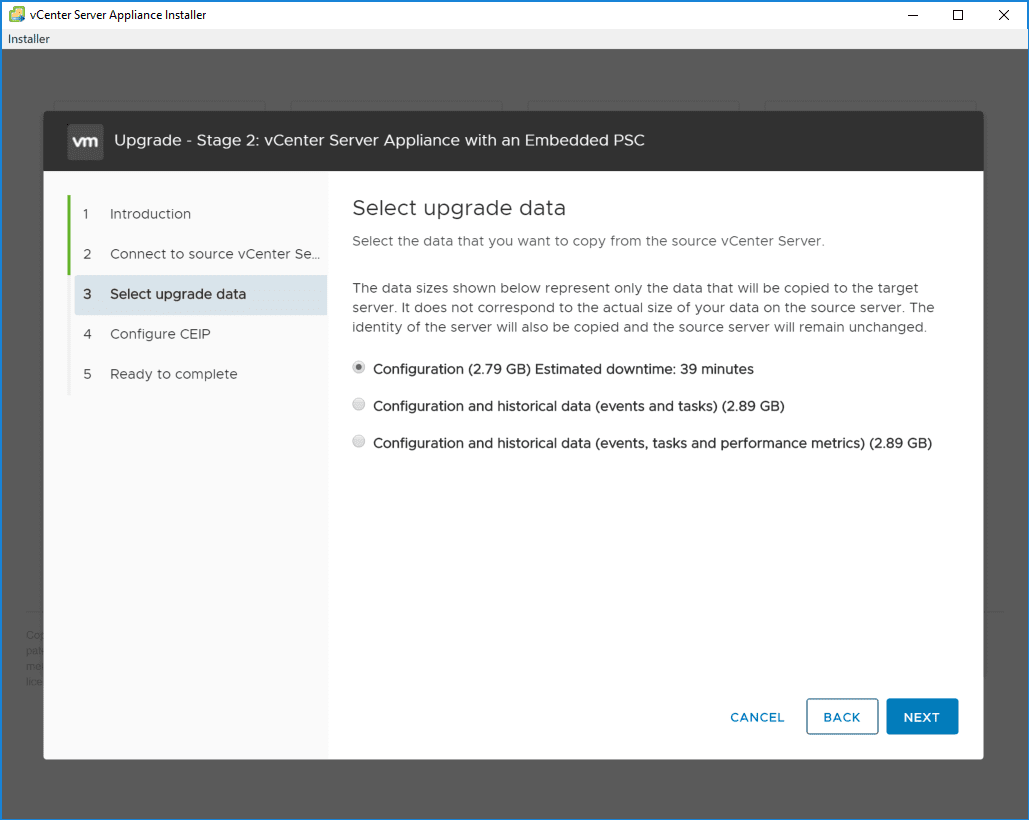
On the select upgrade data screen, you select the data you want to copy from the source VCSA appliance. The options are:
- Configuration data
- Configuration and historical data (events and tasks)
- Configuration and historical data (events, tasks, and performance metrics)
The installer will show the data sizes of each option. A nice feature as well is the estimated downtime that is displayed for the configuration option.
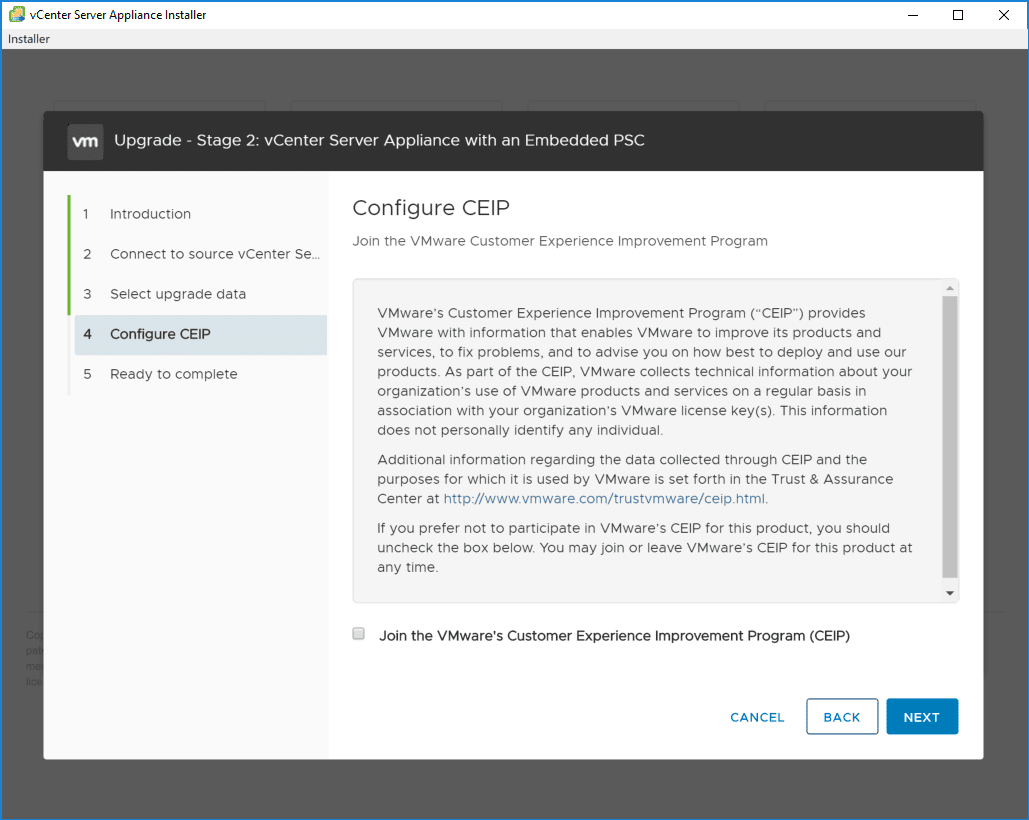
Choose whether or not to join the CEIP program.
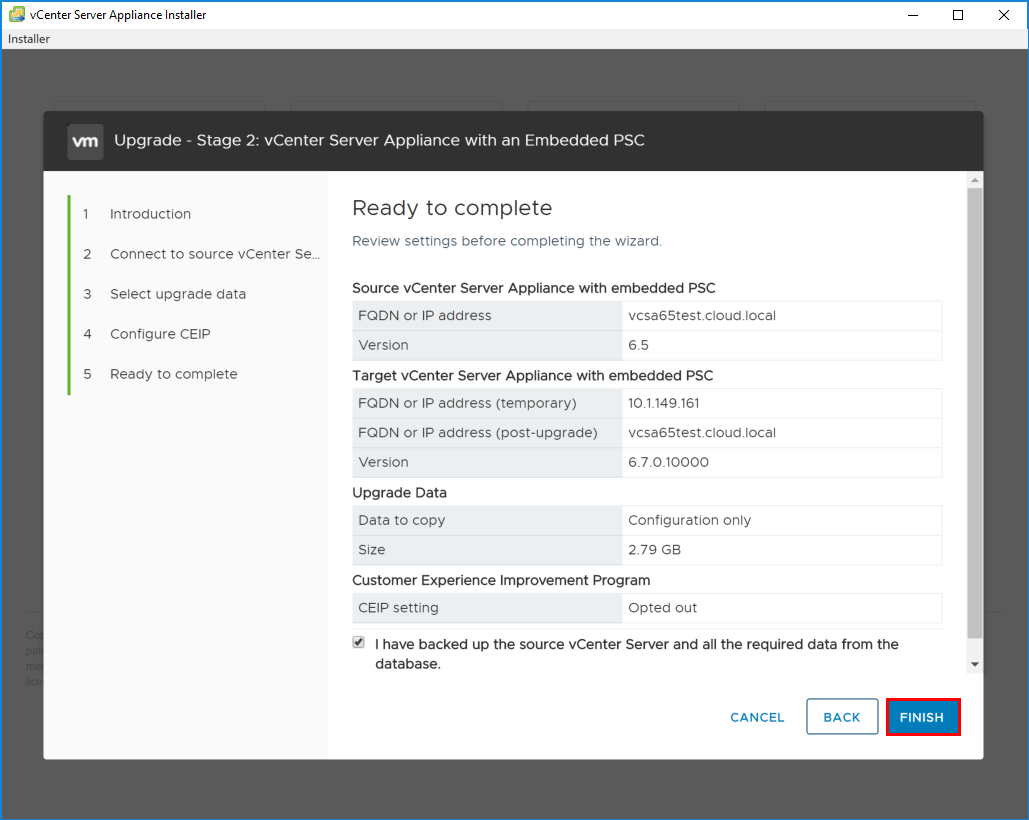
Stage 2 is ready to complete. Be sure to backup your source appliance data. Check the box and then click Finish.
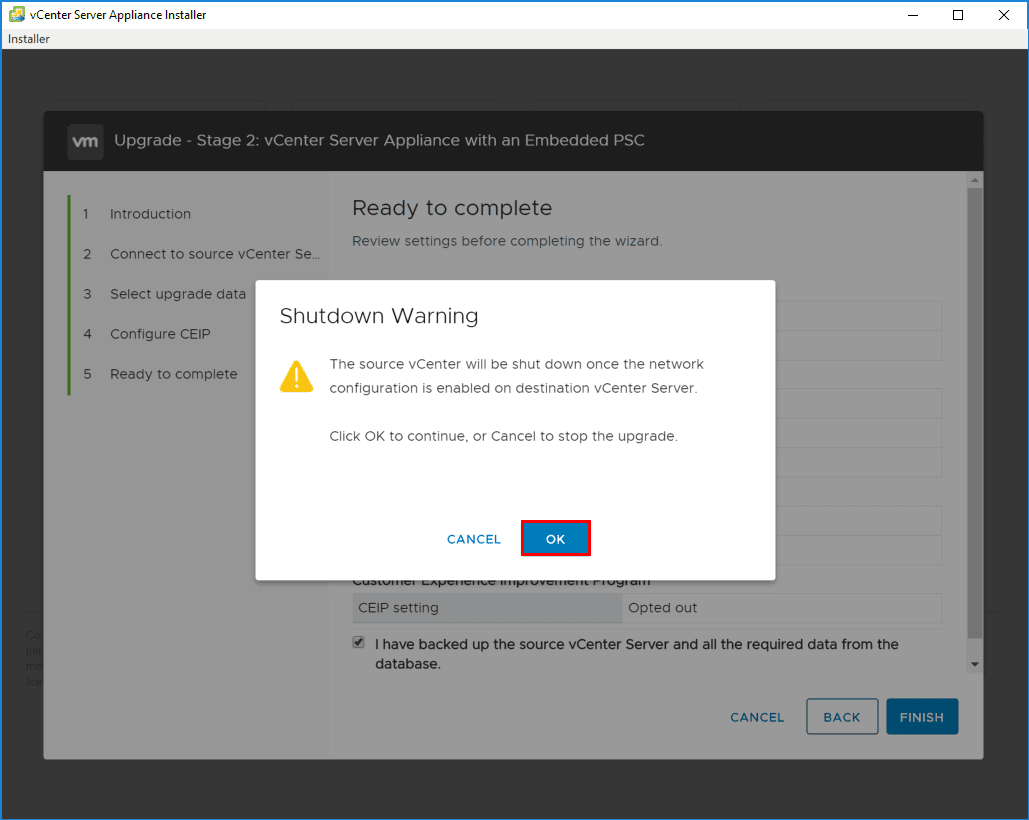
There will be a Shutdown Warning displayed to notify you that the source vCenter will be shut down once the network configuration is enabled on the destination VCSA 6.7 appliance.
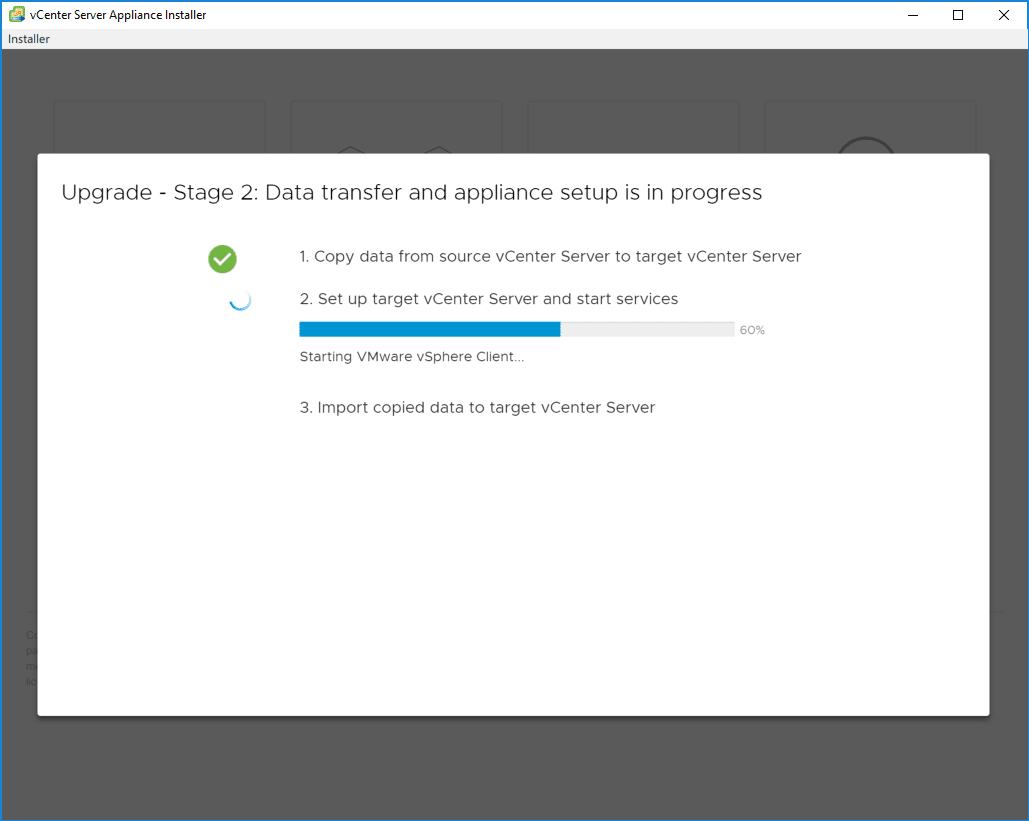
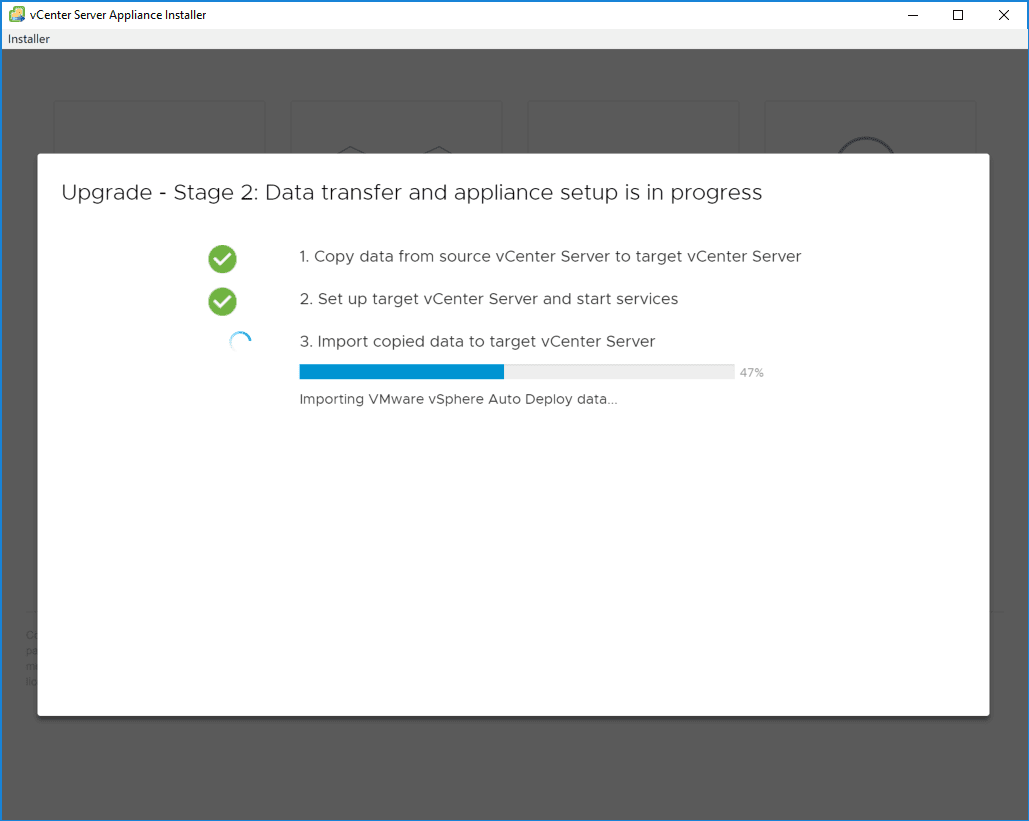
The three step Stage 2 process begins:
- Copying data from source VCSA to target VCSA 6.7
- Setting up target VCSA 6.7 appliance and starting services
- Importing copied data to the target VCSA 6.7 appliance.

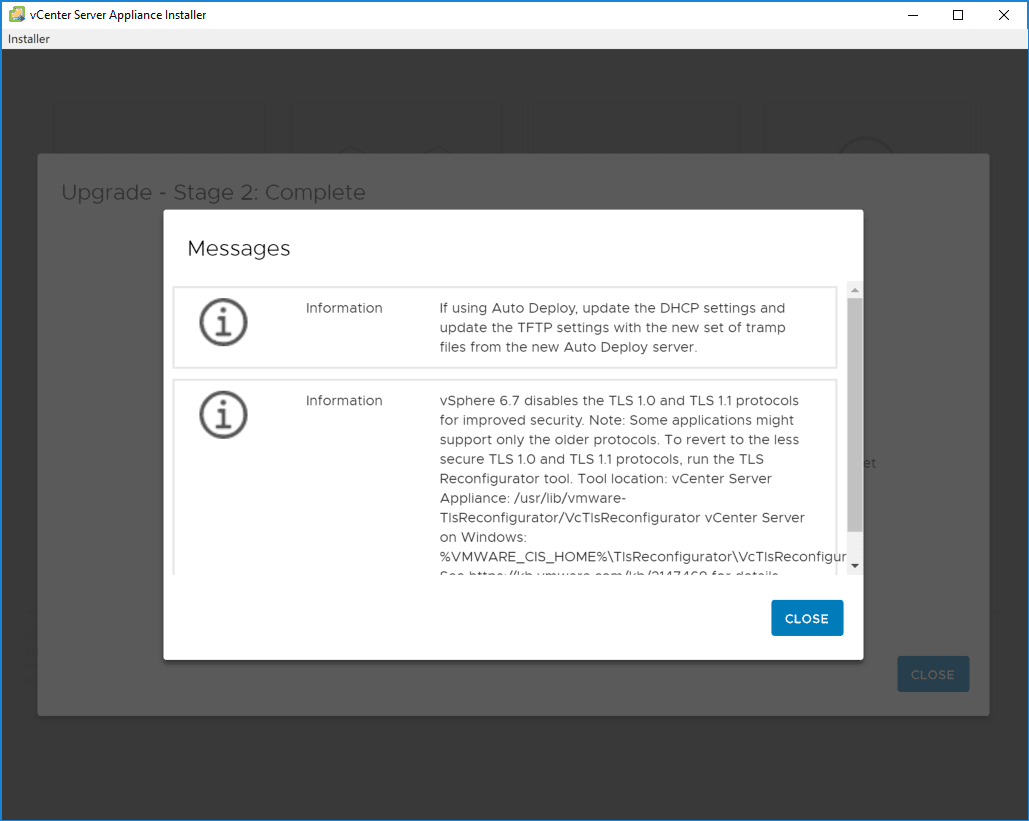
After the third step finishes, you will see a Messages box that shows some reminders after the upgrade finishes, including TFTP settings with Auto Deploy and new TLS standards with VCSA 6.7.
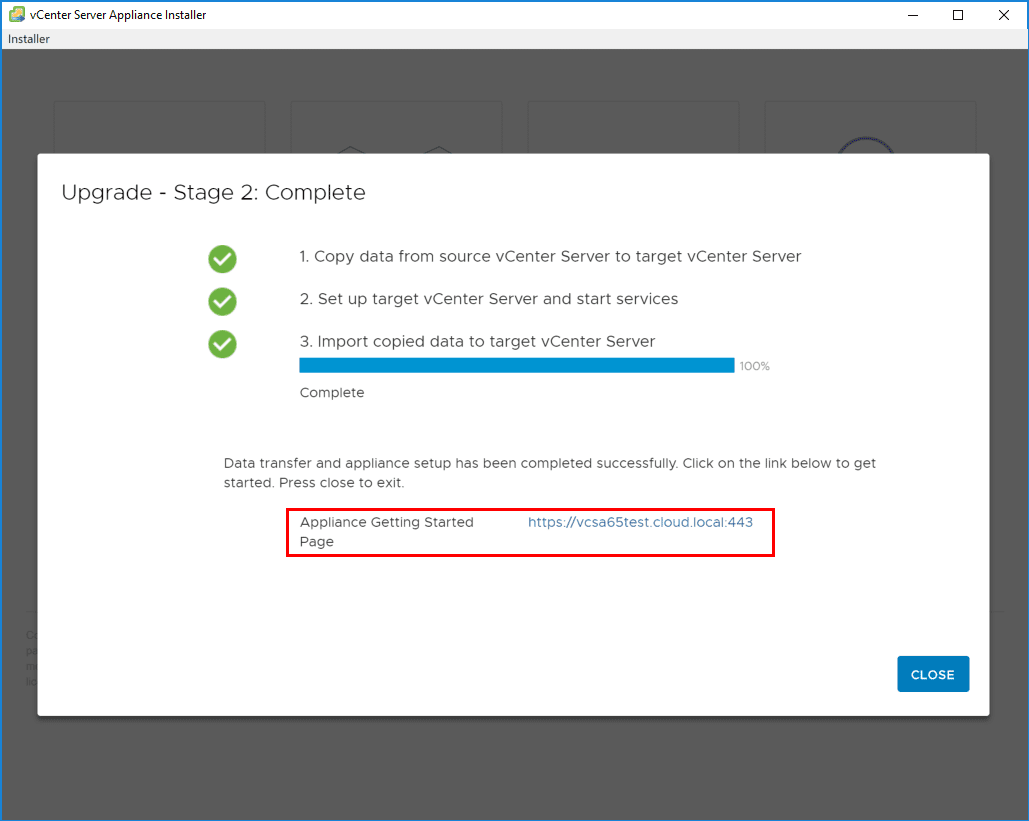
Conveniently, the link to the new VCSA 6.7 appliance web client is linked from the Stage 2 Complete screen at the bottom.
Takeaways
There you have it! The process of Upgrading to VMware vCenter Server VCSA 6.7 is as straightforward as you would expect from the now very mature VCSA platform for vCenter Server. The upgrade process went buttery smooth. There are no surprises here compared to the VCSA 6.5 upgrade. The new look and feel of the installer with the Clarity UI is extremely nice however and makes the process that much more pleasing to step through. Be sure to keep the order or upgrading in mind as many complex environments may be running many VMware products integrated with vCenter Server. Know at this point at least at the time of this post, NSX is not compatible currently with VCSA 6.7. So know your environment, read the documentation, and make sure to follow what is supported in production. Home labs are another story 😉