There are many reverse proxy solutions that enable configuring SSL certificates, both in the home lab and production environments. Most have heard about Traefik reverse proxy that allows you to pull LetsEncrypt certificates for your domain name automatically. However, there is another solution that provides a really great GUI dashboard for managing your reverse proxy configuration and LetsEncrypt certificates that is built on top of the Nginx reverse proxy. Let’s look at the Nginx Proxy Manager Docker install and LetsEncrypt certificates to see how it is installed and configured.
What is Nginx Proxy Manager?
Before we get into the installation and setup of Nginx Proxy Manager, let’s look at the solution itself. What is it exactly?
Nginx Proxy Manager is a pre-built docker image designed for forwarding traffic to your websites, whether they are located at home or elsewhere. The tool is handy for users who may not have extensive knowledge about Nginx reverse proxy or Letsencrypt but need a secure, efficient way to implement forwarding with free SSL.
Benefits
GUI interface – This interface allows users to perform various tasks without knowing the ins and outs of Nginx, including easily create forwarding domains, establishing redirections, managing streams, setting up 404 hosts
SSL Certificate Management – Arguably, the best feature of the Nginx Proxy Manager is its support for free SSL through Let’s Encrypt, although you can also choose to use your own SSL certificates if you prefer. Using SSL with Let’s Encrypt helps automate your certificate renewals, making these effortless.
Access Controls and User Management – The Nginx Proxy Manager provides features like Access Lists and basic HTTP Authentication for hosts to enhance security. These features ensure that access is regulated and only authorized users can interact with the hosts.
Advanced configurations – For users who need to perform more sophisticated configurations, advanced Nginx options are available. Moreover, the tool supports comprehensive user management permissions settings, and maintains an audit log for tracking activities.
Proxy host configuration – With the click of a button, users can create forwarding domains with ease. The intuitive interface and straightforward controls make it simple for users to set up new proxy hosts, define domain names, and manage SSL certificates for each host.
Nginx Proxy Manager Docker Install and LetsEncrypt Certificates
Let’s look at the following steps to install Nginx Proxy Manager setup and also use Let’s Encrypt certificates to secure the connection.
Use the Quick or Full Docker Compose file
Login to Nginx Proxy Manager and change the default password
Create the Proxy host
Configure SSL
Test the configuration
1. Use the Quick or Full Docker Compose file
Users can choose between a Quick Setup and a Full Setup depending on their specific needs and level of expertise. The Quick setup does not include a backend database configuration. The full setup does include a backend database for more advanced configurations.
The Quick Setup requires simply running Docker compose code without a backend database.
version: '3.8'
services:
  app:
    image: 'jc21/nginx-proxy-manager:latest'
    restart: unless-stopped
    ports:
      - '80:80'
      - '81:81'
      - '443:443'
    volumes:
      - ./data:/data
      - ./letsencrypt:/etc/letsencrypt
The Full setup code adds a MySQL database backend with the following command code. Be sure to change the database credentials in the code below for security.
version: '3.8'
services:
  app:
    image: 'jc21/nginx-proxy-manager:latest'
    restart: unless-stopped
    ports:
      # These ports are in format <host-port>:<container-port>
      - '80:80' # Public HTTP Port
      - '443:443' # Public HTTPS Port
      - '81:81' # Admin Web Port
      # Add any other Stream port you want to expose
      # - '21:21' # FTP

    # Uncomment the next line if you uncomment anything in the section
    # environment:
      # Uncomment this if you want to change the location of
      # the SQLite DB file within the container
      # DB_SQLITE_FILE: "/data/database.sqlite"

      # Uncomment this if IPv6 is not enabled on your host
      # DISABLE_IPV6: 'true'

    volumes:
      - ./data:/data
      - ./letsencrypt:/etc/letsencrypt
Copy either of these configurations to a docker-compose.yml file. Run the command:
docker-compose up -d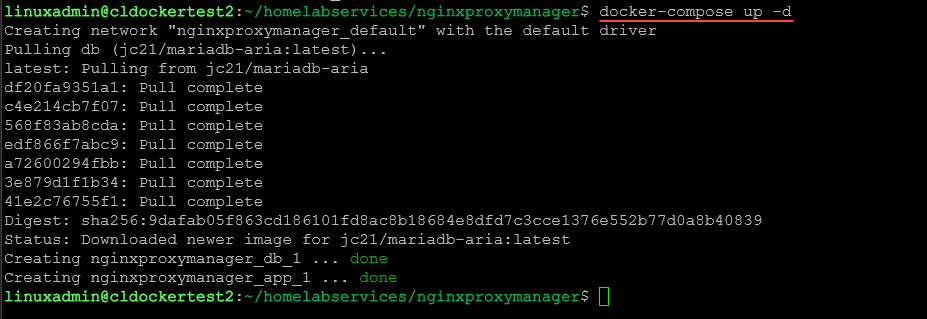
2. Login to Nginx Proxy Manager and change the default password
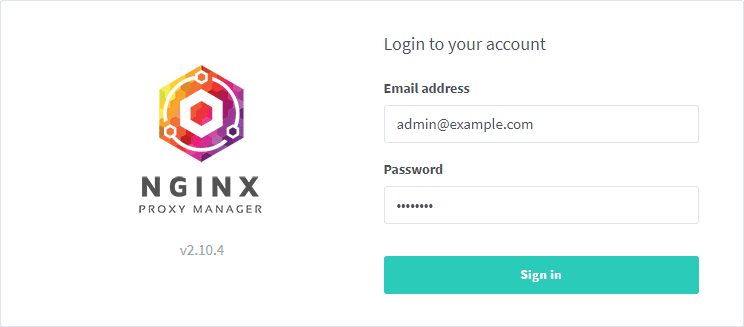
Accessing Nginx Proxy Manager is as simple as browsing in a web browser to your Docker container host where you spun up Nginx Proxy Manager on port 81, and you will login with the following default admin user credentials from the official documentation:
user: [email protected]
pass: changeme
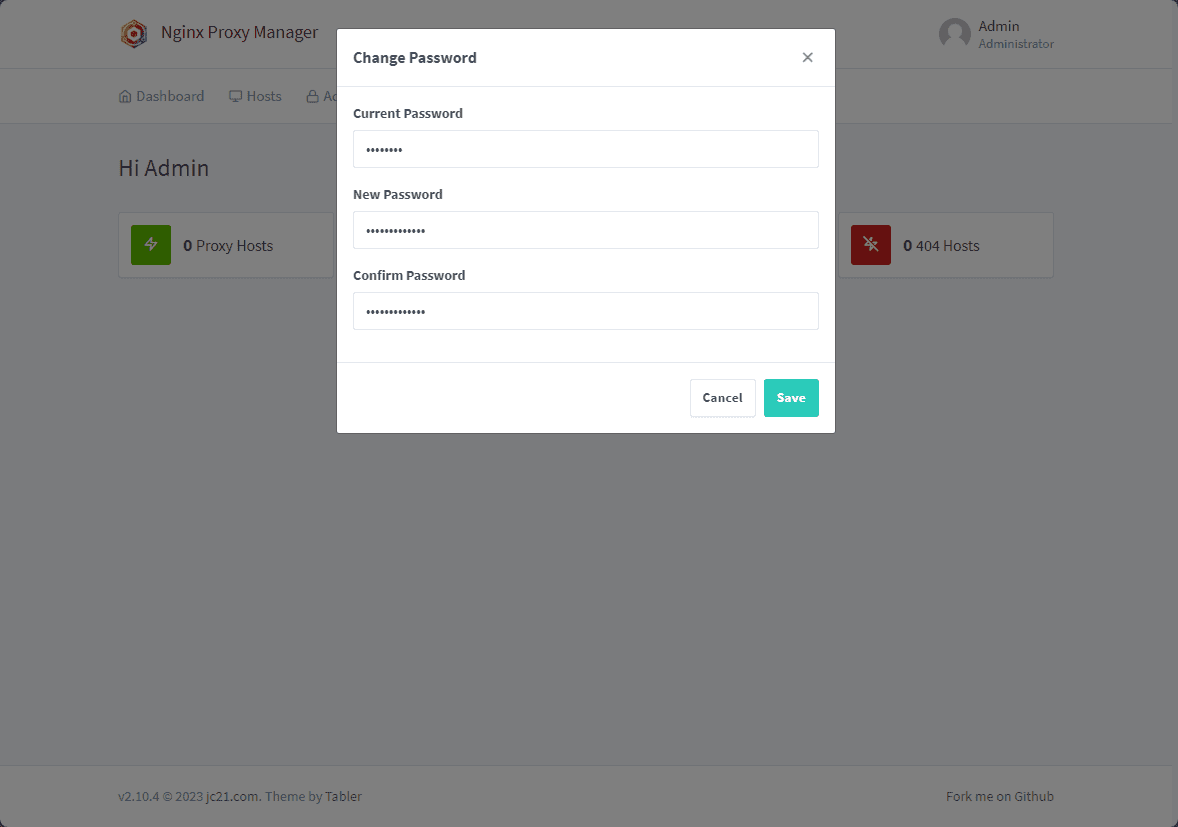
Also, once logged in, we can change the default user as needed.
After this, you should be taken to the Nginx Proxy Manager dashboard where you can begin configuring with the proxy hosts button and the add proxy host button.
3. Connect another container to the same Docker network
For the Nginx Proxy Manager to have direct access to containers running on the same Docker container host, we need to connect our container to the same network as the Nginx Proxy Manager. If you don’t specify the network by default, it will create the nginxproxymanager_default Docker network, shown below.
You can leave it as the default or specify this in your Docker compose file.

To test the configuration, let’s pull down a Grafana container to the same Docker container host and connect the container to the same Docker network as Nginx Proxy Manager. Note in the command below, we are not exposing any ports. This is because we only want to be able to access through the Nginx Proxy Manager.
docker run -d --network=nginxproxymanager_default --name grafana grafana/grafana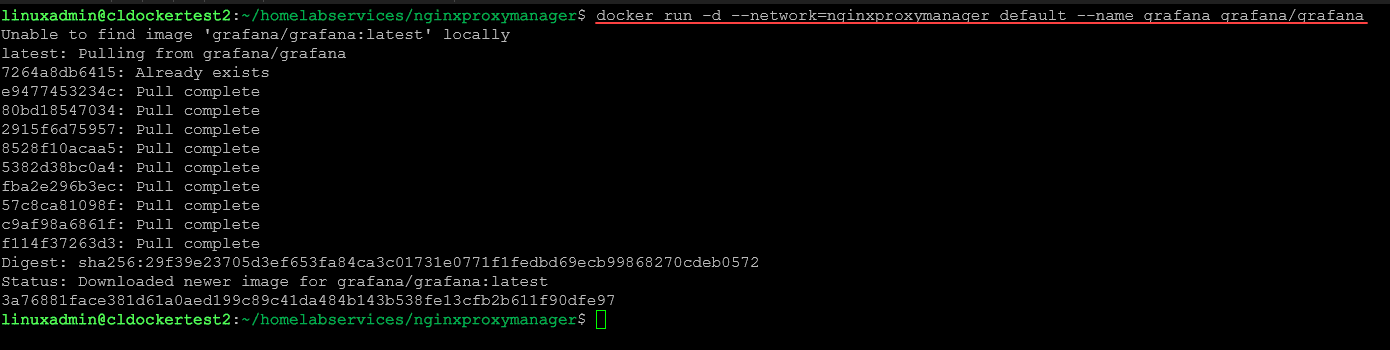
4. Create the Proxy Host
Now that we have another container pulled down and connected to the same Docker network let’s create the Nginx Proxy host. You can create as many Nginx Proxy hosts as you need.
super users user management hosts advanced nginx configuration docker compose create public ip address new ssl certificate nginx free SSL add port forwarding data folder install docker apt install ca certificates
Navigate to the Proxy Hosts page. Since we connected the grafana container to the same network as the Nginx Proxy Manager, we can just put the container name in the Forward Hostname/IP field.
Here we leave the scheme as HTTP and the forward port (port forwarding) as 3000, which matches the configuration on the container for access.
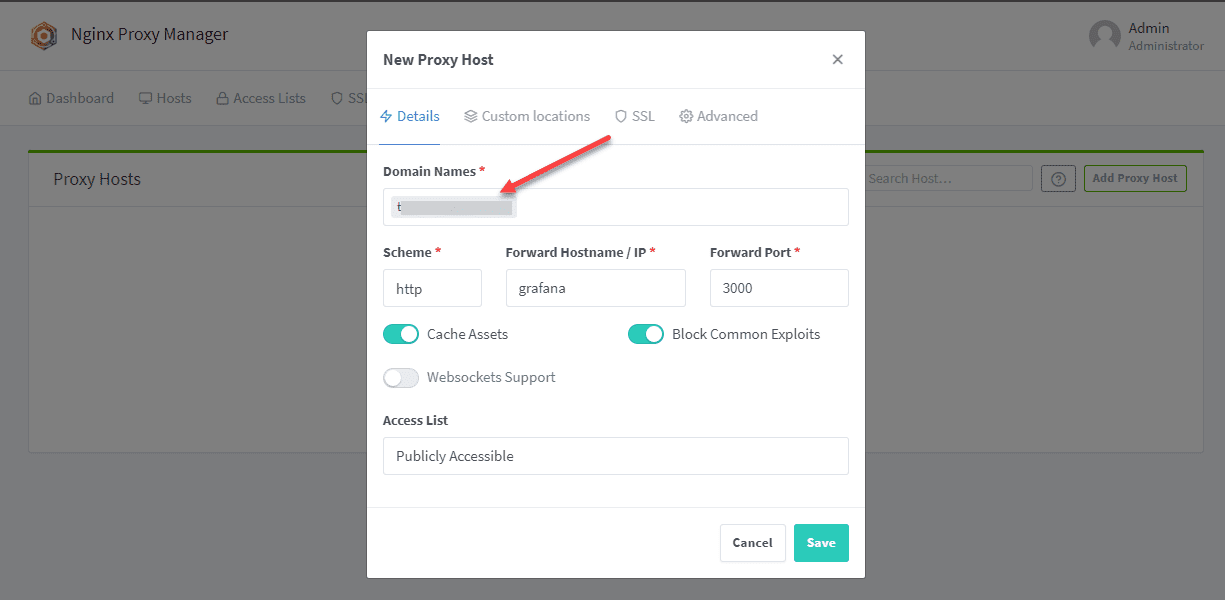
Click Save.
At this point, you should be able to pull up the domain name you have configured for the grafana (or other container) and it work.
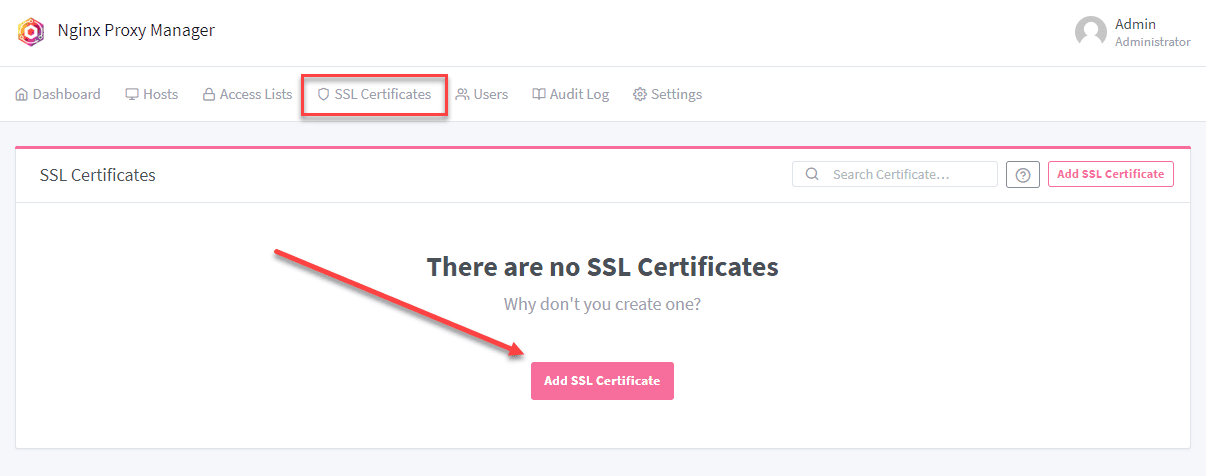
Configure SSL
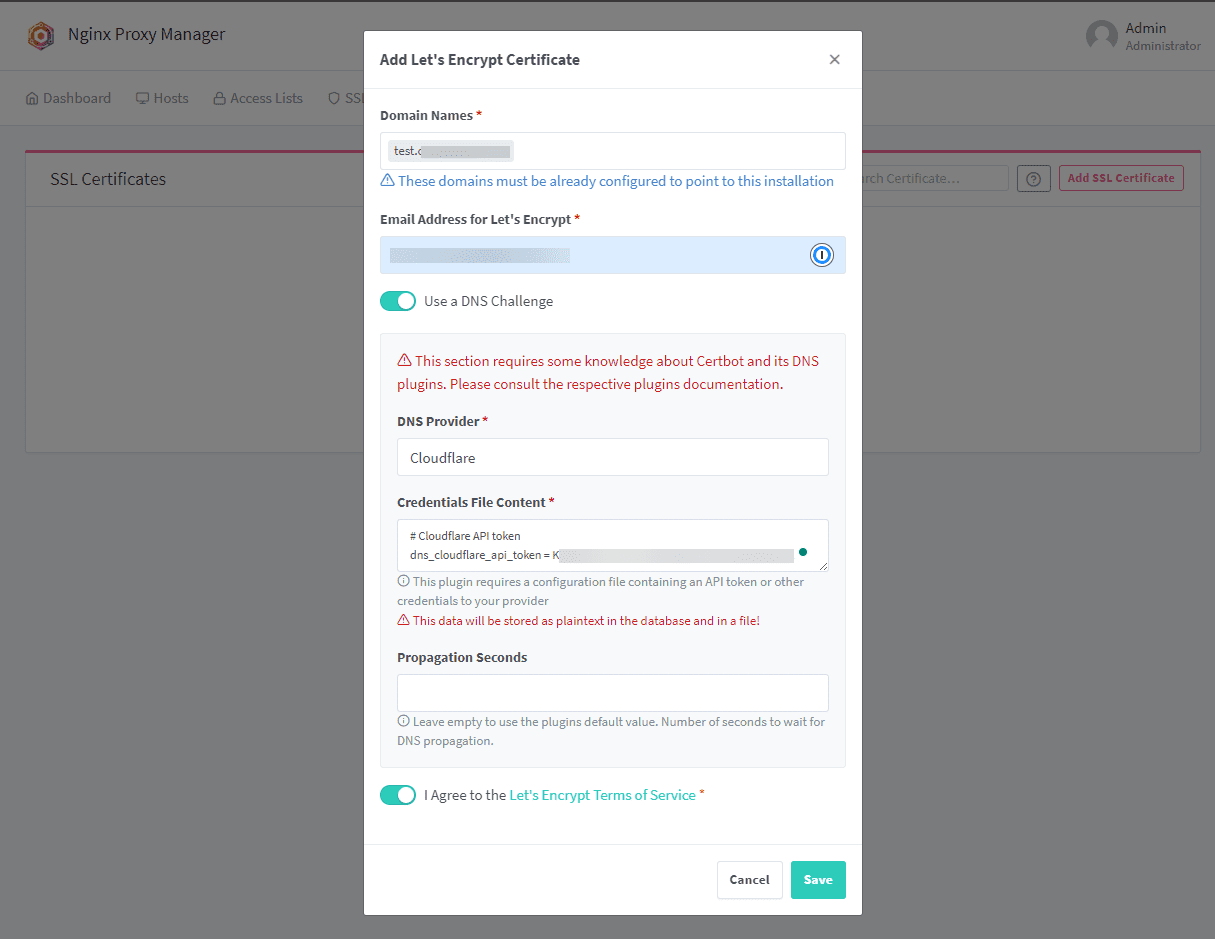
Now that the proxy host is working, let’s take it a step further and add SSL. First, let’s create the Let’s Encrypt certificate. Click Add SSL Certificate. You will have the option between Lets Encrypt and Custom. Choose Let’s Encrypt.
Now we will configure the Let’s Encrypt options. Fill in the following:
Domain names – you will fill in your domain name that needs to match the publicly accessible domain you have
Decide if you want to use DNS challenge – Here, I am using this as I find it is the most effective and least error-prone
Choose your DNS provider
Provide your API token for interacting with your DNS provider
Change the TTL value if you want
Toggle the I Agree to the Let’s Encrypt Terms of Service.
SSL termination is a process that allows secure handling of SSL certificates, and with Nginx Proxy Manager, managing these are easy. The platform also supports automatic renewal of SSL certificates.
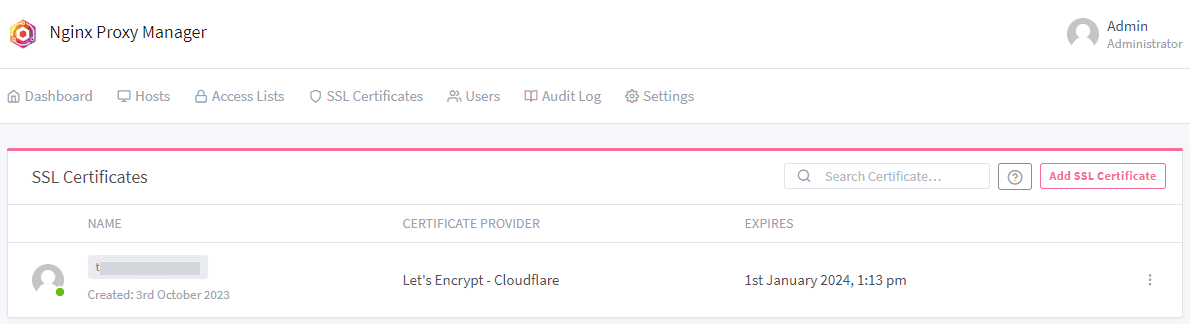
Once you click save, it will take a couple of moments for the Nginx Proxy Manager to generate the certificate.
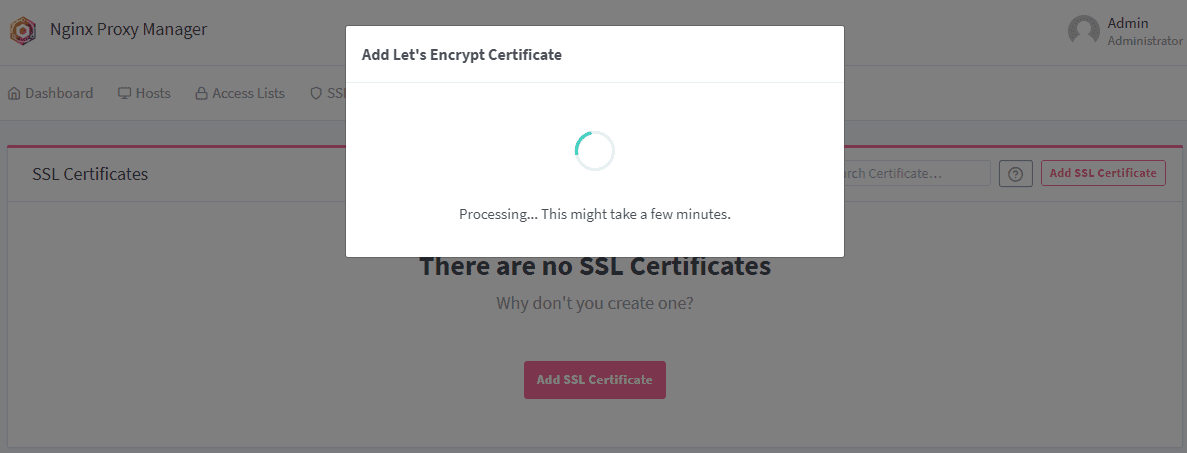
After 10-15 seconds in my testing, the certificate was provisioned and successfully installed.
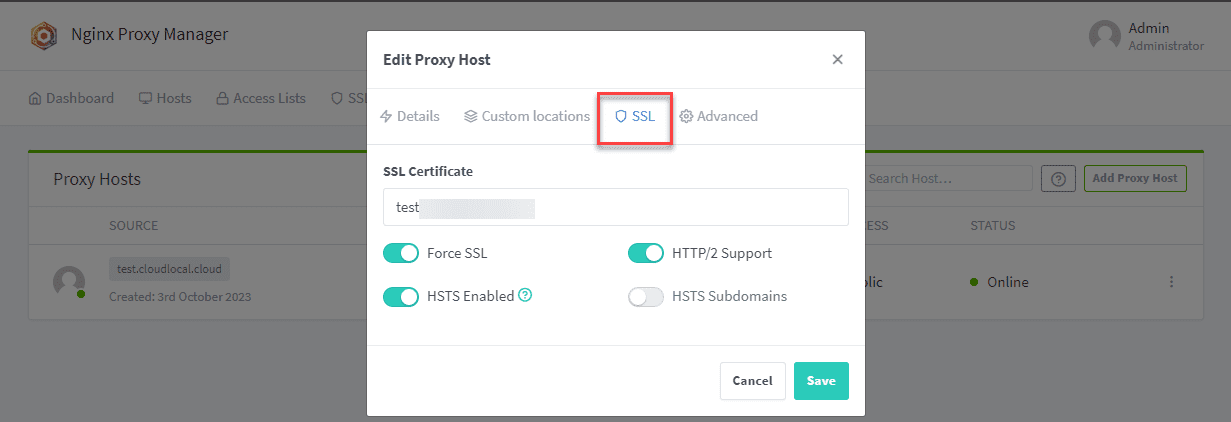
Now, we can go back and Edit Proxy Host that we created earlier. Select the SSL tab and under SSL Certificate, you will see the certificate you just provisioned. Select it and also flag on:
Force SSL
HTTP/2 Support
HSTS Enabled
Now, on a test client, we can navigate out to an HTTPS connection for the configured hostname and we shouldn’t get a certificate error.
Wrapping up
Nginx Proxy Manager is an excellent solution to easily create and configure reverse proxy connections to web services running in your home lab environment or even production. It also provides an extremely easy way to have automated SSL certificates in your environment by automating Let’s Encrypt configuration for your domain names.
Once you have your certificates configured and connected to your sites, it will automatically provision new certificates as needed. Also you can bring your own certificates to the solution as well.
More in this topic

Discuss this in the Community
Google is updating how articles are shown. Don’t miss our leading home lab and tech content, written by humans, by setting Virtualization Howto as a preferred source.
About The Author

is it possible to handle subdomain forwarding?
Austin,
Thank you for your comment. It looks like this is possible. However, there may be some quirkiness with certs and making sure you have all the certs you need configured for the subdomains. See here:
Brandon
is it possible to use with load balancing for many proxy host ?
Nguyen,
Thank you for your comment! It looks like this is talked about as a native feature coming soon, but may not be implemented yet. However, there are some proposed solutions here: https://github.com/NginxProxyManager/nginx-proxy-manager/issues/1963.
Brandon