Traefik LetsEncrypt Certificates Configuration
Traefik is an extremely cool reverse proxy that you can use in Docker and Kubernetes. It can manage incoming traffic to your applications in containers or K8s. Also, it can easily provide SSL certificate automation so you can have automatic LetsEncrypt certificates for your web containers. Let’s look at Traefik LetsEncrypt certificates configuration and see how you can get up and running with this.
What is Letsencrypt?
If you have ever managed environments where you have provisioned certificates for websites, this process is a pain. You have to create CSRs, get the certificate and then install the certificate on your web host. Also, SSL certificates have been expensive historically from well known certificate authorities. Lets Encrypt changes all that.
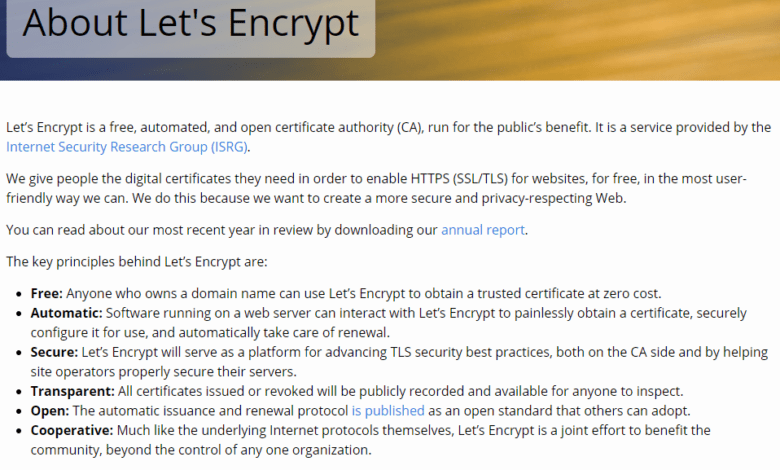
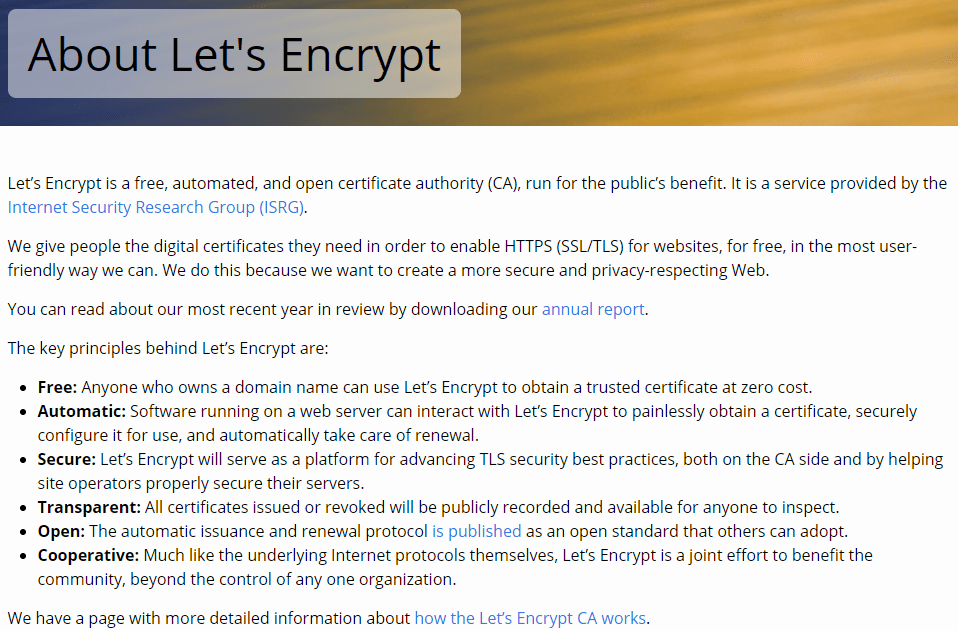
Let’s Encrypt is a free service. It is provided by the Internet Security Research Group (ISRG). and it is a service that it takes the complexity out of SSL certificates and these are also free. Another great thing about SSL certs with LetsEncrypt is that they can be automated with certbot so you don’t have to manually take care of any part of the certificate renewal or deployment process.
Below is a screenshot of the “about Let’s Encrypt” page.
Traefik Reverse Proxy Overview
Traefik is a reverse proxy. It is also a load balancer used to take care of incoming traffic to applications running in Docker containers or in Kubernetes environments. Instead of having to provision multiple IP addresses, you can have a single IP address and based on the name coming in, it will route the request to the appropriate container.
Traefik can automatically detect new containers in your Docker environment and route traffic to the appropriate container based on the container’s labels. Labels are something specific to Traefik that marks your containers for Traefik routing purposes.
Traefik Setup
To get started with Traefik v2, we must create a new Docker Compose file for our Traefik stack. This file will define the configuration for our Traefik service. Most of the config is basic Docker cmopose. A few things to note are the environment configuration stanzas where the DNS provider is defined. Here I am defining cloudflare. Also, you see the volume mounts.
version: "3"

services:
  traefik:
    image: traefik:v2.5
    container_name: traefik
    restart: unless-stopped
    security_opt:
      - no-new-privileges:true
    ports:
      - "80:80"
      - "443:443"
    environment:
      - CF_API_EMAIL=<cloudflare email>
      - CF_API_KEY=<cloudflare api key>
    volumes:
      - /var/run/docker.sock:/var/run/docker.sock
      - /opt/traefik/letsencrypt:/letsencrypt
      - /opt/traefik/traefik.yml:/traefik.yml
    networks:
      - traefik

networks:
  traefik:
    external: true
In the configuration above, we are defining a new service called traefik. It uses the traefik:v2.5 image. We are also mounting the Docker socket and the letsencrypt and traefik.yml files as volumes. Then we are defining the traefik network as an external network for the Traefik container.
Traefik 2 Folders and Files
In the last section, we created a docker-compose.yml file for our Traefik Docker stack. Now, let’s create the necessary folders and files for Traefik to use.
First, we need to create a file called traefik.yml in the same directory as our docker-compose.yml file. This file will define the static configuration for our Traefik service:
providers:
  docker:
    exposedByDefault: false
  file:
    filename: /etc/traefik/dynamic.yml
  http:
    routers:
      dashboard:
        rule: Host(`traefik.<your domain>`)
        service: api@internal
        middlewares:
          - traefik-auth
        tls:
          certResolver: dns-cloudflare
    middlewares:
      traefik-auth:
        basicAuth:
          users:
            - "<username>:<password>"
certificatesResolvers:
  dns-cloudflare:
    acme:
      email: <your email>
      storage: /letsencrypt/acme.json
      dnsChallenge:
        provider: cloudflare
        delayBeforeCheck: 0
      caServer: https://acme-v02.api.letsencrypt.org/directory
In this configuration, we are defining a new provider In this configuration. We are defining a new provider called file, which will load the dynamic configuration for our Traefik service. This comes from a file called dynamic.yml. We are also defining a new router called dashboard, which will route traffic to the Traefik dashboard.
Then we are configuring middleware called traefik-auth. It uses basic HTTP authentication to secure the Traefik dashboard. We have also defined a certificate resolver called dns-cloudflare for the DNS challenge. This will automatically generate Letsencrypt SSL certificates using the Cloudflare DNS provider.
You will see in the config above the acme certificates are stored in the acme certificates json file. The acme.json file stores the actual certificates pulled after the acme-challenge to Letsencrypt certificate resolver for the SSL certificate.
Use the staging server
An important point to note is to use the letsencrypt acme staging v02 api.letsencrypt.org server. If you immediately point to the production server, if the configuration is not right, it will keep hitting the prod API and will eventually get throttled and blocked.
There is a rate limit on the production server that you will hit if you keep testing your configuration and pulling certificates from the certificate resolver.
During testing and development of your Docker-compose code, use the staging v02 api.letsencrypt.org directory server and then when you have everything lined out from a configuration perspective, you can transition over to the production server as the staging server does not have the rate limits that exist on the production server.
Static Configuration
In addition to the traefik.yml file, we also need to create a new file called dynamic.yml. This file will define the dynamic configuration for our Traefik service, including the routers, middlewares, and services for our media server container.
http:
  routers:
    plex:
      rule: Host(`plex.<your domain>`)
      entryPoints:
        - https
      middlewares:
        - plex-auth
      service: plex-svc
      tls:
        certResolver: dns-cloudflare
  middlewares:
    plex-auth:
      basicAuth:
        users:
          - "<username>:<password>"
  services:
    plex-svc:
      loadBalancer:
        servers:
          - url: "http://plex:32400"
In this configuration, we are defining a new router called plex, which will route traffic to our media server container using the domain name plex.<your domain>. We also define a middleware called plex-auth, which uses basic HTTP authentication to secure the media server.
We are also defining a new service called plex-svc, which will load balance traffic to the plex container.
Traefik 2 Routers, Middlewares, and Services
In Traefik, we can use routers to route traffic to our applications. Middlewares are used to modify incoming requests and responses, and services to load balance traffic to the containers.
In the last section, we defined a new router called plex to route traffic to our media server container. We also defined a middleware called plex-auth to secure the media server. Then we created a service called plex-svc to load balance traffic to the plex container.
Define Trusted IPs
Also, in conjunction and additon to basic HTTP authentication, we can also define a list of trusted IP addresses that can access our Traefik dashboard without authentication. To do this, we need to add a new label to our Traefik service:
labels:
  - "traefik.http.middlewares.traefik-auth.ipWhiteList.sourceRange=192.168.0.0/16"
In this example, we are allowing all IP addresses from the 192.168.0.0/16 subnet to access the Traefik dashboard without authentication. You can change this to match your trusted home lab or prod networks to access the dashboard.
Docker Network
Before we can start our Traefik stack, we need to define a new Docker network that our Traefik and media server containers will use:
docker network create traefikThis will create a new Docker network called traefik. When you define the network and connect the containers you want to expose to the traefik only network, the only way traffic can get in, is through the Traefik reverse proxy connection. This is what you want. You don’t want to have your container exposed so that it can be connected to otherwise.
Define Networks for Traefik Docker Compose
Now, we can update our docker-compose.yml file to include the new Docker network for the internal networks we will use when we expose containers using Traefik.
version: "3"

services:
  traefik:
    image: traefik:v2.5
    container_name: traefik
    restart: unless-stopped
    security_opt:
      - no-new-privileges:true
    ports:
      - "80:80"
      - "443:443"
    environment:
      - CF_API_EMAIL=<cloudflare email>
      - CF_API_KEY=<cloudflare api key>
    volumes:
      - /var/run/docker.sock:/var/run/docker.sock
      - /opt/traefik/letsencrypt:/letsencrypt
      - /opt/traefik/traefik.yml:/traefik.yml
    networks:
      - traefik
      - default

  plex:
    image: linuxserver/plex
    container_name: plex
    restart: unless-stopped
    environment:
      - PUID=<your user ID>
      - PGID=<your group ID>
      - TZ=<your timezone>
    volumes:
      - /opt/plex:/config
      - /mnt/disks/media:/data
    networks:
      - traefik
      - default

networks:
  traefik:
    external: true
In this configuration, we have added the traefik network to both the Traefik and media server containers. We have also defined a new network called default, the default Docker network.
Testing Docker Traefik 2 Setup
Now that we have defined our Docker Traefik 2 setup, we can start our Traefik stack using the following command:
docker-compose up -dCreate Traefik 2 Environmental Variables
We can define environmental variables in our docker-compose.yml file to configure our Traefik service for Let’s Encrypt. For example, we can define the email address to use for Letsencrypt SSL certificates so we can read the DNS records in the Cloudflare environment when we enable Traefik:
environment:
  - CF_API_EMAIL=<cloudflare email>
  - CF_API_KEY=<cloudflare api key>
With the above, we use the global API key for our DNS zone to authenticate to Cloudflare and read the DNS records.
Traefik 2 Basic HTTP Authentication – Middleware
As mentioned earlier, we can use middleware in Traefik to modify incoming requests and responses. One useful middleware is the basicauth middleware. This allows you to add basic HTTP authentication to your applications.
To use the basicauth middleware, we need to define a new middleware in our Traefik configuration file:
middlewares:
  my-auth:
    basicAuth:
      users:
        - "user:password"
In this example, we define a new middleware called my-auth, which uses basic HTTP authentication to authenticate users with the username and password. We can then apply this middleware to our routers or services as needed.
Redirect to HTTPS
To make sure that all traffic to our applications is encrypted, we can configure Traefik to redirect all HTTP traffic to HTTPS. To do this, it is just a bit of configuration. We need to add a new middleware to our Traefik configuration file:
middlewares:
  redirect-to-https:
    redirectScheme:
      scheme: https
We can then apply this middleware to our routers or services to redirect all HTTP traffic to HTTPS.
Tip to Identify Copy-Paste Errors
When copying and pasting configuration files, it is easy to cause errors in the YAML code accidentally. To help see these before trying your docker-compose up -d, we can use the traefik check command to check the syntax of our Traefik configuration files:
traefik checkThis command will check the syntax of our configuration files and show any errors or warnings.
Networks for Traefik 2 Dashboard
By default, the Traefik dashboard is only accessible from the host machine. To access the dashboard from another machine on the network, we need to modify our Traefik configuration to bind the dashboard to a specific IP address or network interface.
providers:
  docker:
    exposedByDefault: false
  http:
    routers:
      dashboard:
        rule: Host(`traefik.<your domain>`)
        service: api@internal
        middlewares:
          - traefik-auth
        tls:
          certResolver: dns-cloudflare
    middlewares:
      traefik-auth:
        basicAuth:
          users:
            - "<username>:<password>"
certificatesResolvers:
  dns-cloudflare:
    acme:
      email: <your email>
      storage: /letsencrypt/acme.json
      dnsChallenge:
        provider: cloudflare
        delayBeforeCheck: 0
      caServer: https://acme-v02.api.letsencrypt.org/directory
api:
  dashboard: true
  debug: true
  insecure: true
  # Uncomment the following lines to bind the dashboard to a specific IP address or network interface
  # address: 192.168.0.10
  # entryPoints:
  #   - http
In this example, we have added the api section to our Traefik configuration, which includes the dashboard, debug, and insecure settings. We have also commented out the address and entryPoints settings. These can be used to bind the dashboard to a specific IP address or network interface.
We are also specifying the Host rule for the router, which is set to traefik.<your domain>. This means that the Traefik dashboard will be accessible at https://traefik.<your domain>.
We are using the basicAuth middleware to add basic HTTP authentication to the Traefik dashboard. We have defined a new middleware called traefik-auth, which uses the basicAuth middleware to authenticate users with the specified username and password.
The certificatesResolvers section defines the dns-cloudflare certificates resolver. This is used to get and manage LetsEncrypt SSL certificates using the Cloudflare DNS provider. We are also configuring the email address to use for LetsEncrypt SSL certificates and the storage location for the certificates.
The api section includes the dashboard, debug, and insecure settings. The dashboard setting enables the Traefik dashboard, the debug setting enables debug logging, and the insecure setting allows insecure connections to the dashboard.
Last, we have have commented out the address and entryPoints settings. These can be used to bind the dashboard to a specific IP address or network interface. If you want to bind the dashboard to a particular IP address or network interface.
Fetching Real LetsEncrypt Wildcard Certificates using Traefik
To get your real LetsEncrypt wildcard certificates using Traefik, we need to configure our DNS provider. To use this, you will need to have an API key for your provider. In this example, we are using the Cloudflare DNS provider, but you can use any supported DNS provider.
You can find the list of supported providers here:
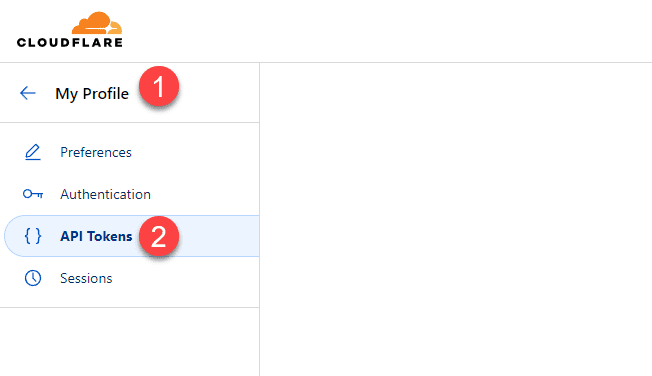
First, we must create a new Cloudflare API token with the MyProfile > API Tokens> Create Token.
We can then add the following environment variables to our Traefik service:
environment:
  - CF_API_EMAIL=<cloudflare email>
  - CF_API_KEY=<cloudflare api key>
We also need to update our Traefik configuration file to use the dnsChallenge settings:
certificatesResolvers:
  dns-cloudflare:
    acme:
      email: <your email>
      storage: /letsencrypt/acme.json
      dnsChallenge:
        provider: cloudflare
        delayBeforeCheck: 0
In this configuration, we are defining a new certificates resolver called dns-cloudflare that uses the Cloudflare DNS provider. We are also specifying the email address to use for LetsEncrypt SSL certificates and the storage location for the certificates.
We use the dnsChallenge settings to verify domain ownership by adding a DNS TXT record to our Cloudflare account. Traefik will automatically create and remove this record during certificate renewal.
Finally, we are adding the CF_API_EMAIL and CF_API_KEY environment variables to our Traefik service, which are used to authenticate with the Cloudflare API.
Middleware Chains
Traefik 2 supports middleware chains, which allow us to apply multiple middlewares to a single router or service. To use middleware chains, we need to define a new middleware that references the other middlewares:
middlewares:
  my-auth-chain:
    chain:
      middlewares:
        - middleware1
        - middleware2
        - middleware3
In this example, we are defining a new middleware called my-auth-chain, which includes the middleware1, middleware2, and middleware3 middlewares. We can then apply the my-auth-chain middleware to our routers or services.
Adding Apps to Traefik Docker Compose Stack
With our Traefik Docker Compose stack set up, we can easily add new applications by defining a new service in our docker-compose.yml file with the appropriate labels.
services:
  app1:
    image: app1:latest
    container_name: app1
    restart: unless-stopped
    labels:
      - "traefik.enable=true"
      - "traefik.http.routers.app1.rule=Host(`app1.<your domain>`)"
      - "traefik.http.routers.app1.tls.certresolver=dns-cloudflare"
      - "traefik.http.middlewares.app1-auth.basicauth.users=<username>:<password>"
      - "traefik.docker.network=traefik"
    networks:
      - traefik
      - default
In this example, we are defining a new service called app1 with the labels needed for Traefik. The traefik.enable label tells Traefik to route traffic for this new application. The traefik.http.routers.app1. The rule label defines this application’s router rule, and the traefik.http.routers.app1.tls.certresolver label configures the certificate resolver.
We are also defining a new middleware called app1-auth, which uses basic HTTP authentication to secure the application. Finally, we are adding the traefik.docker.network label to configure the network to use.
The certificatesResolvers.dns-cloudflare.acme lines in our Traefik configuration file are responsible for getting and managing LetsEncrypt SSL certificates using the Cloudflare DNS provider.
In this configuration, we define a new certificate resolver called dns-cloudflare that uses the Cloudflare DNS provider. We are also specifying the email address to use for LetsEncrypt SSL certificates and the storage location for the certificates.
Other Apps to route
In addition to media server containers, we can use Traefik to route traffic to other Docker applications. Some popular applications that can be used with Traefik include:
Plex
Jellyfin
Nextcloud
Home Assistant
Bitwarden
Adding non-docker or external apps behind Traefik
Traefik can also route traffic to non-Docker, external applications, or web servers. To do this, we need to define a new service in our docker-compose.yml file with the appropriate labels:
services:
  external-app:
    container_name: external-app
    image: nginx:latest
    labels:
      - "traefik.enable=true"
      - "traefik.http.routers.external-app.rule=Host(`external.<your domain>`)"
      - "traefik.http.routers.external-app.tls.certresolver=dns-cloudflare"
      - "traefik.http.middlewares.external-app-auth.basicauth.users=<username>:<password>"
    networks:
      - traefik
      - default
In this example, there is a new service called external-app with the appropriate labels. The traefik.enable label tells Traefik to enable routing for this application. The traefik.http.routers.external-app.rule label defines the router rule for this application, and the traefik.http.routers.external-app.tls.certresolver label specifies the certificate resolver to use.
We also define middleware called external-app-auth, which uses basic HTTP authentication to secure the application. Finally, we are adding the traefik.docker.network label to specify the network to use.
Wrapping up
Using Traefik along with Cloudflare and Letsencrypt is a great way to secure your web resources. It makes for an easy way to make sure you have proper certificates protecting your web servers. With Traefik and Letsencrypt automation, you can have Letsencrypt automatically renew your certificates without the tedious manual processes this typically calls for.





Thank you so much for taking the time to make this tutorial! I’ve been struggling to setup Traefik on my NAS for weeks. After following your tutorial however, I’m getting this error in the Traefik container logs. Any ideas? Thank you!
Attaching to traefik

traefik    | 2023/03/17 18:45:05 command traefik error: field not found, node: middlewares

traefik    | 2023/03/17 18:45:13 command traefik error: field not found, node: middlewares

traefik    | 2023/03/17 18:45:18 command traefik error: field not found, node: middlewares
To confusing. To many variables. I may never get a reverse proxy with wild card certs working. So many guides out there, but none that work.
Dirtyharrywk,
Thanks for the comment. Hey hop over to the forums and create a new topic under the Kubernetes and Containers forum. I can give you more detailed help there if you would like.
Brandon