If you are working with Ubuntu servers in your home lab or production environment, you may have seen issues with DNS resolution. One of the reasons that DNS can cause fits in Ubuntu and other Linux distros is multiple files can potentially affect how DNS resolves for name resolution. Whether you are running a DNS server on Ubuntu or you just want to configure DNS server IP addresses, let’s look at setting DNS Ubuntu name resolution and which files you need to give attention to.
Table of contents
Configuration Files for DNS on Ubuntu
DNS in Ubuntu potentially involves several configuration files. Here’s a brief overview of the primary conf file configurations related to DNS configuration from Internet Service Providers, third-party DNS servers, or local LAN DNS servers:
- /etc/resolv.conf – This file was traditionally used in Ubuntu to store DNS addresses information on Linux systems. However, in Ubuntu installations since version 18.04, this file is automatically generated and managed by the systemd-resolved service. You should not edit this file directly as changes will be overwritten.
- /etc/netplan/*.yaml – Netplan is the default network configuration utility for modern Ubuntu versions. Netplan configuration files are found in /etc/netplan with a .yaml extension. You can specify how network interfaces of the system should be configured. You can define DNS nameservers in these files.
- /etc/systemd/resolved.conf – This file configures the systemd-resolved service, which manages DNS resolution in many modern Ubuntu systems.
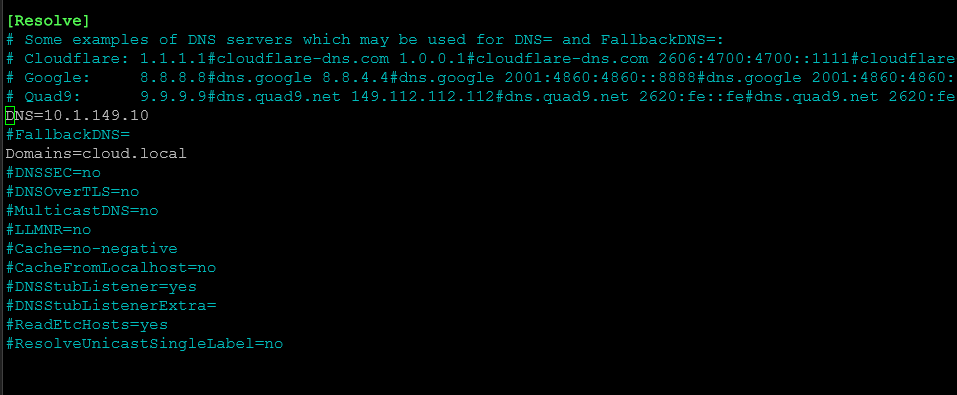
Below is a look at the resolved.conf file. You can see the DNS server I have configured there and the search domain also. You can also see the following additional configuration that is commented out:
- DNSSEC
- DNSOverTLS
- MulticastDNS
- LLMNR
- Cache
- CacheFromLocalhost
- DNSStubListener
- DNSStubListenerExtra
- ReadEtcHosts
- ResolveUnicastSingleLabel
Editing DNS Configuration
To effectively edit DNS settings on an Ubuntu client, follow these steps in Ubuntu 20.04, 22.04, etc:
Determine the Correct File:
- Check if your system uses Netplan by looking for configuration files in /etc/netplan. If files exist there, use Netplan configuration.
- Otherwise, check if /etc/resolv.conf points to a systemd-resolved stub. This can be identified by checking if the file contains lines like current DNS server nameserver 127.0.0.53 configuration. If so, you will need to configure DNS using systemd-resolved.
Editing Netplan:
Open the Netplan configuration file in an editor with administrative privileges, for example, sudo nano /etc/netplan/01-netcfg.yaml.
Under the appropriate network interface, add or modify the nameservers section. For example:
network:
  version: 2
  ethernets:
    eth0:
      dhcp4: yes
      nameservers:
        addresses:
          - "8.8.8.8"
          - "8.8.4.4"
Apply the changes by running sudo netplan apply.
Editing systemd-resolved:
- Edit /etc/systemd/resolved.conf and ensure the [Resolve] section includes your nameserver and DNS settings. For example:
[Resolve] DNS=8.8.8.8 8.8.4.4 FallbackDNS=1.1.1.1 9.9.9.9 - Restart the systemd-resolved service with sudo systemctl restart systemd-resolved.
Netplan configuration is not taking effect
If you’ve specified DNS servers in your Netplan configuration but find they are not being used, check the following
- Network Manager Overriding If you’re using a desktop environment, Network Manager might be managing network settings and overriding those specified in Netplan.
- systemd-resolved Configuration: systemd-resolved might not be set to use the DNS servers specified in Netplan. Check resolved.conf and ensure it is correctly configured or the service uses Netplan’s settings.
- Incorrect Syntax in YAML File: YAML files are sensitive to syntax and must be precisely formatted. Even small errors (like using tabs instead of spaces) can prevent settings from being applied.
The /etc/systemd/resolved.conf file
When you want to directly manage the systemd-resolved service you would configure DNS settings in /etc/systemd/resolved.conf. This is the system service responsible for network name resolution in many modern Linux distributions like Ubuntu. Use this in the following:
- To set global DNS settings that apply system-wide, regardless of the specific network interfaces.
- Fallback DNS Servers: You can specify fallback DNS servers that systemd-resolved will use if the primary servers fail.
- DNS over TLS: If you want to enable DNS over TLS for more secure DNS queries, this configuration is done in resolved.conf.
- DNS caching and resolution settings: systemd-resolved offers DNS caching, and configuring its behavior (like cache size or DNSSEC handling) is done through this file.
Using Netplan (/etc/netplan/*.yaml)
Netplan is typically used for defining all aspects of network interface configuration, including setting static IP addresses, configuring network interfaces to use DHCP, defining routes, and more. You would use Netplan for DNS configuration when:
- Interface-specific DNS settings: If you want to specify DNS servers that are particular to a given network interface, you do this through Netplan. This is especially relevant in environments with multiple network interfaces where each interface might connect to a different network with its own DNS setup.
- Integration with cloud environments: Since Netplan supports various backends such as NetworkManager and systemd-networkd, it is particularly useful in cloud environments where automated, template-driven configurations are required.
- Modern Ubuntu installations: Since Netplan is the default network configuration tool in Ubuntu 17.10 and later, using it ensures compatibility with the system’s expected network management workflows.
Interaction Between systemd-resolved and Netplan
It’s important to note that systemd-resolved and Netplan can interact in the handling of DNS settings. For instance:
- Netplan can be used to specify DNS servers for specific interfaces, and systemd-resolved can use these settings to resolve names based on the interface used.
- Changes in Netplan configuration config file (/etc/netplan/*.yaml) typically require running sudo netplan apply to take effect, and the DNS settings specified there are communicated to systemd-resolved to manage DNS resolution according to the plan.
See your DNS configuration from the command line
You can use the command line to view the DNS nameserver configured. This is handy if you change DNS server configuration. When changing DNS servers configured, you can look at your DNS setting using the following command:
resolvectl status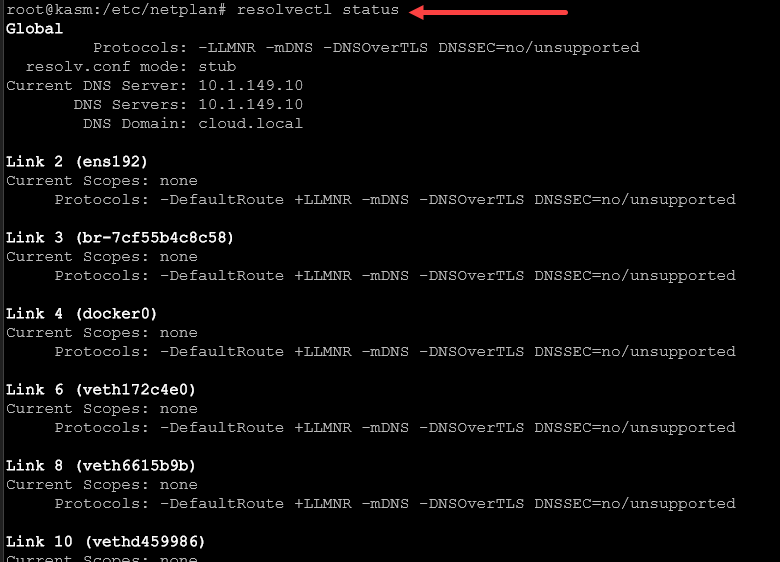
You can also use the dig command to query specific forward zone file DNS records:
dig www.google.com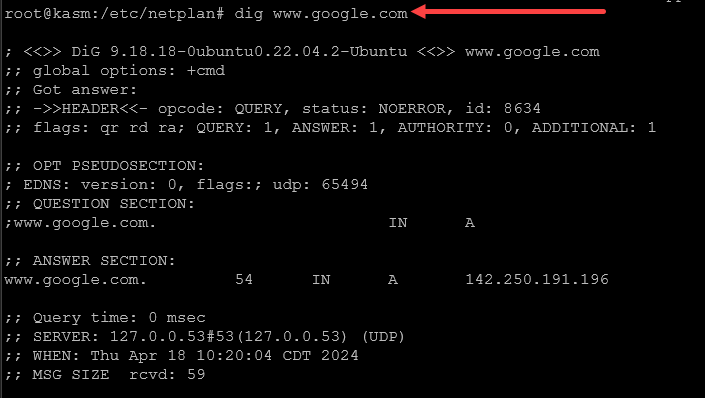
You can query for a reverse zone file record using dig:
dig -x 8.8.8.8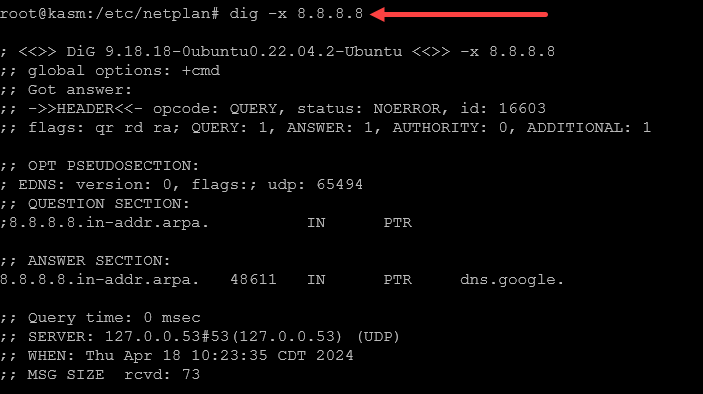
Troubleshooting
When troubleshooting and setting DNS Ubuntu configuration, always:
- Verify the syntax of your configuration files when you change DNS nameserver.
- Restart services after making configuration changes or adding a new DNS server.
- Use tools like dig or nslookup to test DNS resolution.
- Review logs for any service-specific errors that might give clues to issues.
When you set up Ubuntu DNS, it provides a robust DNS solution for querying name records and DNS services, either as a client configuration or a DNS server. Understanding the DNS files and how these interact with one another is a great way to help configure and manage name resolution in Ubuntu.
Google is updating how articles are shown. Don’t miss our leading home lab and tech content, written by humans, by setting Virtualization Howto as a preferred source.
About The Author