One of the new releases coming from VMware just in the last few weeks is VMware vRealize Orchestrator 8.1. VMware vRealize Orchestrator 8.1 brings some really great new features to the table that go hand-in-hand with some of the new core releases from VMware recently. There are some other great new enhancements foudn in Orchestrator 8.1 as well from a language standpoint that I am excited about. In this post, we will take a look at VMware vRealize Orchestrator 8.1 new features and installation to get a better understanding of what is new with vRO 8.1.
VMware vRealize Orchestrator 8.1 new features and installation
With each new version of solutions we are accumstomed to with VMware, there are always enhancements to make note of. VMware vRO 8.1 is no exception to this rule. It brings about enhanced ease of use and DevOps automation improvements. What are the new features to be aware of in this release?
- vSphere 6.7 plugin-in API update – If you have been struggling with the latest version of vRO and vSphere 6.7, this release brings about vSphere 6.7 plugin-in support which will make for the ability to get the plugin registered with your vSphere 6.7 environment.
- New Scripting Languages Added – With vRealize Orchestrator 8.1, some exciting new scripting languages have been added including PowerShell, Node.js, and Python. This brings about greater flexibility in the language choices for scripting
- Tree view of Hierarchical folders – vRO 8.1 once again introduces support for tree views of hierarchical folders. This allows organizing, viewing, and browsing objects in hierarchical tree view. This allows easier management giving users a view of all organized content
- Run and Debug workflow elements – run and debug an action without having to add the action to a workflow and then perform the workflow run. This will help to accelerate workflow creation
- Push change sets to Git branches – Allows users to select, configure, and push change sets to different branches from a Git repo. This allows promoting vRO code through the normal Git methods.
- Debug workflow breakpoints – Set breakpoints on specific elements in the workflow schema
- Syslog support – Configure logging integration to one or more remote syslog servers
Installing VMware vRealize Orchestrator 8.1
Installing the VMware vRealize Orchestrator 8.1 appliance is as simple as deploying the prebuilt appliance that is distributed by VMware. The VMware vRealize Orchestrator 8.1 appliance is downloadable as an OVA file. The appliance is built on the following architecture and vCenter Server compatibility:
- Novell Suse Linux Enterprise Server, PostgreSQL
- It can be installed with vCenter Server 6.0 or later
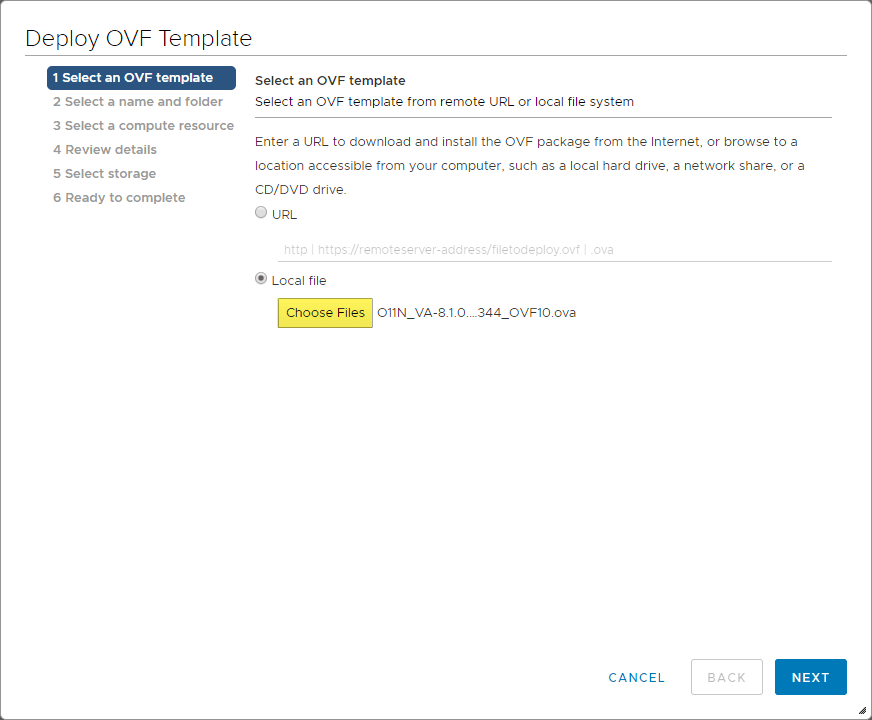
Below is a quick walk through of the screenshots you will see deploying the VMware vRealize Orchestrator 8.1 appliance OVA. Choose the vRO 8.1 OVA appliance file from your workstation. For me the file name and size details are as follows:
- O11N_VA-8.1.0.9326-15995344_OVF10.ova
- Size 3,313,110 KB
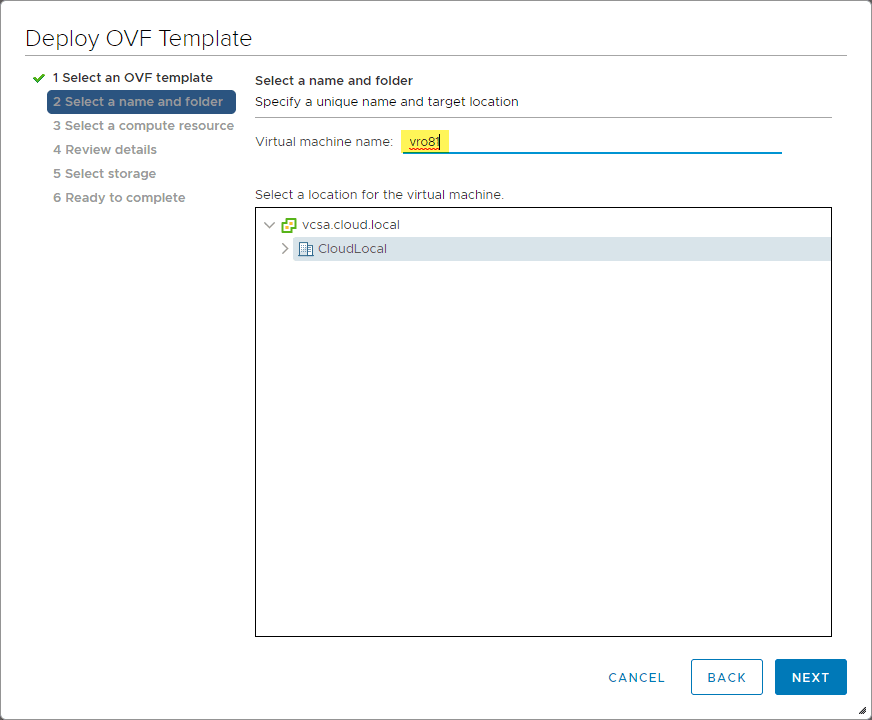
Choose an inventory name for the vRO 8.1 VM appliance that will be created.
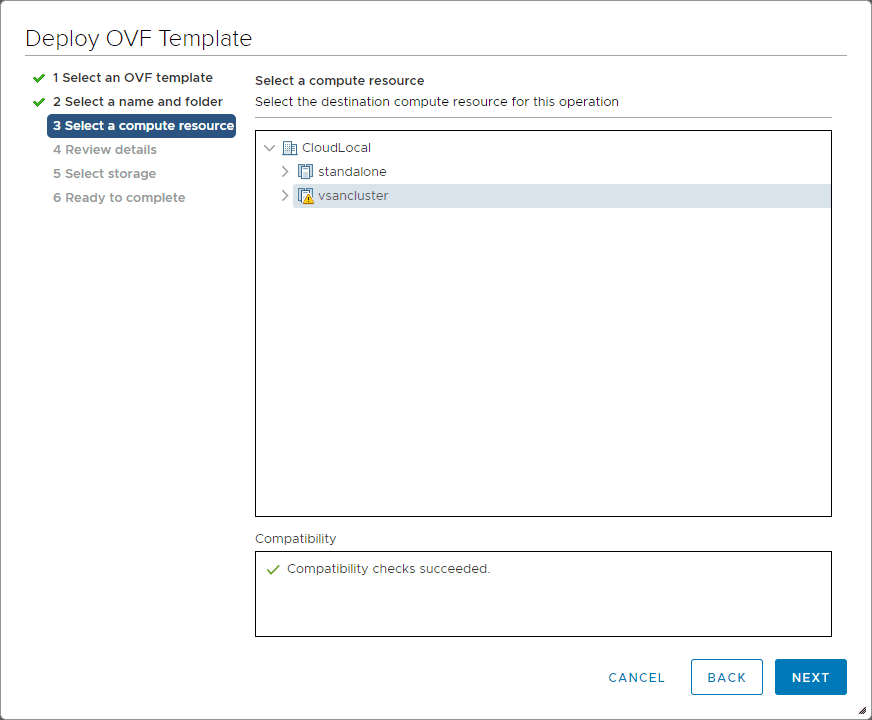
Choose the compute resource for deploying the appliance.
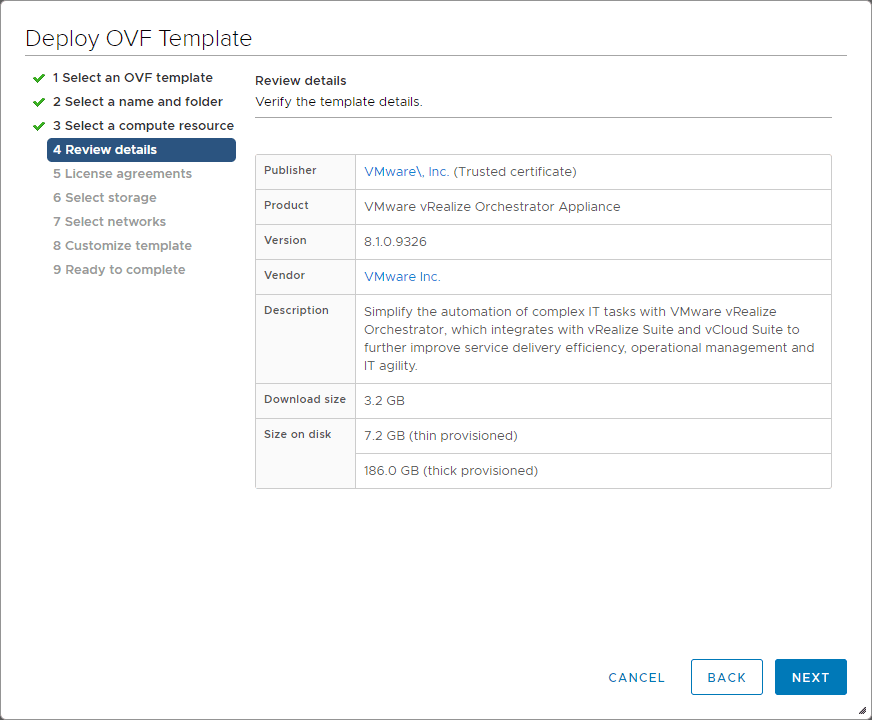
Review the details of the initial vRO 8.1 appliance deployment.
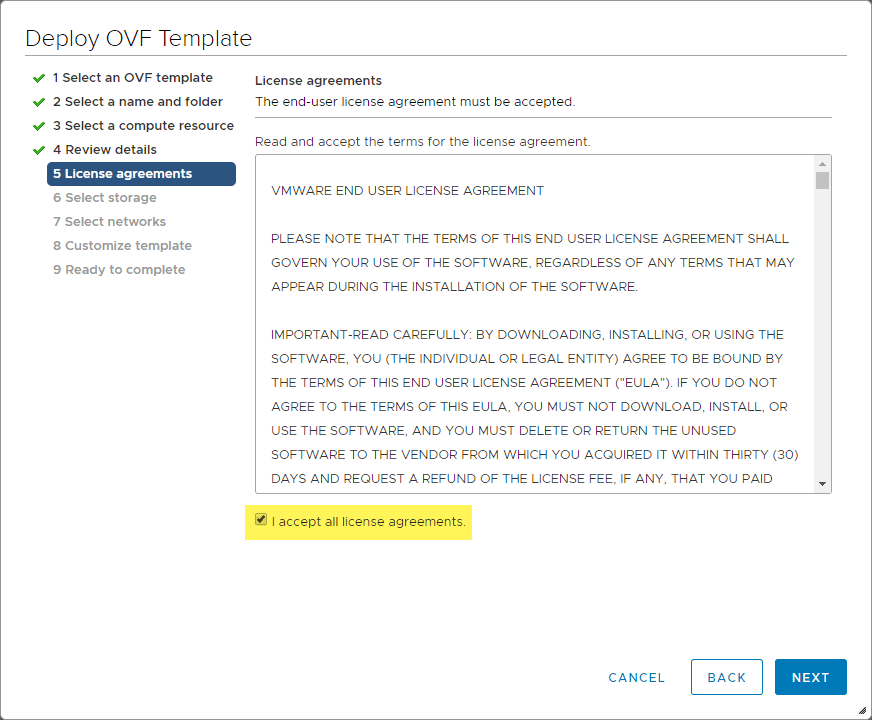
Accept the EULA.
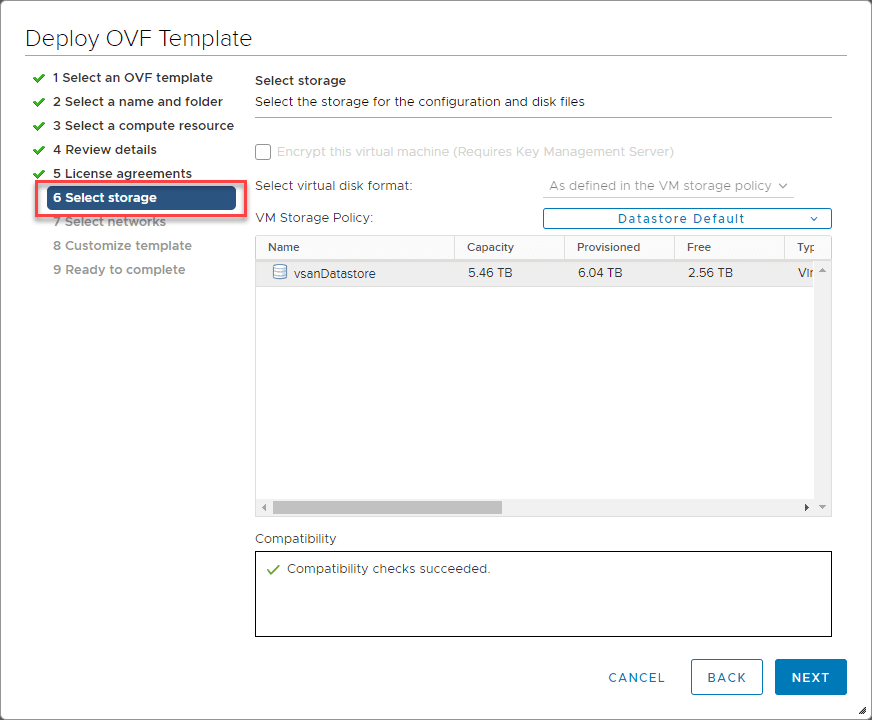
Select storage.
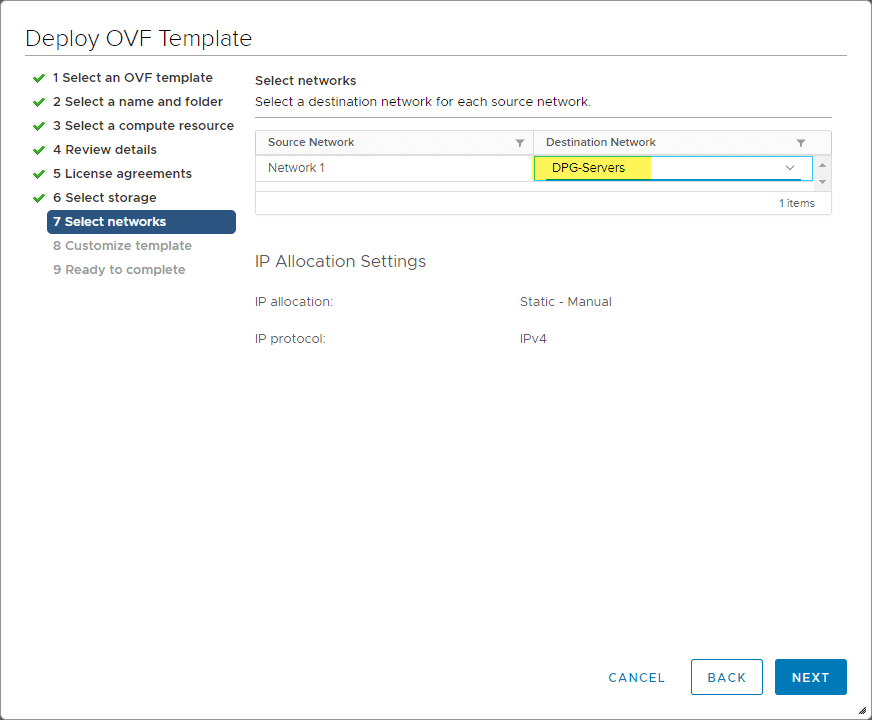
Select network configuration.
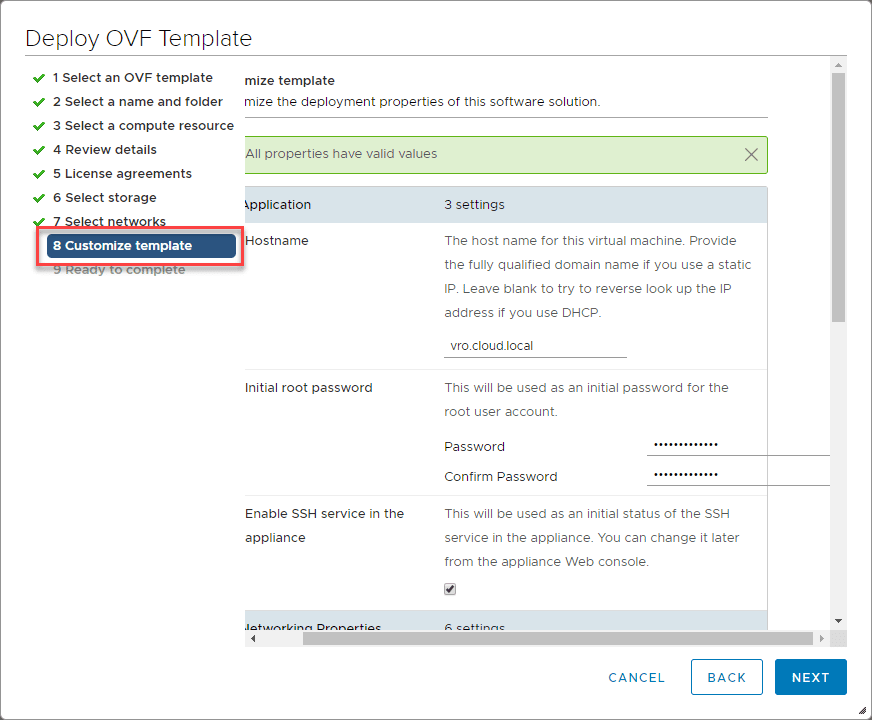
Customize the template. This is a screen to pay attention to. Here you will set many aspects of the configuration for the vRO 8.1 appliance including:
- Name
- Initial root password
- SSH options
- Network configuration (IP, subnet mask, gateway, DNS settings, DNS search order, etc)
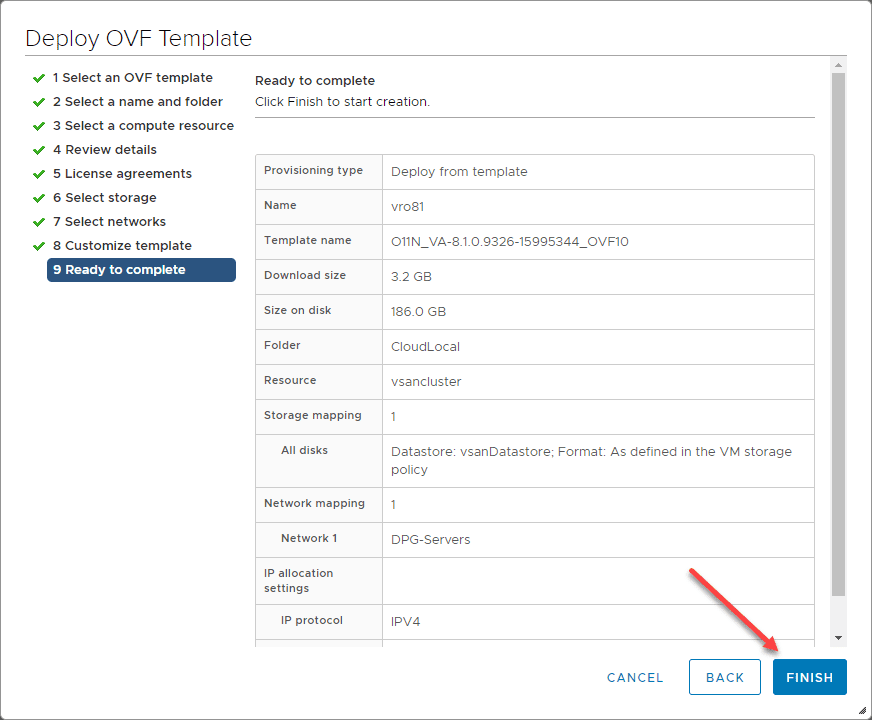
Finish out the deployment of the vRealize Orchestrator 8.1 appliance.
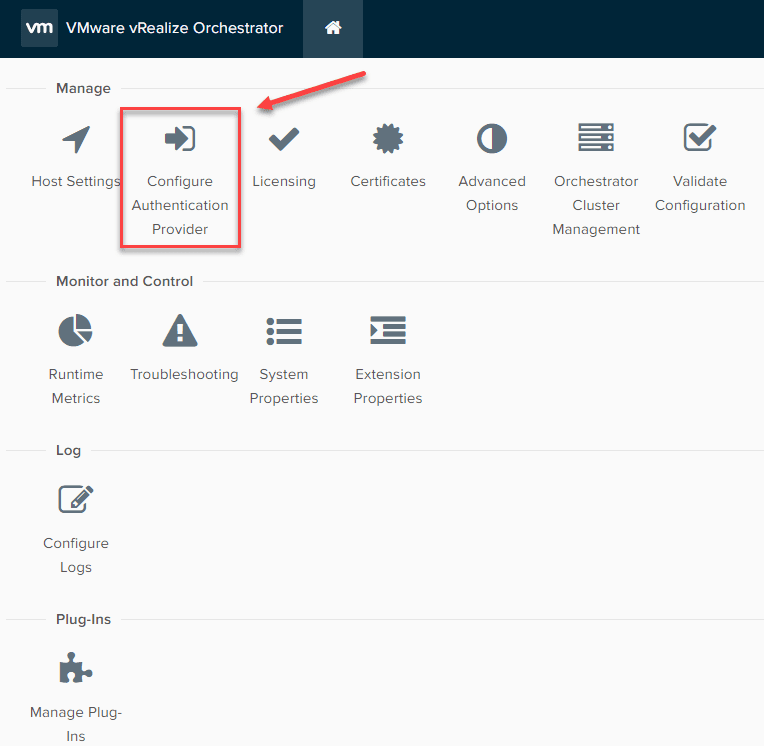
Configure the Authentication Provider
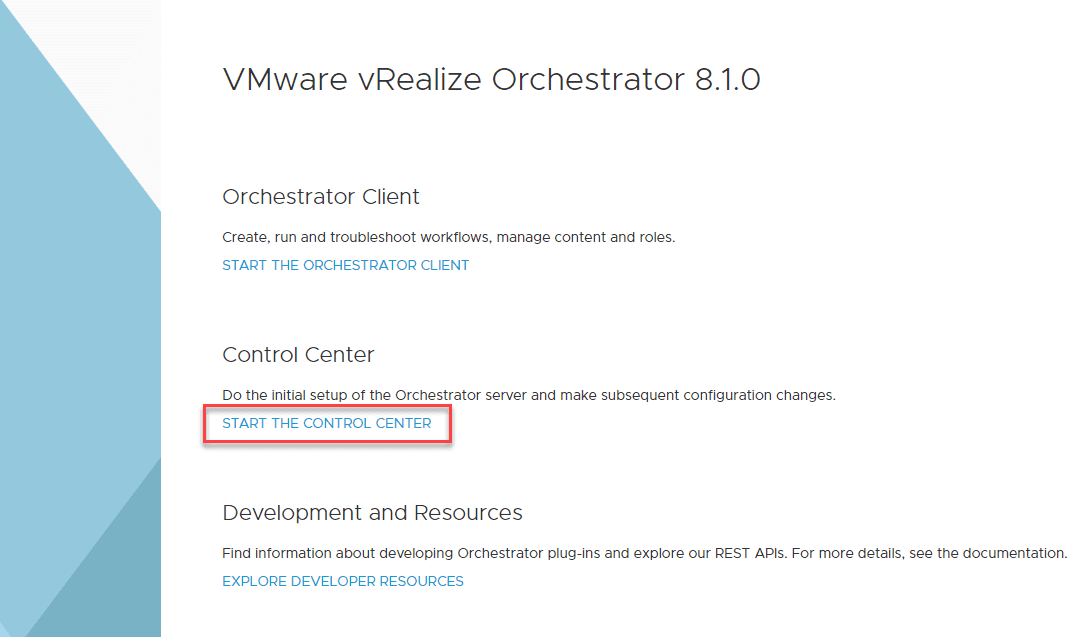
Once the appliance finishes deploying and all services are running, you should be able to browse out to the URL of the appliance via HTTPS. The first thing you will need to do before you Start the Orchestrator Client is run the Start the Control Center.
First, we need to configure authentication provider.
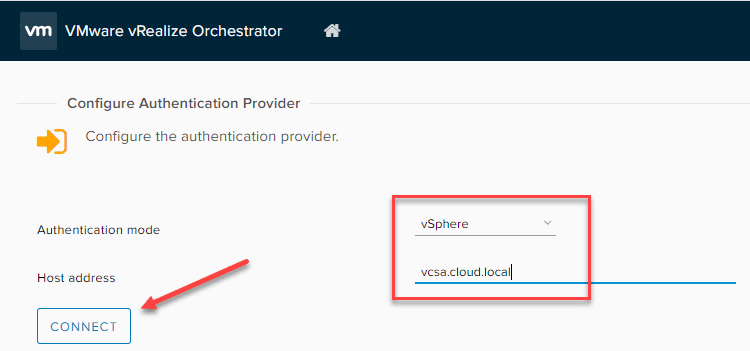
Select vSphere here if you are registering a vCenter Server. After entering the details, click Connect.
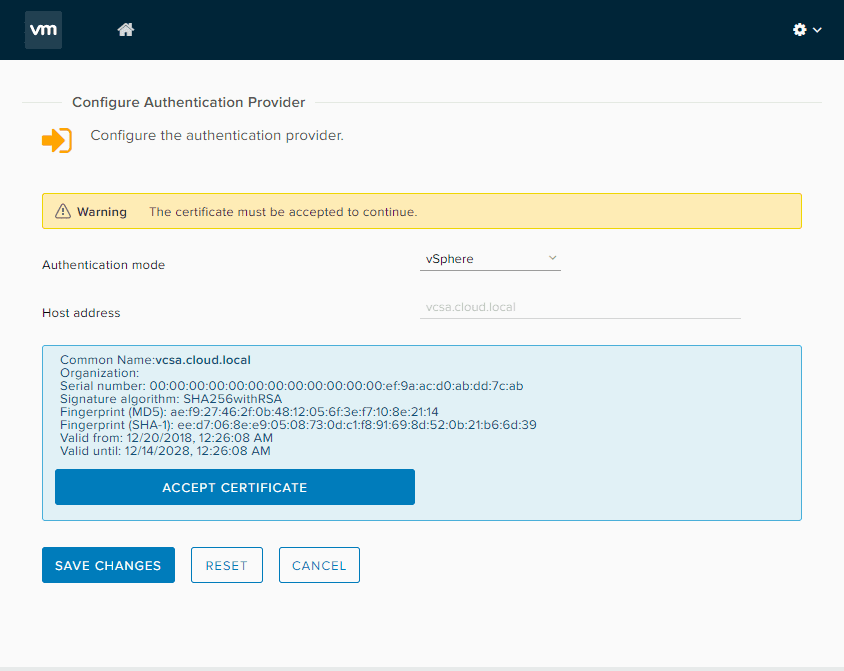
Click the Accept Certificate button.
Enter the username, password and the default tenant will automatically populate.
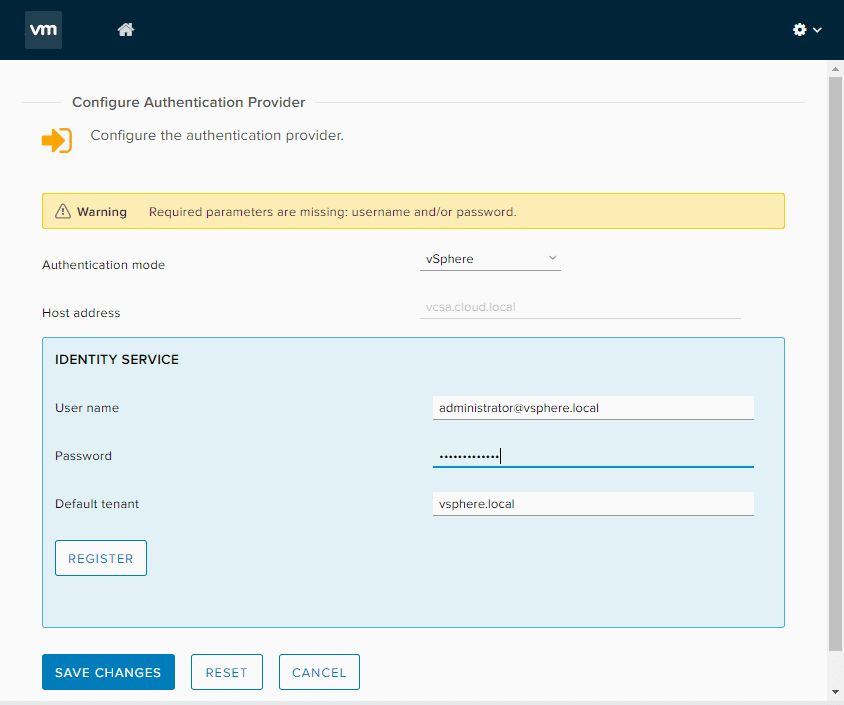
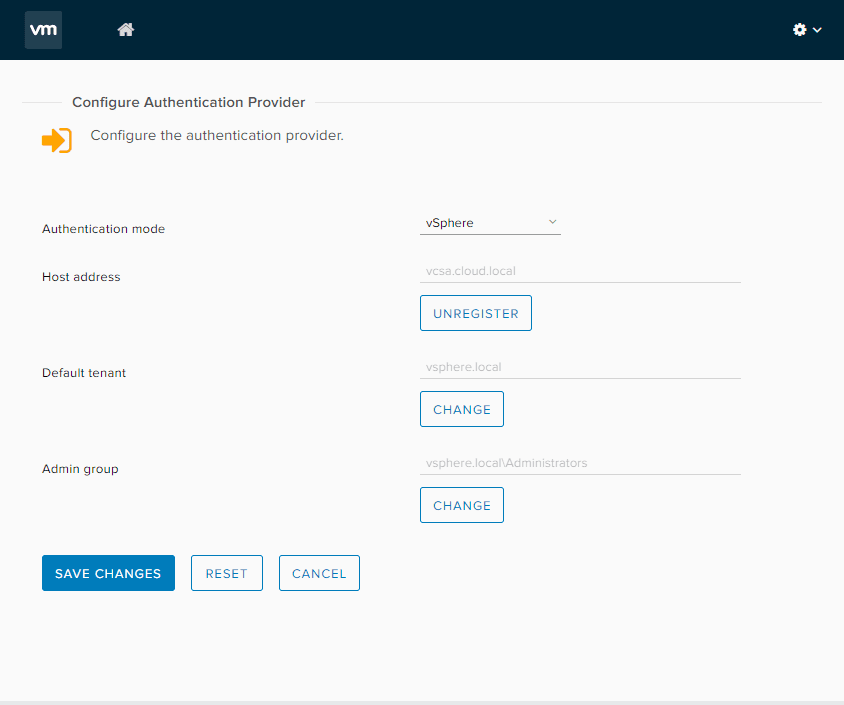
You will need to enter the Admin group. Just type Administrators in the field and select <your SSO domain>Administrators. Save your changes.
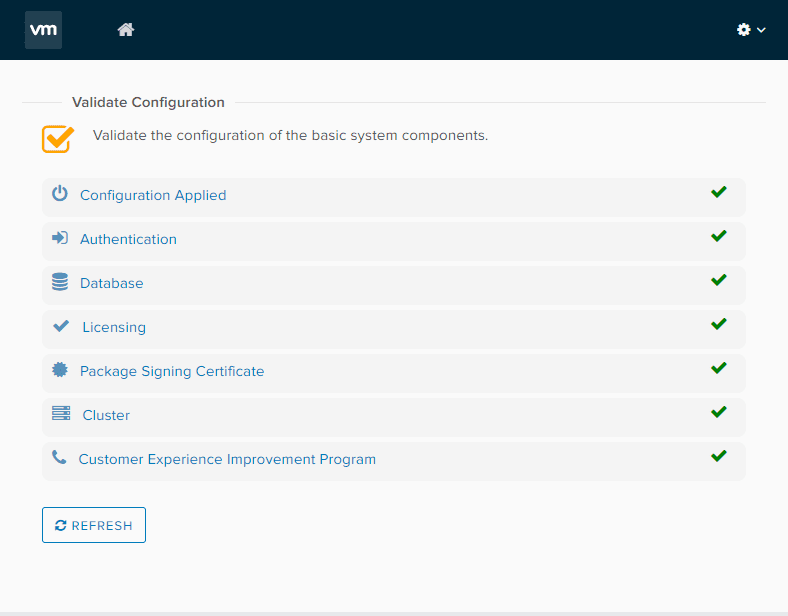
Run the Validate configuration option in the control center. **Note** you will want to wait a few minutes after you have added the authentication provider. You should see all green checkboxes.
Add a vCenter Server instance to vRealize Orchestrator 8.1.
Under Workflows, search for Add a vCenter Server instance workflow. This allows adding a vCenter Server instance to your vRealize Orchestrator 8.1 appliance. Once you find it, select Run.
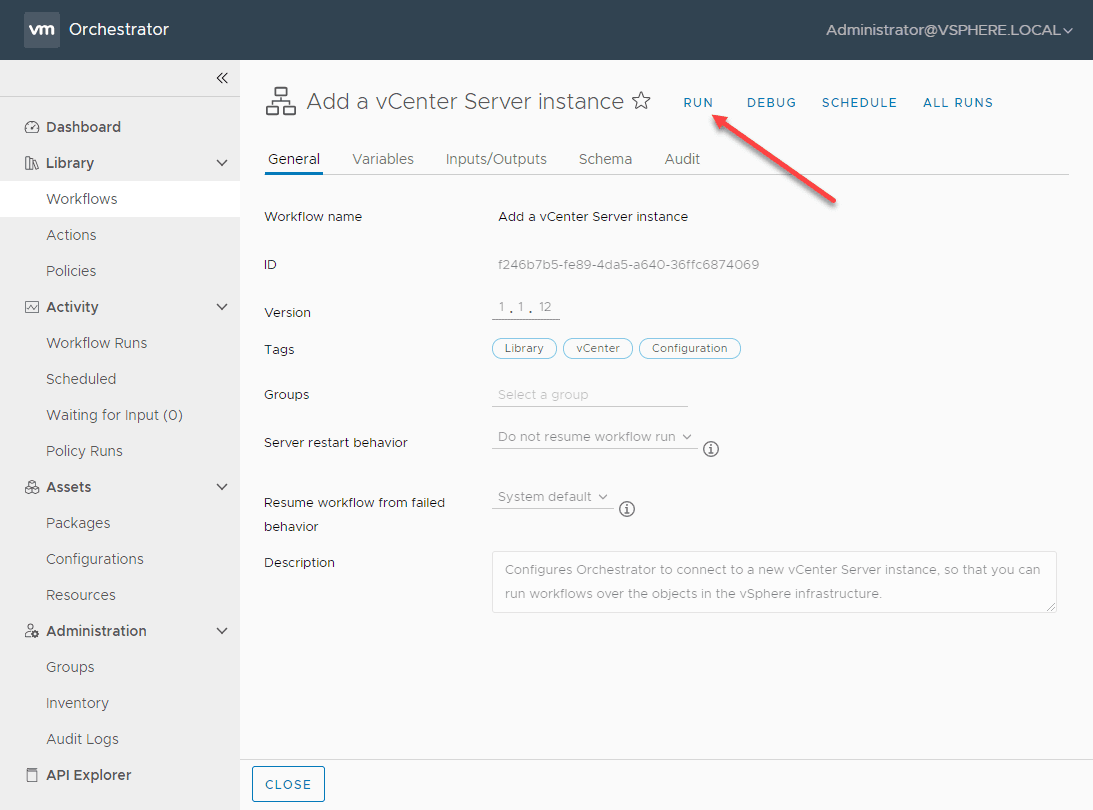
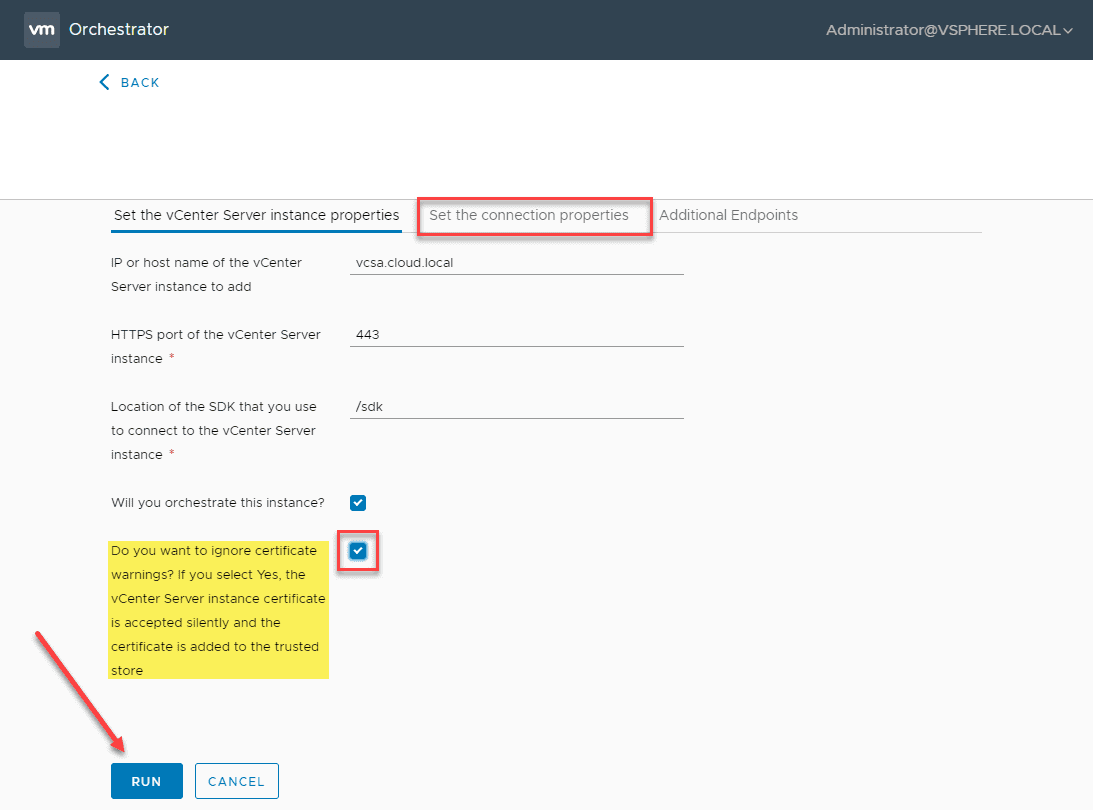
Make sure you set the username and password under the Set the connection properties tab. Check the box to ignore SSL certificate warnings. Then, click Run.
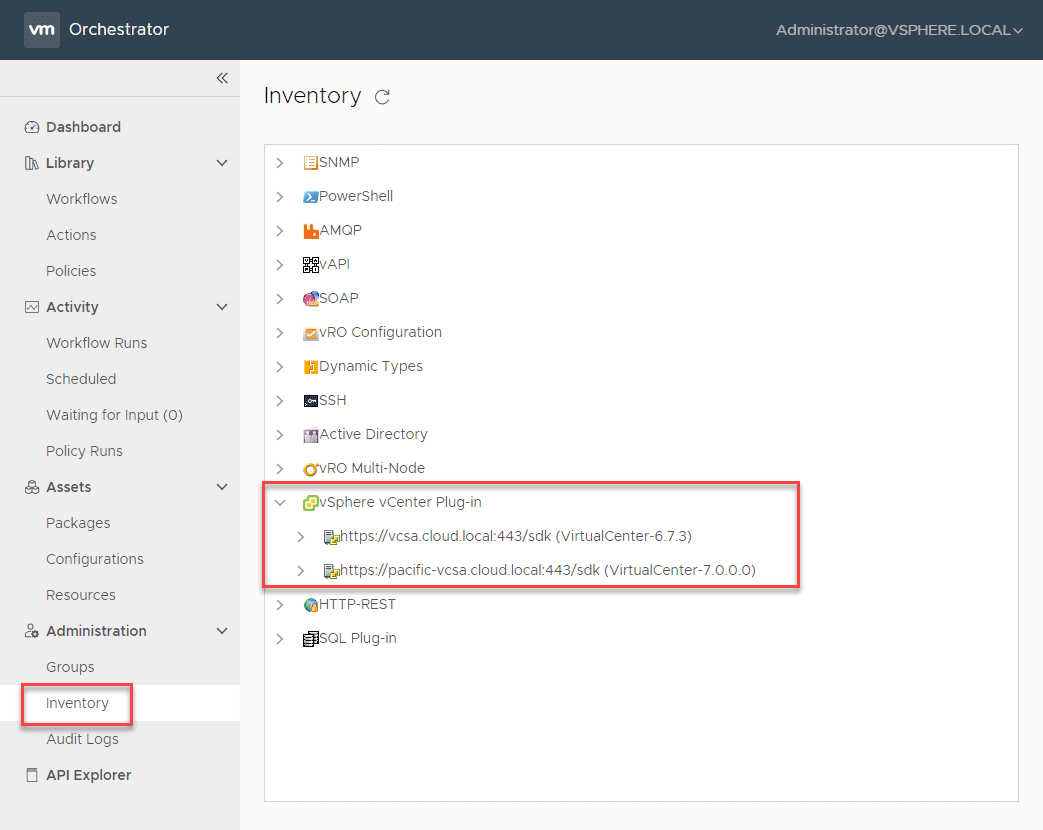
You should see the workflow run successfully. Navigate to the Inventory section and expand the vSphere vCenter Plug-in section and you should see your vCenter Server listed here. I have added both a vCenter Server 6.7 environment and a vCenter Server 7.0 environment.
Wrapping Up
There are many great new features as shown in covering VMware vRealize Orchestrator 8.1 new features and install. The new languages and streamlined workflow reports are certainly worth upgrading to vRealize Orchestrator 8.1.
As you can see, getting the appliance up and running is fairly easy. After that, you need to add the authentication provider and then add the vCenter Server instance.
Google is updating how articles are shown. Don’t miss our leading home lab and tech content, written by humans, by setting Virtualization Howto as a preferred source.
About The Author