Software defined storage today is one of the hottest and most desired technology solutions in the enterprise datacenter. Most organizations are looking very seriously at software defined storage solutions as opposed to refreshing SAN storage devices in the next refresh cycle. Why is this? Software defined storage provides exceptional features and functionality that generally allow businesses today to not be tied to a specific hardware vendor for features and functionality as has traditionally been the case. With the release of Windows Server 2019 (in a state of non release due to retraction from Microsoft with reported issues), the latest version of Storage Spaces Direct is now available. Storage Spaces Direct or S2D is Microsoft’s software-defined stoage solution that allows using commodity directly attached storage to be used as production storage for Hyper-V and other infrastructure technologies. In this post, we will take a look at Configuring Windows Server 2019 Storage Spaces Direct S2D in VMware vSphere to see how S2D is configured and how this can be done inside of VMware virtual machines for lab purposes.
Configuring Windows Server 2019 Storage Spaces Direct S2D Lab Setup
To begin with, let me give you an overview of the VMware vSphere lab itself that is being used as well as the Windows Server 2019 variant used in testing. In the home lab, I am running VMware vSphere 6.7 (waiting on U1). Windows Server 2019 has been installed in three VMware virtual machines each with (3) 10 gig disks for provisioning to use in the S2D configuration. Prior to the recall of sorts on the current Windows Server 2019 binaries, I had downloaded the ISO and had built a 3-node Hyper-V cluster using the GA release. However, I received the following error when attempting to enable S2D on the cluster.
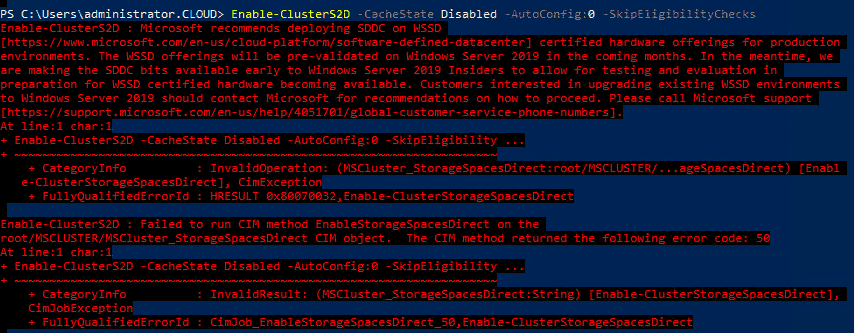
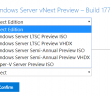
Microsoft supposedly has a registry key that will allow storage spaces direct to be installed regardless of the compatibility with the product. At the time of this writing however, I do not have my hands on the registry key to allow the installation to move forward. Microsoft however, plainly states the Insider versions of the Server OS do allow installing S2D on non-supported hardware. I did find this to be true as backing back down to the 17744 build release on each of the three cluster nodes of the Insider preview did allow me to run the Enable-Clusters2d command.
Highlights:
- vSphere 6.7 virtual machines
- 80 GB OS drive, (3) 50 GB drives for use with S2D
- Windows Server 2019 – Version 1809, Build 17744
Configuring Windows Server 2019 Storage Spaces Direct S2D in VMware vSphere
Below, I will run through the steps to get Storage Spaces Direct up and running and in a configured state so you are ready to begin carving out storage for your virtual machines running on top of your S2D cluster. As a disclaimer here, I closely followed the steps found on Virtualtothecore blog with a few little changes for my environment. I am continuing to play with the commands to see what is needed in Windows Server 2019 and what may not be needed for this to work in a VMware virtual machine.
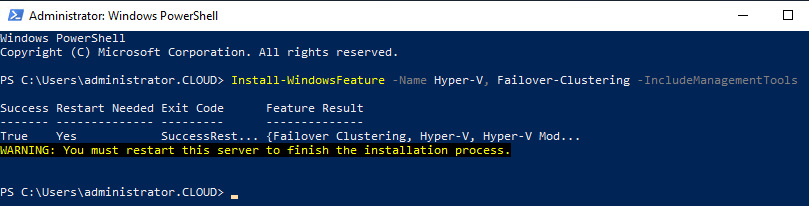
The first thing we need to do is install the Windows features needed for Failover Clustering and Hyper-V, since our cluster will be intended for use as a Hyper-V cluster running on top of Storage Spaces Direct.
After rebooting the hosts after installing the Windows features/roles we need, we can now create the cluster itself. From PowerShell, this is as simple as running the New-Cluster command, naming the cluster, and then providing the hosts that will be members. Also, we provide the IP address assigned to the Cluster name.
New-Cluster -Name S2Dcluster -Node hyper19-01.cloud.local, hyper19-02.cloud.local, hyper19-03.cloud.local -NoStorage -StaticAddress 10.1.149.190

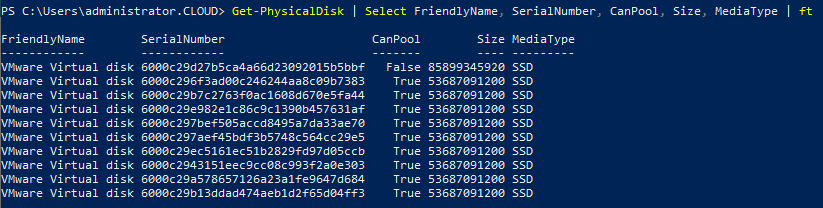
To check and see whether the disks we have provisioned to the servers are available to pool, we can run the Get-Physicaldisk cmdlet to check the status of the disks.
To actually enable the Storage Spaces Direct functionality on the cluster, we run the following command:
Enable-Clusters2d -cachestate disabled -autoconfig:0 -skipeligibilitychecks

The configuration process begins on the cluster.

You should see the command finish without error. There is a log file that gets created covering the process found at C:WindowsClusterReportsEnableClusterS2D.

The next step is to create the Storage Pool. The Storage Pool is the raw storage that we can create virtual disks from.
New-StoragePool -StorageSubSystemFriendlyName *Cluster* -FriendlyName S2D -ProvisioningTypeDefault Fixed -PhysicalDisk (Get-PhysicalDisk | ? CanPool -eq $true)

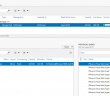
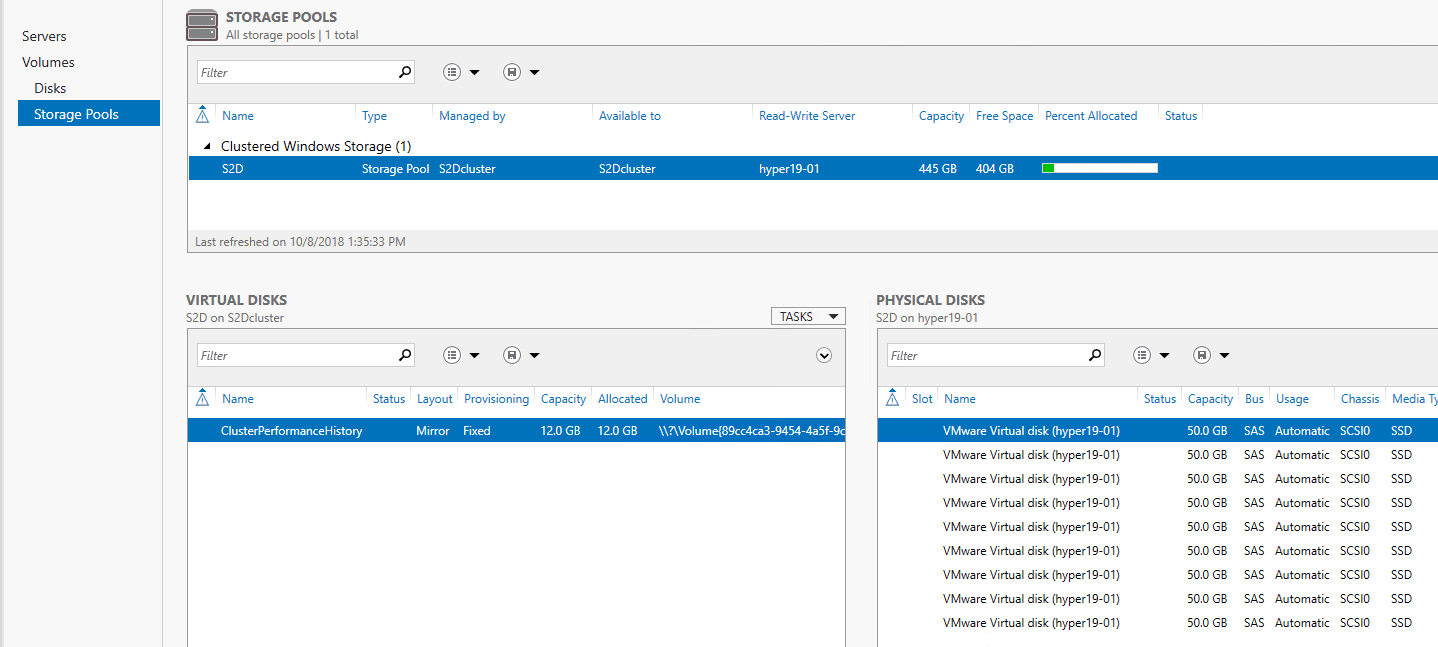
To visually manage the new Storage Pool, you can launch Server Manager, click the Cluster name, navigate to Storage Pools and you should see the Storage Pool created in the step above.
Takeaways
The process of Configuring Windows Server 2019 Storage Spaces Direct S2D in VMware vSphere was simpler that I thought it would be as I expected to see errors or other unexplained behavior. I had tried this once before in Windows Server 2016 cluster hosts and ran into a few odditites that I was never able to get around with the time I had to play around with it. It looks like however, in Windows Server 2019, these issues are no longer present. One thing to emphasize again, this is the Insiders Preview release build 17744 that was used in the post. Hopefully the registry key that will allow using the GA release will be published so we can hack away with the GA release, once it is re-released. Stay tuned for more Storage Spaces Direct information, configuration, and labbing.
Google is updating how articles are shown. Don’t miss our leading home lab and tech content, written by humans, by setting Virtualization Howto as a preferred source.
About The Author