
When you set up a TrueNAS SCALE server, one of the first configuration items you will want to tackle is the network configuration. This helps make sure you achieve optimal performance and security. If you are struggling to configure your TrueNAS SCALE home server networking, this post will help you configure a static IP address, Link Aggregation (Failover, LoadBalance, LACP), VLAN, and Bridge interfaces making the TrueNAS Scale network configuration less daunting, even for those with just a little command line knowledge.
Configure from web UI or console?
While you can configure global network configuration settings from the web UI, I definitely recommend doing this from the console menu. The reason is simple. If you are using the web UI, one misstep will prevent you from being able to connect to the server.
So you will need physical access to your server console or use an IP-based KVM or have IPMI access to keep from losing connection.
Also, I have seen instances where, even when you configure things correctly from the web UI, such as with failover and load balancing, you may get disconnected and be unable to connect to the server again.
So, for this post, that is the method I will be using in the examples given.
TrueNAS SCALE Static IP Address: The Starting Point
The most basic configuration you want to set is a static IP address on your server. Why are static IP addresses important? Well, most likely, you are using TrueNAS to serve out resources in your home lab or home network. For those resources to always be found at the same IP address, you will want to configure a static address.
A static IP address remains constant, unlike a dynamic IP address configured by a dynamic host configuration protocol (DHCP) server. Assigning a static IP address to your TrueNAS system is usually the first step in the network configuration process.
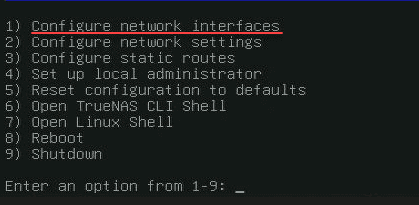
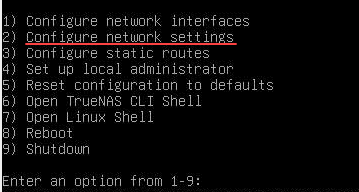
First, choose option 1) Configure network interfaces. This is where you will configure your global configuration option.
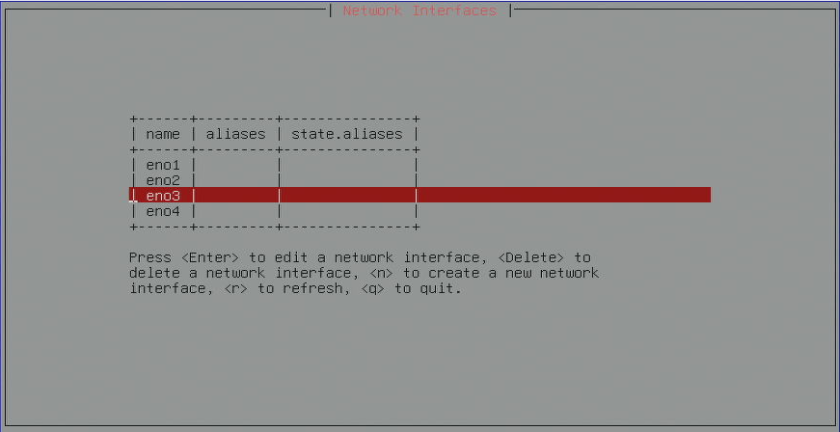
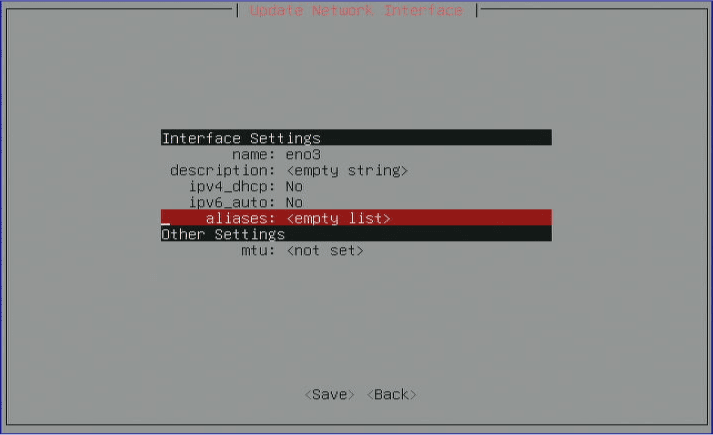
Pick the network interface you want to edit and assign a static IP address on. In my case, the (2) 10 gig connections for my TrueNAS server are found on eno3 and eno4. So, for a basic example, I am going to pick eno3 as the configured interface to host the static IP address. Keep in mind we can only select only one interface from this screen. We will see below how to create the special interfaces needed to add multiple network adapters.
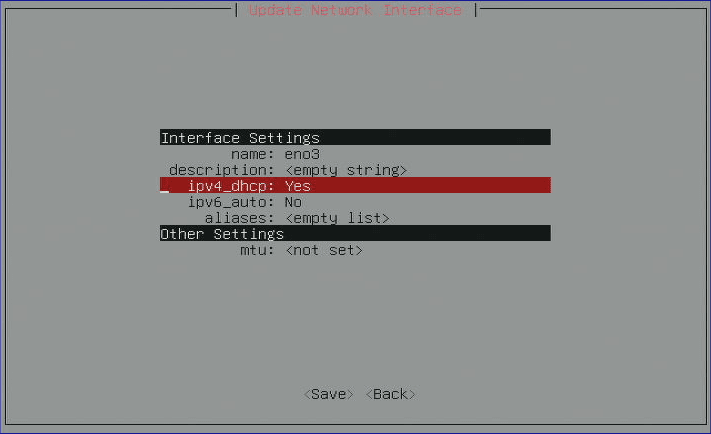
Next, we see this screen. on the ipv4_dhcp setting, select it, and then press Enter.
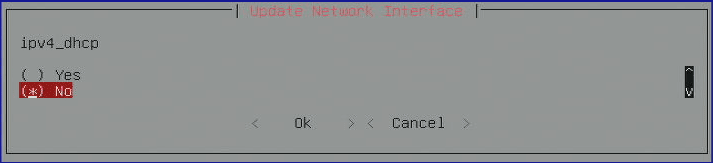
Here, we select no on the DHCP checkbox.
Now, enter into the aliases configuration. The aliases in this context are the IP addresses we want to assign.
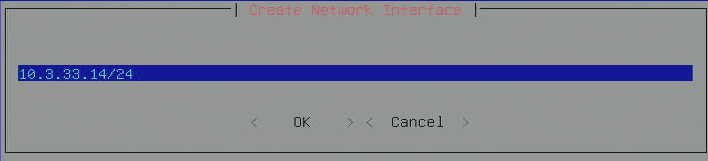
Type in the new static IP address in CIDR format containing the bits for the subnet mask. Then TAB and press OK.
You will want to Save your changes.
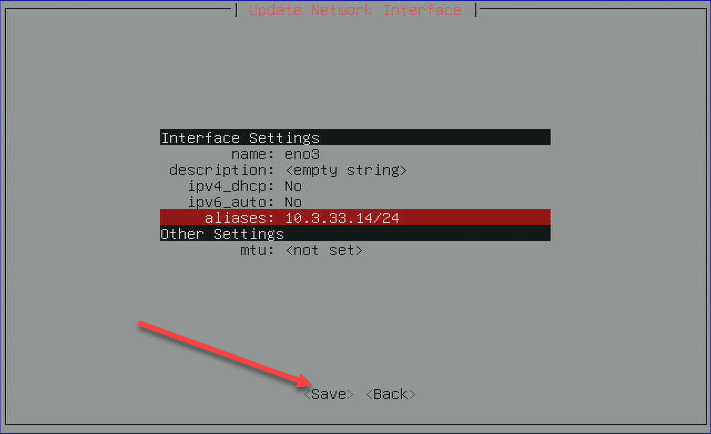
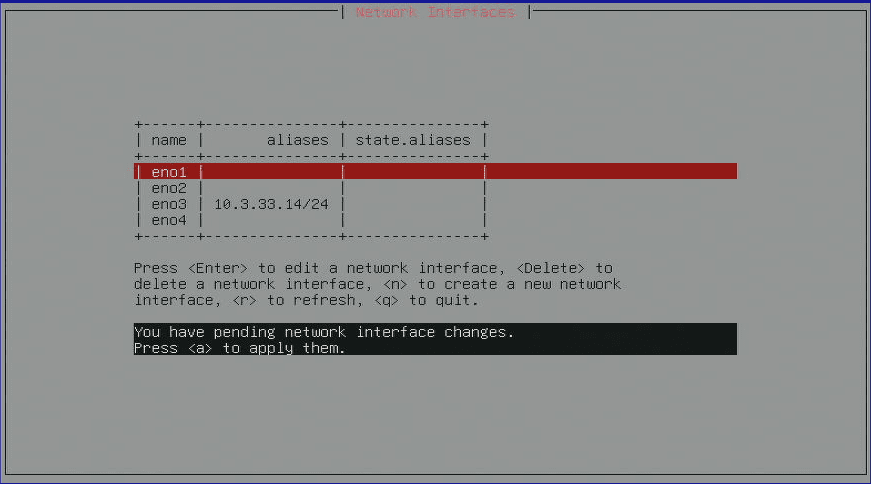
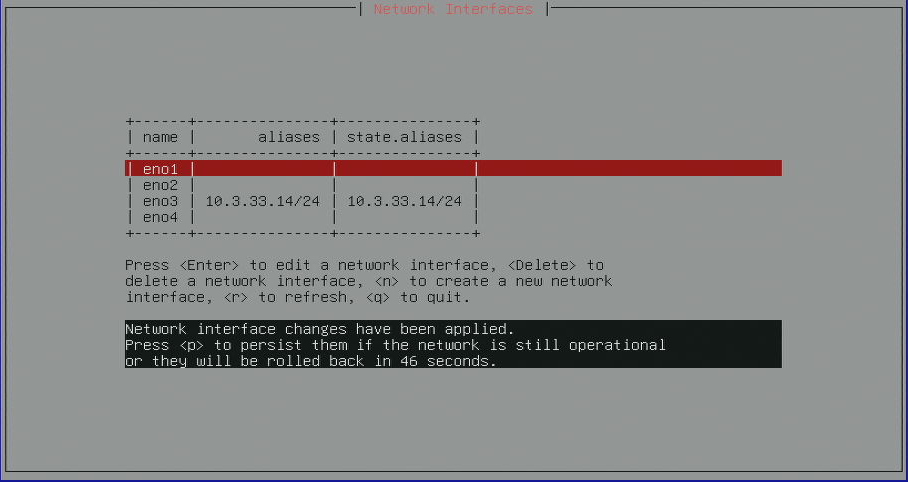
Once you save out of the configuration screen. You will see the message that you have network changes to apply. Press the a button.
Then you will see a message asking if you want to make the configuration persistent. Press the p button to persist the changes.
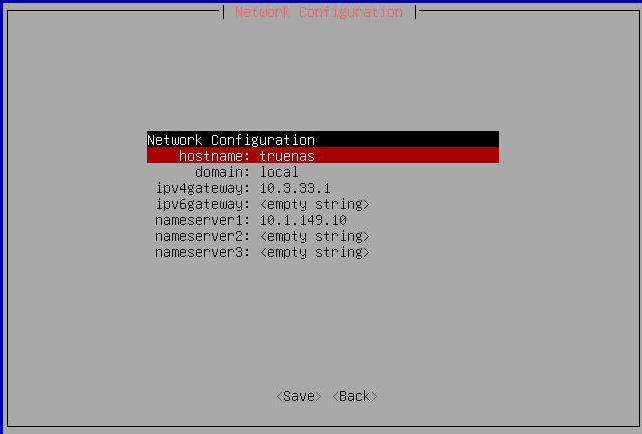
Hostname, default gateway, domain, DNS servers
One confusing thing with TrueNAS on the network configuration, they split up the configuration of the IP address from the configuration of the default gateway and other settings. I really think it would be best if they would consolidate this configuration as it is just confusing.
To get to these settings, you need to enter into menu item 2) Configure network settings to set these.
In this menu, you can configure the above-mentioned settings. Your default gateway will need to be on the same subnet as the IP address you are configuring for network connectivity. Below on this screen, you will see the current settings.
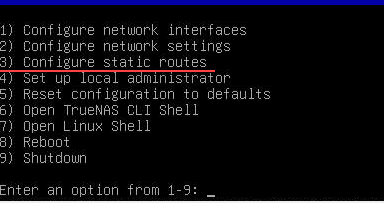
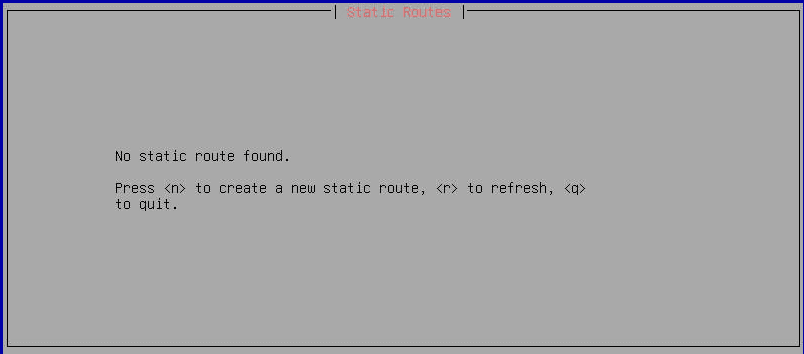
Configure static routes
You may want to add static routes to your TrueNAS configuration. You can configure static routes as well on menu item 3) Configure static routes.
Link Aggregation: Failover
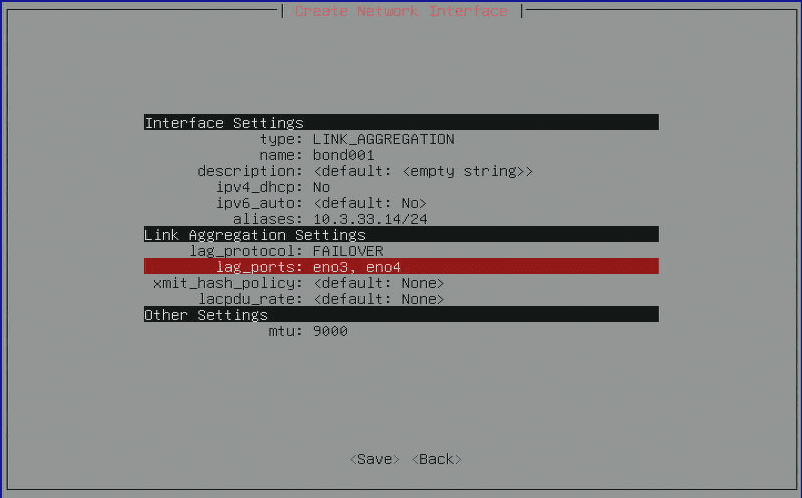
The next type of network configuration is the failover configuration. The failover configuration is an option for the link aggregation interface type. With failover, you can assign multiple interfaces to the failover link. If one of the links fails, then the other link takes off and picks up traffic.
Configuring Failover in TrueNAS Scale primarily involves setting up multiple interfaces and IP addresses. A common practice is to assign multiple IP addresses to a single interface or have multiple interfaces each with a static IP address.
The web interface of TrueNAS Scale simplifies this configuration, guiding you through the necessary steps to achieve a Failover setup that meets your needs.
You will need to configure the following:
| Setting | Specification |
|---|---|
| Type | LINK_AGGREGATION |
| Name | “bond” followed by a unique number |
| Description | default |
| IPV4_dhcp | No (for a static IP address) |
| IPV6_auto | NO (default) |
| Aliases | Your desired IP address |
| Lag_protocol | FAILOVER |
| Lag_ports | Select your adapter interfaces here |
| Xmit_hash_policy | default |
| Lacpdu_rate | default |
| Other settings | MTU value |
TrueNAS SCALE Link Aggregation: Loadbalancing
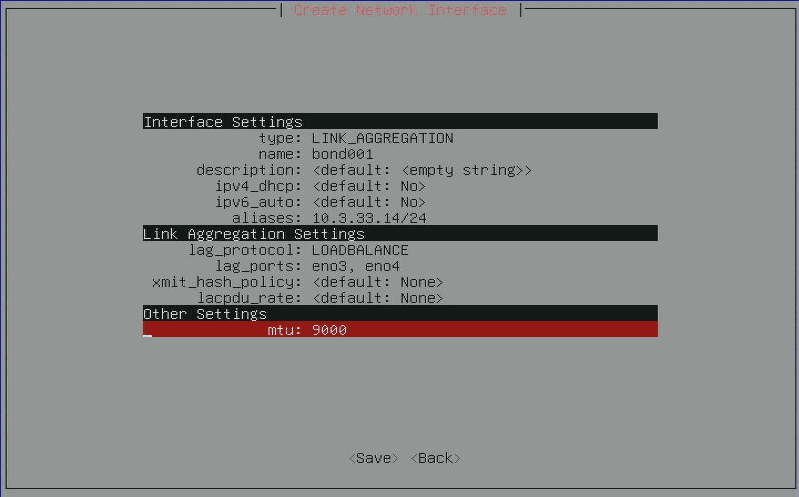
Loadbalancing is another crucial network configuration in TrueNAS Scale, aiming to distribute network traffic evenly across several servers or network interfaces. This not only enhances the performance but also the reliability of your network.
Between LoadBalance and LACP, LACP provides better resiliency against failure. In a “dumb” loadbalance configuration, the loadbalance configuration doesn’t know if there is a problem with the load balance links. However, LACP sends PDU packets to know at all times the state of the link aggregation links. So, it is the smarter of the two. However, keep in mind it is the most involved to setup, since you will have configuration that will also need to happen from the switch side as well.
The process of setting up “dumb” Loadbalancing involves configuring multiple interfaces to the link aggregation interface. A balanced distribution of network traffic is achieved by the underlying algorithms across the links.
Note the following configuration you will need to assign for the “dumb” or traditional link aggregation configuration.
| Setting | Specification |
|---|---|
| Type | LINK_AGGREGATION |
| Name | “bond” followed by a unique number |
| Description | default |
| IPV4_dhcp | No (for a static IP address) |
| IPV6_auto | NO (default) |
| Aliases | Your desired IP address |
| Lag_protocol | LOADBALANCE |
| Lag_ports | Select your adapter interfaces here |
| Xmit_hash_policy | default |
| Lacpdu_rate | default |
| Other settings | MTU value |
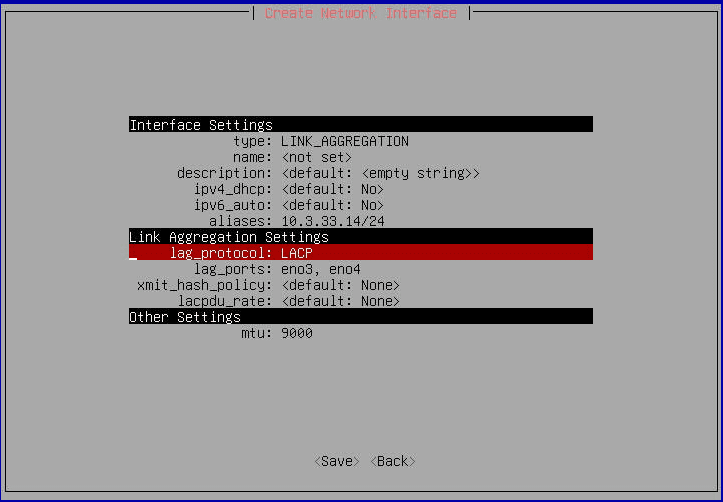
Link Aggregation: LACP
LACP is very similar. However, as mentioned, it must also be configured on the switchports for your uplinks coming from your TrueNAS system, in addition to the TrueNAS configuration.
| Setting | Specification |
|---|---|
| Type | LINK_AGGREGATION |
| Name | “bond” followed by a unique number |
| Description | default |
| IPV4_dhcp | No (for a static IP address) |
| IPV6_auto | NO (default) |
| Aliases | Your desired IP address |
| Lag_protocol | LACP |
| Lag_ports | Select your adapter interfaces here |
| Xmit_hash_policy | default |
| Lacpdu_rate | default |
| Other settings | MTU value |
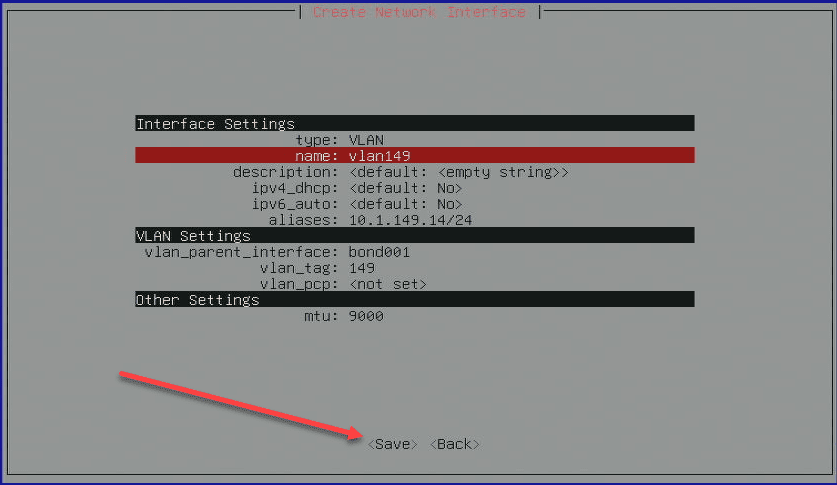
TrueNAS SCALE VLAN: Segmenting Your Network
VLAN (Virtual Local Area Network) configuration in TrueNAS Scale allows for network segmentation for enhancing network security and performance. By creating VLANs, you can isolate network traffic, ensuring that only authorized users can access certain network resources.
Another reason to think about creating your VLAN interfaces is if you will be using TrueNAS SCALE for virtualization (no brainer) you will most likely want your various VMs to be able to connect to the different segments of your network. When you create a new VM, you can choose which interface you want it to connect to, which gives you the same effect as a port group on a VMware vSphere virtual switch as an example.
Configuring a VLAN involves creating a new network interface, assigning it a static IP address, and defining the VLAN ID and other network settings. The web interface simplifies this process, allowing for a straightforward VLAN setup.
| Setting | Specification |
|---|---|
| Type | VLAN |
| Name | “vlan” followed by a unique number |
| Description | default |
| IPV4_dhcp | No (for a static IP address) |
| IPV6_auto | NO (default) |
| Aliases | Your desired IP address |
| Vlan_parent_interface | Your parent interface name |
| Vlan_tag | <VLAN number> |
| Vlan_pcp | <not set> |
| Other settings | MTU value |
This table organizes the settings for configuring a VLAN-type network
Link Aggregation: Round Robin and None
Round robin accepts inbound traffic on any port of the LAGG group. It sends outbound traffic using a round robin scheduling algorithm. The None setting uses no link algorithm for the lag protocol.
Bridge Interfaces: Connecting Networks
Bridge interfaces in TrueNAS Scale allow for the interconnection of multiple networks at the data link layer. This is particularly useful in extending or segmenting networks. However, for my purposes and I think most others, using the link aggregation interface or assigning a static IP address to an interface you want to use will be the more common configuration. Just know they are available and you can use the Bridge interface when needed.
Wrapping up
TrueNAS SCALE has really robust networking with many different configuration options that will allow most to do just about anything they want to do. Understand the different interface configurations, including the link aggregation with failover, load balancing, and LACP, along with the VLAN interface. These will allow you to create many different configurations for your TrueNAS server that will allow you also to have the networking needed for virtualization, etc.
More in this topic


Discuss this in the Community
Google is updating how articles are shown. Don’t miss our leading home lab and tech content, written by humans, by setting Virtualization Howto as a preferred source.
About The Author
