When it comes to VMware vSAN and any other hyperconverged infrastructure, the network is vitally important. I have been doing some reworking of the home lab vSAN environment with the upgrade of my 10 gig network switch. I have been revisiting the vSAN network and how the vSAN network is configured. Up until now, I have simply had (2) 10 gig connections in active and standby for basically failover purposes only. However, I wanted to up the performance of the vSAN network so revisited the options available to architect the vSAN network. Let’s look at VMware LACP load balancing mode in vSAN.
vSAN NIC Teaming Options
When it comes to your vSAN network, you want to have multiple paths to your vSAN network. This is just basic high-availability. It would be silly to have a vSAN host knocked out of the cluster because a single network cable is unplugged accidentally.
This is where NIC teaming comes into play. When you have at least (2) uplinks protecting your vSAN VMkernel port, if a single link fails, you still have a path to your vSAN VMkernel port and the vSAN storage traffic can still flow.
With vSAN vmknic, there are several approaches that can be used with the vSAN network. These are as follows:
- Basic NIC teaming with a single vmknic for vSAN – You assign multiple uplink adapters associtated with a single vmknic to form a team. This can be used with both VSS and VDS. The uplinks are placed in the Active/Standby configuration. There is no special configuration required on the upstream switch.
- Route based on originating virtual port – In the active/active, or active/passive configurations this is normally the policy assigned to NIC teams. When this is in effect, only one physical NIC is used for the vmknic port.
- Route based on physical NIC load (Load Based Teaming) – Load is checked on the uplinks and a load-balancing algorithm is used to balance out load. Once the load reaches 75% on the first uplink, the algorithm shifts traffic to the second uplink. This is only available on the VDS.
- Air-Gap vSAN network – There are two different storage networks that are created to provide redundant storage fabric. This requires two different subnets and VLANs. This is not a recommended approach.
- Static LAG – Creates a grouping of uplinks into a single logical unit with an upstream switch. With “static” LAG LACP frames are not sent to negotiate the LAG creation.
- Dynamic LAG – This is an LACP LAG where the LACP PDUs are sent to form the LAG. This is preferred. VDS switches are required with this approach.
Creating a new LACP enabled vSphere Distributed Switch (vDS)
To rework the vSAN network in the home lab, I opted for the Dynamic LAG approach using LACP. This provides the best load balancing option for ensuring all links are utilized as much as possible. It also provides the failover that you would expect in case a link is lost.
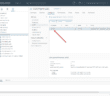
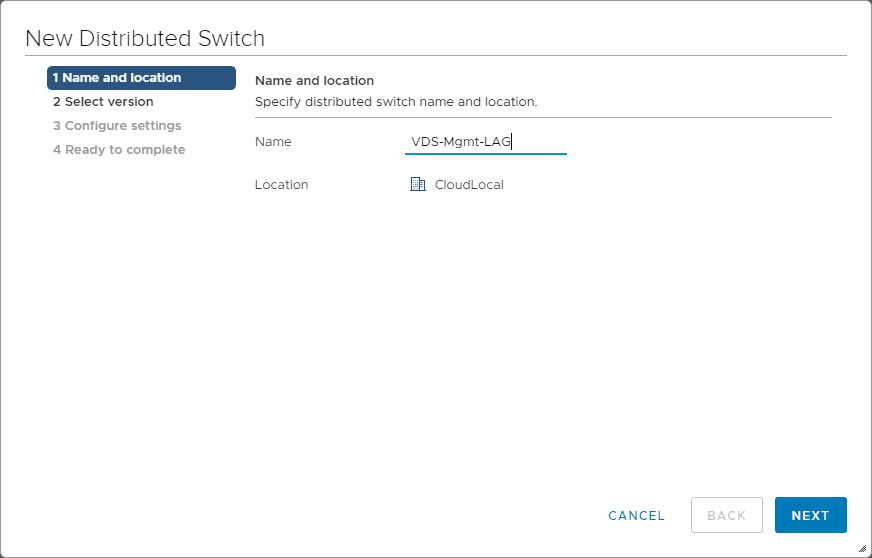
Before we can enable the LAG on a VDS, we need to first create the VDS itself. Here I am starting the wizard to create a new distributed switch.
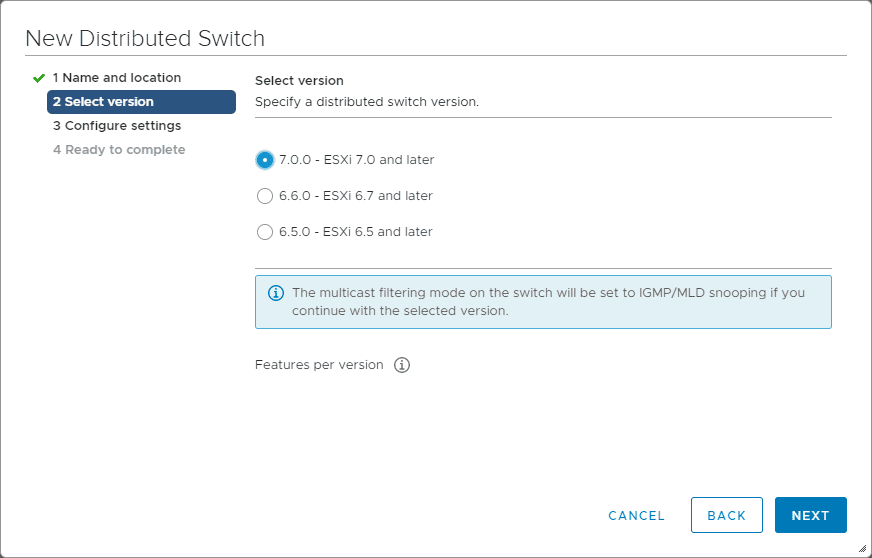
Select the version of the vSphere Distributed Switch.
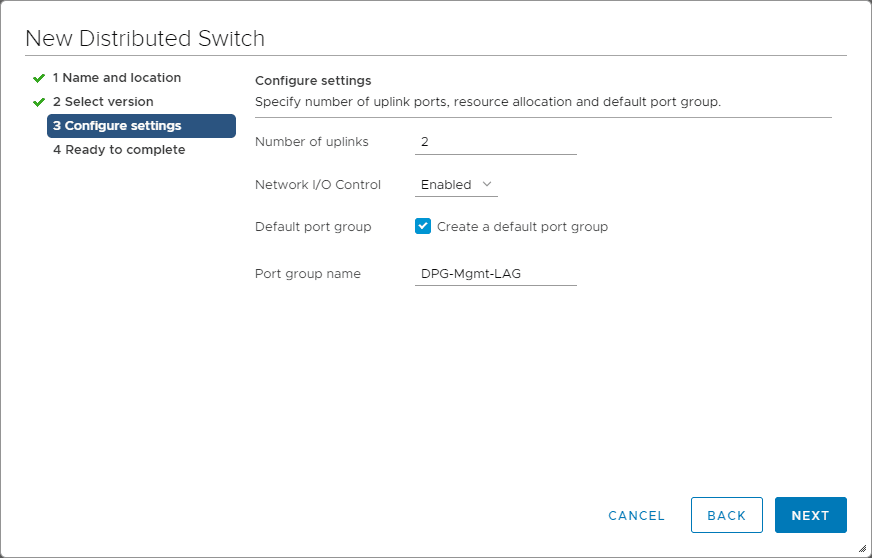
Define the number of uplinks with the new VDS, Network I/O Control (enabled by default) and creating the default port group.
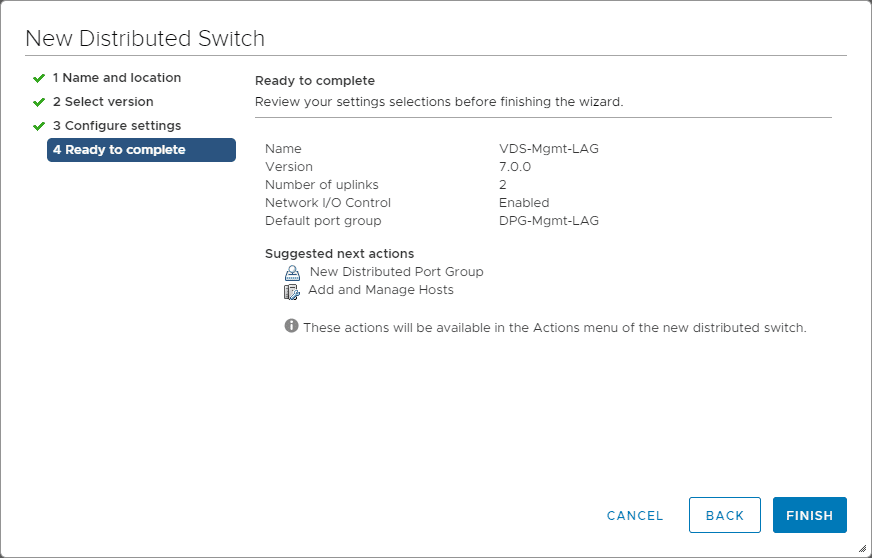
Finishing the new vSphere Distributed Switch wizard.
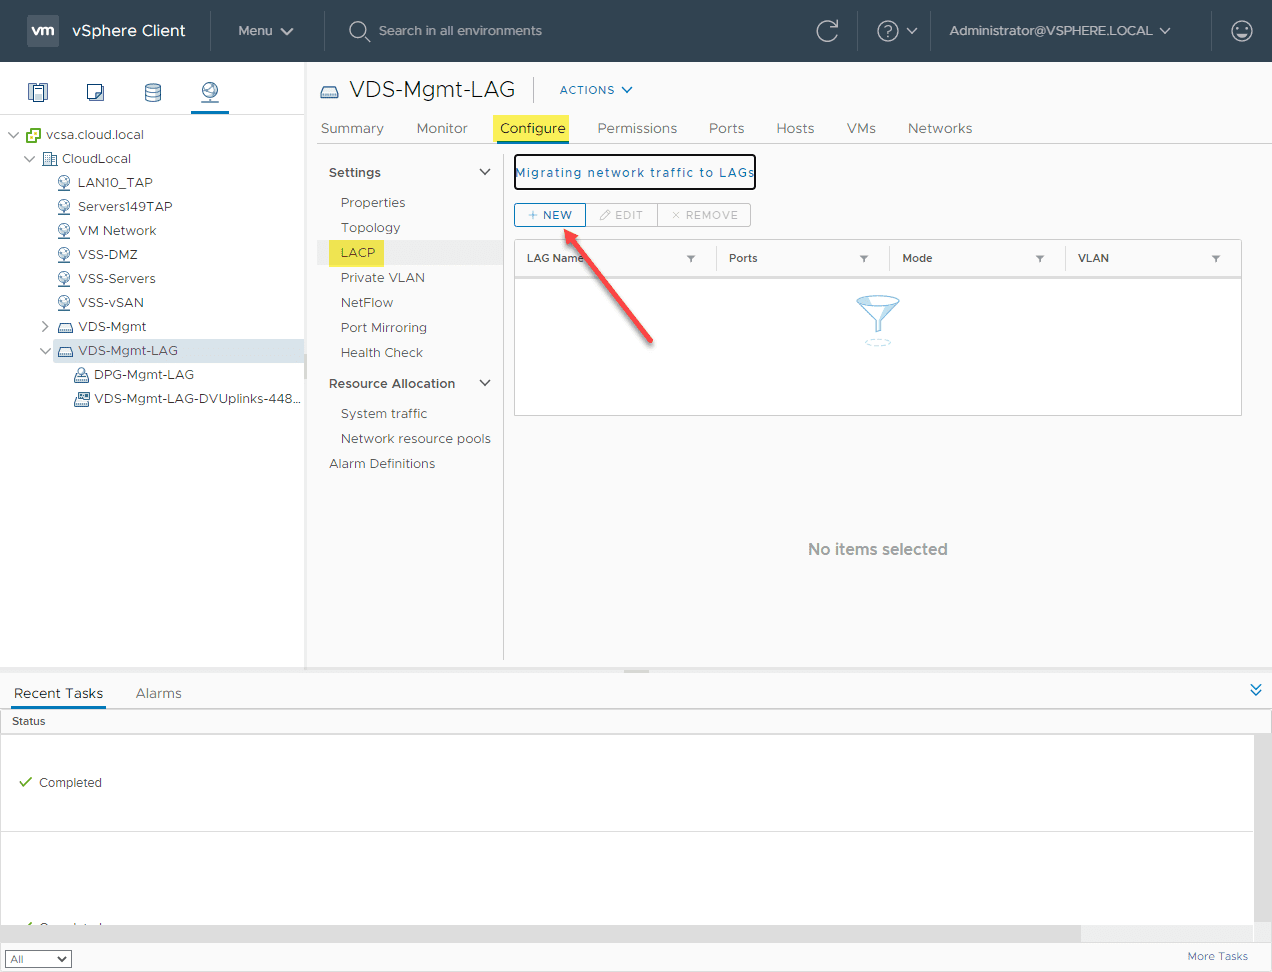
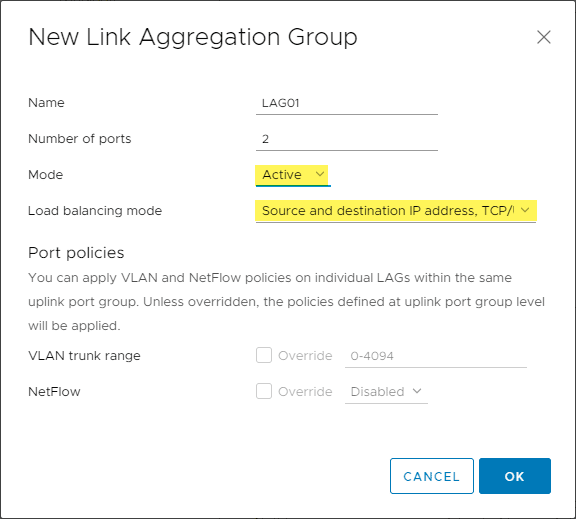
Creating a new LACP LAG for the new VDS
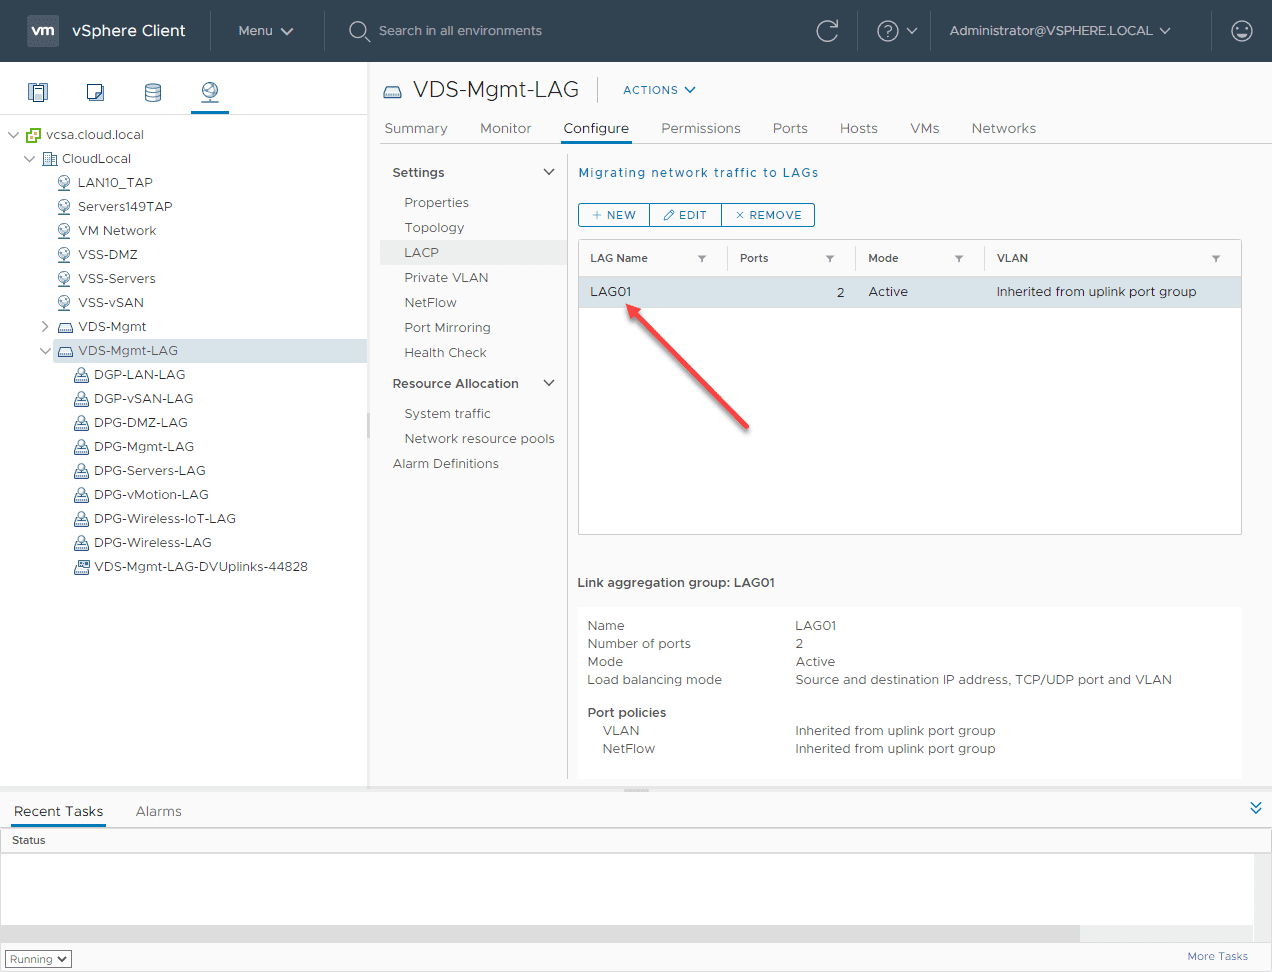
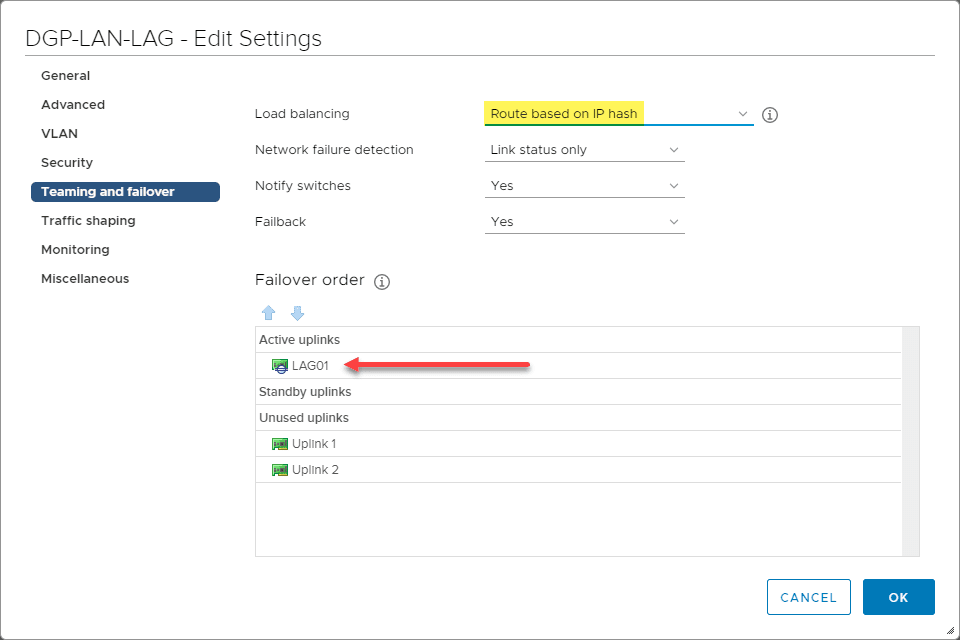
Configuring the LACP LAG on your VDS port groups
Once you have the LAG configured and ready to go, you now need to configure your Teaming and Failover settings in the properties of your VDS portgroups that will be backed by the LACP LAG. Here I have assigned the LAG as active and moved the individual uplinks to Unused.
Migrating from Non LAG to LACP LAG in production
Can you migrate from a non-LACP LAG enabled VSS or VDS to a LACP enabled LAG in production without downtime? Yes you can. In fact, in my home lab environment, I have done just that.
Basically to pull this off, you need to create a new VDS that has all the same port groups configured/VLANs etc. You will configure the LACP LAG uplink on the VDS switch, then assign the LAG to the individual port groups of the VDS switch.
After you have done this, you can then add the VDS to the ESXi host, reassign your VMkernel NICs to the appropriate LACP-LAG-enabled port group on the new VDS and then also migrate your virtual machine networking at the same time as well.
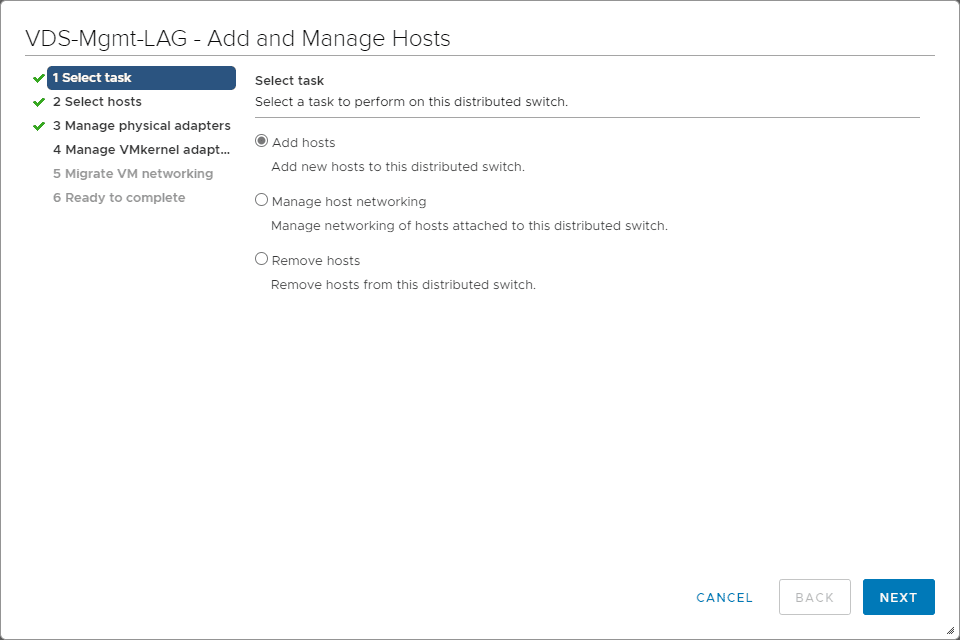
Here I am initiating the Add and Manage Hosts for my new LACP-enabled VDS.
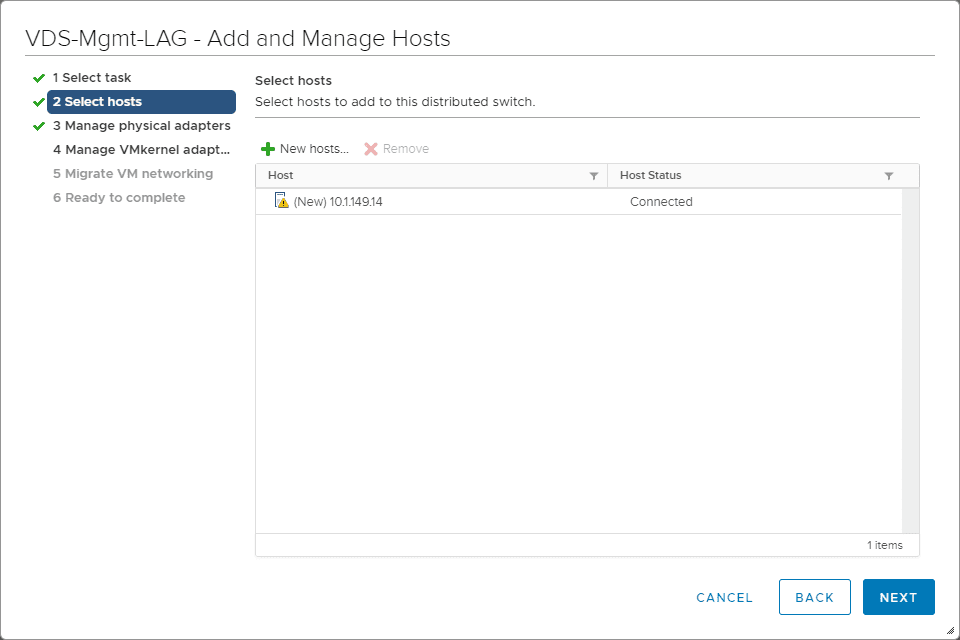
Select your hosts that you want to add to the VDS.
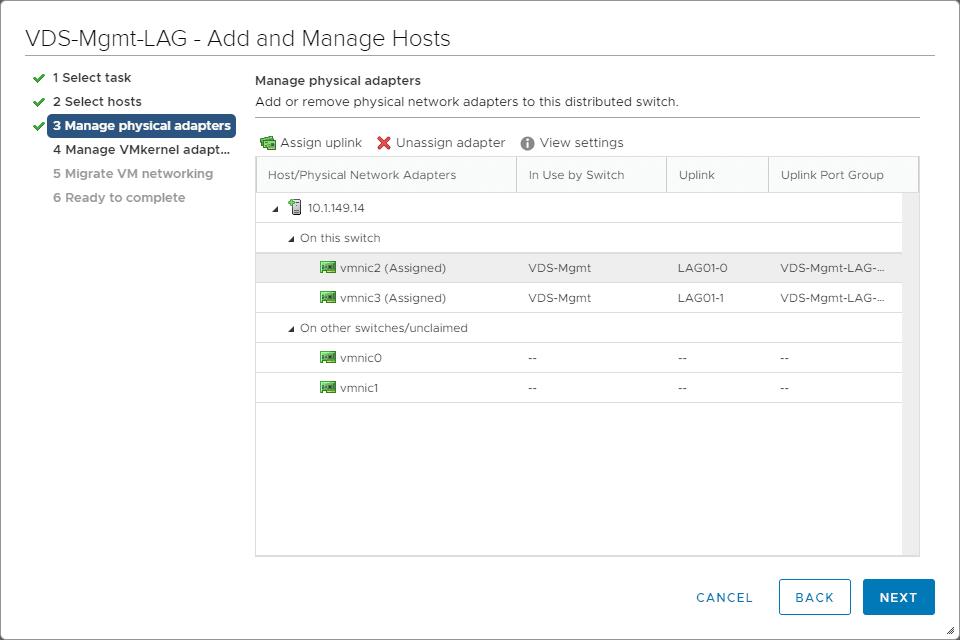
Assigning the vmnics to the new LAG ports.
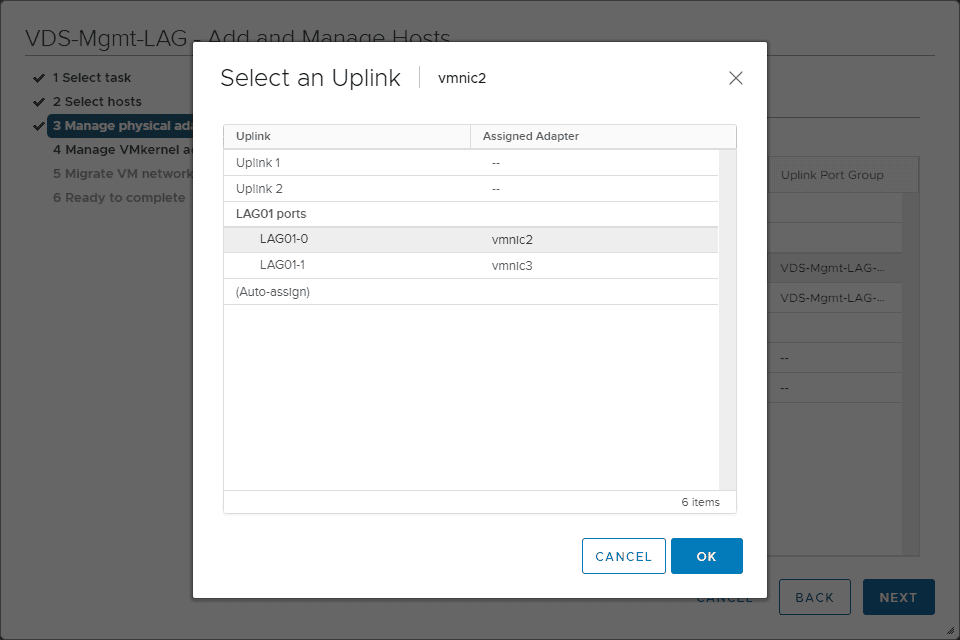
VMnics have now been reassigned.
You will see a note that you need to reassign your vmkernel adapters since the migration of your physical adapters will leave these disconnected.
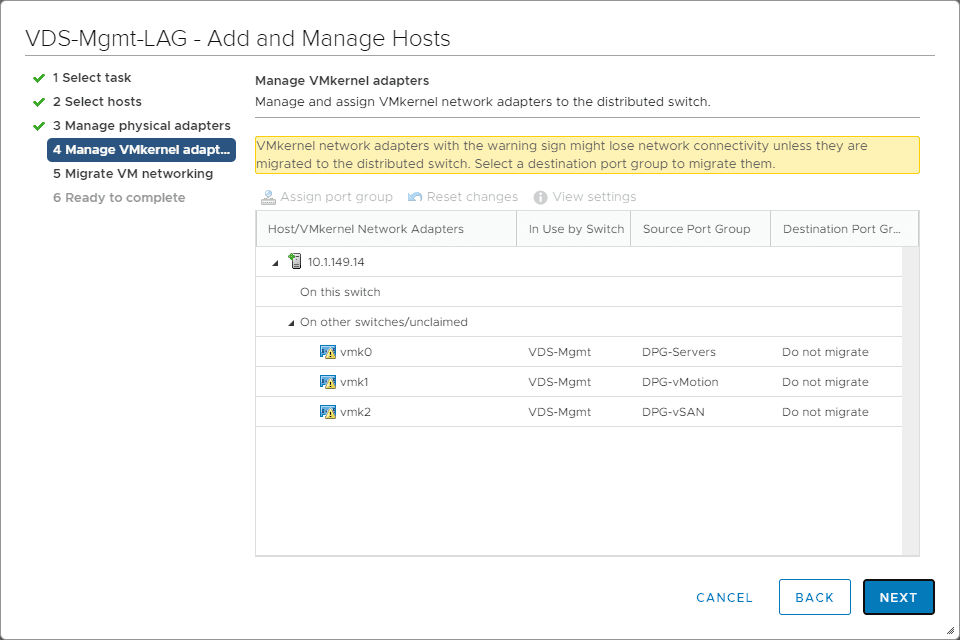
After reassigning the VMkernel adapters to the new portgroups associated with the new VDS.

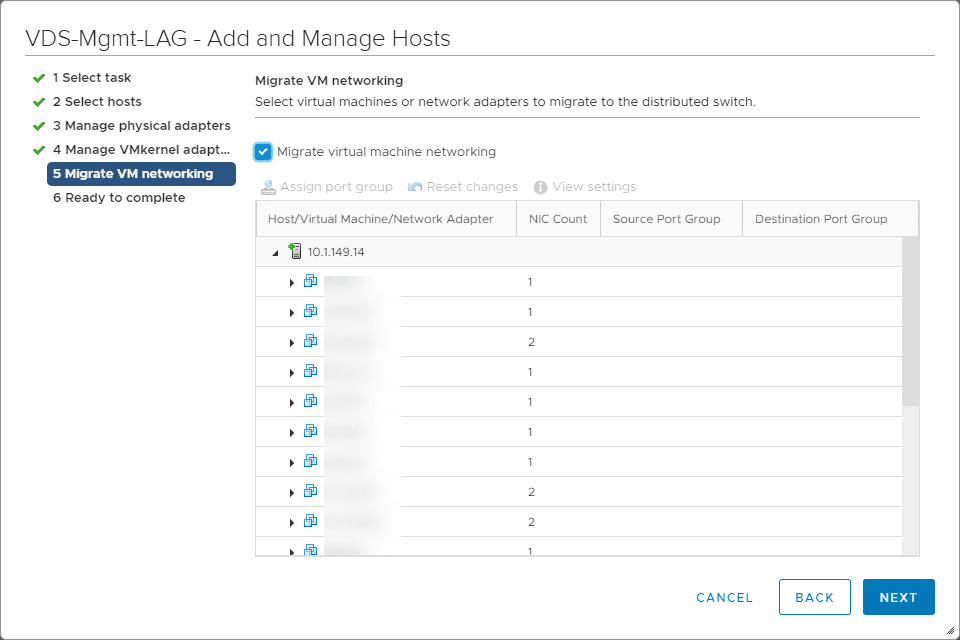
The wizard will next prompt you to migrate your virtual machine networking since your VMs will also be disconnected once you migrate over the physical adapters to the new VDS.
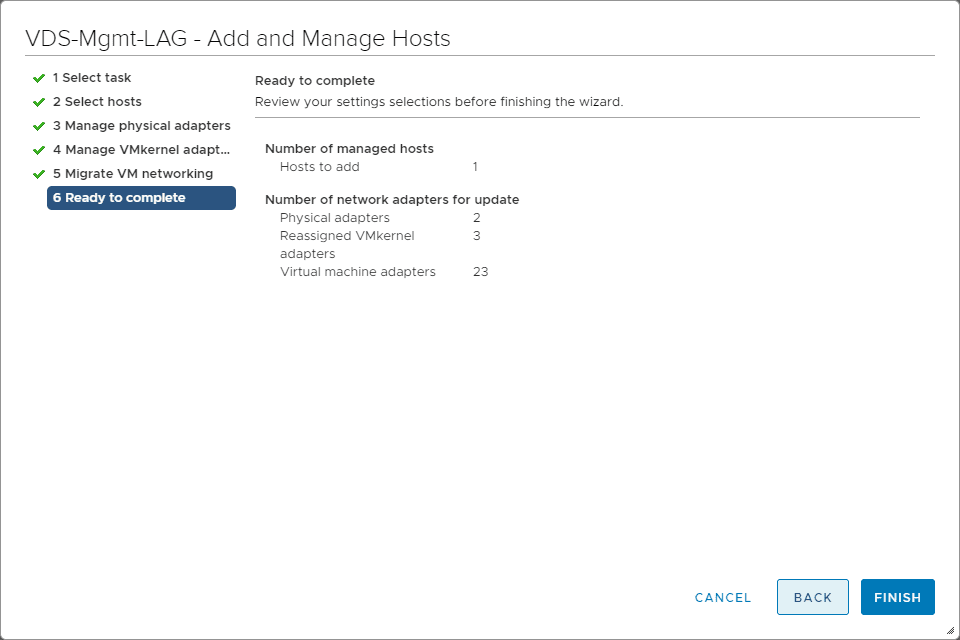
Completing the wizard.
In the lab, I didn’t migrate VMs off to be safe or place the host in maintenance mode. In a true production environment, you would probably want to take some safety measures here as this is a major shift in your networking architecture for vSAN. Just a slight misconfiguration can cause major issues.
Wrapping Up
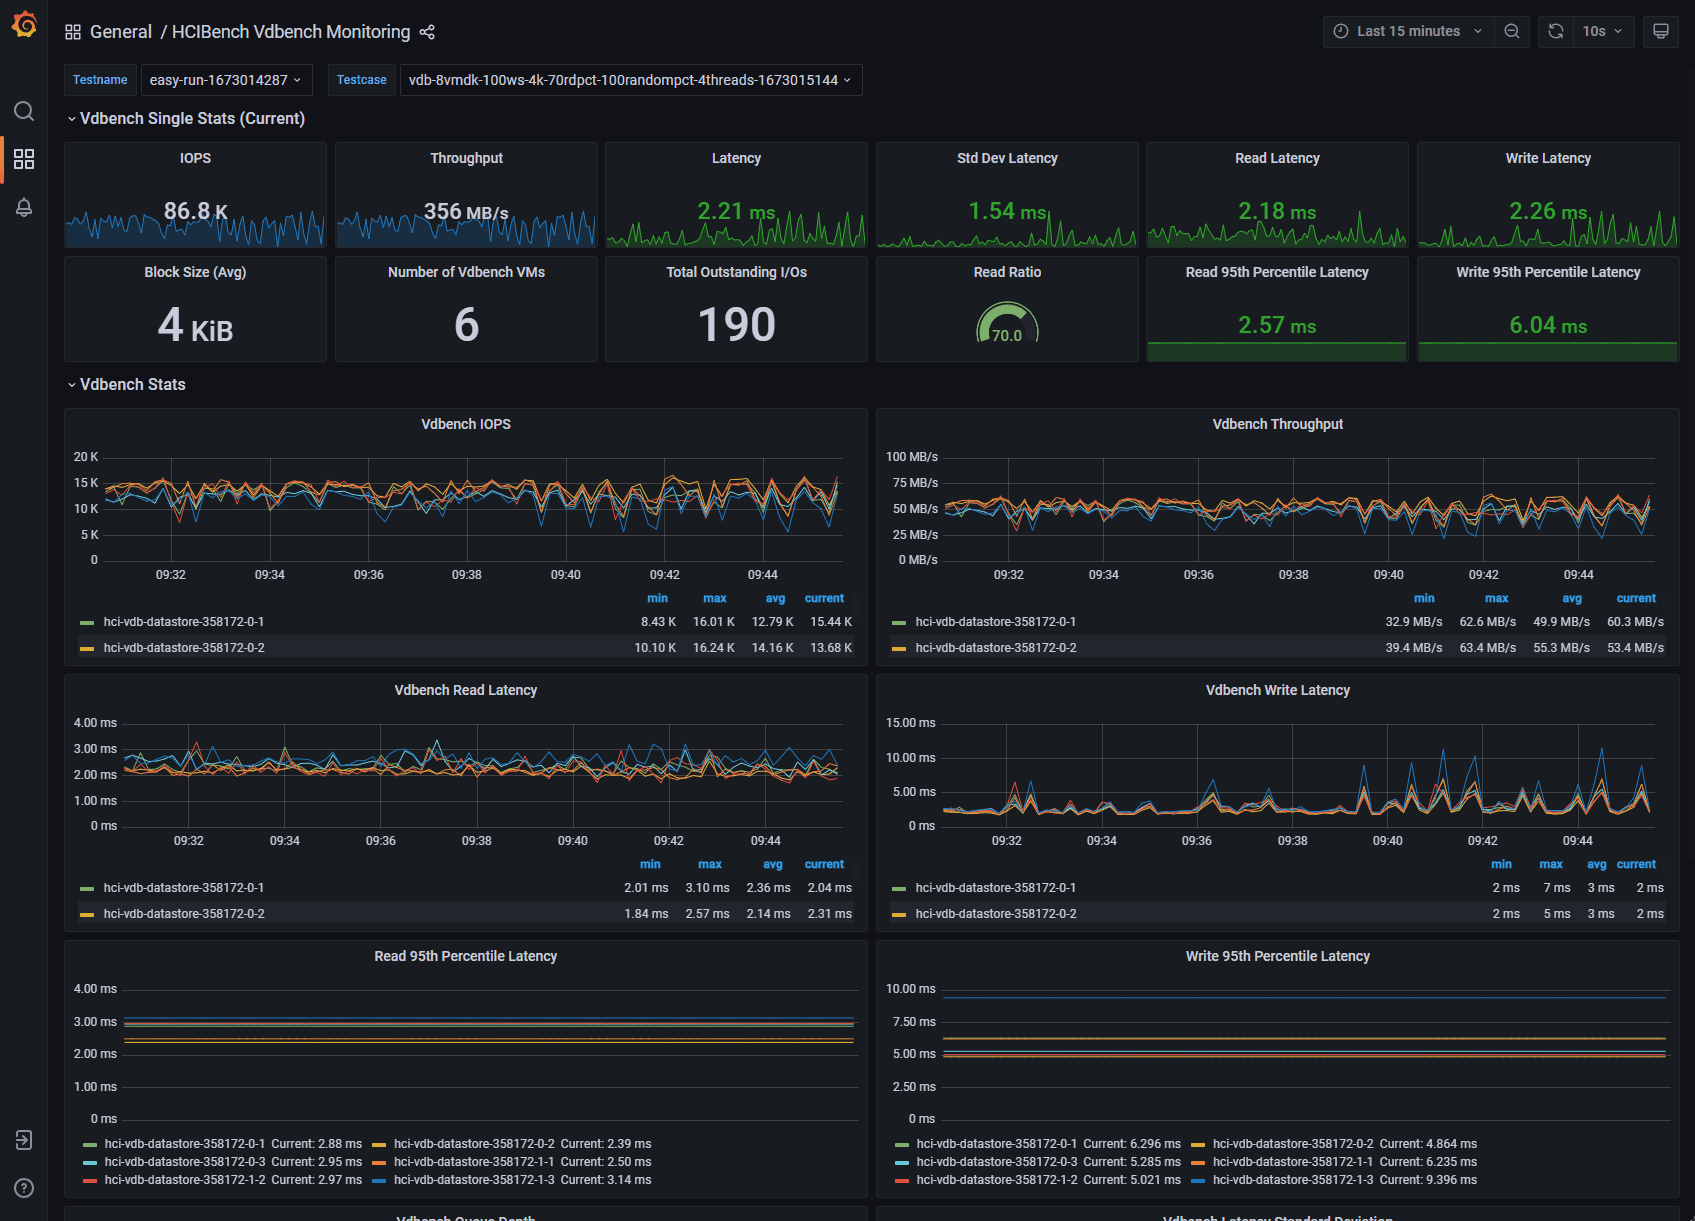
I have since seen quite a performance increase with VMware LACP Load Balancing Mode in vSAN. The single vSAN VMkernel adapter now makes use of both adapters. While it is not a true 50/50 use of the adapters, it is a much more even balance between the two.
Different environments will have different business needs. Just because there is a nice and shiny feature that you can use, it does not often make sense to use it. LACP LAG configuration adds quite a bit of complexity on top of the vSAN networking configuration. This can introduce a lot of room for error and lead to additional complexity and challenges when troubleshooting issues. Also, different switch manufacturers implement LACP differently, so there will always be the variable of your third-party switch vendor.
Be sure to check out the vSAN NIC teaming design document on the VMware storagehub here for further guidance and considerations:
More in this topic
Discuss this in the Community
Google is updating how articles are shown. Don’t miss our leading home lab and tech content, written by humans, by setting Virtualization Howto as a preferred source.
About The Author
