There are many great advantages of the new VMware vSAN 7 with VMware vSphere 7.0. I have been running vSAN 6.7 U3 in the home lab for quite a long while now. Once backup vendors started announcing their support for vSphere 7.0, I have been getting geared up to upgrade the home lab to vSphere 7.0 and vSAN 7 to go along. Just in the last couple of days, I was able to complete the task of getting my underlying physical vSphere home lab upgraded to vSphere 7.0. I have to say the process was the most seamless of the upgrades that I have done so far and I didn’t run into any major issues besides the error I encountered with the NTP Error upgrading vCenter Server to VCSA 7. As shown in that post, I was able to get past that. For the most part after that, it was smooth sailing. In this post let’s take a look at how to upgrade VMware vSAN 6.7 U3 to vSAN 7.0 and the process and steps that were involved to get the home lab upgraded.
New Features with vSAN 7 with vSphere 7.0
Just as a brief on some of the great new features that are included in the vSAN 7 release found in conjunction with vSphere 7.0, these include the following:
- Even better simplified management
- Native File Services with NFS v4.1 and v3
- Powerful Lifecycle Management with firmware updates included
- Enhanced cloud native storage
- Awareness of vSphere Replication data
- Hot-plug NVMe devices
- Improved flexibility for applications that use mult-writer shared disks (no requirement for Thick, eager zeroing)
For a full write up of the new features, see my post here of VMware vSAN 7.0 new features and capabilities.
You can also check out the official VMware page for vSAN 7.0 here:
Upgrade VMware vSAN 6.7 U3 to vSAN 7.0
The process to upgrade your vSAN environment to vSAN 7.0 involves the same type of process that has been required in previous vSphere versions. This includes the following steps in a simply vSphere environment (one with vCenter and ESXi hosts running with vSAN).
- Upgrade your VCSA 6.7 or other appliance to VCSA 7.0
- Upgrade your ESXi hosts to ESXi 7.0
- Upgrade your disk format version to vSAN 7.0
Upgrade VCSA 6.7 to VCSA 7.0
As most are aware, VMware has provided a vCenter Server Installer tool that is an ISO downloaded from VMware that provides the solution to deploy the new VCSA appliance, migrate data, and then cutover and assume all the network details of the previous appliance.
This makes the process extremely easy. The process is no different in vSphere 7.0. You simply run the tool, choose Upgrade, enter the details of your current VCSA appliance as well as connection information for the environment as well as the target environment.
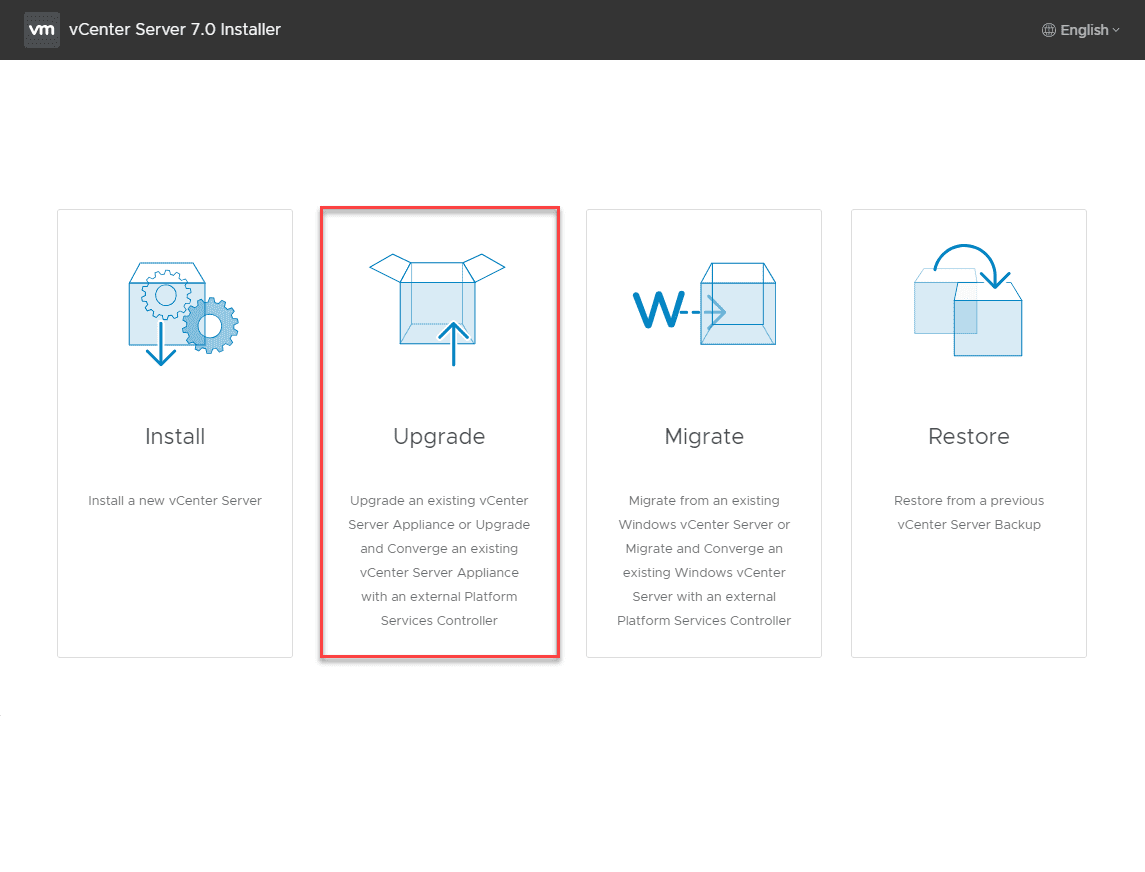
As mentioned, the process will deploy the new VCSA 7.0 appliance in Stage 1. After Stage 1, the next Stage of the vCenter Server 7.0 appliance installation is the migration of data from your source appliance to the destination appliance. After this is completed, the process powers off the source appliance and assumes the network details on the new appliance.
I am not showing the screenshots of this process in its entirety, however, I have already covered just this piece of the upgrade process in the post below:
Upgrade your ESXi Hosts to ESXi 7.0
Once you have the vSphere vCenter Server upgraded, you can proceed with upgrading your ESXi hosts. There are a couple of different ways that you can now do this with vSphere 7.0.
New with vSphere 7.0 is the new vSphere Lifecycle Manager that provides an image-based approach to upgrades and applying patches which is great. I have detailed the process to applying ESXi updates for ESXi 7.0 here:
For the vSphere 7.0 upgrade, I will be using the legacy vSphere Update Manager by uploading the ISO file and then creating a baseline that contains the ISO for upgrading.
My reasoning here is that I may be adding NSX-T in the future to my physical ESXi hosts. As of right now, NSX-T isn’t compatible with the vLCM tool. If you try to add a cluster that has NSX-T integrated, it will not let you flag on Image-based updates.
For now, I am sticking with the VUM process. Either way, you will be able to easily get the ESXi 7.0 upgrade performed without issue. For this, I have uploaded the ESXi 7.0b ISO, created a new baseline, and added the baseline as an upgrade baseline.
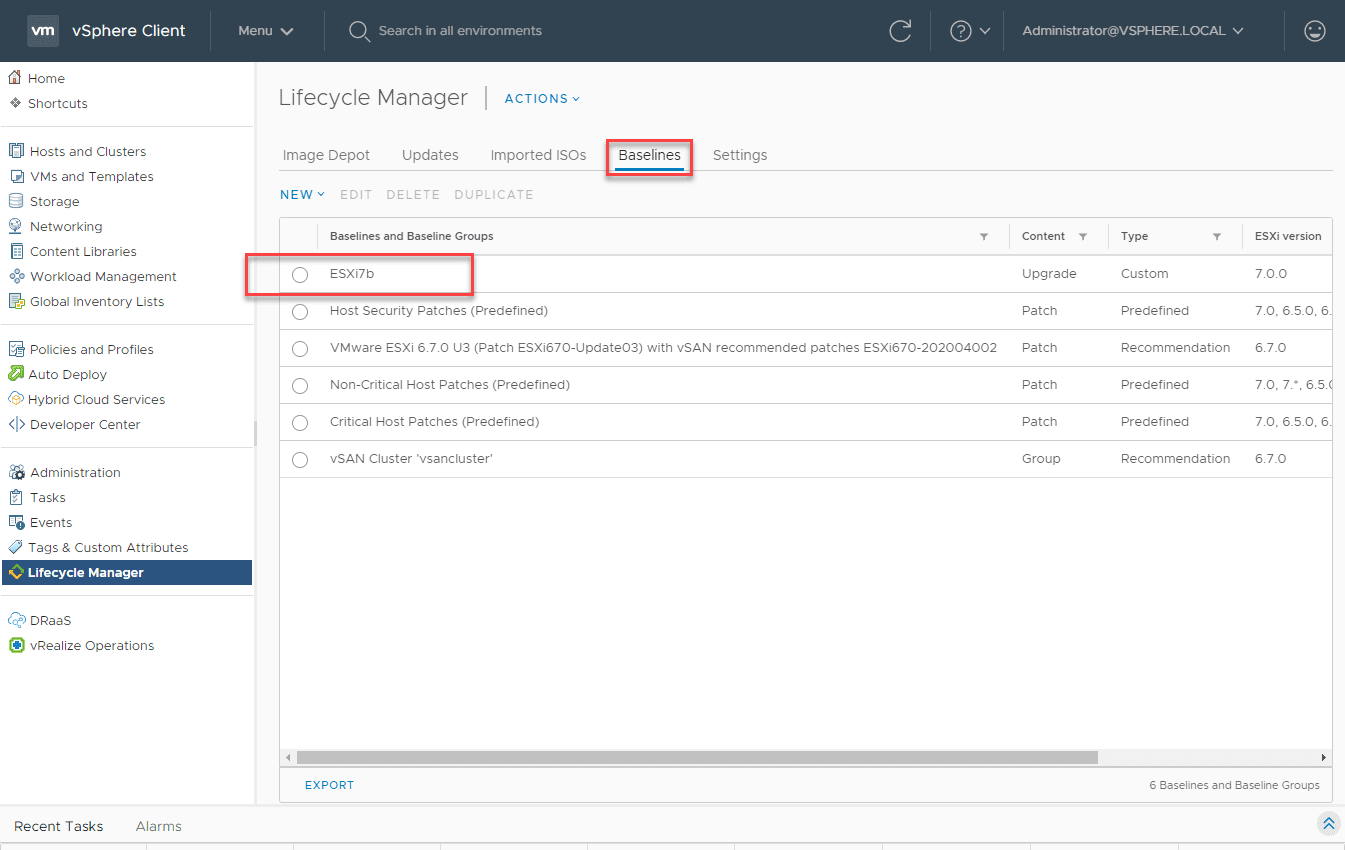
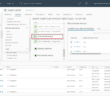
Now, we need to Attach baseline or baseline group.
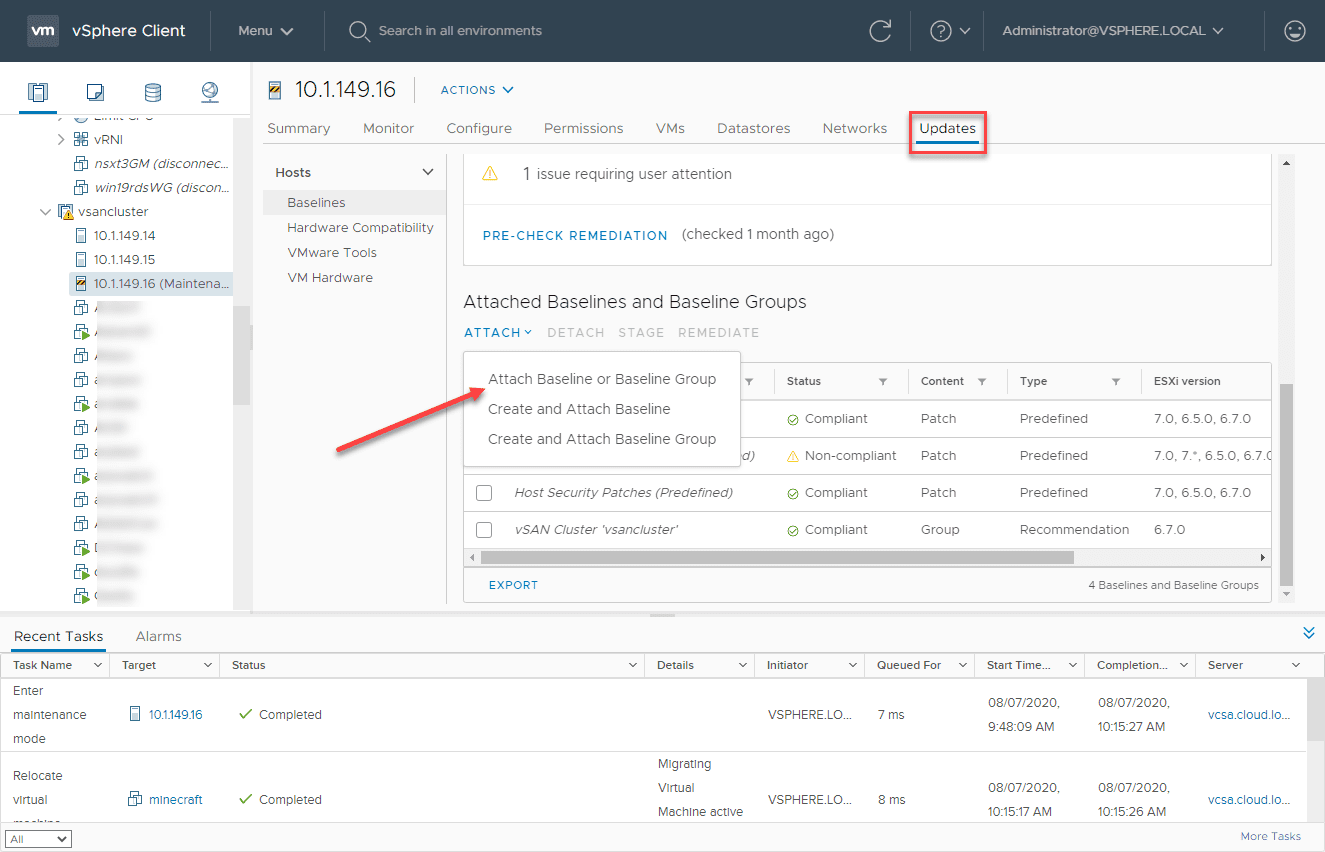
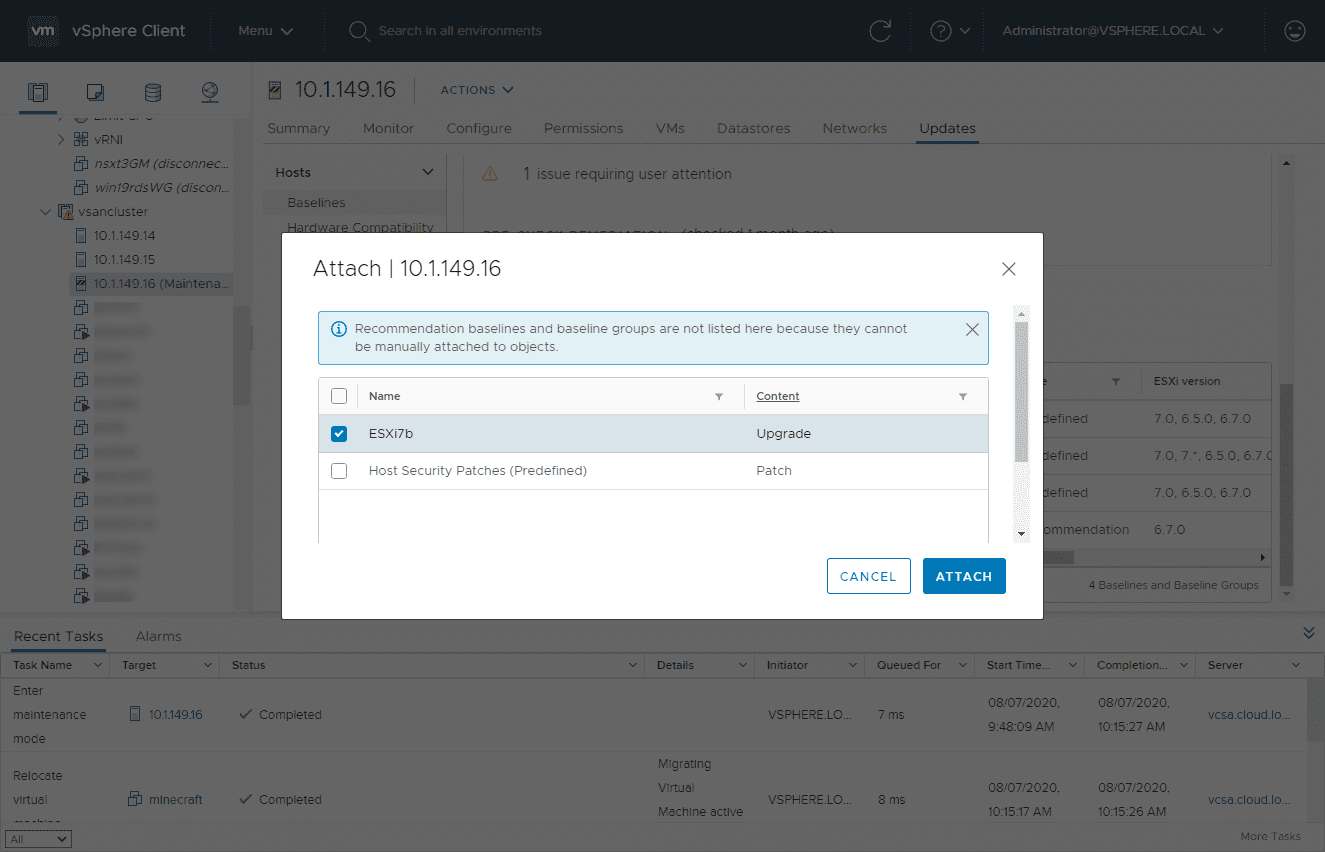
This launches the Attach <server> dialog box to allow you to select the baseline you want to attach. Here, I am selecting the ESXi 7.0b upgrade baseline. Then select Attach.
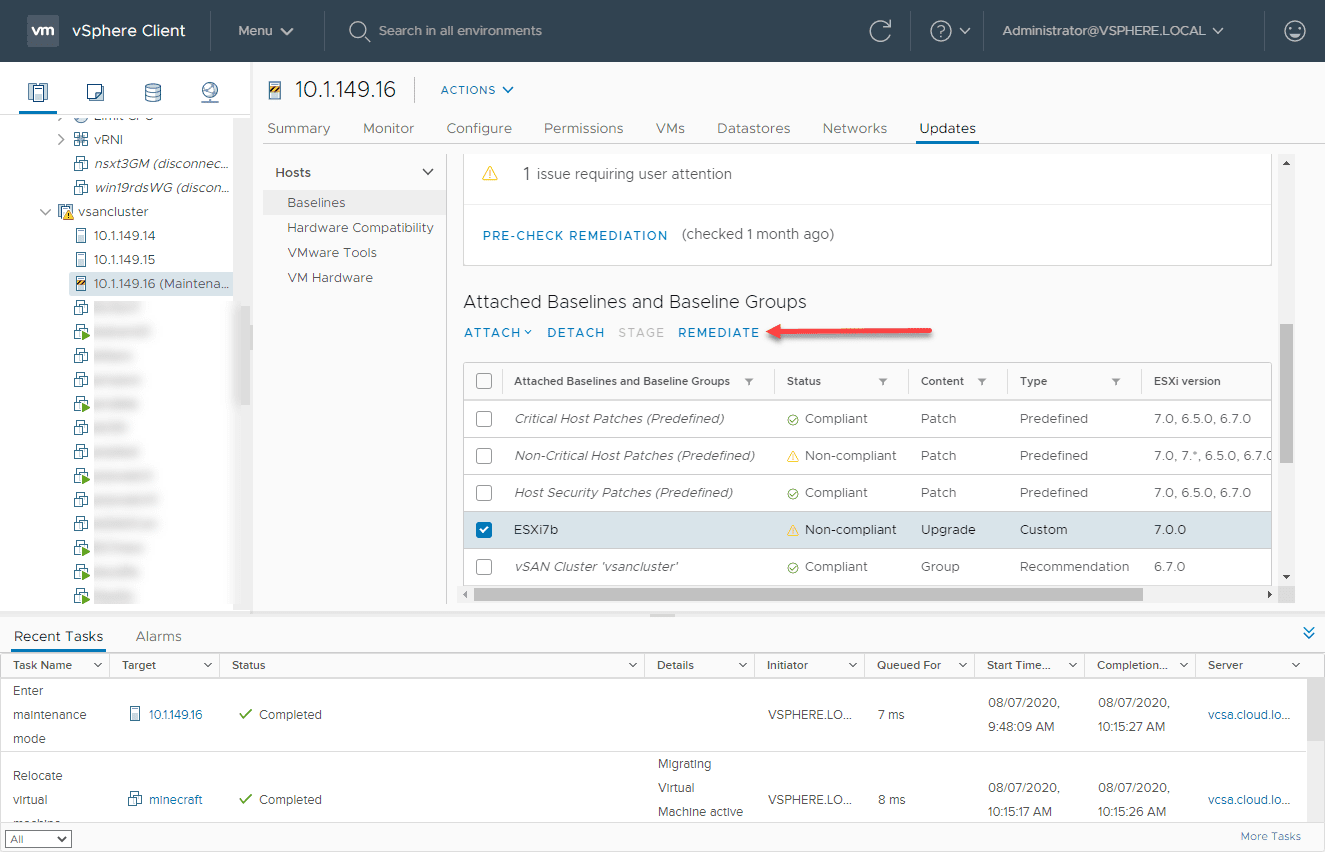
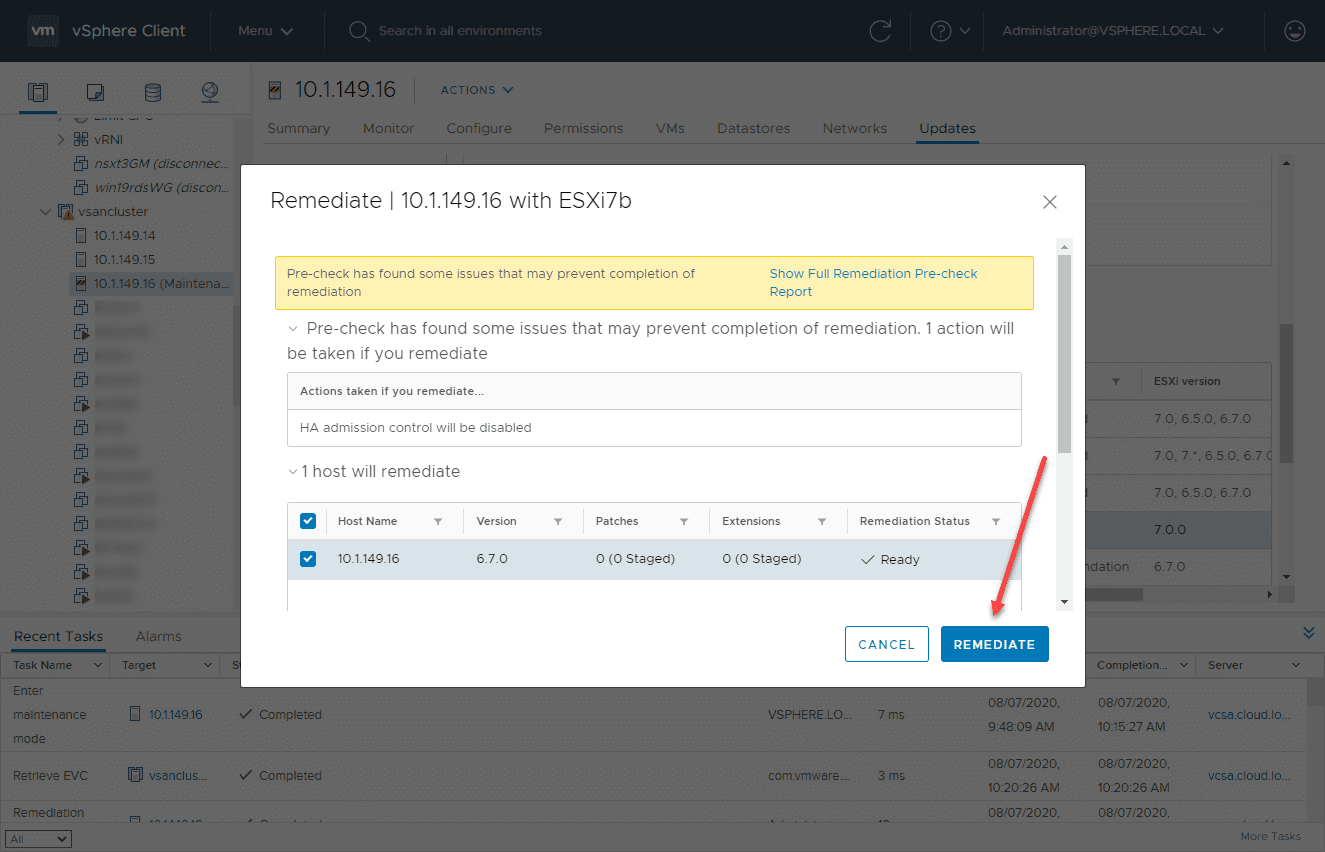
After the baseline is attached to the host, you can then select the Remediate button which begins the process to start upgrading the host to ESXi 7.0b.
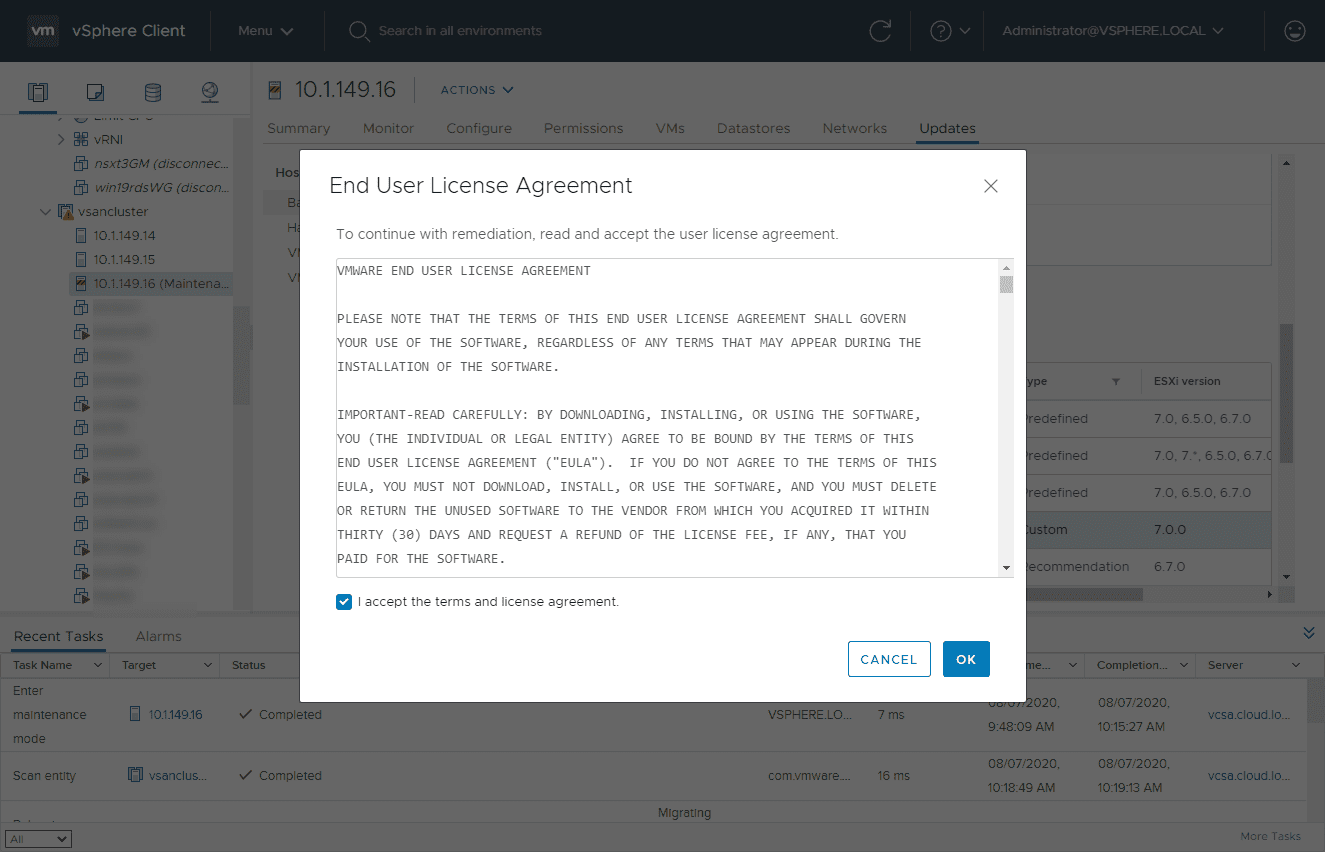
Accept the EULA.
Once you have reviewed any of the errors or warnings, you can select the Remediate button again to actually kick off the process. The warning I have here is related to using non-VMware certified hardware.
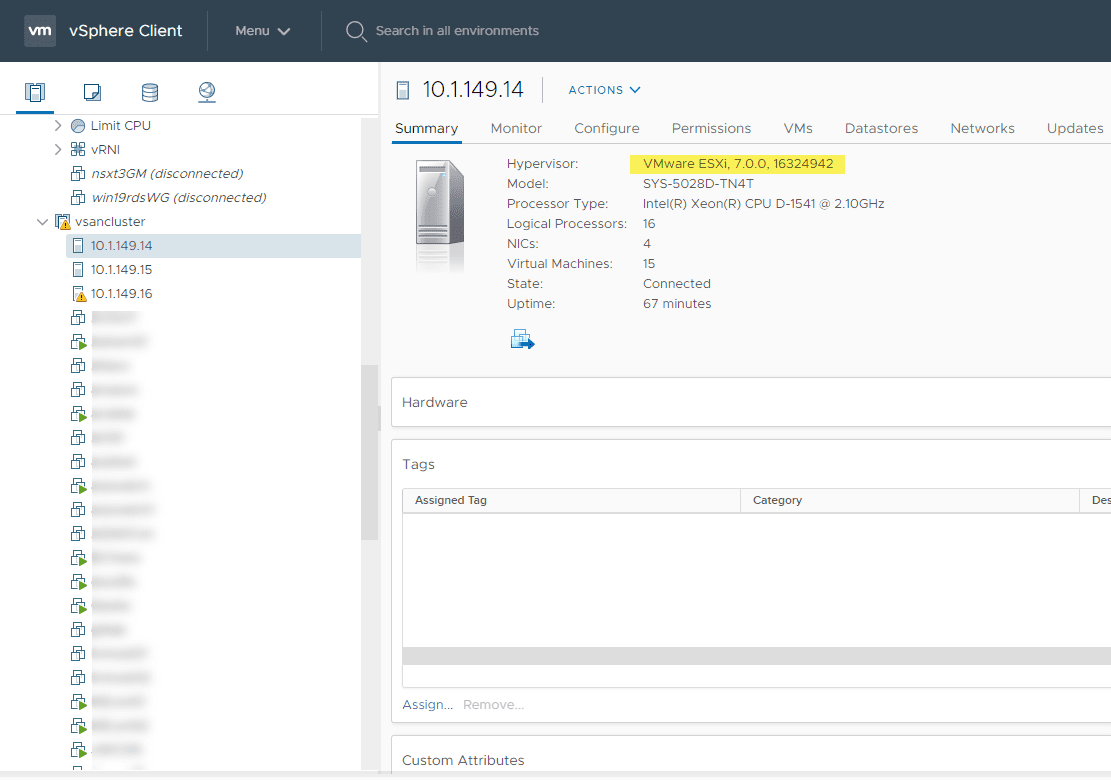
After rolling through the hosts in the cluster, I can now verify the host verion. As shown below, they are sitting on VMware ESXi 7.0.0 16324942 which is the correct version for ESXi 7.0b.
Upgrade your disk format version to vSAN 7.0
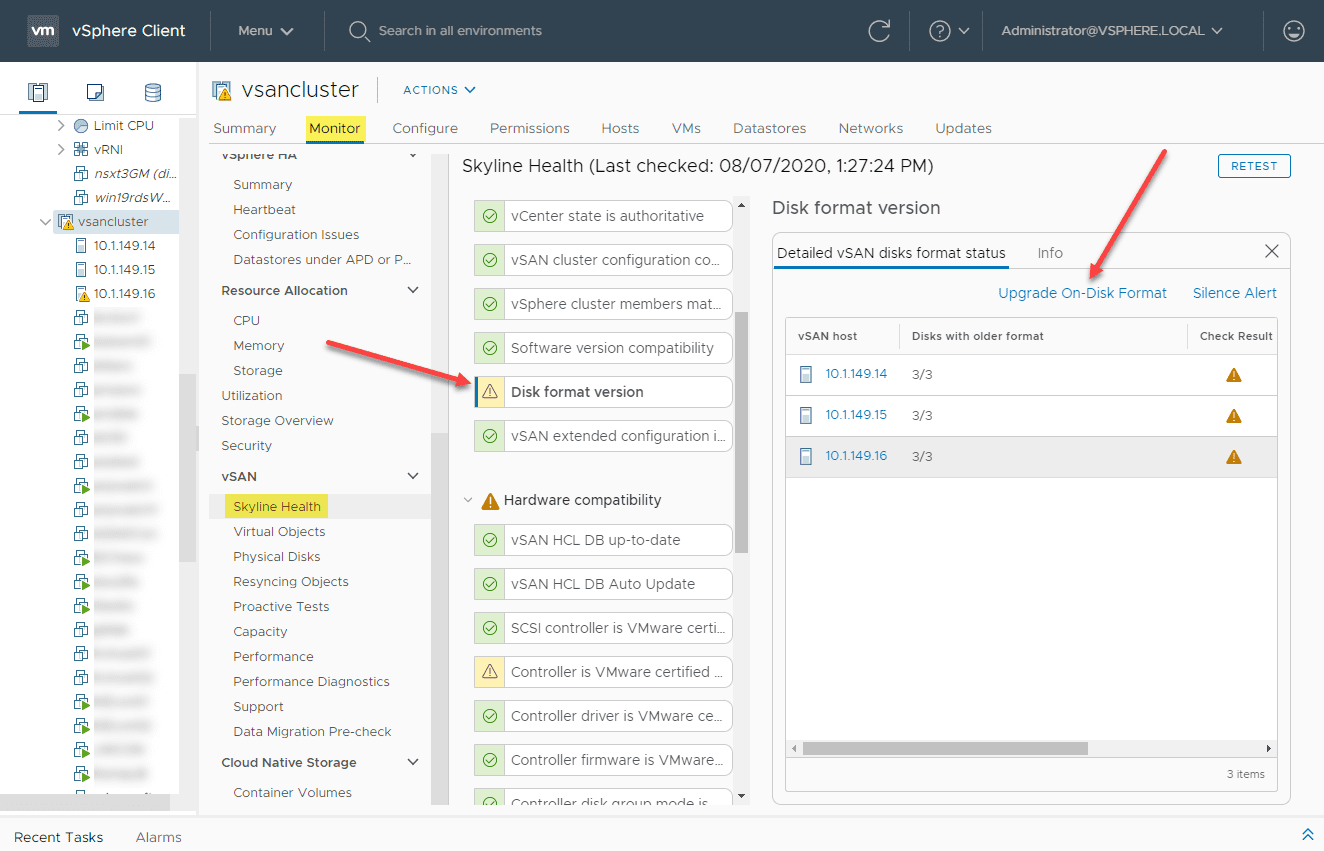
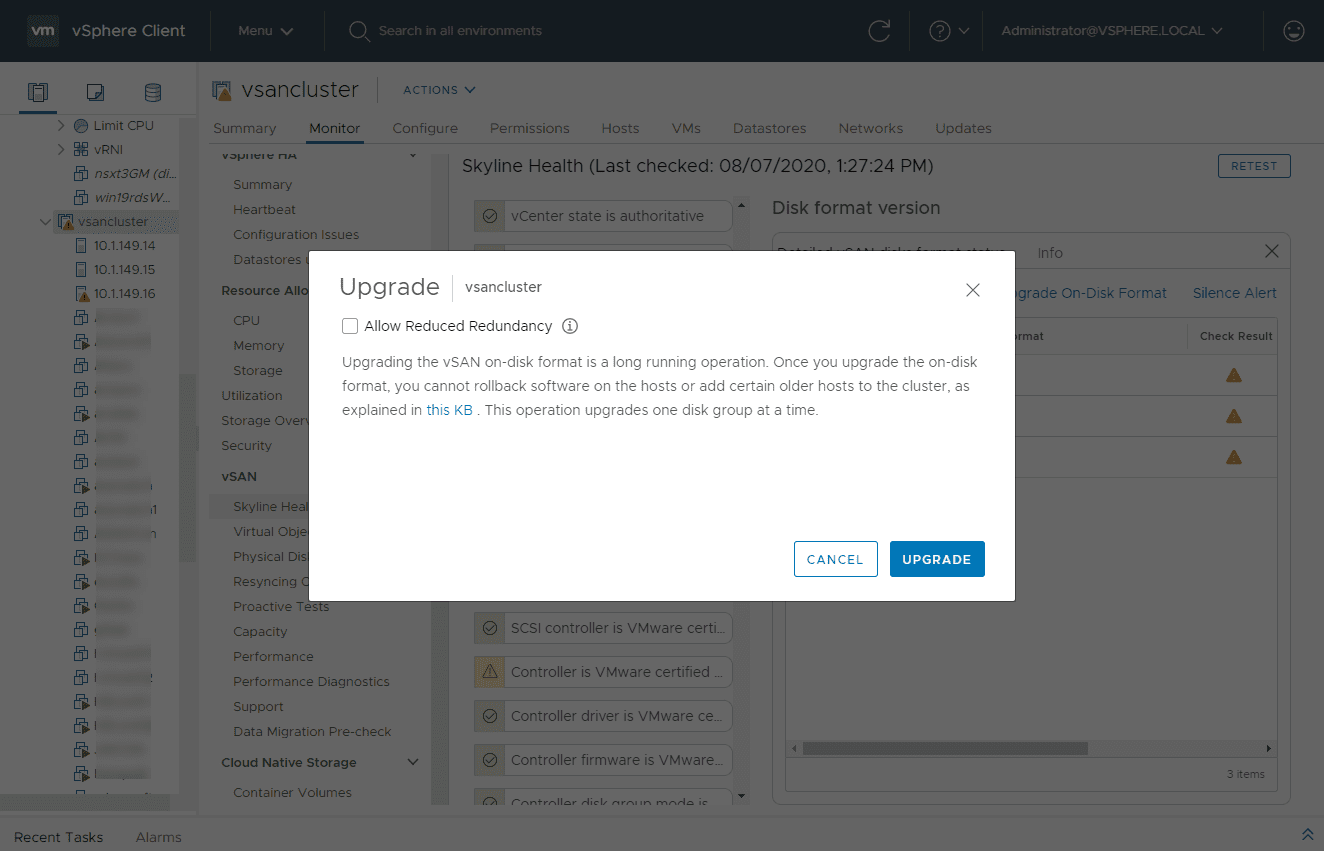
After you upgrade your ESXi hosts to ESXi 7.0, you will then have the option to upgrade your on-disk format version to vSAN 7.0 compatibility level which incidentally is version 11. To do that, navigate to Monitor > vSAN > Skyline Health > Disk format version > Upgrade vSAN disks format status.
Once you click the link to upgrade the disk format version, you will see the Upgrade dialog box pop up. You can select the Allow reduced redundancy while the on-disk operation takes place.
When you allow reduced redundancy, your VMs are not protected for the duration of the upgrade. The reduced redundancy does not evacuate data to other hosts in the cluster. Each disk group is removed, the disk format is upgraded, and adds the disk group back to the cluster.
When you are ready to proceed, you can hit the Upgrade button.
The Convert disk format for vSAN operation kicks off.
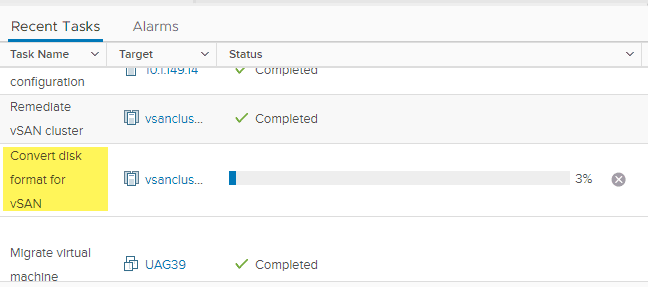
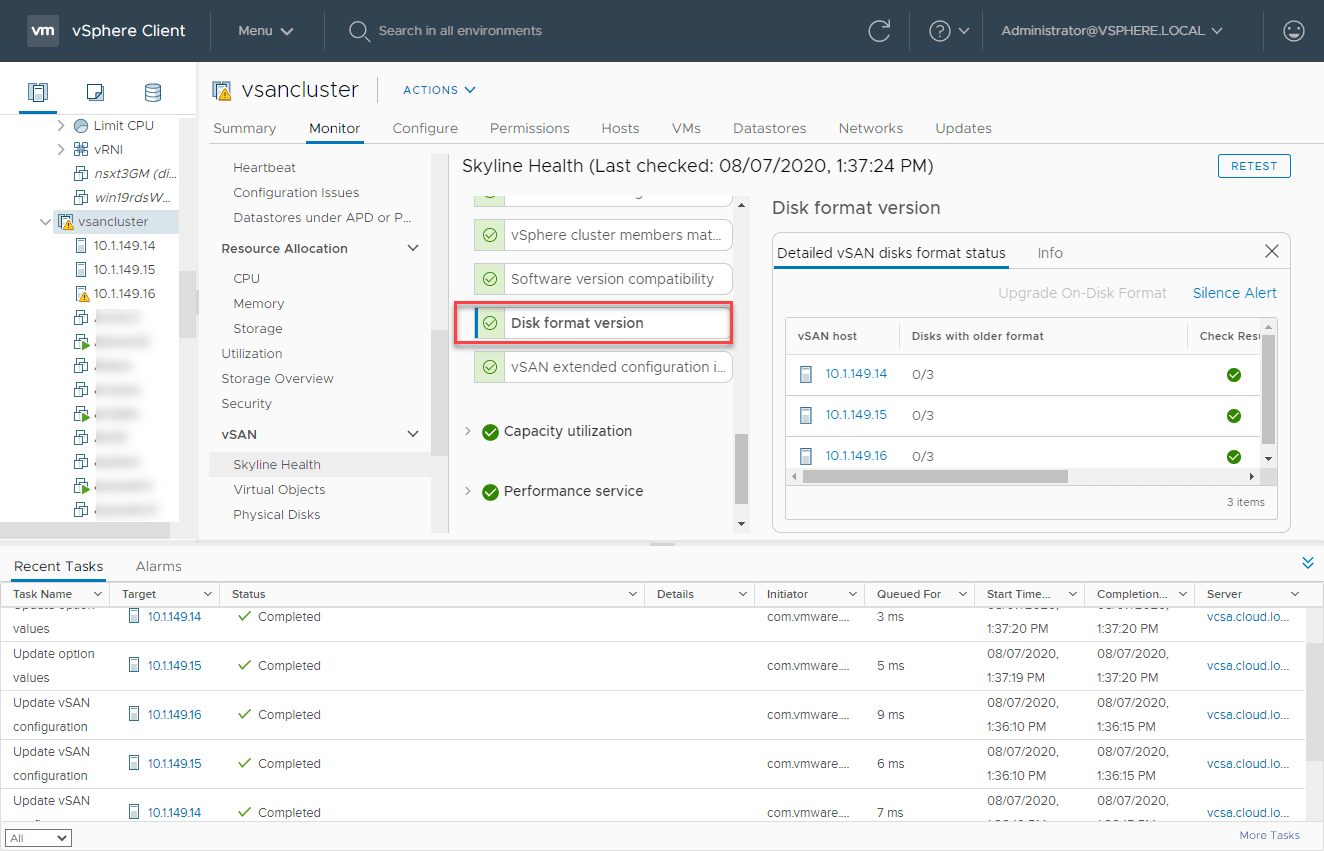
The process might take a while. I was pleasantly surprised though on my vSAN cluster with NVMe drives, it only took a few minutes. After the process completes, you will see the Disk format version turn green and pass the check.
Concluding Thoughts
As shown in the overview, the process to Upgrade VMware vSAN 6.7 U3 to vSAN 7.0 is not hard at all. This involves performing a few different steps in the right order.
First you upgrade vCenter Server using the vCenter Server 7.0 Installer, then you upgrade your ESXi hosts to ESXi 7.0. Finally, you can upgrade your on-disk format version to the vSAN 7.0 format level version 11.
Google is updating how articles are shown. Don’t miss our leading home lab and tech content, written by humans, by setting Virtualization Howto as a preferred source.
About The Author