VMware NSX-T Global Manager Appliance Install
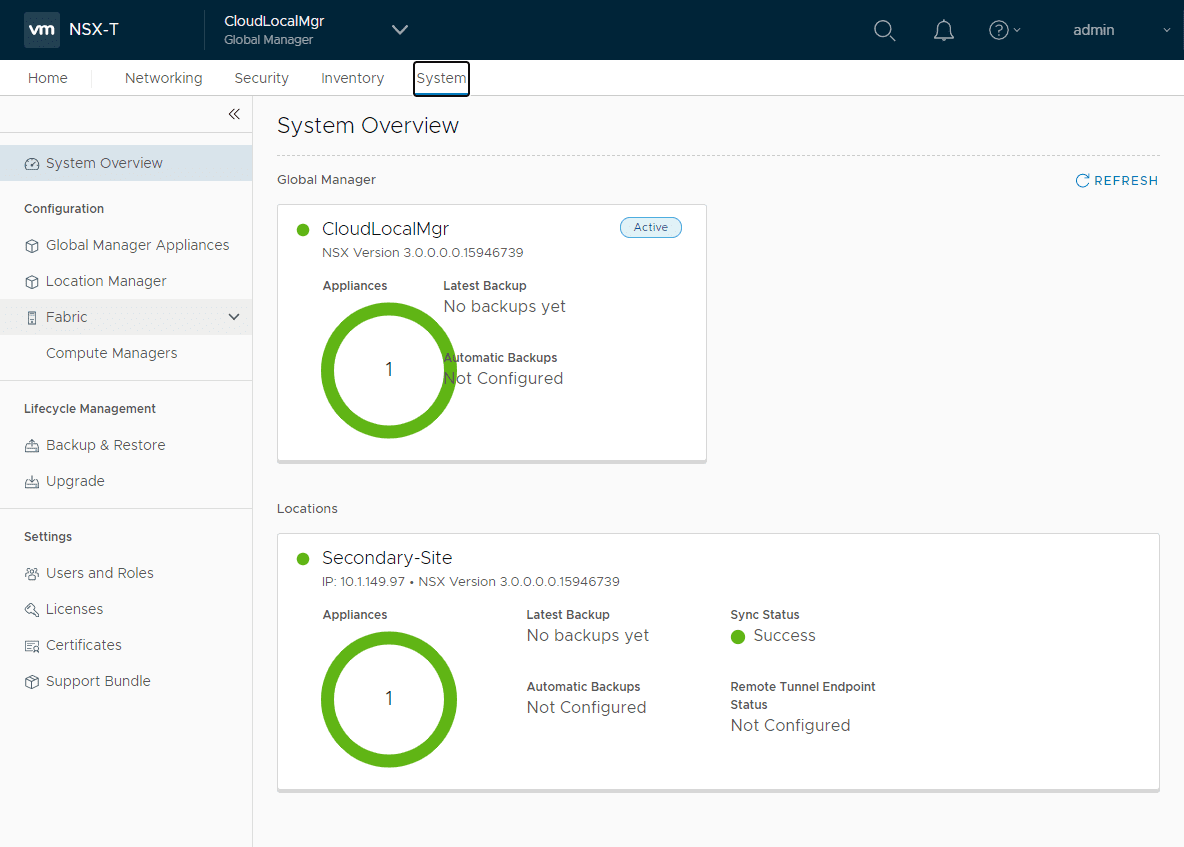
One of the really great new features of NSX-T 3.0 and higher is the introduction of the Global Manager appliance. With the global manager appliance, you have access to the really cool new features in NSX-T 3 such as NSX Federation. In this post, let’s take a quick look at VMware NSX-T global manager appliance install and getting started adding your NSX-T managers to the global manager.
What is NSX-T Data Center Federation?
With NSX-T Data center federation, you can manage multiple NSX-T data center environments from a single dashboard for seamless management. This allows creating gateways and segments that span more than one location as well as creating/enforcing firewall rules across locations. This simple addition to the NSX-T 3.0 release is extremely powerful and gives networking and security admins what they have been asking for quite some time with NSX-T.
A Federation environment includes two types of management systems:
- Global Manager: a system similar to NSX Manager that federates multiple Local Managers.
- Local Manager: an NSX Manager system in charge of network and security services for a location.
Regarding configuration, a couple of points to note:
- Configurations that are created on the Global Manager are read-only on the Local Managers. Configurations on the Local Managers are not synced with the Global Manager.
- The Global Manager syncs a configuration with a Local Manager only if the configuration is relevant to that location. For example, if you create a tier-0 gateway and add it to Location 1, Location 2, and Location 3, the configuration is synced with all three Local Managers.
To understand more of the specifics with NSX Federation, check out the KB here:
VMware NSX-T Global Manager Appliance Install
What are the steps involved to install the NSX-T Global manager appliance? This is an additional deployment of the Global Manager appliance OVA in your environment and selecting the special global manager role during deployment.
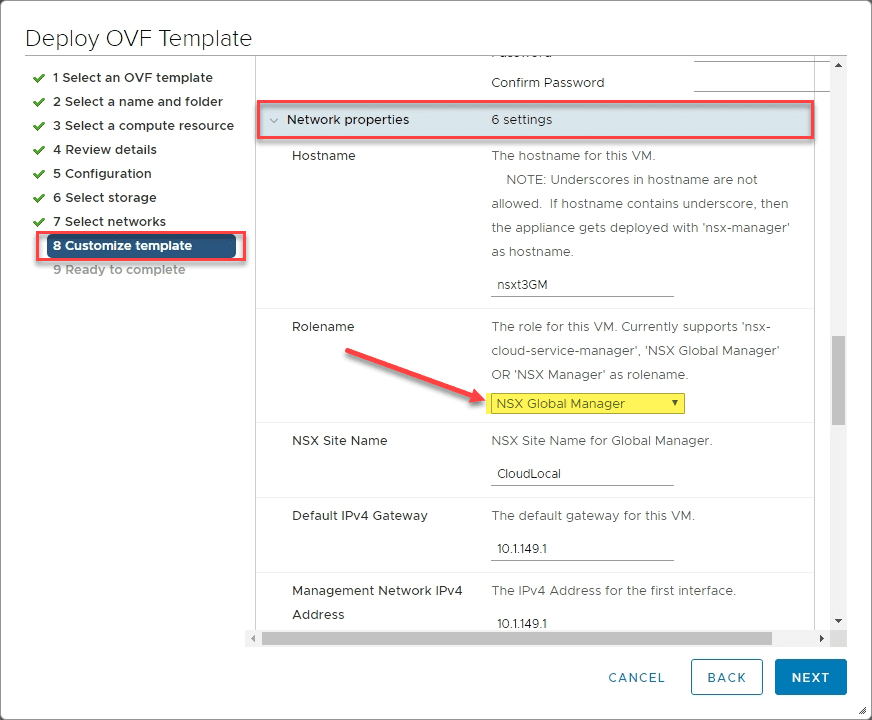
I won’t bore you with screenshots of the rest of the OVA deployment, however, below, step 8 Customize template is where you choose to deploy the NSX Global Manager instead of a normal NSX-T Manager.
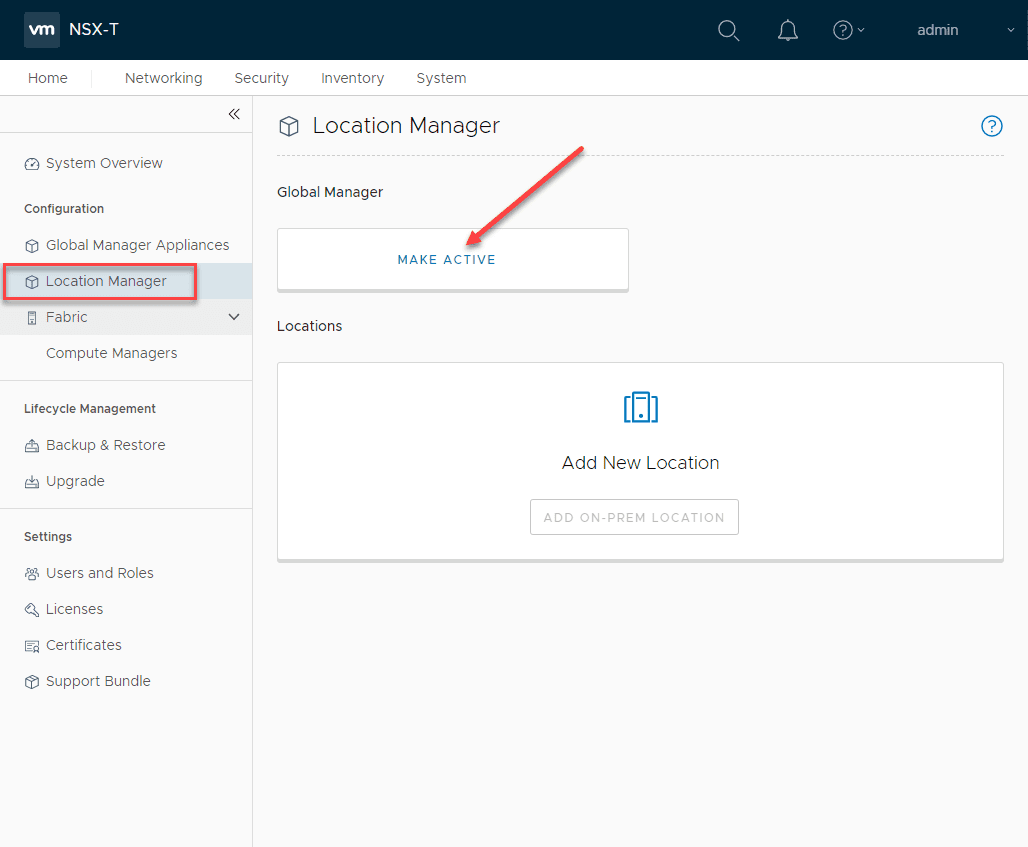
Once you have deployed the NSX Global manager, you will need to make it active. This is done by navigating to Local Manager under System and selecting the Make Active link there.
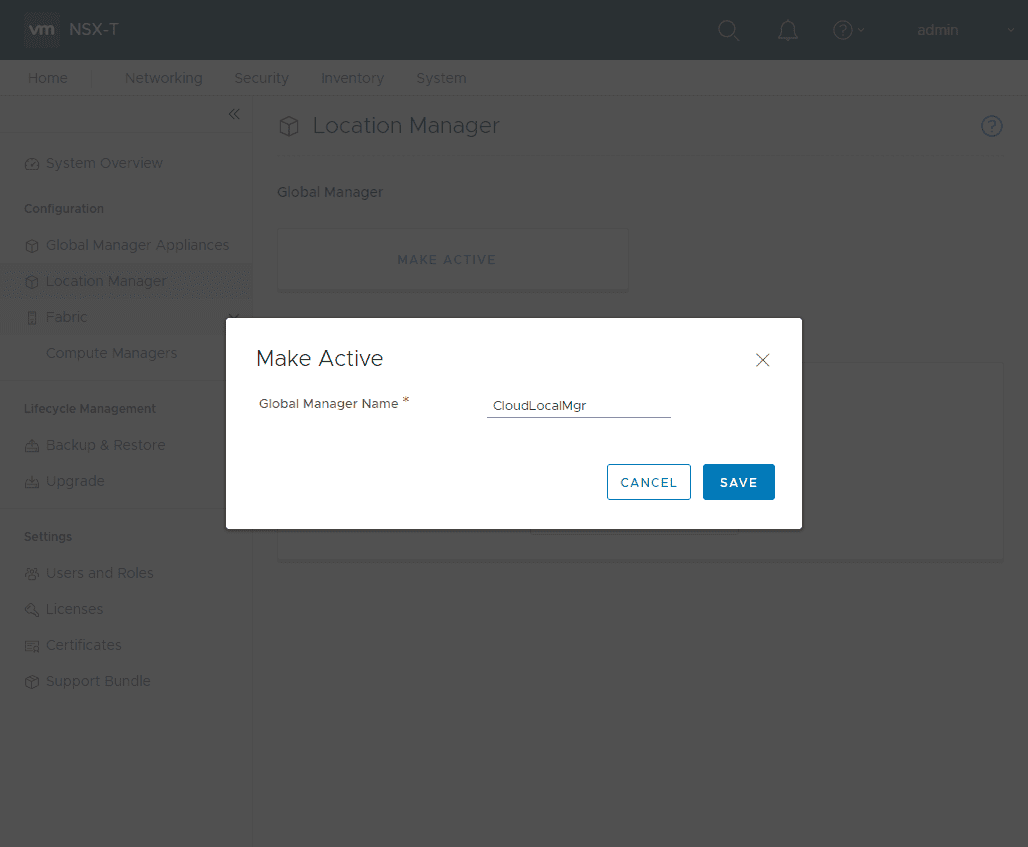
Once you select o make the NSX Global Manager active, you enter a Global Manager name. Click Save.
Adding NSX-T Global Manager locations
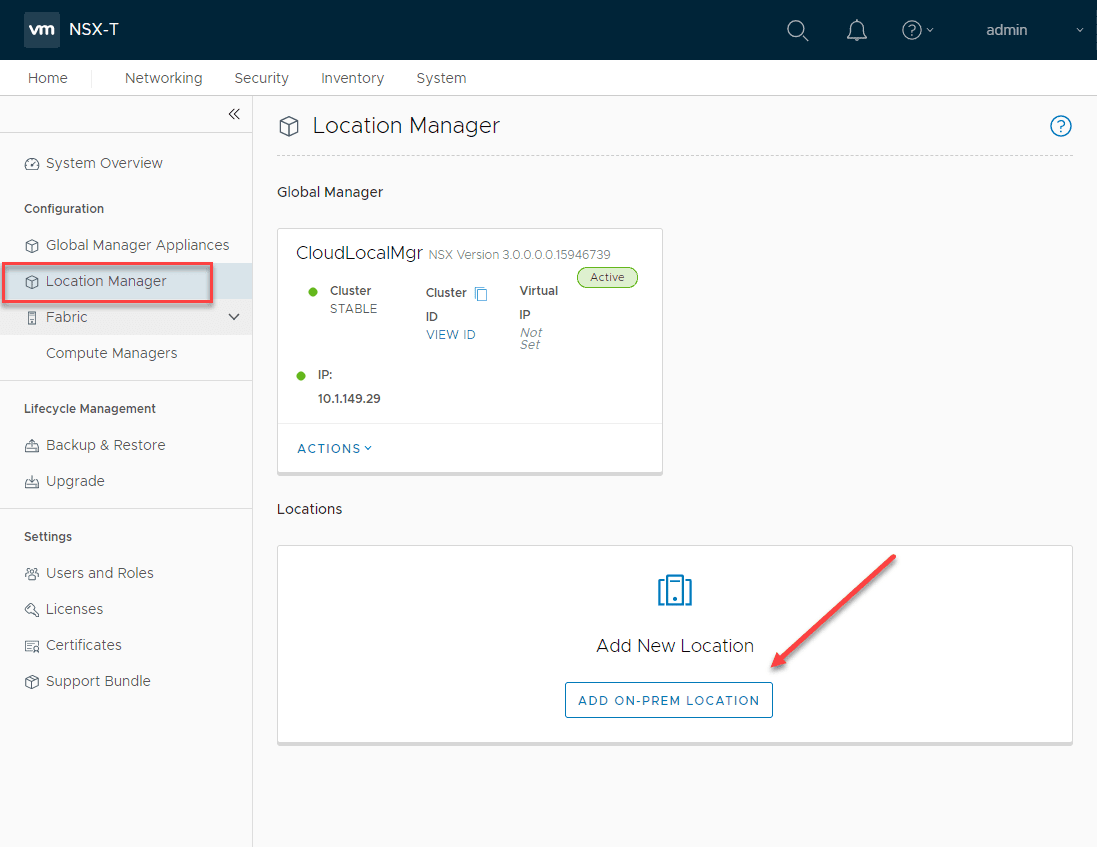
The next step is adding NSX-T Global Manager locations. This is done on the same screen as making the Global Manager active under the Location Manager > Add New Location area.
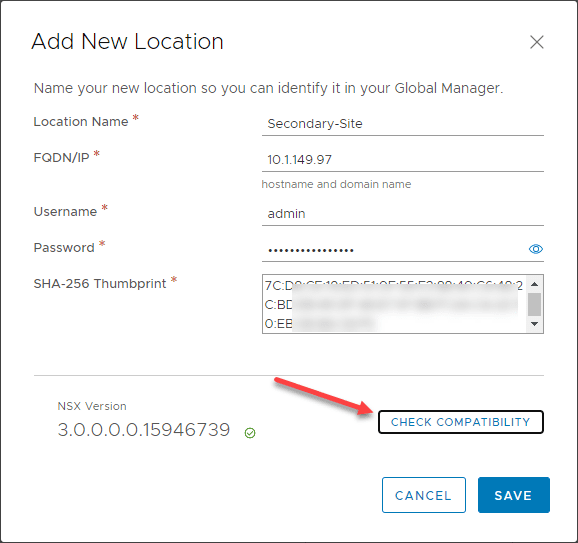
On the Add New Location screen, you enter the location name, FQDN/IP, username, password, and SHA-256 Thumprint. In case you are wondering how you can get the thumbprint of the existing NSX-T Manager, from one of the NSX-T manager appliances in your cluster, you can type:
get certificate cluster thumbprint
Once you have the information filled in, select the Check Compatibility button. Once compatibility is verified, click the Save button.
The new location addition will synchronize and should show up as successful after a few moments.
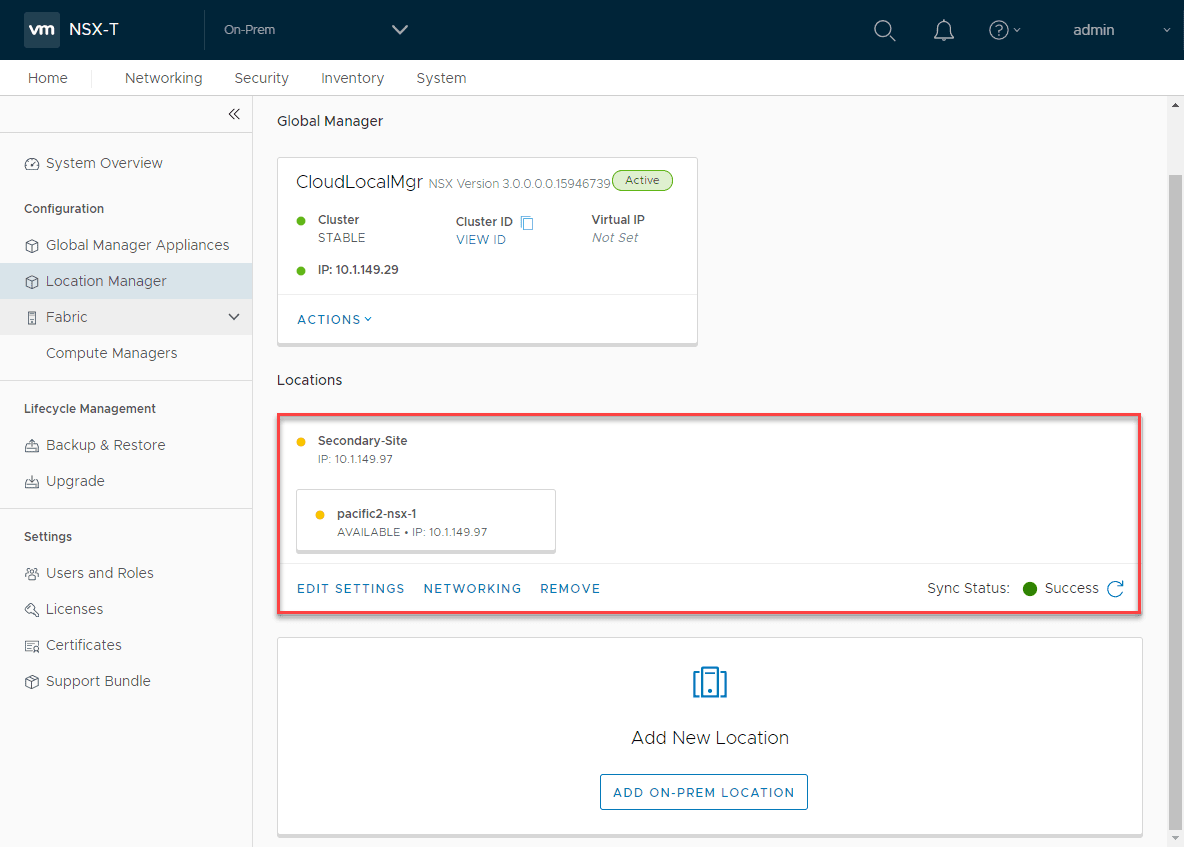
After adding the secondary location, you will see the locations show up under the system overview. This will include the global manager and the Secondary site. From one dashboard you can see sync status, etc.

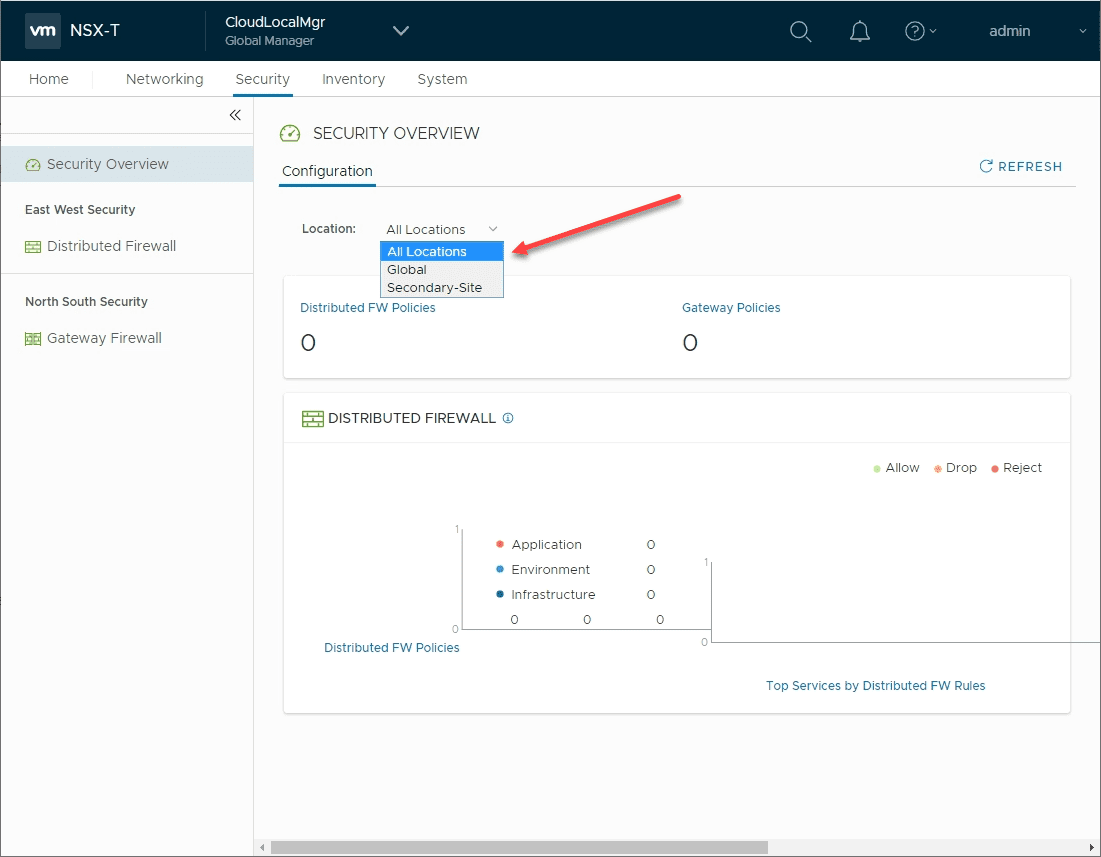
Under the security overview, you will see under the location dropdown, you will note you can select between all locations as well as your various NSX Manager appliances and their respective locations.
Wrapping Up
The NSX Manager global appliance is easy to spin up and allows quickly getting up and running with adding additional locations to the appliance and beginning to manage your NSX environment under a single-pane-of-glass interface. This will help to simplify environments with multiple sites configured with NSX and keeping a streamlined, consistent policy configured across sites.


