When many enthusiasts or home labbers start to look at services they want to run at home after purchasing some server gear, DNS server is one of the first services that you can benefit from. DNS provides the core name resolution for your home lab and server environment. Hosting your own DNS server provides many benefits over using the configured ISP’s DNS server settings.
Requirements for this post:
- Access to a host that will run Technitium
- Can be a full Linux/Windows OS or Docker host
- Internet connectivity to pull down the Technitium image/install
- Install Docker and Docker Compose if going the container route
- Point clients to the new server
Table of contents
- What is a DNS Server?
- Why is DNS Important for Home Lab?
- What is Technitium DNS Server
- Technitium DNS Server: Features and Benefits
- How Does Technitium Compare to Pi-Hole and AdGuard Home?
- Installing Technitium – Step-by-Step
- Robust DNS conditional forwarder zone support
- Roles and RBAC
- Other screens, features, and configuration
- Technitium vs. Other DNS Providers
- Wrapping up: My thoughts on Technitium
- Other posts you may like
What is a DNS Server?
A DNS (Domain Name System) server is one of the technological foundations of the Internet. It translates human-readable domain names into IP addresses. It acts as a phonebook for the Internet, allowing humans to not have to remember the IP addresses of their favorite websites or server hosts, but instead type in friendly, easy-to-remember names. DNS servers are responsible for domain name resolution and handle clients’ DNS requests.
Recursive DNS Server
A recursive DNS server is a type of DNS server that directly handles DNS requests from clients. It plays a vital role in resolving domain names and can be configured as a locally running DNS server or use different DNS provider options.
Why is DNS Important for Home Lab?
If you are running a home server or home lab environment with many self-hosted resources, running your own DNS server has many benefits. These include:
Enhanced privacy and security
Performance
Name resolution for local resources
Enhanced Privacy and Security
Many host their own DNS server for privacy and security reasons. A DNS server for privacy can block ads malware at the DNS level and employ HTTPS security. Server options for privacy security include features like encrypted DNS protocols and DNSSEC validation support.
Also, it means you are filtering and sanitizing your DNS requests before they leave the control of your network, allowing you to squash unwanted privacy and security concerns before they happen.
Performance
A self-hosted high-performance DNS server offers advanced DNS blocking and custom DNS response based on your needs. In other words, your queries from clients will hit your local DNS server first and resolve from cache; only if the DNS server needs to forward the request will the traffic traverse outside your network.
Name resolution for local resources
You may be using a “.local” or “.lab” suffix for your internal domain. If that is the case, you will need a way to resolve these names inside your network since they won’t exist outside the network.
Hosting your own DNS server allows effectively answering these queries for resources that only exist in your lab environment without the possibility of the lookups failing and eliminating the need to handle name resolution in less efficient ways, like manipulating host files.
What is Technitium DNS Server
Technitium DNS Server is more than just a DNS server; it’s a tool that empowers users to host a DNS server, configure their ISP’s DNS server, and even self-host a DNS. With features like encrypted DNS protocols and wildcard subdomain support, it’s a versatile solution for privacy and security.
Like Pi-Hole and Adguard Home, it allows blocking ads malware at DNS layer.
Also, like other self-hosted DNS services, you can run Technitium on commodity desktop pc hardware or run it inside a Docker container, as we will see below.
Technitium DNS Server: Features and Benefits
Note the following benefits of Technitium DNS server:
Advanced forwarding
Enhanced privacy and security
User friendly console
- DNS Apps
Advanced Forwarding DNS App and Extended DNS Errors Support
Technitium DNS Server offers an advanced forwarding DNS app that enhances the user experience. Extended DNS errors support ensures that users can troubleshoot issues with ease. These features contribute to making Technitium a high-performance DNS server.
DNS Server for Privacy Security
With server options for privacy security, Technitium DNS Server configured settings provide robust protection. Block ads malware at the DNS level and employ HTTPS security to safeguard your entire network.
User-Friendly Web Console and Modern Web Browser Compatibility
You don’t have to read a DNS server user manual to run Technitium. The user-friendly web console in Technitium allows for easy navigation and management. Compatibility with modern web browsers ensures that users can access the DNS server core functionalities without hassle.
One complaint that I do have about the interface is there is no dark mode unfortunately 🙁
DNS Apps
As we will see below, DNS Apps in Technititum allow extending the capabilities of Technititum and allow it to do even more. It makes it a highly modular solution that sets it apart from other self-hosted DNS solutions.
How Does Technitium Compare to Pi-Hole and AdGuard Home?
Technitium DNS Server vs. Pi-Hole
Technitium DNS Server offers advanced features like DNS server HTTP API and extended DNS errors support. Unlike Pi-Hole, Technitium supports DNS notify support and dynamic DNS updates support. It has much more robust conditional forwarding support as well. I do think the web console in Pi-Hole looks better than Technitium with the default dark mode and modern UI.
Check out my video on using Unbound with Pi-hole here:
Technitium DNS Server vs. AdGuard Home
Compared to AdGuard Home, Technitium offers unique features like custom DNS apps feature and more robust domain zone handling. With options to route DNS through different client IP addresses and support for DNS apps, Technitium stands out vs Adguard. The DNS cache management and frequent DNS resolution support make it a good choice.
Installing Technitium – Step-by-Step
Let’s consider installing Technitium as a self-hosted resource on your home server environment, including configuring the operating system’s DNS resolver for clients, etc.
One of the easiest ways to install Technitium is by using a Docker container. You can easily spin up Technitium using Docker Compose. To get Docker and Docker Compose up and running in Ubuntu, you can use the following:
sudo apt-get update \
sudo apt-get install \
    ca-certificates \
    curl \
    gnupg \
    lsb-release -y && \
sudo mkdir -m 0755 -p /etc/apt/keyrings
curl -fsSL https://download.docker.com/linux/ubuntu/gpg | sudo gpg --dearmor -o /etc/apt/keyrings/docker.gpg && \
echo \
  "deb [arch=$(dpkg --print-architecture) signed-by=/etc/apt/keyrings/docker.gpg] https://download.docker.com/linux/ubuntu \
  $(lsb_release -cs) stable" | sudo tee /etc/apt/sources.list.d/docker.list > /dev/null && \
sudo apt-get update && \
sudo chmod a+r /etc/apt/keyrings/docker.gpg
sudo apt-get update && \
sudo apt-get install docker-ce docker-ce-cli containerd.io docker-buildx-plugin docker-compose-plugin -y
Use the following code found on the official Technitium GitHub repository to create a new Technitium contanier.
You can uncomment the line for admin password:
DNS_SERVER_ADMIN_PASSWORD
Or you can use a password file and uncomment that line alternatively.
services:
  dns-server:
    container_name: dns-server
    hostname: dns-server
    image: technitium/dns-server:latest

    ports:
      - "5380:5380/tcp"  # Web console (HTTP)
      - "53:53/udp"      # DNS service
      - "53:53/tcp"      # DNS service
      # Optional ports - uncomment as needed:
      # - "53443:53443/tcp"  # Web console (HTTPS)
      # - "853:853/udp"      # DNS-over-QUIC
      # - "853:853/tcp"      # DNS-over-TLS
      # - "443:443/udp"      # DNS-over-HTTPS (HTTP/3)
      # - "443:443/tcp"      # DNS-over-HTTPS (HTTP/1.1, HTTP/2)
      # - "67:67/udp"        # DHCP service

    environment:
      - DNS_SERVER_DOMAIN=dns-server
      # Uncomment and set for production:
      # - DNS_SERVER_ADMIN_PASSWORD=your_secure_password
      # - DNS_SERVER_PREFER_IPV6=false
      # - DNS_SERVER_RECURSION=AllowOnlyForPrivateNetworks
      # - DNS_SERVER_FORWARDERS=1.1.1.1,8.8.8.8

    volumes:
      - config:/etc/dns

    restart: unless-stopped

    sysctls:
      - net.ipv4.ip_local_port_range=1024 65000

volumes:
  config:
Place the code inside a new docker-compose.yml file and then issue the command:
docker compose up -d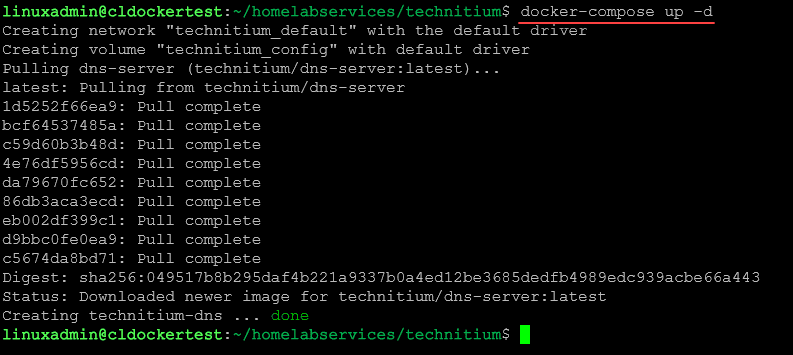
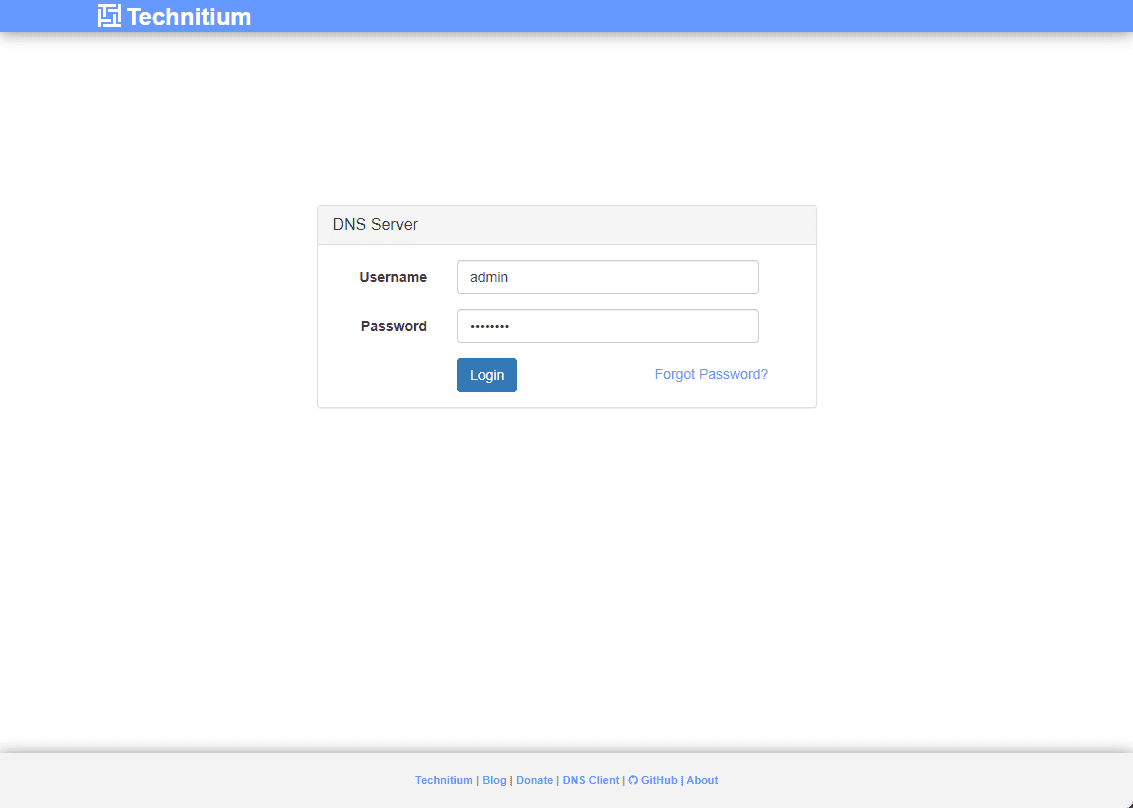
At this point, you should be able to browse to the IP address of your Docker host, hosting the Technitium server and enter the credentials configured in the Docker Compose code.
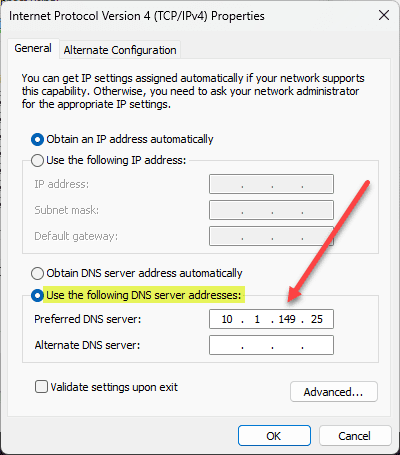
To start having Technitium answer DNS queries, point your clients to the Technitium DNS server IP (Docker host IP if hosted in Docker). You can automate this configuration of course by configuring your DHCP server to hand out the IP address of your Technitium DNS server.
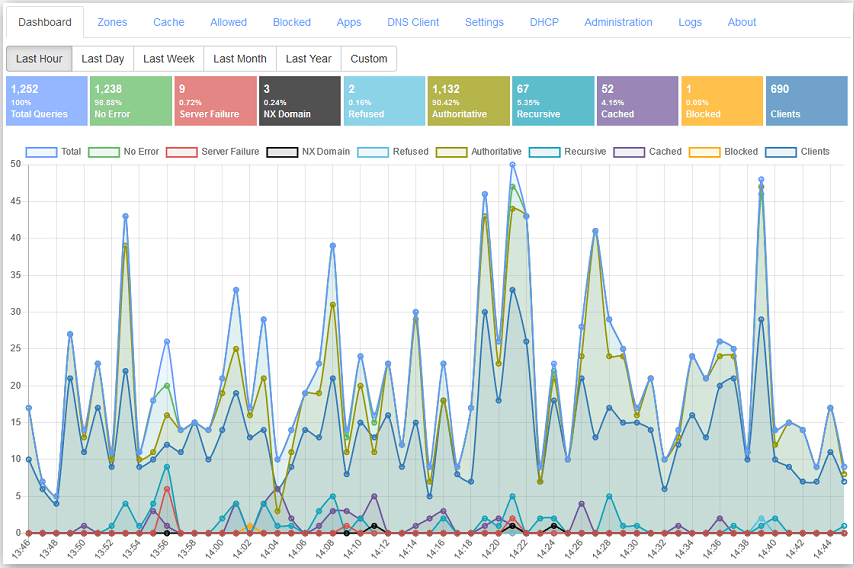
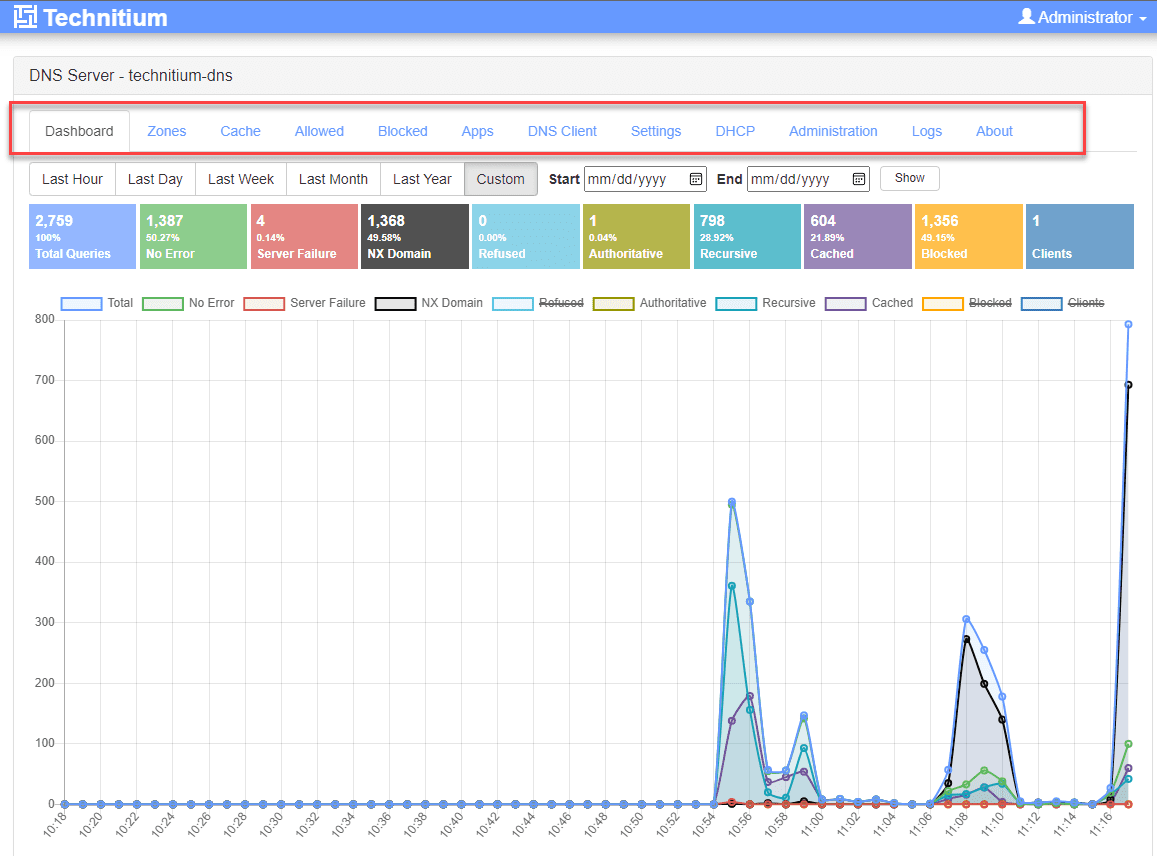
After a few moments (you may need to refresh the Dashboard screen), you will see the DNS query activity hit the Technitium DNS server.
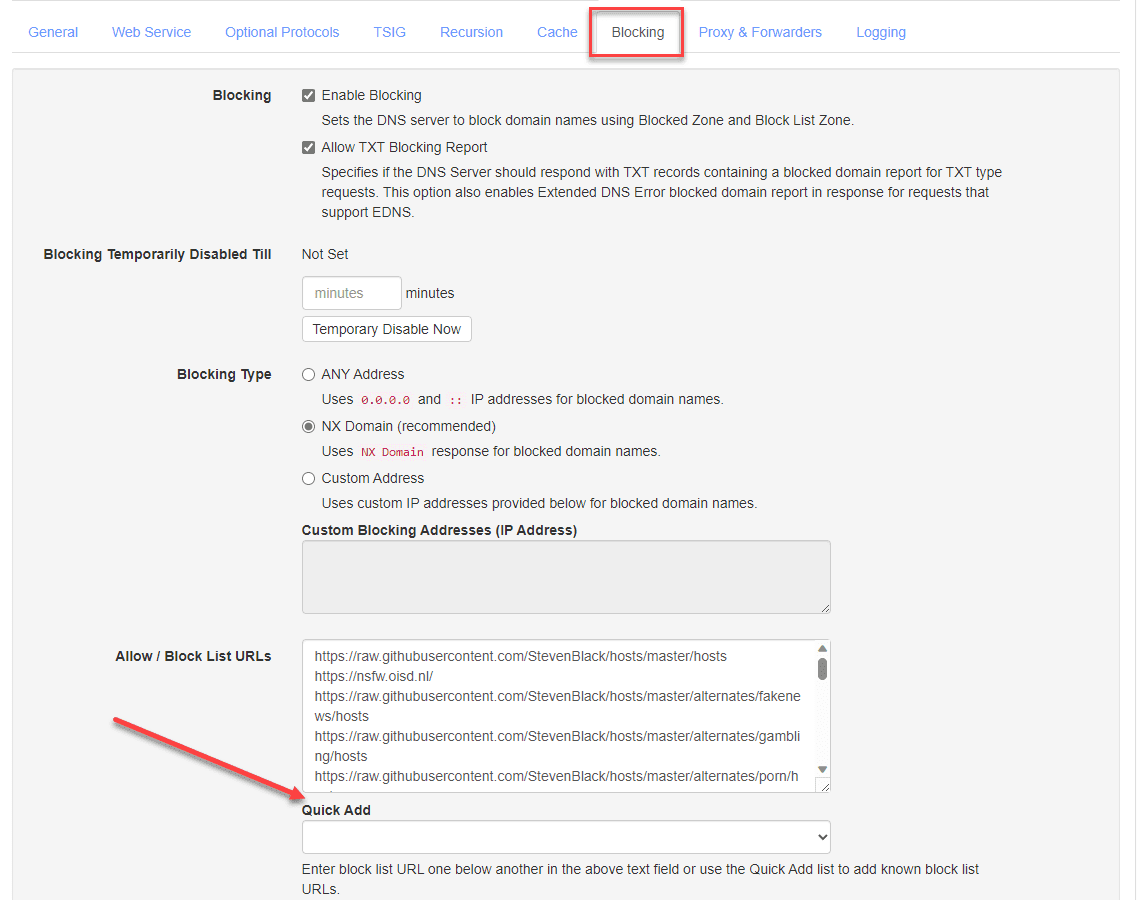
Adding block lists
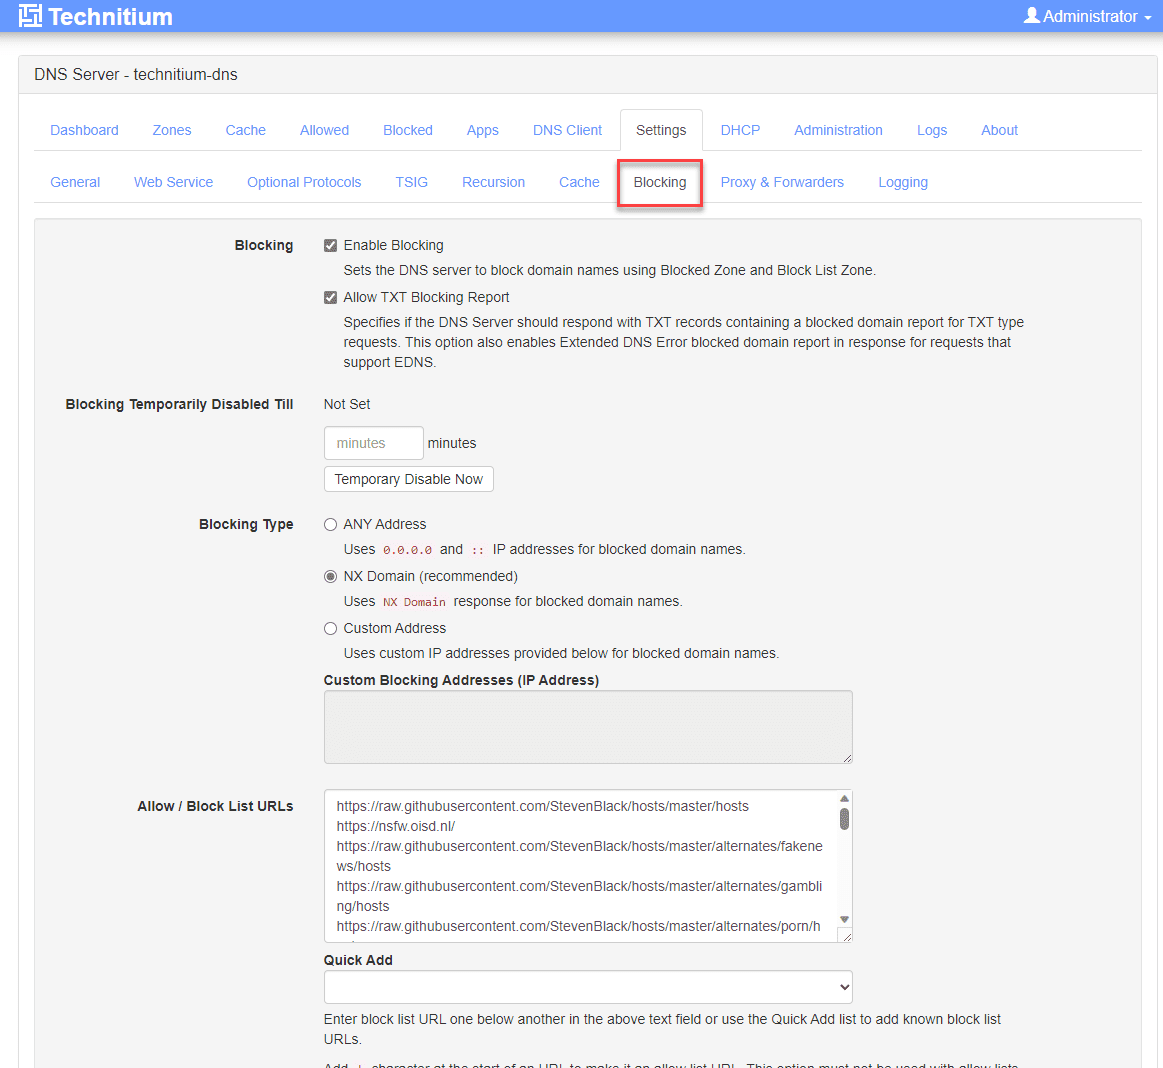
How do you add block lists to Technitium? They have made this quite easy, but it isn’t just readily obvious if you haven’t used Technitium before. Navigate to the Settings > Blocking page.
There is a Quick Add dropdown with included blocklists, like in Pi-Hole and others. Select the blocklists from the dropdown menu and save your changes.
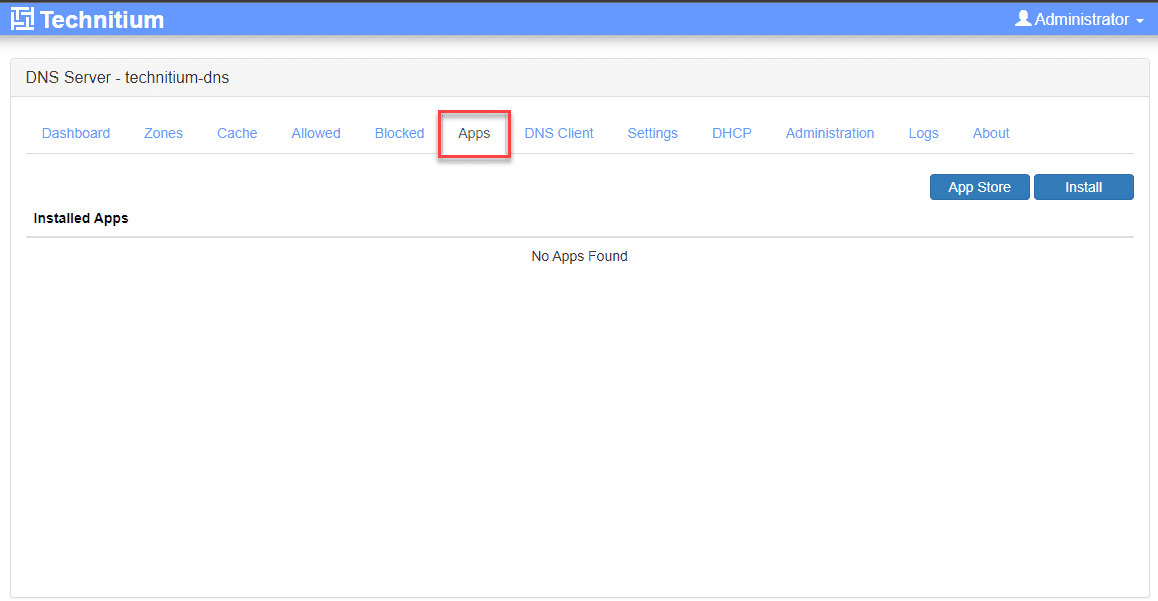
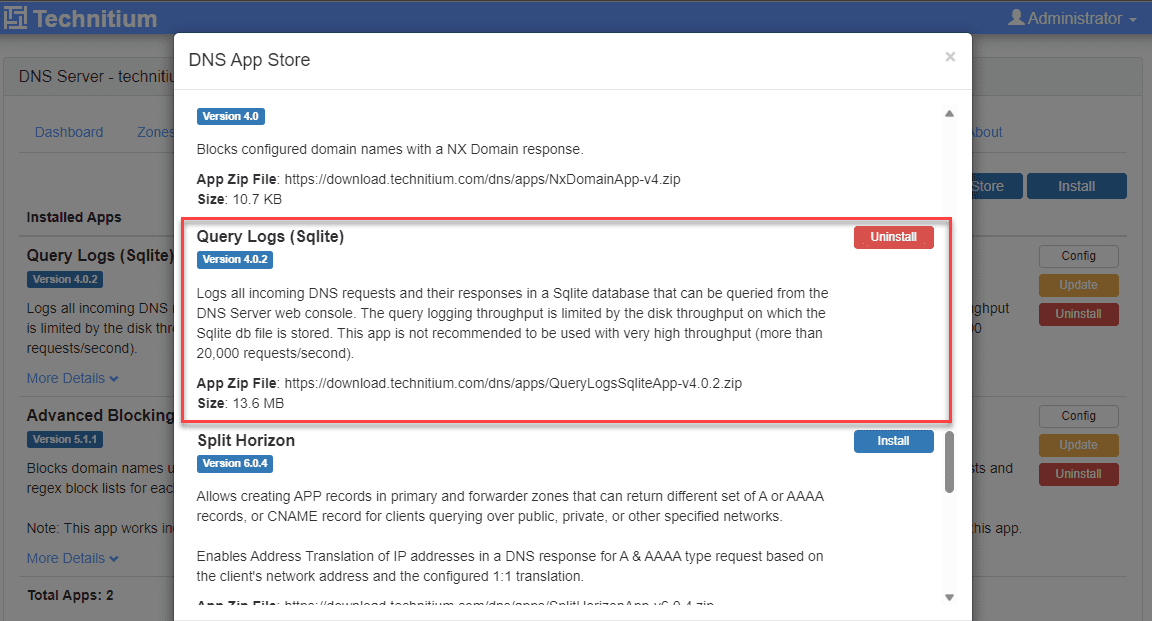
Custom DNS Apps
One of the great things about Technitium is its modular architecture. Within the Technitium interface, you can add DNS “apps” that extend the functionality of Technitium. You can access this from the Apps screen.
As you can see, when you open the Apps, you will see the DNS App Store. There are several apps listed in the store, including the following in the store by default:
Advanced Blocking
Advanced Forwarding
Auto PTR
Block Page
DNS64
DNS Block List (DNSBL)
Drop Requests
Failover
Geo Continent
Geo Country
Geo Distance
NO DATA
NX Domain
Query Logs (Sqlite)
Split Horizon
Weighted Round Robin
What is My DNS
Wild IP
Zone Alias

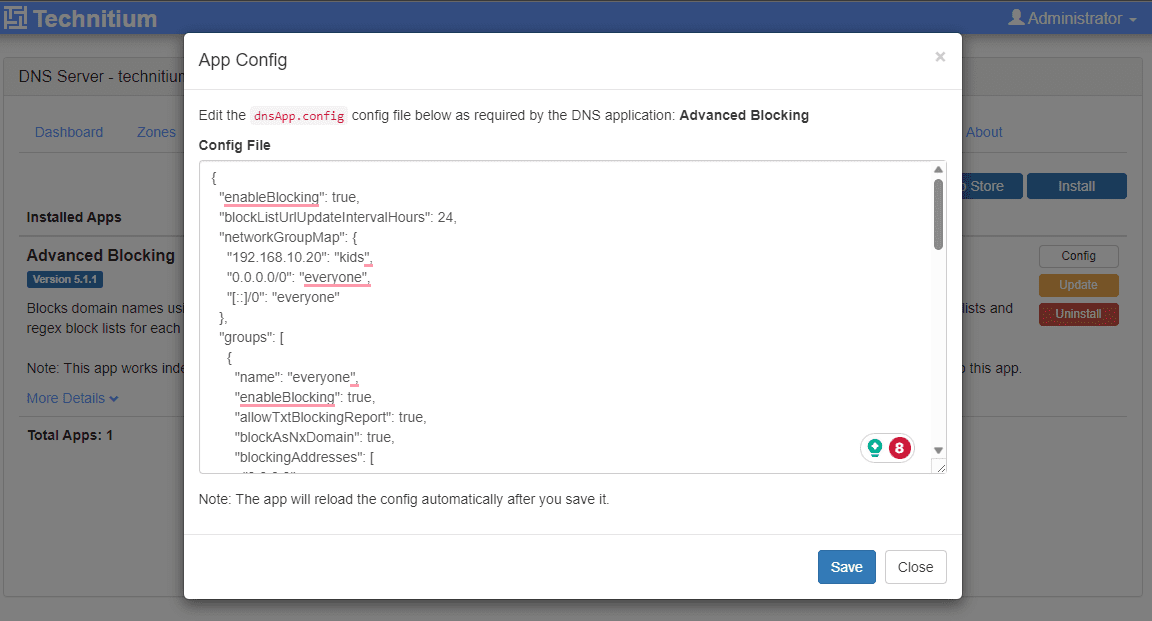
Below, I am editing the App Config for the Advanced Blocking DNS app.
One of the apps you will need to install from the start is the Query Logs (Sqlite) app. This app will allow you to query the logs on the Technitium DNS server. I am not sure why they don’t have this installed by default? However, note this if you install it and run into the error getting the logs from the server.
Explore custom DNS apps and how to create custom DNS responses. Whether you’re looking to route DNS traffic securely or implement dynamic DNS update support, this section covers it all.
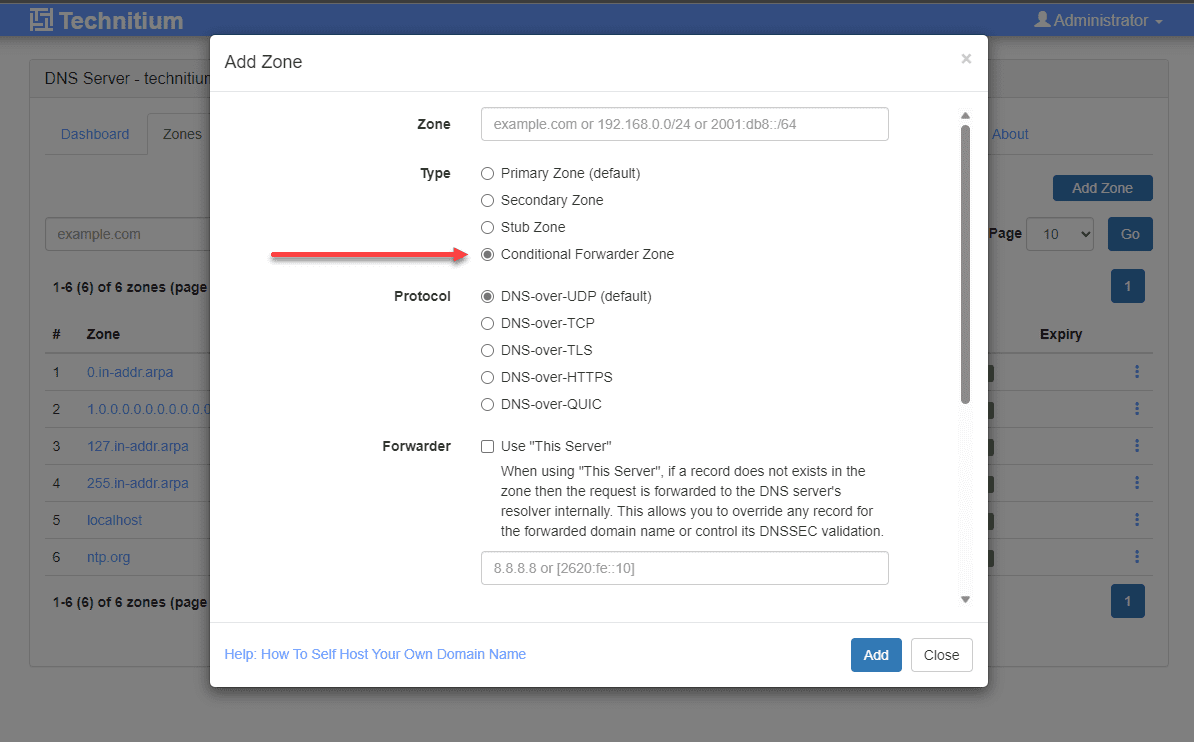
Robust DNS conditional forwarder zone support
One of the things that I like about Technitium is the robust conditional forwarder support built-in. One of the limitations I ran into with Pi-Hole was being limited to a single conditional forwarder in the Pi-Hole interface.
Below is a look at the Pi-Hole dashboard and conditional forwarder settings.
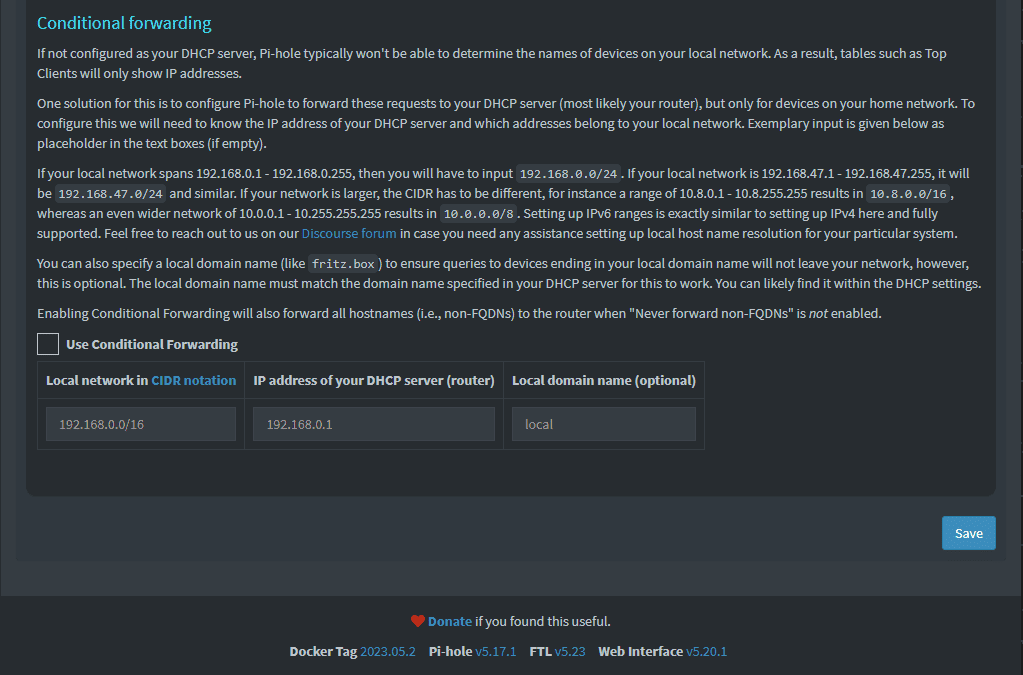
Technitium has much more robust options for controlling DNS zones. You can add multiple conditional forwarders, and there are many more options for DNS zones.
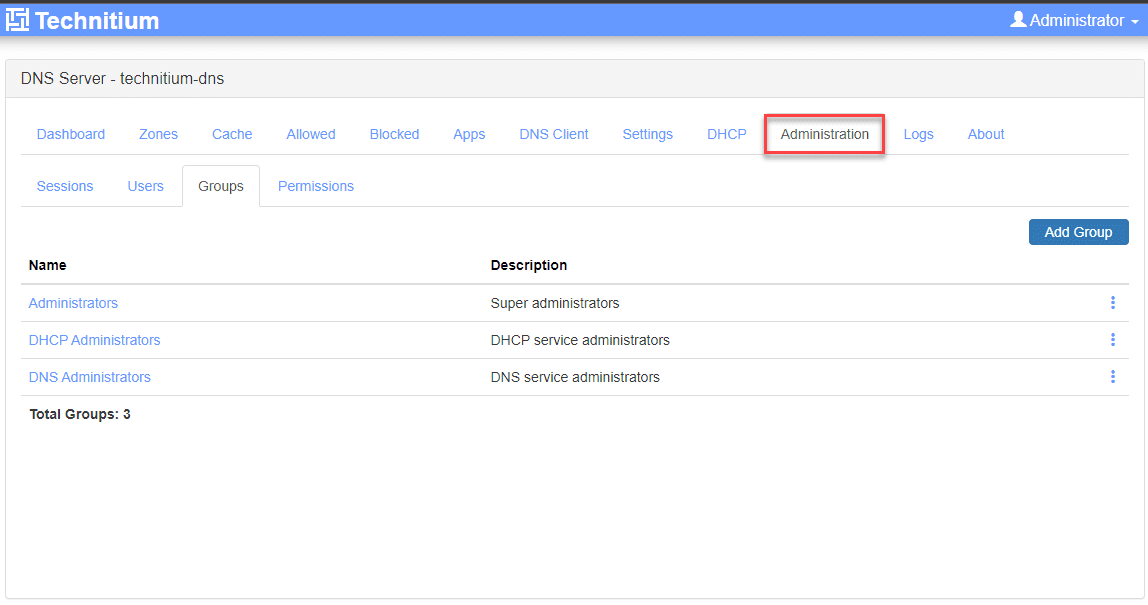
Roles and RBAC
Technitium comes out of the box with great support for role-based access controls. It has the concept of users and groups and built in permissions that define access to the core features of the solution. It was designed to allow administration for multiple users, using least privilege access settings.
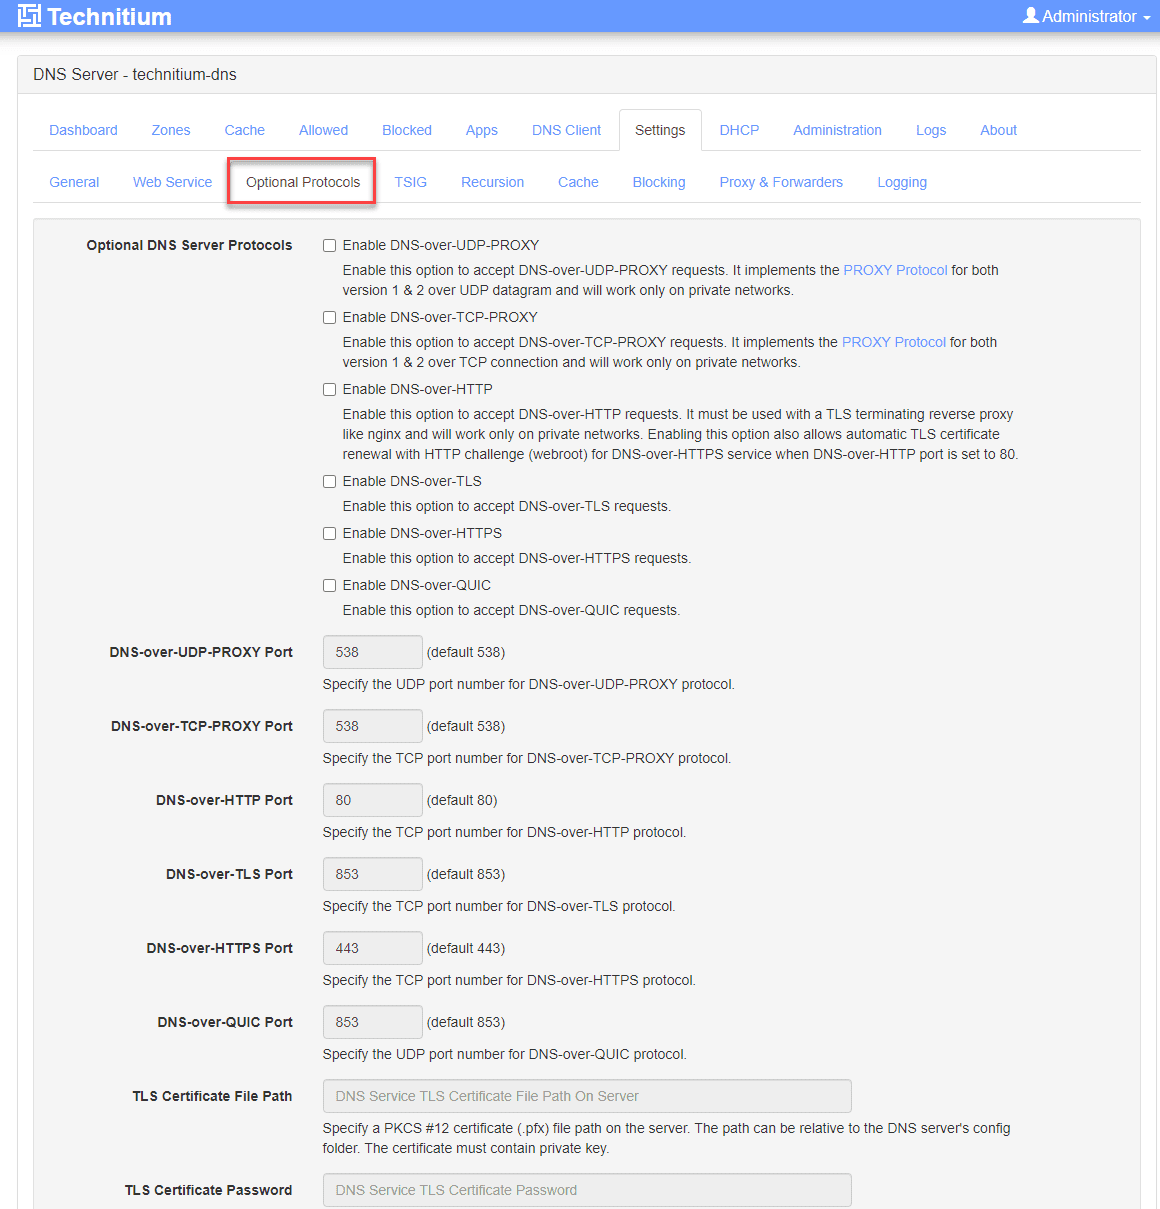
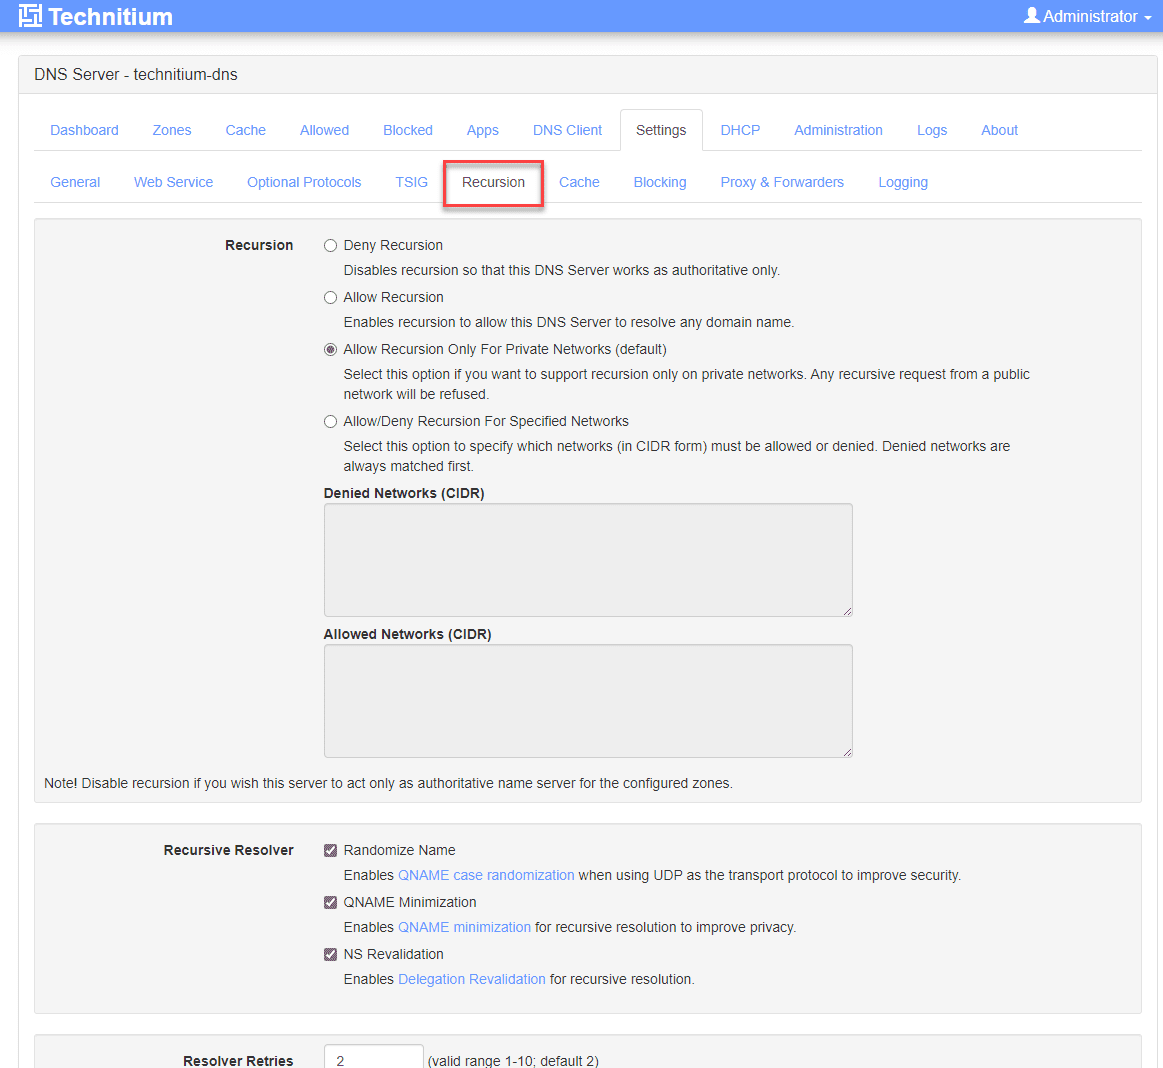
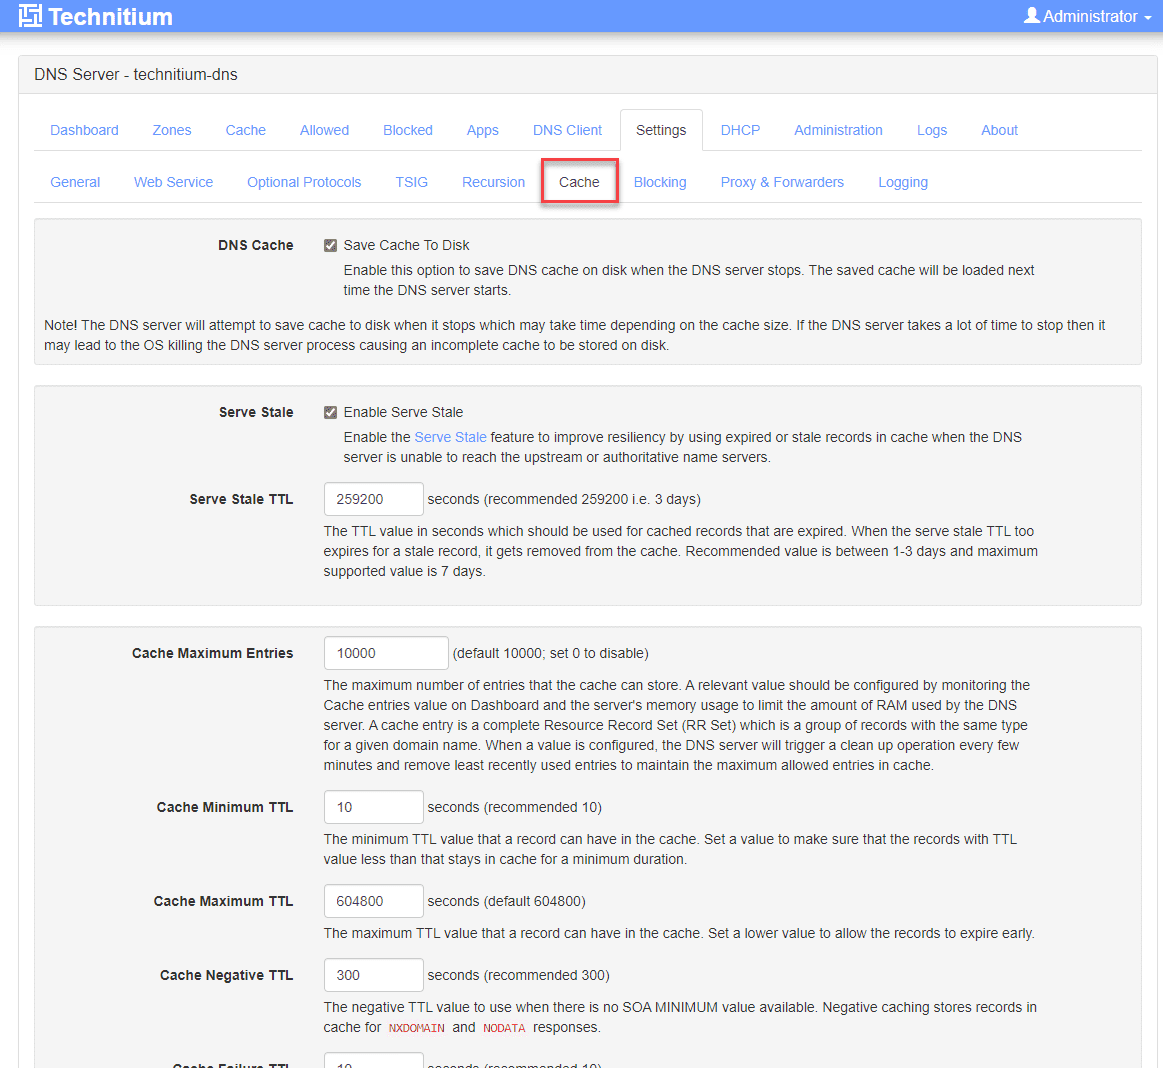
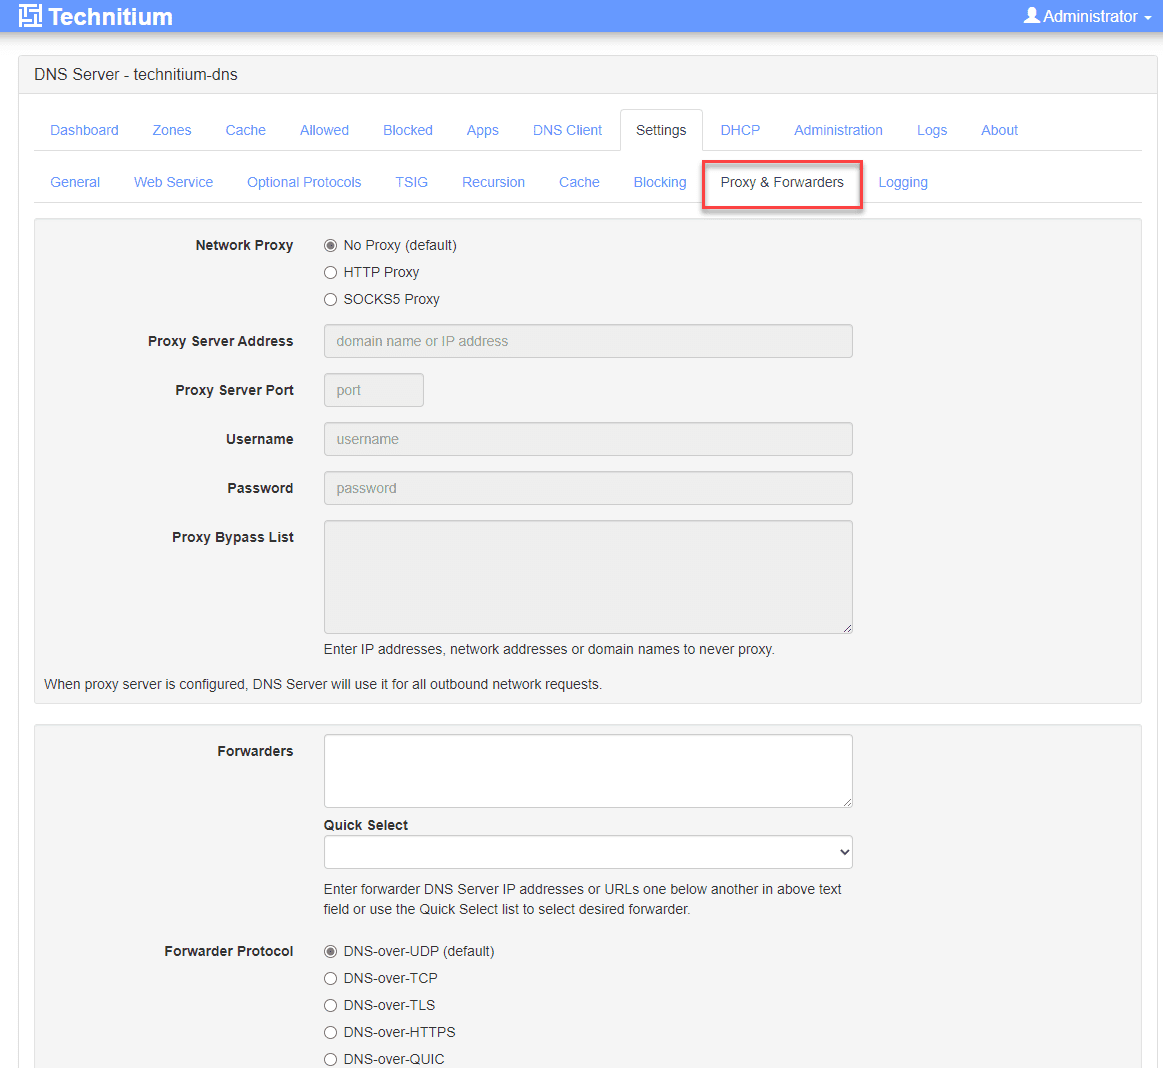
Other screens, features, and configuration
Take note of the following additional screens, features, and configuration.
Optional Protocols.
Recursion settings.
Cache configuration.
Blocking configuration.
Proxy and forwarders.
Technitium vs. Other DNS Providers
Public resolvers like Google DNS and Cloudflare DNS are good choices for upstream DNS servers. However, you won’t be able to resolve your local non-public DNS zones with these providers. Technitium gives you more options in supported DNS transport protocols and features like DNS notify support and bulk conditional forwarding support in your home & home lab networks.
Add dark mode to Technitium
On the subject of dark mode, which the default “light” mode of the interface and no option to change to dark mode natively, can leave your eyes feeling like they are about to bleed. However, if you want to use a browser plugin, the “Dark Reader” plugin allows you to create a list of websites you want to display in dark mode, and it will force the site into dark mode.
After installing it and configuring the Technitium URL to display in dark mode, the results were great (much better than the default light mode):
Wrapping up: My thoughts on Technitium
In setting up and using Technitium, I found it to be surprisingly powerful compared to other solutions I have used, like Pi-Hole and Adguard. It has many features above and beyond other solutions if you like to have fine-grained control and unlimited options for setting up your DNS zones, like conditional forwarding.
I really like the DNS apps it provides, which allow you to extend the functionality of the solution and pick and choose additional features you want to add and do really cool things like split horizon DNS. Also, the built-in RBAC, and great DNS zone control are extremely handy.
Despite the lack of a dark mode in the interface and the inability to customize the dashboard from what I could find, this is perhaps the best home dns server. Let me know in the comments if you have used Technitium or use something you like better.
Other posts you may like
Google is updating how articles are shown. Don’t miss our leading home lab and tech content, written by humans, by setting Virtualization Howto as a preferred source.
About The Author

Finally you did it! 😁👌
I’m using it since a few years years, it’s the best and they are the bests: their support is flawless, even for home-lab users.
When I started with Docker I moved away from dedicated VM to Docker instances.
I was so motivated that I also put Technitium instances for my guest network. It’s so good!
Franck,
Thank you for the comment! Yes, kicking myself that I haven’t tried it out before now. Definitely impressed with all it can do, especially for free. A win for home lab!
Brandon
Hi Franck:
I have been using this for a number of years now and have found it to be extremely useful and stable. I use it in my home network and have found it very easy and quick to use.
I have also implemented a secondary dns (technitium does not yet provide failover support) server which provides me with a level of redundancy if something goes offline.
I highly recommend this software for sure!
I had already heard about Technitium while I was evaluating DNS solutions for my Homelab.
It is very powerful compared to the others.
I put it into production in my homelab in less than 30 minutes and in the tests with the yahoo.co.jp website it was phenomenal, even though I was in Brazil.
Thank you very much for your tips.
Hugs, see you, and good luck.
Jose,
thank you for the comment! Yes definitely, Technitium is an awesome DNS solution, lots of features and capabilities…I personally think it is one of the best out there.
Brandon
Hi Brandon, like the article and DNS solution. I am only new to docker and have a question how to access the Query Logs (Sqlite) data. Once it is turned on I like to grab the file but can you explain how that is done?
Thx in advance
Erik,
Thank you for the comment! That sounds great that you are delving into Docker. I think you will enjoy what you are learning. So, to access files in Docker, you typically have a “bind mount” on your Docker host, which is nothing more than a glorified directory on your host. This directory contains the “data” used by docker for apps that need persistent data, like databases. So for instance in the below Docker Compose code, I have a local folder on my docker host at /home/linuxadmin/homelabservices/gitlab/data and then on the inside of the container, it is mounted to /var/opt/gitlab:
volumes:
– ‘/home/linuxadmin/homelabservices/gitlab/data:/var/opt/gitlab’
So, I can browse to this folder on the docker host and access the data there. Hopefully, this helps. Also, feel free to jump over to the forums and create a topic on the containers and Kubernetes forum if you need to work through anything. We can better discuss things there. Thanks Erik.
Brandon
Hi Brandon, this is an excellent guide that really aided my understanding of technitium dns server. However, I am stuck. I want the server which is cloud hosted to accept connections from my dynamic host name. Do you have any ideas or thoughts on how to establish this?
Thank you in advance
Dr Dike
Dike,
Thank you for the comment! And so glad the post has been helpful. What issues are you seeing with your cloud hosted instance? Also, if you want to create a forum topic under “home lab” I will be better able to help there: https://www.virtualizationhowto.com/community.
Brandon
Hello Brandon,
Been following your channel for a while. I was wondering if could or plan on actually doing a how to video on setting up and configuring a Technitium DNS Server for the homelab. If you have already made a video could you please direct me to it.
Thanks
Tanyeus,
I haven’t really covered Technitium in detail, but definitely a great topic that I will add to an upcoming video. Stay tuned!
Brandon
eagerly awaiting and thanks for the response as well.
Sure thing Tanyeus. Quick question as well. Are you currently using Technitium or looking to switch over?