Safe search is a feature on firewalls that allows you to filter out search results that might not be appropriate for young ones or in certain environments. Let’s look at pfSense force safe search and how to implement it.
Table of contents
- What is pfSense?
- How do you enable plugins in pfSense?
- Install pfBlockerNG
- Running the pfBlockerng devel setup wizard
- Google Safe Search VIP
- Configure DNS Forwarder or Resolver for Bing and YouTube
- Other plugins
- Implementing Firewall Rules for filtering content
- Editing Local Unbound Configuration Files
- More posts to consider
- Wrapping up
What is pfSense?
pfSense is a great open-source firewall with many features like safe search but also other enterprise features including VPN, IDP, IPS, and plugins to add even more capabilities.
You can do the following with pfSense:
Firewall rules
VPN access
Content filtering,
Force safesearch, etc
These features and others help to protect your network from attackers or just help to protect end-users from certain types of content or sites.
What is Safe Search?
Safe search is a feature of most search engines that filters out explicit content, like pornography, etc. Content filtering for safe search includes:
Pornographic images, videos, and websites
Hate, violence, and other mature content
This is a feature most want for families, schools, and organizations who want to protect users in an age-appropriate way.
How do you enable plugins in pfSense?
Since the safe search feature in pfSense is made possible by a plugin, we will first look at the steps to enable plugins in pfSense in general. Follow these steps below to enable plugins, which will be needed, to enforce Safe Search:
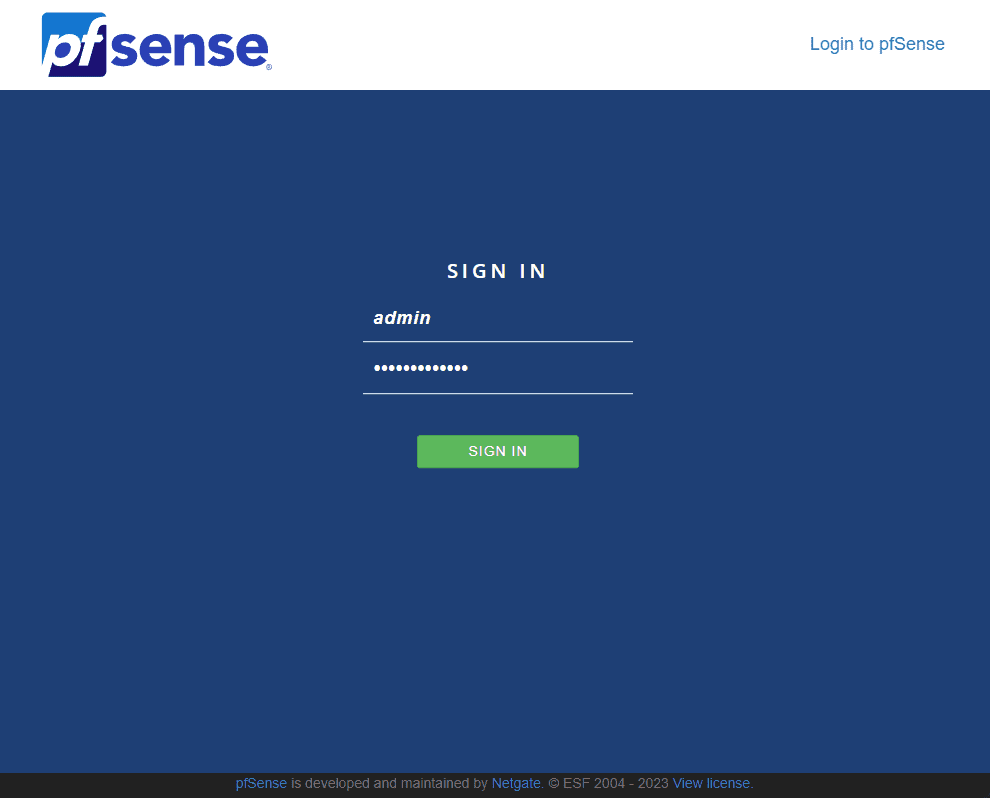
Log into your pfSense web interface
Click on “System” in the top menu, and then select “Package Manager” from the dropdown menu.
Then go to the “Available Packages” tab to browse the list of available plugins.
Locate the desired plugin and click the “+” button next to it to install.
Those steps in general will allow you to install any plugin available in pfSense. Now lets see how to install pfBlockerNG in particular as this is the one that will allow us to enforce safe search.
Install pfBlockerNG
pfBlockerNG filters DNS server queries (the phone book of the Internet) and it allows pfSense to block DNS access to specific domains and websites based on certain content and blocklists.
pfBlockerNG also allows turning on enforcing Safe Search. To install pfBlockerNG, follow these steps:
Access your pfSense web interface and log in.
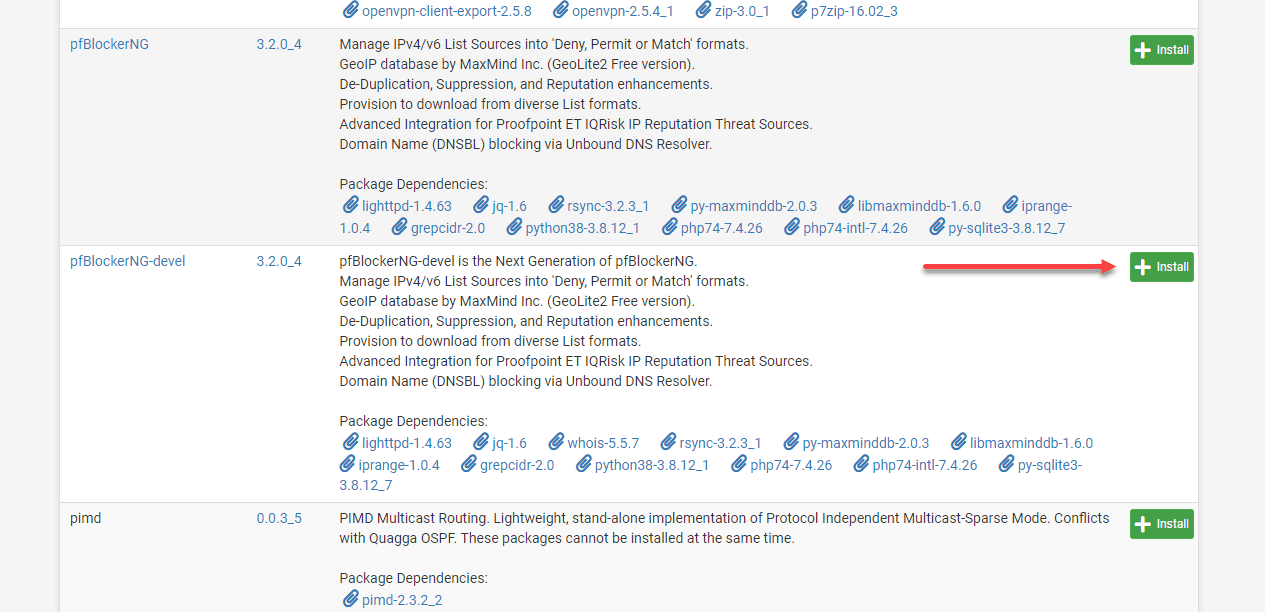
Navigate to “System” > “Package Manager” > “Available Packages“.
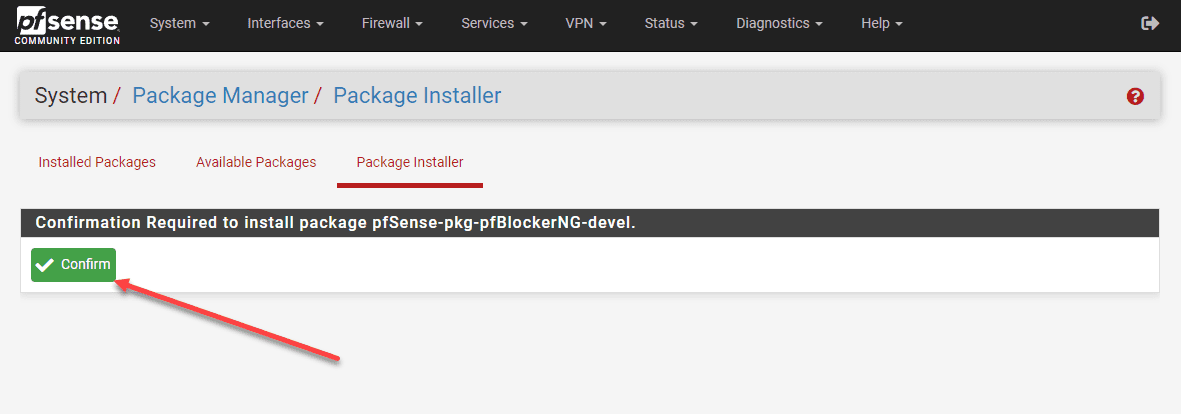
Locate “pfBlockerNG-devel” in the list and click the “+” button to install it.
Once installed, you will find the pfBlockerNG menu under “Firewall” in the top menu.
Next, you will click the Confirm button to confirm the installation.
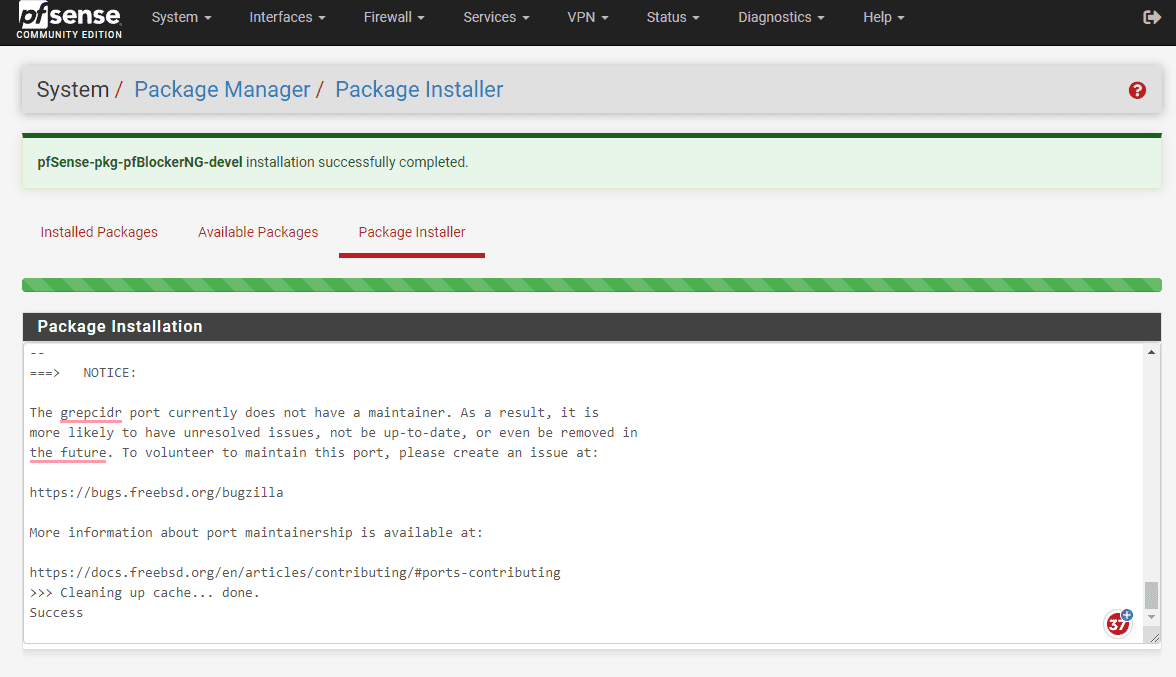
The installation begins, proceeds, and finishes.
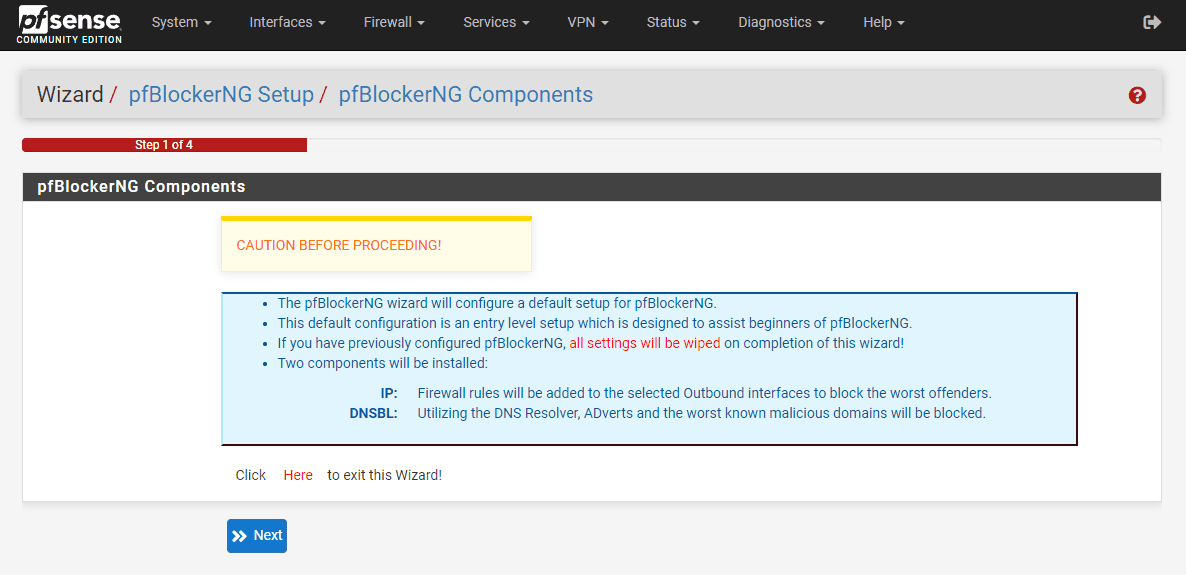
Running the pfBlockerng devel setup wizard
After you install the pfBlockerNG module and launch it, under Firewall > pfBlockerNG you will run through a setup wizard of sorts.
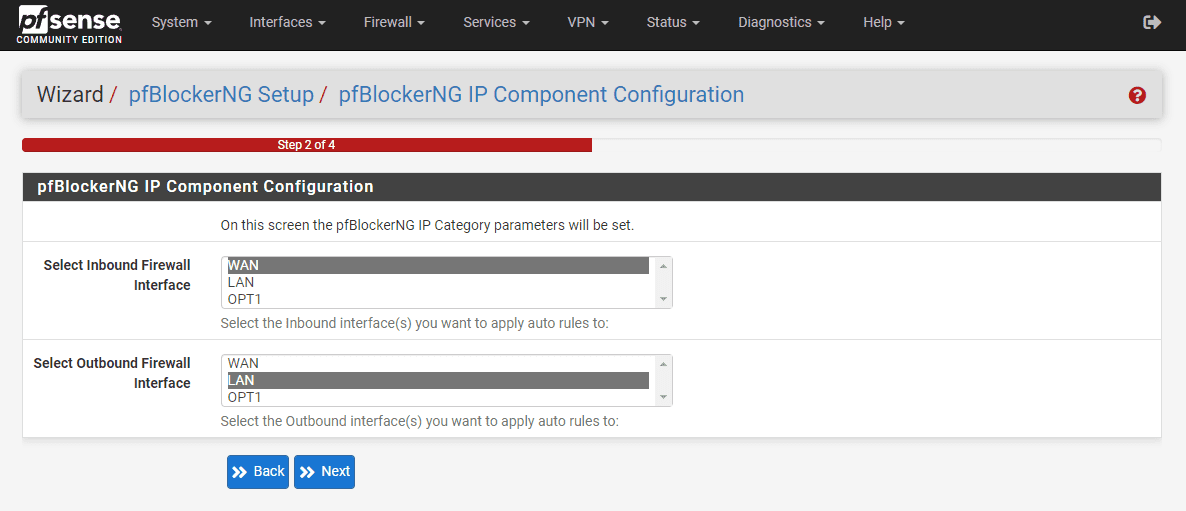
Configure the inbound and outbound interfaces for pfBlockerNG.
Configure the IP and port the pfBlockerNG module will listen on.
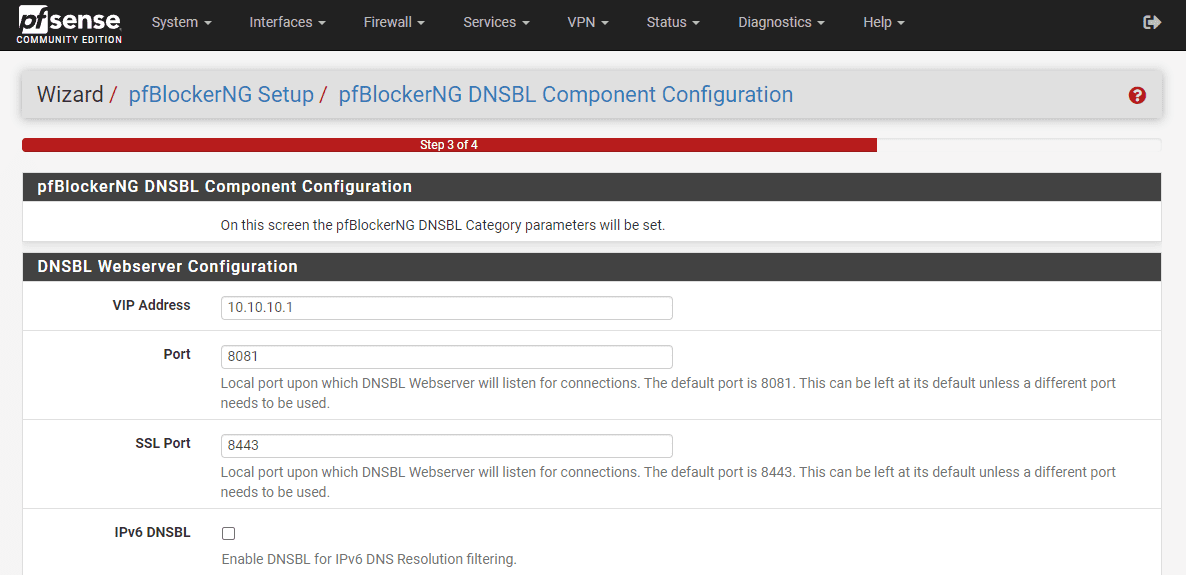
Finally, finish out the installation of pfBlockerNG.
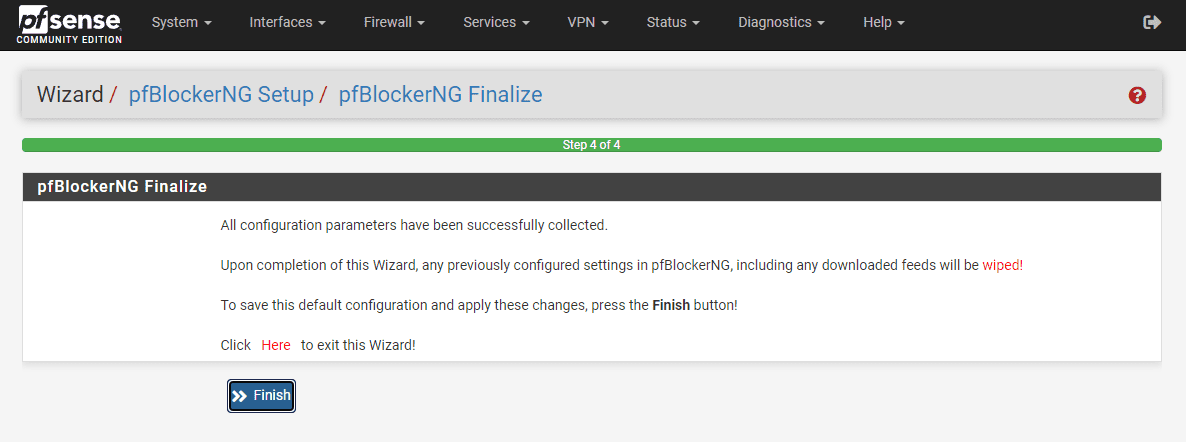
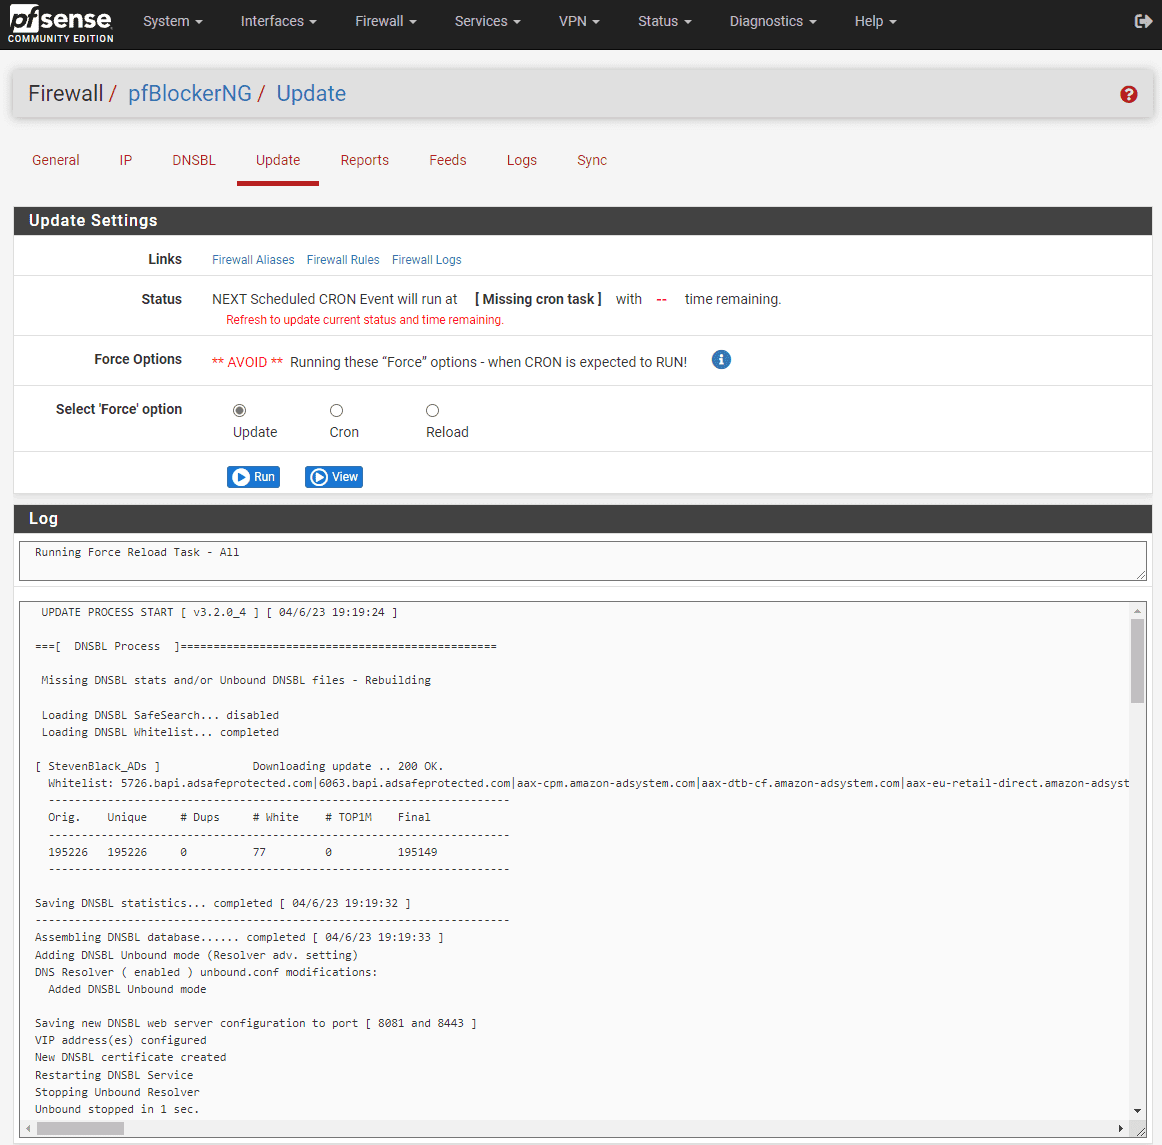
It will download the latest updates to the DNSBL lists. These lists are lists of websites that contain content that you want to block based on the content settings and safe search settings.
Google Safe Search VIP
Google offers a special DNS service called “SafeSearch VIP”. This service forces Safe Search for all Google search queries. To configure Google Safe Search VIP in pfSense, follow these steps:
Log into pfSense
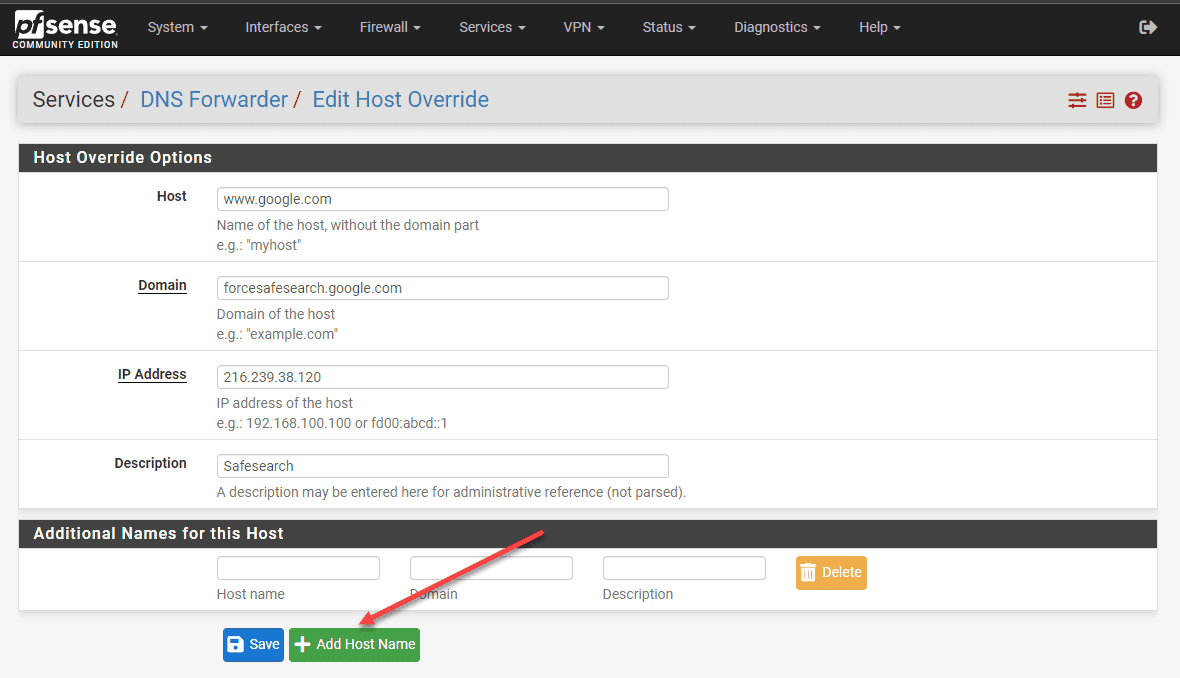
Click on “Services” > “DNS Forwarder” or “DNS Resolver”.
In the “General Settings” tab, go to the “Host Overrides” or “Domain Overrides” section, depending on your setup.
Click the “+” button to add a new entry.
Enter the following entry:
Host: www.google.com
Domain: forcesafesearch.google.com
IP Address: 216.239.38.120
Save the changes and apply the settings.
Repeat the steps for other Google owned domains, such as www.google.co.uk, www.google.ca, etc.
Configure DNS Forwarder or Resolver for Bing and YouTube
To force Safe Search on other search engines (Bing and YouTube), configure DNS Forwarder or Resolver in pfSense. Follow these steps:
Log in
Go to “Services” > “DNS Forwarder” or “DNS Resolver”
In the “General Settings” tab, got to the “Host Overrides” or “Domain Overrides” section
Click the “+” button to add a new entry for each search engine you want to force Safe Search on. For example:
Host: www.bing.com
Domain: strict.bing.com
IP Address: 204.79.197.220
Host: www.youtube.com
Domain: restrict.youtube.com
IP Address: 216.239.38.120
Save the changes and apply your saved settings
Other plugins
There are other plugins for pfSense to note that admins can benefit from knowing about
URL filtering: SquidGuard or DNSBL (DNS Blacklist) within the pfBlockerNG plugin.
Content filtering: Squid and SquidGuard
VPN filtering: You can create firewall rules to block or restrict VPN access to certain websites or services
Application control: Snort or Suricata plugins
Implementing Firewall Rules for filtering content
Aside from configuring Safe Search and utilizing plugins, you can also create firewall rules in pfSense to further enhance content filtering and control web traffic. These rules can block or restrict access to specific IP addresses, ports, or protocols, giving you more granular control over your network’s security. To create firewall rules in pfSense, follow these steps:
Access your pfSense web interface and log in.
Navigate to “Firewall” > “Rules” in the top menu.
Choose the interface (e.g., LAN) where you want to apply the rule.
Click the “+” button to add a new rule.
Specify the action (pass, block, or reject), protocol, source, destination, and other settings according to your content filtering requirements.
Add a description for the rule to help you remember its purpose.
Save the changes and apply the settings.
Editing Local Unbound Configuration Files
You may rather edit the local config files for unbound as this would be a great way to do this with configuration management or automation.
One file you can create and edit is /var/unbound/google.conf. In this file you can add custom settings for forcing Safe Search on Google domains. To edit or create the google.conf file, follow these steps:
SSH into your pfSense firewall
Type the following command to create or open the google.conf file in the vi text editor:
vi /var/unbound/google.confPress the “i” key to enter insert mode, allowing you to edit the file.
Add the following lines
local-zone: "www.google.com" redirect local-data: "www.google.com 30 IN A 216.239.38.120"Repeat these lines for other Google domains, such as www.google.co.uk, www.google.ca, etc.
Once you’ve added the necessary entries, press the “Esc” key to exit insert mode.
Type :wq and press “Enter” to save your changes and exit the vi text editor.
To apply the changes, restart the Unbound DNS resolver service by running the following command:
service unbound restartMore posts to consider
Wrapping up
pfSense is powerful and has many plugins like the pfBlockerNG plugin that can do content filtering and allows you to force the search results to be the safe search variety. This helps to protect your users on the network and is great for families, schools, and other organizations that definitely want to enforce age-appropriate content.
Google is updating how articles are shown. Don’t miss our leading home lab and tech content, written by humans, by setting Virtualization Howto as a preferred source.
About The Author