Pialert Docker Setup – Detecting Rogue Devices connected to the network
If you are like me, you are constantly looking at new solutions for network security and better visibility to devices connected to your network, including unknown devices. I have been using arpwatch for a few years now, and it has worked well in my network for visibility to connected devices. However, I stumbled onto another open-source project called Pialert that I wanted to try. Let’s look at Pialert and how to set it up using a Docker container.
What is Pialert?
Pialert is an open-source project that can be run on Raspberry Pi devices, full Linux installations, or in a Docker container. It provides a simple interface via a web address to view devices connected to the network.
It can then send you an alert based on the activity found on the network based on what you choose to be notified on. While it is no guarantee that you can prevent any and all network attacks, an attacker may attempt to connect a rogue device to the network.
Pialert scans
It scans for:
New devices
New connections and devices re-connecting to the network
Disconnections of devices that were previously connected
“Always Connected” devices down
Devices IP changes
Internet IP address changes
Types of network scans
It uses various means of detecting new devices connected to the network, including:
Method 1: arp-scan. Arp scan searches for devices on the network using arp frames
Method 2: Pi-hole. This method is optional and complementary to method 1. If you are using Pi-hole DNS servers, Pi.Alert examines its activity looking for active devices using DNS that have not been detected by method 1.
Method 3. dnsmasq. In another complementary method to the previous methods, if the DHCP server dnsmasq is active, Pi.Alert examines the DHCP leases and finds active devices that may not have been detected using the other methods.
If you don’t run the Pi-hole system configured and running on your network, Pialert does not require Pi-hole to detect network activity effectively.
Secure web interface and Docker config
You can also secure your Pialert web interface with a password, using a fork of the solution that we will look at running in a Docker container. You can create and manage the solution with a single Docker compose command. It will pull down the latest image for the Docker deployment, which you can access using a host port configuration and your Docker compose script.
Pialert setup using Docker
Let’s look at the Pialert setup process using Docker and see what is involved. There are a few steps you need to complete, including:
Downloading three files from the GitHub repository
Creating your directory structure for compose, config, database, and logs
Modifying your pialert.conf file for your environment, including alerts
Running Docker compose to deploy the solution
Configuring your users
I am not using a Raspberry Pi to host the Pialert service in my home lab environment. Rather, on my Ubuntu 22.04 Docker host, I have Docker configured and set up using a Linux user that I have added to the sudo group and the Docker group.
Configure the directories for Pialert
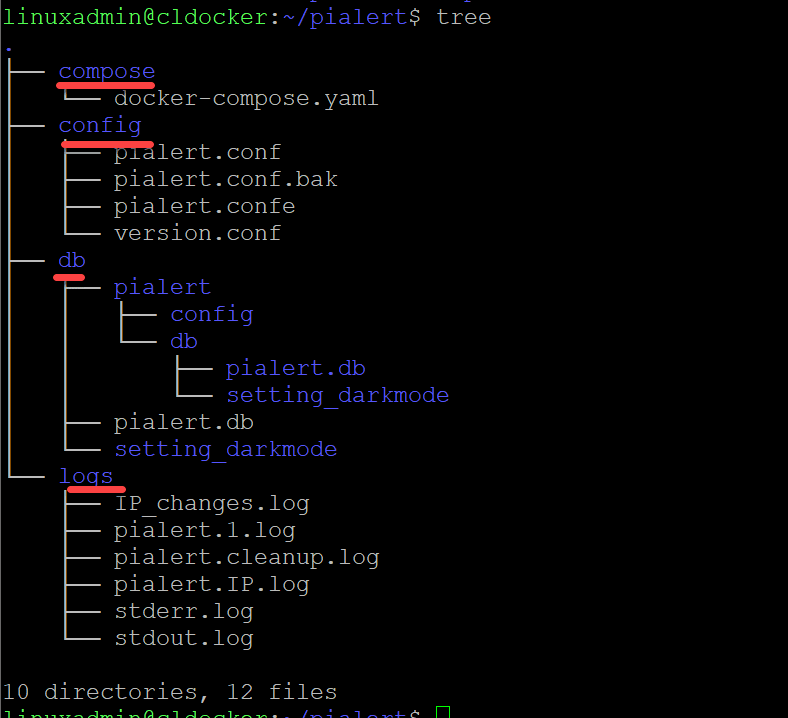
Below is a look at the directory structure I have configured for Pialert. I have directories for compose, config, DB, and logs. The screenshot below is on a working Pialert configuration. You won’t initially have the files listed under the logs directory below. Pialert will create these once you run it for the first time.
Download files for the Docker configuration
Once we have the directories created, there are three files you will need to create:
pialert.conf
version.conf
db
These files can be obtained from the “official” Docker GitHub page that has ported the solution over to run in a Docker container from the original Pialert project.
Download the two files listed in the link below to the config folder shown in the tree view above. These include the pialert.conf and version.conf files.
Download the pialert.db file to the db folder here:
Customize the pialert.conf file for your network
Once you have the files in place, you need to customize the pialert.conf file to your network, choosing a few configuration settings, including:
Notification settings
Notification events
Create your Docker compose files
With the current Pialert project, creating the Docker compose files has you create two files, the docker compose YAML file and an .env file that holds variables the compose file uses to make things a bit easier.
My docker compose file:
version: "3"

services:

  pialert:

    container_name: pialert

    image: "jokobsk/pi.alert:latest"

    network_mode: "host"

    restart: always

    volumes:

      - ${APP_DATA_LOCATION}/pialert/config:/home/pi/pialert/config

      - ${APP_DATA_LOCATION}/pialert/db/pialert.db:/home/pi/pialert/db/pialert.db

      # (optional) map an empty file with the name 'setting_darkmode' if you want to force the dark mode on container rebuilt

      - ${APP_DATA_LOCATION}/pialert/db/setting_darkmode:/home/pi/pialert/db/setting_darkmode

      # (optional) useful for debugging if you have issues setting up the container

      - ${LOGS_LOCATION}:/home/pi/pialert/log

    environment:

      - TZ=${TZ}

      - PORT=${PORT}

      - HOST_USER_ID=${HOST_USER_ID}

      - HOST_USER_GID=${HOST_USER_GID}
My .env file that holds the variables:
#GLOBAL PATH VARIABLES

APP_DATA_LOCATION=/home/linuxadmin

APP_CONFIG_LOCATION=/home/linuxadmin

LOGS_LOCATION=/home/linuxadmin/pialert/logs

#ENVIRONMENT VARIABLES

TZ=America/Chicago

HOST_USER_ID=1001

HOST_USER_GID=1001

PORT=20211
Bringing up the Pialert install:
Once you have the files in place, you can issue the command:
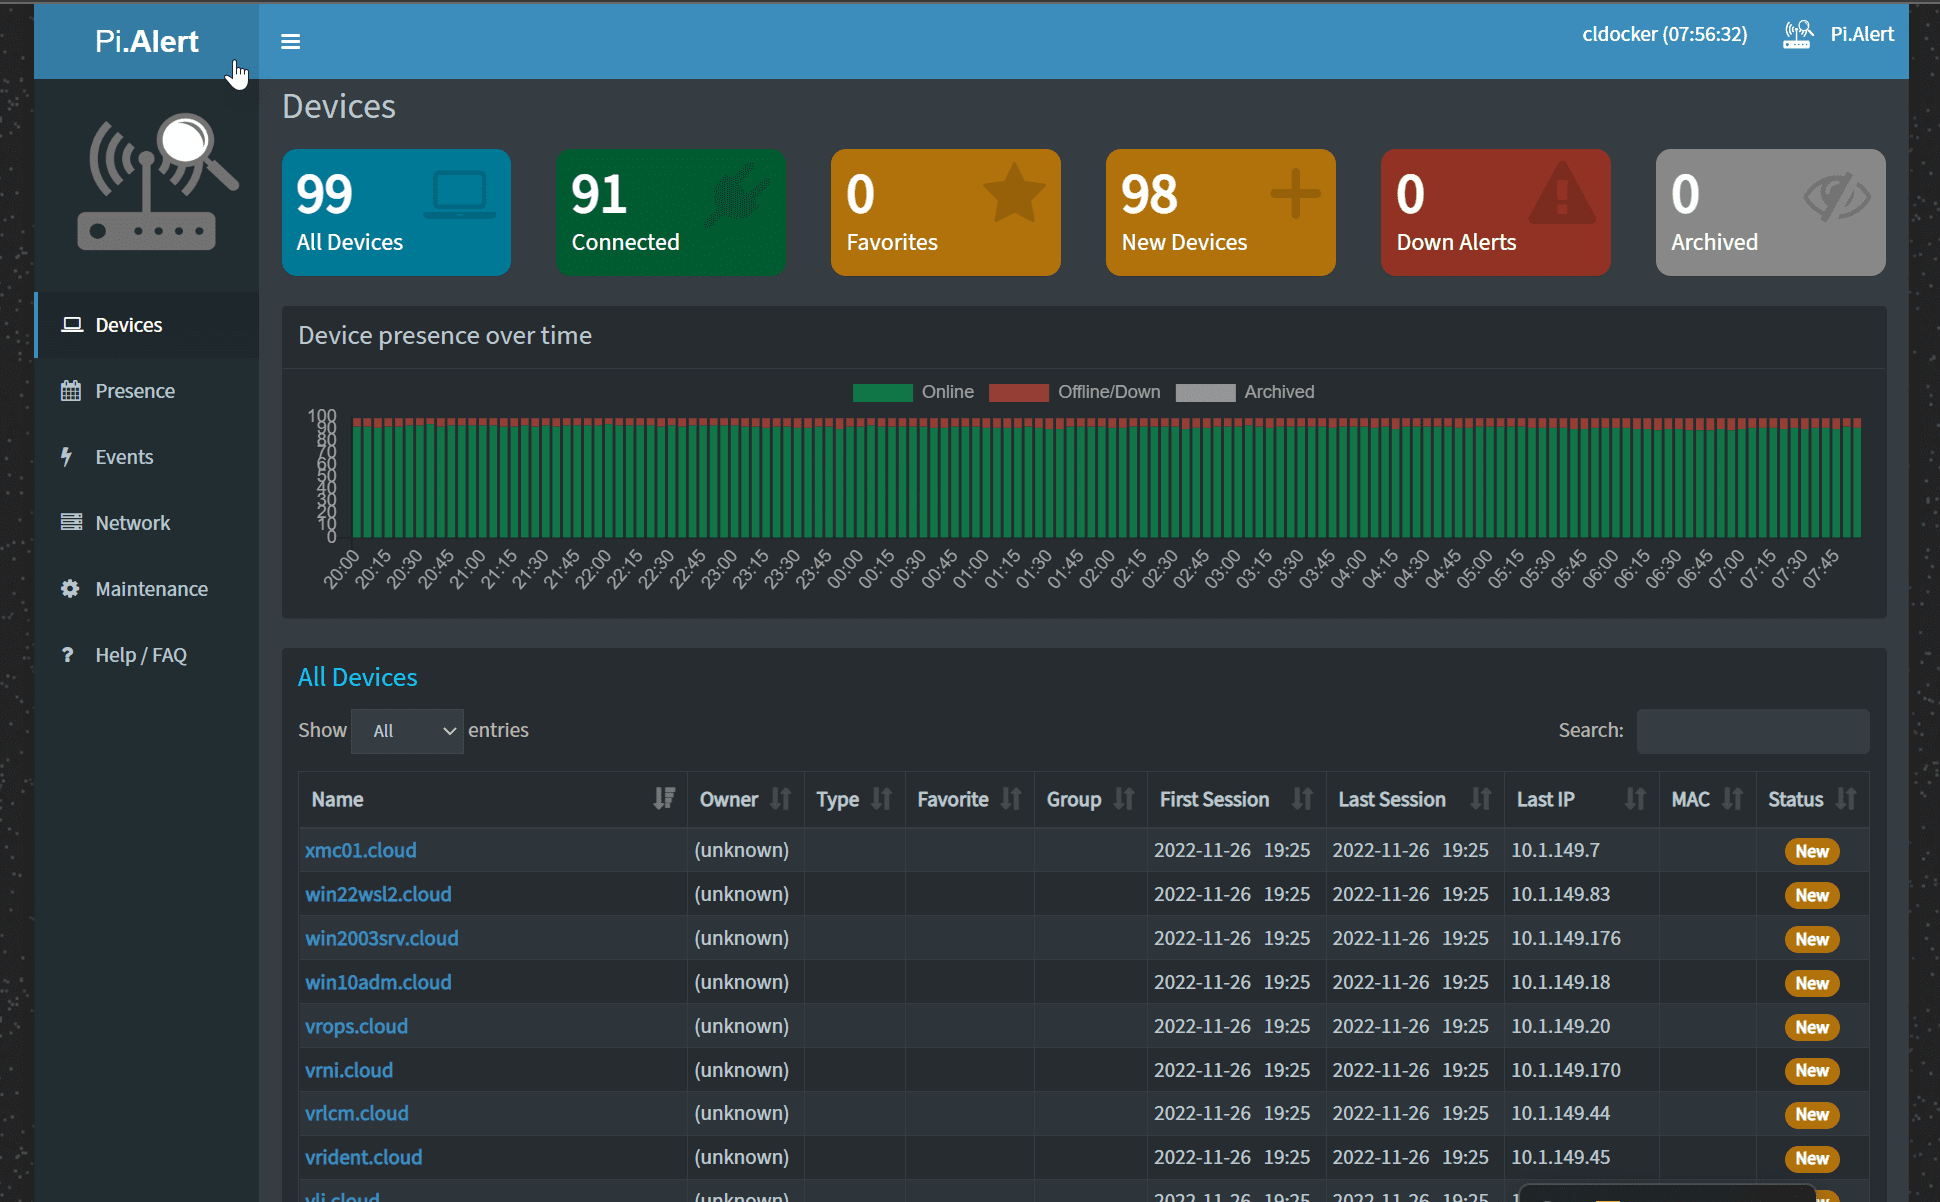
docker compose up -dYou should see your Docker compose up command complete successfully and see your Pialert docker container running as expected.
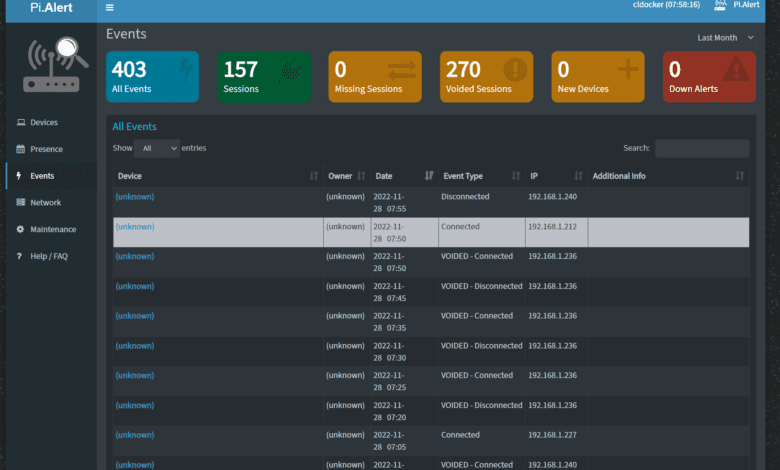
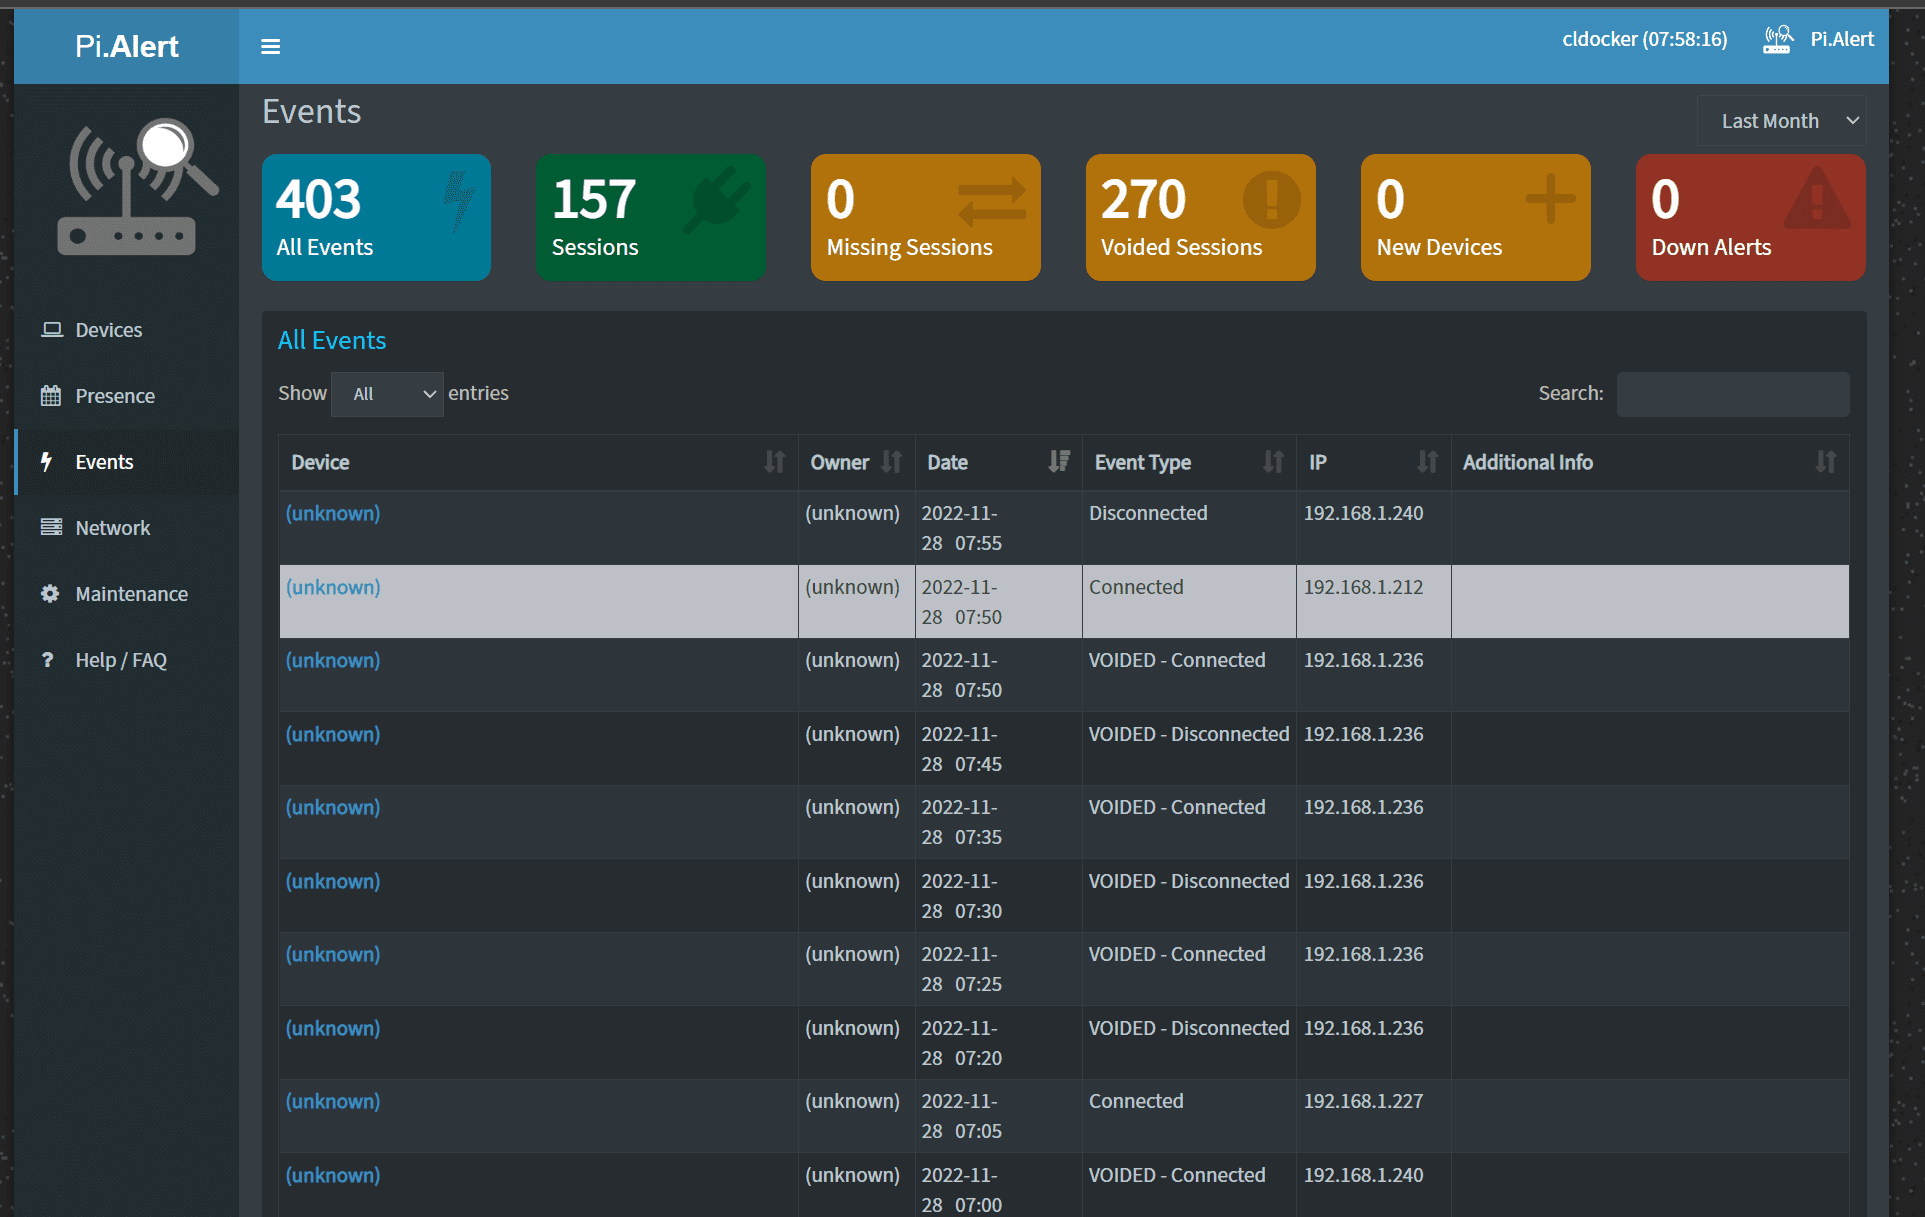
Looking at the events view.
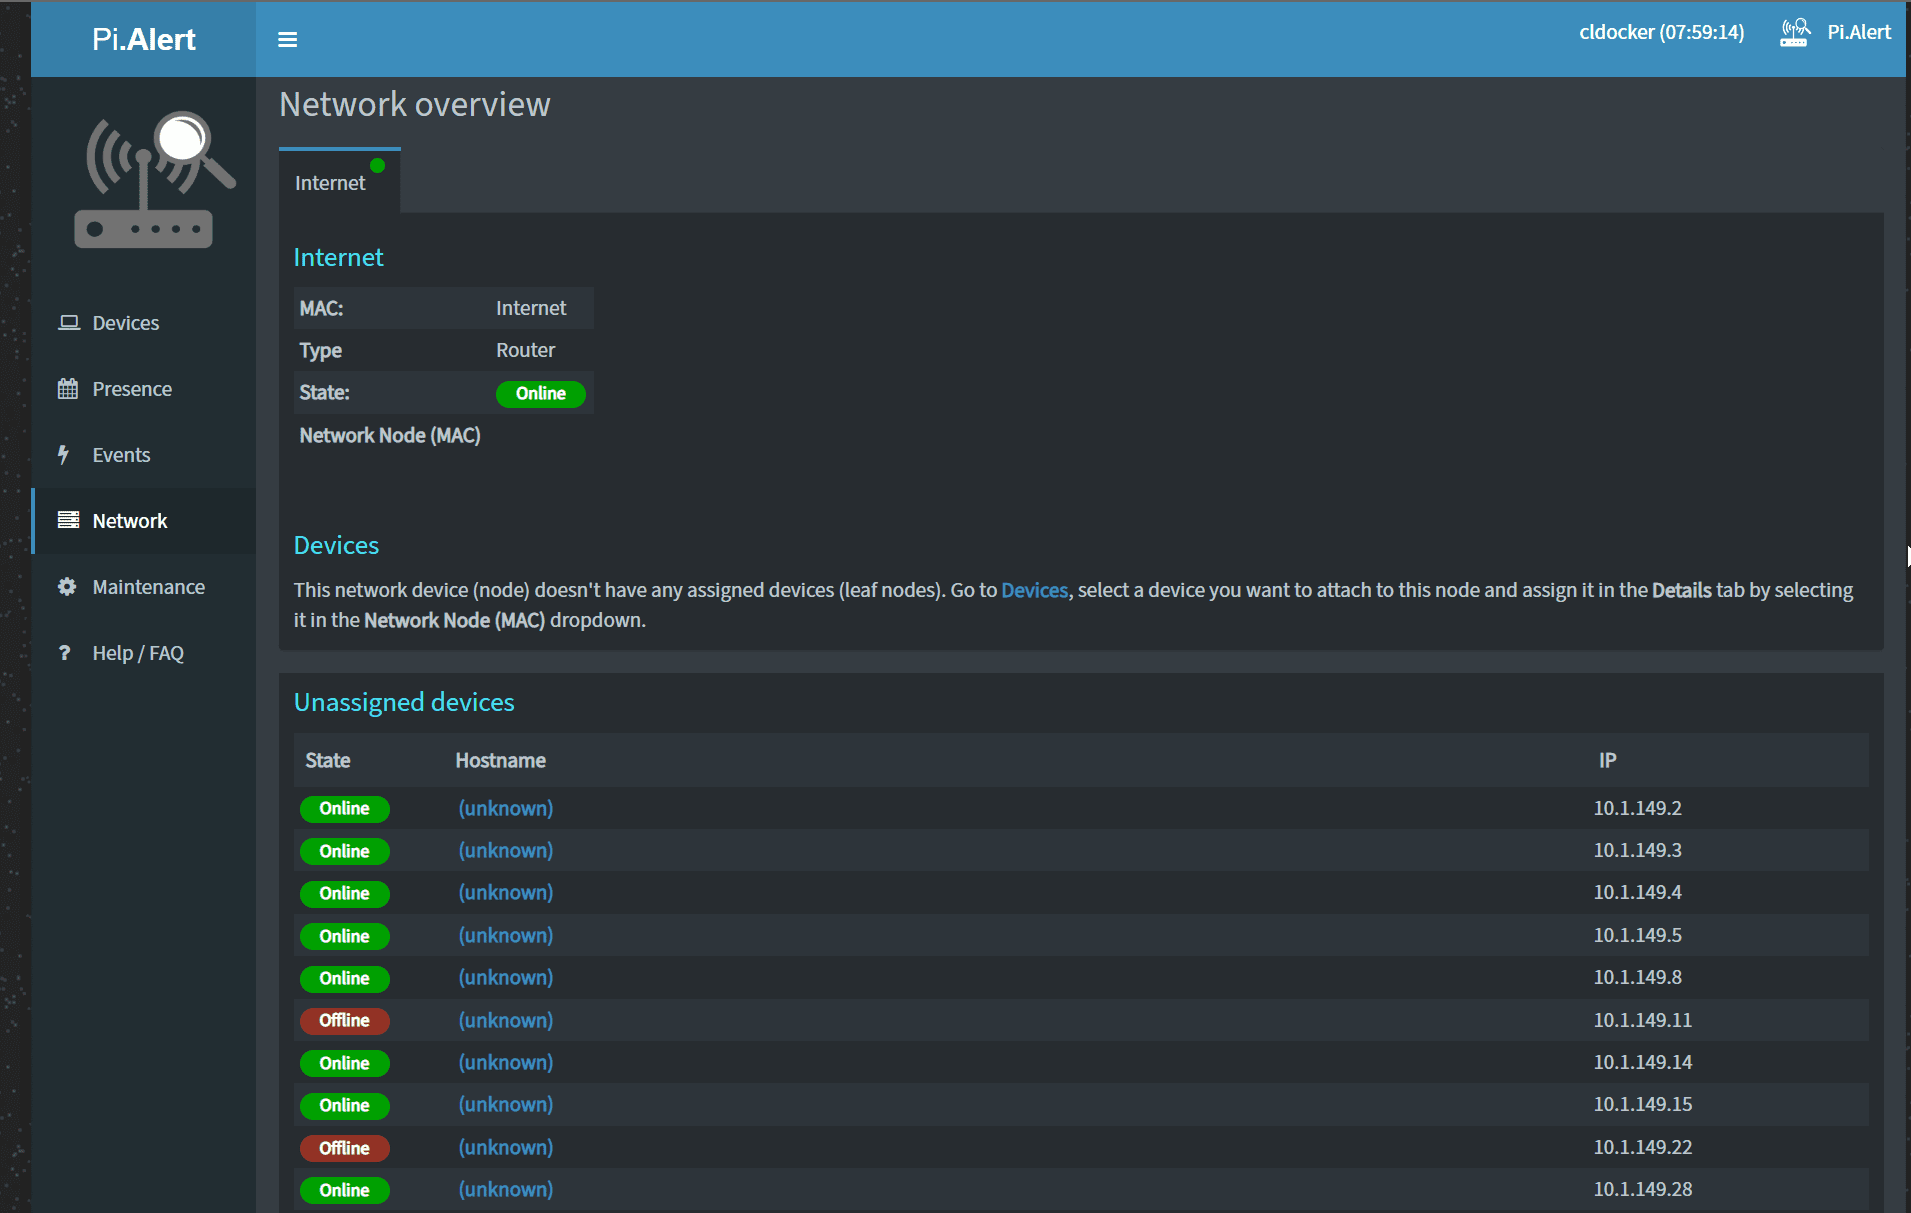
Looking at the network view.
Wrapping Up
Pialert is a great project I am enjoying in the home lab. It is an excellent compliment to my existing arpwatch install as it provides a nice web interface and additional alerting if I want to take advantage of that. Visibility is a key component of good security. Knowing what devices are on your network at all times is a cornerstone to good security and a valuable foundational security layer to implement.