I have been using FreshRSS more and more to aggregate news and other information sources out there for quick and easy consumption to get to the details quickly. FreshRSS is a popular favorite for a simple and easy RSS feed aggregator that you can self-host and configure with many different options.
Table of contents
What is FreshRSS?
FreshRSS is an open-source project, self-hostable aggregator that offers a familiar Google Reader-like experience for users. It has the added benefit of full control and privacy since you can self-host the solution and run the app in a browser. Using a simple Docker container installation using the Docker command line or Docker Compose, we can spin up a FreshRSS installation. You can also use a reverse proxy for a proper SSL certificate and trusted connection in a browser.
FreshRSS features
There are many features offered by FreshRSS that will allow you to get the most out of aggregating your content. These include the following:
- Ability to follow websites, podcasts, and video channels
- Ability to read the full article in FreshRSS (I will show how to do this in this post)
- Search and save your search queries
- Web scraping of external websites
- Feeds generation for generating new feeds based on your filters
- OPML importing and exporting so you can properly migrate existing installations
- WebSub – Have feeds updated in real-time
- API access, such as through the Google Reader API
- Mobile friendly – viewing the FreshRSS installation on a mobile device is possible
- Fast and efficient – you can manage thousands of feeds without issues
- It is highly extensible, with extensions and themes to customize the experience if you find limited features, there is probably a plugin
- Multi-language, available in more than 15 languages
- Add SQLite support – There is also support for SQLite database server configuration
- Frequent updates – there are many updates to the FreshRSS platform such as add version layer information, rebasing to Alpine linux, fix cron init, add layer badges to README, and many others. You can view the changes here: freshrss – LinuxServer.io.
Install FreshRSS with Docker Compose
Using Docker Compose for FreshRSS installation allows you to get up and running quickly with running FreshRSS aggregating RSS feeds and self-hosting it on your own infrastructure using a Docker host. You will need to perform the following steps:
- Install Docker and Docker Compose
- Create a docker-compose YAML file with the necessary configuration
- Bring up the containers with docker-compose
- (Optional) – Use a reverse proxy to provide SSL connectivity
1. Install Docker and Docker Compose
Use the following instructions in Ubuntu to install Docker and Docker Compose:
## Add Docker's official GPG key:
sudo apt-get update
sudo apt-get install ca-certificates curl gnupg
sudo install -m 0755 -d /etc/apt/keyrings
curl -fsSL https://download.docker.com/linux/ubuntu/gpg | sudo gpg --dearmor -o /etc/apt/keyrings/docker.gpg
sudo chmod a+r /etc/apt/keyrings/docker.gpg

## Add the repository to Apt sources:
echo \
"deb [arch=$(dpkg --print-architecture) signed-by=/etc/apt/keyrings/docker.gpg] https://download.docker.com/linux/ubuntu \
$(. /etc/os-release && echo "$VERSION_CODENAME") stable" | \
sudo tee /etc/apt/sources.list.d/docker.list > /dev/null
sudo apt-get update

## Install Docker and Docker Compose
sudo apt-get install docker-ce docker-ce-cli containerd.io docker-buildx-plugin docker-compose-plugin
2. Create a docker-compose YAML file with the necessary configuration
To create the FreshRSS installation, you can use the following Docker Compose code to initialize the container needed using an image from Linuxserver.io. You can use docker run -d an option to run the container service as well. However, docker-compose is the recommended way.
You can adjust the parameters to fit your environment. The CRON_MIN provides a way for a user customized crontab to determine how often FreshRSS will update with a cron job.
Create a docker-compose.yml file in your directory which you are working out of and populate the file with the code below. I have updated the container restart policy to always to make sure the container restarts when the host is restarted, etc. Also, you can set the PGID of the accounts you want to use in the example.
The values for 1000 are typically the root account. The TZ environment variable is the timezone you can configure. Enter the value of your timezone. The CRON_MIN parameter configures when the cron job will run to update the feeds. The volume can be configured as you need on your Docker host.
services:
  freshrss:
    image: lscr.io/linuxserver/freshrss:latest
    container_name: freshrss
    environment:
      - PUID=1000
      - PGID=1000
      - TZ=America/Chicago
      - CRON_MIN=3,33
    volumes:
      - /path/to/data:/config
    ports:
      - "80:80"
    restart: always
If you want to use the official Github repo and image, you can use the following:version:
volumes:
  data:
  extensions:

services:
  freshrss:
    image: freshrss/freshrss:latest

    # Optional build section if you want to build the image locally
    build:
      context: https://github.com/FreshRSS/FreshRSS.git#latest
      dockerfile: Docker/Dockerfile-Alpine

    container_name: freshrss
    hostname: freshrss
    restart: unless-stopped

    logging:
      options:
        max-size: "10m"

    volumes:
      - data:/var/www/FreshRSS/data
      - extensions:/var/www/FreshRSS/extensions

    environment:
      TZ: America/Chicago
      CRON_MIN: "3,33"
      TRUSTED_PROXY: "172.16.0.1/12 192.168.0.1/16"
3. Bring up the containers with docker compose
Finally, after you create the docker-compose.yml file, you can bring the FreshRSS installation up with the below command. This will install all the required FreshRSS site files within Docker:
docker-compose up -d4. (Optional) – Use a reverse proxy to provide SSL connectivity
You can also add a reverse proxy to provide SSL connectivity to your FreshRSS installation. You can use something like Nginx Proxy Manager or Traefik. Connect the container to the proxy network so the only way to access the container is through the proxy.
You can check out my post on configuring the Nginx Proxy Manager here: Setting Up Nginx Proxy Manager on Docker with Easy LetsEncrypt SSL.
Keep in mind this is optional, as you can use the default to expose the container on port 8023 directly on the Docker container host. However, reverse proxying connections for SSL is definitely recommended any time you are passing login credentials across the network.
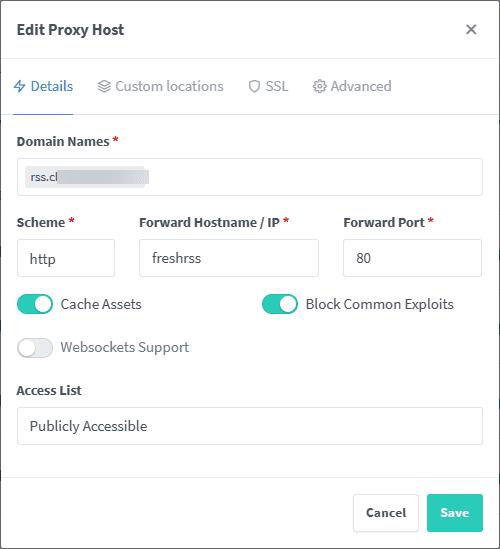
You can see the Nginx Proxy Manager config below that I have set up to update Nginx config. Configure your domain name, scheme, forward hostname/IP, which can be the name of the container, and then the forward port. I flag on the Cache Assets and Block Common Exploits.
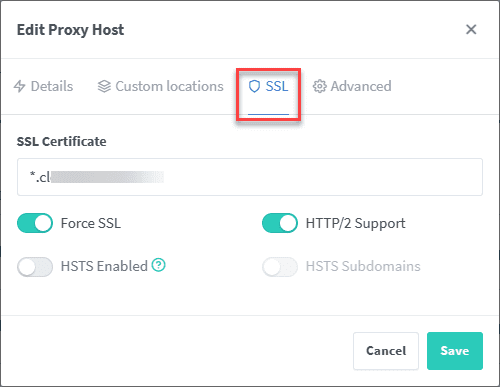
On the SSL tab, choose the SSL certificate and the Force SSL and HTTP/2 Support toggles.
Initial Server Configuration for FreshRSS
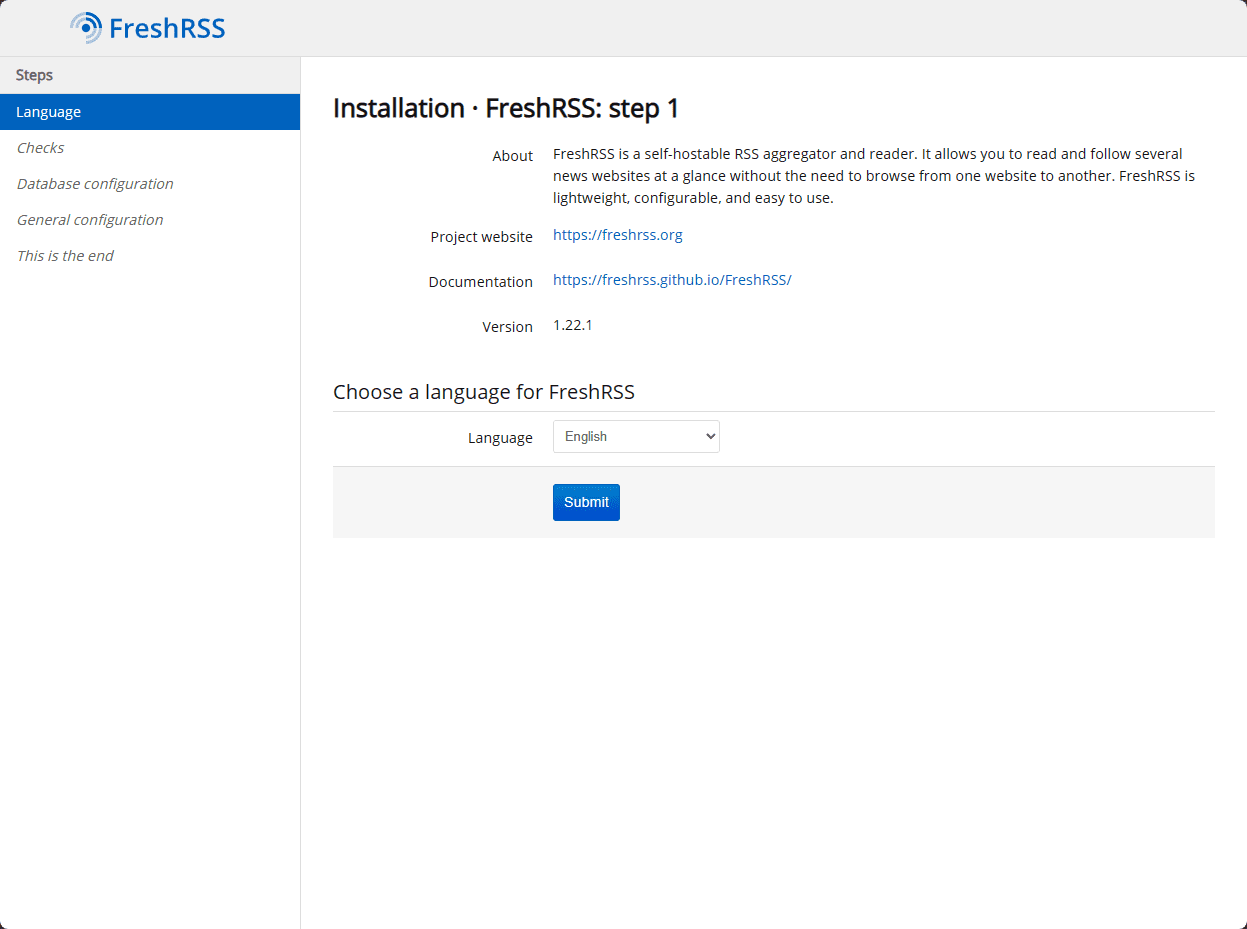
Let’s look at configuring the web server configuration setup wizard. When you first visit the FreshRSS web server in a browser session on the default port 8023, you will see the 5-step wizard that will get the initial configuration on your FreshRSS installation.
The first step shows you the version of FreshRSS deployed and you choose the language and hit next.
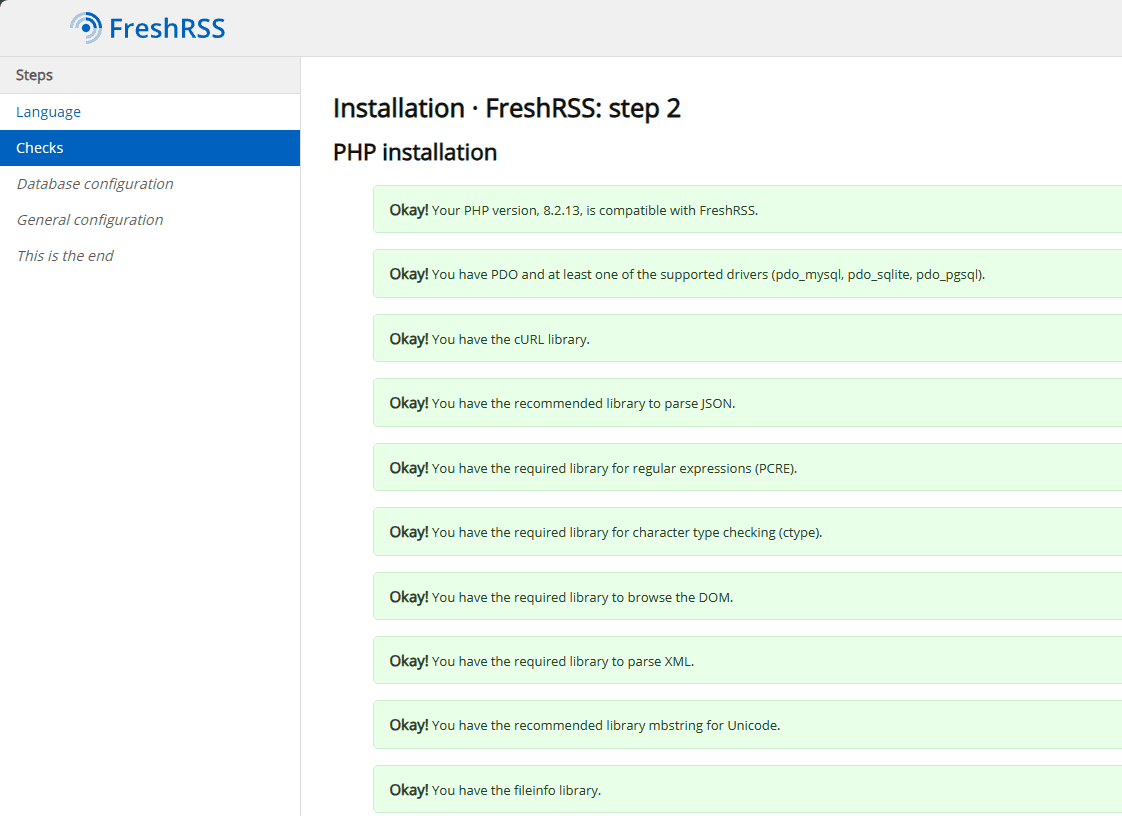
In Step 2, the wizard will check the prerequisites to ensure everything required is there. With the container there are no worries with that since everything is included. Click next.
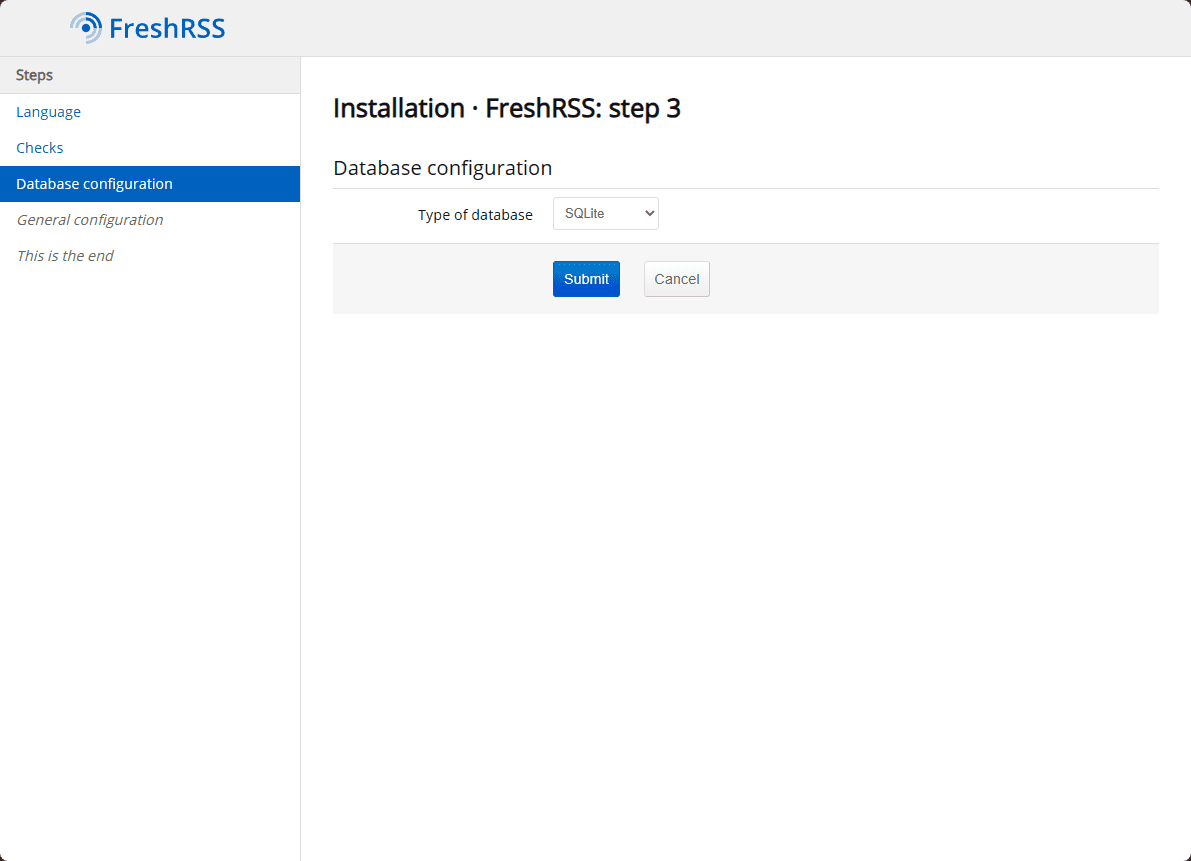
On Step 3, choose the DB you want to use for the installation. You can use the included SQLite DB. However you can point the installation to an external PostgreSQL DB or MySQL DB.
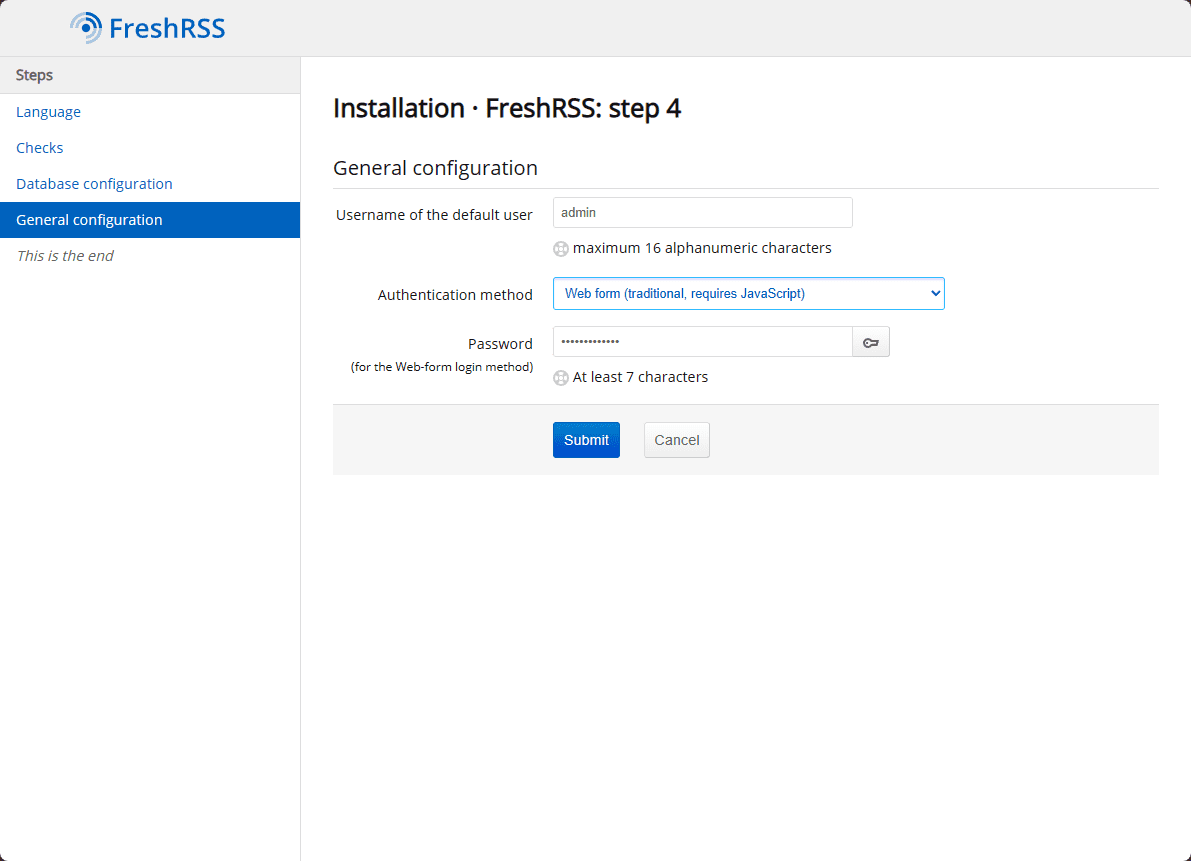
Next, you choose the authentication method.
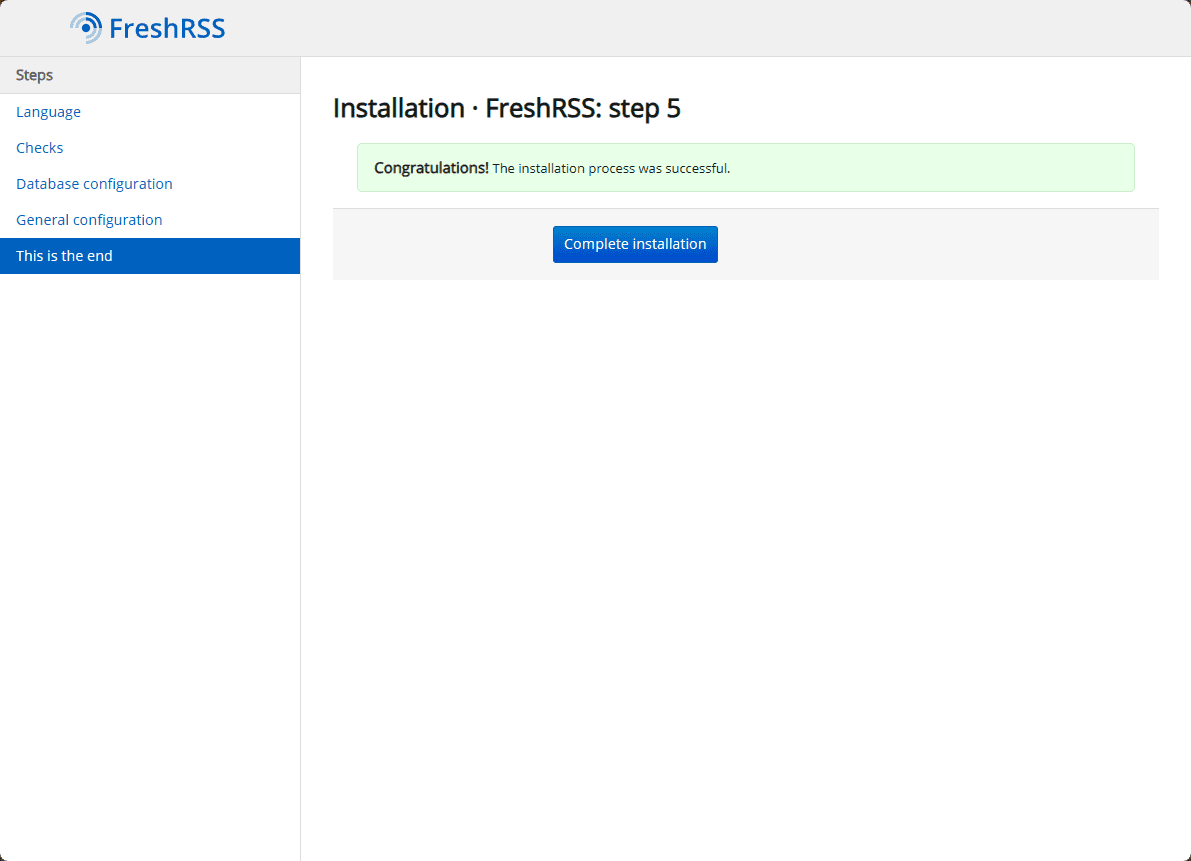
Finally, on Step 5, you complete the installation.
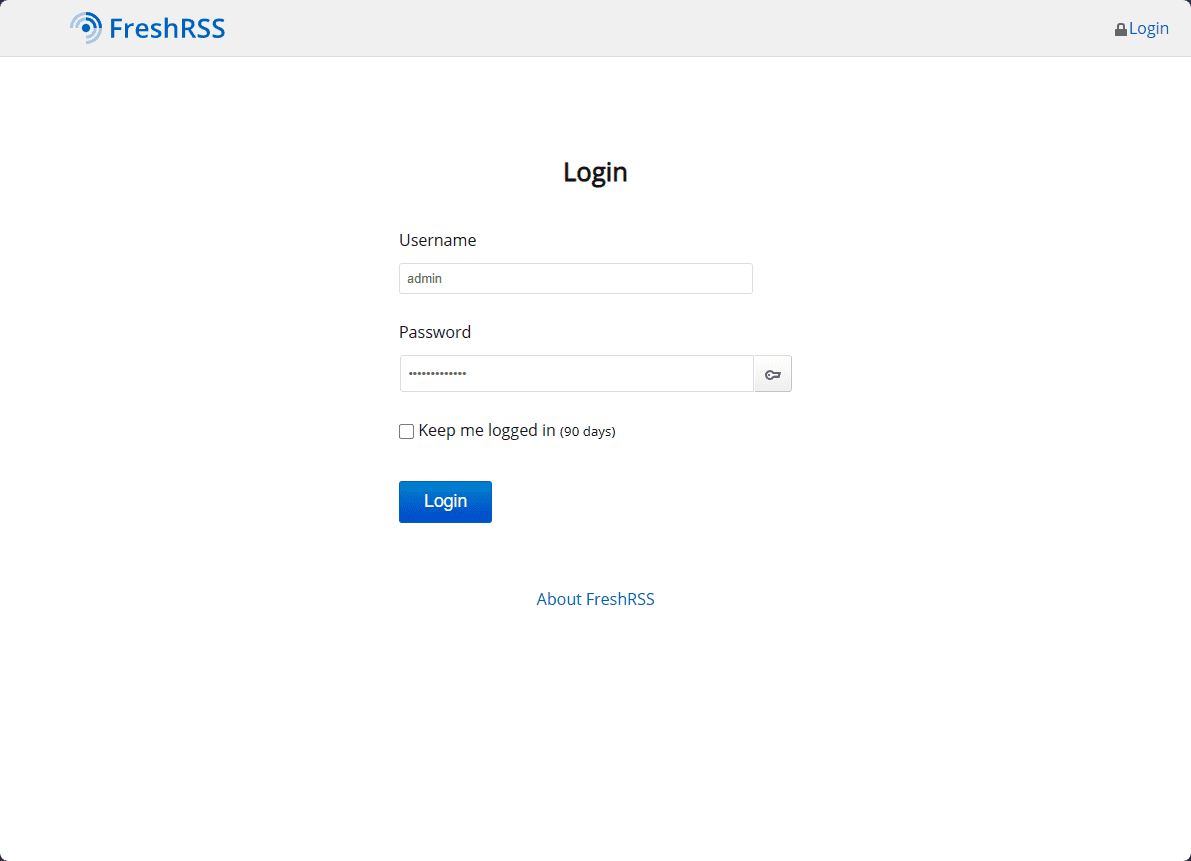
When you complete the installation, you will be taken to the login screen.
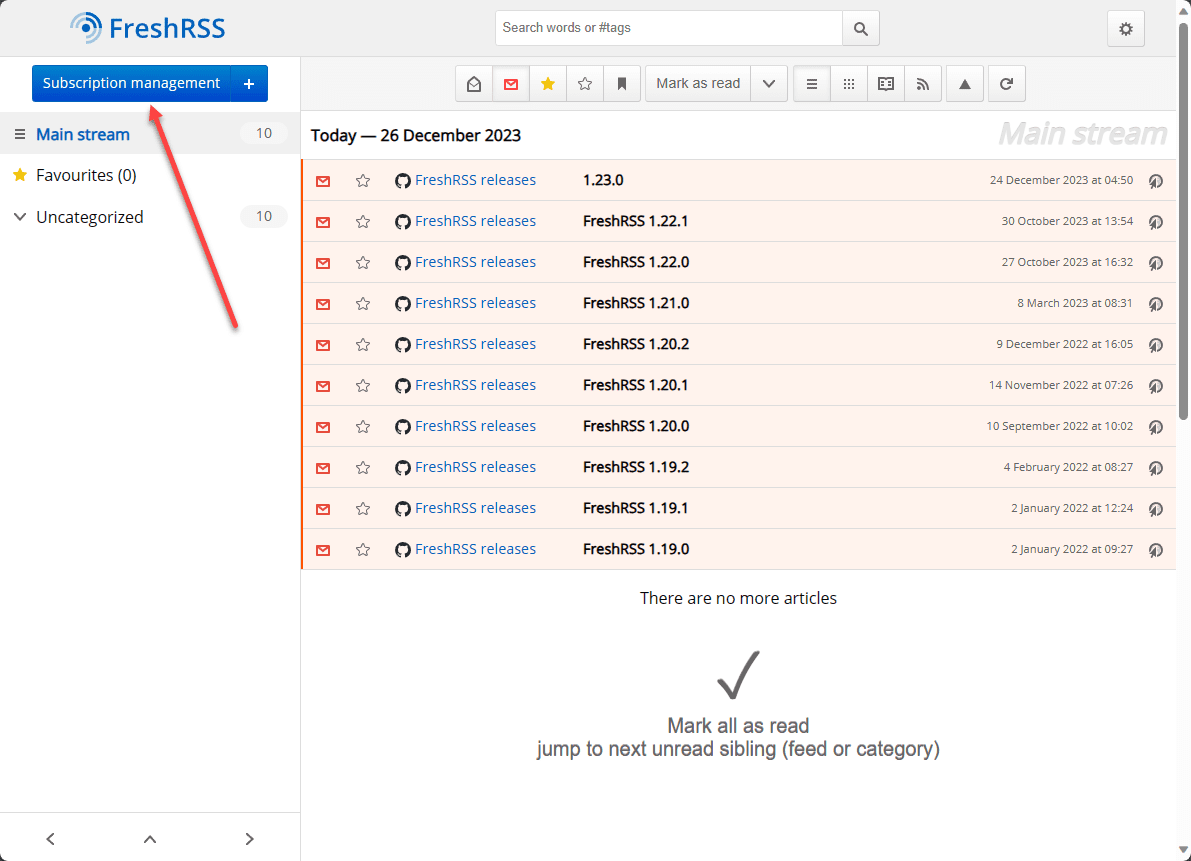
Subscription management
With the subscription management you can manage your subscription feeds and categories among other things. In the Navigation window, click the subscription management button.
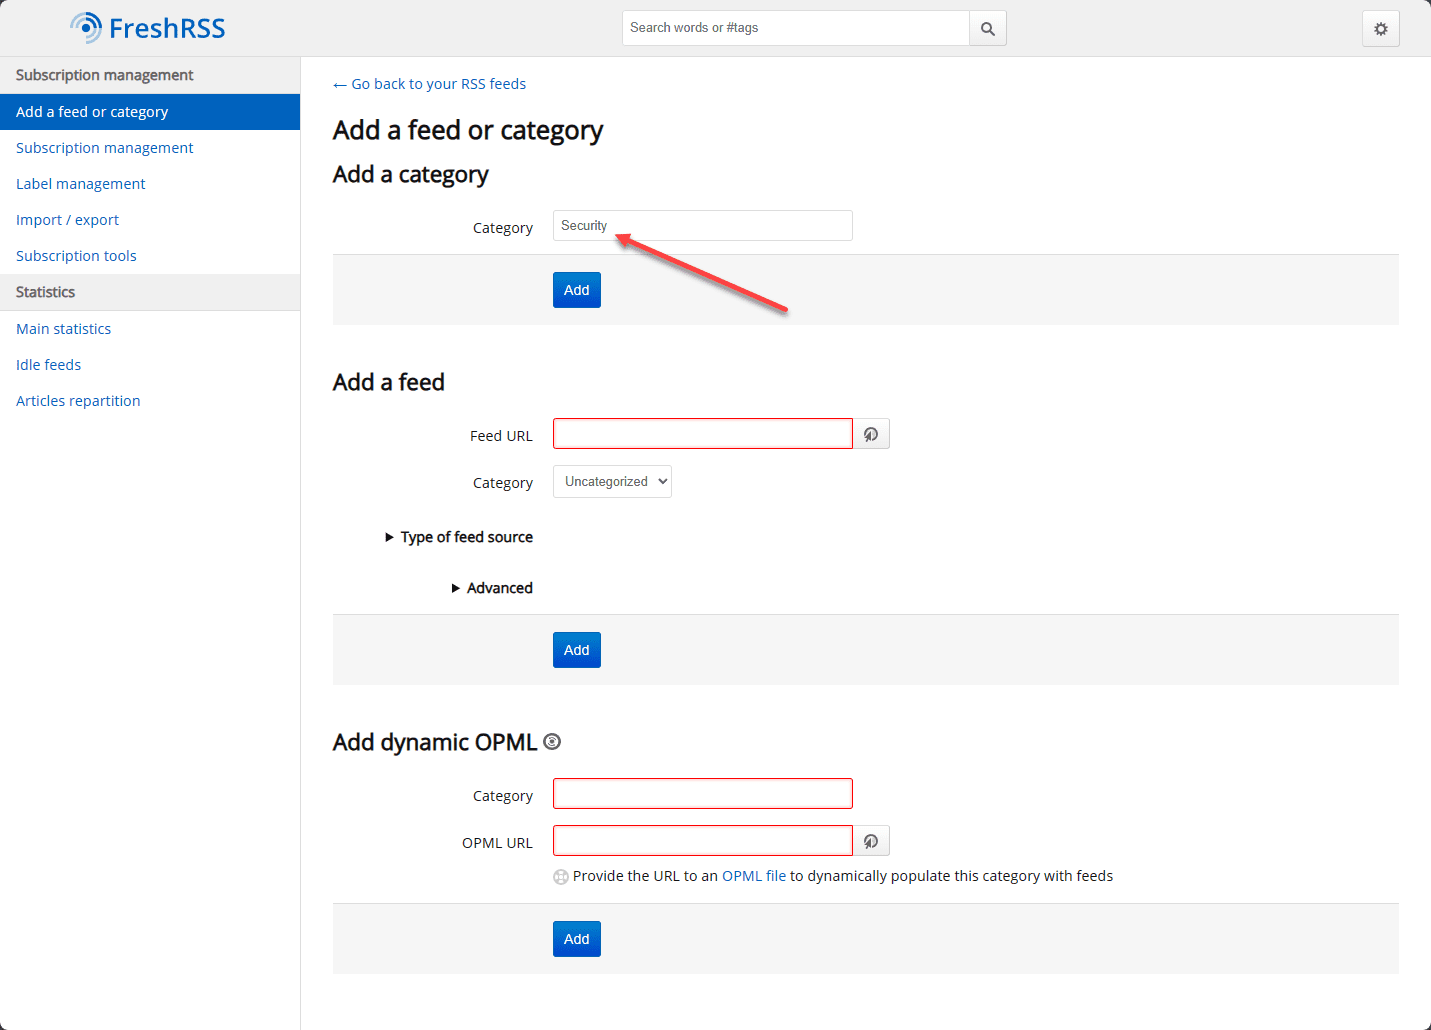
Below, I am creating a new category called Security.
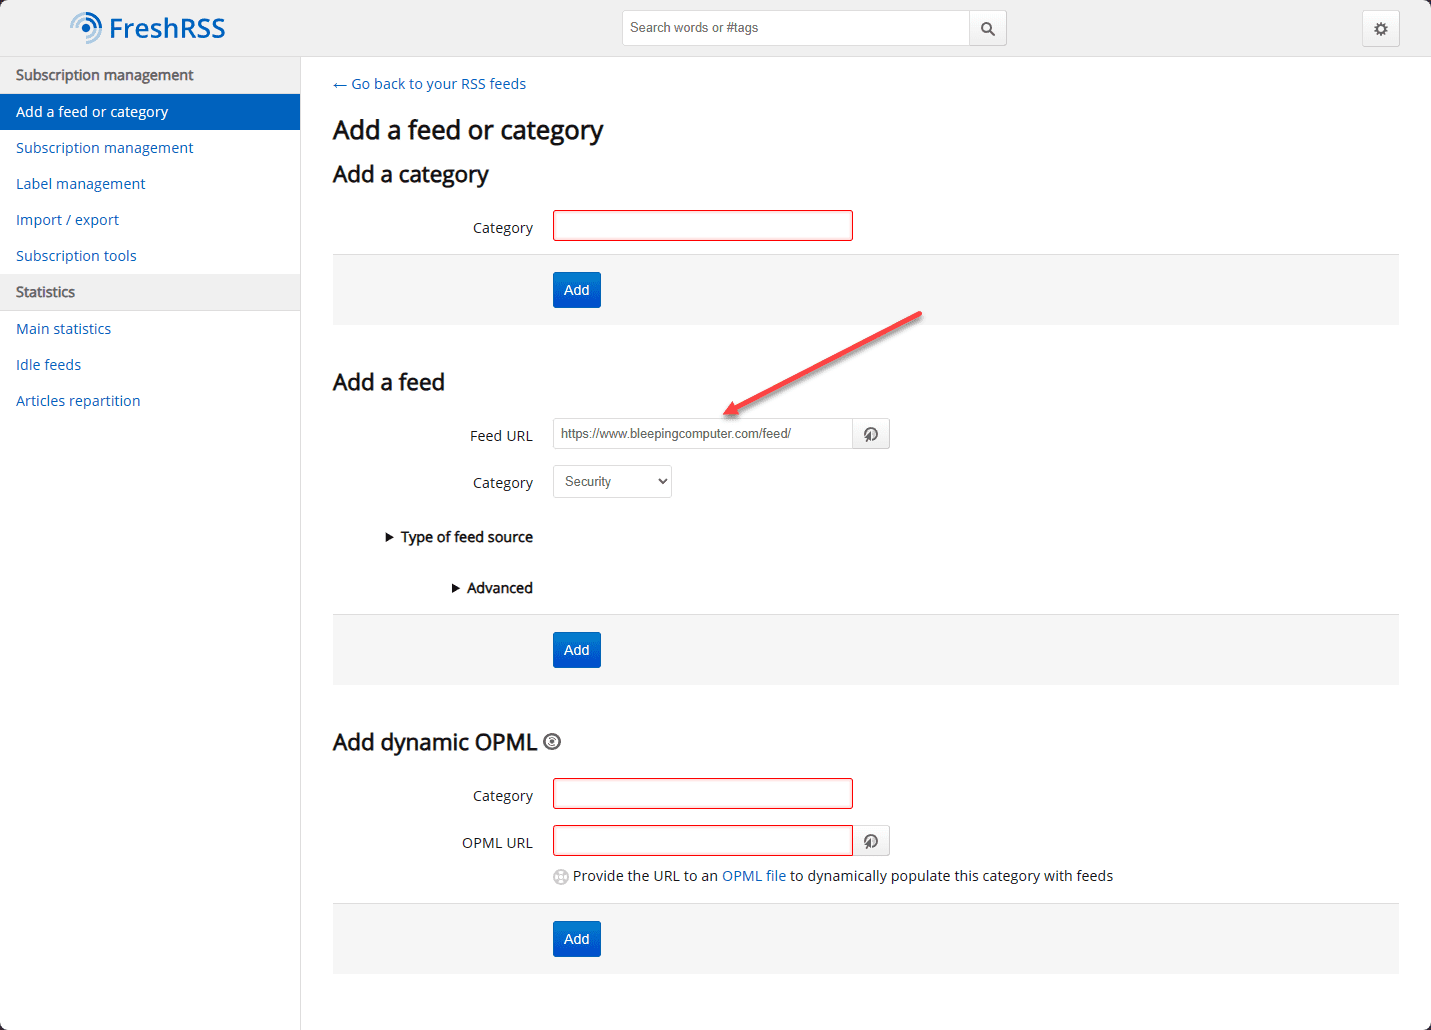
Now that we have a new category added, I am adding a new feed URL and setting the category to Security.
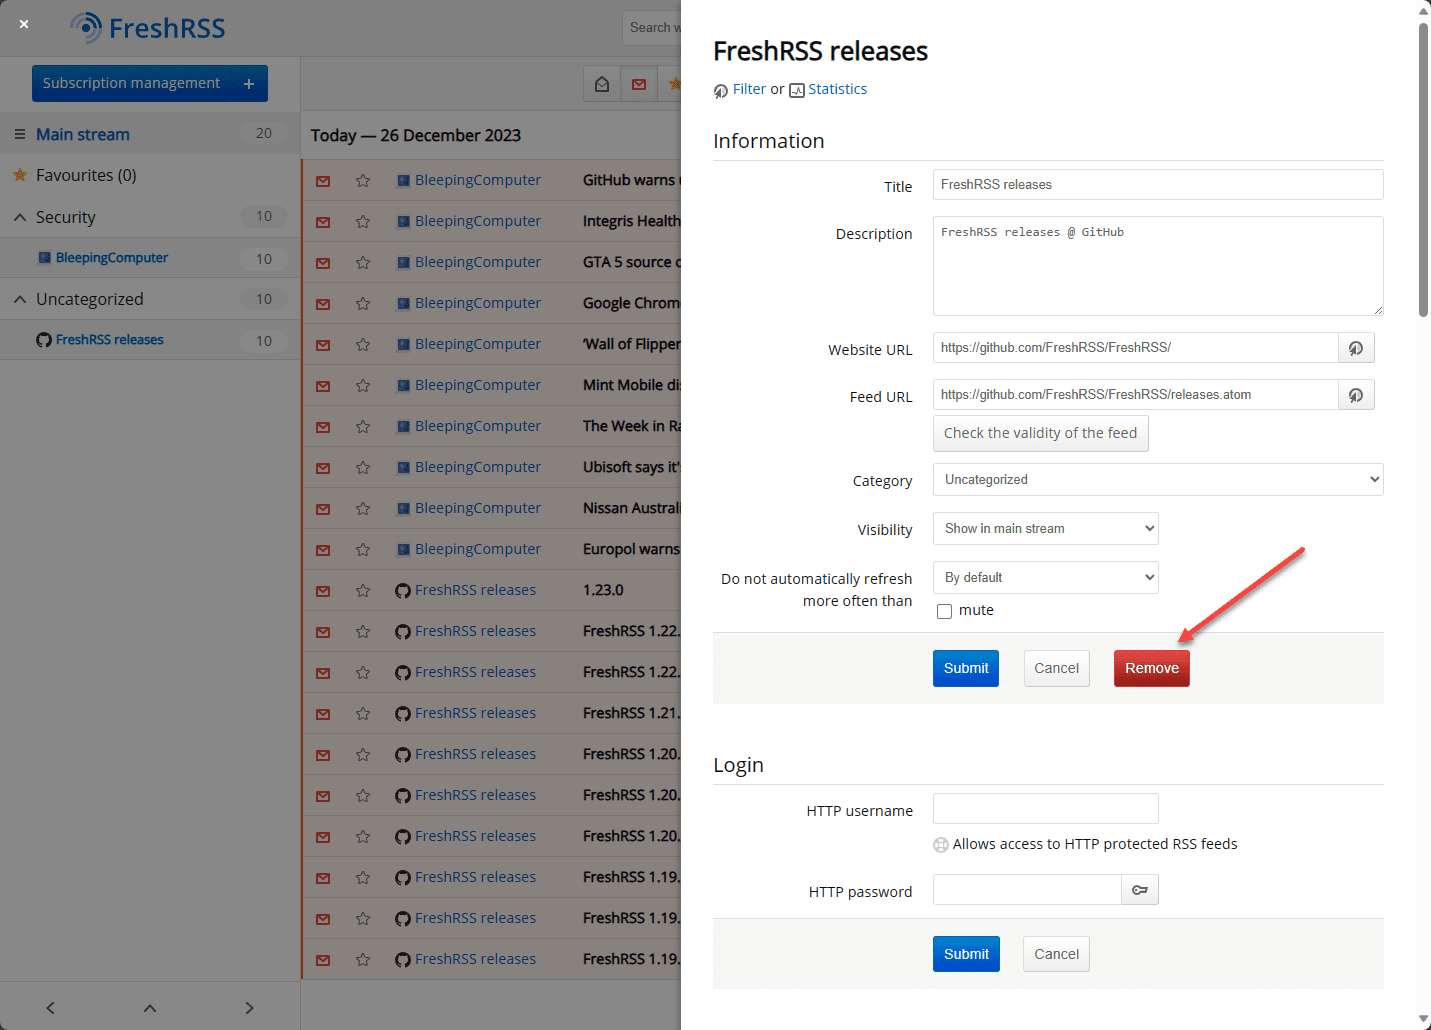
You can remove the default FreshRSS subscription feed.
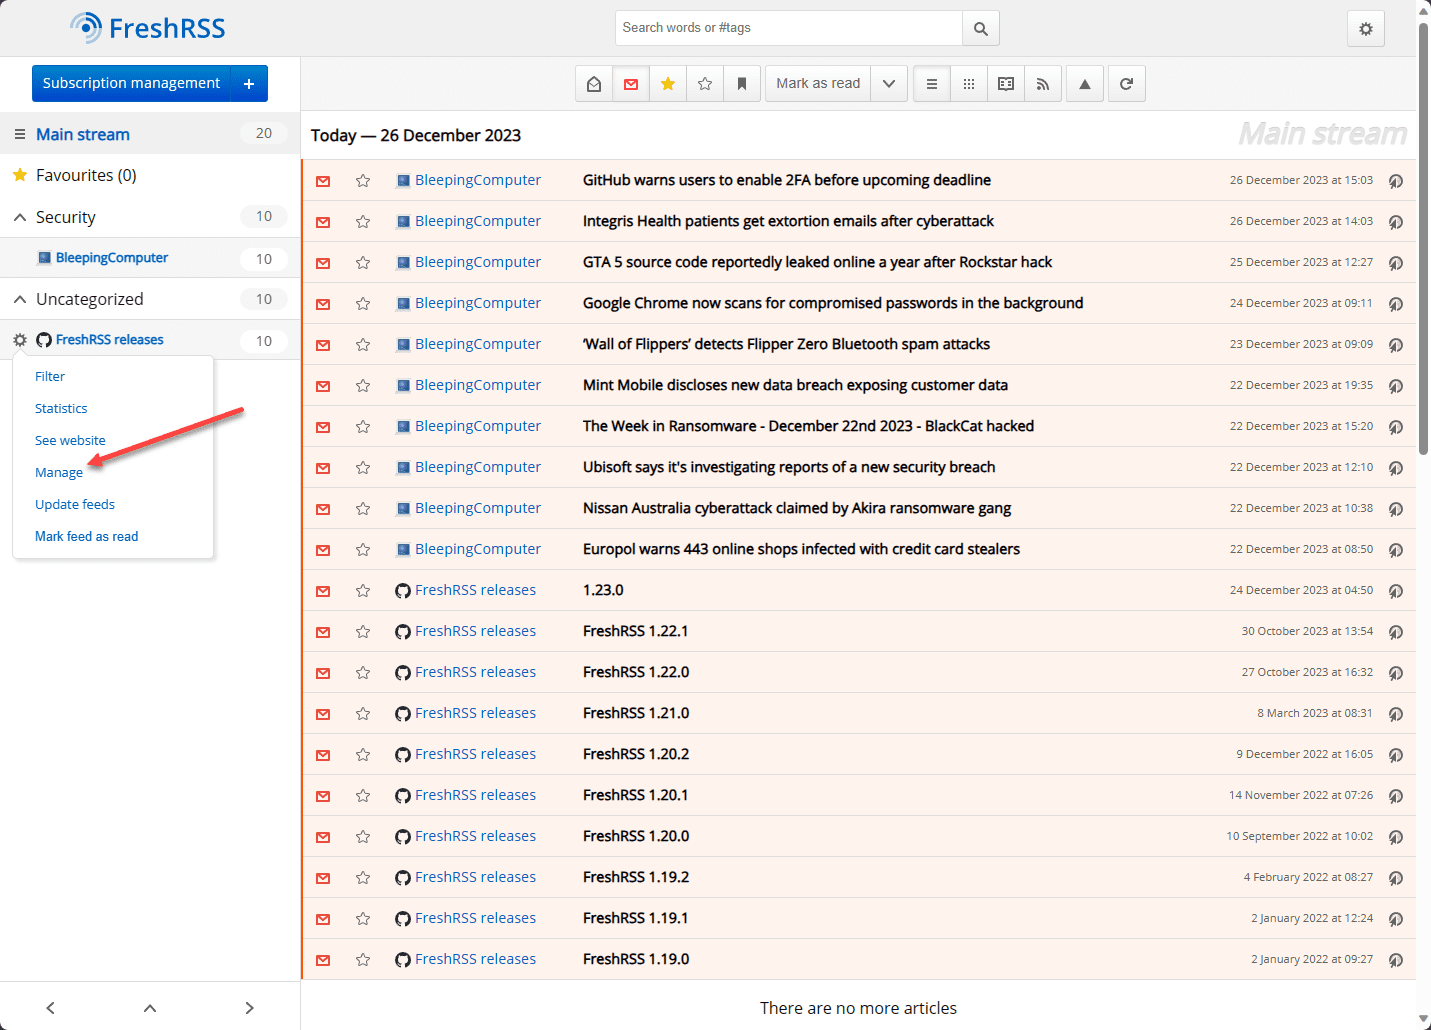
Click the Remove button to remove the feed.
Changing the display to dark mode
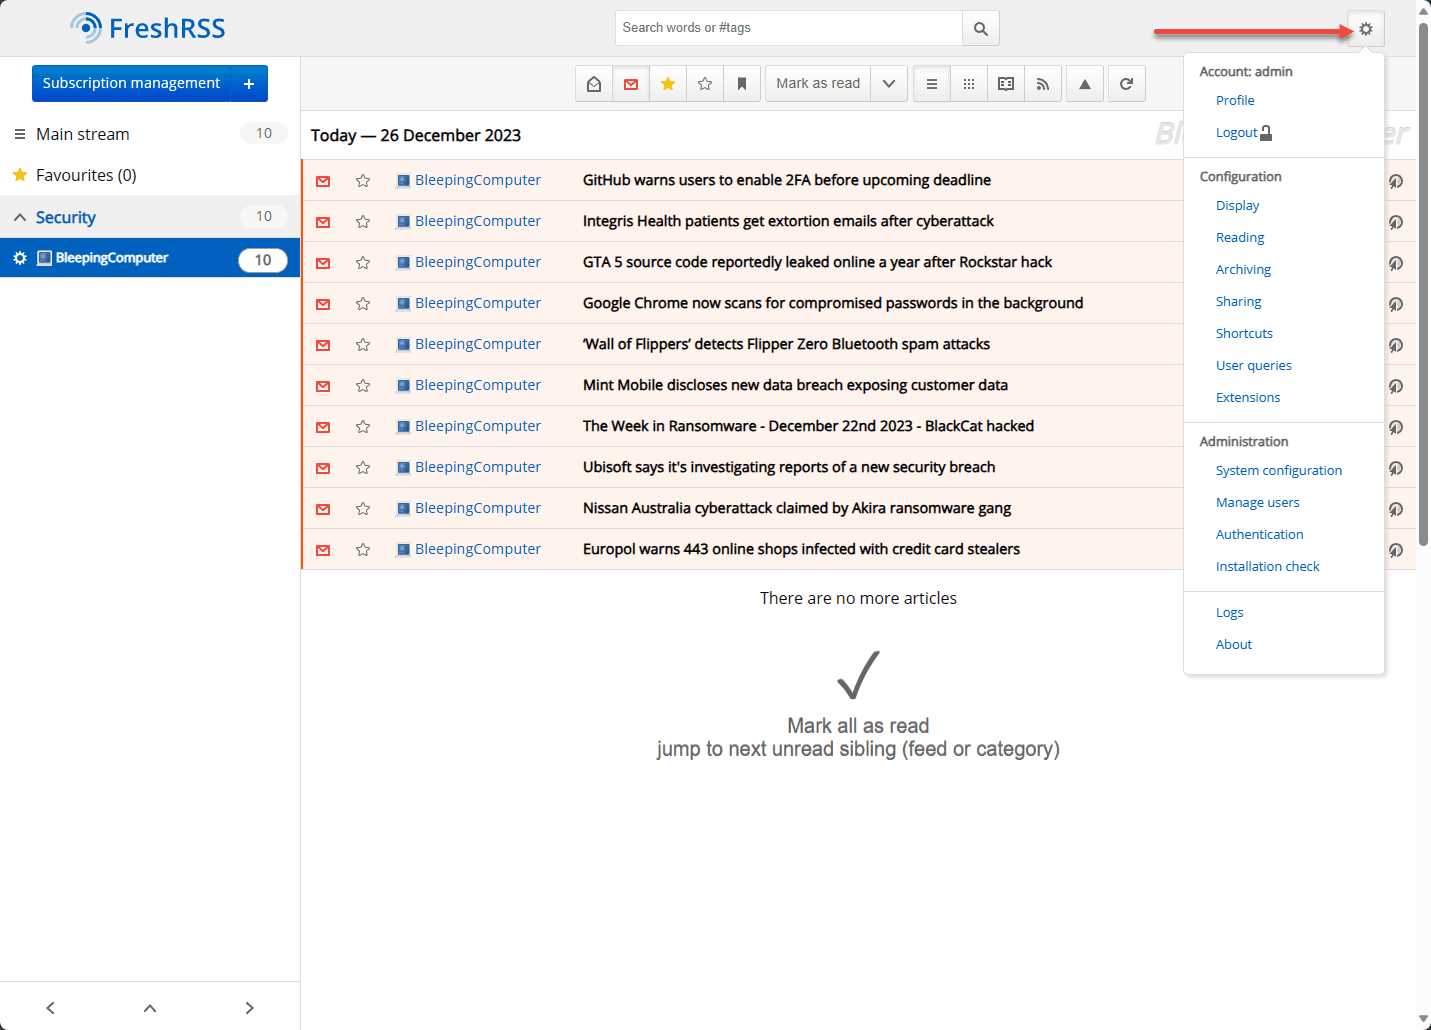
One of the first things you will probably want to do is change from the “eye bleeding” white to the much more easy-on-the-eyes dark mode. Navigate to the system configurations cog in the upper right-hand corner.
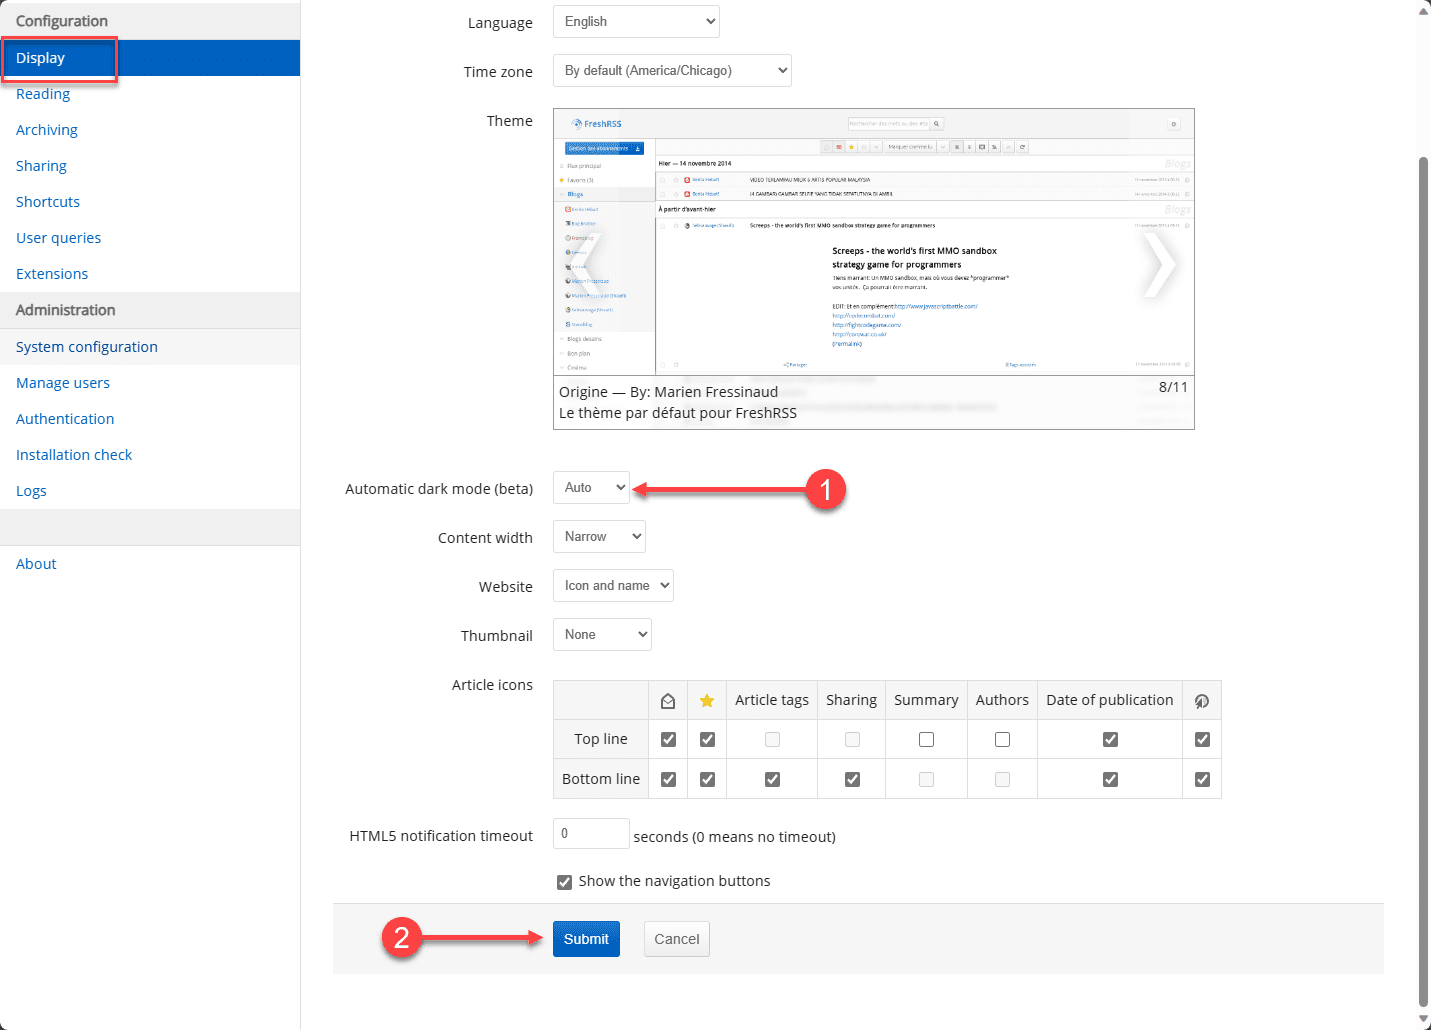
On the Automatic dark mode (beta) setting, change this to Auto.
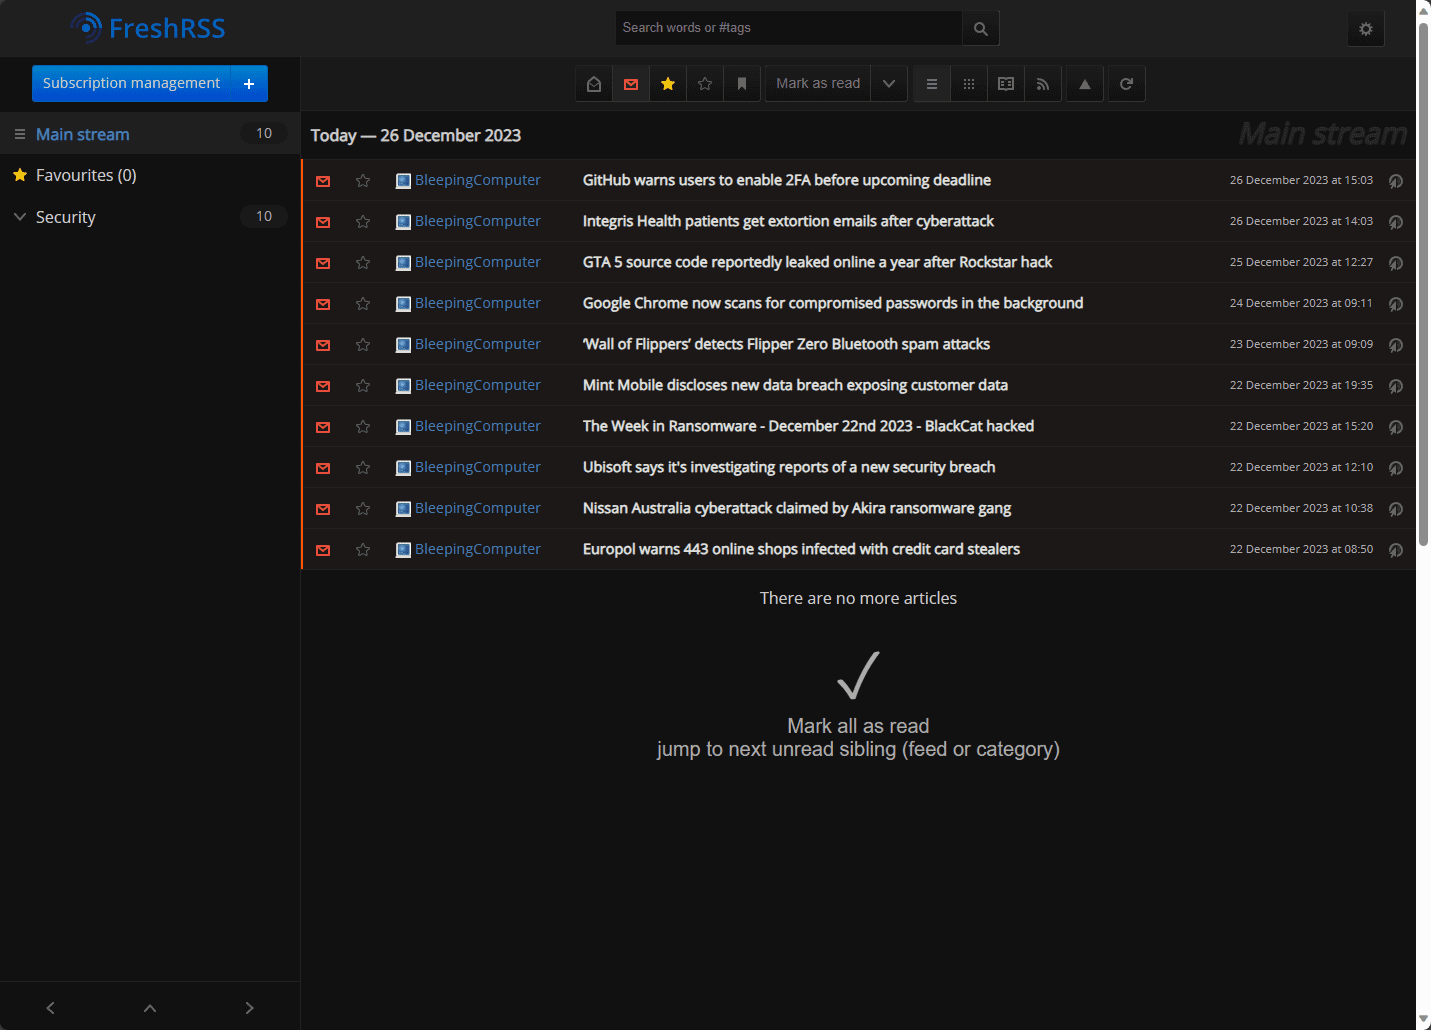
Now the interface is set to dark mode.
Extensions
Extensions are third-party plugins that allow you to extend the functionality of FreshRSS. Navigate to the settings cog in the upper right-hand corner of the interface. Navigate to Configuration > Extensions.
Here you will find a list of extensions you can download and install as well as a link to GitHub or another source for the files. You have to download these manually and copy them to the following directory in the volume mount for your container:
freshrsstest/data/www/freshrss/extensions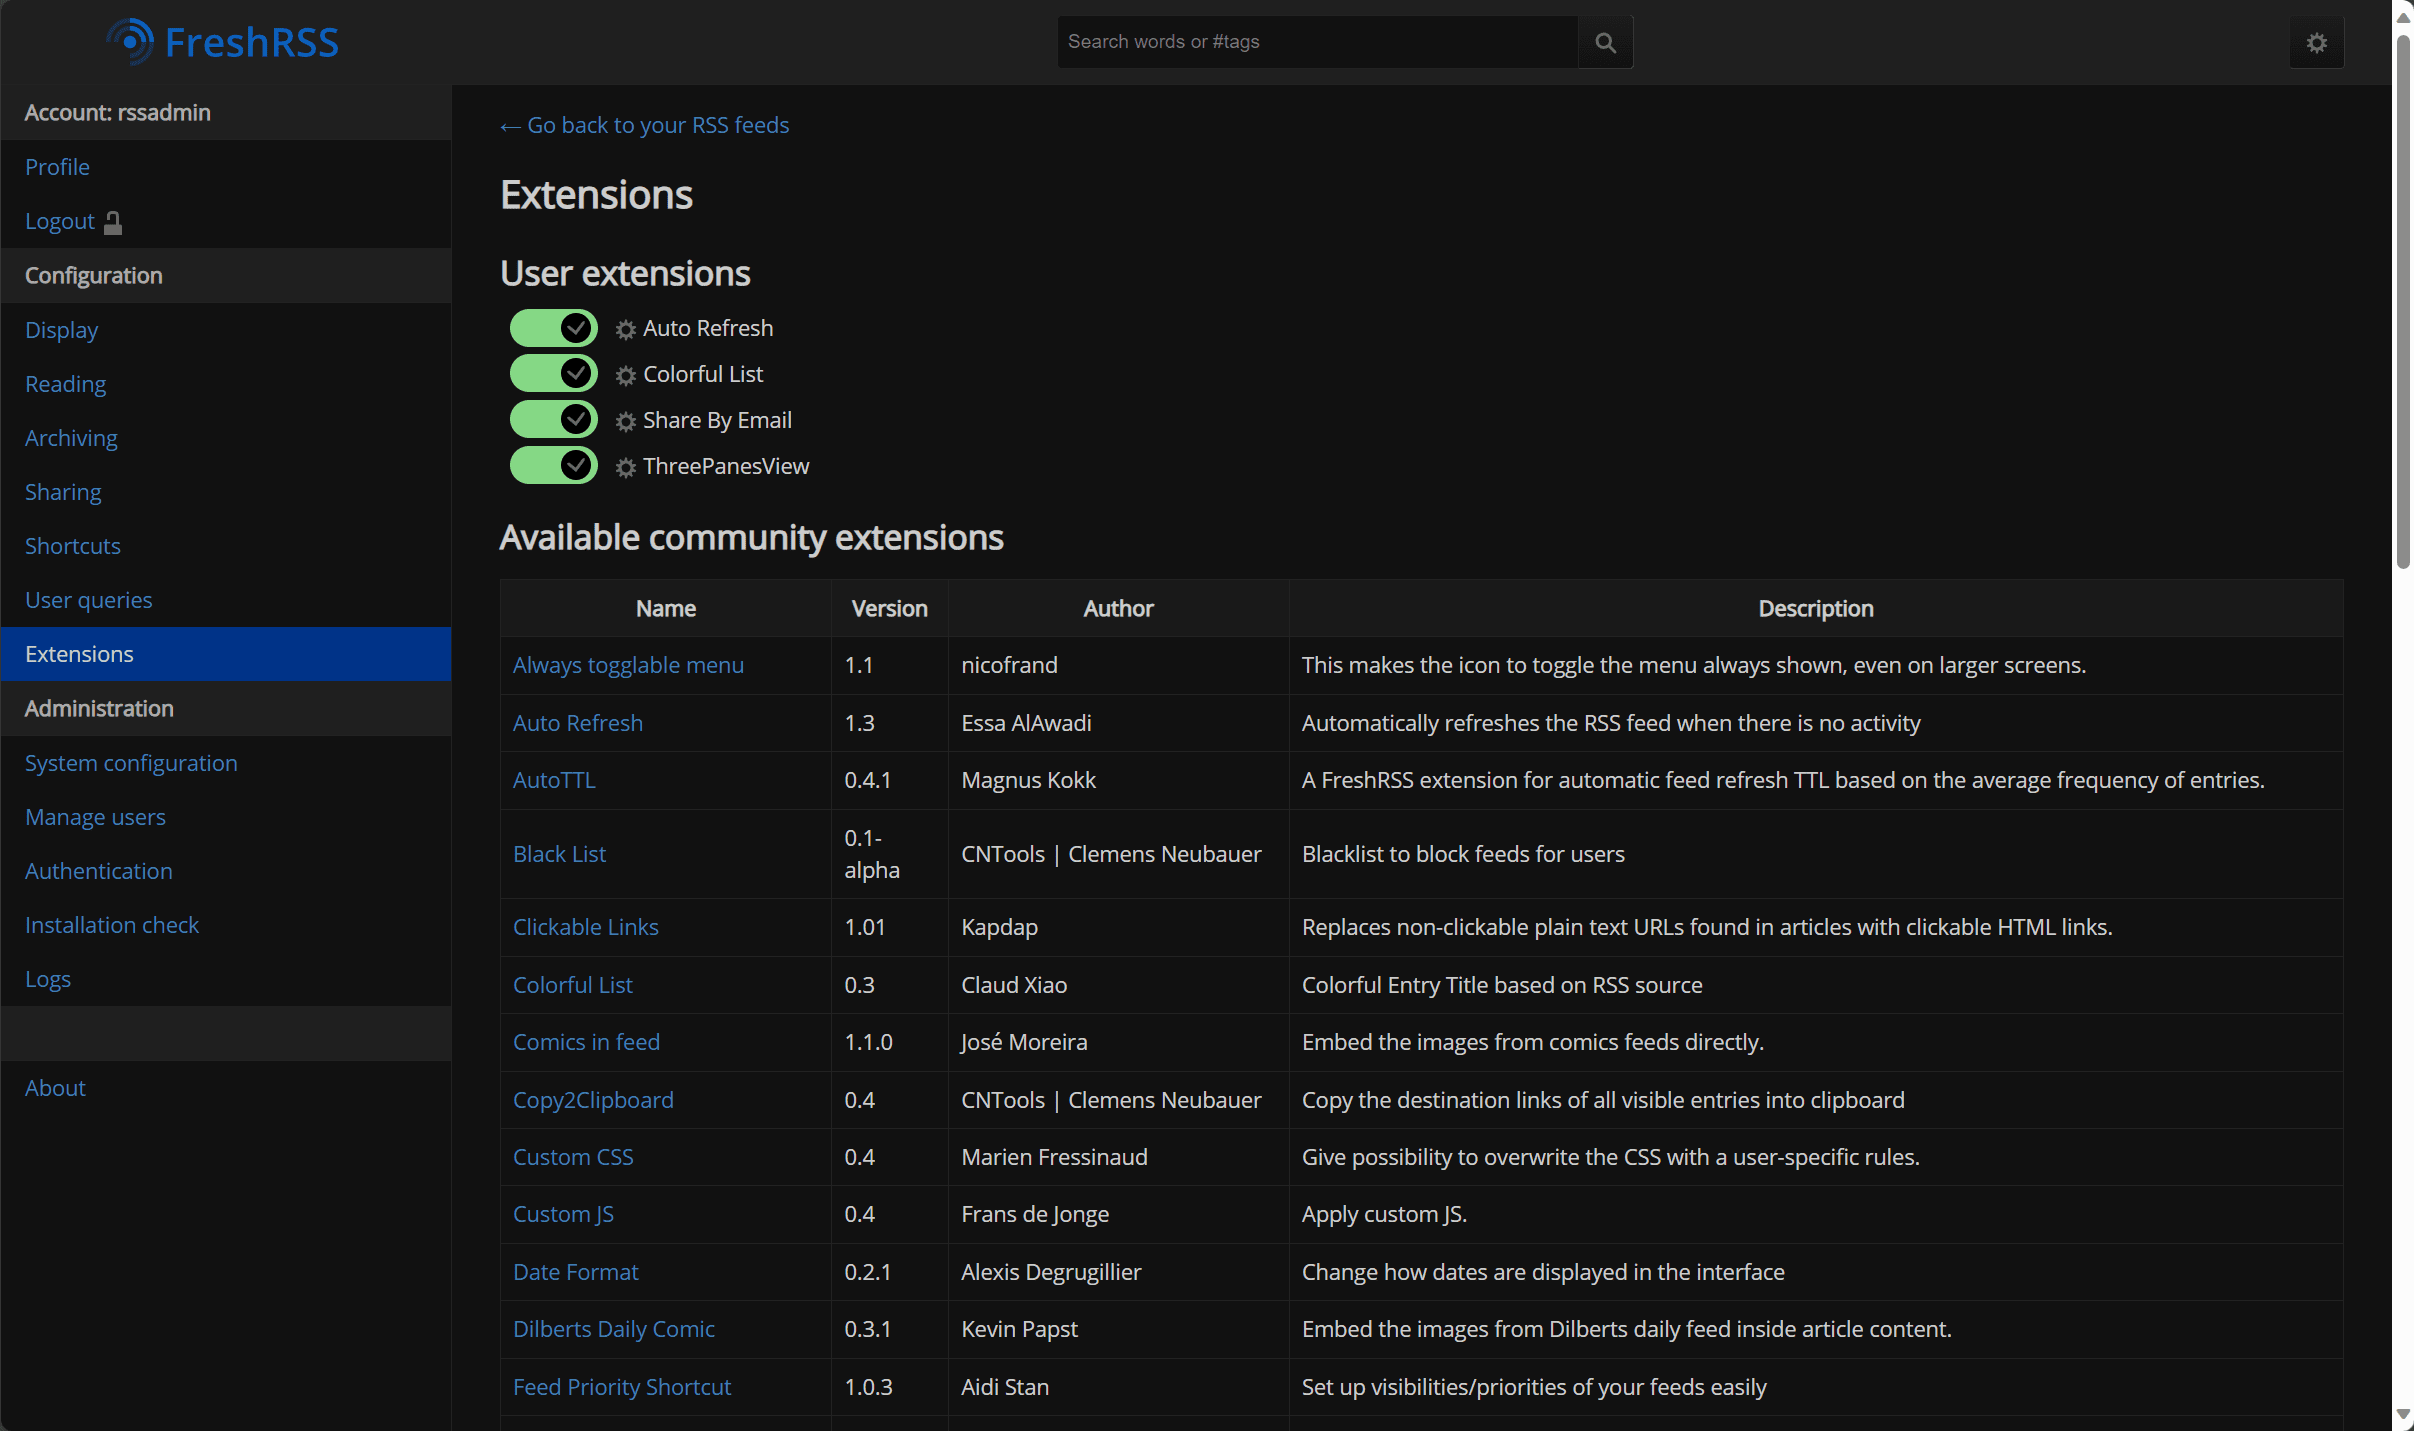
Getting the full article text
I struggled a bit with this at first with FreshRSS understanding how to set this up. I looked for extensions and there are a few out there that use readability or Mercury to pull full text. However, I stumbled onto some documentation showing another way to pull full content by fetching different classes and IDs from the article content.
Using this, you can look at one of the articles on a feed and view the page source for the page. You can look for the CSS class or ID you want to pull. Most pages I have found have a CSS element you can pull from the page to display the full content.
For instance, Bleepingcomputer which I have in my feed, I was able to pull the class:.bc_main_content
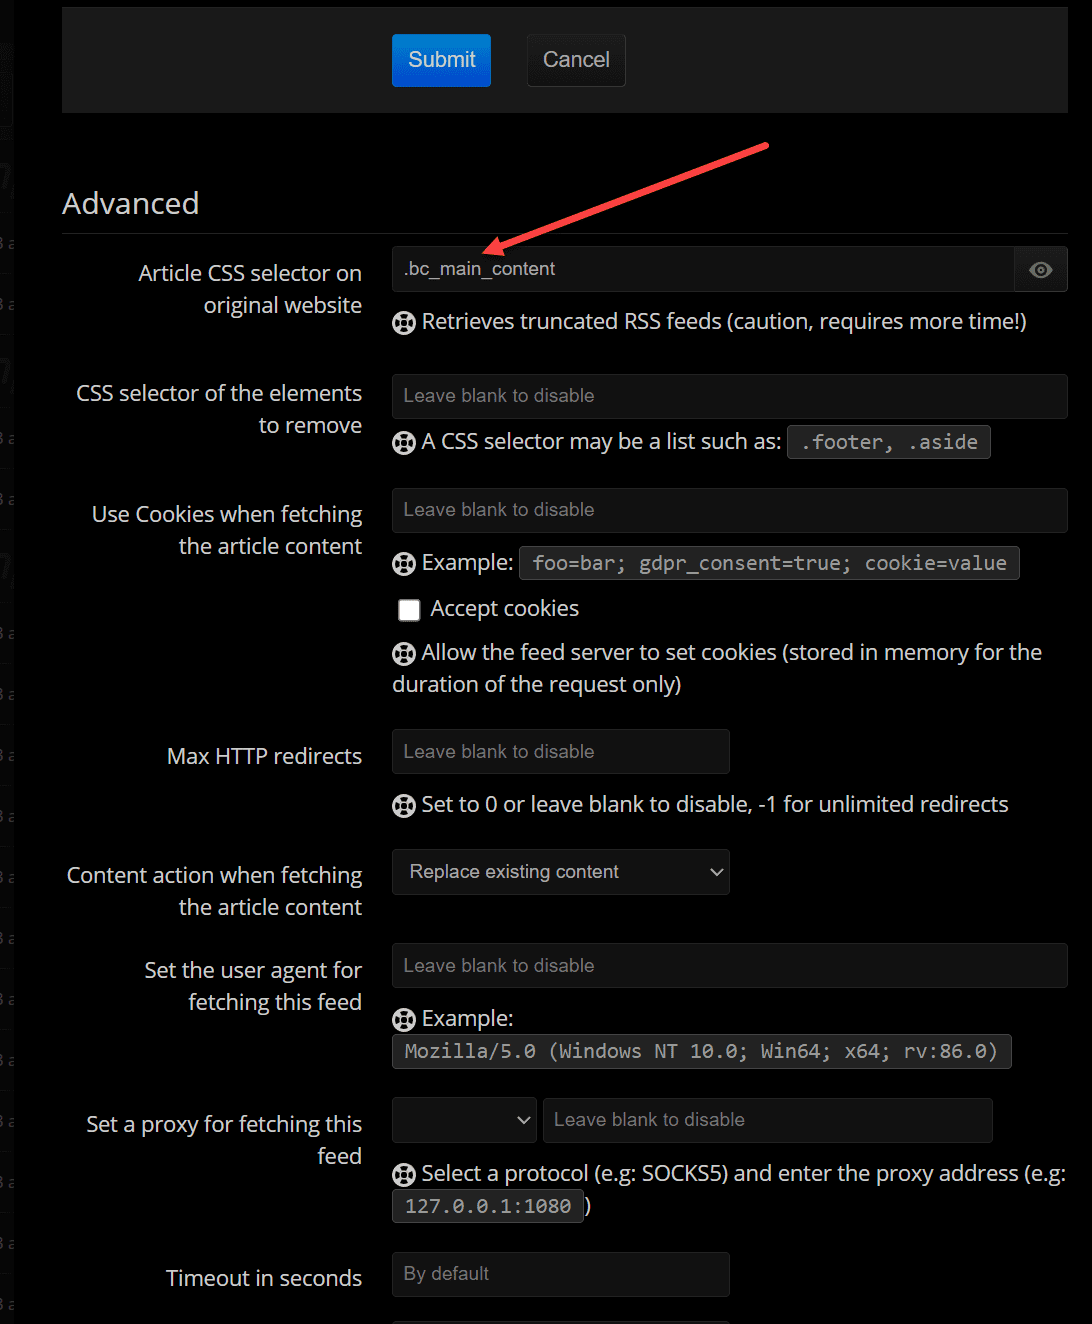
You can also hit the little “eye” next to the field to view the results of the class selector you are using to see if you receive an error message that the element wasn’t found or if it works as expected.
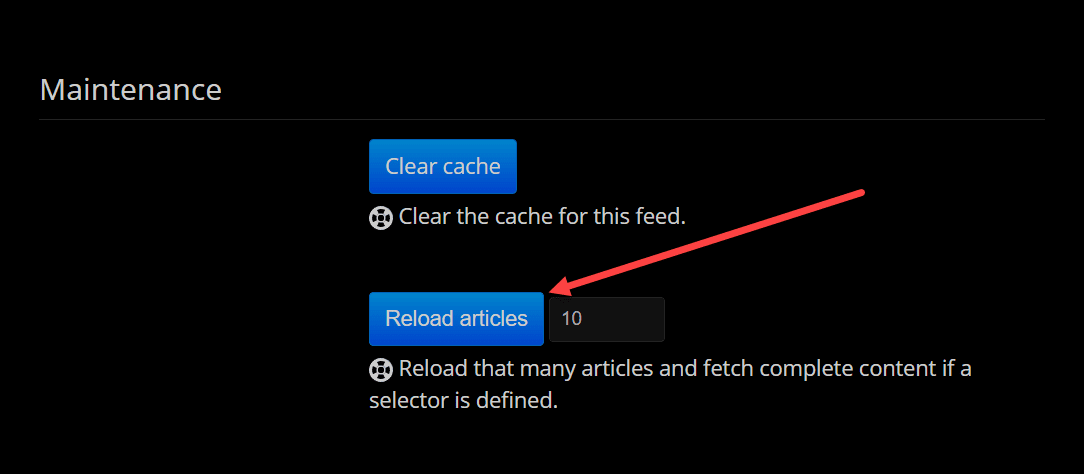
After you enter and Submit the configuration, you will need to Reload the articles for that feed.
Wrapping up: The Power of Self-Hosted FreshRSS
FreshRSS is a great tool to stay up-to-date on the latest news in the world if you want to follow from multiple feeds. If you are like me, browsing websites manually is a chore to aggregate all the headlines you want to read. With a feed aggregator like FreshRSS, you can automate this into a single source and have an effective way to read the latest news feeds.
The deployment is straightforward, and you can use CSS selectors to pull in the full text of a news feed into FreshRSS without an extension. However, there are many powerful extensions to enhance your feeds and make the experience more seamless.
Google is updating how articles are shown. Don’t miss our leading home lab and tech content, written by humans, by setting Virtualization Howto as a preferred source.
About The Author