Install LogRhythm NetMon in VMware vSphere VM
In the previous post, Free Network Threat Detection Monitoring and Forensics Tool, we tool a look at a great free network threat detection, monitoring solution, and forensics tool in the LogRhythm NetMon tool. It is a great way to stand up a simple solution that can give tremendous visibility to the network traffic happening on the network. As the previous post was a high-level overview of the solution, in this post, we will take a look at what is required to spin up an instance of LogRhythm Netmon inside VMware vSphere VM and pass network traffic from your network into the software configuration. Let’s take a look at how to Install LogRhythm NetMon in VMware vSphere VM.
LogRhythm NetMon Requirements
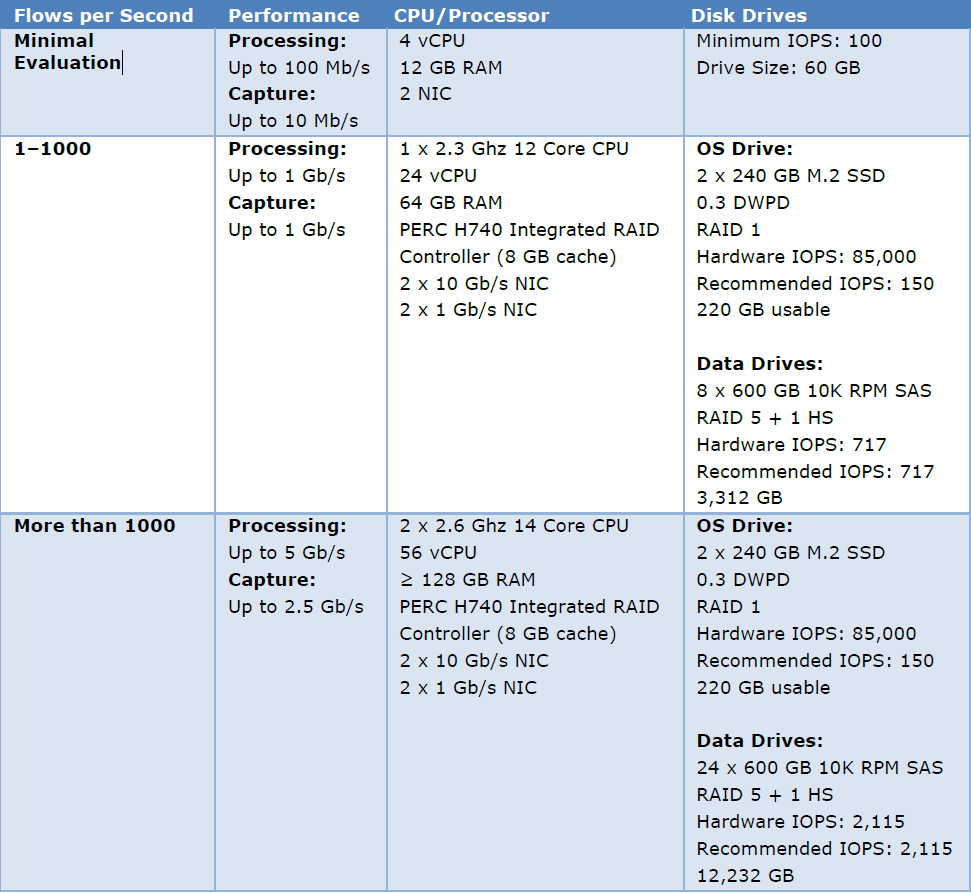
There are various virtual hardware requirements when considering installation of LogRhythm NetMon inside a VMware vSphere virtual machine. From the official Software Installation Configuration from LogRhythm, the following hardware requirements are worth noting.
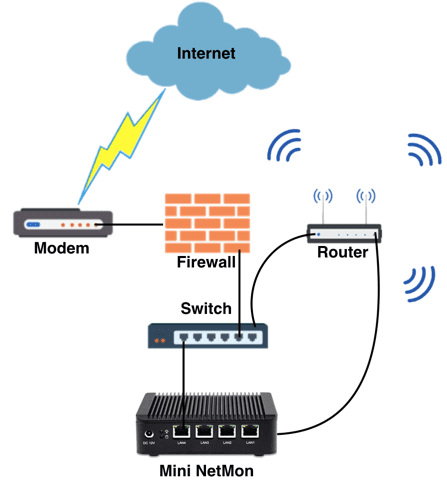
Keep in mind that if you are installing in a virtual machine, you will need to have your networking architecture in mind as to how you want to flow traffic through the NetMon appliance.
Straight from the NetMon Blog post on setting this up on a mini-PC, they say the following:
“In a home network, you’ll need a Tap, Hub, Smart Switch, or a router that supports port mirroring to capture traffic in-transit. There are countless products out there that will support these options; however, the ideal solution is to either use a Switch or configure Port Mirroring from the router directly, as this will have the least degradation on your home network’s connection speed.”
Install LogRhythm NetMon in VMware vSphere VM
The first thing to do is download LogRhythm NetMon Freemium:
- https://logrhythm.com/products/logrhythm-netmon-freemium/
- For VMware, download the ISO file
- Upload the ISO file to a datastore
- Mount the ISO to a VM you create
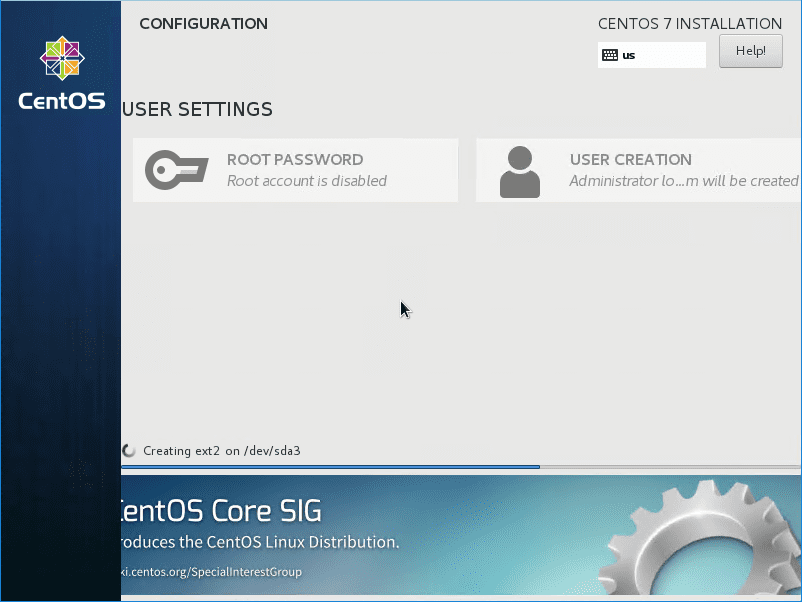
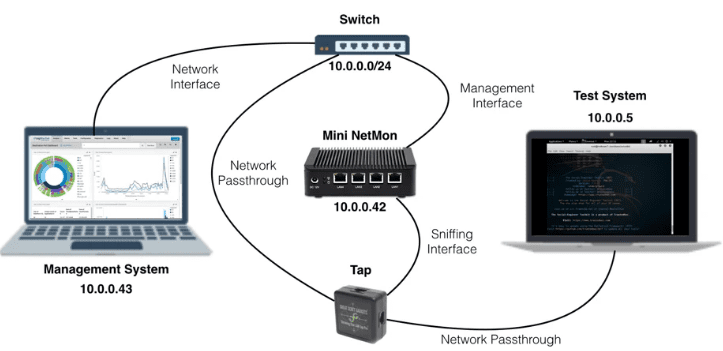
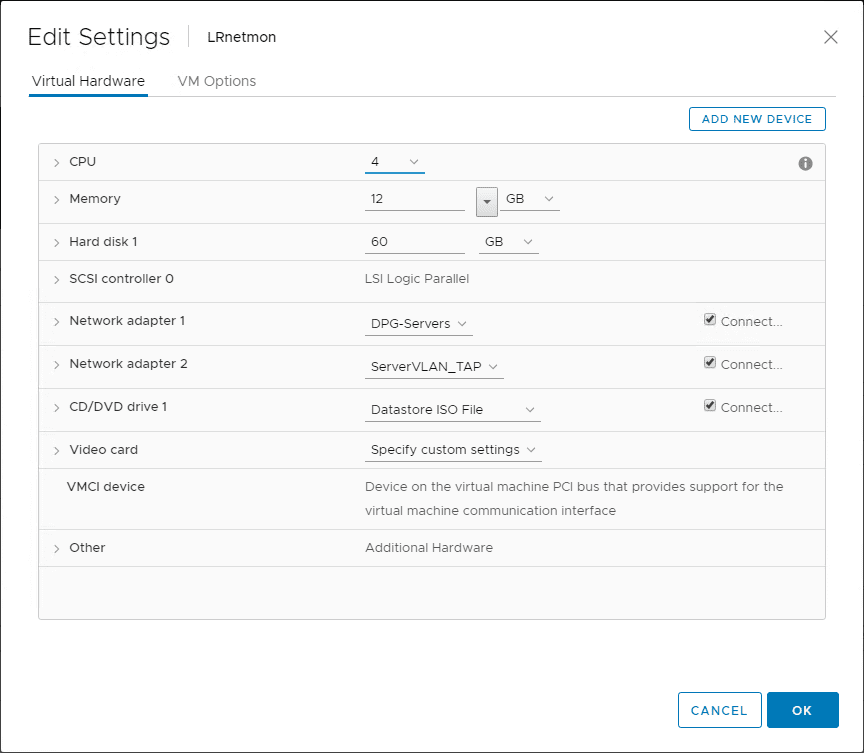
For the installation that I performed in the home lab, I stood up a CentOS VM in inventory with the following specs as shown in the screen capture. For the VM provisioned, I configured the minimum evaluation specs as listed in the documentation for the virtual machine. This included 4 processors, 12 GB of RAM and 60 GB of hard disk space. Also, as you can see, I have (2) NICs configured, one for management of the installation and the other is a TAP connection that will be connected to a mirrored port for grabbing traffic coming across the network.
The cool thing with the LogRhythm NetMon appliance is that it is a fully automated installation of CentOS that as you can observe during the installation, it will automatically install a minimal installation of CentOS 7.4 with the required components of CentOS installed for NetMon.
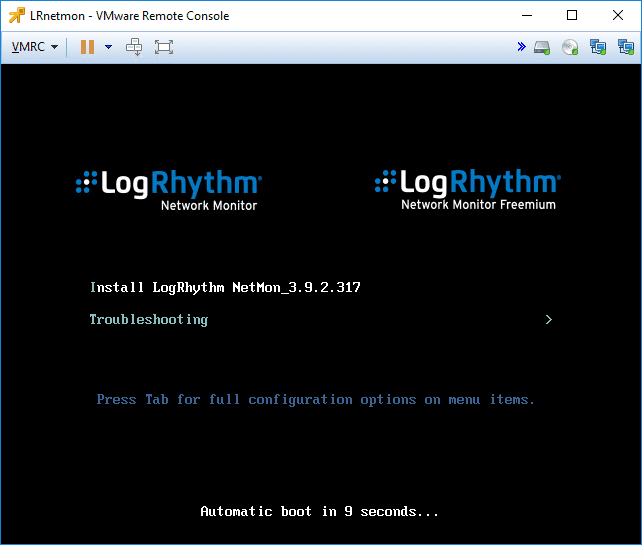
The automated CentOS installation script proceeds forward with the CentOS installation.

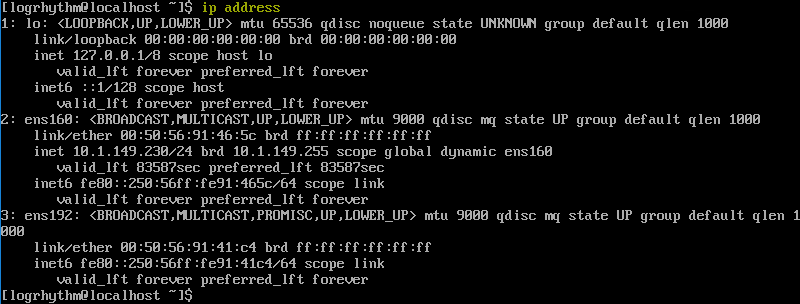
By default, the NetMon appliance will be configured with a DHCP address. You can use your DHCP management utility, or hopefully you have ARPwatch running or some other means to see what IP has been assigned. However, you can also login to the console of the NetMon appliance and get the IP Address that way. To login to the console of the NetMon appliance:
user: logrhythm
pass: changeme
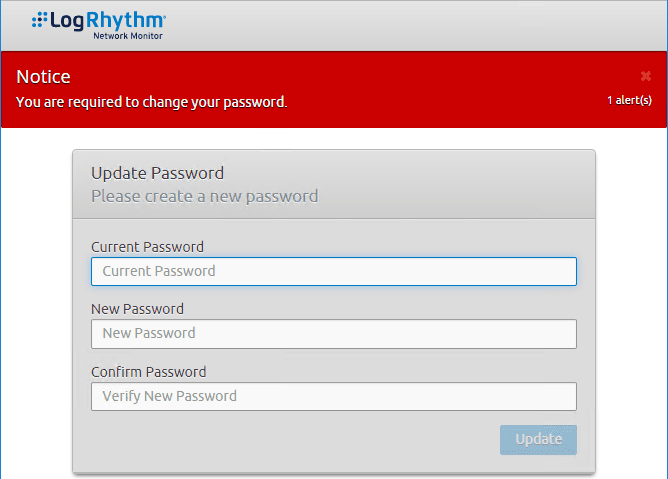
Browse out to the IP address for the LogRhythm NetMon appliance. You will be prompted to change the default password. The default account:
user: admin
pass: changeme
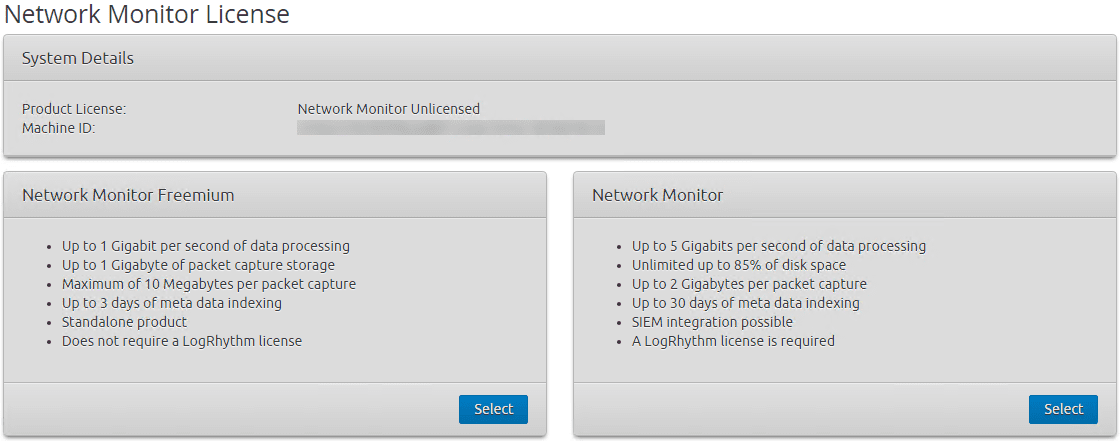
You will be able to select to run the Network Monitor Freemium version or Network Monitor in the paid version. Here, I am selecting the free version.
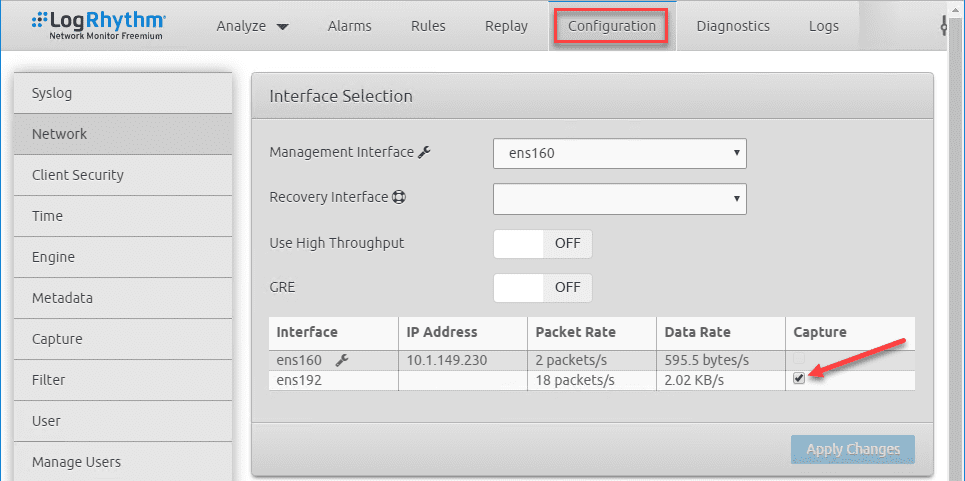
Once you login you can capture the traffic on the specified interface of your choosing. From what I have seen, LogRhythm is able to make a good determination on which interface you want to capture. It sees an interface with a DHCP address for management and the uplinked TAP port that is not addressed which I want to capture traffic on. The settings below were determined automatically during the installer and I didn’t have to make any changes.
Configure a Mirrored/TAP port for capturing traffic
For me I have a Cisco SG300-20 for use as my 1GB uplink core switch. My Palo Alto PA200 is uplinked to the SG300-20. So, I simply mirrored the uplink port on the SG300-20 to another port. The other port has a physical NIC uplinked from my ESXi host. You will need to consult the documentation of your particular switch manufacturer on the syntax or process to do this.
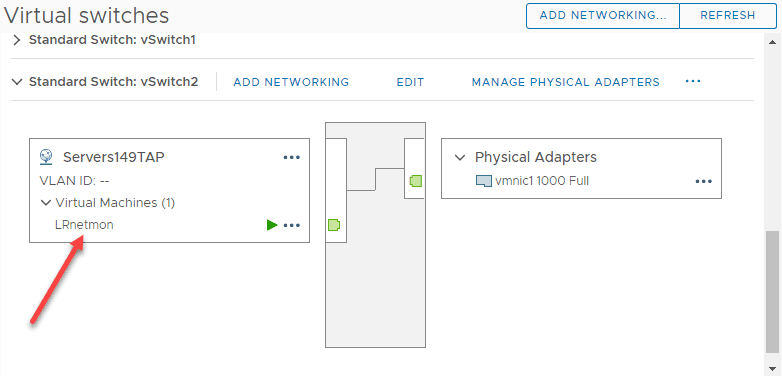
The physical NIC feeds a VSS switch that has promiscuous mode enabled to allow traffic snooping. The VSS has one portgroup that I have assigned to the LogRhythm NetMon VM.
Wrapping Up
The process to Install LogRhythm NetMon in VMware vSphere VM is a straightforward process that is intuitive. Really, the trickiest part of the configuration is simply configuring a mirrored port and assigning this to a VM by way of a virtual switch with a port group. You have to make sure you have promiscuous mode enabled on the virtual switch as well to allow the traffic snooping needed. By using your VMware environment you can easily have a great way to see the types of network traffic happening and anything that is unusual happening on your network.