I have been running a new Palo Alto PA-220 on a TAP interface mirroring my WAN traffic coming into the home lab and loving the visibility to applications that I didn’t have with my previous firewall. Palo certainly gives you that when you introduce it into an environment. The time for me came however, to introduce the firewall into “production”, replacing my existing firewall with the Palo to route and control traffic. Configuring any firewall is certainly tedious as they generally all have their tricks to getting up and running with slight variances on how technologies are implemented and how traffic is handled. In this post, we will take a look at Installing and Configuring Palo Alto PA220 Home Lab Firewall and step through some of the major points of configuration in getting traffic flowing.
Installing and Configuring Palo Alto PA220 Home Lab Firewall
At a high level, what is involved with Installing and Configuring Palo Alto PA220 Home Lab Firewall? Well there are several things that you want to accomplish during the installation and configuration to make sure network traffic flows correctly. This assumes that you already have connectivity via the management interface which allows out-of-band management of the firewall.
- Install Licenses
- Configure Dynamic Updates
- Configure Interfaces, VLANs, appropriate switch tagging
- Setup DHCP Server(s)
- Configure Zones
- Configure Network Address Objects
- Create Security Policies
- Create NAT Policies
- Ingress and Egress
The above list is by no means all inclusive, especially with the different needs of different network environments, however, it represents a few of the major configuration areas that you need to cover to get traffic flowing correctly.
Install Palo Alto Licenses
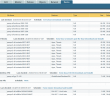
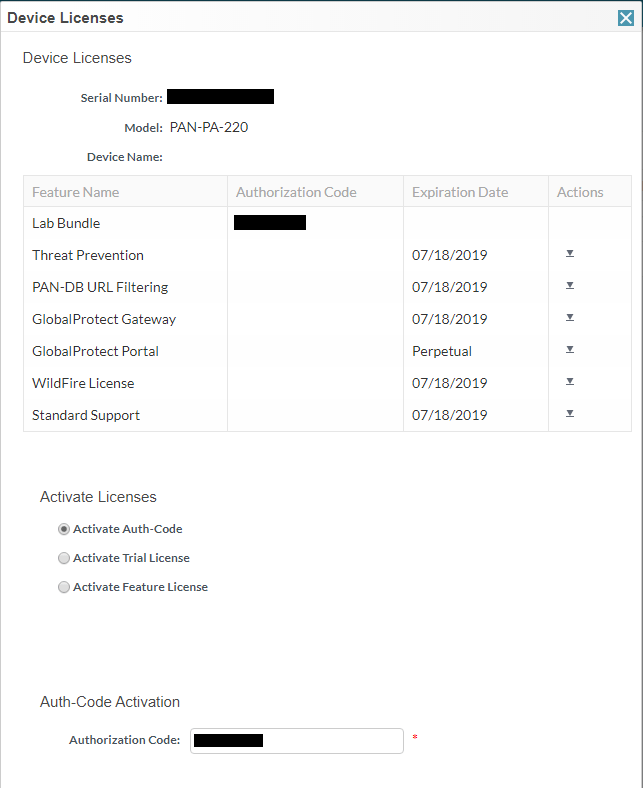
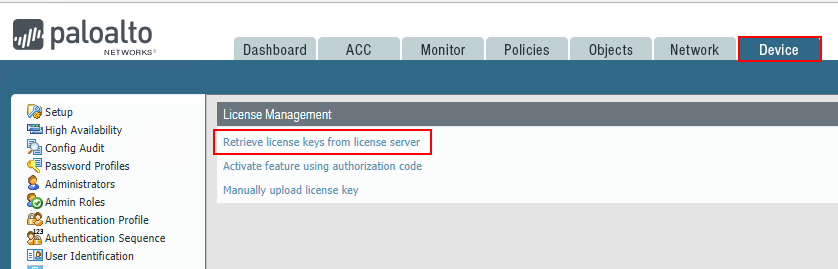
First things first, you want to have your licensing in order as the installed licensing unlocks the various functionality for the firewall itself, including Threat Prevention, PAN-DB URL Filtering, and Wildfire to name a few. To do this, you should have an authorization code received from your vendor that you purchased your firewall from that allows you to match up the serial and authorization code to receive your licensing. Go to https://support.paloaltonetworks.com, create an account if you do not have one and then simply perform the Register New Device process.
Configure Dynamic Updates
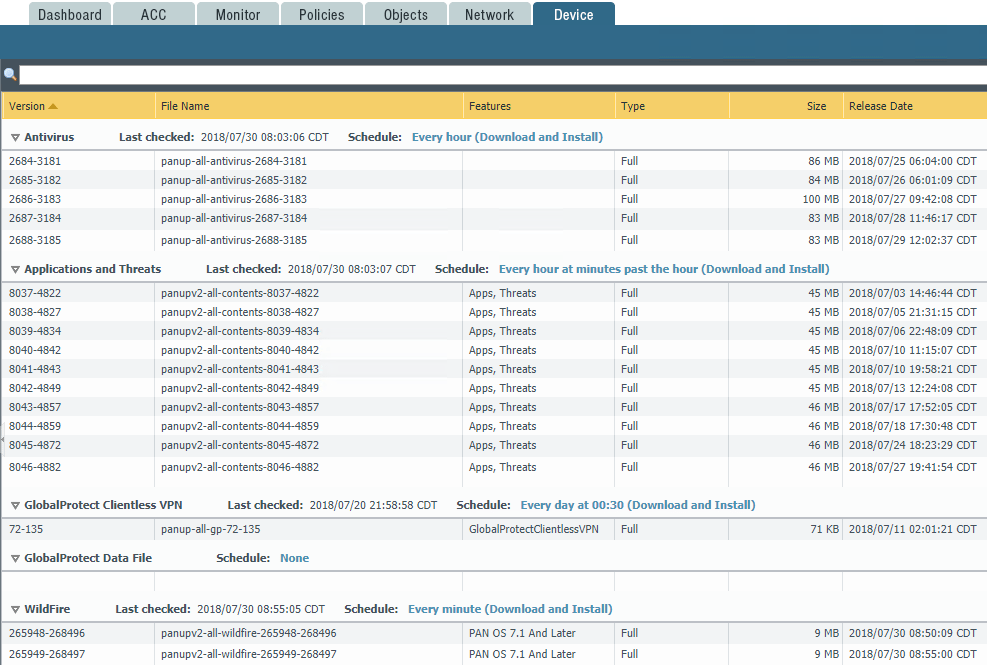
Once you have your licenses installed, you can configure the dynamic updates on the Palo Alto which aligns with the installed features and functionality via the licenses. This allows you to schedule pulls of Antivirus definitions, Applications and threats, GlobalProtect Clientless VPN and Wildfire updates. With the Schedule options you can schedule the check for new downloads and install option for each of the various components.
Configure Interfaces, VLANs, Appropriate Switch Tagging
Setting up the Interfaces on the Palo Alto is an essential part of the configuration process for the firewall. You have to setup your interfaces for the various subnets for which the Palo Alto will be routing traffic. This includes any VLAN tagging that needs to be done. For most, setting up the interfaces as Layer 3 Interface Types is preferrable. To setup VLANs, you can utilize subinterfaces which allow setting the VLAN tag.
One nice thing to note about the Palo is you can create new security zones and objects from most of the configuration menus.
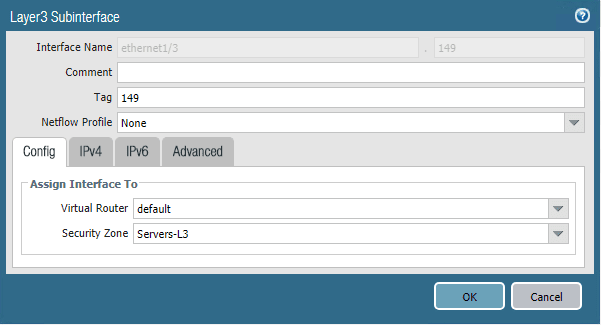
This follows suit with any VLAN tagging, however, part of the configuration of your physical switch you are utilizing to pass the tagged frames is to have the VLANs configured on the port(s) configured for uplinks. With the PA-220 there are a ton of ports that can be configured as physical uplinks to your switch that can align with your logical interface configuration and zones.
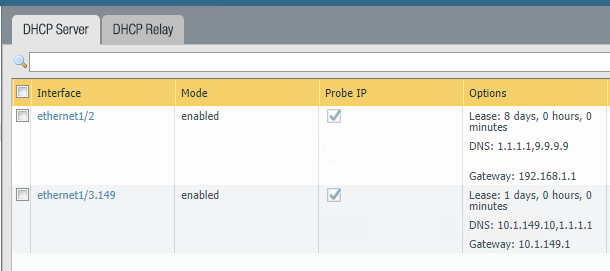
Additionally, you can setup DHCP servers if you need them on various interfaces to service your configured subnets. The DHCP servers are fully autonomous of one another and can have completely separate configuration settings and values.
Configuring Palo Alto Zones
Most modern firewalls have the concept of zones. What are zones? According to the official Palo Alto documentation:
A zone is a grouping of interfaces (physical or virtual) that represents a segment of your network that is connected to, and controlled by, the firewall. Because traffic can only flow between zones if there is a Security policy rule to allow it, this is your first line of defense. The more granular the zones you create, the greater control you have over access to sensitive applications and data and the more protection you have against malware moving laterally throughout your network. For example, you might want to segment access to the database servers that store your customer data into a zone called Customer Data. You can then define security policies that only permit certain users or groups of users to access the Customer Data zone, thereby preventing unauthorized internal or external access to the data stored in that segment.
Zones are an extremely important part of the overall security design and construct of your policies to plumb traffic into your various network segments. In many SMB sized enterprises, a lot of times the security zones simply align with the various uplinked physical interfaces and their purpose, however, there are many creative ways that zones can be implemented to control traffic flow.
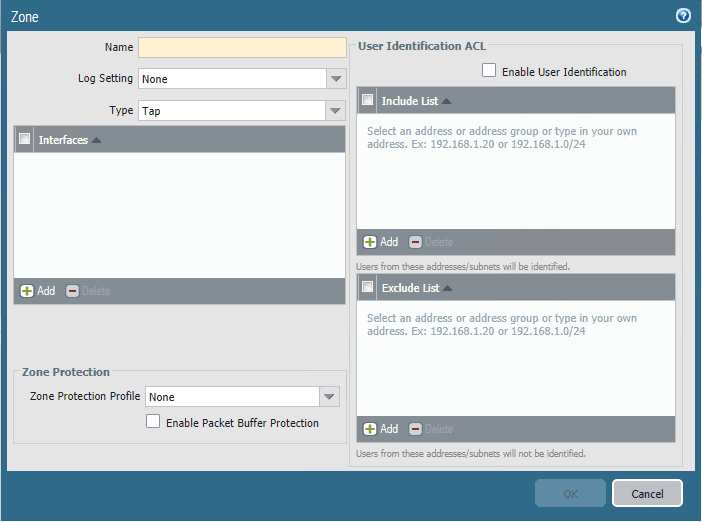
You can either create zones ahead of time, or you can configure the interface and create the zone at that time. The key areas of configuration here are the Name, Type and Interfaces.
Configure Palo Alto Network Address Objects
What are Address Objects? These allow creating entities that represent network addresses that can be used inside policies. A huge advantage to using address objects are they allow you to make changes to address objects in one place and the change is represented across all security or NAT policies the address object is referenced in. This approach is way more efficient than changing an IP address in 100 different policies where it may be referenced.
This was also great from the standpoint of taking the firewall live into my production environment. I simply changed the network address objects that I had assigned to each of the interfaces on the Palo and once the commit was complete, due to changing the objects, all the interfaces, and security policies were configured as I wanted them to be.
Address groups allow you to group together multiple address objects. This allows you to reference one object and that one object containing multiple address objects. Creating your Address Objects before delving off into your security policies allows you to have your address objects in place so you can begin working with them inside policies either security or NAT. However, as is the case with most of the PAN-OS GUI, you can actually create the address object from within the security or NAT policy configuration when scoping a rule down to a certain object. You can select to create a new address object.
Create Security Policies
Once you have the above configuration in place, you can really start getting down to creating your security policies. Security policies are basically your firewall rules as such that allow or disallow traffic from a source to a destination. However, one of the great abilities of the Palo Alto firewall is being able to filter traffic based on application ID. This allows you to filter traffic based on the ID of the application and not based on IP and port rules. So for instance, you can simply allow “facebook” and not worry about which IPs and ports that need to be allowed. The Palo is able to see the application ID and block or allow traffic at the application layer. This is a much more powerful approach than strictly layer 3 or 4 traffic.
A couple of special rules to note – the Palo by default creates the two rules below, intrazone-default and interzone-default which are default rules that control traffic inside a zone and between zones. By default PAN-OS blocks traffic between zones. A point to note that can cause confusion – PAN-OS does not log the drops by default that are a result of the interzone-default rule. To enable logging on these default rules, click the rule, and then select the Override button which allows you to make changes to these default rules (logging, etc). 
Configure NAT Policies
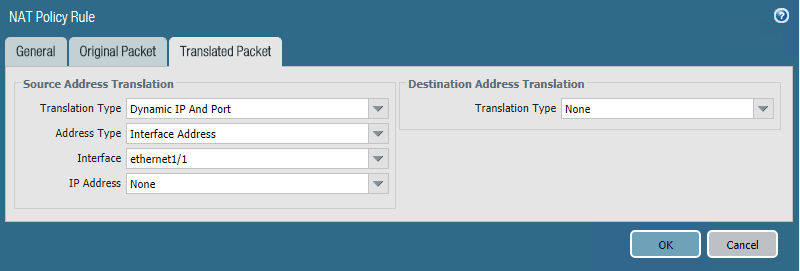
NAT policies are what allow a firewall to present source traffic as a certain IP address such as for Internet connectivity (you want a whole subnet to present to the Internet at the outside IP of the firewall.) Also, it allows setting up destination NAT so that ingress traffic coming into the firewall on the public IP can be forwarded to the inside IP address or DMZ address of a web server.
Below, on my DHCP assigned WAN IP address, I am translating the Source Address to the Interface Address of the firewall.
Takeaways
So far my transition to the Palo Alto PA-220 firewall in the home lab has been fairly smooth. I have encountered the normal wrinkles in getting security policies in place that needed to be carried over from my other firewall that were missed in the outset. However, all in all, Installing and Configuring Palo Alto PA220 Home Lab Firewall has been intuitive and fairly uneventful. Looking forward to diving into the Palo even further and doing some more advanced networking and filtering in the home lab.
More in this topic


Discuss this in the Community
Google is updating how articles are shown. Don’t miss our leading home lab and tech content, written by humans, by setting Virtualization Howto as a preferred source.
About The Author
