



A lot of times we think about high availability being some complicated or complex thing that we just think in the home lab it isn’t worth doing. However, HA doesn’t have to be complicated and there are several really great projects that you can tackle in the home lab over a weekend. Here are seven simple ways you can build high availability into your home lab this weekend.
1. Run two DNS servers
This is one of the first projects that I think most who run home labs can benefit from and that is running two DNS servers. DNS is one of those services that most lab environments and production can’t live without. A lot of home labbers run a single Pi-Hole, AdGuard Home, or Technitium server or some other type of resolver.
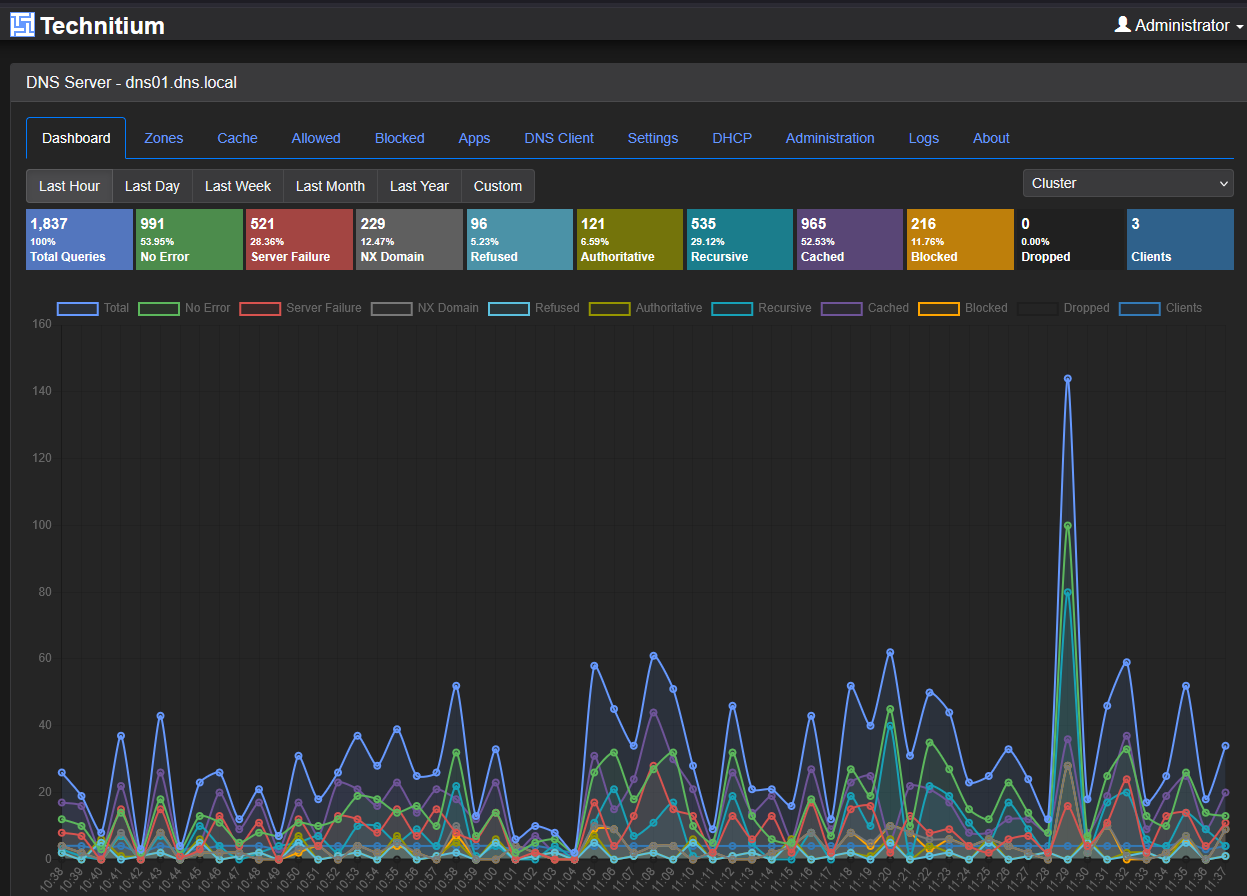
However, having a single DNS server is setting yourself up for a single point of failure. And, when DNS goes down, EVERYTHING stops working as expected. Now, the obvious improvement here is to run two DNS servers in your environment. These don’t have to be large virtual machines. Most of these solutions you can run as containerized solutions.
Outside of running two DNS servers, one of the main considerations is your failure domain and having your failure domain separated for each server. So, for instance, running two DNS server containers on the same Docker host gives you some resiliency but if the Docker host itself goes offline, then “both” of your DNS servers go down which isn’t helpful. So, at the very least, run your DNS server containers on separate Docker hosts. This way you gave assign one IP as the primary DNS server for clients and the other address as the secondary DNS server for clients.
For example:
DNS server 1: 10.10.10.10
DNS server 2: 10.10.10.11
One thing to keep in mind here is that clients aren’t always the best at just automatically switching over between their primary DNS server and the secondary DNS server. I have seen clients hang onto their primary server for an uncomfortable amount of time before name resolution starts working again when it actually starts using the secondary.
Also, another aspect of this is synchronizing your DNS platform between the two servers like Pi-Hole or Technitium. Both of these solutions are ones I have experience with in keeping them synchronized. Pi-Hole has the “Nebula sync” project that works well. Technitium has native server clustering as of v15, and it works great!
Check out my post on using Technitium DNS clustering instead of relying on Pi-hole synchronization tools for an example of how I have approached high availability DNS in my home lab.
2. Put important services behind a Keepalived virtual IP
So in the case of DNS, running two DNS servers solves one part of the problem. However, we can bolster this solution with another solution that you need to check out, called Keepalived. Keepalived creates a virtual IP address that two servers share. One is primary and the other is secondary. If something happens to the primary server, then the secondary takes over.
Then, on the client side, this works much more smoothly in the case of DNS. You just assign one IP address to clients for DNS, the “virtual IP address” of the Keepalived pair. So the setup looks like the following:
dns01: 10.10.10.10
dns02: 10.10.10.11
VIP:   10.10.10.53
So, again, clients only need to know about the 10.10.10.53 address for their DNS settings. A recent discovery for me was the fact that Keepalived actually has another way to determine if the “server” is alive, even if the physical server host or virtual server host is ok, the application may not be.
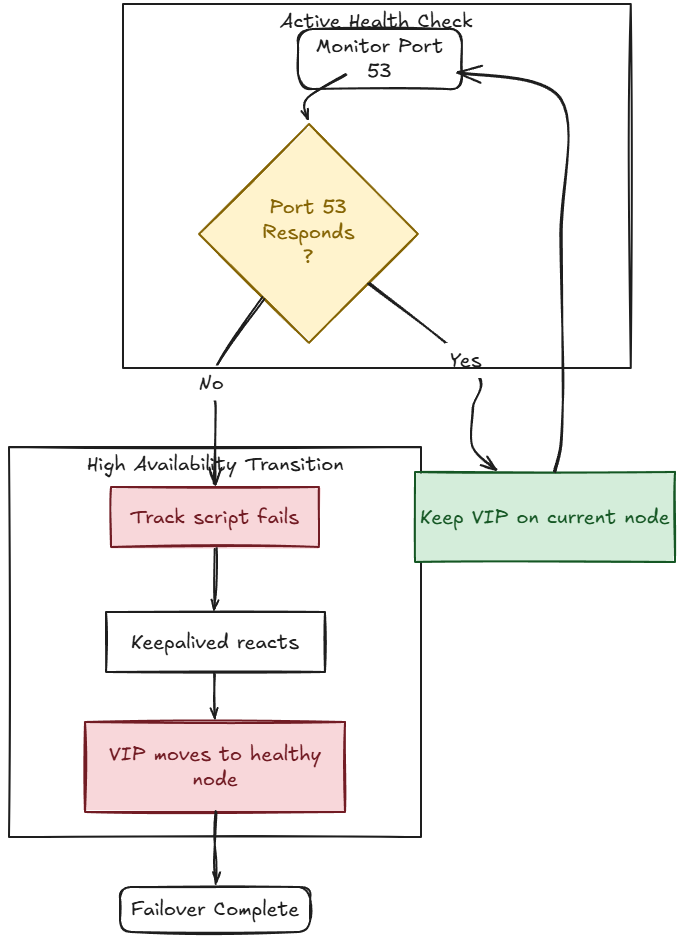
Keepalived track scripts can monitor an application like DNS. You can check things like whether DNS is actually answering on port 53, using something like this:
#!/bin/bash

nc -z -w 1 127.0.0.1 53
The same idea can be used for other services like HTTP endpoints, containers, reverse proxies, databases, or really anything else you can check with a script. This is one of the easiest ways I know of to have application aware failover in your home lab without some type of complicated orchestration platform.
Check out my post I Thought Keepalived Only Protected My Home Lab Servers. Then I Found Track Scripts for the configuration and application-level health checks I am using with Keepalived.
3. Turn multiple Proxmox hosts into an HA cluster
This is one that I think all of us eventually get to in the home lab, a Proxmox cluster. If you have more than one Proxmox VE Server in your current home lab, why not put them into a Proxmox cluster? This opens up a lot of interesting capabilities and possibilities.
The built-in Proxmox HA functionality can restart VMs and containers on another cluster node if the current node fails. One call out here is that you do need to have some type of shared storage between your cluster hosts. Proxmox has native HCI storage built into the solution in Ceph HCI storage. I currently am using Ceph storage and it is amazing. Works incredibly well in my home lab environment.
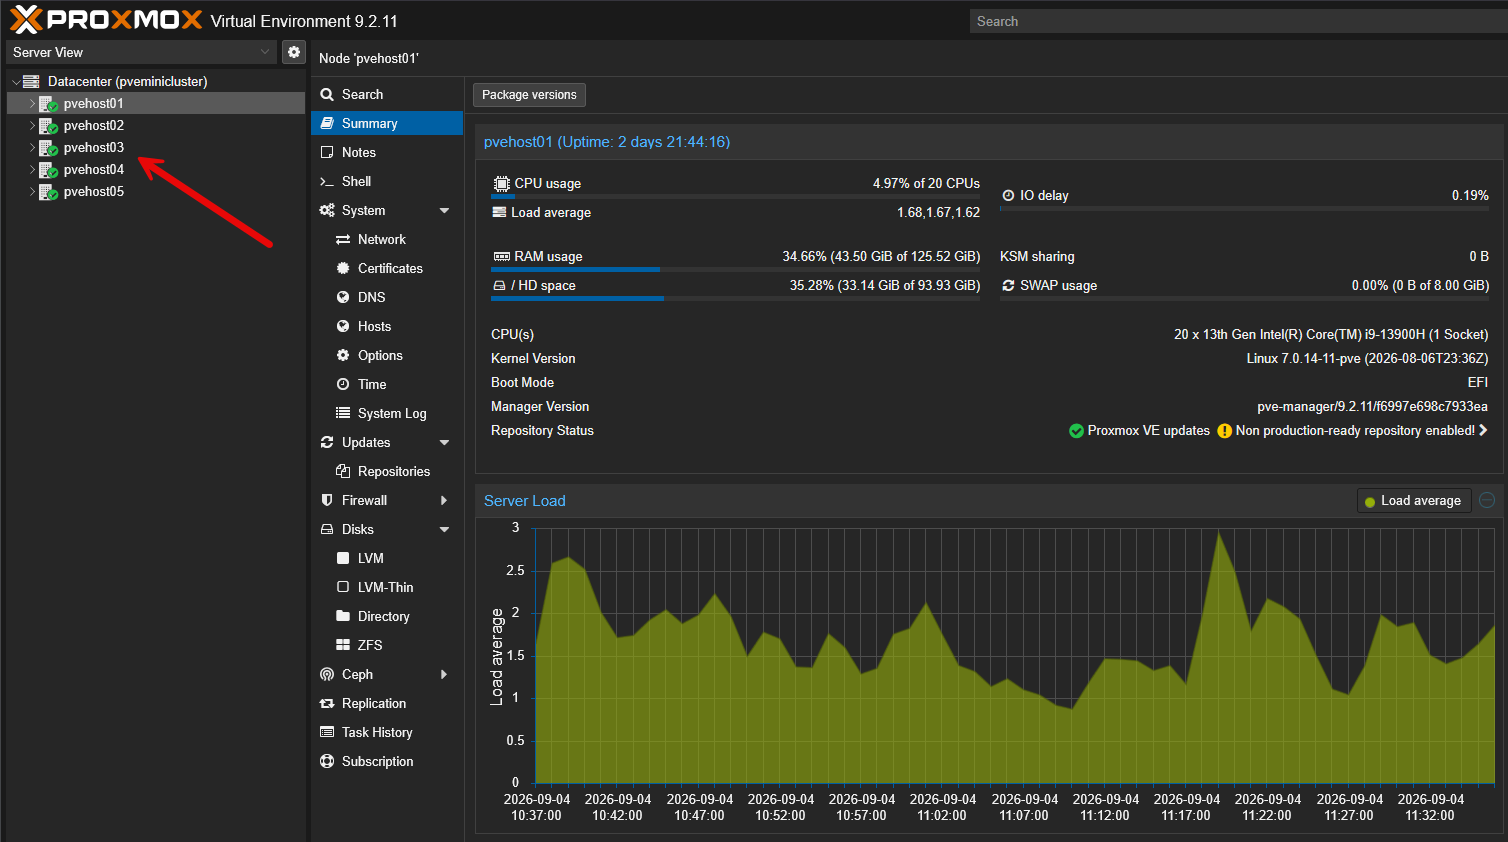
That said, Proxmox HA is super useful for your most critical home lab services. Think about the handful of VMs you would really notice losing even if they went down for 5 minutes:
DNS
Home Assistant
Reverse proxy
Monitoring
Authentication
Management services
Important Docker hosts
Check out my Proxmox HA Cluster Configuration for Virtual Machines guide if you want to see how the built-in Proxmox HA functionality works.
4. Replicate important VMs to another Proxmox host
While replication isn’t true high availability and is a nuance here, it is still what I would say is part of the overall high availability strategy for home lab services. Not everyone has shared storage they can use in the home lab. And, honestly, for a lot of small home labs, I understand why.
Distributed storage like Ceph is really powerful, but it comes at a cost of more complexity to manage, and with Ceph you really need 10 gig networking and enterprise class drives to get the true benefit of the solution.
A simpler option for many is setting up Proxmox replication. Replication lets you have another copy of your VM on a different Proxmox host. Keep in mind this is not synchronous replication. In other words there will be a skew of data. So if your replication happens hourly and you replicate a VM that you added a file on after the last replication interval, then had a crash before the next replication interval, the file would not exist on the replica. So you have to keep those things in mind.
Another requirement for Proxmox replication is that you are running ZFS storage. ZFS is the underlying technology it uses for replicating your data. It replicates things at a storage level. However, there is also another way using PegaProx that you can replicate your VMs as well, using snapshot replication.
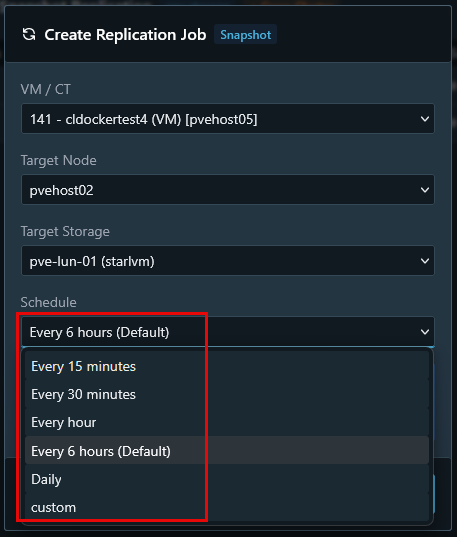
You can check out my post on that subject here: I Thought ZFS Was Required for Proxmox Replication in My Home Lab but I Was Wrong.
5. Remove the reverse proxy as a single point of failure
Most of us are running reverse proxies in front of our containerized environments. I run Traefik as my reverse proxy of choice and have also run Nginx Proxy Manager as well and think it is a great option also. Traefik aligns better with infrastructure as code and GitOps initiatives though.
Usually we run reverse proxies inside containers just like everything else. It is important to realize that we create a pretty important dependency with a reverse proxy since everything else lives “behind” it and it is required for connectivity to your other solutions.
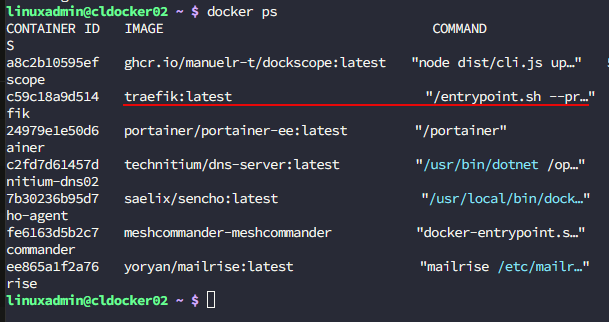
So in other words, to get to names that look like these, the reverse proxy is usually the service that terminates these names with proper SSL certificates and then forwards the traffic to the backend containers.
grafana.lab.example.com
homeassistant.lab.example.com
portainer.lab.example.com
proxmox.lab.example.com
Reverse proxies need to have their code live inside a Git repo so that you can have your configuration preserved as code. Also, the Docker host running your reverse Proxy makes a great candidate for a replicated VM that lives on another Proxmox environment. You can just simply power on the replicated VM and you have your environment back.
Also, I love running highly available Docker environments like Docker Swarm with Microceph which I have written about. Also, running your reverse proxy in a Kubernetes cluster takes your high availability to the next level in terms of self-healing, and resiliency.
Check out The Reverse Proxy Mistakes I Still See in Home Labs and How I Avoid Them for more of the design considerations I use with reverse proxies in my own environment.
6. Add network redundancy with bonded NICs or LACP
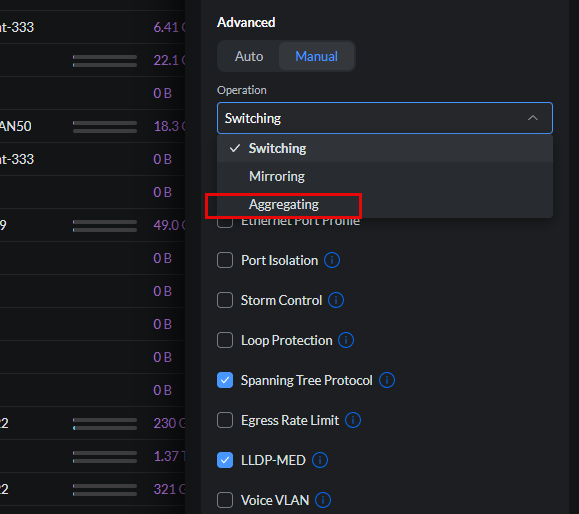
An area that we often don’t think about is network redundancy. If your server and switch support doing it, you can combine multiple network interfaces into a bond. My preferred way is creating an LACP enabled LAG that combines multiple physical connections that participate in a logical interface. This is how I have my Proxmox servers configured currently.
My Minisforum MS-01s have (2) 10 gig SFP ports that I have configured in an LACP bond and then I have these in the LACP enabled switch ports. This creates the logical link that I have between my switch and Proxmox VE Server. This gives me the benefit of the 2 10 gig connections working together and means that I can unplug one of the links and still have connectivity.

Configuring a Unifi network switch for LACP bonding.
Check out my post I Tried LACP in My Proxmox Home Lab and Here’s What Actually Happened for the lessons I learned using LACP with Proxmox.
7. Let your container workloads move between hosts
Configuring your containerized environments where your containers can move between hosts is one of the coolest things to see. I know I felt giddy when I first setup my Docker Swarm cluster and then was able to use Portainer to manage the containers running on the hosts.
Setting up your home lab containers where they can “move” between hosts you essentially setup a mini hypervisor cluster environment (the way I like to think about it), and it allows you to view your VMs that are container hosts as little hypervisor hosts and the containers can be rescheduled on a different host when you need to do things like maintenance, patching, etc.
The most important requirement for this to work, like a hypervisor cluster has for HA, is to have shared storage between your Docker container hosts. This way, any persistent storage the containers rely on can be accessed from any one of your Docker hosts.
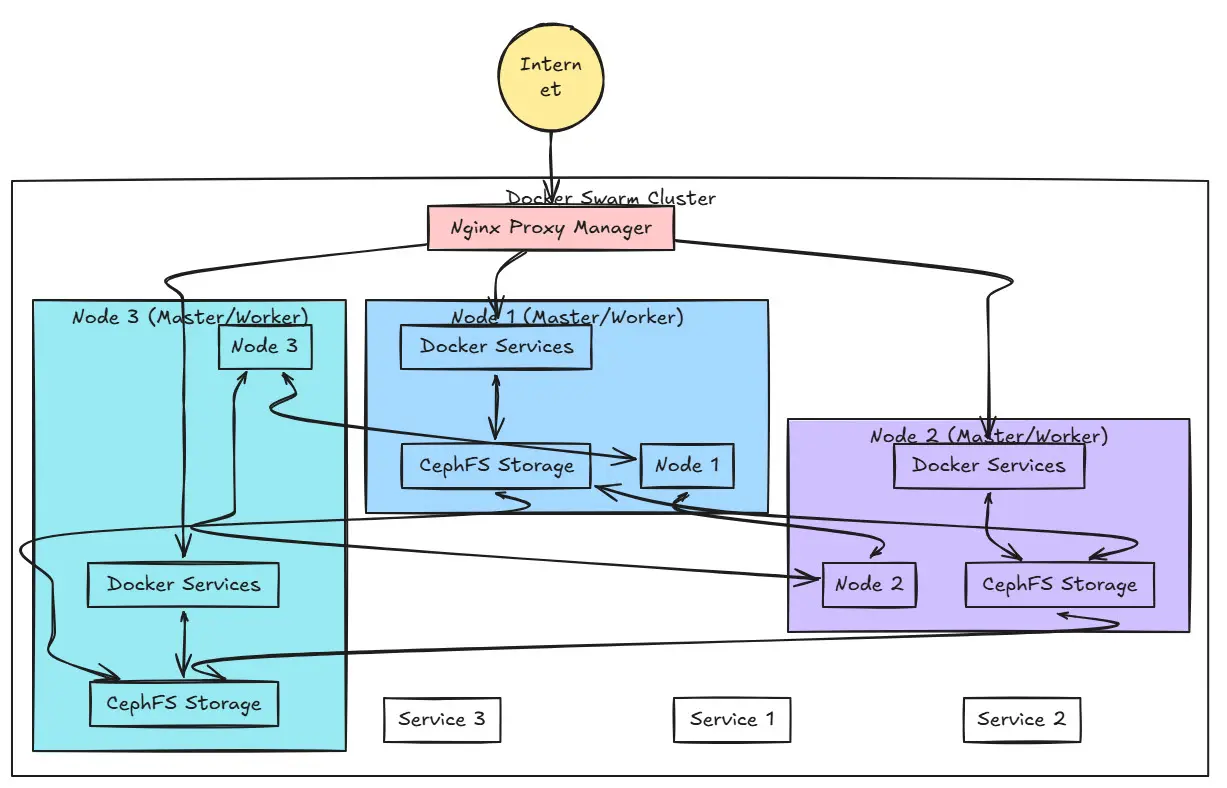
Docker Swarm is one of the easiest ways to get into having your Docker containers be mobile between hosts. I think it is a great middle ground between a single Docker container host and a full blown Kubernetes cluster.
Check out my post How I Deployed a Self-Hosting Stack with Docker Swarm and MicroCeph for an example of combining clustered containers with resilient storage.
Wrapping up
One of the cool things about high availability in the home lab is that we can start simple and go from there. Often, we might think of HA as being only for complex production environments. There is some truth to that. But, the key is, we can take advantage of HA in the right places in the home lab environment and reap a lot of benefits in running our self-hosted services like DNS. How about you? What high availability have you introduced into your home lab environment?
More in this topic




Google is updating how articles are shown. Don’t miss our leading home lab and tech content, written by humans, by setting Virtualization Howto as a preferred source.
About The Author
