
Now that the release of Ubuntu 24.04 LTS is official with Ubuntu dropping news of the release today of both the new Desktop and Server, it’s time to start updating some automation in the home lab. I wanted to test and see if the framework of automated build templates I had used for Ubuntu 22.04 Server LTS would work with Ubuntu 24.04 LTS, and for the most part they did. So, let’s look at what you will need for installing Ubuntu 24.04 Server LTS using packer.
Table of contents
Why is Packer helpful in vSphere?
You can automatically build and provision new vSphere templates. This capability allows you to schedule or automate the creation and updating of vSphere templates so you always have the latest template available with updates, etc.
Download Packer and vSphere plugin
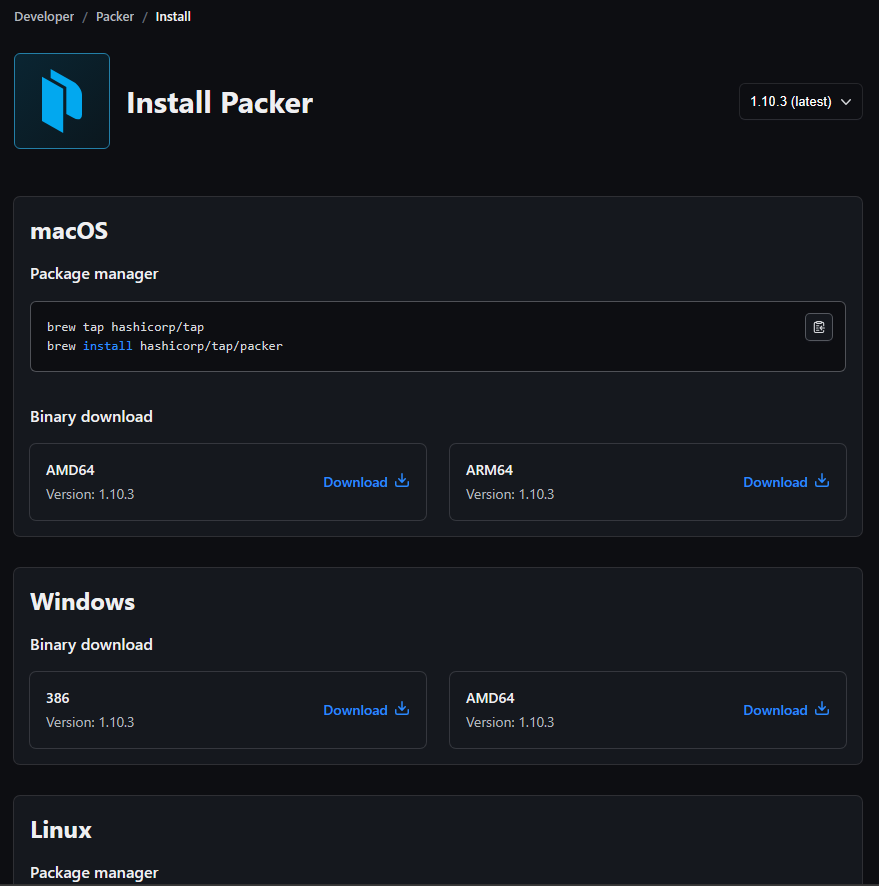
The first thing you need to do is download Packer and the vSphere ISO plugin. You can download the latest version of Hashicorp Packer here: Download Packer. Select the binary for your specific platform.
Install the vSphere plugin
Once you have Packer installed, we need to download the vSphere plugin. This plugin allows Packer to work with automated builds for VMware vSphere. You can do that with the following command:
packer plugins install github.com/hashicorp/vsphere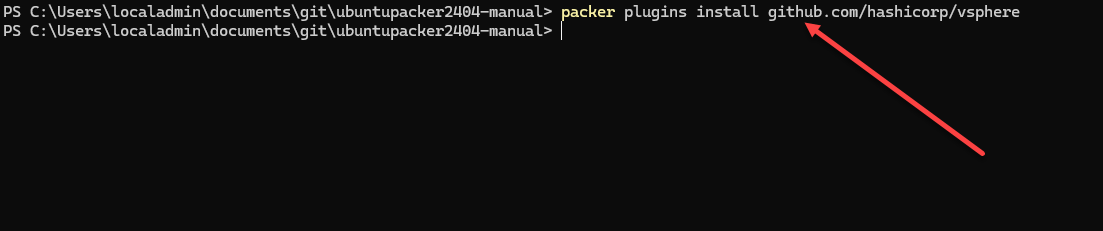
Now that we have Packer and the vSphere plugin installed, we are ready to automate our Ubuntu 24.04 LTS Server installation.
Ubuntu 24.04 LTS Server Packer template
You will need three files:
- ubuntu.auto.pkrvars.hcl – Contains the values for the variables file
- ubuntu-24.04.pkr.hcl – The main Packer build file
- variables.pkr.hcl – The variables file
Ubuntu.auto.pkrvars.hcl
The contents of the ubuntu.auto.pkrvars.hcl file is as follows:
vsphere_server = "server.domain.local"
vsphere_user = "[email protected]"
vsphere_password = "password"
vsphere_template_name = "ubuntu2404-testtemplate"
vsphere_folder = "Templates"
vsphere_dc_name = "DC name"
cluster = "clustername"
vsphere_host = "host.domain.local"
vsphere_portgroup_name = "DPG-Servers"
vsphere_datastore = "datastore1"
cpu_num = 4
mem_size = 4096
disk_size = 102400
vm_disk_controller_type = ["pvscsi"]
Ubuntu-24.04.pkr.hcl
The contents of the Ubuntu-24.04.pkr.hcl file are as follows. Note below the http_ip isn’t needed in most cases. However, it allows you to specify which IP address you want your remote VM template as it is building, to access. I have found this to be needed especially when you are running Packer from a machine that has more than one network card as Packer will randomly pick the NIC otherwise.
packer {
required_plugins {
vsphere = {
version = “~> 1”
source = “github.com/hashicorp/vsphere”
}
}
}

source "vsphere-iso" "autogenerated_1" {
  CPUs                 = 4
  RAM                  = 4096
  boot_command         = ["<esc><esc><esc><esc>e<wait>", "<del><del><del><del><del><del><del><del>", "<del><del><del><del><del><del><del><del>", "<del><del><del><del><del><del><del><del>", "<del><del><del><del><del><del><del><del>", "<del><del><del><del><del><del><del><del>", "<del><del><del><del><del><del><del><del>", "<del><del><del><del><del><del><del><del>", "<del><del><del><del><del><del><del><del>", "<del><del><del><del><del><del><del><del>", "<del><del><del><del><del><del><del><del>", "<del><del><del><del><del><del><del><del>", "<del><del><del><del><del><del><del><del>", "<del><del><del><del><del><del><del><del>", "<del><del><del><del><del><del><del><del>", "linux /casper/vmlinuz --- autoinstall ds=\"nocloud-net;seedfrom=http://{{ .HTTPIP }}:{{ .HTTPPort }}/\"<enter><wait>", "initrd /casper/initrd<enter><wait>", "boot<enter>", "<enter><f10><wait>"]
  boot_wait            = "3s"
  cluster              = "${var.cluster}"
  convert_to_template  = true
  datastore            = "${var.vsphere_datastore}"
  disk_controller_type = "${var.vm_disk_controller_type}"
  folder               = "${var.vsphere_folder}"
  guest_os_type        = "ubuntu64Guest"
  http_directory       = "./http"
  http_ip              = "10.1.149.152"
  insecure_connection  = "true"
  iso_checksum         = "sha256:8762f7e74e4d64d72fceb5f70682e6b069932deedb4949c6975d0f0fe0a91be3"
  iso_urls             = ["https://releases.ubuntu.com/24.04/ubuntu-24.04-live-server-amd64.iso"]
  network_adapters {
    network      = "${var.vsphere_portgroup_name}"
    network_card = "vmxnet3"
  }
  password               = "${var.vsphere_password}"
  shutdown_command       = "sudo shutdown -P now"
  ssh_handshake_attempts = "100"
  ssh_password           = "ubuntu"
  ssh_port               = 22
  ssh_timeout            = "20m"
  ssh_username           = "ubuntu"
  storage {
    disk_size             = 40960
    disk_thin_provisioned = true
  }
  username       = "${var.vsphere_user}"
  vcenter_server = "${var.vsphere_server}"
  vm_name        = "${var.vsphere_template_name}"
}

# a build block invokes sources and runs provisioning steps on them. The
# documentation for build blocks can be found here:
# https://www.packer.io/docs/templates/hcl_templates/blocks/build
build {
  sources = ["source.vsphere-iso.autogenerated_1"]

}
Variables.pkr.hcl
The contents of the variables.pkr.hcl file are as follows:
variable "cpu_num" {
  type    = string
  default = ""
}

variable "disk_size" {
  type    = string
  default = ""
}

variable "mem_size" {
  type    = string
  default = ""
}

variable "os_iso_path" {
  type    = string
  default = ""
}

variable "cluster" {
  type    = string
  default = ""
}

variable "vsphere_datastore" {
  type    = string
  default = ""
}

variable "vsphere_dc_name" {
  type    = string
  default = ""
}

variable "vsphere_folder" {
  type    = string
  default = ""
}

variable "vsphere_host" {
  type    = string
  default = ""
}

variable "vsphere_password" {
  type      = string
  sensitive = true
}

variable "vsphere_portgroup_name" {
  type    = string
  default = ""
}

variable "vsphere_server" {
  type    = string
  default = ""
}

variable "vsphere_template_name" {
  type    = string
  default = ""
}

variable "vsphere_user" {
  type    = string
  default = ""
}

variable "ssh_username" {
  type      = string
  default   = ""
  sensitive = true
}

variable "ssh_password" {
  type      = string
  default   = ""
  sensitive = true
}

variable "vm_disk_controller_type" {
  type        = list(string)
  description = "The virtual disk controller types in sequence. (e.g. 'pvscsi')"
  default     = ["pvscsi"]
}
Cloud config
There is one other part of a successful Ubuntu 24.04 LTS packer installation and that is the cloud config customizations.
You will need to create a folder called http in the same folder as the three files we have detailed above. The http folder will house 2 files:
- user-data
- meta-data
The meta-data file is just empty. However, the user-data file is the file where we can introduce customizations to the installation like SSH keys and other configuration. In the config below, you will have an Ubuntu installation that will create a user called ubuntu and the hashed password is also ubuntu as I have highlighted.
#cloud-config
autoinstall:
version: 1
apt:
fallback: offline-install
geoip: true
preserve_sources_list: false
primary:
- arches: [amd64, i386]
uri: http://gb.archive.ubuntu.com/ubuntu
- arches: [default]
uri: http://ports.ubuntu.com/ubuntu-ports
users:
- default
- name: ubuntu
lock_passwd: false
passwd: "$6$exDY1mhS4KUYCE/2$zmn9ToZwTKLhCw.b4/b.ZRTIZM30JZ4QrOQ2aOXJ8yk96xpcCof0kxKwuX1kqLG/ygbJ1f8wxED22bTL4F46P0"
write_files:
- path: /etc/ssh/sshd_config
content: |
Port 22
Protocol 2
HostKey /etc/ssh/ssh_host_rsa_key
HostKey /etc/ssh/ssh_host_dsa_key
HostKey /etc/ssh/ssh_host_ecdsa_key
HostKey /etc/ssh/ssh_host_ed25519_key
UsePrivilegeSeparation yes
KeyRegenerationInterval 3600
ServerKeyBits 1024
SyslogFacility AUTH
LogLevel INFO
LoginGraceTime 120
PermitRootLogin yes
StrictModes no
RSAAuthentication yes
PubkeyAuthentication no
IgnoreRhosts yes
RhostsRSAAuthentication no
HostbasedAuthentication no
PermitEmptyPasswords no
ChallengeResponseAuthentication no
X11Forwarding yes
X11DisplayOffset 10
PrintMotd no
PrintLastLog yes
TCPKeepAlive yes
AcceptEnv LANG LC_*
Subsystem sftp /usr/lib/openssh/sftp-server
UsePAM yes
AllowUsers ubuntu
identity:
hostname: ubuntu2404
username: ubuntu
password: "$6$exDY1mhS4KUYCE/2$zmn9ToZwTKLhCw.b4/b.ZRTIZM30JZ4QrOQ2aOXJ8yk96xpcCof0kxKwuX1kqLG/ygbJ1f8wxED22bTL4F46P0"
ssh:
allow-pw: true
install-server: true
user-data:
disable_root: false
locale: en_US
storage:
layout:
name: direct
config:
- type: disk
id: disk0
match:
size: largest
- type: partition
id: boot-partition
device: disk0
size: 500M
- type: partition
id: root-partition
device: disk0
size: -1
late-commands:
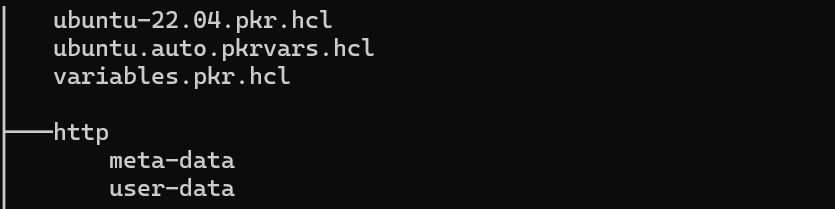
- echo 'ubuntu ALL=(ALL) NOPASSWD:ALL' > /target/etc/sudoers.d/ubuntuRunning the command:
tree /fWe see the following files and folders:
How do you run Packer once all the files are in place?
After you have the files in place in a directory you are working from, you can run the following command to initiate the Packer build command:
First, make sure you have the Proxmox plugin by running the command:
packer init .Then, you can run the Packer build with the following:
packer build .Troubleshooting
If you run into errors, you can validate your files using:
packer validate <put your hcl file here>If variables aren’t correctly recognized, makes sure:
- There are no typos
- They correctly exist in both the variables file and the auto.pkr.hcl file
If the Proxmox plugin isn’t recognized, make sure you run:
packer init .Masking sensitive variables
I know some may read this post and say, you never want to have sensitive variables and other information in plain text. You are right. The files above are meant to be for learning purposes and for quick and dirty VM templates in a home lab environment.
However, for production, you can do a couple of things:
- Use something like Hashicorp Vault to house sensitive information
- Learn how to use this here: Using Terraform Vault Provider with VMware vSphere
- Use a CI/CD pipeline solution with pipeline variables to mask sensitive information
- Look at the section Pipeline variables in my post here: Automate Home Lab Server Updates with GitLab CI CD
What should you do next?
You can clone down my Packer builds repo on Github that includes the new Ubuntu 24.04 build here:
git clone https://github.com/brandonleegit/PackerBuilds.gitWrapping up
Hopefully, this post and example files and configurations will help anyone who wants to update their virtual machine templates to Ubuntu 24.04 Server LTS now that the release is official. Packer provides an easy way to do this and automate the entire solution to take the heavy lifting out of the process.
Google is updating how articles are shown. Don’t miss our leading home lab and tech content, written by humans, by setting Virtualization Howto as a preferred source.
About The Author


Hi,
What is the packer command to utilize those files?
Thank You,
Yigal Dar
Yigal,
Thank you for your comment! I will add this to the text of the blog. Once you have the files in place, you should be able to run the packer build command as follows: “packer build .” Notice the period at the end of the command.
Brandon
New sections added “How do you run Packer once all the files are in place?” and “Troubleshooting” to help with troubleshooting any errors.
It would have been great if you had made a tutorial using ubuntu’s cloud images 🙂 I’ve just tried upgrading from 22.04 to 24.04 and it doesn’t work because open-vm-tools (well, the vmtools integrated with cloudinit) don’t seem to recognize the system when running a guest info command, I can see that in the cloudinit logs. The consequence is that packer clones the VM succesfully, but the network interface is never connected. After connecting it, packer starts running the ansible role.
letharson,
Thank you for the comment! Hmmm…I haven’t worked with the cloud images using packer. Wondering if this is a compatibility issue with 24.04 being new. What are your observations? However, it sounds like they are getting installed, just not automatically connecting?
Brandon
You may try this little trick I had to use on Ubuntu 22.04 – open-vm-tools seemed to think “22.04” was an old distribution, and tried some old way of doing things – by changing version in /etc/issue, the guest customization network configuration worked. You can try to change “24.04” in /etc/issue to “22.04” or to “18.04” to see if that works…
provisioner “shell” {
inline = [
“echo ‘*** Fake Ubuntu version 18.04 so that open-vm-tools guest customization works ***'”,
“echo ‘${var.ssh_password}’ | sudo -S sed -i ‘s/Ubuntu 22.04/Ubuntu 18.04/’ /etc/issue”
]
}
BHF,
Thanks for this tip!
Brandon
It would be great if you offered a tutorial for Ubuntu 24.04 cloud image too, so that you don’t have to wait for the whole installer when provisioning templates 🙂
Cretin,
Thanks for that suggestion, that would be a good post for sure. Will look at spinning something up on this front.
Brandon
is it possible to configure it from the start so it will have a MAC as client identifier ? it seems packer can’t the vm once it’s rebooted and the ip keeps changing even though the MAC remains the same
Hi Brandon the project have 2 bugs to use on linux
1) on file ubuntu-24.04.pkr.hcl this
packer {
required_plugins {
vsphere = {
version = “~> 1”
source = “github.com/hashicorp/vsphere”
}
}
}
is required or not start
2) after start packer build . the build is in
vsphere-iso.autogenerated_1: Serving HTTP requests at http://192.168.168.25:8298/.
==> vsphere-iso.autogenerated_1: Typing boot command…
==> vsphere-iso.autogenerated_1: Waiting for IP…
because the vm is blocked on startup screen where request language…….
Gianluca,
I have added the first bit of code. What are you seeing on the second? Just that the VM is not progressing with the build?
Brandon