If you are like me, for years, you have used scheduled tasks in the home lab and production to accomplish various tasks. However, delving into the world of CI CD opens many opportunities to learn how to use this instead of rudimentary scheduled tasks to carry out automation. And the benefits are tremendous, especially when you use source to manage your DevOps code. However, many see the term “ci cd pipeline” and get intimidated. However, let’s look at a simple Gitlab CI CD pipeline for a home lab that you can easily set up to use CI CD instead of scheduled tasks, etc.
Table of contents
What is GitLab?
It is a solution that I have been using in the home lab for quite some time now. It is, in my opinion, one of the best self-hosted code repositories and makes setting up and learning CI/CD very intuitive and easy to learn.
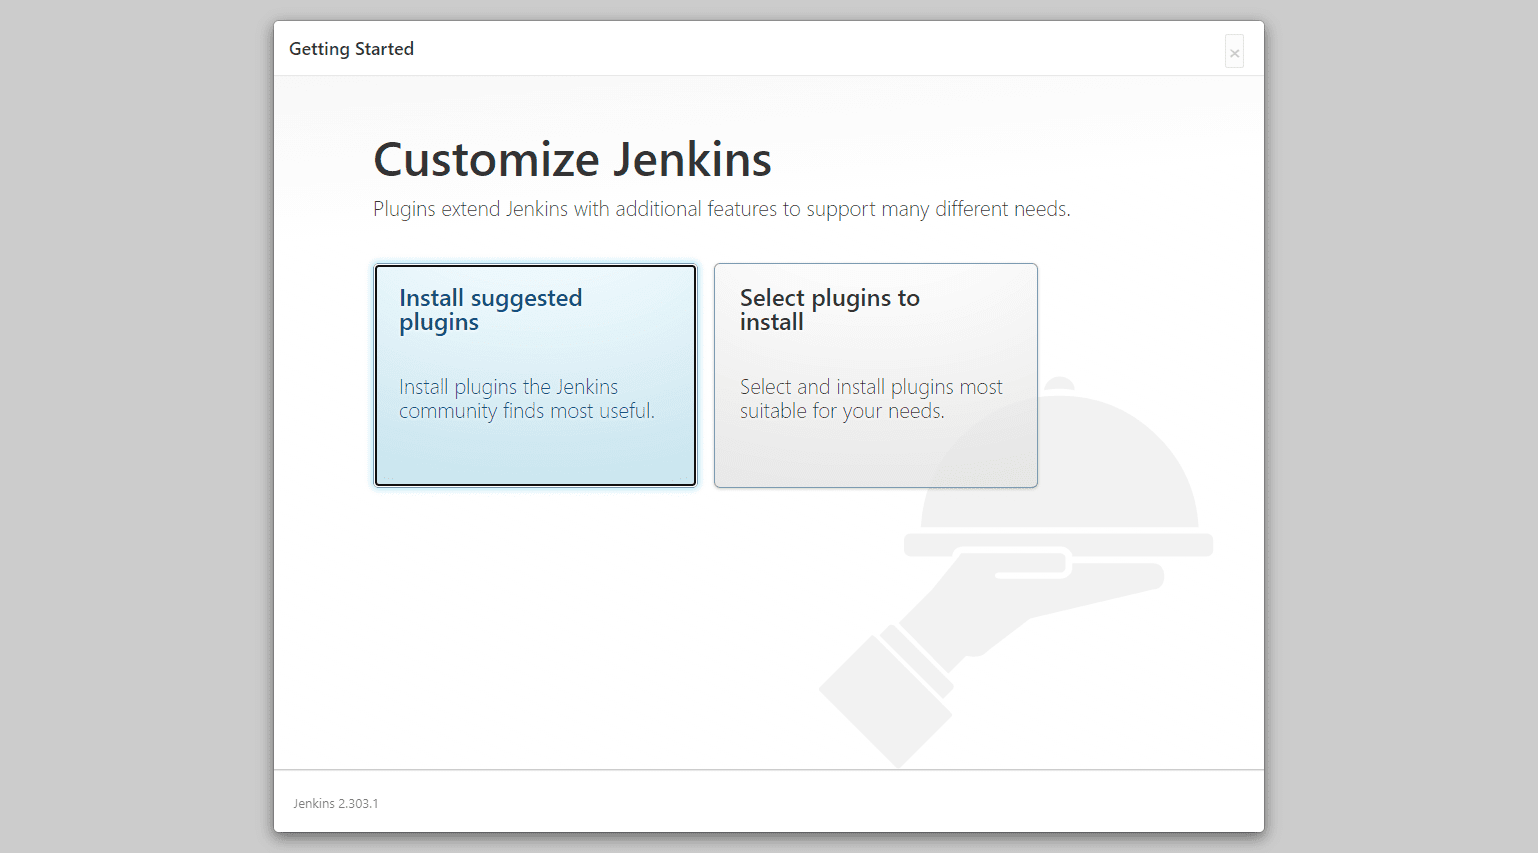
There are many other great solutions you can use as well, such as Jenkins, etc. So the concepts we are learning in this post will apply across the board. Each solution has a slightly different way of implementing the concepts and terminology that goes with a specific solution. So, keep that in mind.
Installing Gitlab
You can learn more about Gitlab here: Download and install GitLab | GitLab.
It is very easy to get started with GitLab. Let’s look at how to easily spin up a Gitlab container image for your home lab, using Docker Compose. Below is an example of Docker compose code I am using.
version: '3.8'
services:
  gitlab:
    image: gitlab/gitlab-ee:latest
    hostname: 'gitlab.cloudlocal.cloud'
    restart: always
    networks:
      - nginxproxy
    volumes:
      - '~/homelabservices/gitlab/data:/var/opt/gitlab'
      - '~/homelabservices/gitlab/config:/etc/gitlab'
      - '~/homelabservices/gitlab/logs:/var/log/gitlab'

    container_name: gitlab
Gitlab Container Registry
We won’t use the container registry in this demo. However, GitLab has a built-in container registry you can enable.
The project’s container registry plays an important role in managing Docker images used in the pipeline. The registry allows you to store and retrieve Docker images. For instance, your pipeline may build a new container image and push that image to your GitLab repository or another repository, such as Docker Hub.
Overview of GitLab CI/CD
GitLab CI/CD is a tool that is designed with software delivery with continuous integration and continuous deployment in mind. With CI/CD, you can automate the software development process, efficiently commit changes to the code repository, and deploy them to a production environment.
Check out my post that I posted recently covering the top DevOps containers in 2023: Top 10 DevOps Containers in 2023. Gitlab is a part of that list.
Continuous Integration
Continuous Integration (CI) is a crucial GitLab feature that enables developers to merge their changes into the master branch regularly.
Each commit initiates a CI process, automatically triggering a pipeline job that can do many things like verify the integrity of new code changes through a set of predefined tests using some type of test suite, build container images, and push images to a container registry.
Continuous Deployment and Delivery
Continuous Deployment (CD) is the logical next step following CI. It automatically deploys every validated change to the production environment, while Continuous Delivery ensures every change is deployable but requires manual deployment.
Both are essential for achieving an automated, streamlined software delivery process in the development lifecycle.
GitLab Runner
When you install Gitlab, you have to provision what Gitlab calls a GitLab Runner. GitLab runners core component that executes all operations defined in the .gitlab-ci.yml file (the special-purpose file that contains the Gitlab pipeline code).
It handles various tasks, and you can install it on different systems, including your local machine, Docker container, Linux host, Windows host, etc to meet specific project requirements.
Installing a GitLab runner
We can spin up a simple Gitlab runner as part of our Docker Compose code, using similar code to the below.
gitlab-runner:
    image: gitlab/gitlab-runner:ubuntu-v16.4.0
    restart: always
    networks:
      - nginxproxy
    volumes:
      - '~/homelabservices/gitlab-runner/config:/etc/gitlab-runner'
      - '/var/run/docker.sock:/var/run/docker.sock'
    container_name: gitlab_runner
Connecting a Gitlab runner to your GitLab CI CD pipeline
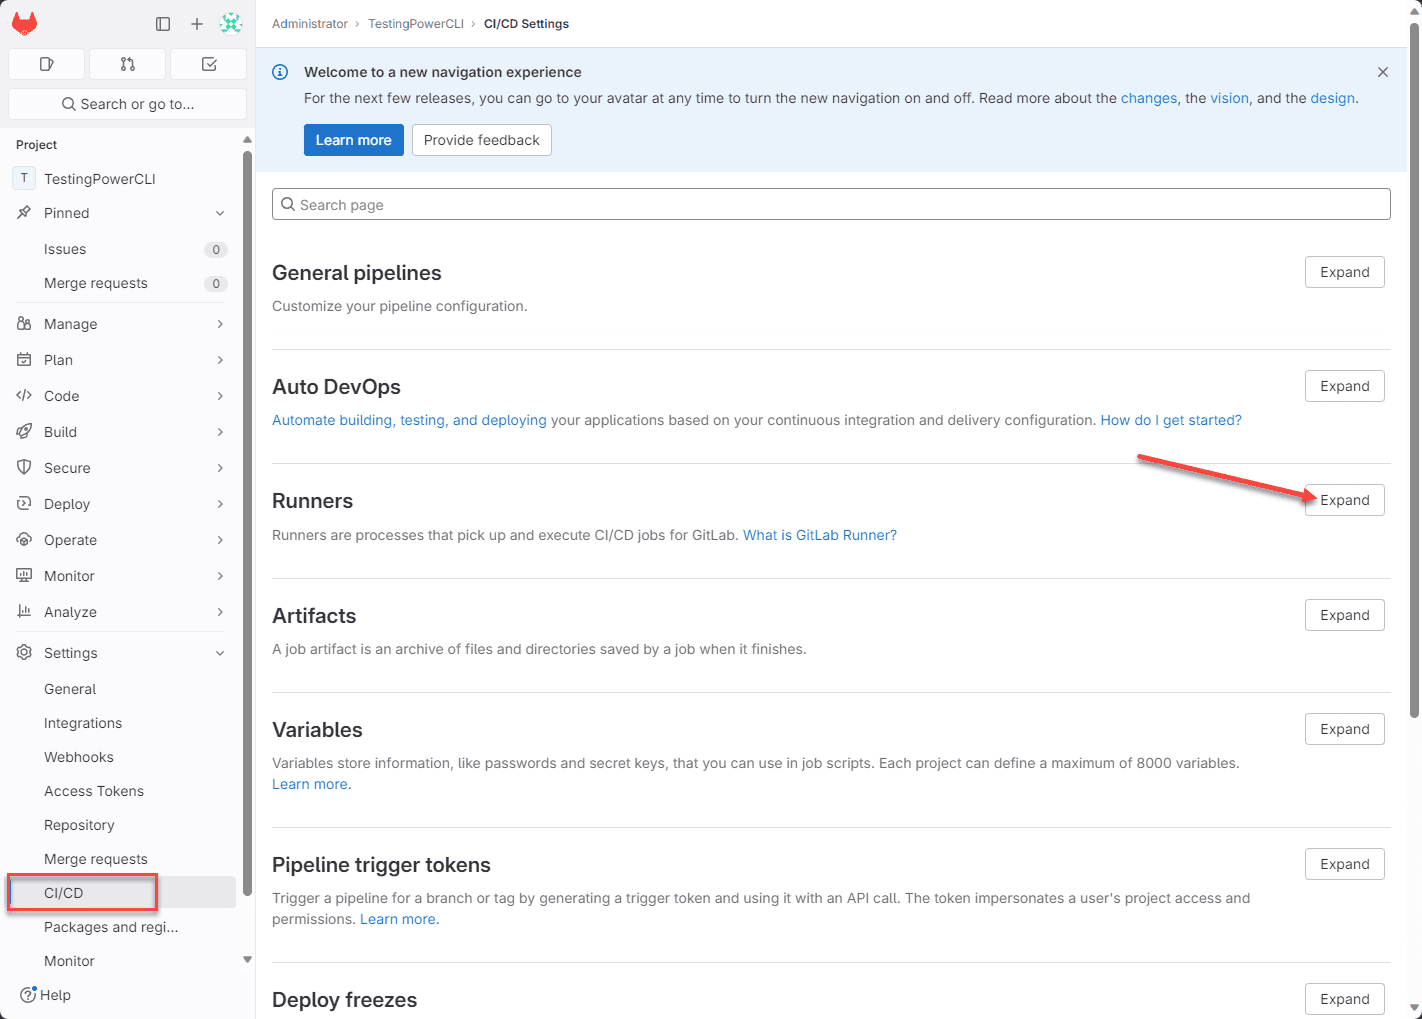
You need to go through a process to connect your GitLab runner to your GitLab CI CD pipeline. Once you have your Gitlab and Gitlab runner stood up, you can create a project in Gitlab. After you have a project (we will show how to create one in the section below), go to the Project Settings > Runners > Expand.
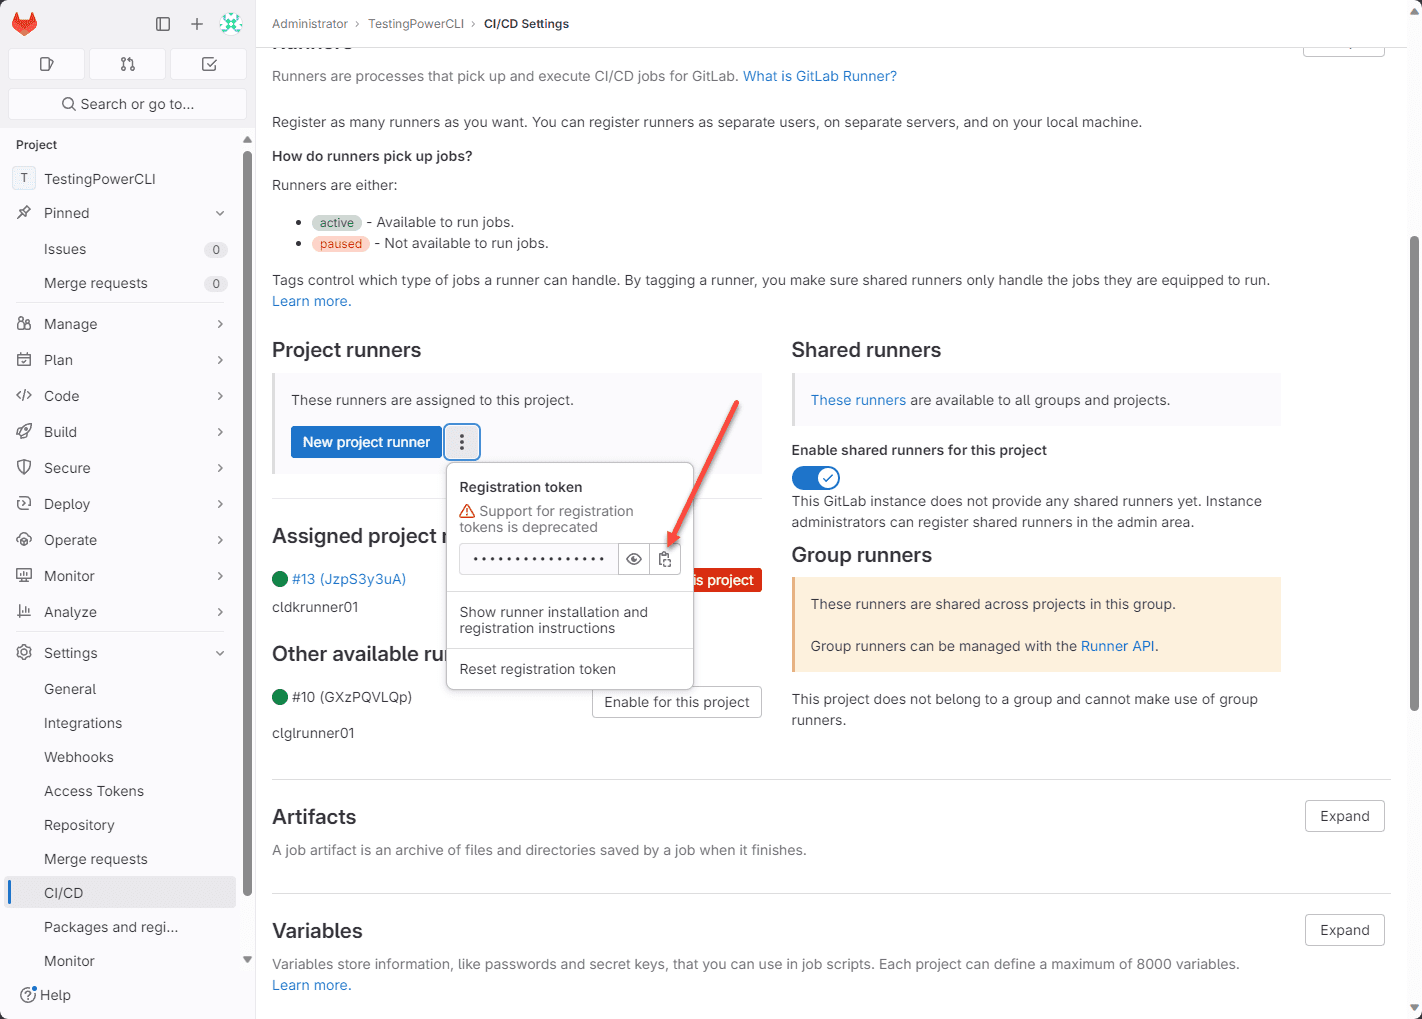
Here you can click the ellipse next to New project runner, and then click the copy icon that appears to copy your token. You will use this to add the Gitlab runner to the project.
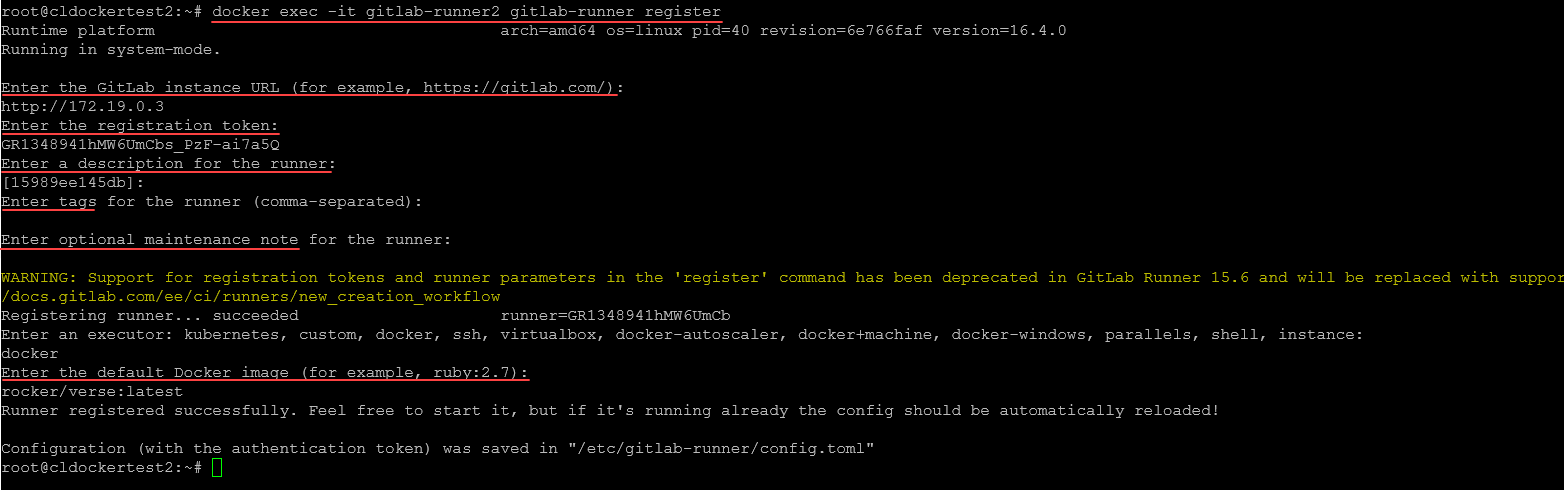
Now, you will exec into your Gitlab runner container and run the command gitlab-runner register.
docker exec -it gitlab_runner gitlab-runner registerYou will be taken through registering the Gitlab runner with your Gitlab instance. Note the following prompts:
Enter the Gitlab instance URL
Enter the registration token
Enter a description for the runner
Enter tags for the runner
Enter optional maintenance note for the runner
Enter the default Docker image
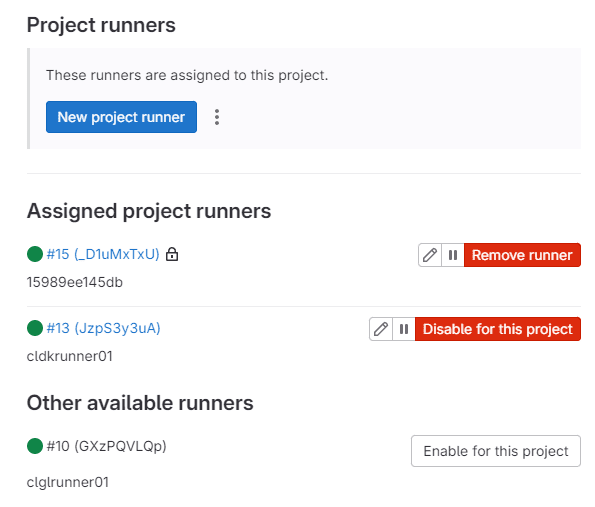
If you refresh your CI CD settings page for the Runners configuration, you will see your new GitLab runner assigned and it should show as “green”.
GitLab projects are tied to a repository
When you create a project in GitLab, it is tied to a repository. It means that the repo that holds your code files is tied to the project. If you want to run PowerShell, PowerCLI, or other types of scripts, this is where we will check in our code.
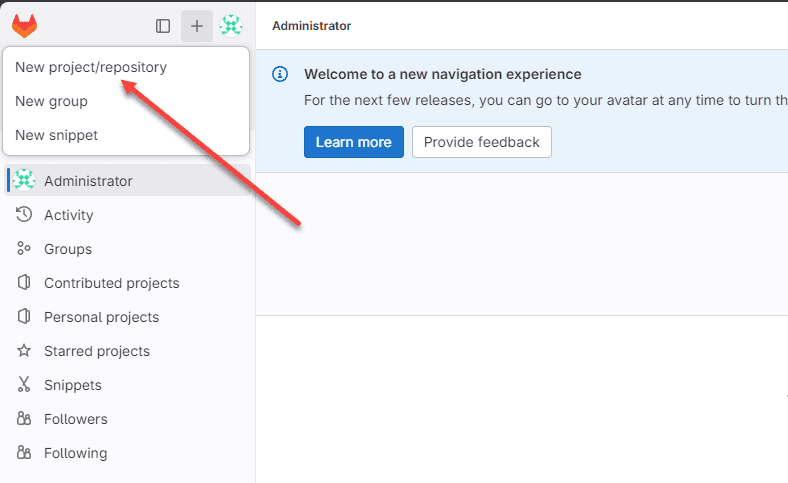
In Gitlab, from the left sidebar create your project.
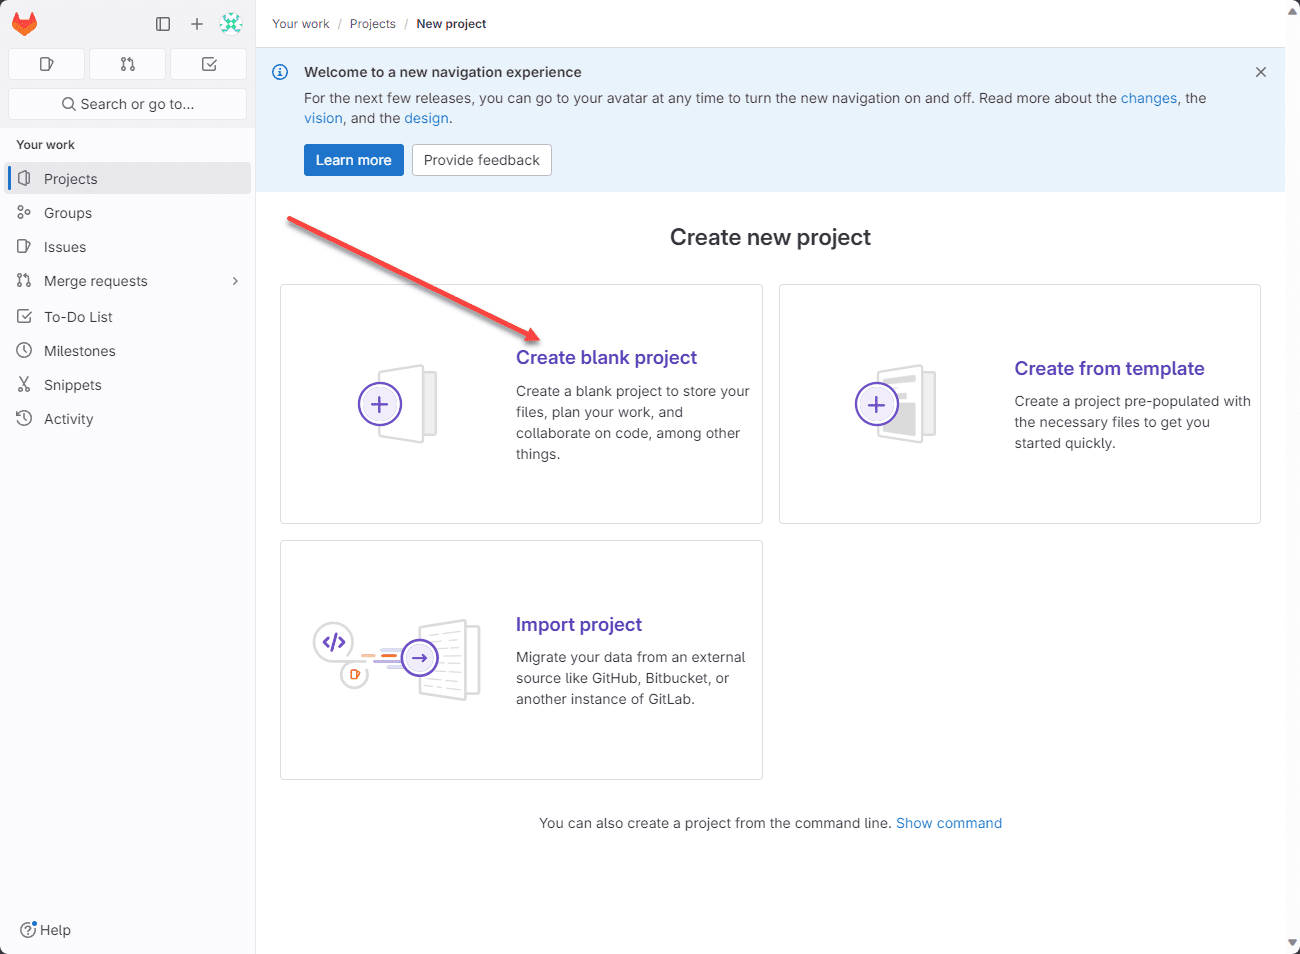
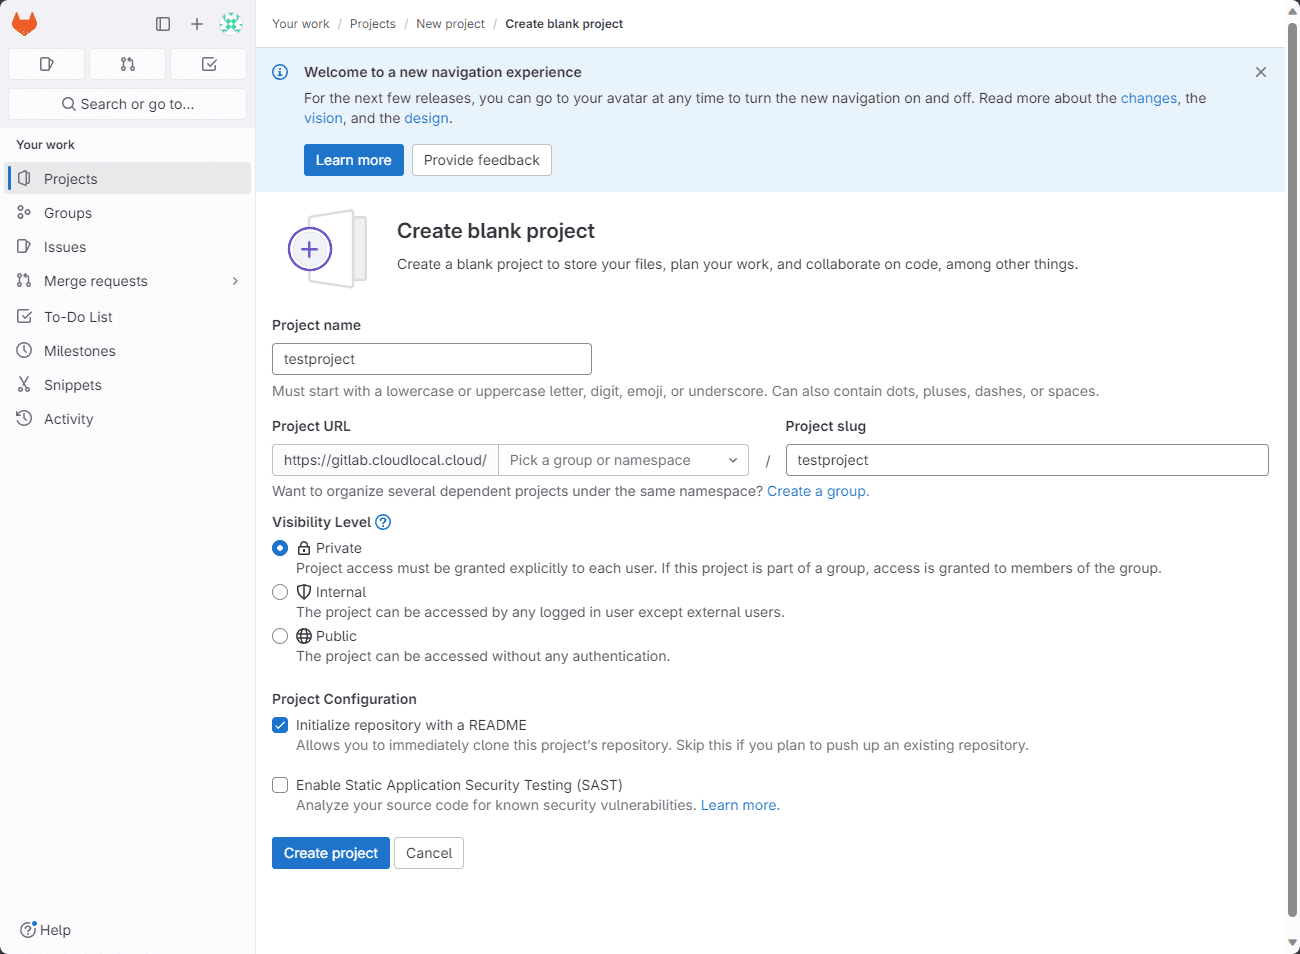
Create a blank project.
Name your project and create the project URL and slug. Also, pick a group or namespace.
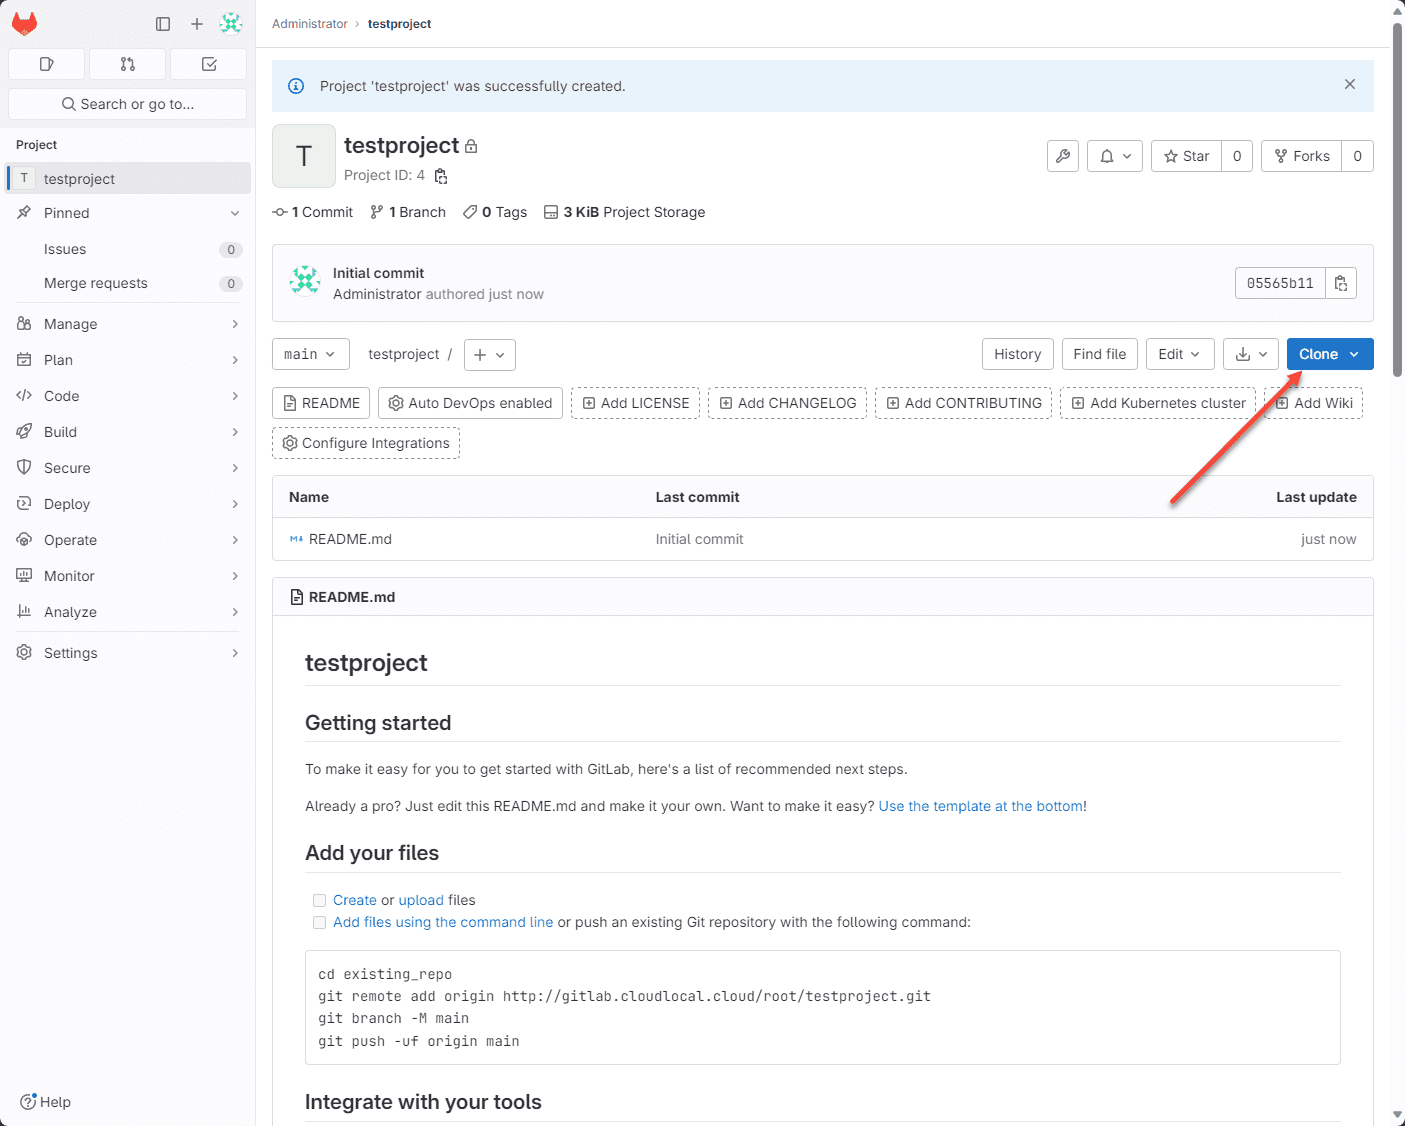
You will see your Clone button. Here is where we will clone our repository locally so we can work with the project.
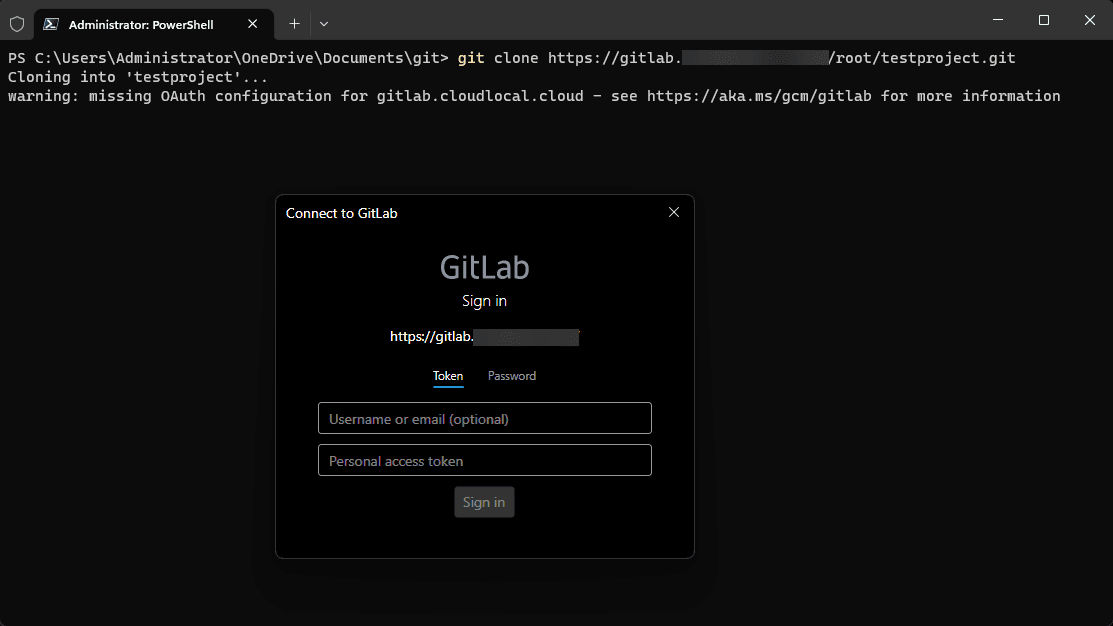
Now from the command line, you can use the git clone command to clone down your repository. Enter your credentials and authenticate to your GitLab instance.
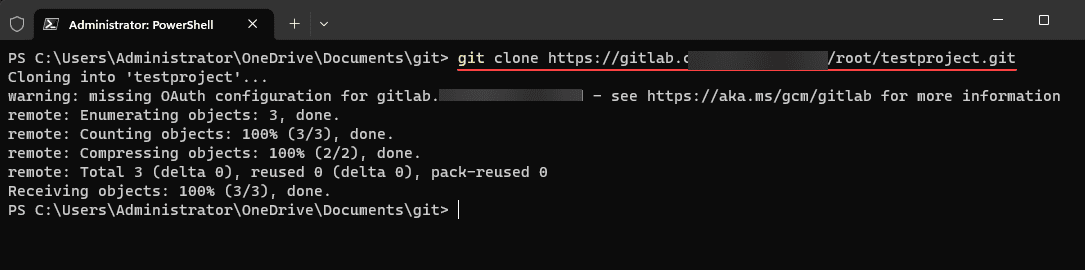
After you authenticate, your files will be cloned down.
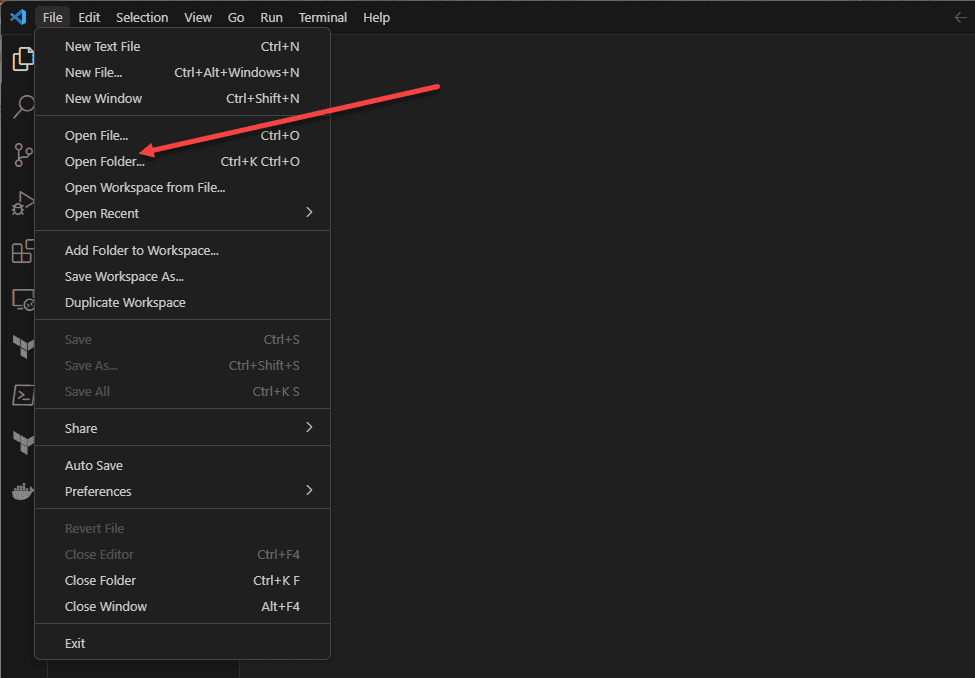
Open your cloned repo in VS Code
Now, we can open the repo in VS Code.
Building a quick PowerShell example for PowerCLI
So, for a quick example, let’s build a pipeline that will use a PowerCLI container to run a simple PowerCLI script against a home lab vCenter Server. We will create two files in VS Code:
.gitlab-ci.yml
powershell.ps1
The .gitlab-ci.yml file
A .gitlab-ci.yml configuration file is pivotal for creating efficient GitLab CI/CD pipelines. This file serves as a blueprint, guiding the GitLab Runner through various predefined jobs, stages, and tasks within the pipeline. It ensures your code is tested, built, and deployed systematically, using the principles of continuous integration and continuous deployment.
The contents of the .gitlab-ci.yml file will look like the following:
powercliscript:
image:
name: vmware/powerclicore
stage: deploy
script:
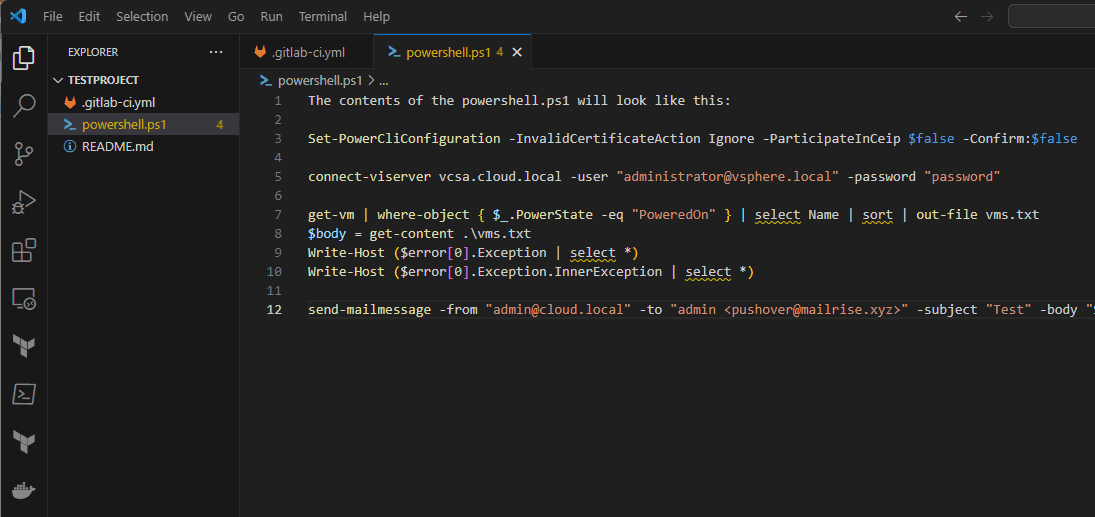
- pwsh test.ps1The contents of the powershell.ps1 will look like this:
Set-PowerCliConfiguration -InvalidCertificateAction Ignore -ParticipateInCeip $false -Confirm:$false

connect-viserver vcsa.cloud.local -user "[email protected]" -password "password"

get-vm | where-object { $_.PowerState -eq "PoweredOn" } | select Name | sort | out-file vms.txt
$body = get-content .\vms.txt
Write-Host ($error[0].Exception | select *)
Write-Host ($error[0].Exception.InnerException | select *)

send-mailmessage -from "[email protected]" -to "admin <[email protected]>" -subject "Test" -body "$body" -Attachments .\vms.txt -smtpserver 10.1.149.19 -port 8025
In the PowerCLI script, I am running a simple query to pull all powered on VMs from the environment. Then emailing the results to myself using my Mailrise server.
Below, we have created both files in VS Code.
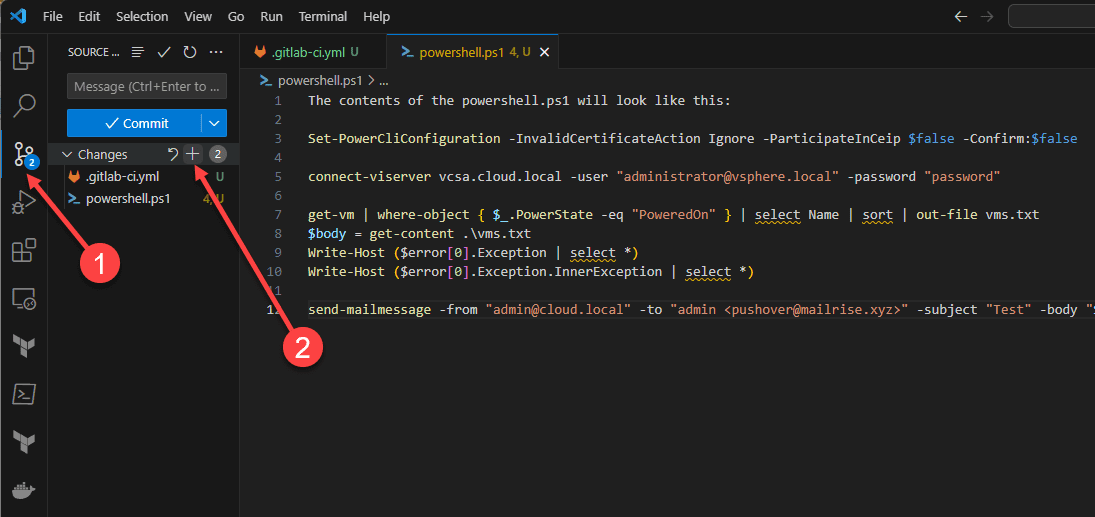
Stage, commit, and push changes to your GitLab repo
Click on the Source control icon in VS Code. Then, click the plus sign next to Changes. This will stage changes to be ready to commit changes.
Now, from the command line we will commit and push changes to our GitLab repository.
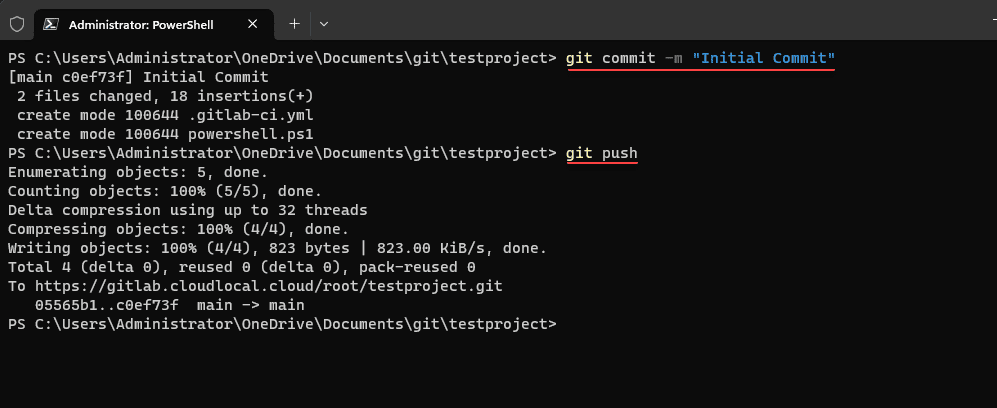
As soon as you push your commit to your GitLab repo, your CI CD pipeline will attempt to run. If you see a failed pipeline run, you can look at the details of the failure and see what is failing.
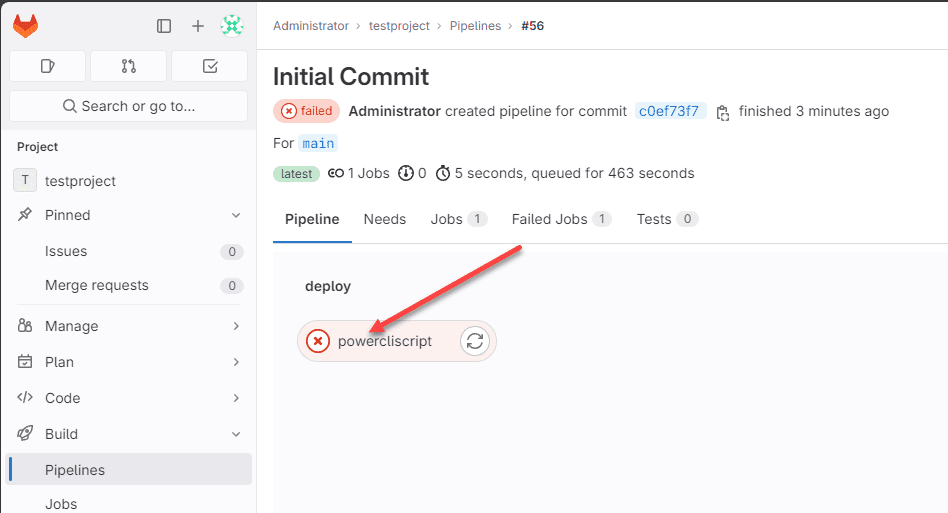
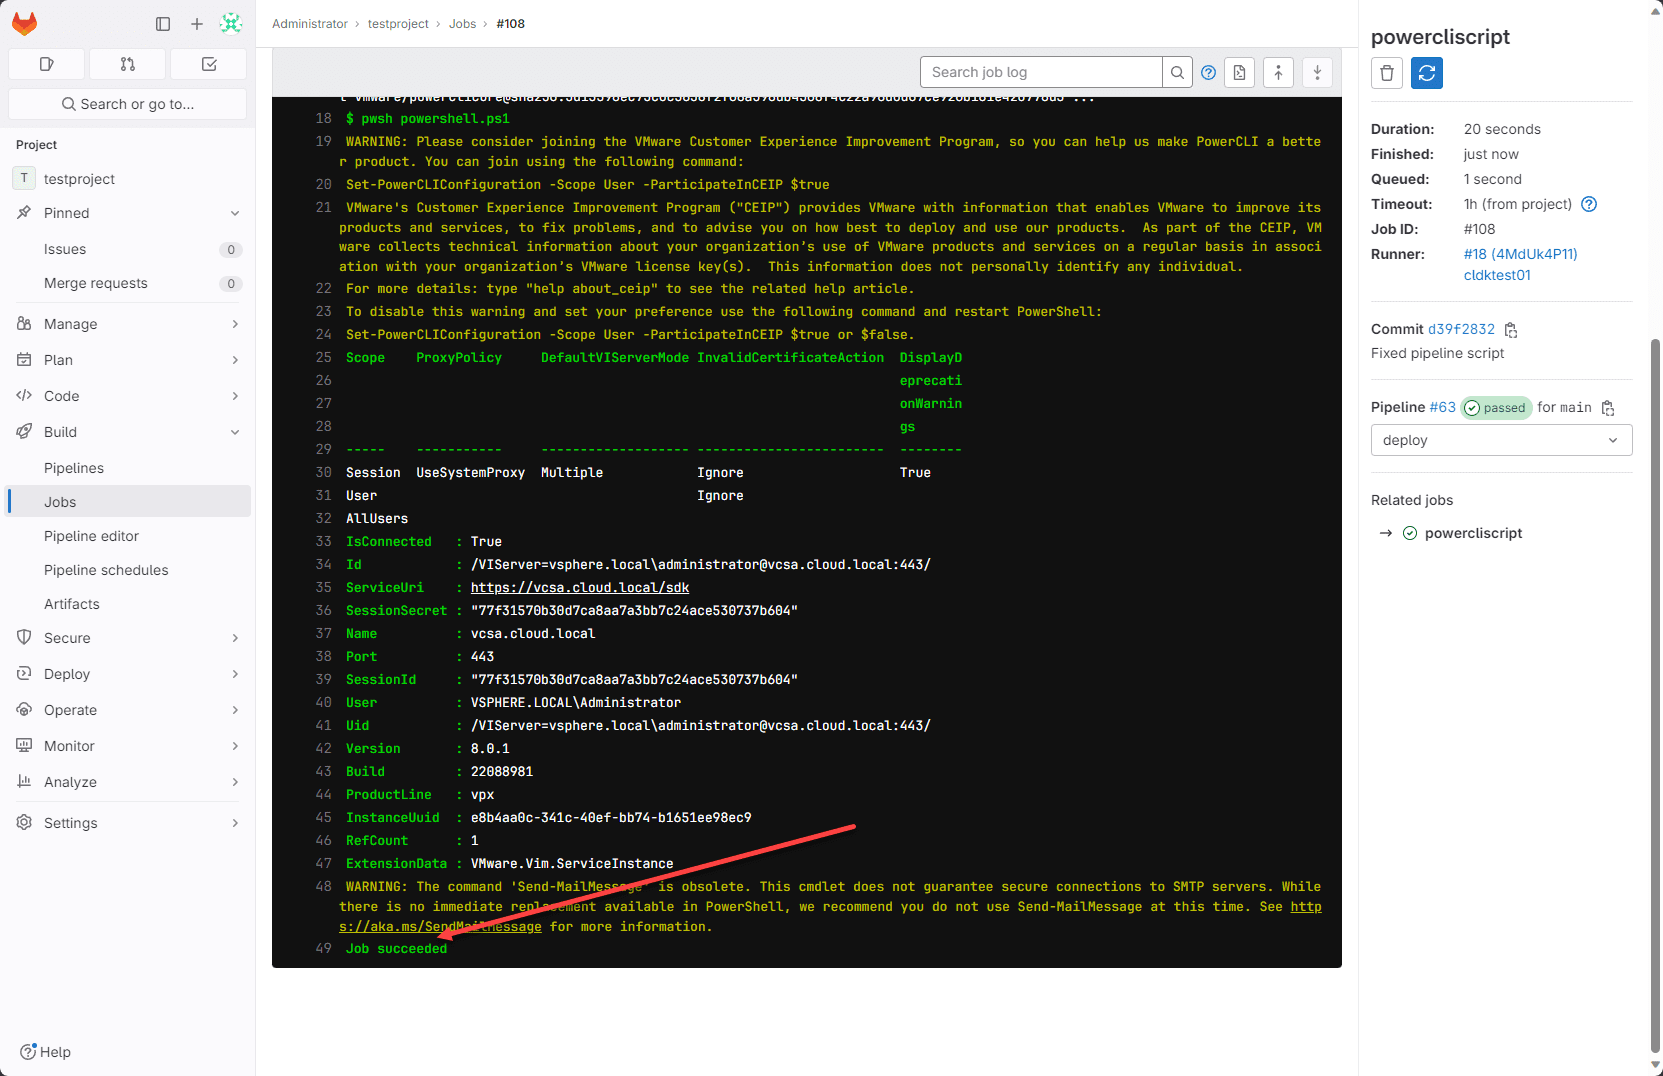
If you don’t see any errors, your task will look something like this:
Wrapping up
GitLab is an extremely powerful CI CD solution that I have been running for quite some time now in the home lab and in production. It has many capabilities that can allow infrastructure engineers to start getting their feet wet in DevOps processes and using source control to keep track of their code. Hopefully, this tutorial will help anyone who wants to start playing around with GitLab and DevOps to see that it isn’t too difficult to get started.
Google is updating how articles are shown. Don’t miss our leading home lab and tech content, written by humans, by setting Virtualization Howto as a preferred source.
About The Author

Very nice written and explained article.
Amol,
Thank you for the comment! So glad the article was helpful.
Brandon
You are great Brandon, i
m new to the devOps and im reading often your publicationsthank you!
Bastri,
Thank you so much! I appreciate your kind words!
Brandon