Ok, there is no denying that Proxmox is picking up steam everywhere. Before, we said that Proxmox was really a home lab option. But now, with VMware going the way of other Broadcom purchases, many are giving Proxmox and other solutions a serious look. Getting Proxmox set up and off to a good start involves some basic configuration. Let me share the first 10 steps I do on Proxmox in 2024 to give you guys an idea of the steps I take on a new install.
Table of contents
- 10 steps I recommend
- 1. Change the update repositories to “no subscription” and run updates
- 2. Eliminating Subscription Notifications
- 3. VLAN-enable the default bridge
- 4. If more than one host, add clustering
- 5. Install Ceph
- 6. Add Proxmox Backup Server connection
- 7. Setup HA on VMs for high-availability
- 8. Setup LetsEncrypt certificates using ACME
- 9. Setup Two-Factor authentication
- 10. Add Proxmox to InfluxDB monitoring
- Wrapping up
10 steps I recommend
There are first 10 steps I do on Proxmox in 2024 when setting up a Proxmox VE server. They are:
- Change the update repositories to “no subscription” and run updates
- Remove the subscription nag
- VLAN-enable the default bridge
- If more than one host, add clustering
- Install Ceph
- Add Proxmox Backup Server connection
- Setup HA on VMs for high-availability
- Setup LetsEncrypt certificates using ACME
- Setup Two-Factor authentication
- Add Proxmox to InfluxDB monitoring
1. Change the update repositories to “no subscription” and run updates
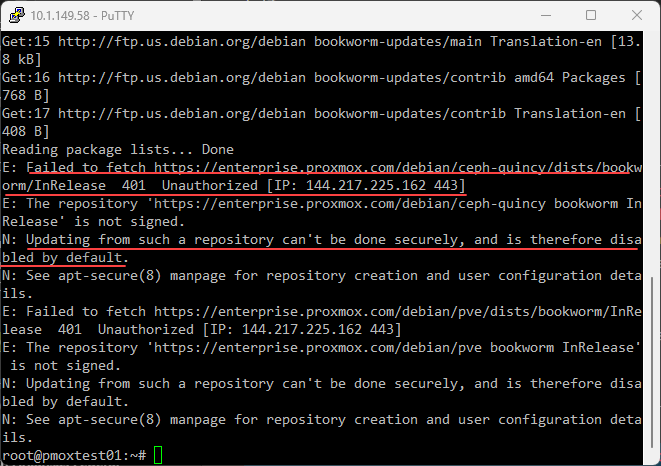
By default, when you install Proxmox VE, it will come out of the box, pointing to enterprise subscription reports. If you attempt to update your Proxmox VE Server, you will get errors related to being unable to connect to the repos. The error will look something like this:
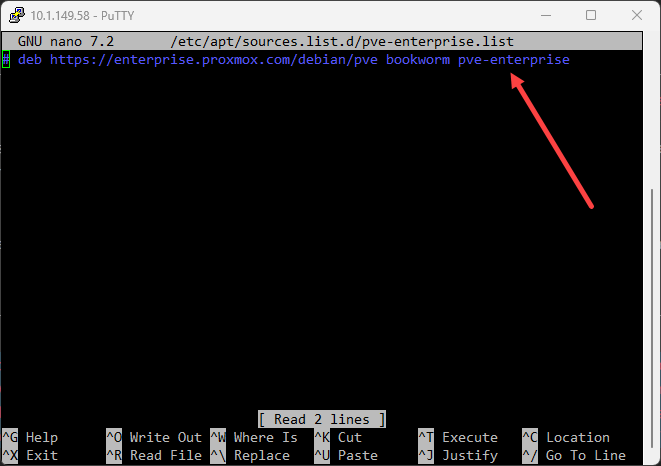
If we take a look at the file:
/etc/apt/sources.list.d/pve-enterprise.listWe will see the following:
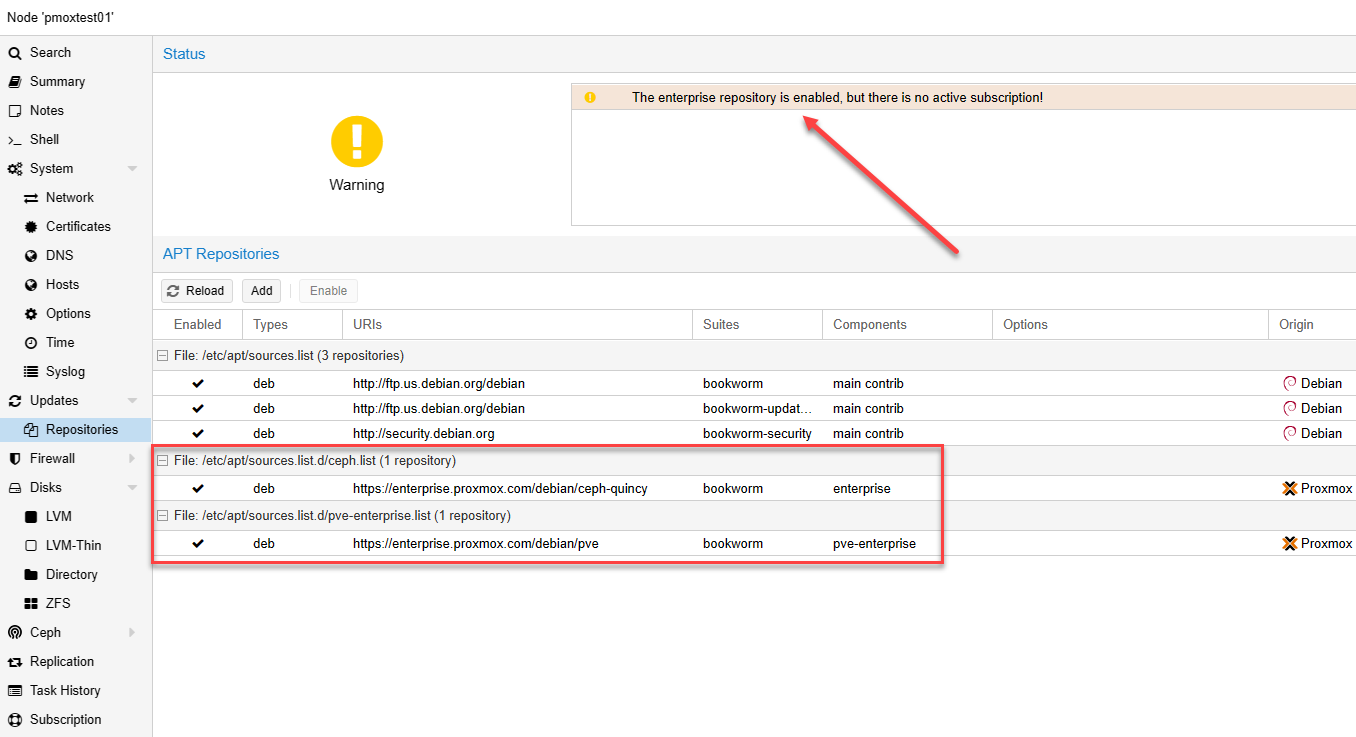
We can also view this in the Proxmox GUI at the Proxmox host > Updates > Repositories. You will see the warning below about the enterprise repositories without a subscription.
One of the first 10 steps I do on Proxmox in 2024 is change this to the non-enterprise no subscription update repositories:
#/etc/apt/sources.list.d/pve-enterprise.list From: deb https://enterprise.proxmox.com/debian/pve bookworm enterprise To: deb http://download.proxmox.com/debian/pve bookworm pve-no-subscription

#/etc/apt/sources.list.d/ceph.list
#For Ceph Quincy
From: deb https://enterprise.proxmox.com/debian/ceph-quincy bookworm enterprise To: deb http://download.proxmox.com/debian/ceph-quincy bookworm no-subscription

#For Ceph Reef From: deb https://enterprise.proxmox.com/debian/ceph-reef bookworm enterprise To: deb http://download.proxmox.com/debian/ceph-reef bookworm no-subscription
After you change the files above, you can run your updates from the Proxmox web GUI or command line:
apt-get update && apt-get upgrade -yCheck out the full guide on the no subscription updates here:
See a video walkthrough here:
2. Eliminating Subscription Notifications
Even after reporting your update repositories to the non-subscription repos, you will see the subscription nag every time you log into Proxmox:
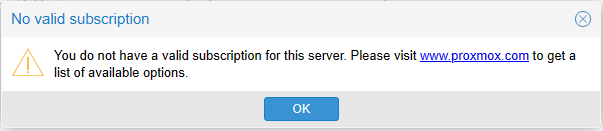
There are subscription nag projects out there to eliminate the subscription nag message when logging in. Most of these have you edit files that suppress the popup.
3. VLAN-enable the default bridge
Configuring VLANs on your Proxmox server allows you to do a lot of different things with your networking in Proxmox VE. You can shift your management traffic to a different VLAN. You can connect your Proxmox VE virtual machines to a different segment of your network. It allows you to do things like run virtual routers and have those routers sit on different segments of your network and successfully route traffic, using something like virtualized pfSense.
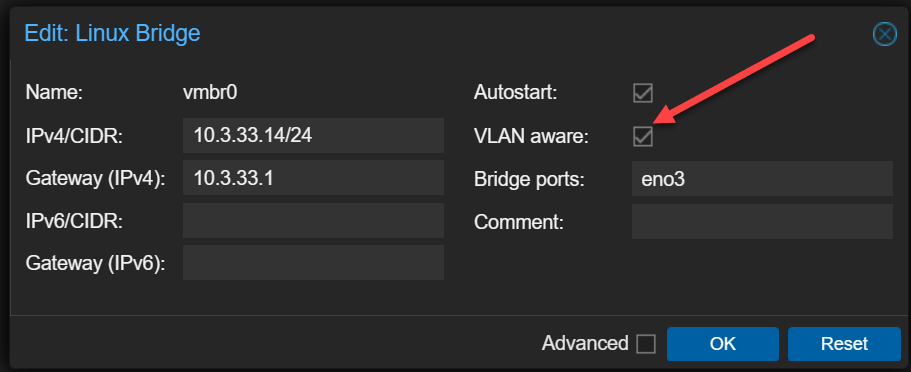
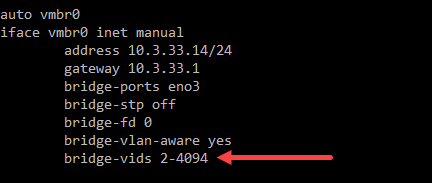
Take a look at your network interfaces file here:
/etc/network/interfacesYou can see the default trunking configuration implemented by checking the VLAN aware checkbox.
Read my in-depth guide on how to do this here:
See a video walkthrough here:
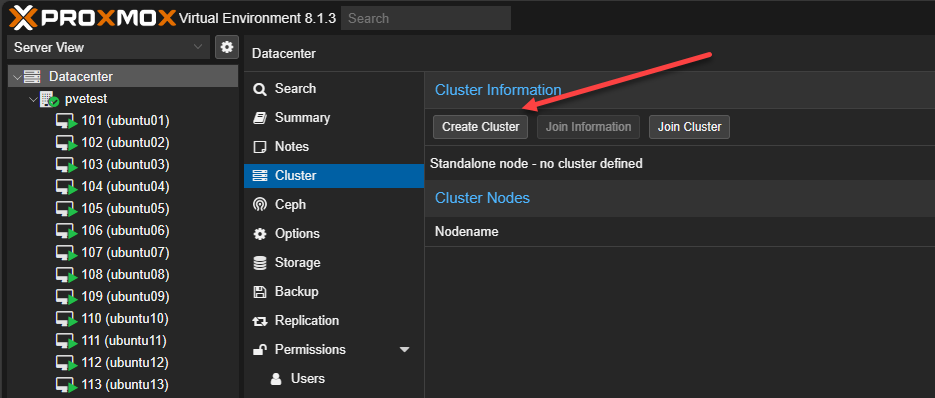
4. If more than one host, add clustering
If you have more than one Proxmox host, you can create a Proxmox cluster. With clustering, you can have a logical unit of compute, network, and storage to run workloads.
To begin the cluster creation process, navigate to Datacenter > Cluster > Create Cluster.
Read the full guide on how to set up a Proxmox cluster here:
Proxmox HA Cluster Configuration for Virtual Machines.
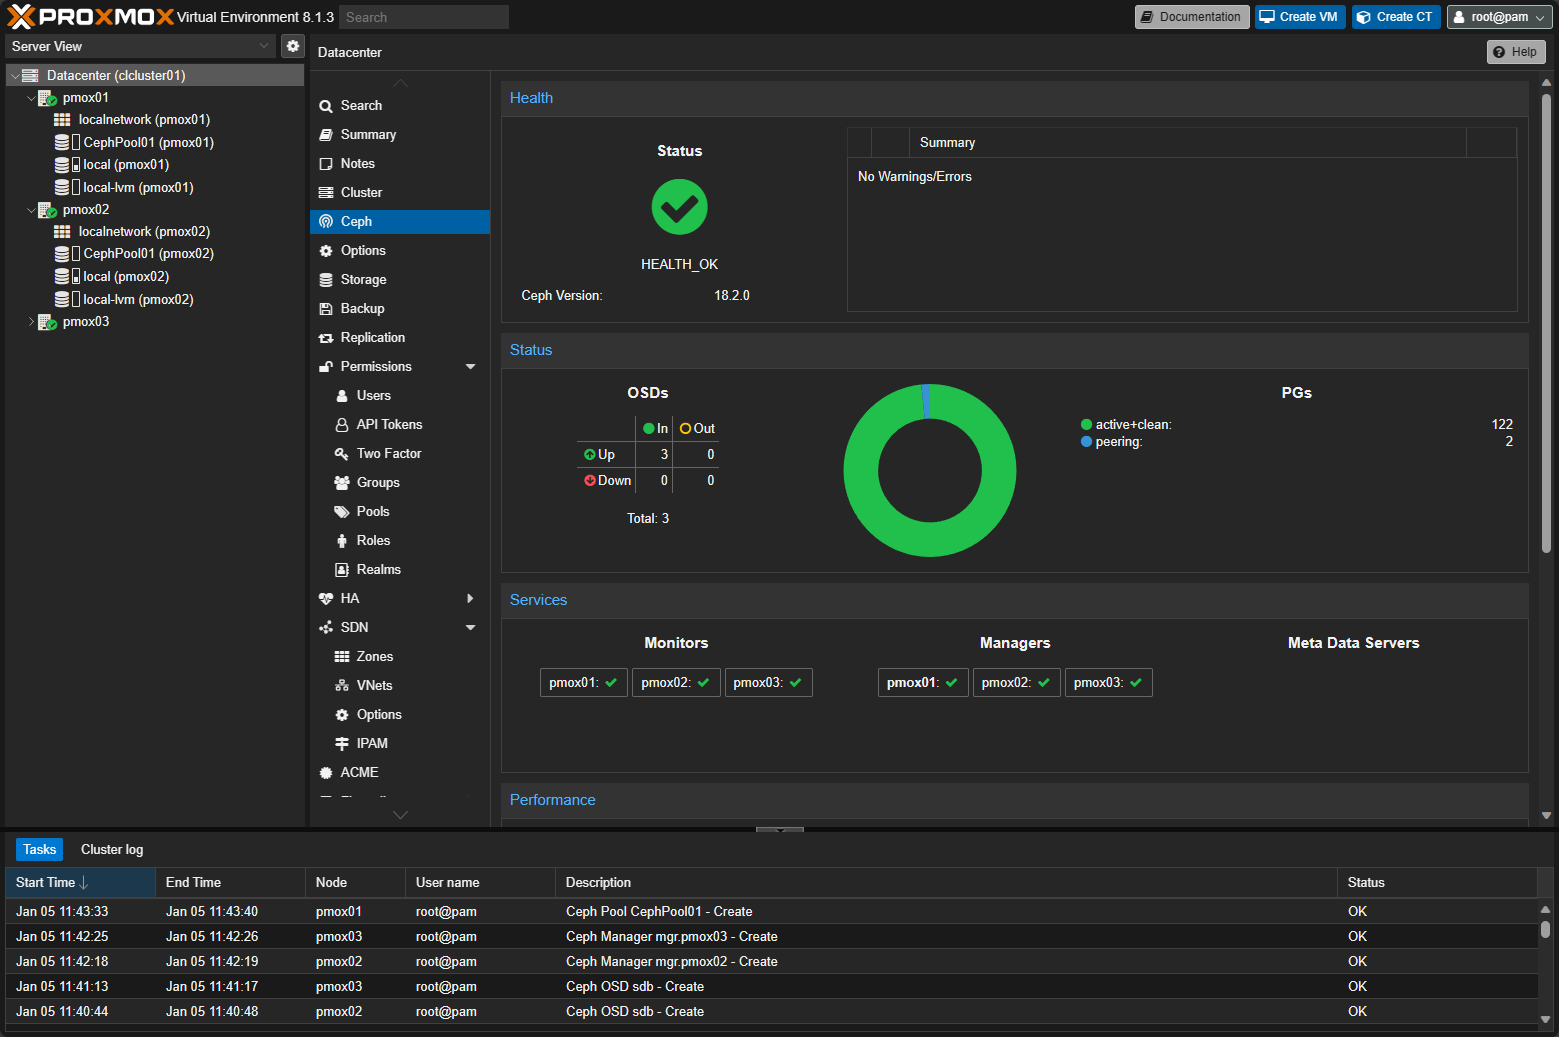
5. Install Ceph
One of the great features and capabilities of Proxmox is the integration with Ceph. Ceph is a distributed storage solution for HCI that allows you to run local storage on each of your Proxmox hosts that is logically aggregated between the cluster nodes to look like a single storage repository for your VMs, and other resources.
You can also install CephFS for storing files on top of your Ceph storage to store things like ISOs, and also to create regular file shares that you can present to Windows and Linux clients.
Check out my walkthrough on Ceph and CephFS here:
- Mastering Ceph Storage Configuration in Proxmox 8 Cluster
- CephFS Configuration in Proxmox Step-by-Step
See a video walkthrough here:
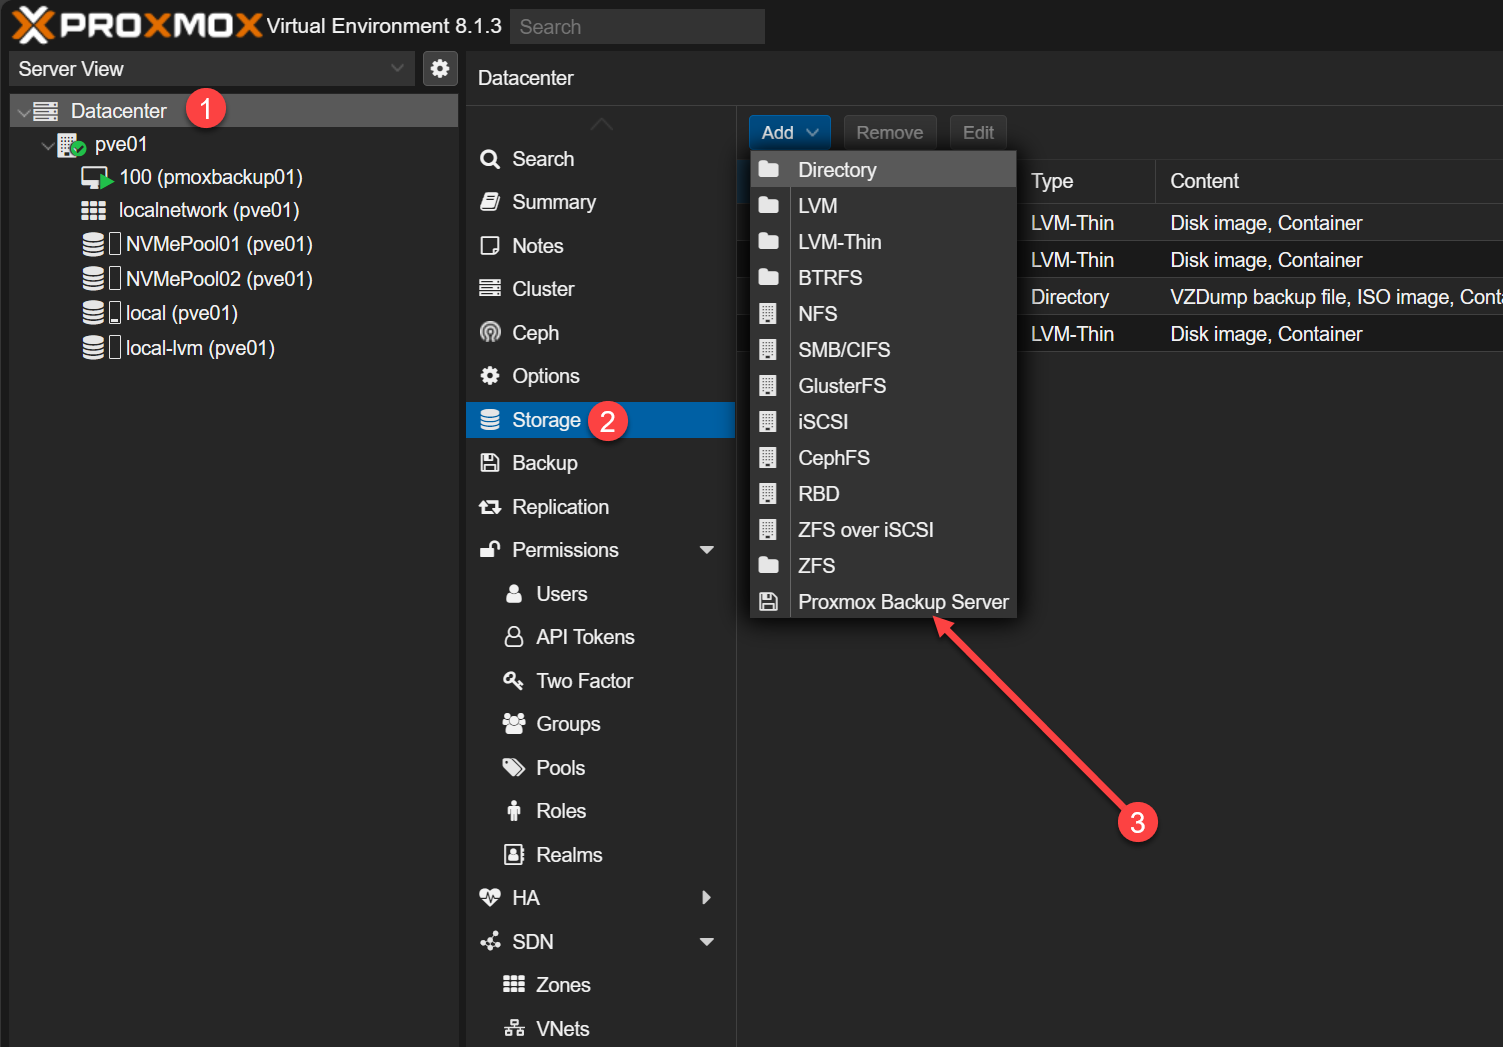
6. Add Proxmox Backup Server connection
In case you didn’t know, Proxmox also has its own backup solution, called Proxmox Backup Server (PBS). It allows you to back up your Proxmox virtual machines for free. It has a lot of great features you can take advantage of as well.
Check out my step-by-step guide to setting up Proxmox Backup Server here:
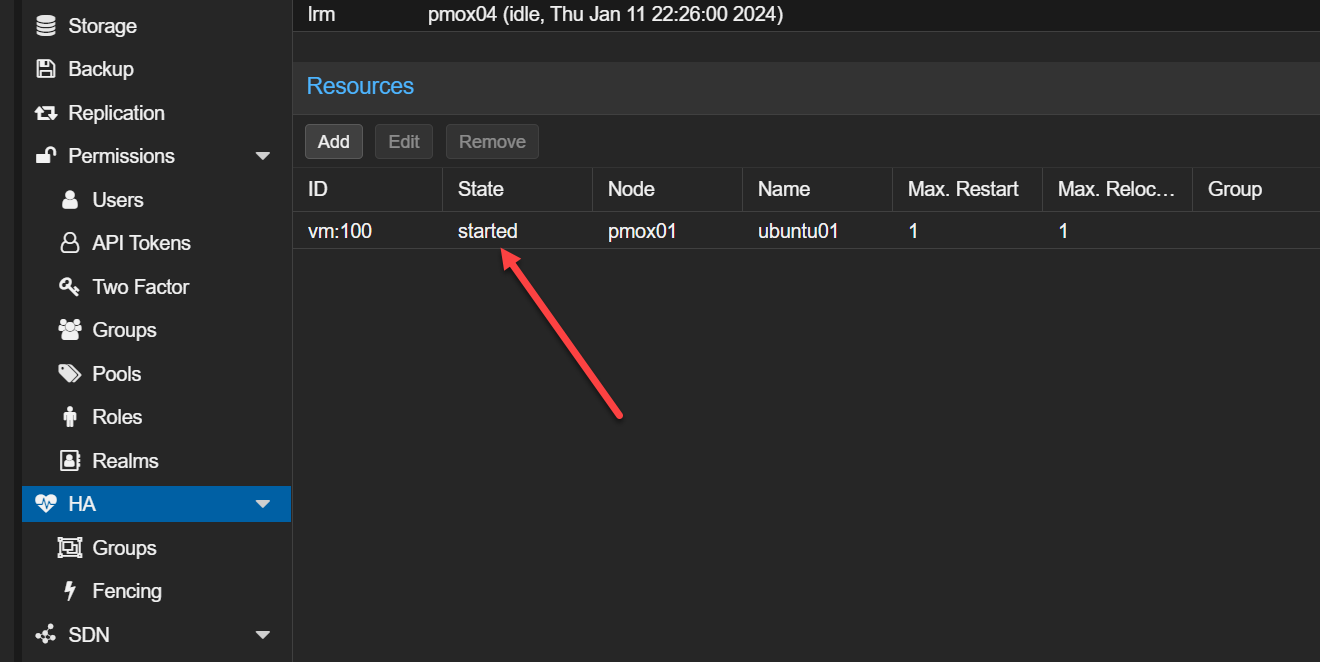
7. Setup HA on VMs for high-availability
Setting up HA for your virtual machines guarantees minimal downtime. When you have a virtual machine in Proxmox configured for high availability, it means that if the host the VM is running on fails, it will automatically restart the virtual machine on a healthy host.
Check out my full guide on setting up a Proxmox HA cluster here:
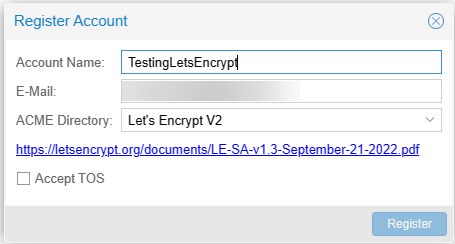
8. Setup LetsEncrypt certificates using ACME
You can secure your Proxmox VE interface with Let’s Encrypt certificates so you no longer have the SSL error when connecting to your Proxmox VE server. This not only improves the user experience, it also helps make sure your connection is secure with a valid certificate, proving your cert is valid and not compromised. SSL communications make sure your management activities are secure from eavesdropping.
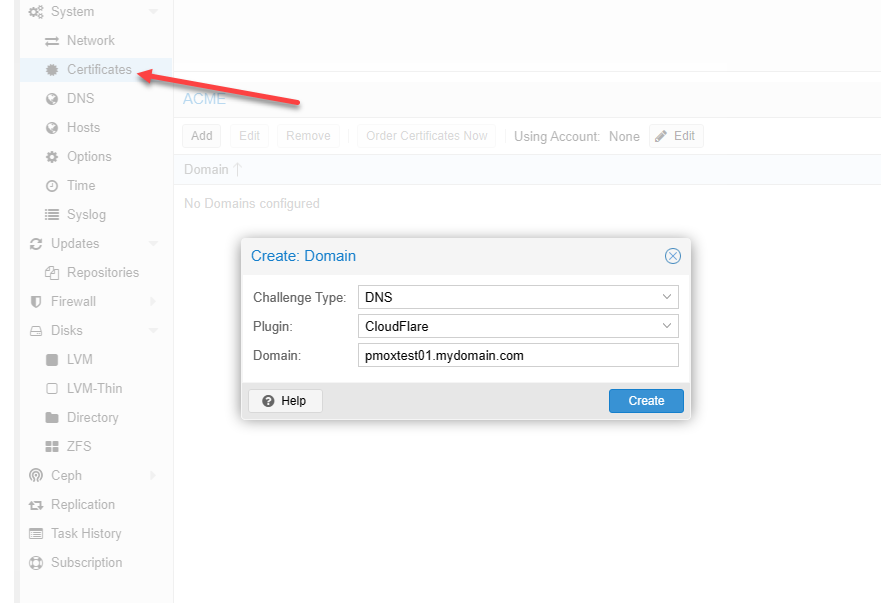
You register your account in the Datacenter under ACME.
Then add a DNS plugin.
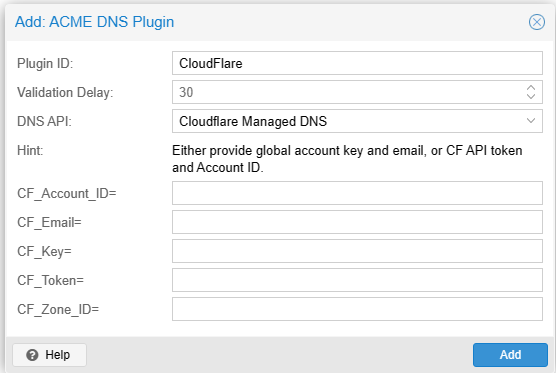
Then, under your host, you will choose DNS challenge (most likely) and your plugin, along with your domain name for your PVE host.
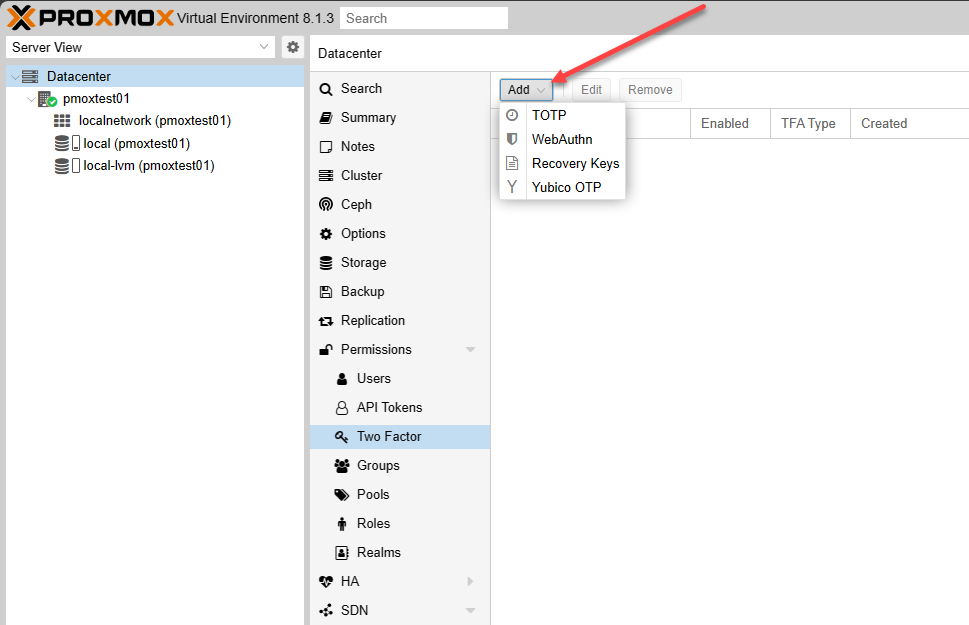
9. Setup Two-Factor authentication
Adding Two-factor authentication is a great way to make your server exponentially harder to compromise. This should be one of the first things you do, especially in production.
Proxmox offers several choices here with 2FA, including:
- TOTP
- WebAuthn
- Recovery Keys
- Yubico OTP
10. Add Proxmox to InfluxDB monitoring
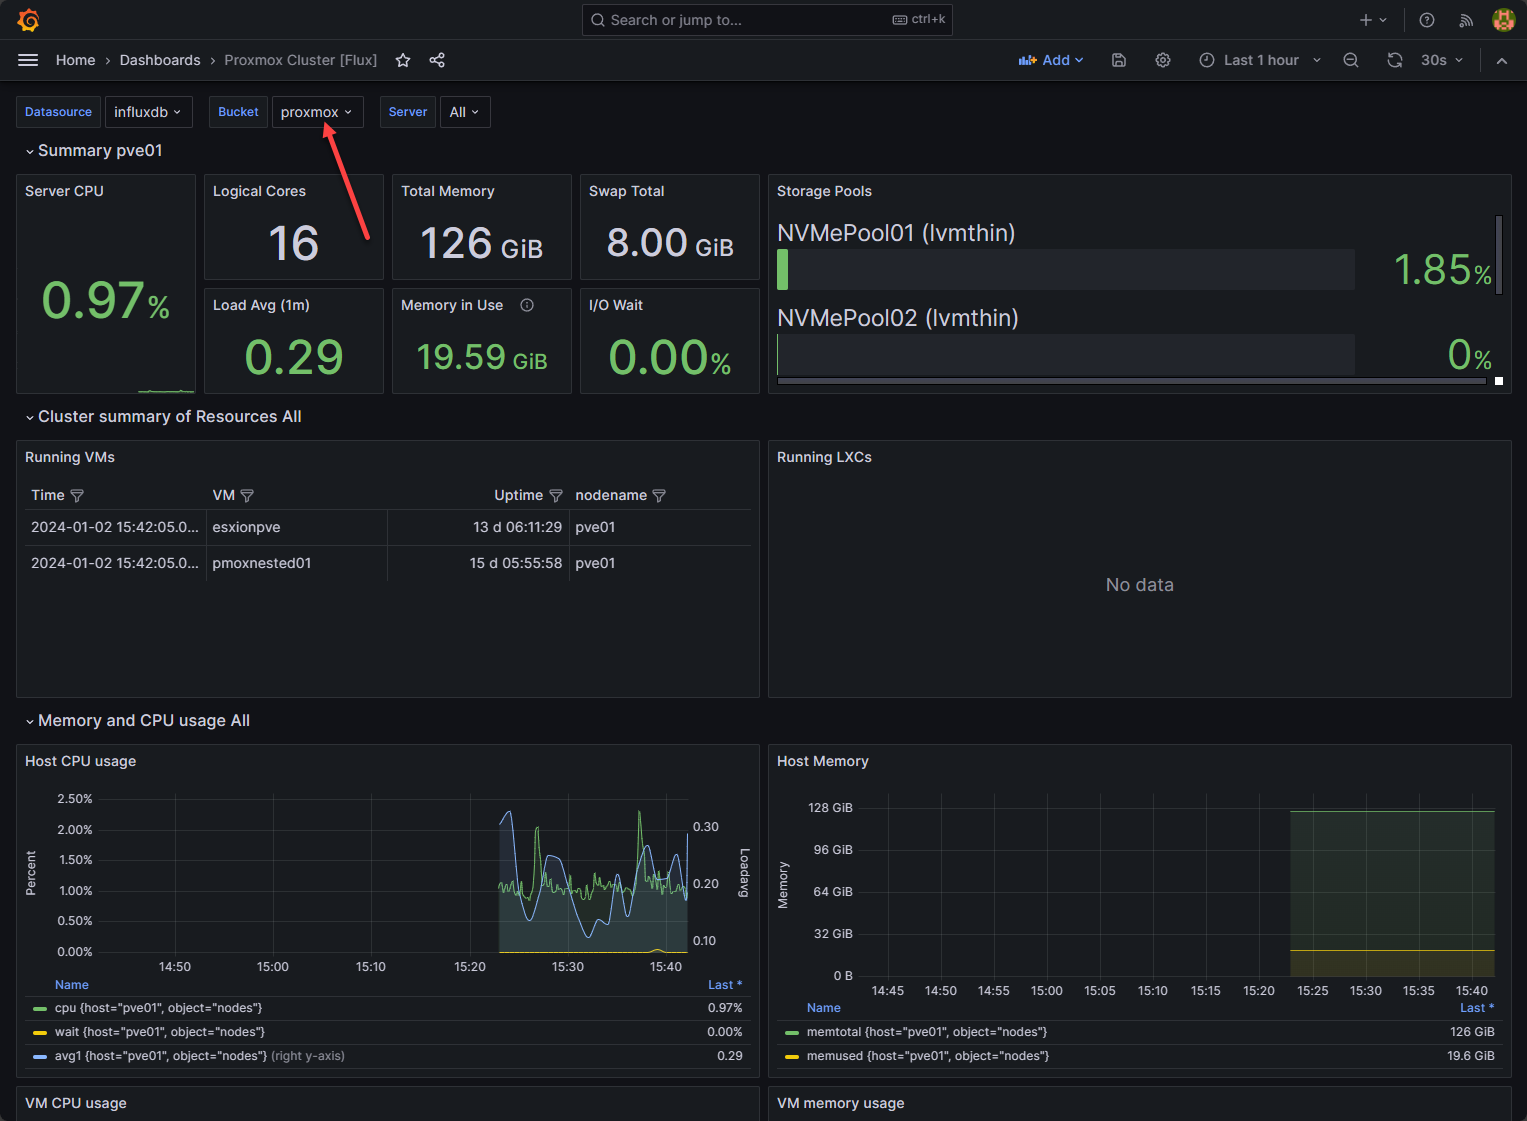
Finally, adding your Proxmox setup to InfluxDB monitoring provides you with the ability to visualize your Proxmox host and environment using Grafana. You can monitor and visualize your system’s performance and other insights.
This integration provides real-time monitoring and analytics that allow keeping tabs on the health and performance of your environment.

Viewing metrics in Grafana from our Proxmox VE server.
Check out the full list of steps in my guide here:
Wrapping up
Hopefully, you have enjoyed these first 10 steps I do in Proxmox in 2024, as these are some of the most important steps you can accomplish when you set up a new Proxmox server. As we have seen, these range from controlling updates, adding network capabilities, clustering, storage, high availability, encryption, multi-factor authentication, and monitoring. There will always be specific configurations for each environment that are specific to individual needs. However, these provide a great starting point for your Proxmox VE environment.
Google is updating how articles are shown. Don’t miss our leading home lab and tech content, written by humans, by setting Virtualization Howto as a preferred source.
About The Author

Hi
I am new for proxmox ve. Your first video is very nice for me but not quite clear. You write about editing /etc/apt/sources.list.d/ceph.list and Ceph Quincy and Ceph Reef but you did not told nothing about Ceph Reef in video. Should I do as was written or as was told?
Regards
Maciek
Maciek,
Thank you for the comment! Great question. Actually, even if you are not using Ceph with Proxmox, you need to edit the ceph.list file. When you pull updates and attempt to upgrade your Proxmox installation, it will check this file as well and will error if it is still pointed to the subscription update repos. Let me know if that helps.
Brandon