There are so many options for running a home server for storage and virtualization needs on a home network. I have run VMware ESXi and Proxmox servers for my virtualization needs for the past few years now. However, until recently, I only ran TrueNAS inside a virtual machine for testing and a few light-duty applications. A project I wanted to tackle was repurposing one of my SuperMicro mini servers as a TrueNAS Scale host since I had transitioned workloads from this box to a mini PC as a VMware ESXi server.
Table of contents
Why TrueNAS SCALE for Home Server?
TrueNAS SCALE extends the features of TrueNAS CORE but with a Linux server twist. For home servers, SCALE runs Debian Linux, which is well-known for its stability and broad support. With Debinan now fronting TrueNAS Scale, I think it is a great option for making the TrueNAS SCALE system an excellent choice for a home server since it is cost-effective (free) and has great features. With it, you can easily create a “LAN in a CAN” configuration.
Support for JBOD RAID
Wait, what do I mean JBOD and RAID? Well, unlike other hypervisors you might load on your hardware, TrueNAS can take JBOD disks without a RAID controller and create a RAID-Z array. You don’t need a license, or have to set up any HCI solution to take advantage of the JBOD disks. You can do this by default with TrueNAS.
Operating System and Support
Unlike some other server solutions tied to proprietary operating systems, TrueNAS SCALE has the familiar underlying flexibility of Linux, along with strong community (and professional) support channels.
Hardware
Most do not want to break the bank when setting up a home server. With TrueNAS SCALE based on Debian Linux, you can load it on just about any hardware. It is a free and open-source platform with extremely flexible compatibility.
If you are like me, you can repurpose old hardware or invest in new components. The choice of storage drives, RAM, and CPUs is totally up to you and can easily match your budget and performance needs.
There are a couple of considerations that you will want to make when choosing your hardware. These may include:
Power consumption – the less power you can use, the better
SATA ports – You will likely want to have multiple SATA ports available to add storage in the form of spindles
CPU with virtualization capabilities – If you are like me, the appeal of TrueNAS is that it provides a hybrid home server. It can serve your storage and virtualization needs with the same hardware and software installation
Virtualization and Apps
In addition to being a great NAS and storage platform, TrueNAS SCALE allows you to host virtualization and apps (Docker containers) on the platform, which I think really bridges the gap between a generic NAS and a home server.
The apps catalog is extensive and allows you to get up and running hosting containers for your apps easily.

My TrueNAS Scale hardware overview and configuration
Setting up TrueNAS SCALE is extremely straightforward. If you have set up any other Linux operating systems before, it will be intuitive. Like any OS, it has its quirks and ways of doing things. But overall, is super easy.
Hardware Considerations
The first step in setting up your TrueNAS SCALE server is the hardware. The basic requirements include a computer with a 64-bit processor, a minimum of 8GB RAM, and a boot drive with at least 8GB of space. Additionally, having enough SATA ports to connect all your storage drives is key. You might also want to consider the type of storage drives (HDDs, SSDs, or a mix of both) based on your data storage and access needs.
| Requirement | Specification |
|---|---|
| Processor | Any x86_64 compatible (Intel or AMD) processor |
| Memory (RAM) | Minimum: 8 GB (16 GB Recommended) |
| Boot Device | Minimum: 20 GB (or 16 GB SSD) |
| Network Port | At least One Gigabit LAN Port (preferably two or more) |
| Additional Storage Devices | 2 Identically Sized Devices (for data storage) |
| Hardware RAID | Not Required |
| Installer Media | CD or Removable USB device (for burning the installer) |
I will talk about this more below, but this is what I am doing. I will have a mix of SATA spindles and NVMe storage.
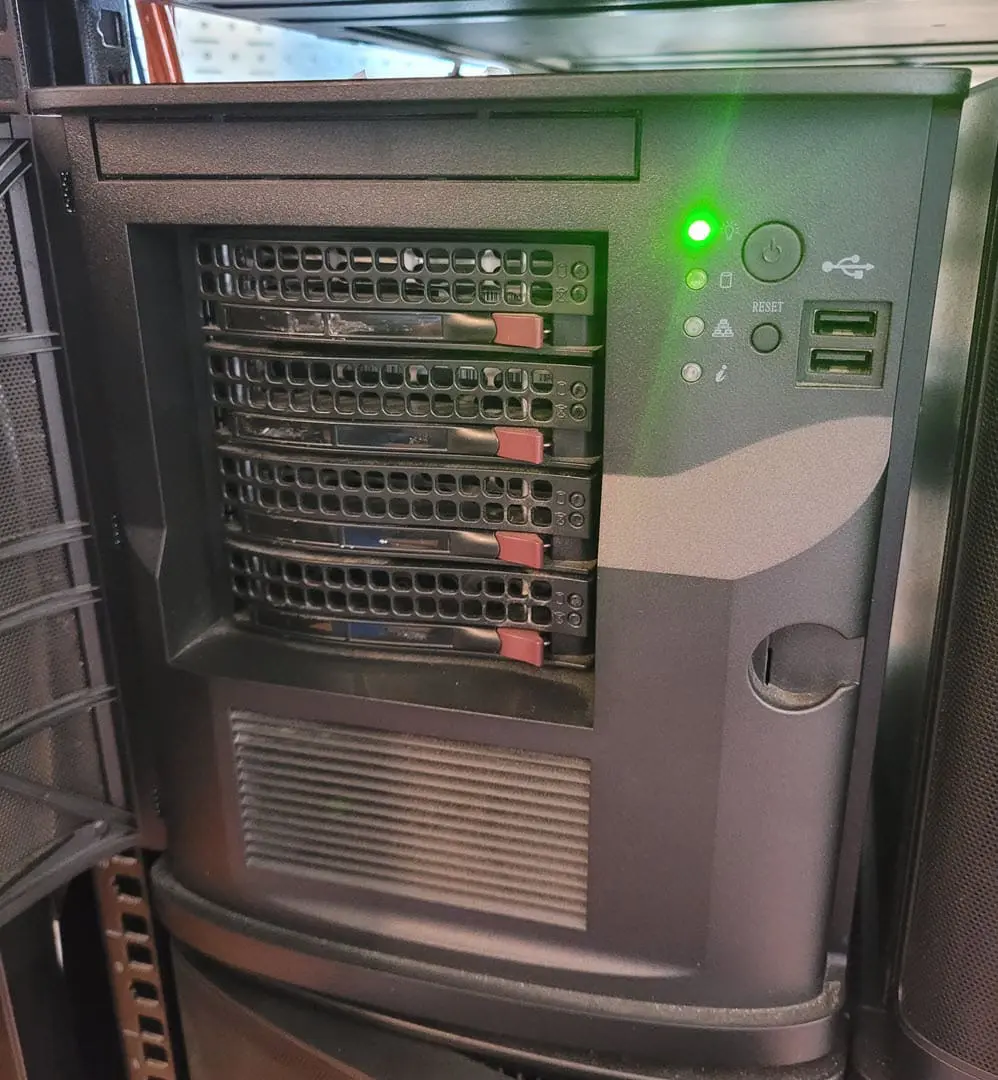
Below is my SuperMicro mini server (SYS-5028D-TN4T). These little servers are a bit long in the tooth. However, they make a great unit for a TrueNAS server build.

Specs for my TrueNAS server include:
| Hardware Component | Specification |
|---|---|
| Processor | Intel Xeon processor D-1541 8-Core, SoC (8 cores, 16 threads) |
| Memory (RAM) | 128 GB DDR4 ECC RAM |
| Network Ports | (2) 10 Gbps Base-T network ports and (2) 1 Gbps Base-T network ports (all Intel-based) |
| Drive Bays | (4) SATA drive bays in the front of the unit |
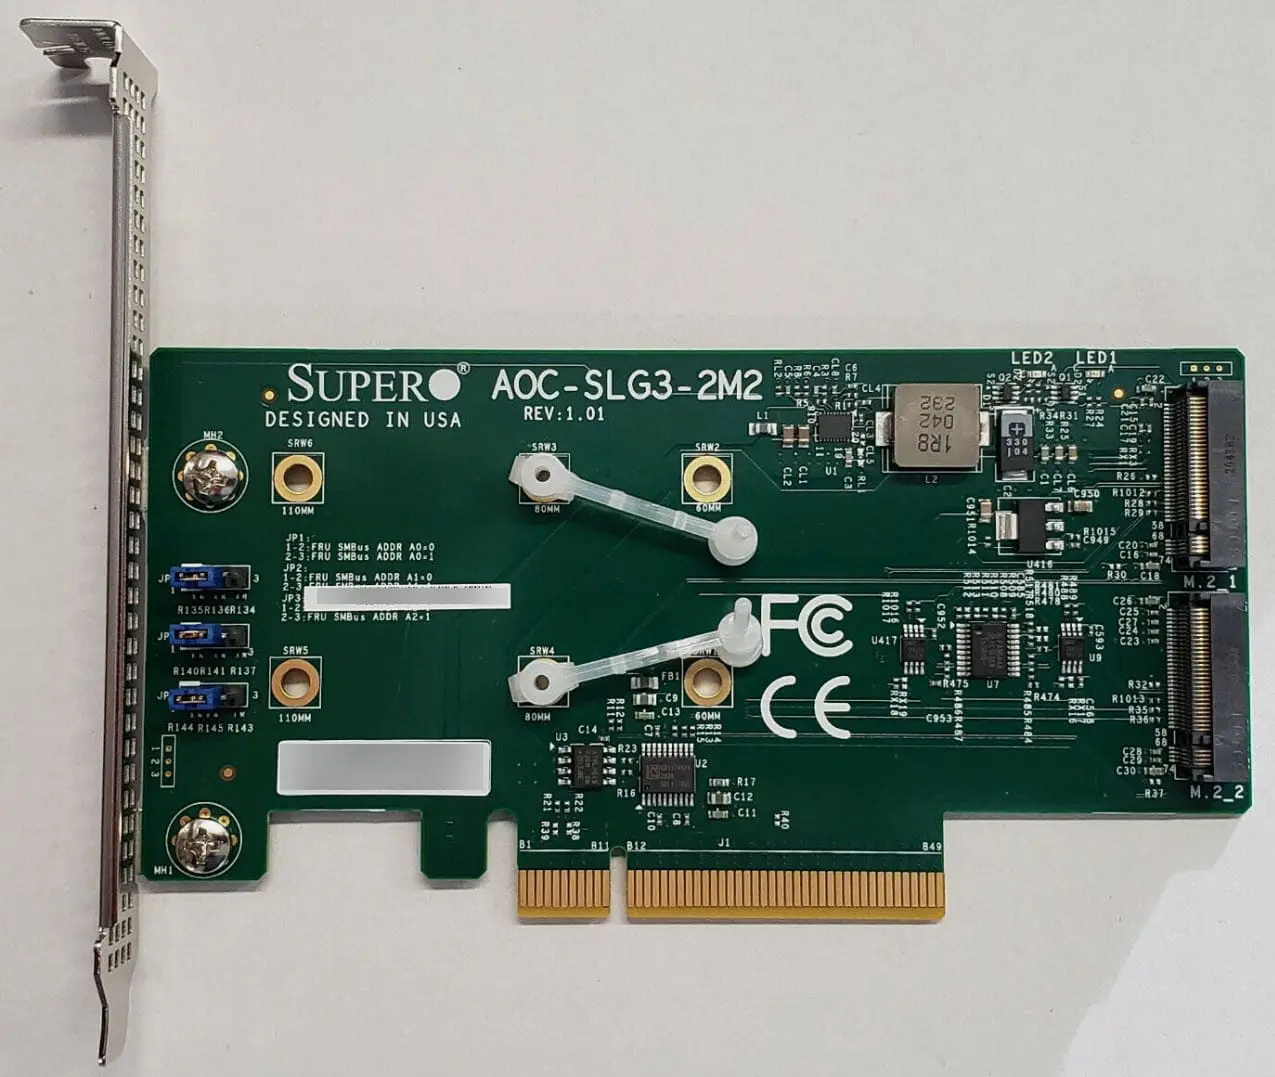
| Expansion Card | Supermicro PCI-e NVMe expansion card |
| NVMe Drives | (2) Samsung EVO 970 1 TB drives |
| Storage Drives | (3) 6 TB Seagate 7200 RPM spinning rust disks |
Below is the front view of my server with the (4) drive bays.
To add the (2) NVMe drives into the system, I have a Supermicro AOC-SLG3-2M2 card installed:
Network Configuration
For the network configuration of my TrueNAS SCALE server build, I have the (2) 10 Gbps network connections plumbed into my Ubiquiti 10 gig switch on the local network and currently not using the (2) 1 Gbps connections.
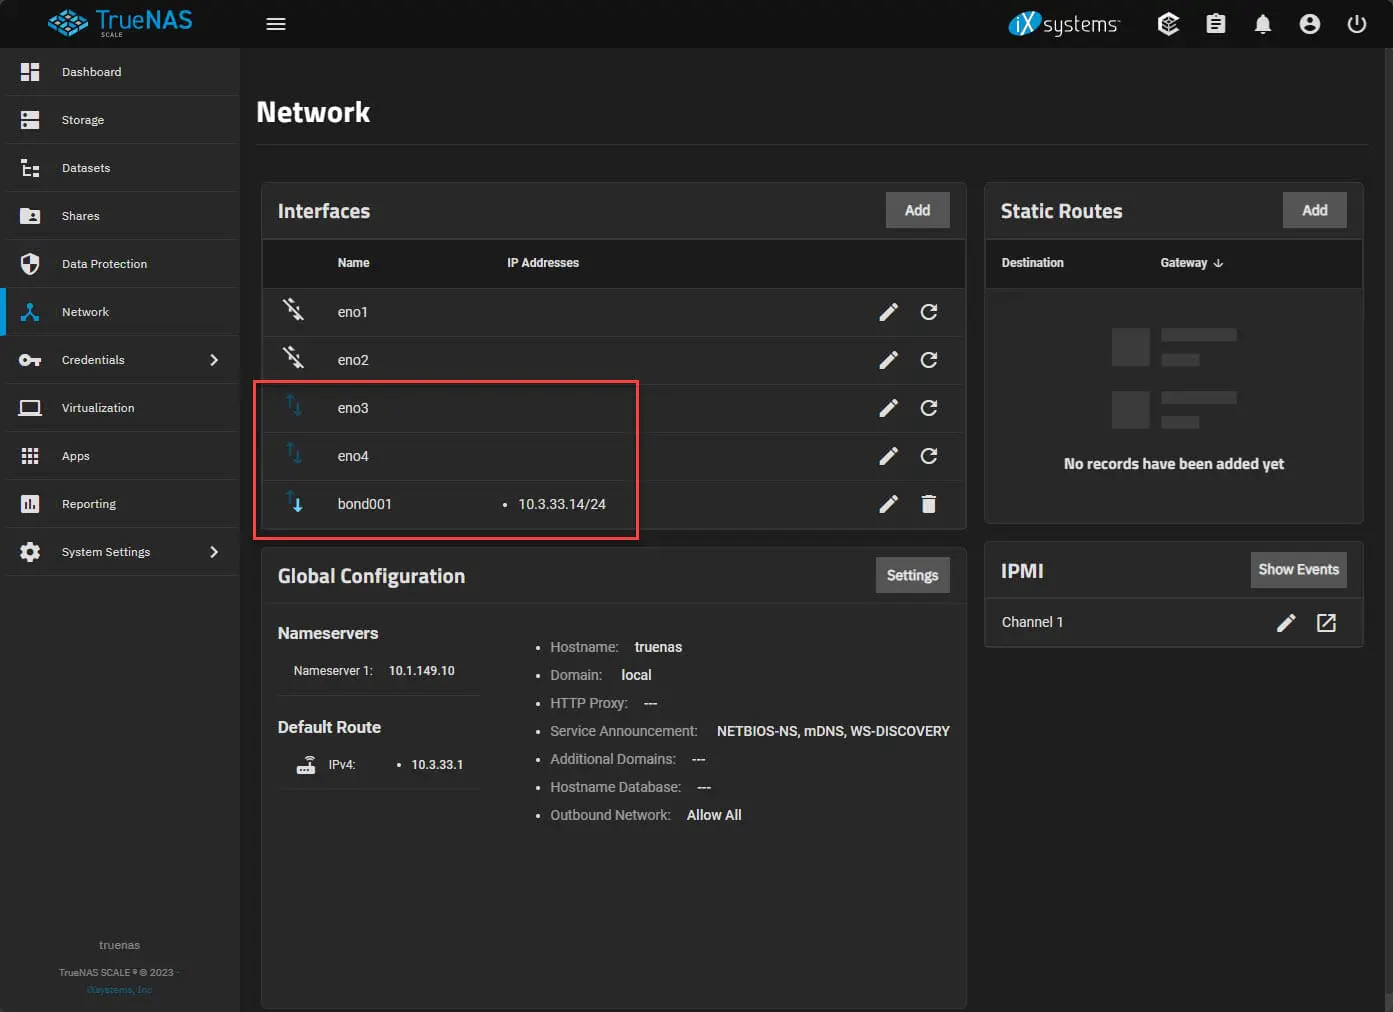
After installing TrueNAS, I went ahead and configured a Link Aggregation interface and added my (2) 10 Gbps interfaces to the LAG. Currently, I am not doing LACP but I may play around with this in the future. So, it is just the standard LAG with failover. The nice thing is you are protected from one of the cables accidentally getting unplugged, etc with the Failover.
Below you can see the two interfaces I have added and the bond.
TrueNAS SCALE installation
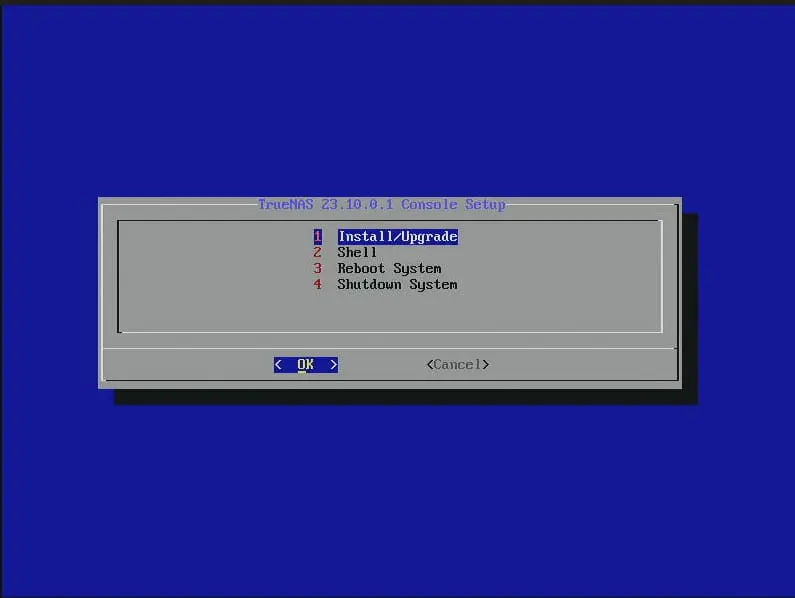
How do you install TrueNAS SCALE? Easy. Just download the ISO image from here: Download TrueNAS SCALE. Then use Ventoy or Rufus to create a bootable USB drive. I am not going to show all the installation screenshots. However, it is straightforward. It will ask you to create your username and password and other important initial configuration.
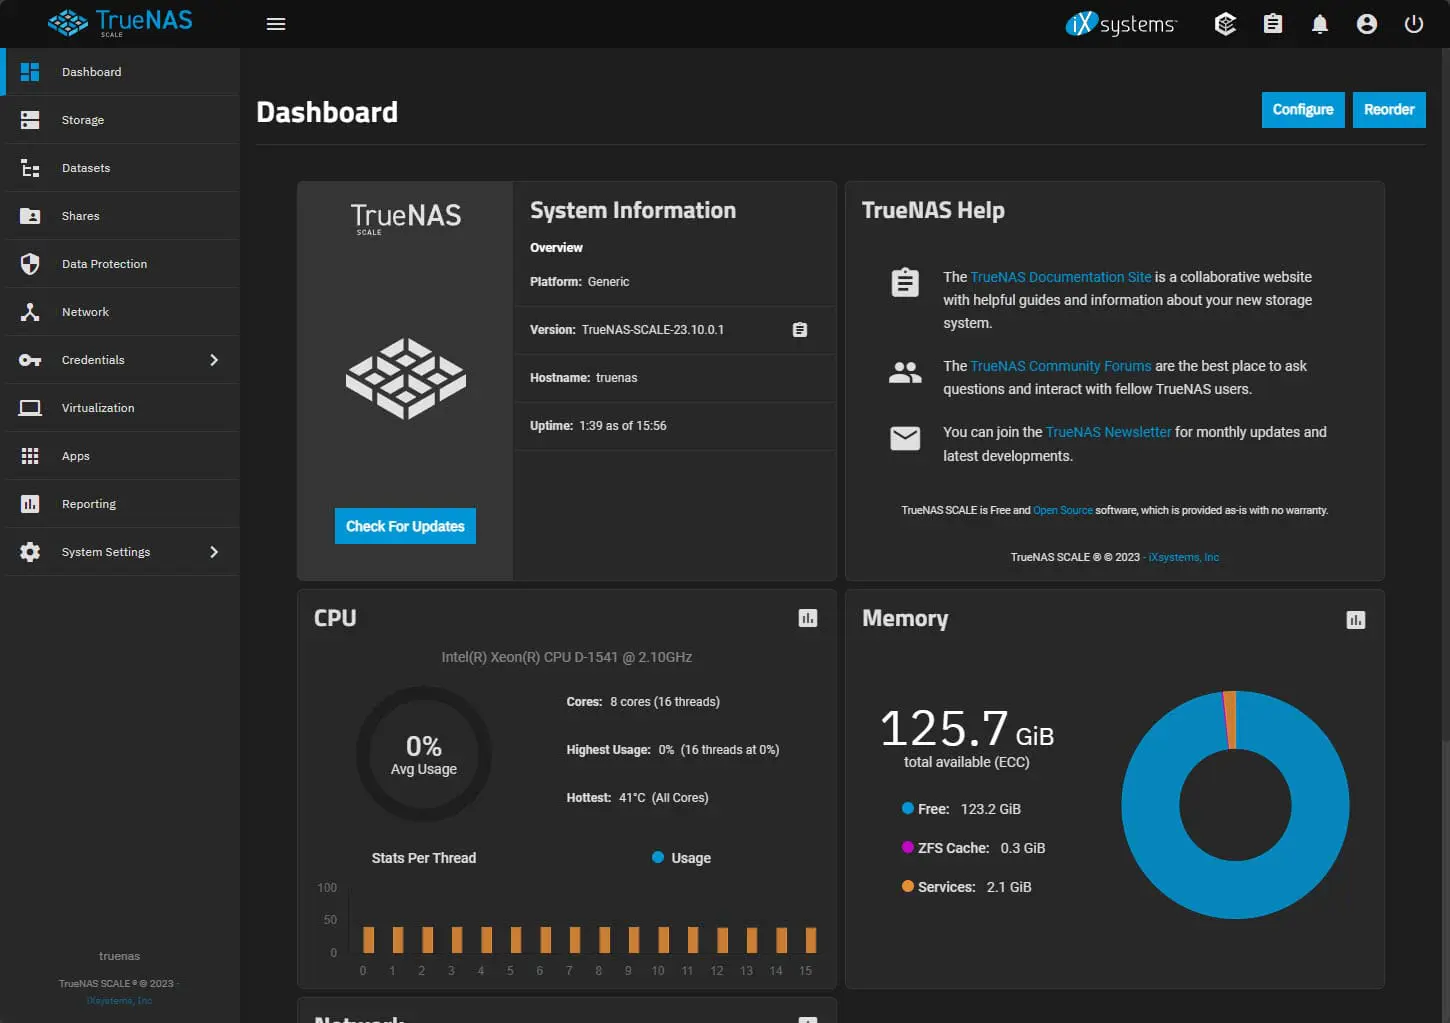
After the setup completes, login to your TrueNAS SCALE system with your configured user and pass. Below, you will see a pic of the TrueNAS dashboard for my Supermicro server.
Storage Configuration
I am using a straightforward storage configuration for the TrueNAS Scale server build. I have the (3) Seagate SATA drives installed into the unit, and these will be in a RAID-Z storage pool for serving out general files stored across the storage and storing the bulk of general data.
The (2) NVMe drives I have configured in a Mirror configuration in an additional storage pool. I was a bit torn about burning half of my NVMe storage. However, since I will use the NVMe storage solely for virtualization storage for VMs, I want this to be resilient to failure as an added layer.
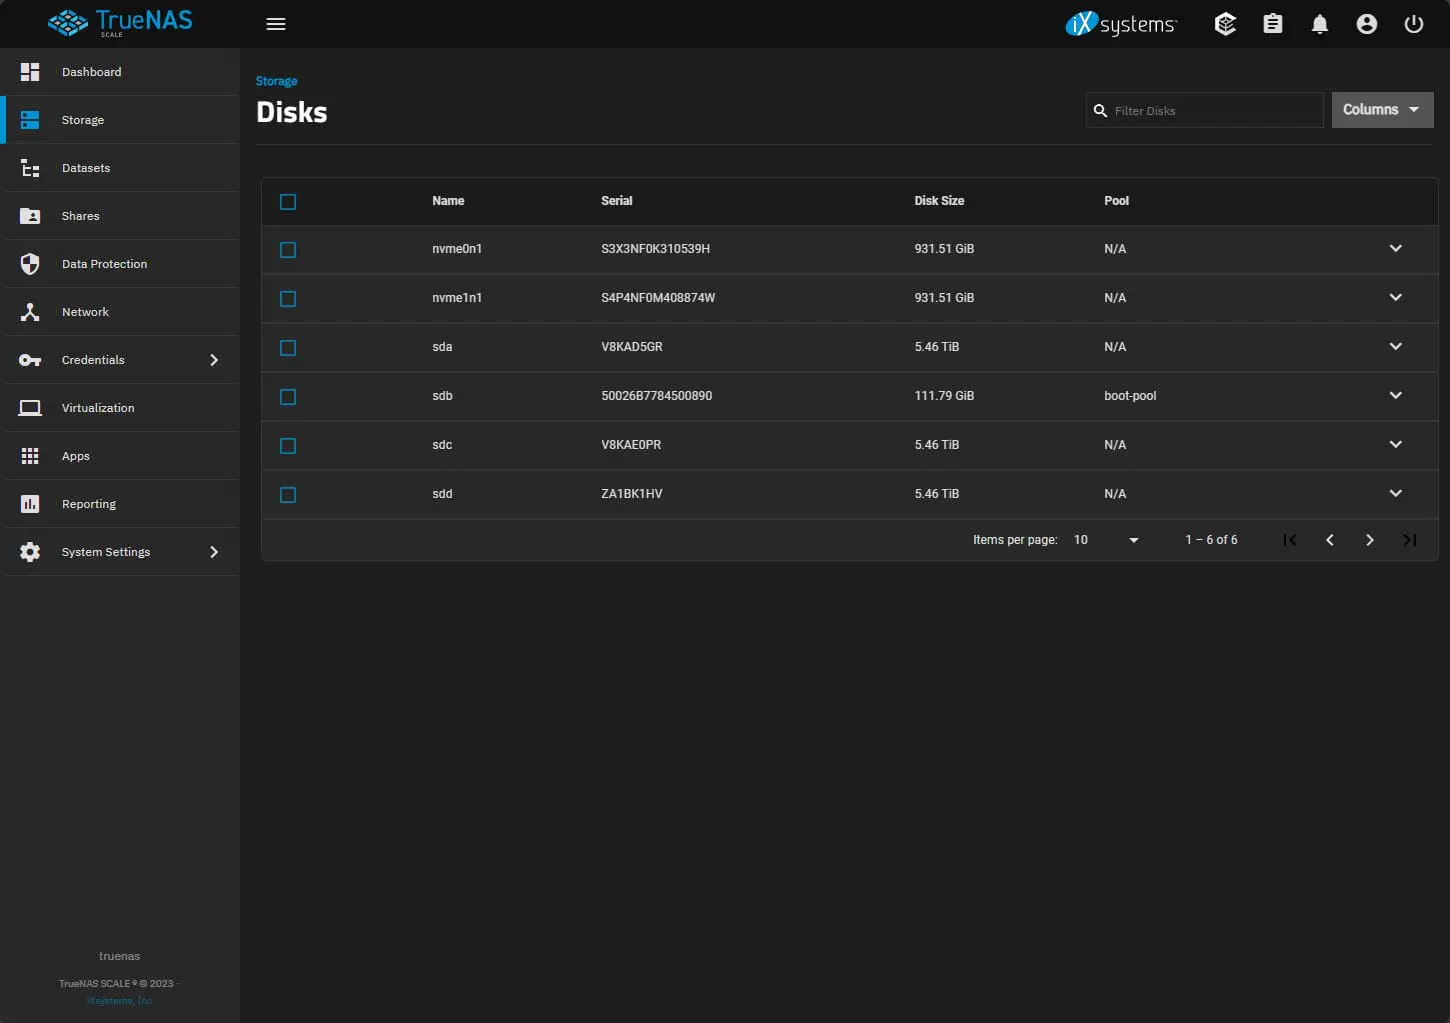
Below is a shot of the Disks screen where you can see the NVMe drives and 6 TB SATA disks I have installed in the system.
Configuring RAID
RAID (Redundant Array of Independent Disks) is a technology used to increase the fault tolerance and performance of your storage system. TrueNAS SCALE supports various RAID levels, allowing you to choose the one that best fits your data protection needs and storage capacity requirements.
However, to implement a RAID setup, having enough SATA ports to connect your drives is essential. Ensuring your motherboard or an additional expansion card has a sufficient number of SATA ports is a vital step in setting up your home server.
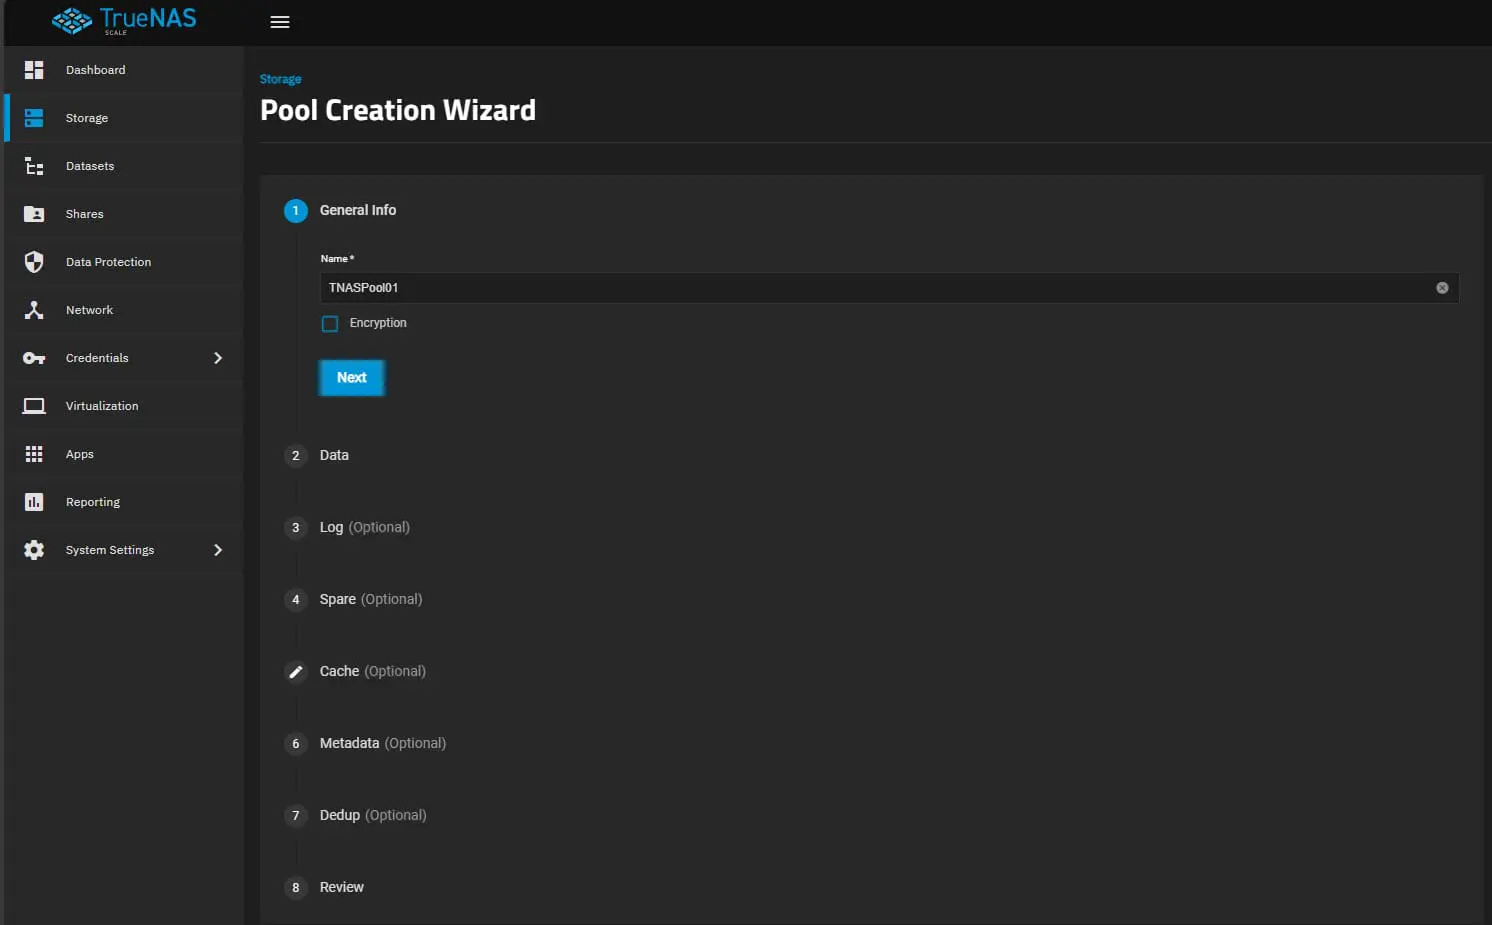
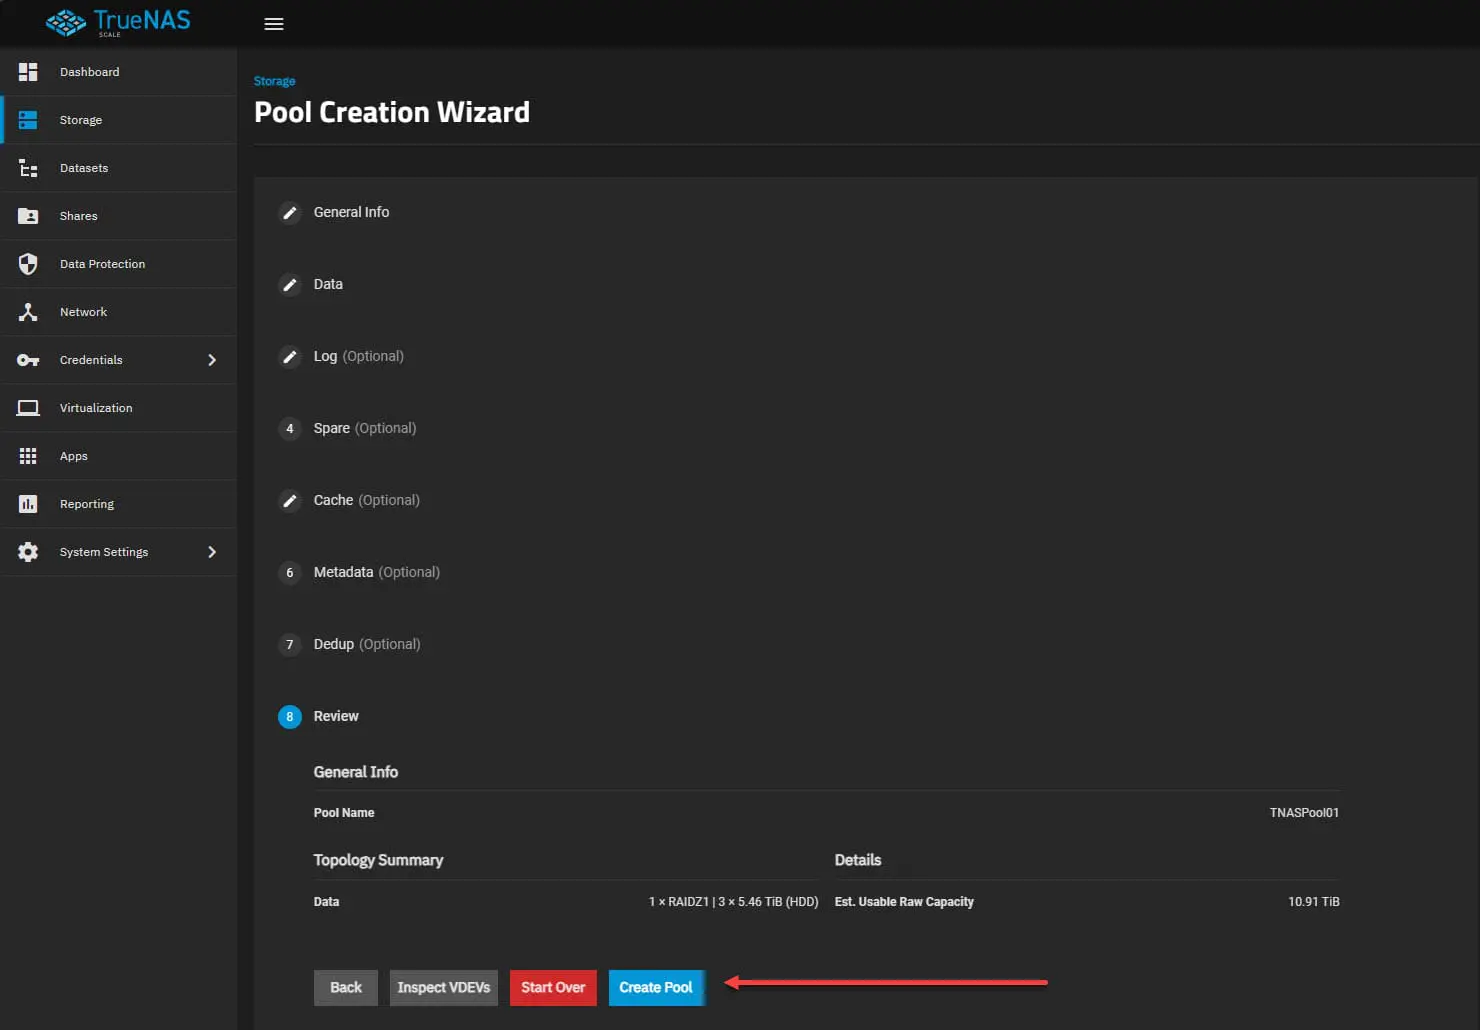
Below are a few shots of the Pool Creation Wizard. Here I am naming the pool.
Select the type of data protection you want. Below I am using RAID-Z which essentially uses one of the disks for parity.
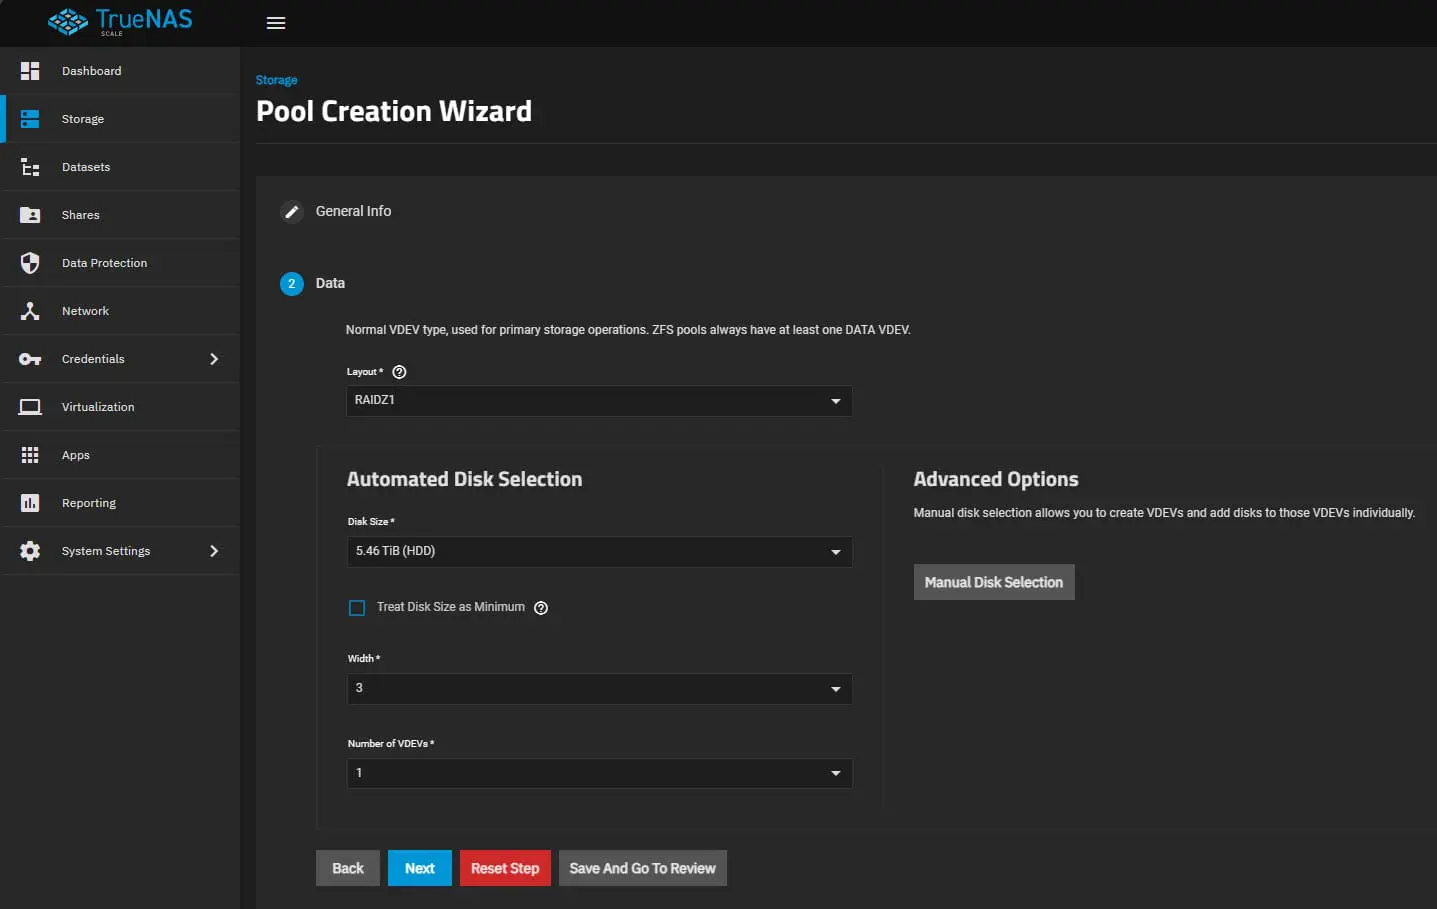
There are a few other optional settings, like Cache Disks, etc. I toyed around with using one of the NVMe drives as cache. However, since I am mainly going to use these for virtualization, I wanted to dedicate these in their own pool. The traditional spindle storage pool will be used mainly for generic file storage, etc.
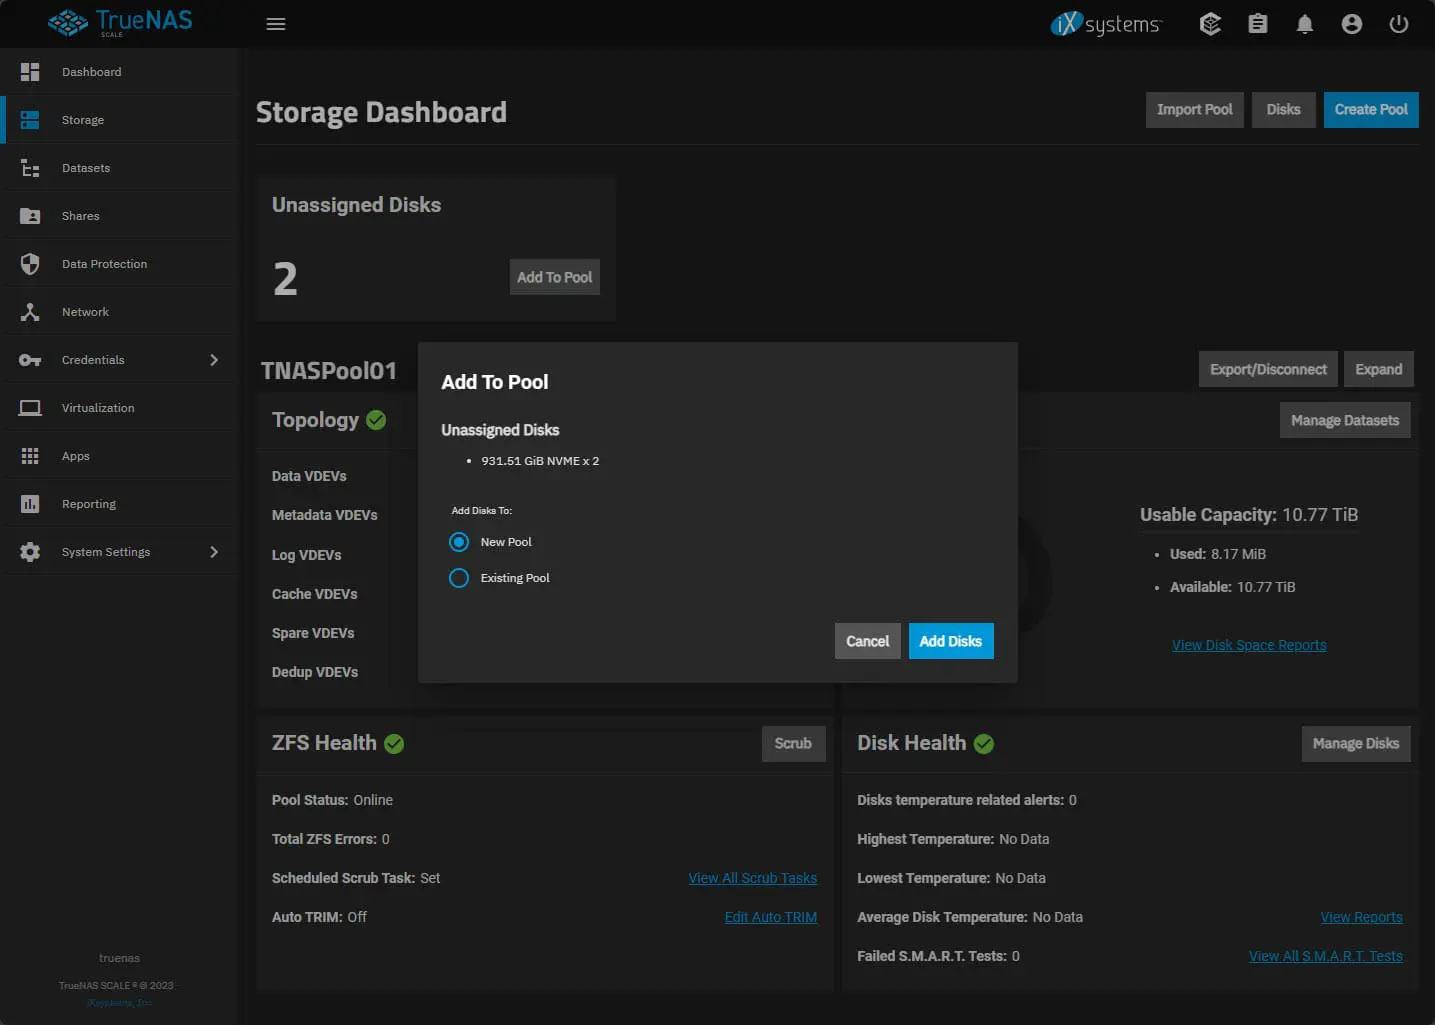
Setting up NVMe Pool
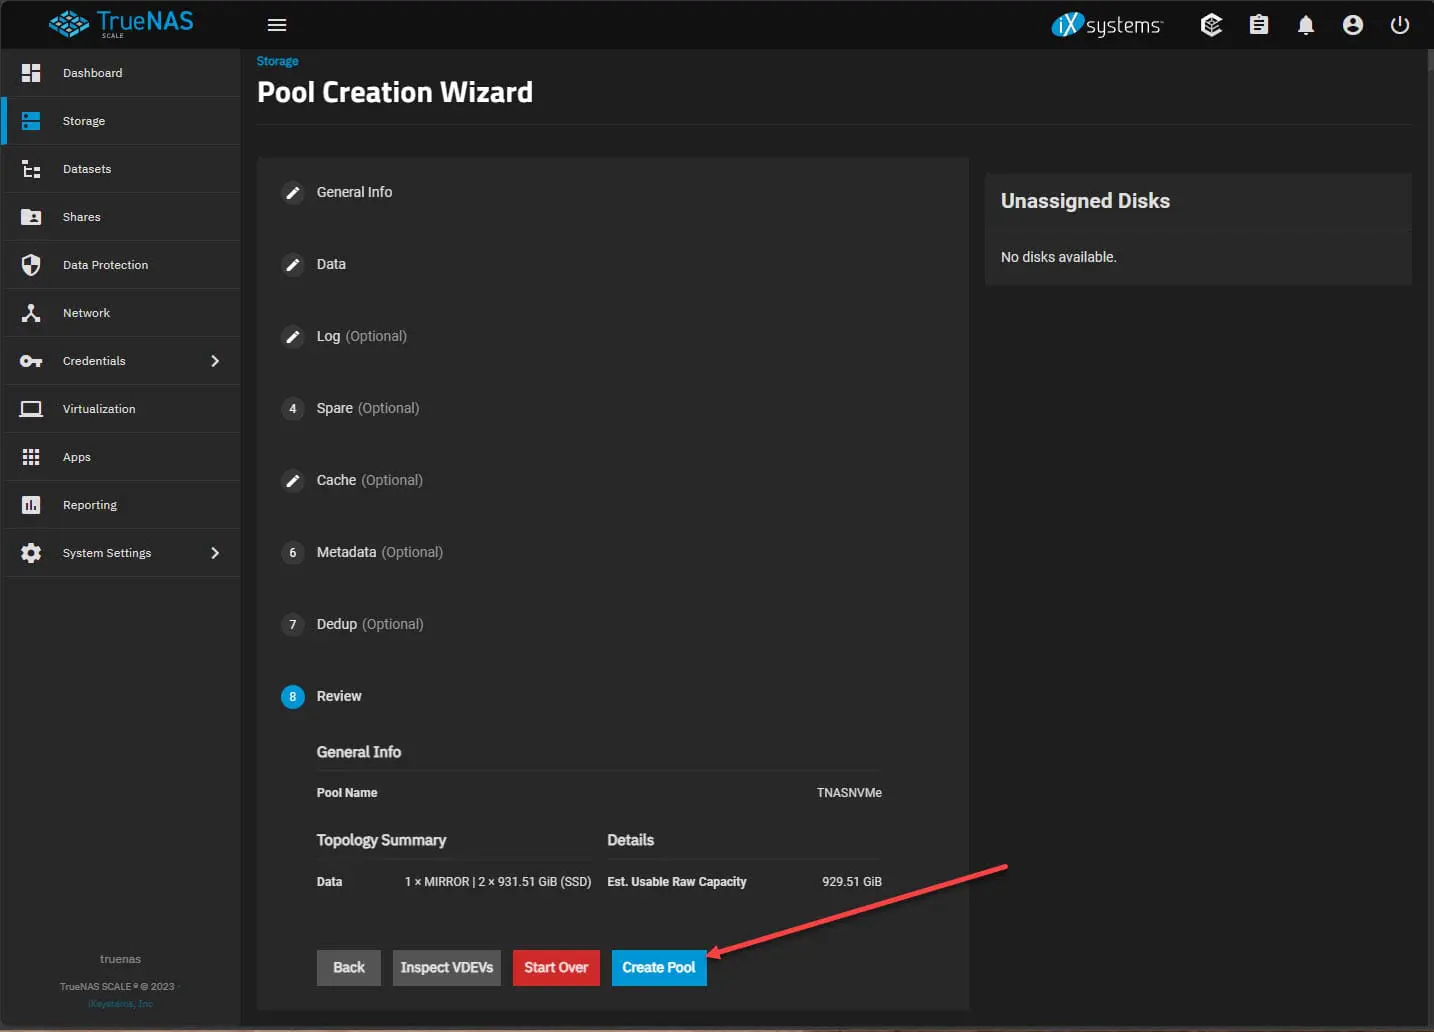
Setting up the NVMe pool below and adding the (2) NVMe disks to the pool.
Saving and creating the pool.
Other things to think about
There are a few other things to consider with your TrueNAS SCALE server build home server configuration. Note these below.
Setting Up Backup Targets
Having backups protects you from accidental deletion or hardware failures. TrueNAS SCALE provides features to set up a secure backup target, either on external storage or another network location. You can also use TrueNAS SCALE’s replication features. With replication, you can automate the backup process.
File Sharing, Media Streaming, and Other Services
By default, TrueNAS SCALE is great for file sharing. It is a NAS at heart. But, you can also use it to host services like NextCloud, which you can easily install using the Apps feature as shown in the outset.
File Sharing Across Devices
TrueNAS SCALE supports a variety of file-sharing protocols like SMB, NFS, iSCSI, AFP, allowing you to share files across all your devices, regardless of the operating system. This may include documents, photos, videos, or even the target of a storage LUN for something like VMware ESXi, etc.
With my configuration, I may play around with iSCSI targets for both VMware ESXi and Proxmox with this system.
Media Streaming and Hosting Multiplayer Games
TrueNAS SCALE can host media server applications like Plex and Jellyfin, allowing you to stream your media collection to other devices in your house. Also, you can use it to host multiplayer game servers like Minecraft, etc.
Home Automation and Other Services
Beyond file sharing and media streaming, a TrueNAS SCALE server can also home automation solutions, like Home Assistant that control smart devices around your home. The possibilities are many, also including hosting your own VPN, running a mail server, or even a self-hosted cloud service like Nextcloud.
Performance Tuning and Hardware Upgrades
The initial setup of your TrueNAS SCALE server is just the start. As your needs evolve, tuning the performance and considering hardware upgrades become part of the server maintenance routine.
Tuning Performance
Performance tuning involves tweaking various settings and configurations to ensure your server runs in a performant way. TrueNAS SCALE provides a range of tools and capabilities:
Enable jumbo frames on your network connections for iSCSI and other storage targeting
Consider using cache disks in front of traditional spindle storage pools
Configure RAM and CPU allocations on VMs appropriately
Considering Hardware Upgrades
In my configuration, I am maxed out. However, upgrading the RAM, expanding the storage capacity, or even upgrading the CPU to a more powerful are all possible with TrueNAS SCALE.
Security
As with any home server, setting up firewalls, using network segmentation, and configuring secure remote access are basic steps to good security. TrueNAS SCALE provides tools and settings to help you manage network access, user permissions, and other security-related configurations.
Be sure to keep your system patches as well as this is one of the basic steps towards better security in the environment as attackers often use unpatched vulnerabilities.
Impressions of TrueNAS SCALE Server Build for Home lab?
All-in-all, I am really pleased with how the TrueNAS SCALE server build turned out using my older Supermicro mini server. TrueNAS was a breeze to configure from a network and storage perspective. It also has so many options to get up and running with virtualization and Docker container apps “in-the-box” that it makes it a no-brainer for someone who doesn’t really want to tinker with the underlying technologies, but just wants to get up and running hosting their services. If you want a LAN in a CAN, this is it! Stay tuned for a follow up post on what services and apps I am running on the TrueNAS server.
Google is updating how articles are shown. Don’t miss our leading home lab and tech content, written by humans, by setting Virtualization Howto as a preferred source.
About The Author