Connect Two OpenVPN Servers with site-to-site connection
Do you have the need to connect multiple sites together with freely available software without using proprietary network appliances? OpenVPN provides a great solution that is freely available to those needing a simple and fairly easy (relatively speaking) solution to access a network remotely. In this post, I want to show you guys how to connect two OpenVPN Servers with site-to-site connection.
OpenVPN Gateway Access Server
A bit of clarity on OpenVPN. OpenVPN itself is open source and is freely available to download and use. You can find it in the app repos of major Linux distros like Ubuntu.
OpenVPN Access Server is a commercially available product that makes implementing OpenVPN extremely easy in GUI form. However, you do get (2) free connections with OpenVPN Access Server without the need to license anything.
For the OpenVPN site-to-site, I am configuring in this walkthrough, I am using OpenVPN Access Server deployed in Azure and then creating a site-to-site VPN connection to an OpenVPN client loaded in Ubuntu Server spun up in the home lab.
Connect Two OpenVPN Servers with site-to-site connection
It is important to understand with the OpenVPN Access Server, there isn’t really an easy, intuitive way to create a “site-to-site” VPN between Access Server and another OpenVPN Server. However, as I found with playing around in the home lab, you can instead use an OpenVPN Access Server and then connect an OpenVPN client from a site using the OpenVPN client in “VPN gateway” mode.
With VPN Gateway you can essentially allow a client to be the gateway for other clients on the same LAN. While not technically a site-to-site, it functions in much the same way.

The steps to connect two OpenVPN servers include the following:
- Deploy an OpenVPN Access Server
- Configure the VPN gateway user
- Download the config.ovpn file
- Install and configure an OpenVPN Gateway client
- Tweaks needed on the VPN Gateway to forward traffic
- Add routes needed
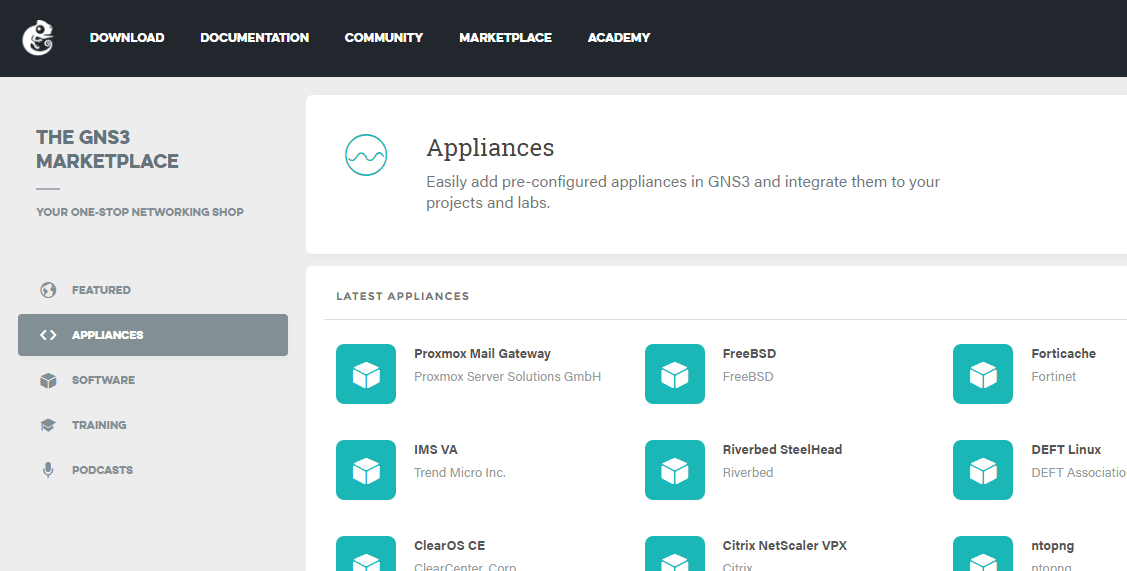
1. Deploy an OpenVPN Access Server
In my lab, I have deployed an OpenVPN Access Server. Keep in mind you don’t have to use an OpenVPN Access Server as again this is a commercial product. However, in my case I don’t need more than two clients. The good thing about a “VPN gateway” is the network clients that use the VPN gateway client connection to communicate with subnets on the Access Server side do not need licensing. Your VPN gateway is considered one of your “clients” but, again, not clients using its connection to OpenVPN.
For me too, the OpenVPN Access Server is easy since it has a GUI and it comes as a prepackaged appliance that can be deployed in the cloud easy using available Marketplace appliances. You can also download a VMware OVA and Hyper-V VHDX for deployment.
I am not going to go through the steps required to deploy the Access Server as this is fairly straightforward no matter what environment or appliance type you are using. Once you deploy it you go through a quick “setup” process to initially configure the Access Server appliance.
2. Configure the VPN gateway user
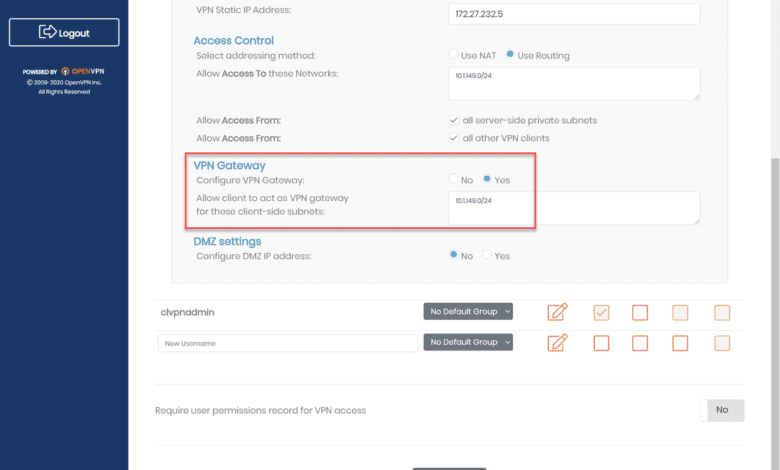
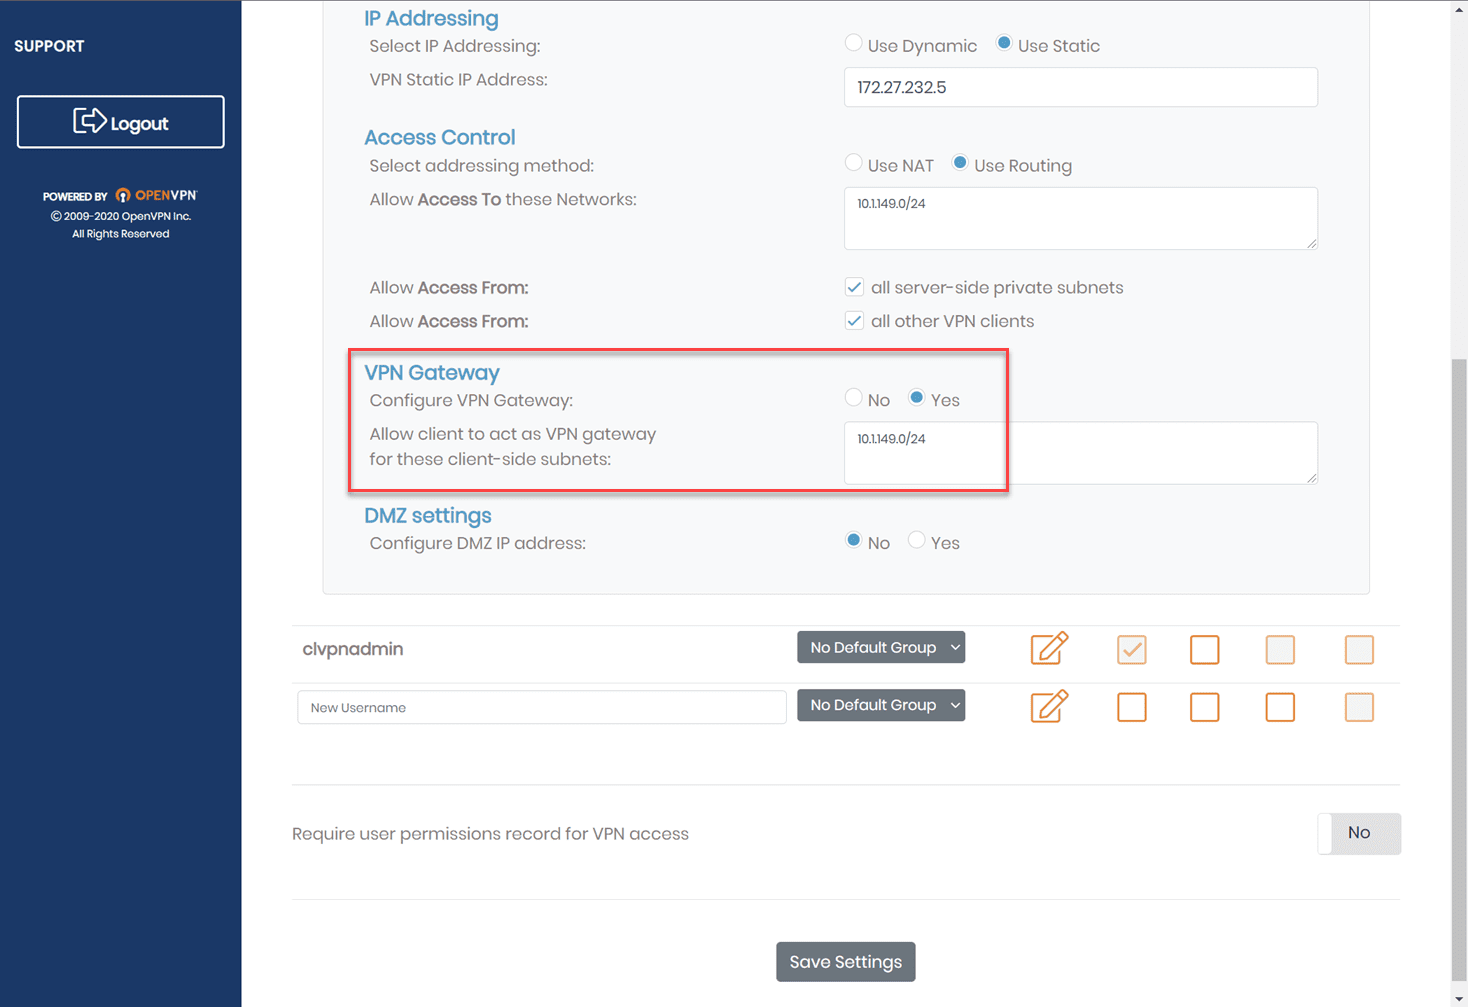
With the OpenVPN Access Server, you can configure a user to be a VPN gateway. This tells the Access Server that specific subnets are located behind the user’s connection. Configuring the VPN gateway will allow the VPN connection of the specific user to provide a connection to all other clients for the subnets that are local to the VPN gateway client. Note the following below:
- Access Control is set to Use Routing and has the subnets configured to allow access to
- VPN Gatway settings are set to Yes and defines the subnet to allow client to act as a VPN gateway for these client-side subnets
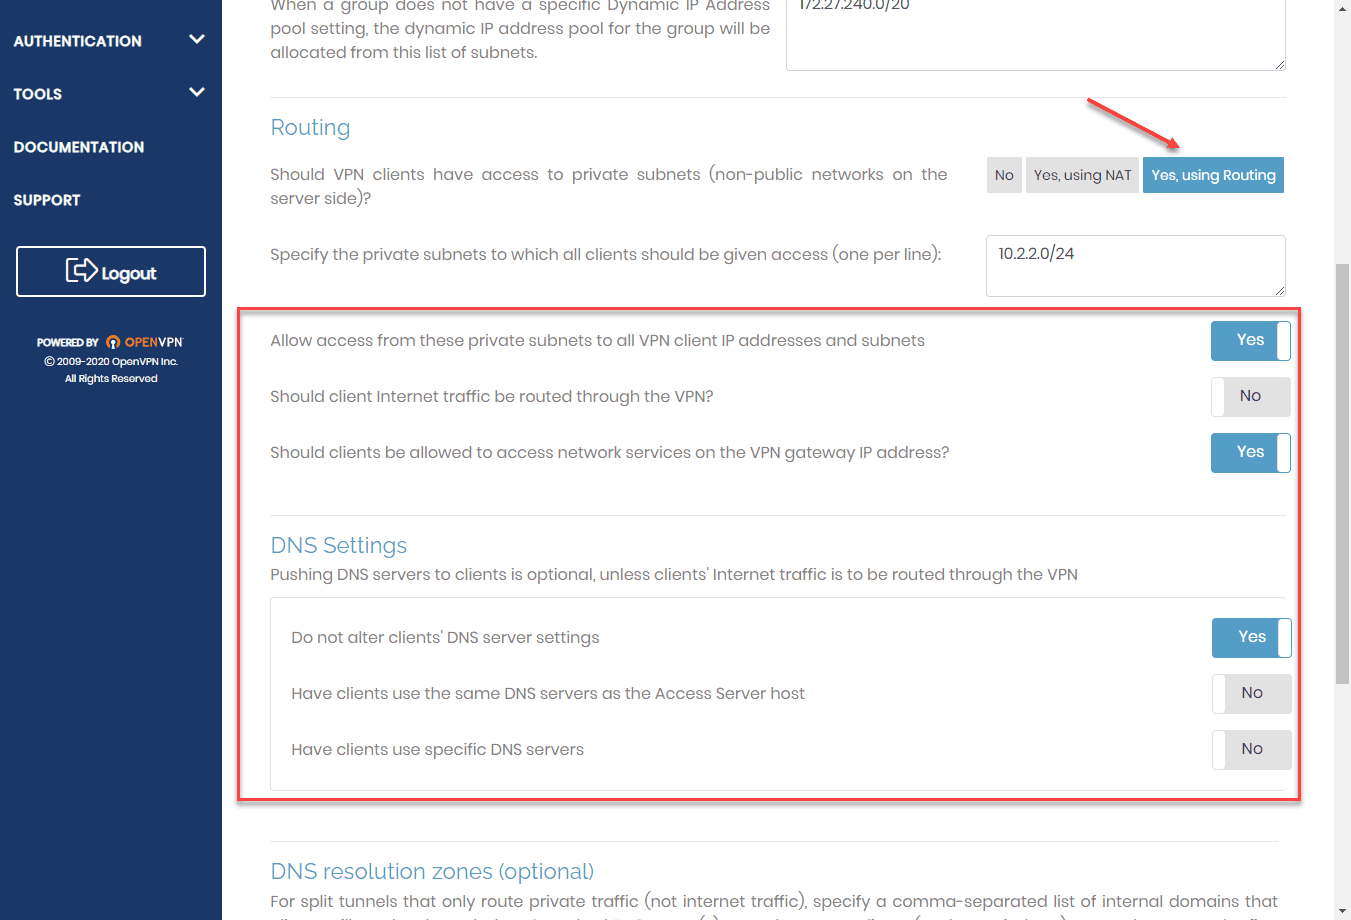
Under the VPN settings screen, I have set the following:
- Routing is set to Yes, using routing and the “server-side” subnets are defined that clients can access. Note, this is on the Access Server side.
- Additional routing configuration is set, including allow access from these private subnets to all VPN client IP addresses and subnets
- DNS settings include “do not alter clients DNS server settings (this needs configured according to your individual needs. I wanted my clients to keep DNS settings intact that are local to their networks. You can specify manual DNS settings here though.
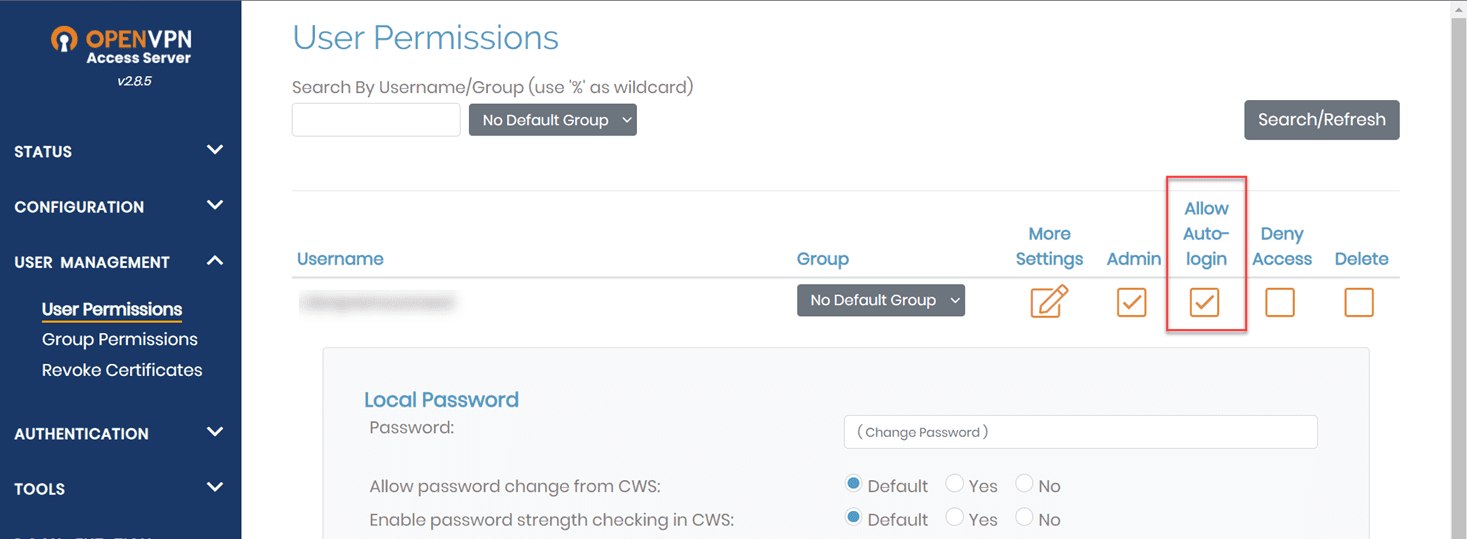
The other thing you want to configure is the Allow Autologin checkbox. This allows the user to autologin using the config.opvn file we will download in the next step.
This is like a site-to-site connection, except it isn’t another server device but rather, a VPN client. What you can do though is use this user to create a connection from a device you want to be a more permanent fixture in your network. For me, this is getting created on an Ubuntu 20.04 server running as a VM in the home lab.
Other configurations to implement for OpenVPN site-to-site, include settings mentioned in their official walkthrough here:
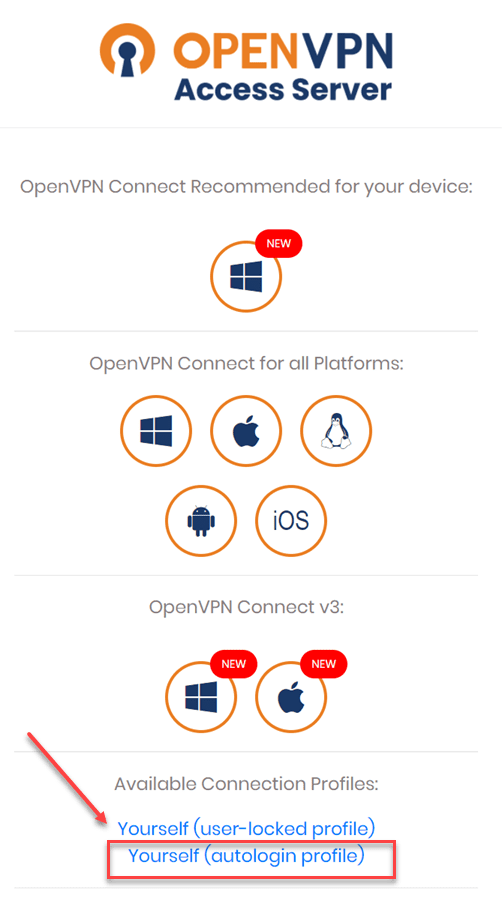
3. Download the config.ovpn file
Once you have the VPN user created that will serve as the VPN gateway, you need to download the config.ovpn file. This file is used to create the VPN connection on your Ubuntu or other VM or device that will be the VPN gateway.
To download the file, you log in to the OpenVPN Access Server and click to download the autologin profile. The autologin profile downloads the config.ovpn file.
4. Install and configure an OpenVPN Gateway client
To install the OpenVPN client on your Ubuntu workstation/server, you can use the following commands:
sudo apt update
sudo apt install openvpn -y
Once you have installed the OpenVPN client, you need to upload the config.ovpn file to the Ubuntu host and start your OpenVPN connection using the config file. To do that, you can use the following command:
openvpn --config client.ovpn --daemonThis will establish the VPN connection using the downloaded config.ovpn profile file that is available once you configure autologin.
5. Tweaks needed on the VPN Gateway to forward traffic
By default, an Ubuntu workstation or Server will not forward IP traffic that is hitting the VPN gateway, destined for other targets on the network behind the VPN gateway. You need to do the following to allow traffic to flow:
- Enable IP forwarding
- Enable NAT
The way to enable IP forwarding in Ubuntu is edit the file:
nano /etc/sysctl.confUncomment the line:
net.ipv4.ip_forward=1Run the command to apply the IP forwarding configuration:
sysctl -pEnable NAT with the following command:
iptables -t nat -A POSTROUTING -j MASQUERADETo make changes persistent between reboots, you can install the iptables-persistent package in Ubuntu:
apt install iptables-persistentYou can then save your IPtables this way:
iptables-save > /etc/iptables/rules.v46. Add routes needed
If you need to access the subnets on the Access Server side from the clients on your local LAN where the VPN gateway resides, you need to add the appropriate routes to your router on-premises to point to the VPN gateway client for the subnets to route correctly through the VPN gateway.
Concluding thoughts
Hopefully, this walkthrough on how to connect Two OpenVPN Servers with site-to-site connection will help to put the process together for anyone looking to create a connection between OpenVPN sites. As shown, to create the connection you can use the mechanism known as the VPN gateway that allows giving access to subnets located in the VPN gateway site.