Home labs comes in many shapes and sizes. One of the first types of labs that many are able to invest in is running VMware Workstation on top of a workstation PC or even a laptop. VMware Workstation is a great tool for home labs as it allows you to have a multi-purpose set of hardware that can be used, not only for a lab environment, but also for your management workstation for business productivity or other purposes. You can then spin up the lab whenever or wherever you want (in the case of a laptop). This post will cover vSAN lab on VMware Workstation: step-by-step and see what you need to do to get this up and running.
VMware Workstation for home lab
VMware Workstation is a great platform as mentioned in the outset. For this vsan lab on VMware workstation walkthrough, I am using VMware Workstation 16. Where can you get VMware Workstation? You can simply buy VMware Workstation for yourself if you want. However, a much better deal than buying VMware Workstation, especially if you are serious about your home lab environment is a VMUG Eval Exeperience license. I have written about this many times and the value this offers. Check out some of my posts here:
- VMware Cloud Foundation vCF 4.0 added to VMUG Advantage
- VMware Cloud Foundation added to VMUG Advantage Eval Experience
- VMware TestDrive added to VMUG Advantage Subscriptions
- VMware Site Recovery Manager SRM added to VMUG Advantage
For just a bit more than you would pay for a single VMware Workstation license, you can get yourself access to VMware Workstation and the whole suite of VMware products and solutions for a whole year of testing and labbing!
VMware Workstation again provides a multi-purpose platform that can share a daily driver workstation or even dedicated resources if you choose that route. For most though, if you are going the VMware Workstation route for a lab instead of ESXi, you are most likely wanting to share resources for other purposes.
Why learn VMware vSAN?
VMware vSAN is the premiere software-defined storage solution on the market. Learning VMware vSAN is a great way to learn the underlying storage technology that underpins many of the advanced VMware solutions such as VMware Cloud on AWS and VMware Cloud Foundation.
It allows aggregating local storage on each VMware ESXi host and pooling this storage together to form one logical shared storage space that all hosts have access to for virtual machine and persistent containerized storage.
vSAN Lab on VMware Workstation: Step-by-Step
So, now, let’s get down to the business of creating a vSAN lab on VMware Workstation. For the vsan lab on VMware Workstation, I have the following:
- VMware Workstation 16 running on a workstation class machine
- (3) ESXi appliances serving as a vSAN hosts
- (1) VMware vCenter Server appliance – In this post, I won’t really detail the configuration of vCenter. You just need to deploy the VCSA either in your VMware Workstation environment or elsewhere that can communicate with the ESXi hosts you will provision in VMware Workstation.
- Networking:
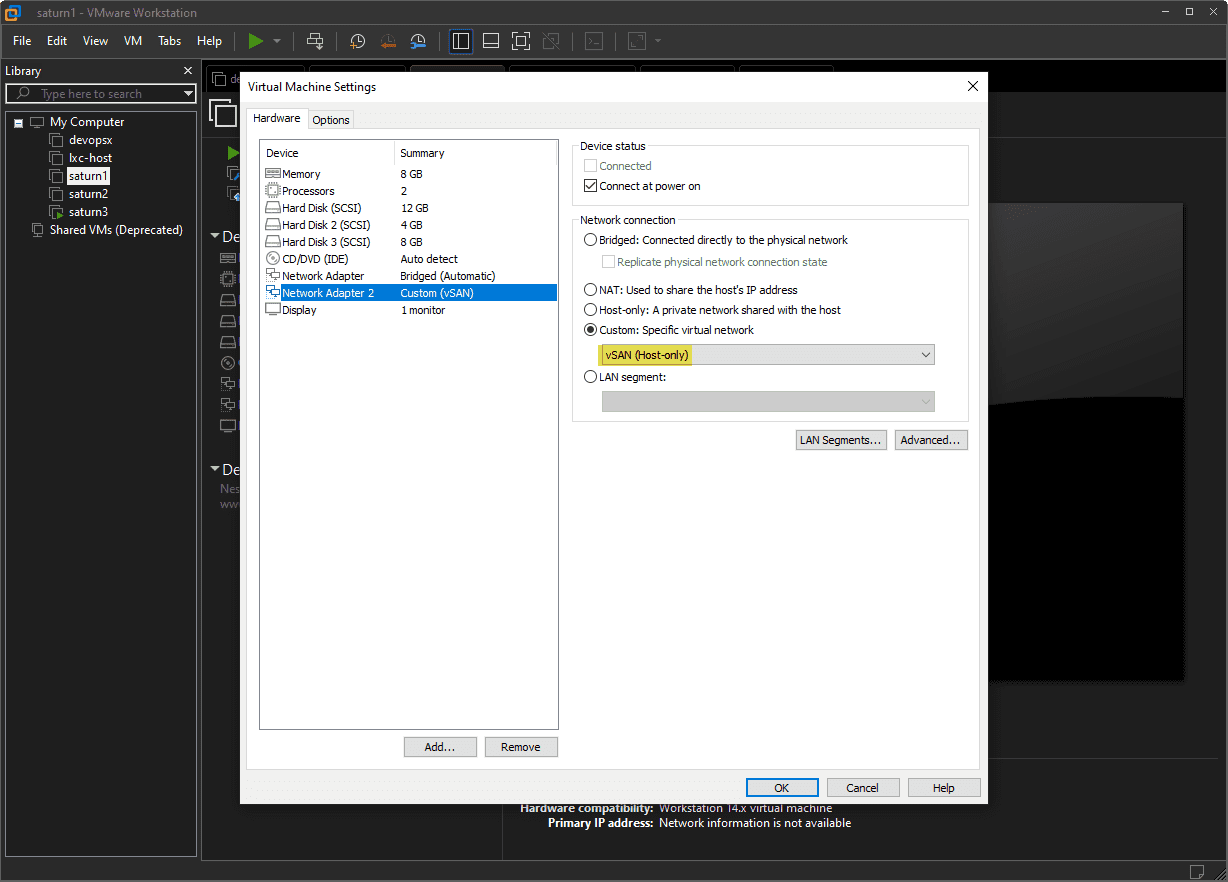
- VMware Workstation networking: (2) networks configured, (1) for management traffic/VM traffic, and (1) for vSAN traffic
- Nested ESXi network – (2) distributed switches (vDS) configured, (1) for management traffic, and (1) for vSAN
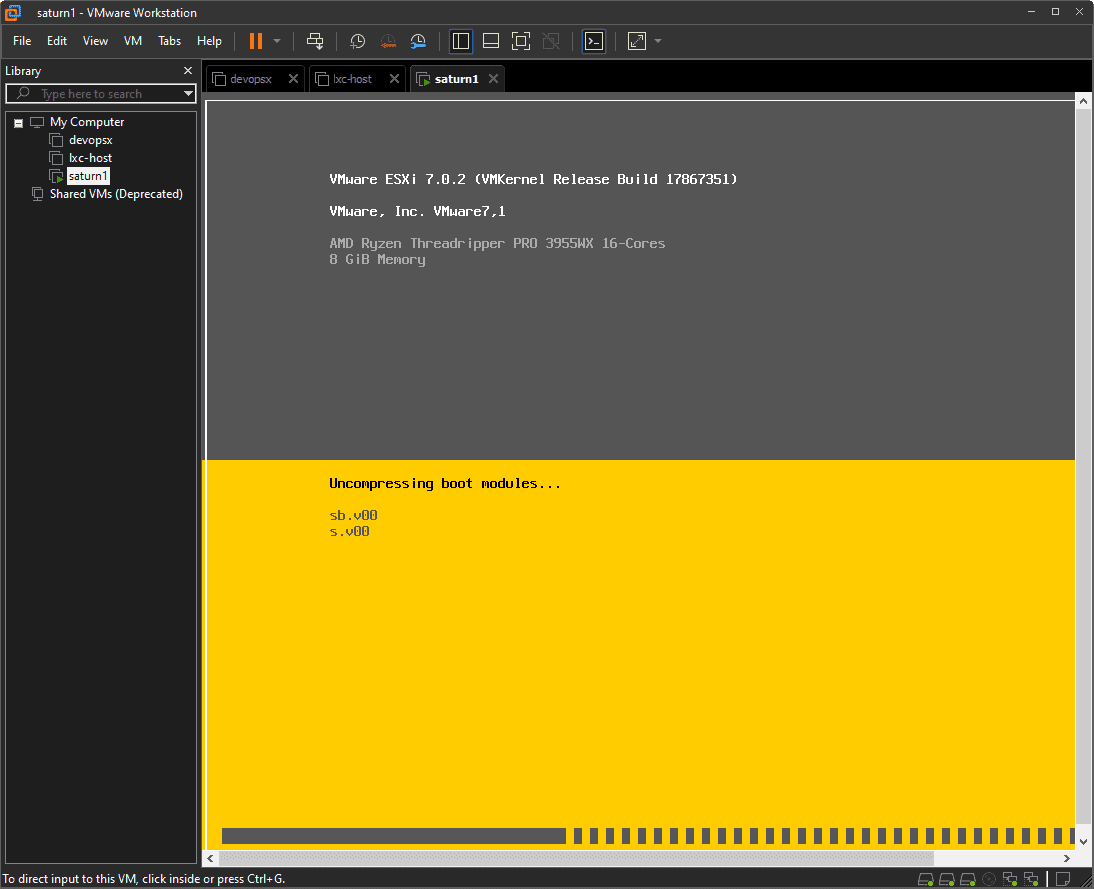
Deploying ESXi
As I have used this as a great resource for nested ESXi on top of vSphere, I wanted to make use of the same thing on VMware Workstation. William Lam provides nested ESXi appliances that can be used to easily deploy ESXi easily for nested lab environments. You can download the appliances here:
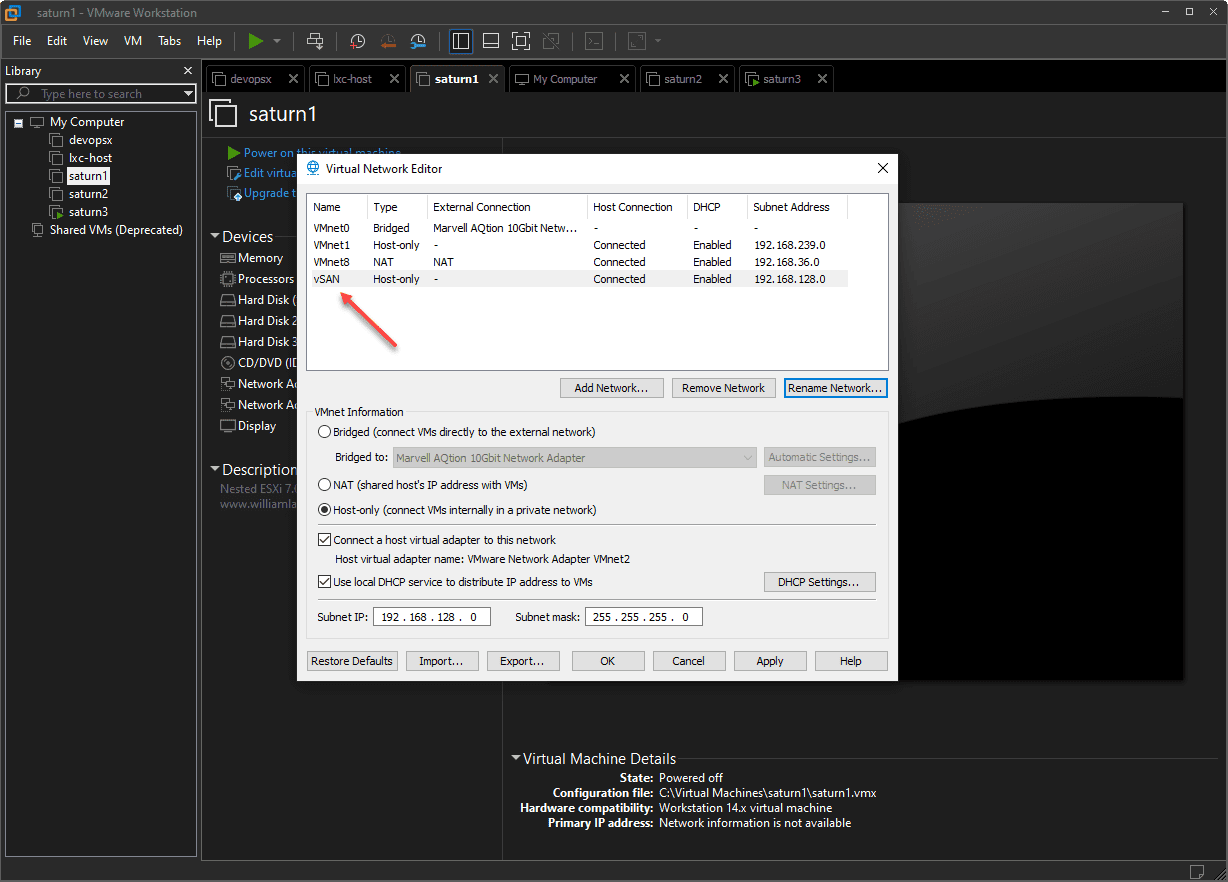
Also, I created a vSAN network in VMware Workstation to handle the vSAN traffic. I will attach the ESXi hosts’ second network adapter to this network in VMware Workstation. Notice I have DHCP enabled on the vSAN network. This will make things easier when it comes to adding the vSAN VMkernel ports later. We won’t have to worry about statically assigning these in the vSAN lab on VMware Workstation.
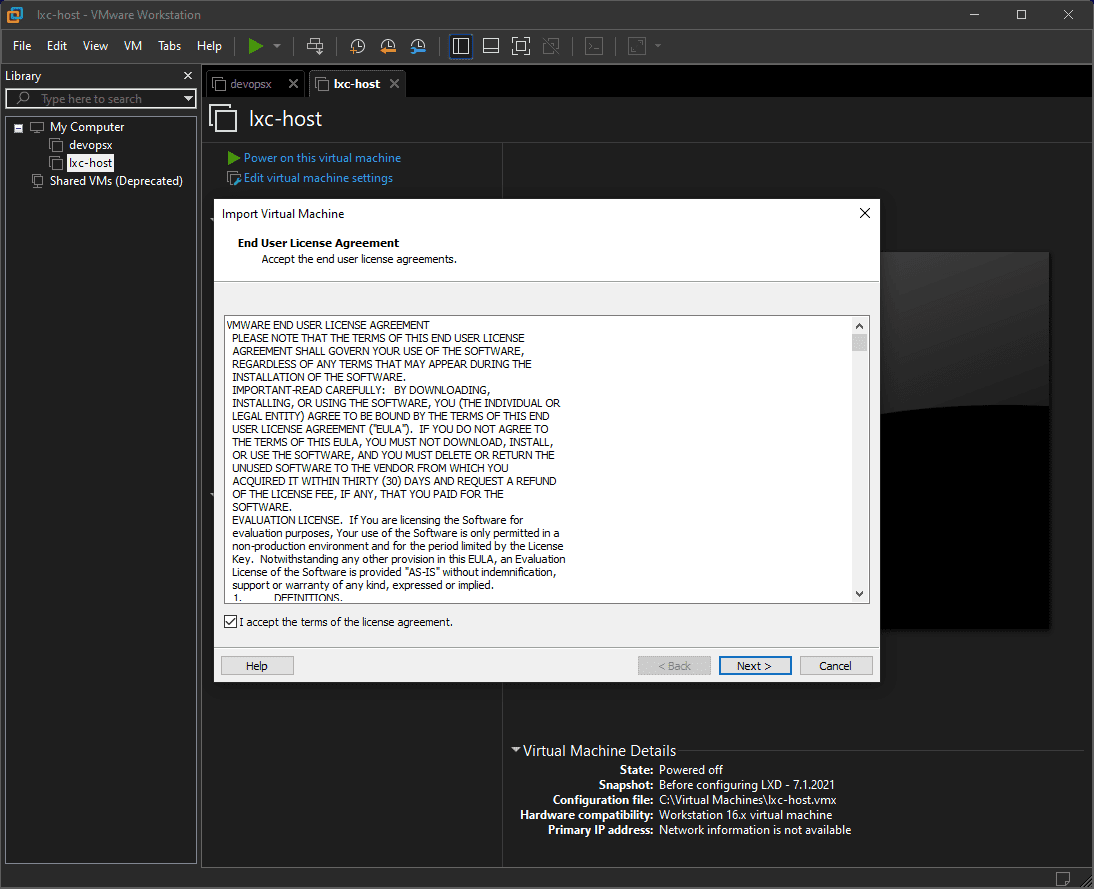
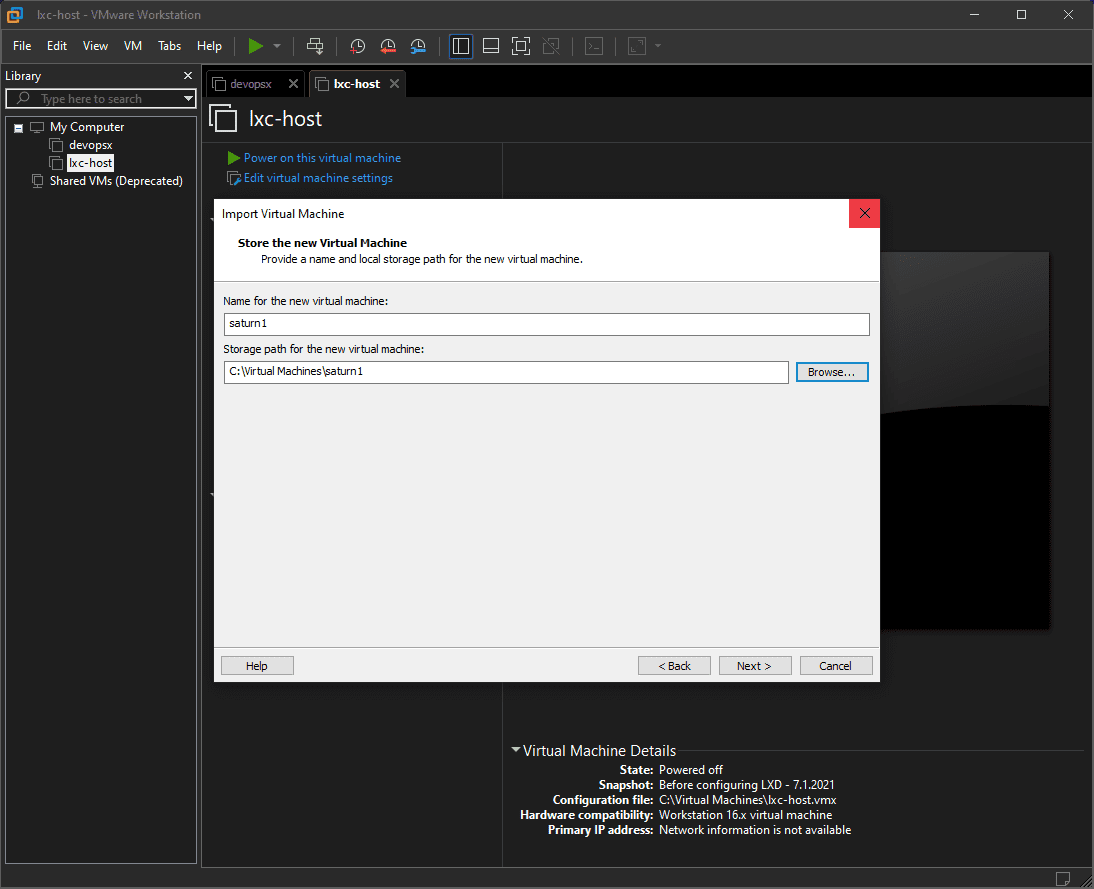
To deploy the OVAs provided, in VMware Workstation, just navigate to the File > Open menu and point to the downloaded OVA appliance. It will launch a wizard to configure the appliance.
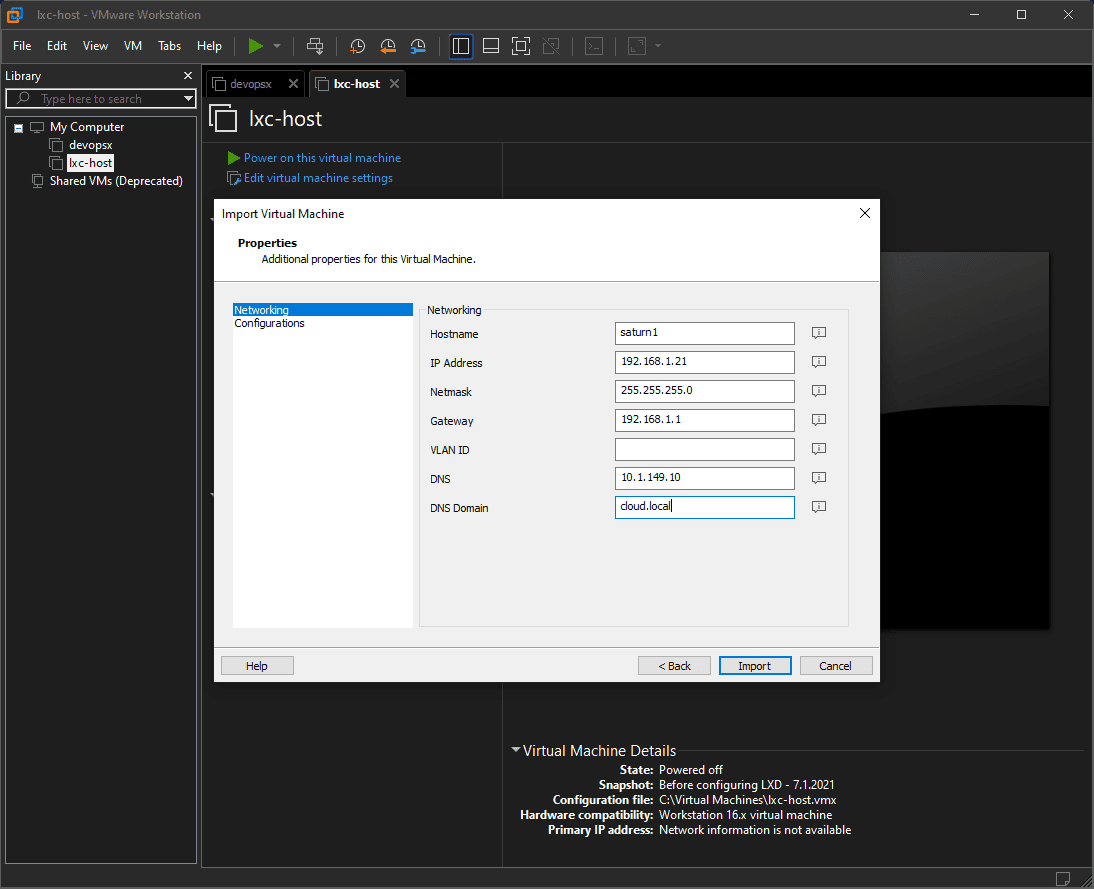
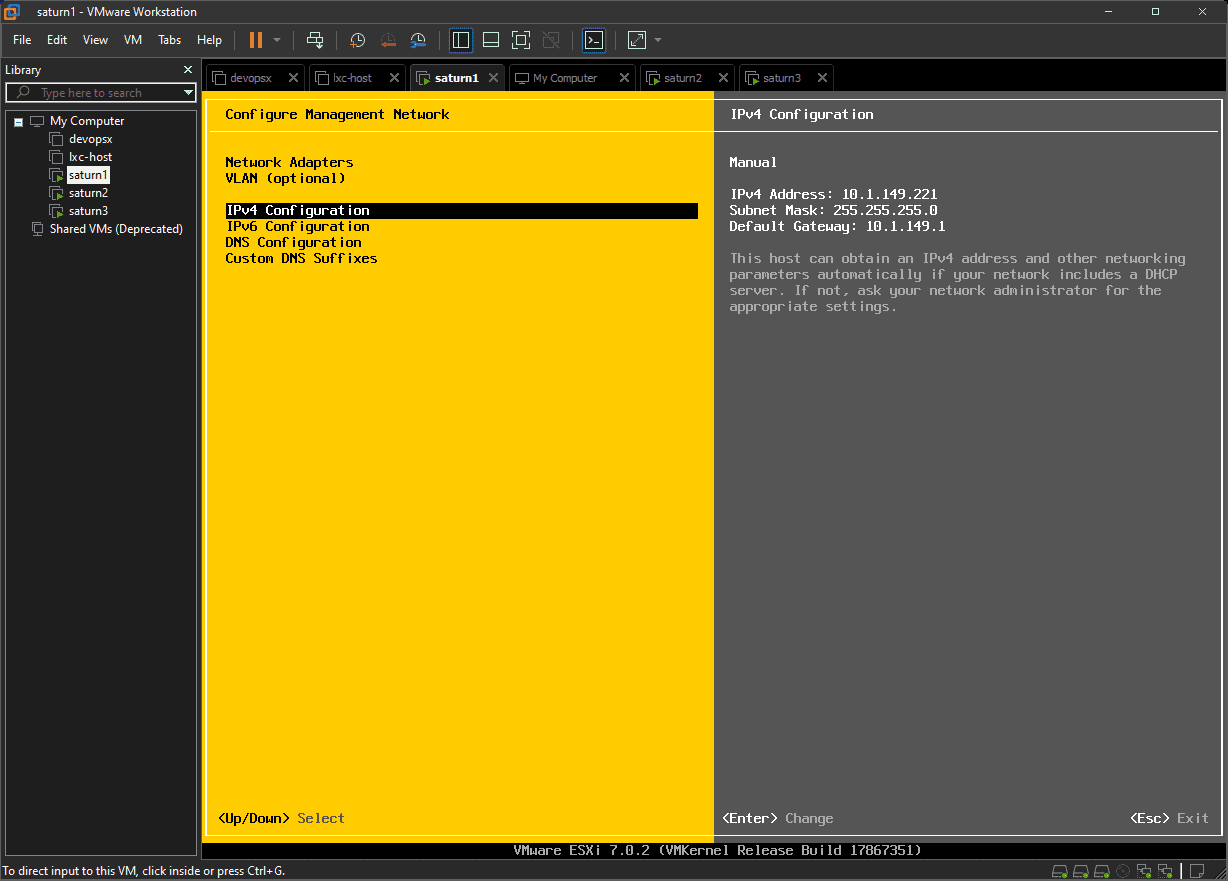
One thing I will mention, the OVA template provided by William is not configured for VMware Workstation. It does work, however, one thing I noticed is the configuration set initially does not get customized properly after the template deploys. So, you will need to make sure to configure your network accordingly per ESXi host. There may be a workaround for this. I have not really played around with the template to see if I can get the configuration to customize properly. One thing you can do since this is a lab environment, is just make sure your networks are configured for DHCP in VMware Workstation so IPs are handed out. I did do this for the vSAN network but not the management network.
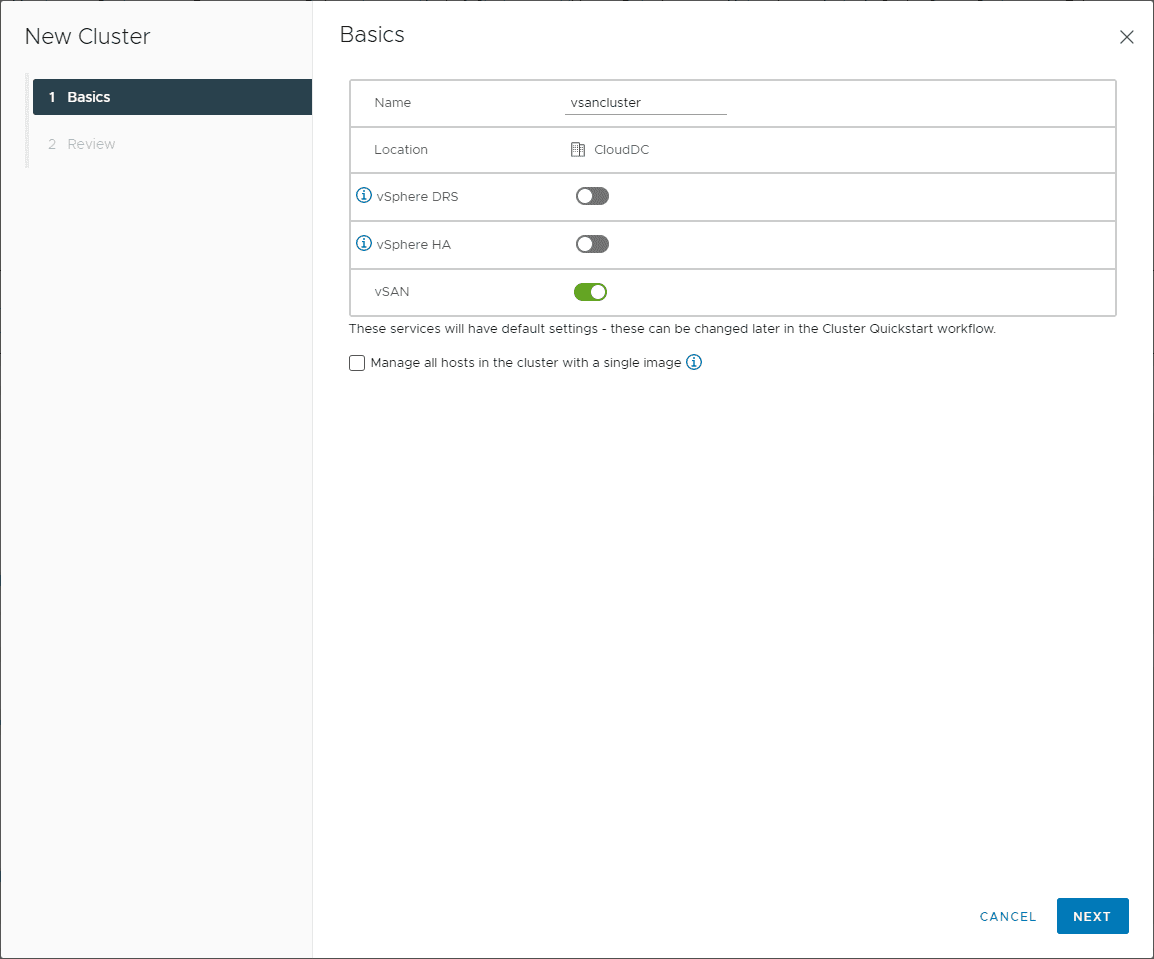
Creating a new cluster in the vSphere Client
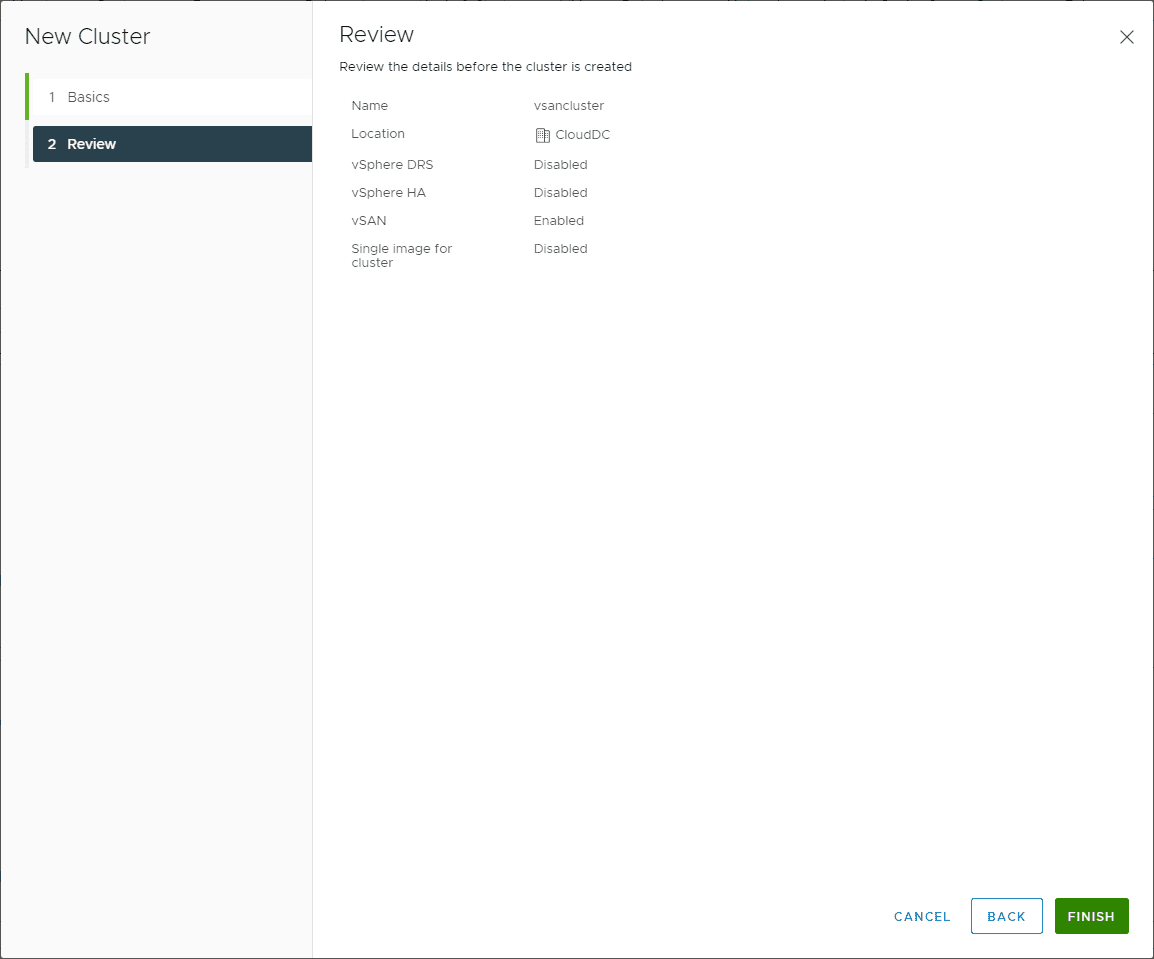
To create a new Cluster, you can right-click your Datacenter and choose New Cluster. This is part of the Quick Start wizard. I went ahead and flagged on vSAN.
Review the new cluster creation wizard and click Finish.
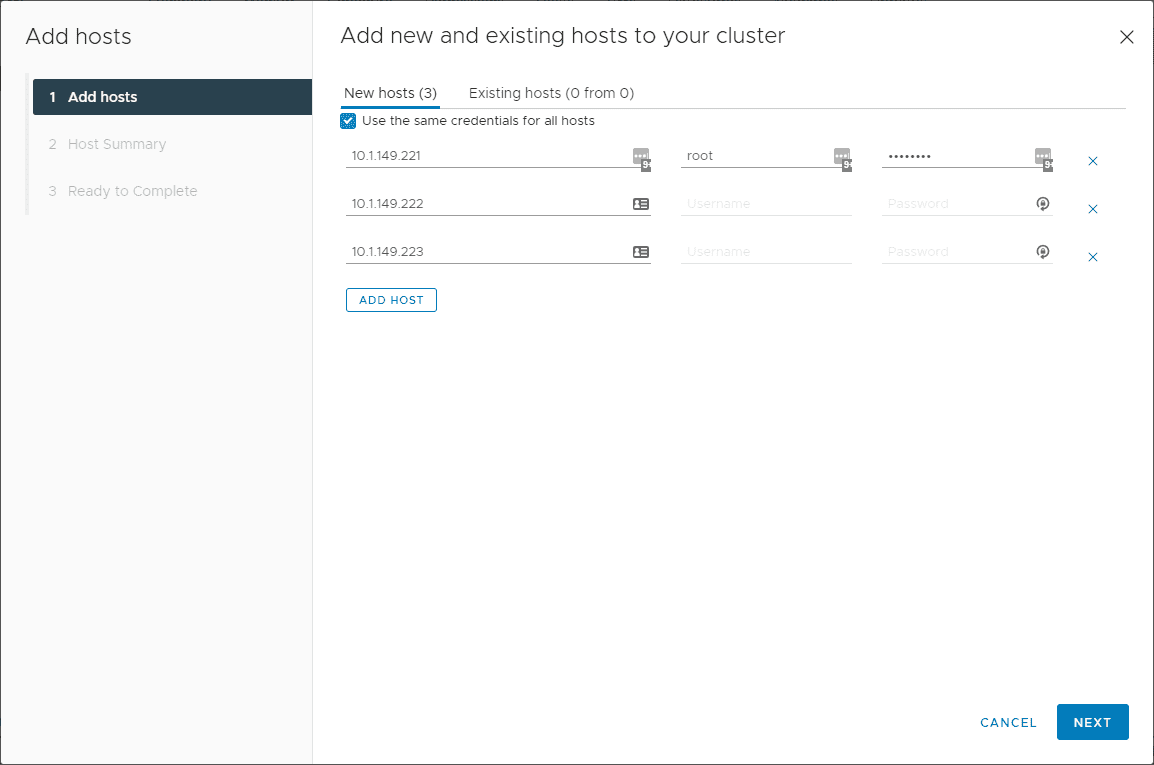
You can then add the hosts to the cluster in one fell swoop.
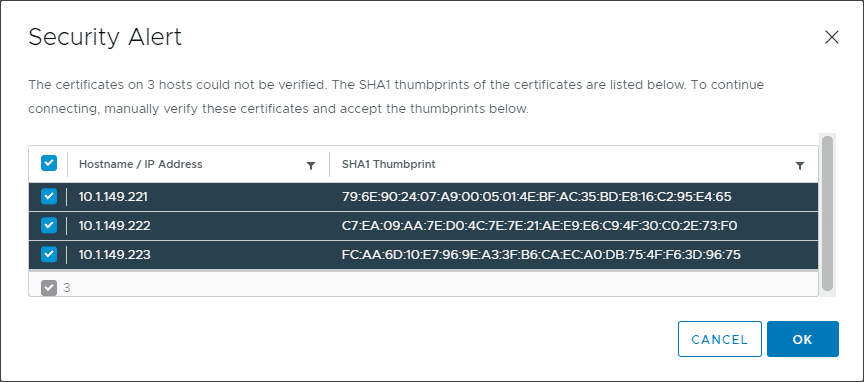
Accept the certificate warnings.
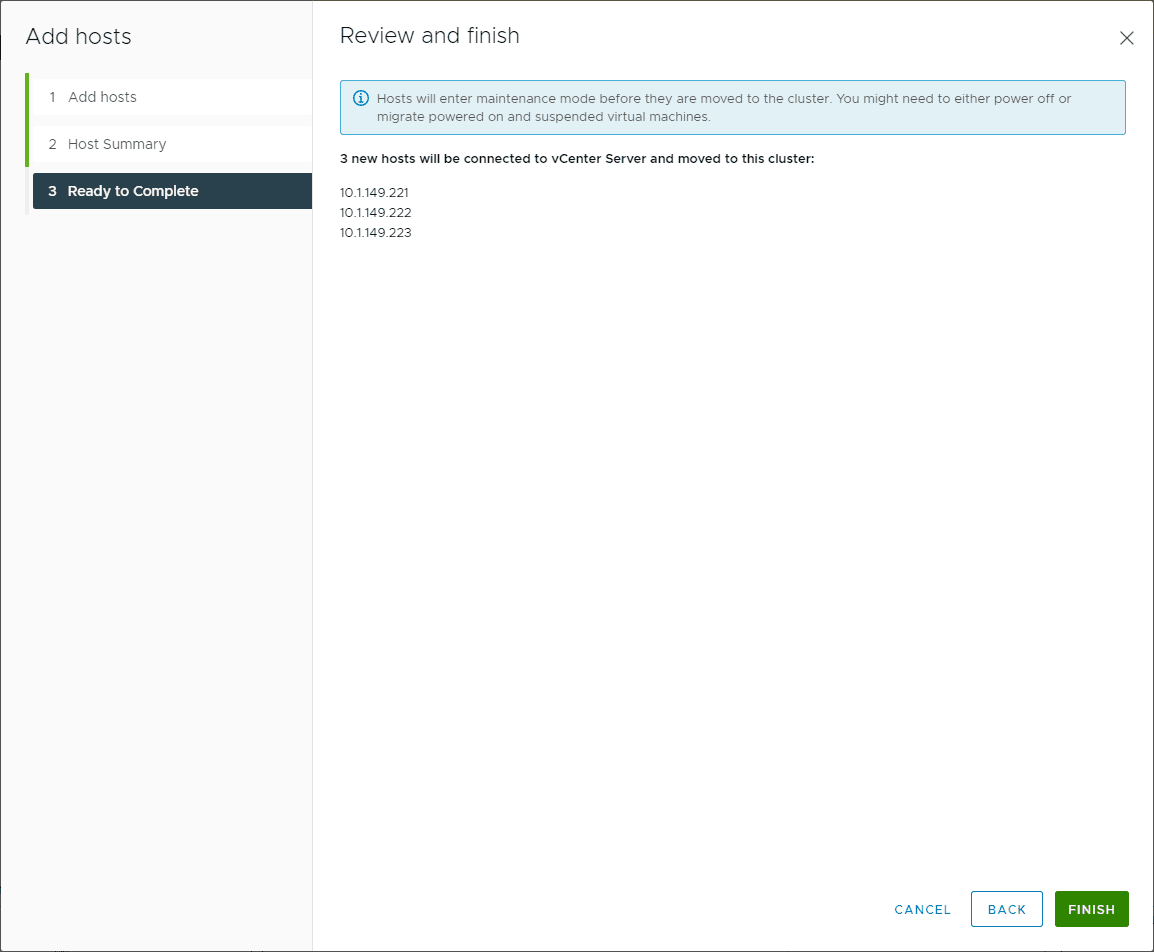
Hosts to be added to your vSphere Cluster. The IPs reflected below are housed in my VMware Workstation environment.
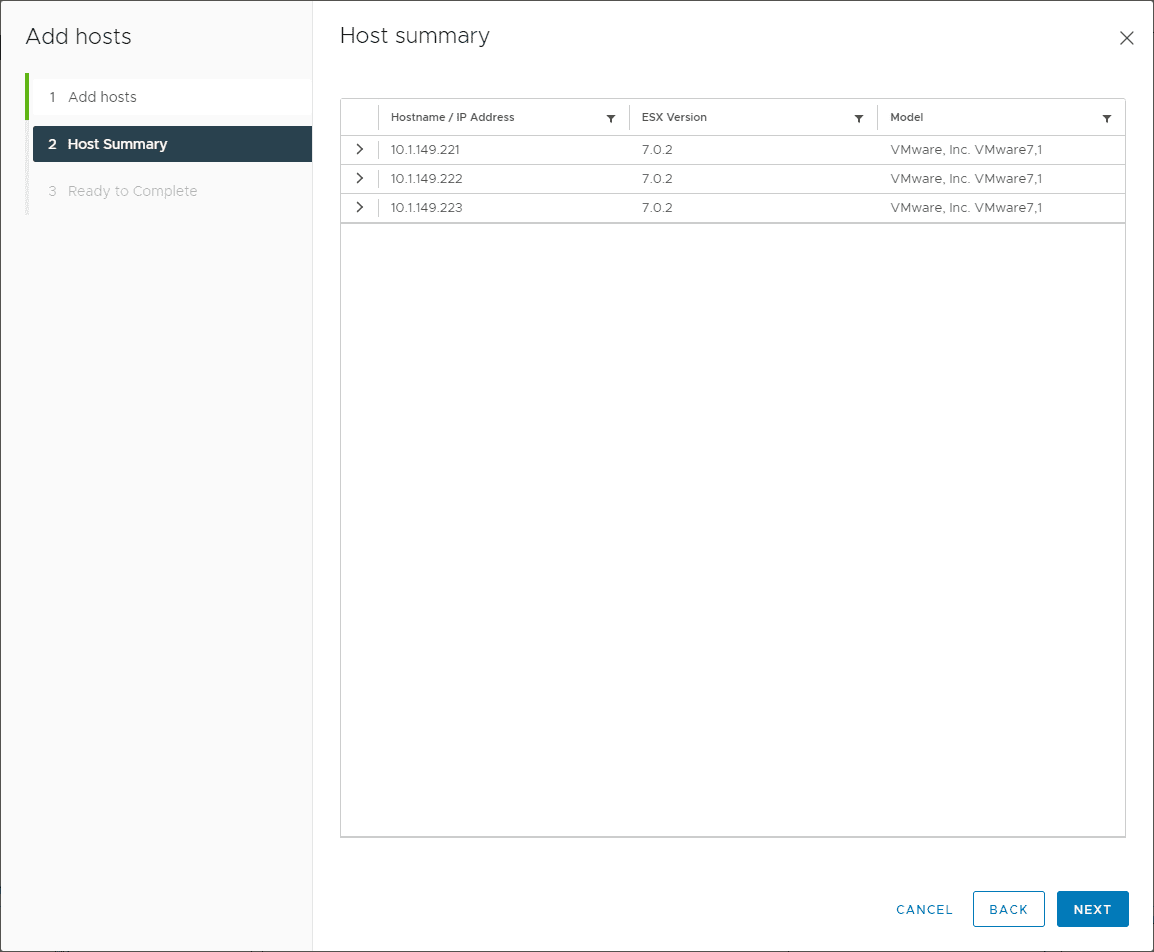
Review and finish adding the hosts to the cluster.
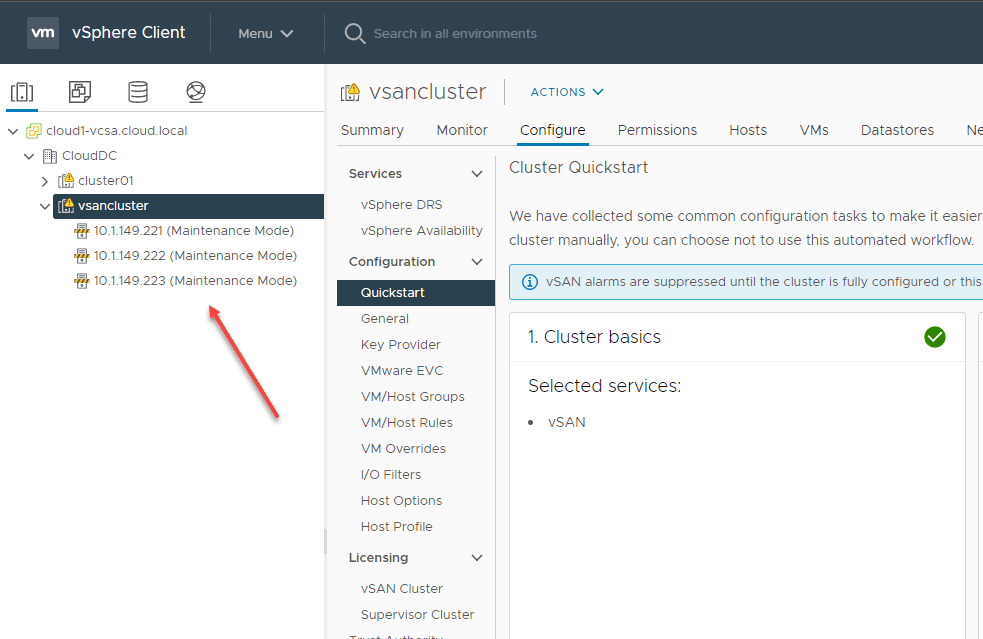
The hosts are added to the cluster.
Now that we have the hosts added to the cluster, we will need to get our networking in place for the hosts to properly communicate, including the vSAN network. For this, I will be using vSphere Distributed Switches.
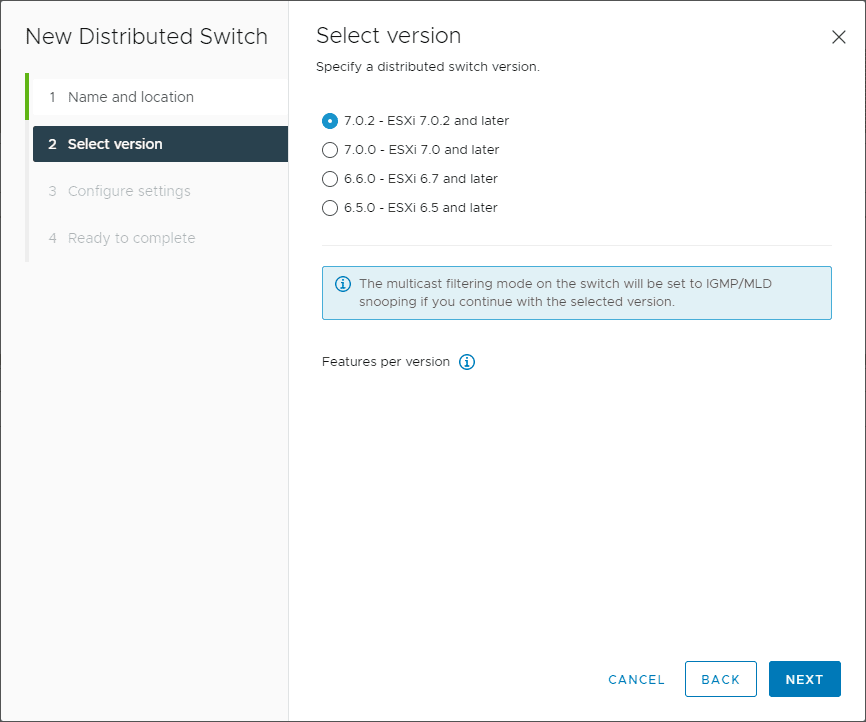
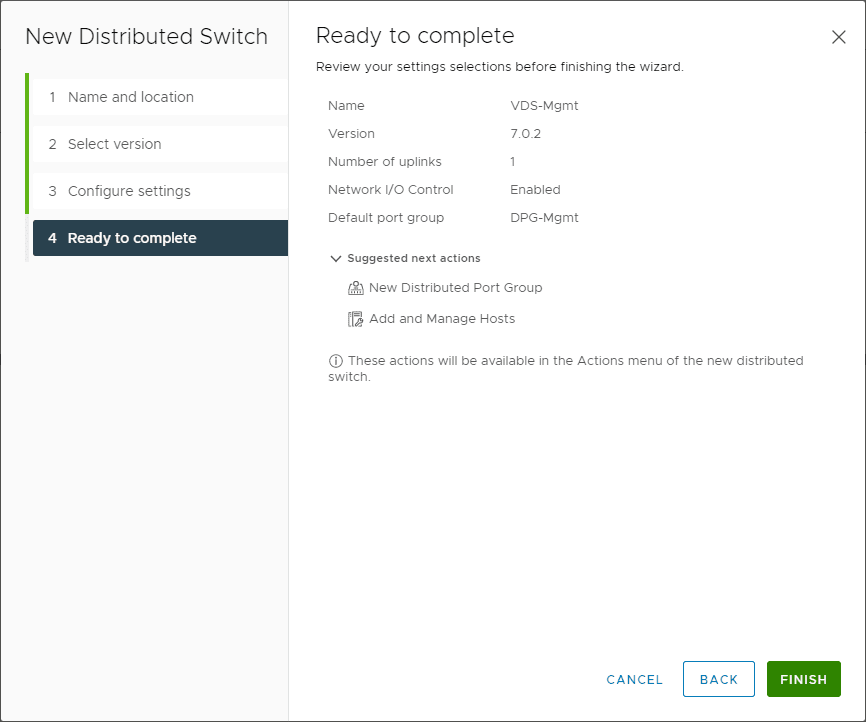
Creating vSphere Distributed Switches
In VMware Workstation we have two network adapters assigned to the (3) ESXi hosts. To segment the traffic, I am creating (2) vSphere Distributed Switches. I am assigning one adapter from each host to each vDS switch. As you already know, when you install ESXi, it will place the management VMkernel port on the default vSwitch0 standard switch.
Why migrate to vSphere Distributed Switches? Can you configure your vSAN lab on VMware Workstation with vSphere Standard Switches? Yes you can. However, there are lots of cool features with vSphere Distributed Switches such as Network I/O Control that you can play around with using vDS. Also, vDS switches make bulk operations easier.
Let’s quickly create two vDS switches, one for management and the other one for vSAN. Basically, we will run through creating both. I will show the process for one of the switches.

Do the same for the vSAN distributed switch.

Adding hosts to the vSphere Distributed Switches
After you create a vDS, you add it to the ESXi hosts. Right-click your switches and then choose the Add and Manage Hosts option.
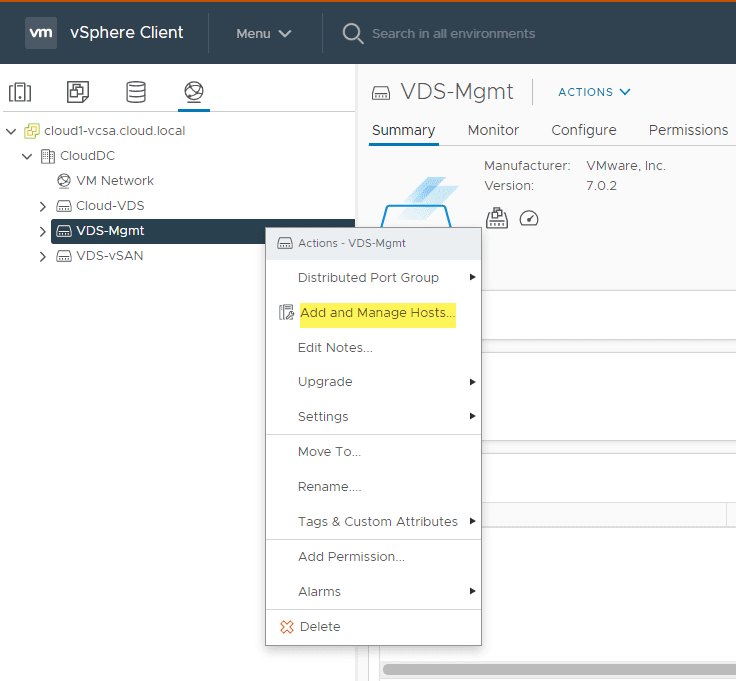
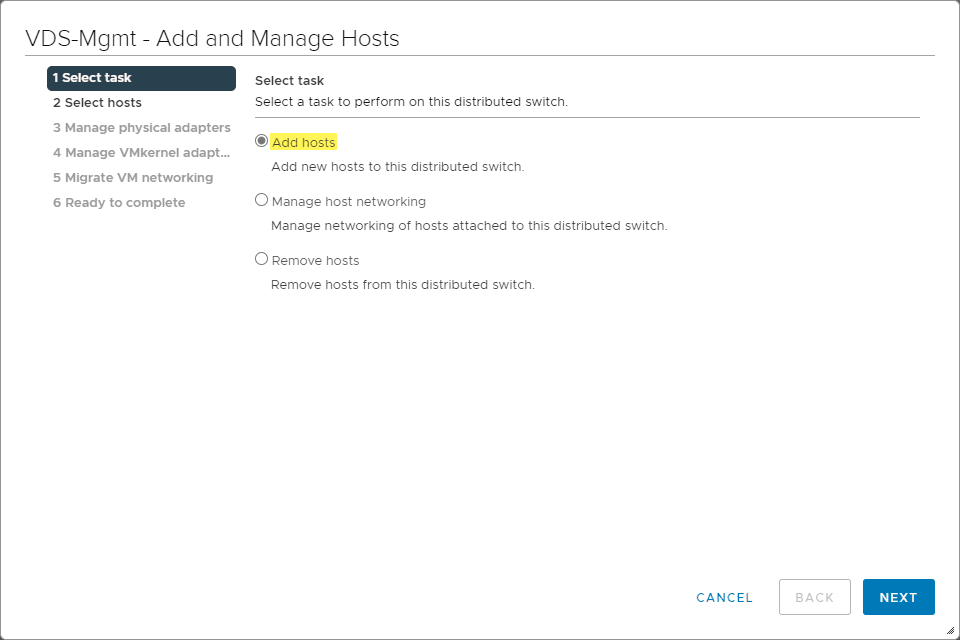
Choose Add hosts.
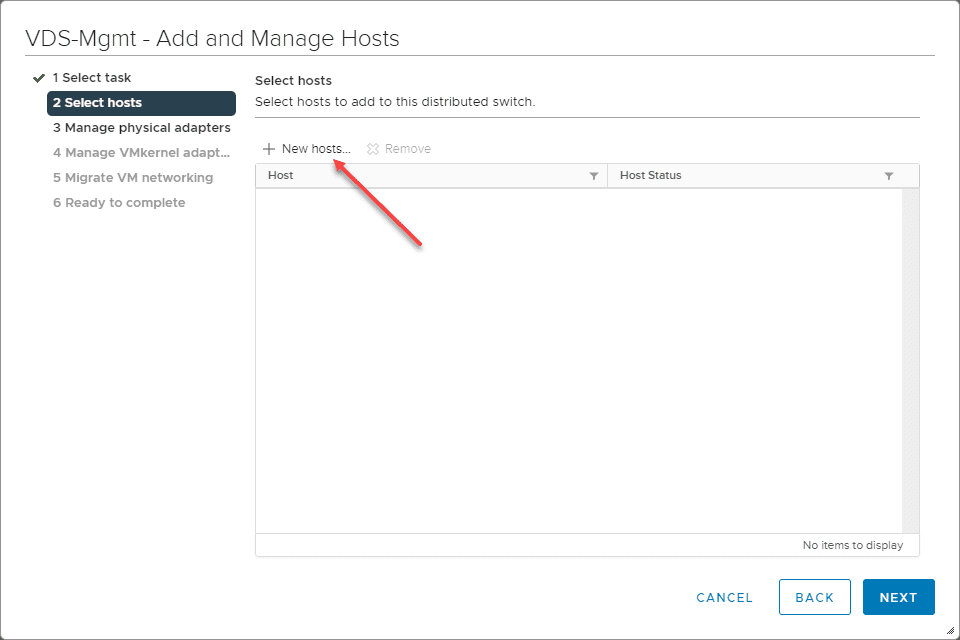
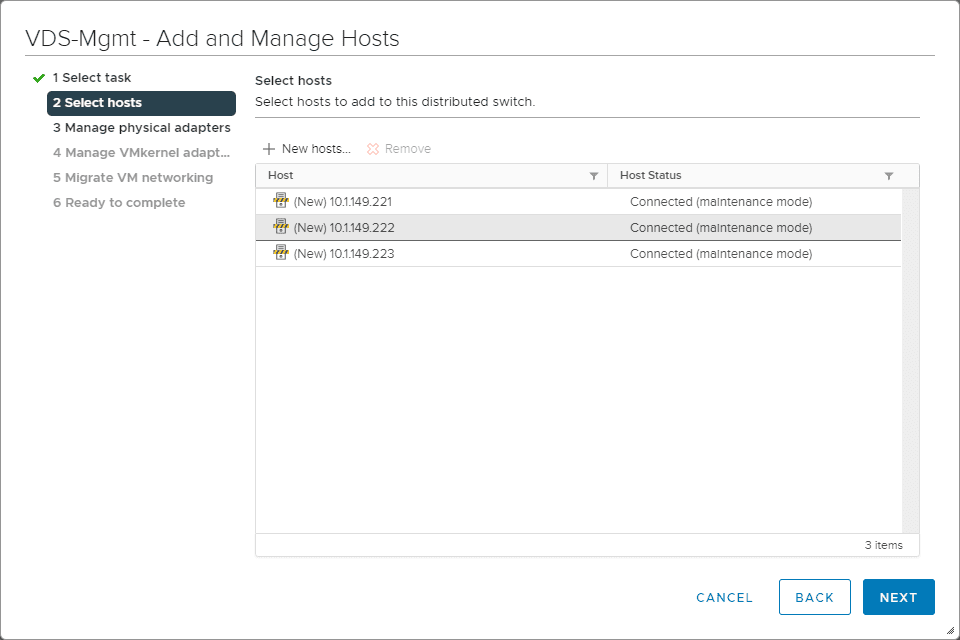
Select New hosts.
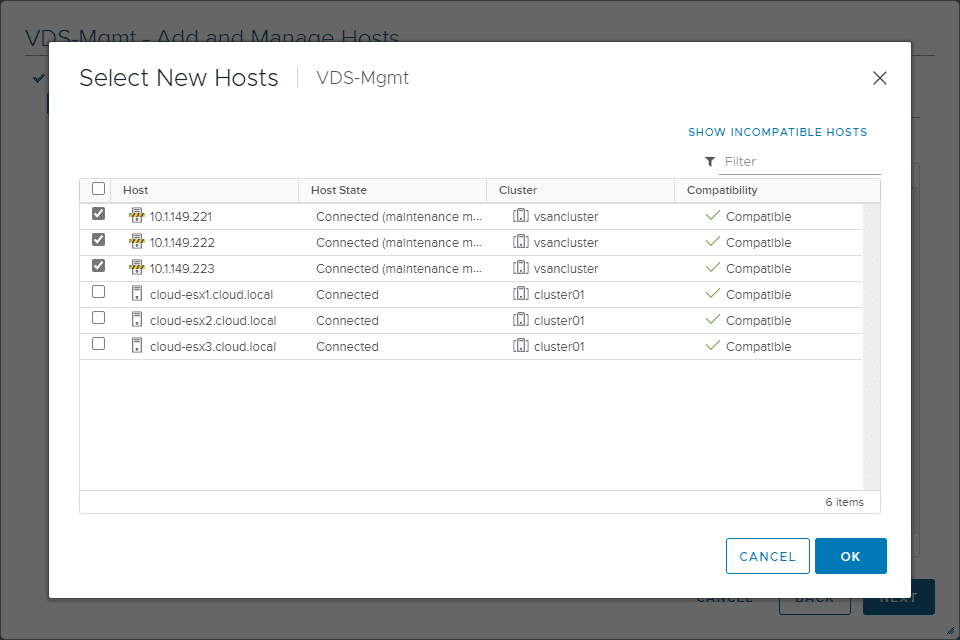
Select your hosts running in VMware Workstation.
Hosts are now selected.
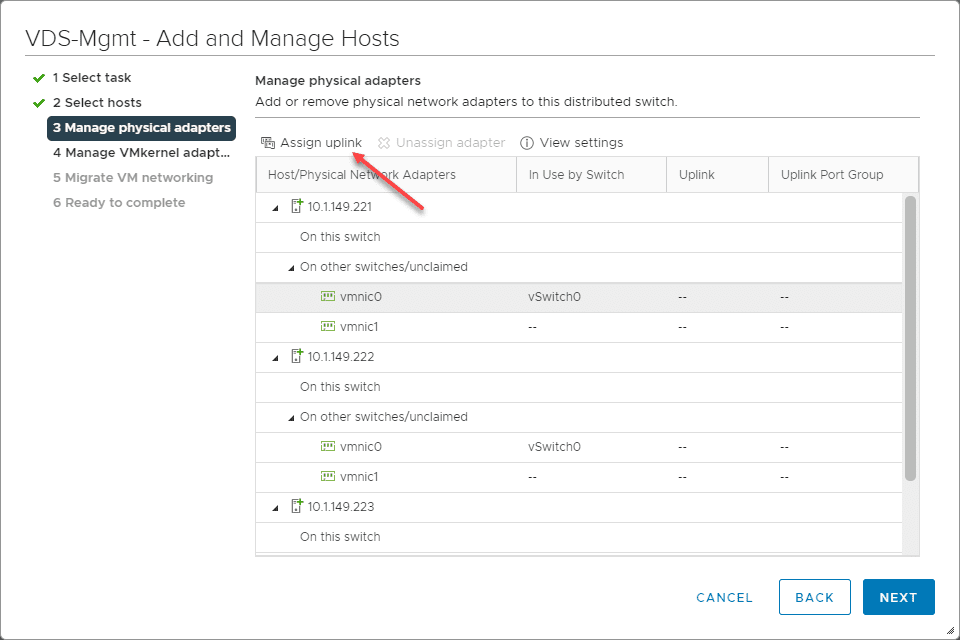
Choose to Assign uplink.
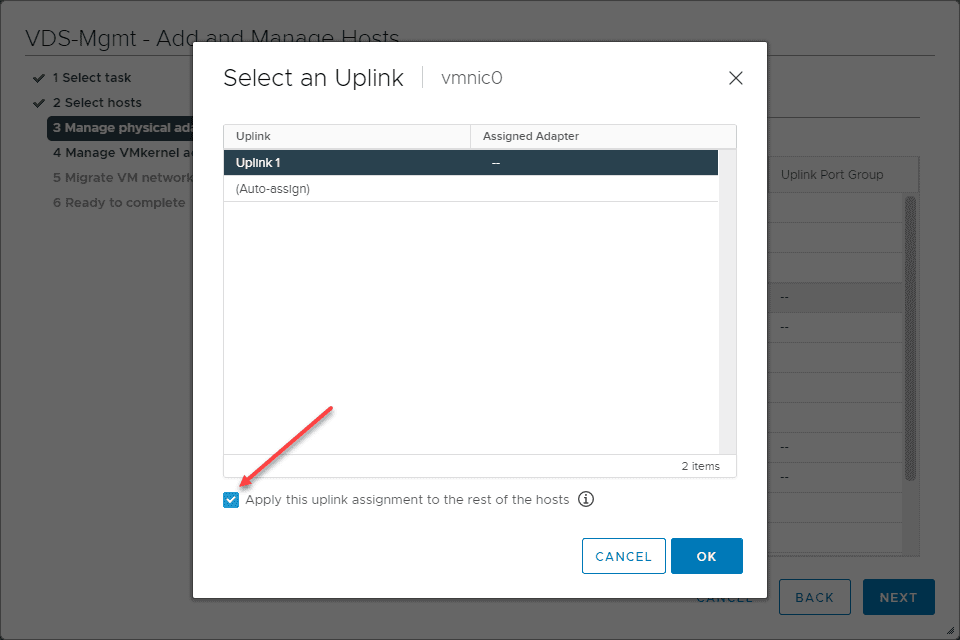
Choose Uplink1 and then Apply this uplink assignment to the rest of the hosts.
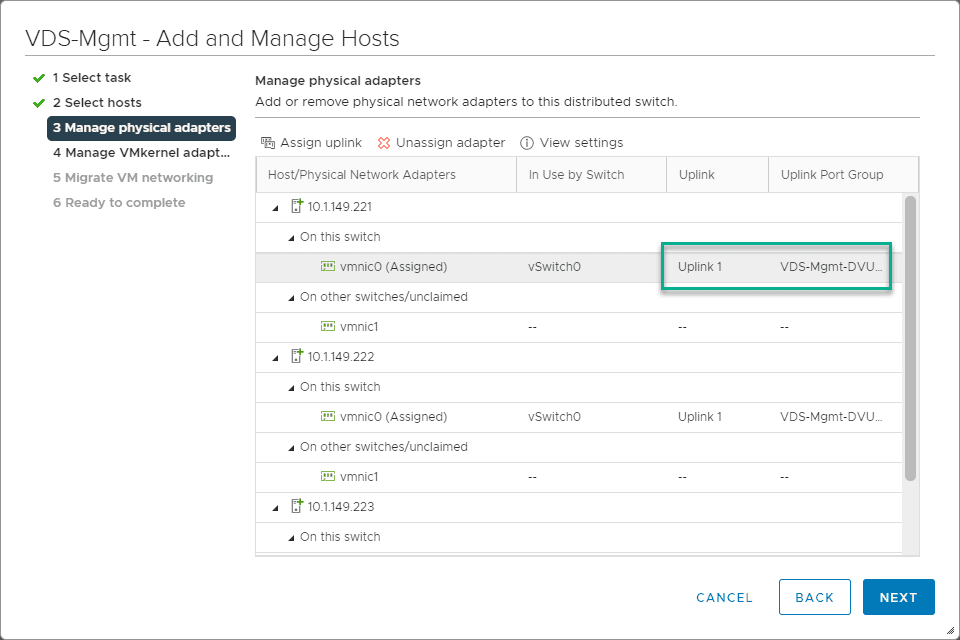
Uplink reassigned.
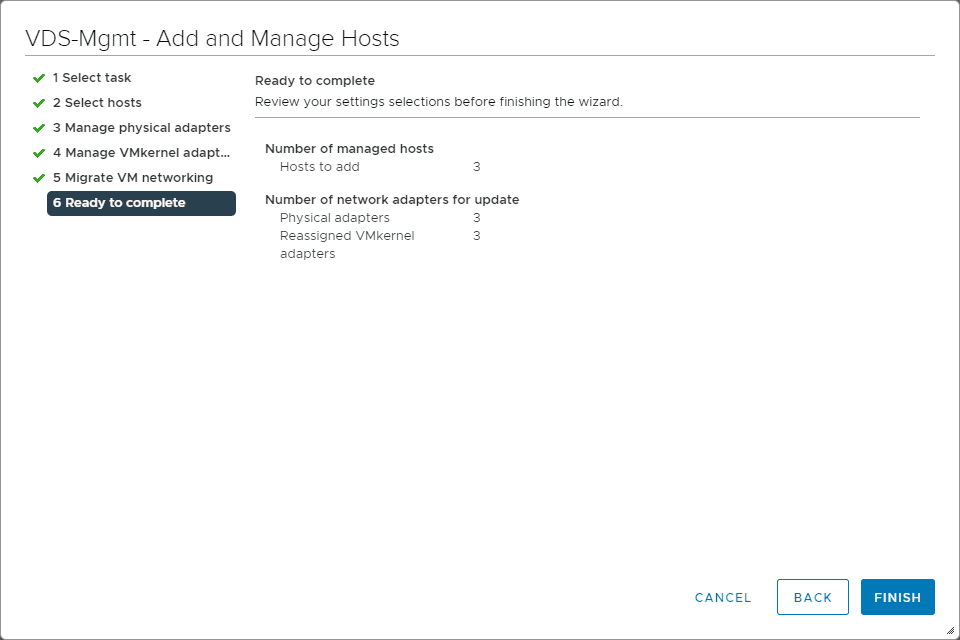
Let’s assign the port group for the Management VMkernel port. During the process of adding the hosts to this management vDS, the management VMkernel port is migrated to the port group defined in the steps below.
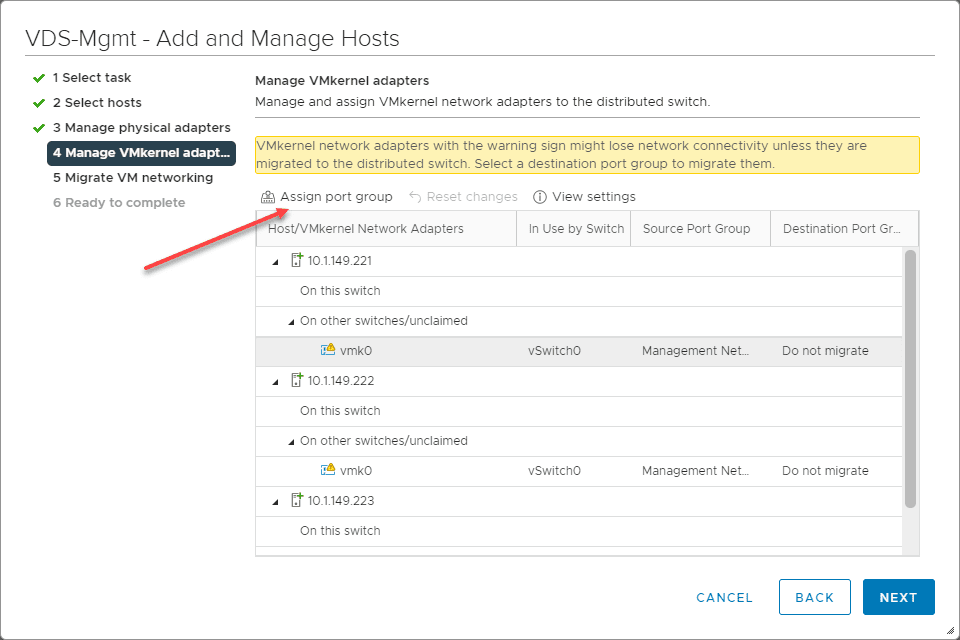
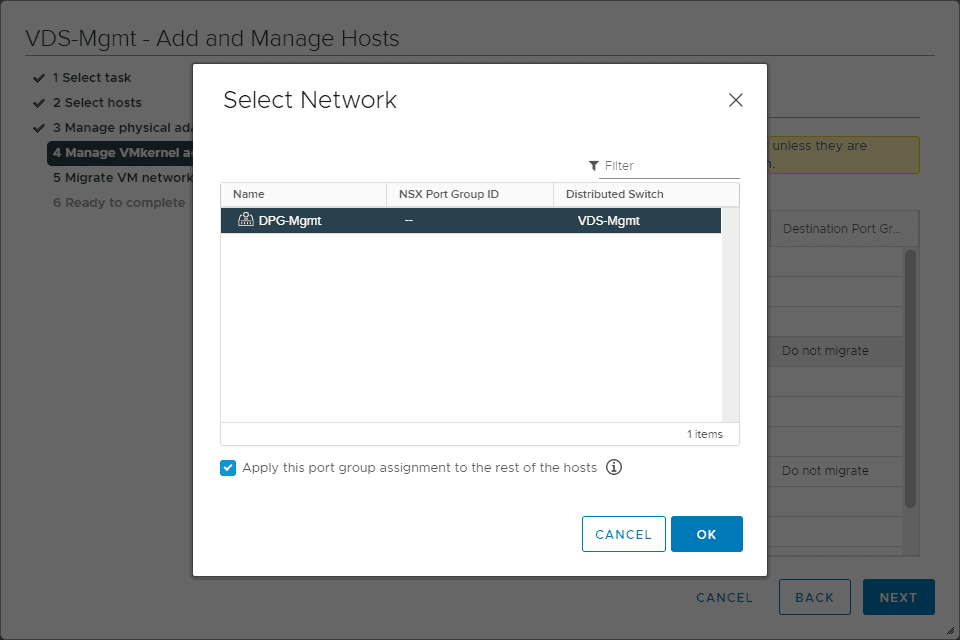
Choose your management port group created on the VDS-Mgmt vDS.
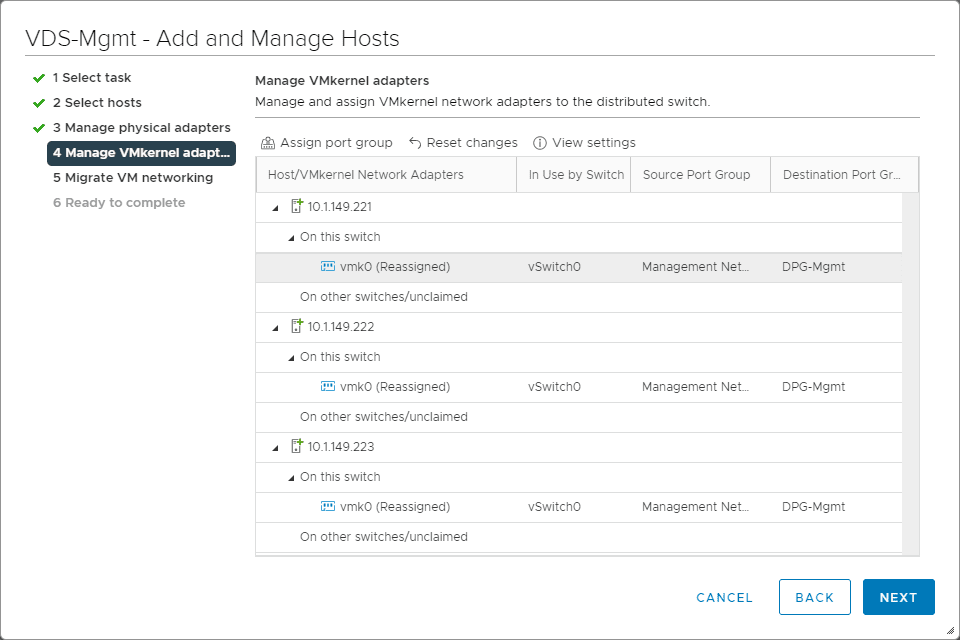
Management VMkernel port reassigned.
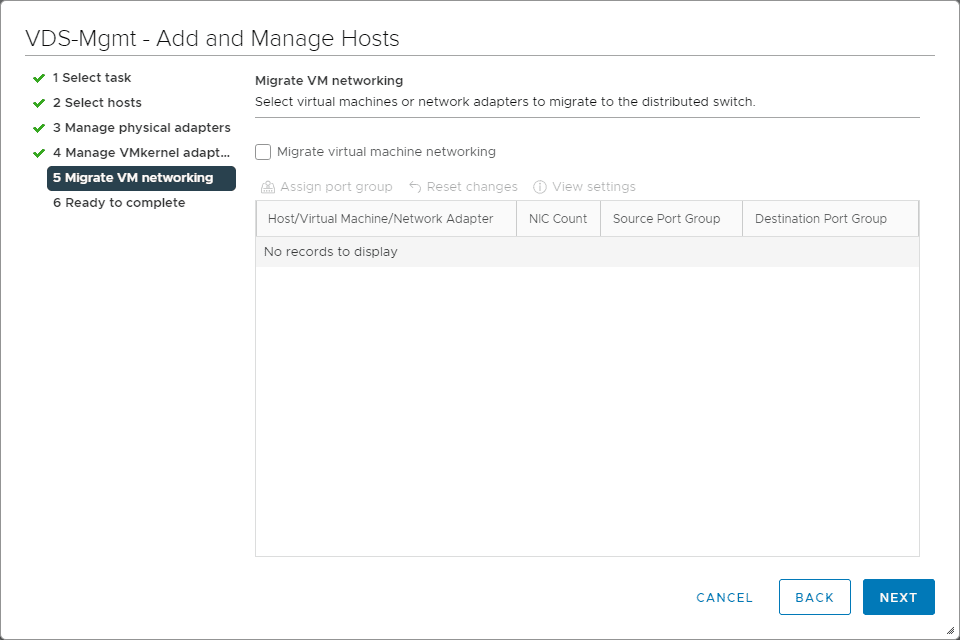
Since this is a new cluster, there is no VMs to worry about.
Ready to complete.
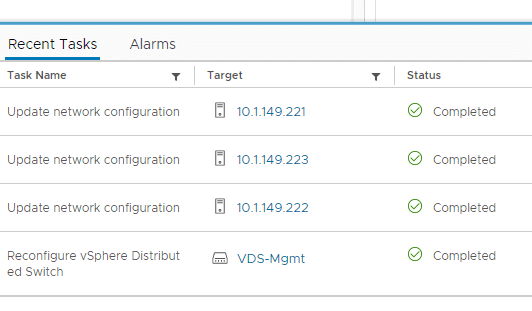
The tasks kick off in vCenter.
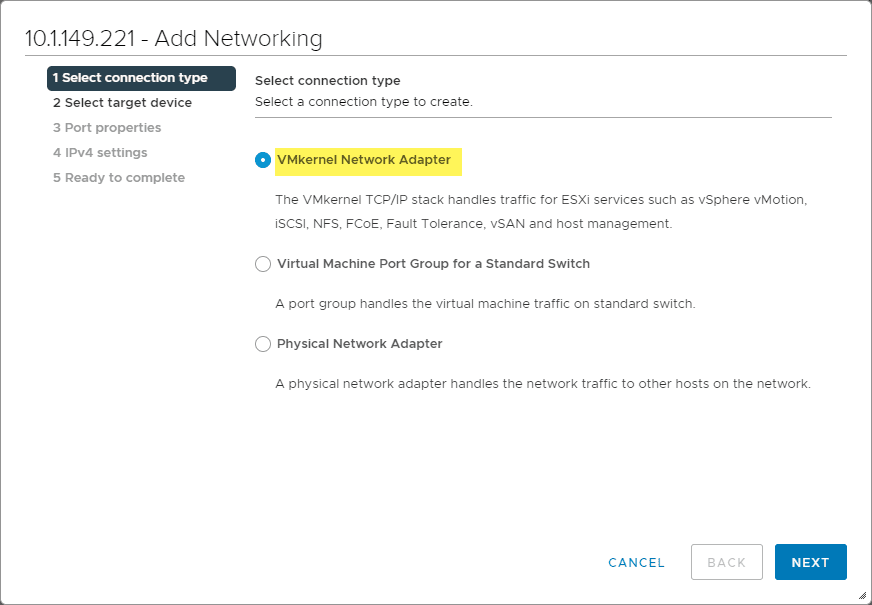
Do the same for your vSAN vDS switch as the process shown above. Note, there will be no existing VMkernel port to reassign. For the vSAN vDS, we just need to add the switch to the ESXi hosts. We will create a VMkernel port for vSAN next. After you have added the hosts to the vDS switch for vSAN, you need to add a VMkernel port. To do that, you right-click each host and choose Add Networking. Choose VMkernel Network Adapter.
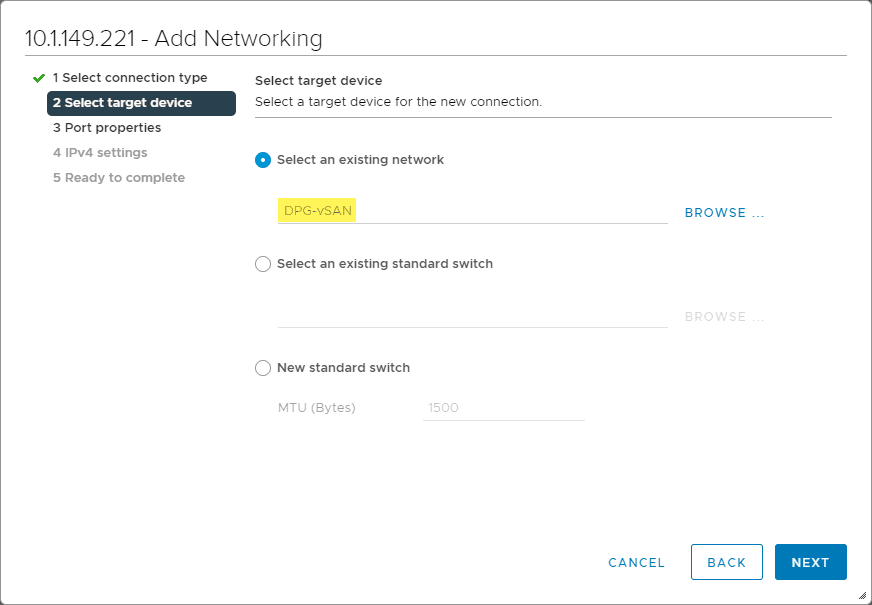
Select the vDS switch added earlier for vSAN.
Make sure to choose vSAN on the Port Properties > Available Services.
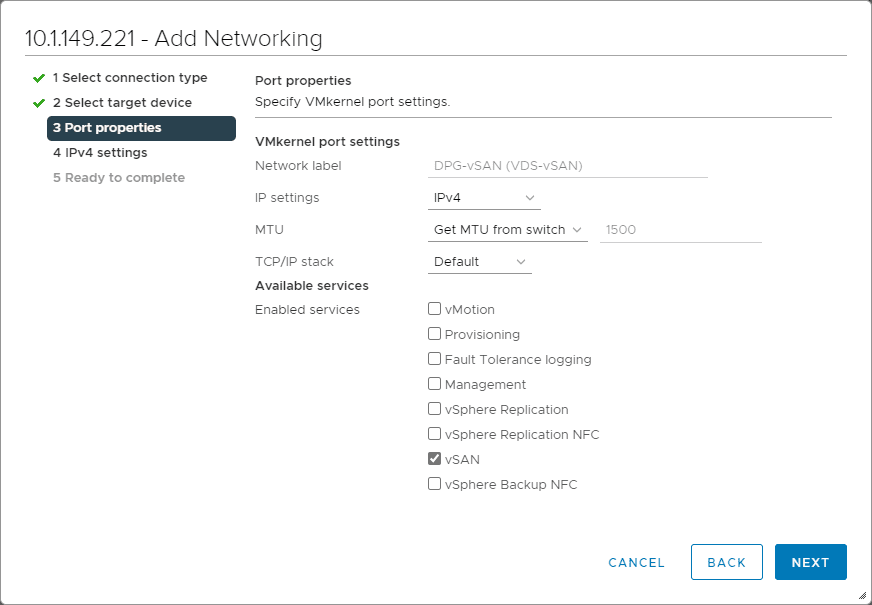
In VMware Workstation, the network segment that I created for vSAN which is backing the vSAN network is enabled with DHCP. Here, I am just leaving it as DHCP which saves the work of having to configure static IPs for the VMkernel ports on all three hosts.
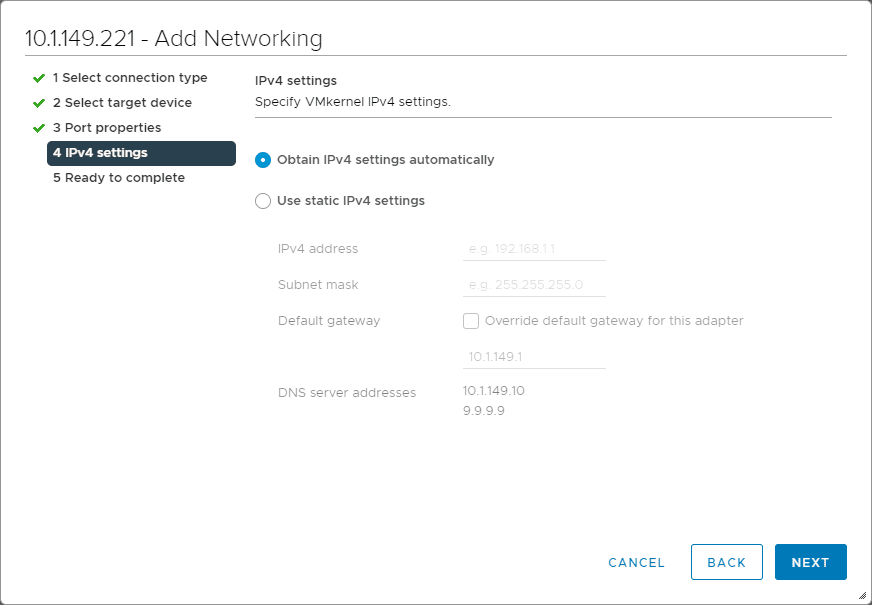
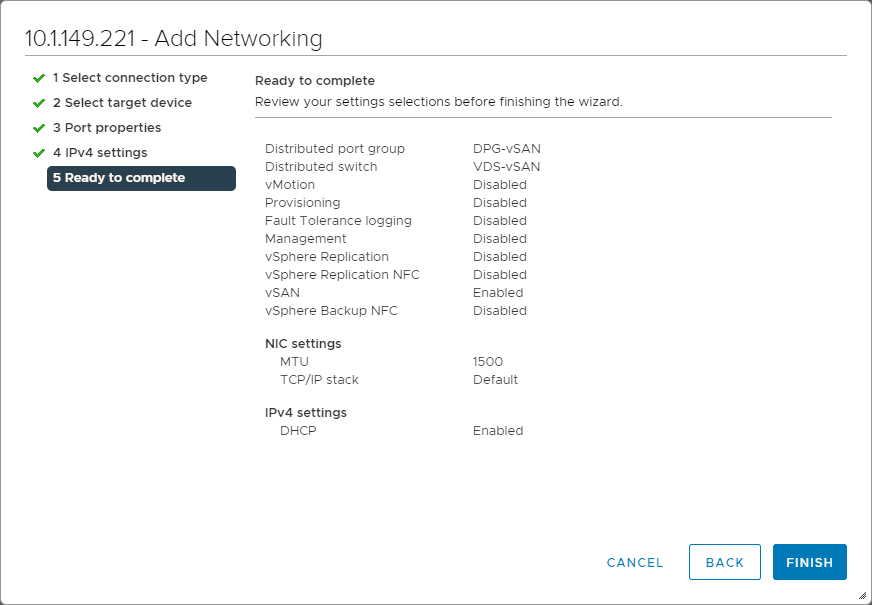
Ready to complete the configuration.
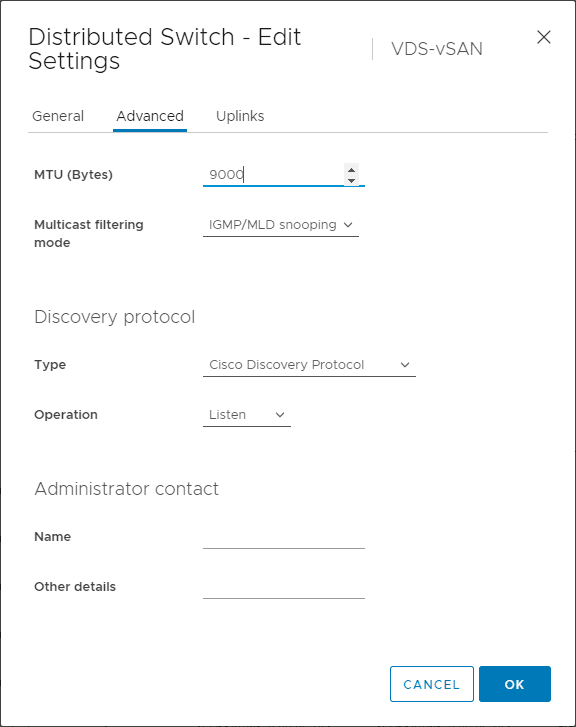
If you noticed above, I forgot to change the MTU of the vDS for vSAN to 9000. I went back and did this. You can do this either when you initially create it or after the fact.
Creating the vSAN disk group
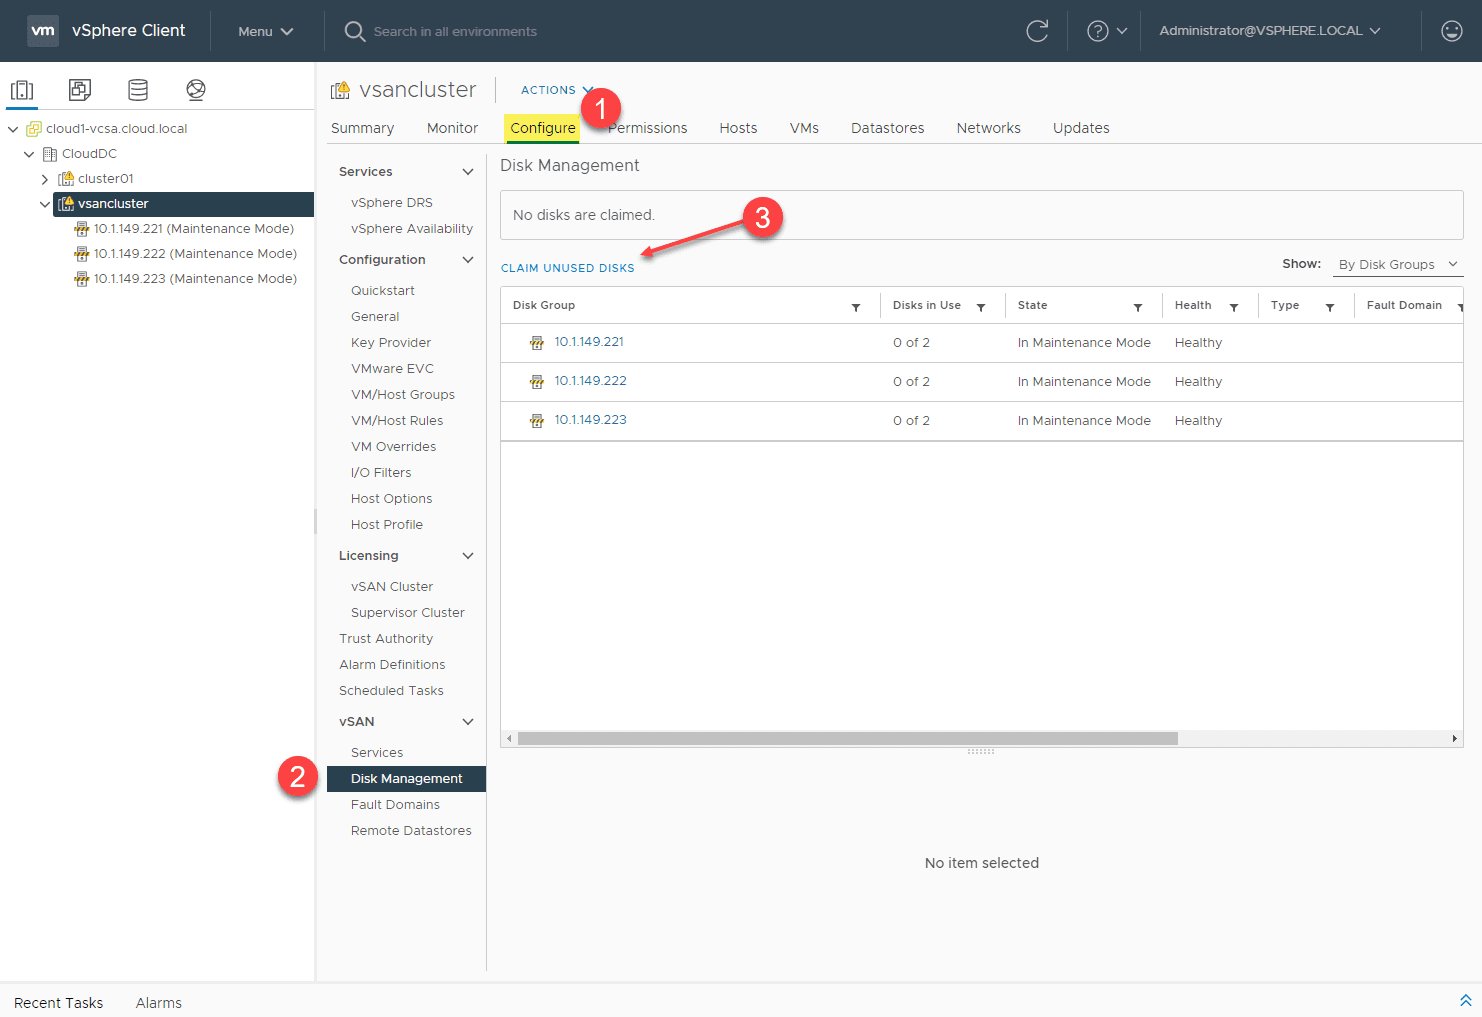
Now that we have the networking side of the vSAN cluster housed in our VMware Workstation environment, we can work on the storage side. With vSAN, each host has a disk group that contributes to the overall vSAN storage capacity. If you navigate to Configure > vSAN > Disk Management > Claim Unused Disks it will launch the wizard to claim all available disks for vSAN use.
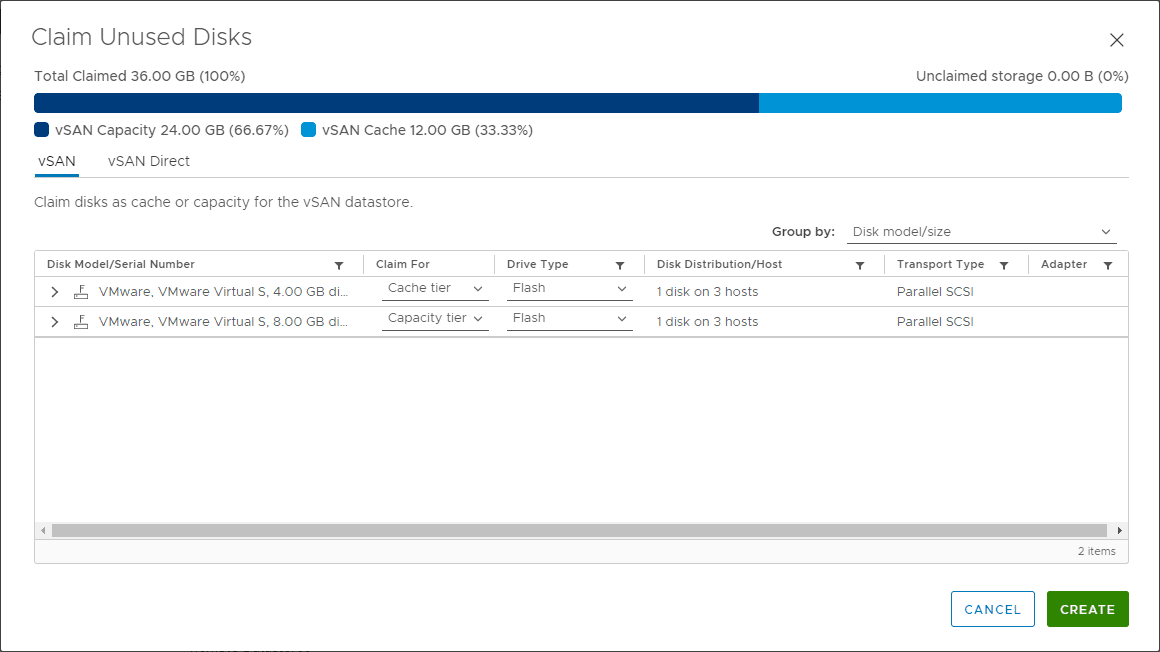
On the Create Disk Group screen, choose the cache disk and capacity disk.

The wizard will claim the disks for all three hosts based on the disks that you select in the previous screen.
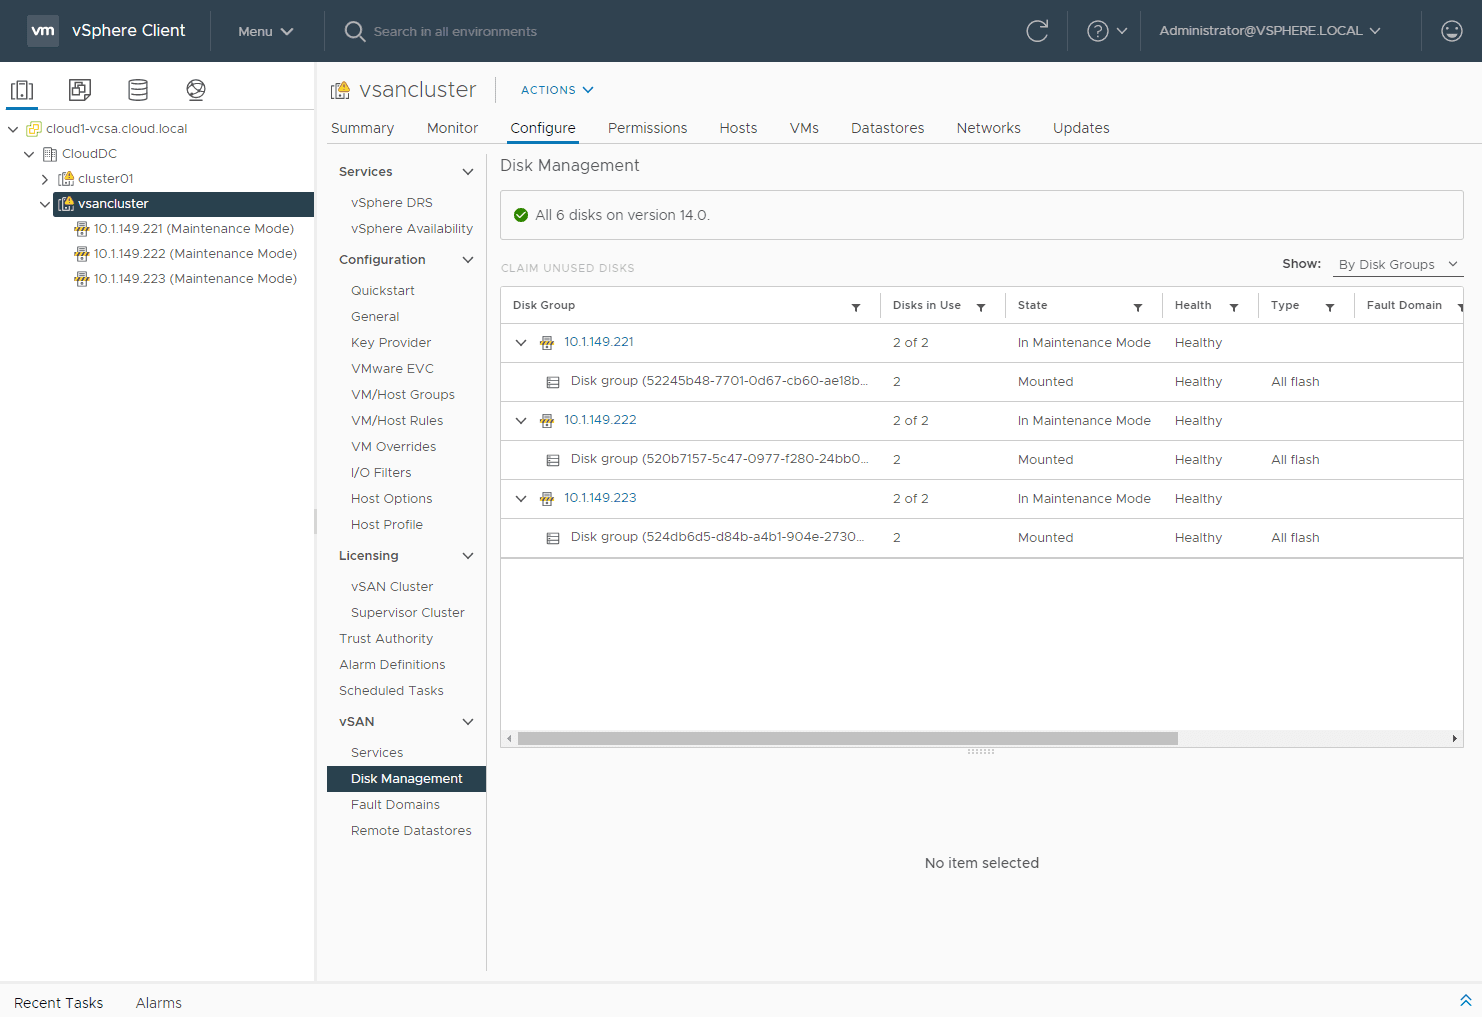
After clicking Create above, the disk groups will be created on all three hosts.
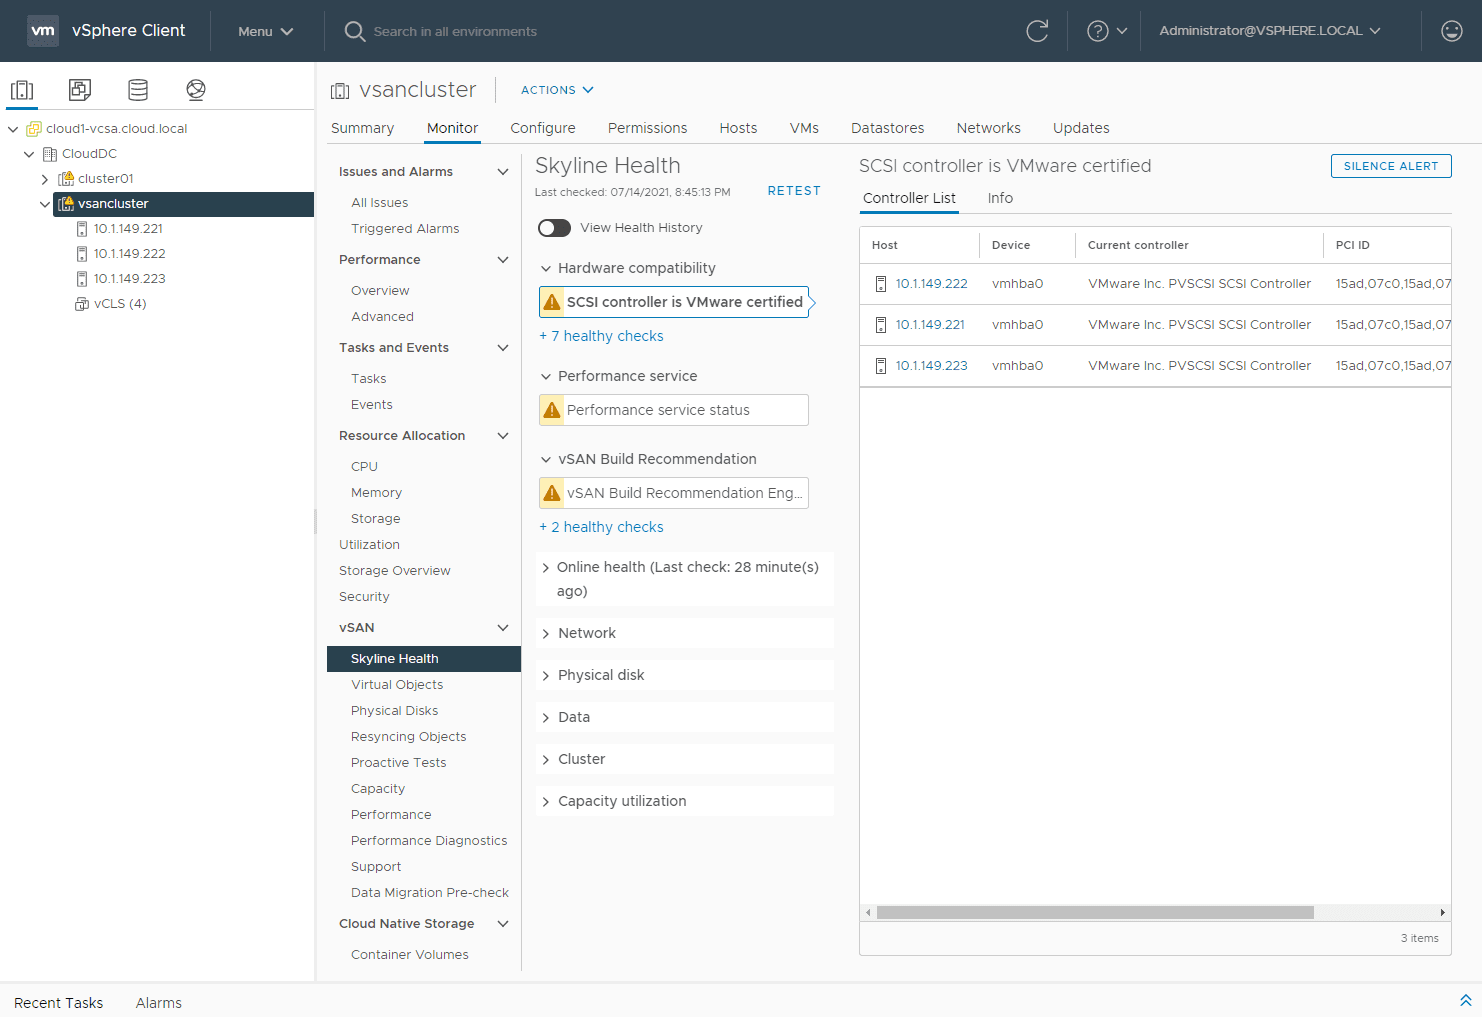
Looking at the Skyline Health screen, we see only a few warnings of things that you would expect such as controllers not being VMware certified, etc.
Final thoughts on lab setup
All in all, configuring a vSAN lab on VMware Workstation is straightforward. Getting your networking setup on VMware Workstation correctly is extremely important. Make sure you have your networking plumbed in correctly from that side of things to your physical network where you have connectivity to vCenter Server if it doesn’t exist in VMware Workstation also.
Once you have your hosts deployed, the primary steps are getting networking configured in vCenter and the disk groups for each host so your vSAN storage will come online. Hopefully this walkthrough will help anyone who wants to make use of VMware Workstation to deploy a VMware vSAN home lab.
More in this topic


Discuss this in the Community
Google is updating how articles are shown. Don’t miss our leading home lab and tech content, written by humans, by setting Virtualization Howto as a preferred source.
About The Author
