Install Nested Nutanix CE in VMware vSphere ESXi 6.7 Update 1
One of the great things about virtualization is “nested virtualization“. This is where you can run a hypervisor inside a virtual machine running on another hypervisor. One of the really cool things with the lab environment is playing around with other hypervisors. Recently, I started taking a look at installing Nutanix Community Edition inside of VMware vSphere. With just a bit of Googling and stepping through the process, I was able to get a good install of Nutanix CE running inside a VMware vSphere 6.7 Update 1 environment. Let’s take a look at how to install Nested Nutanix CE in VMware vSphere ESXi 6.7 Update 1 and take a look at the steps required to do this.
Downloading Nutanix CE
While we won’t detail how to get the Nutanix CE bits here, it is fairly straightforward by visting the following URL:
You will have go through the process of creating a community account (NEXT account) and verify your email address, etc. Basically, all of the normal stuff.
Getting the Nutanix VMDK Files Ready
I’m not going to go into overly detailed instructions for this part, however, once you download the Nutanix CE package from the community page, it will download as a tar.gz file. Extract this file.
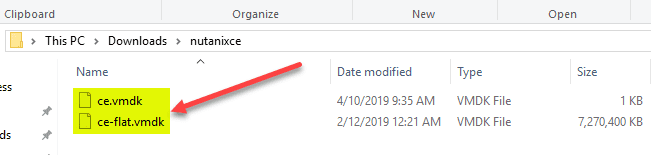
The file that is extracted will end in an .img extension. Rename this file to a .vmdk extension. For me this was around an 8GB file. This is the flat VMDK, so we need to add a descriptor VMDK file.
There is a great post here from Virtuallifestyle that actually has a descriptor file available for download. This is the file that I used in the lab to get Nutanix CE loaded.
When you are finished with the prep work including downloading the file from Nutanix and then creating a VMDK descriptor file, you will have two files, similar to this.
Now the last thing to do for getting ready to install Nutanix in VMware ESXi 6.7 Update 1, is upload the files to your datastore. Create a folder for the VM and upload the two files there.
Install Nested Nutanix CE in VMware vSphere ESXi 6.7 Update 1
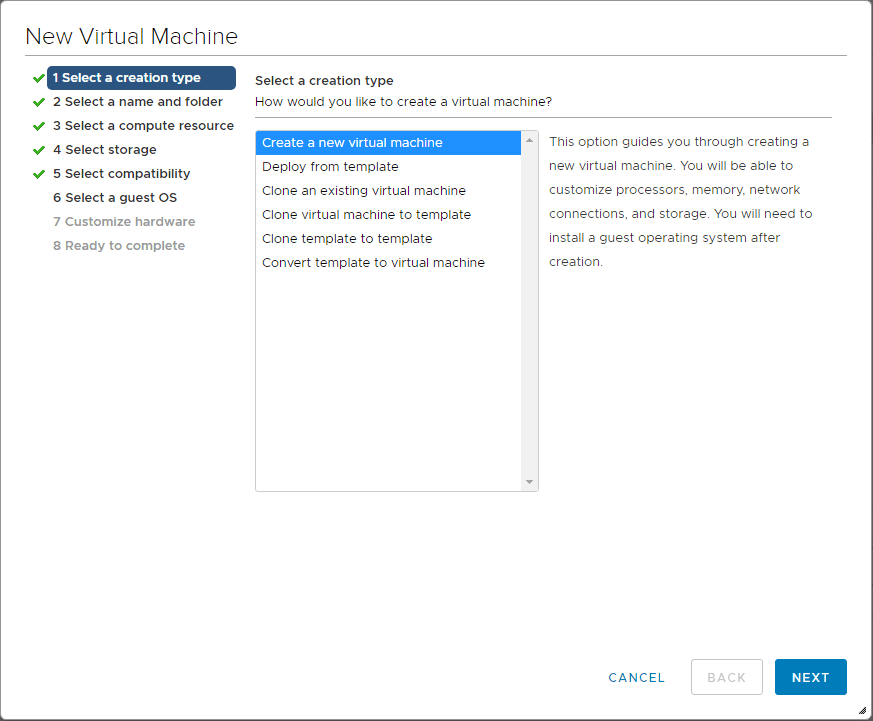
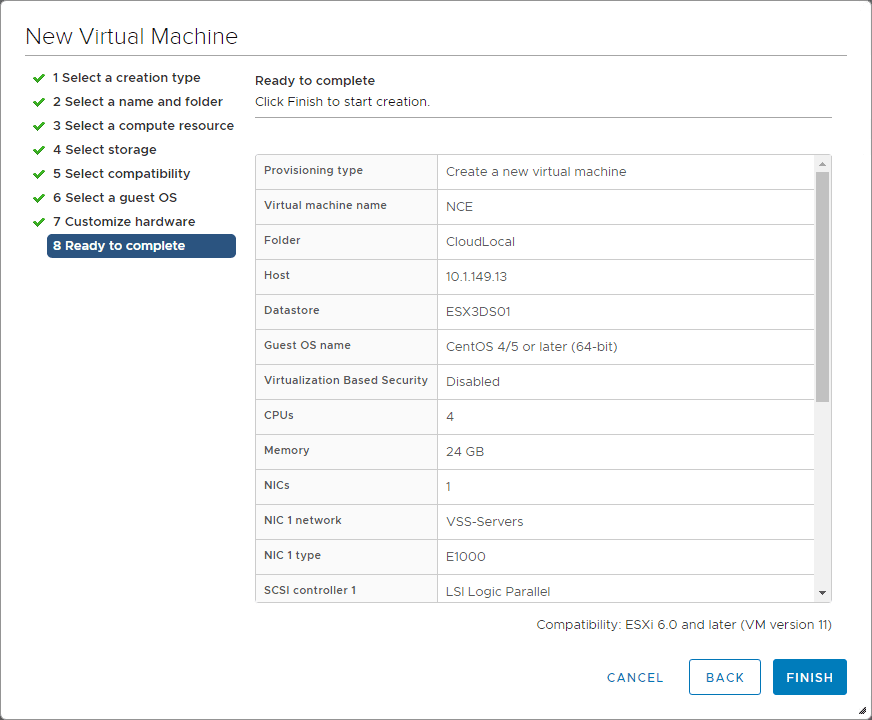
Let’s take a look at the steps to get a VM created to house the Nutanix CE install. Here I am using the vSphere 6.7 Update vSphere client to get the VM created and provisioned. Begin by creating a new virtual machine.
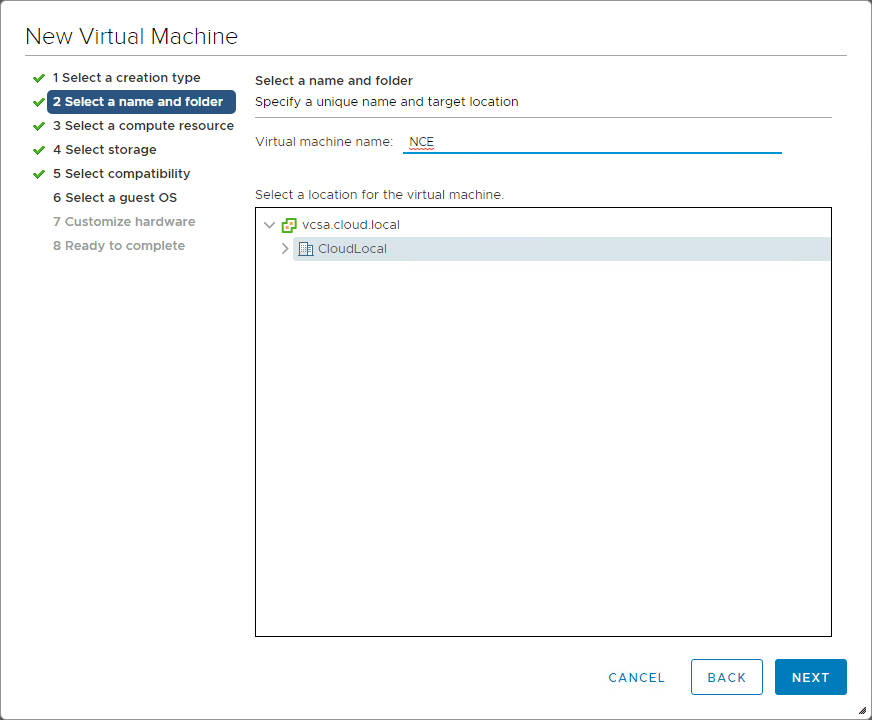
Choose a name and folder for the nested Nutanix CE VM.
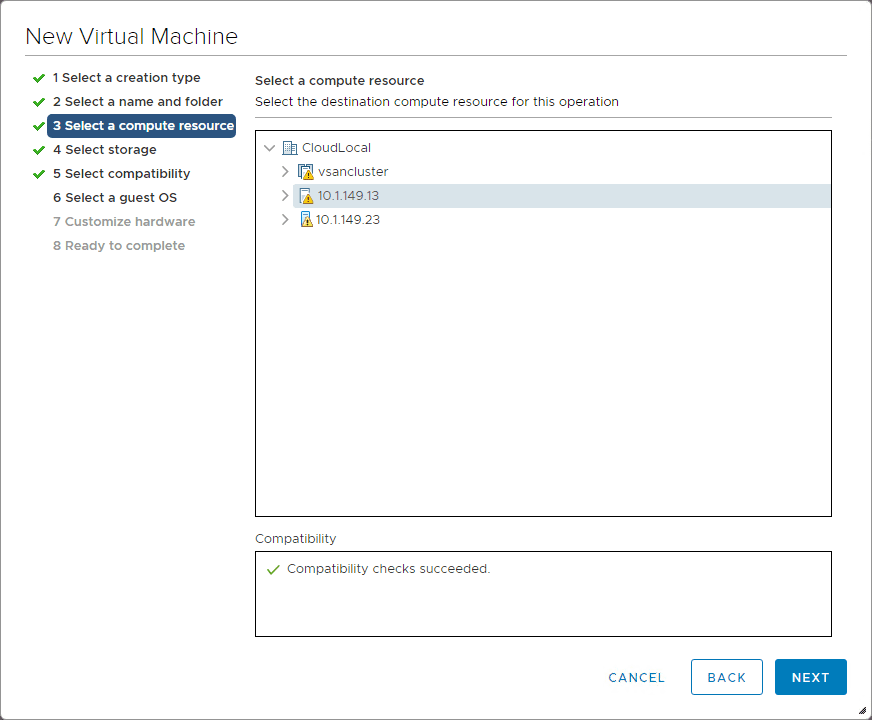
Choose your compute resource for the Nutanix CE installation.
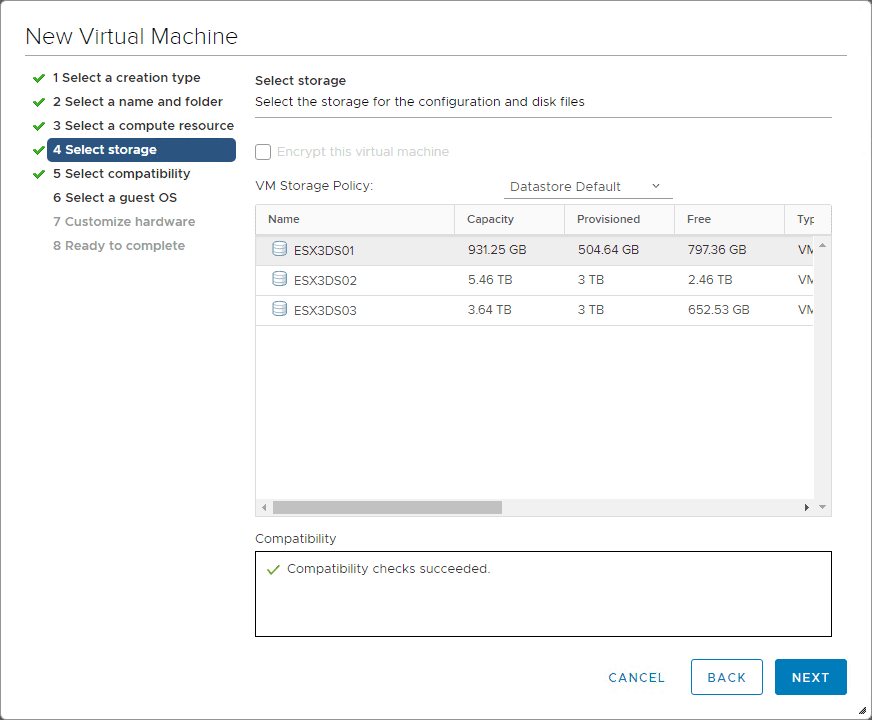
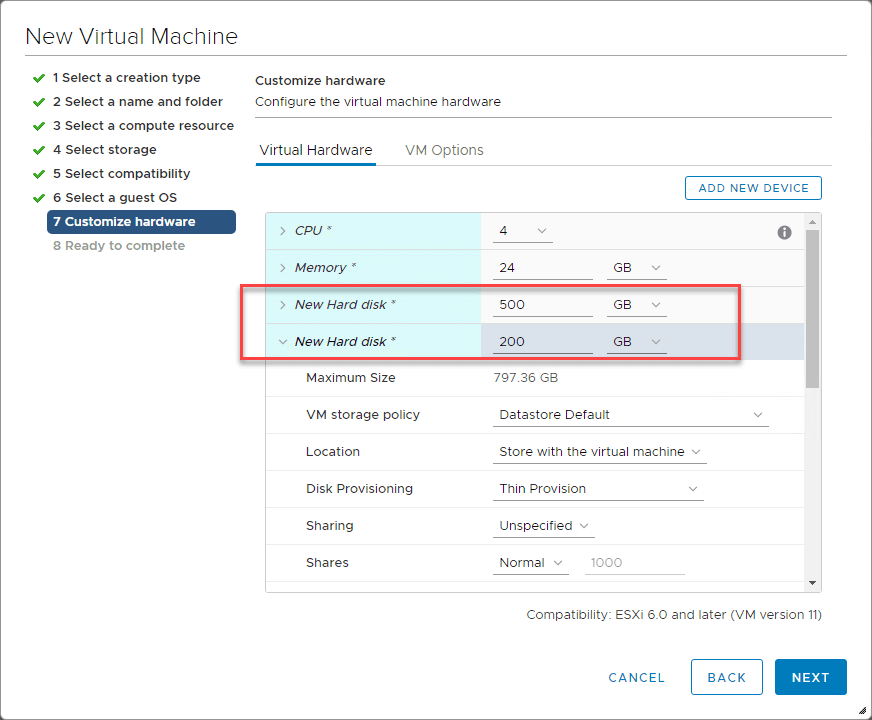
Choose a datastore. A note here, the two disks required for the Nutanix CE installation need to be at a minimum 500 GB and 200 GB. In the lab environment with NVMe storage, I am thin provisioning.
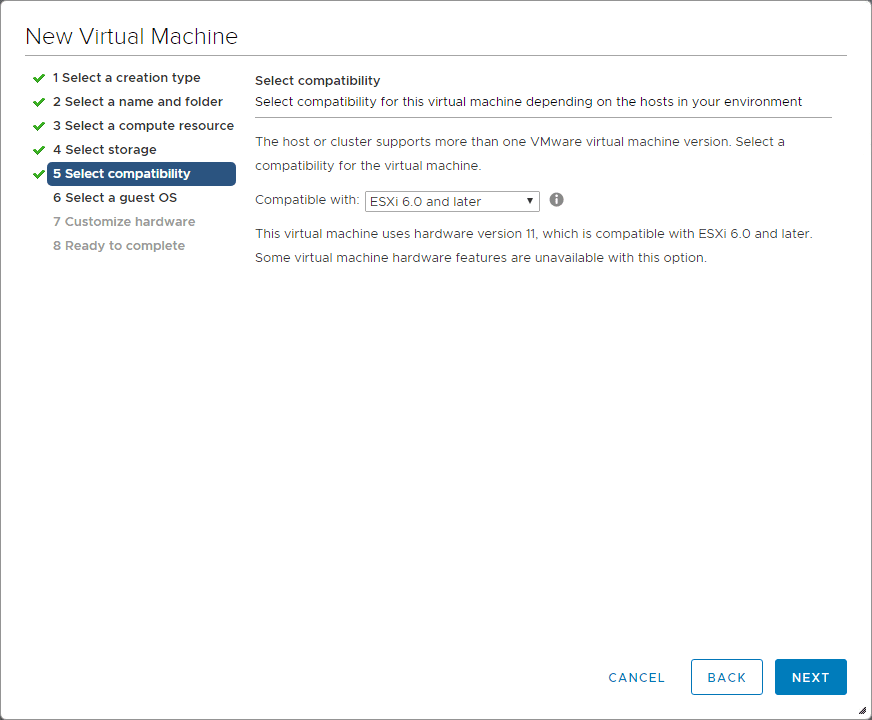
Here, I am selecting ESXi 6.0 and later for the compatibility mode. For no other reason than some of the other posts on installing Nutanix CE in vSphere, I chose this compatibility level.
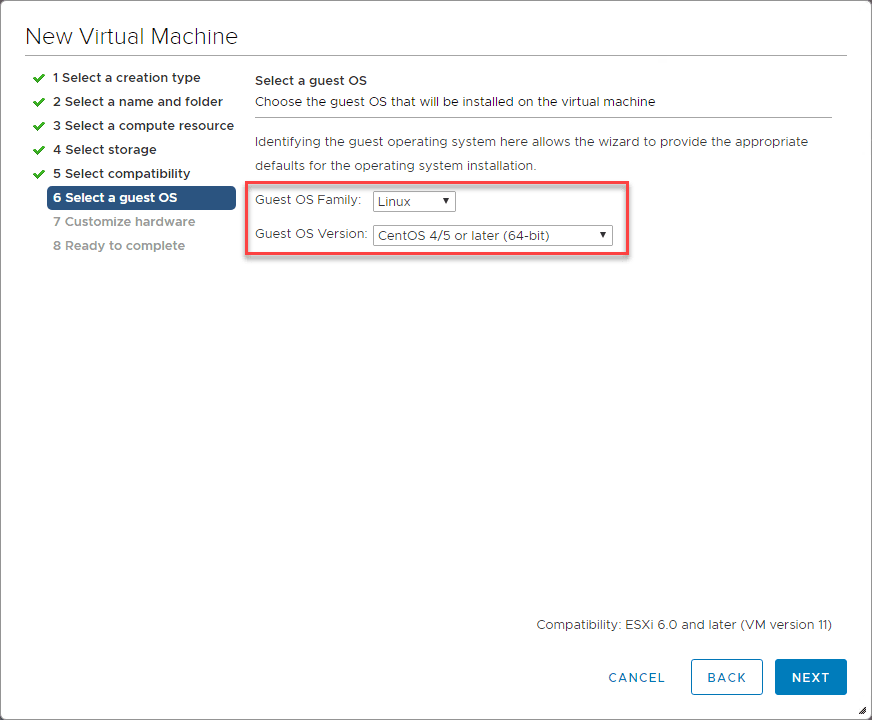
For installing Nutanix CE, you need to choose Linux and CentOS 4/5 or later (64-bit).
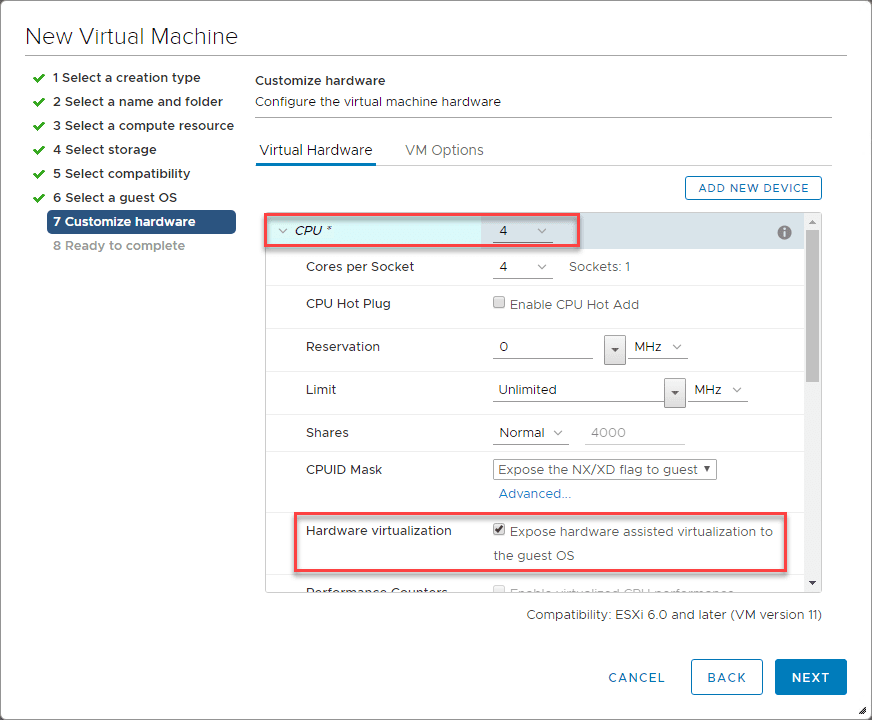
Now, we being the list of things we need to do to customize the virtual hardware for the Nutanix CE installation. The minimum here is 4 vCPUs. Also, the same as needed with nested ESXi installations, you need to enable the Expose hardware assisted virtualization to the guest OS option.
Configure and add hard disks here for the minimums if you want here. The first hard disk here is 500 GB and the second is 200 GB. Again, I am thin provisioning.
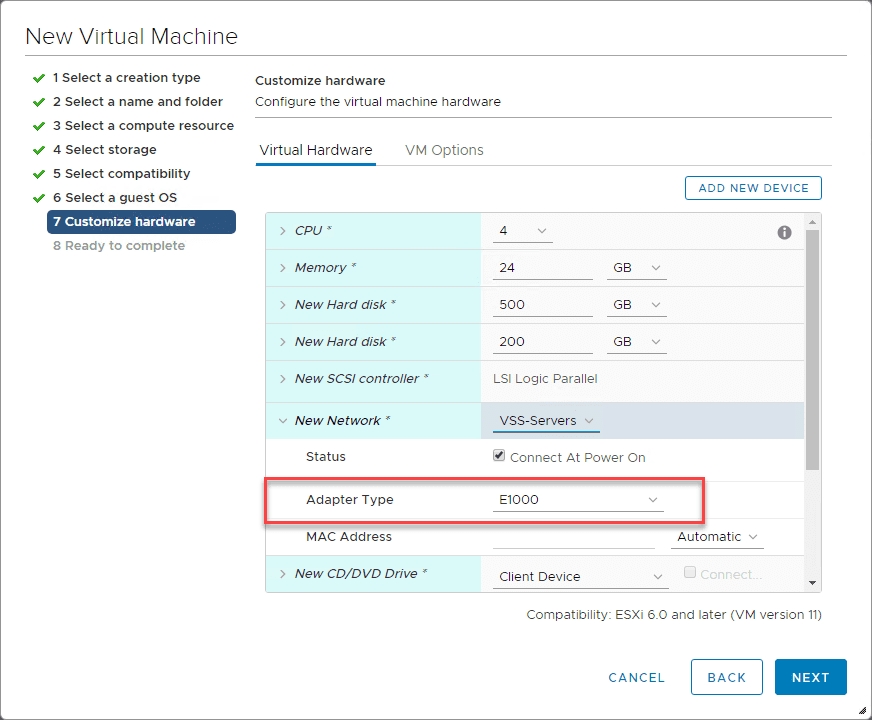
For network compatibility, choose the E1000 adapter.
Finally, in the wizard, add a New SATA Controller. This is the controller we will attach the downloaded Nutanix CE VMDK to.

Finish out the wizard.
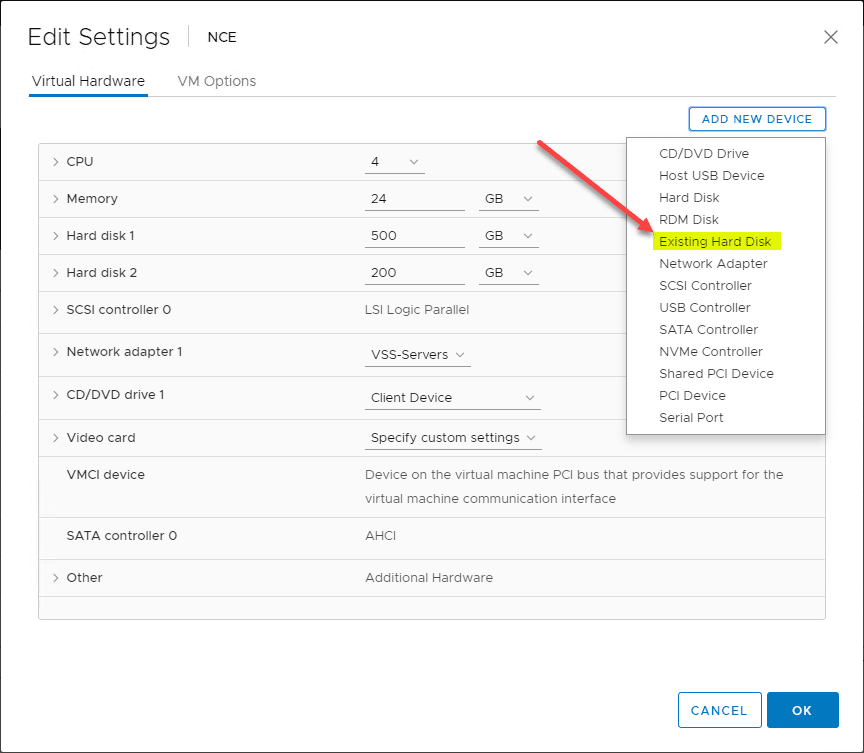
Edit the resulting VM and choose to Add New Device > Existing Hard Disk.
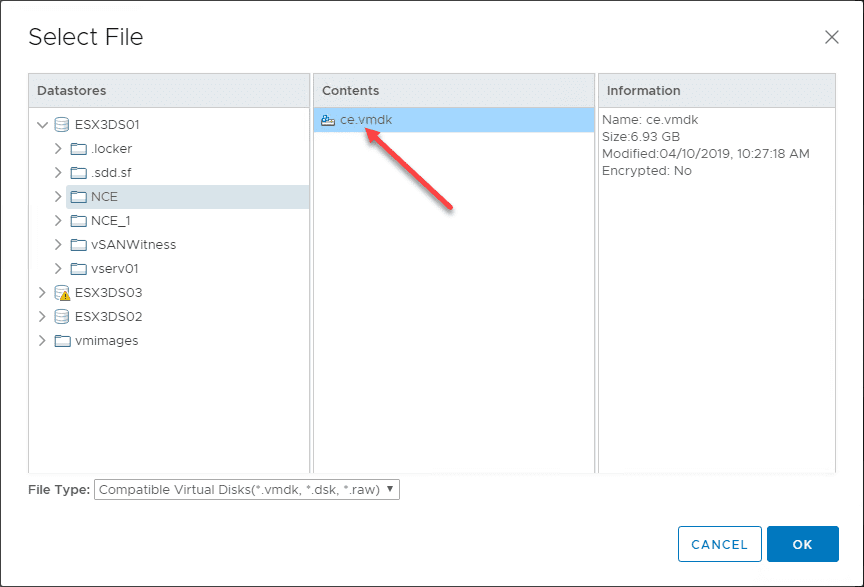
Browse and choose the Nutanix CE VMDK on your datastore.
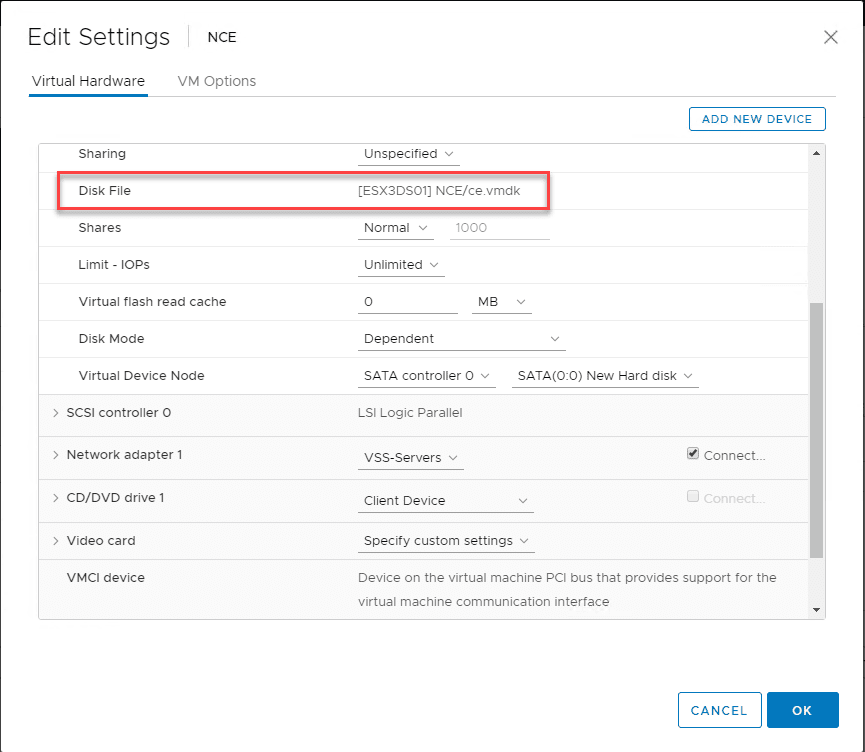
The downloaded Nutanix CE VMDK is now attached to the VM.
In the boot options for the VM, set the boot order to include the SATA Hard Drive first.
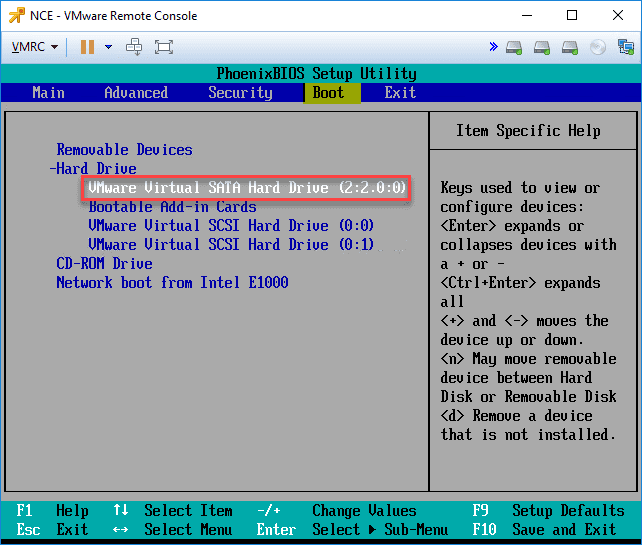
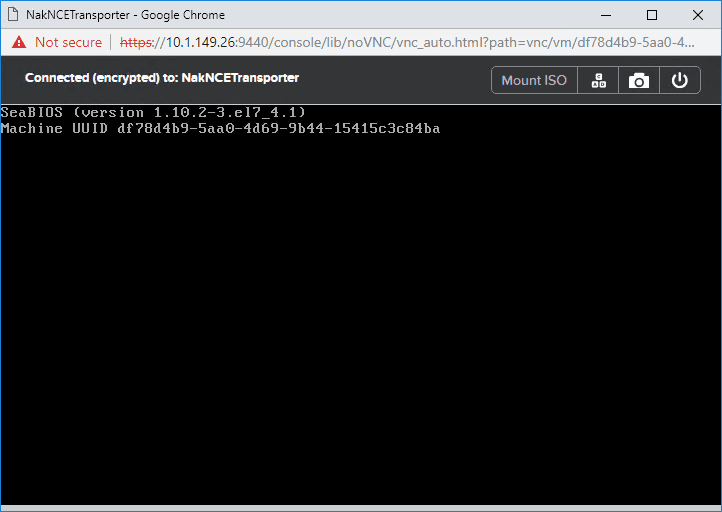
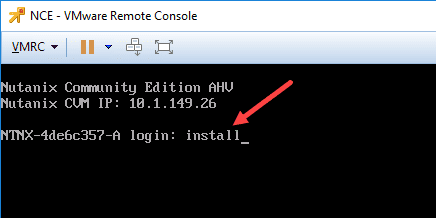
Power on the Nutanix CE VM and you should see the VM boot Nutanix for installation.

Once the VM is booted, on the login screen, enter the install user and hit ENTER. There is no password.
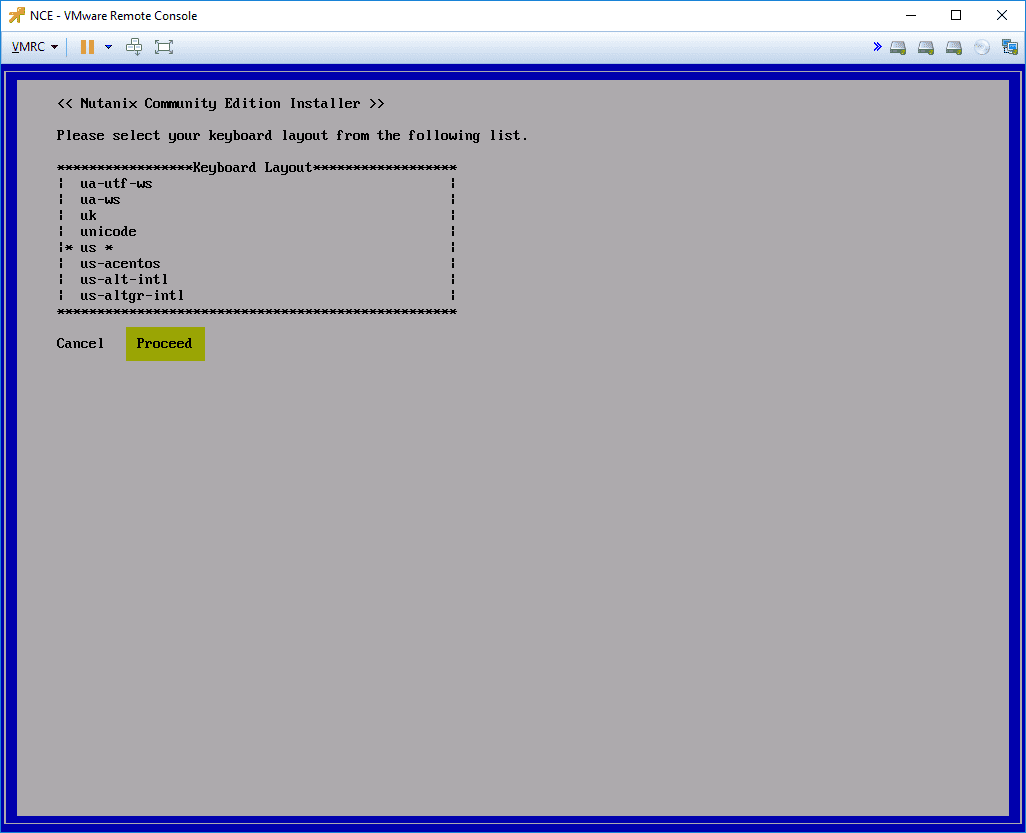
This will launch the Nutanix Community Edition Installer. Choose your location and then choose Proceed.
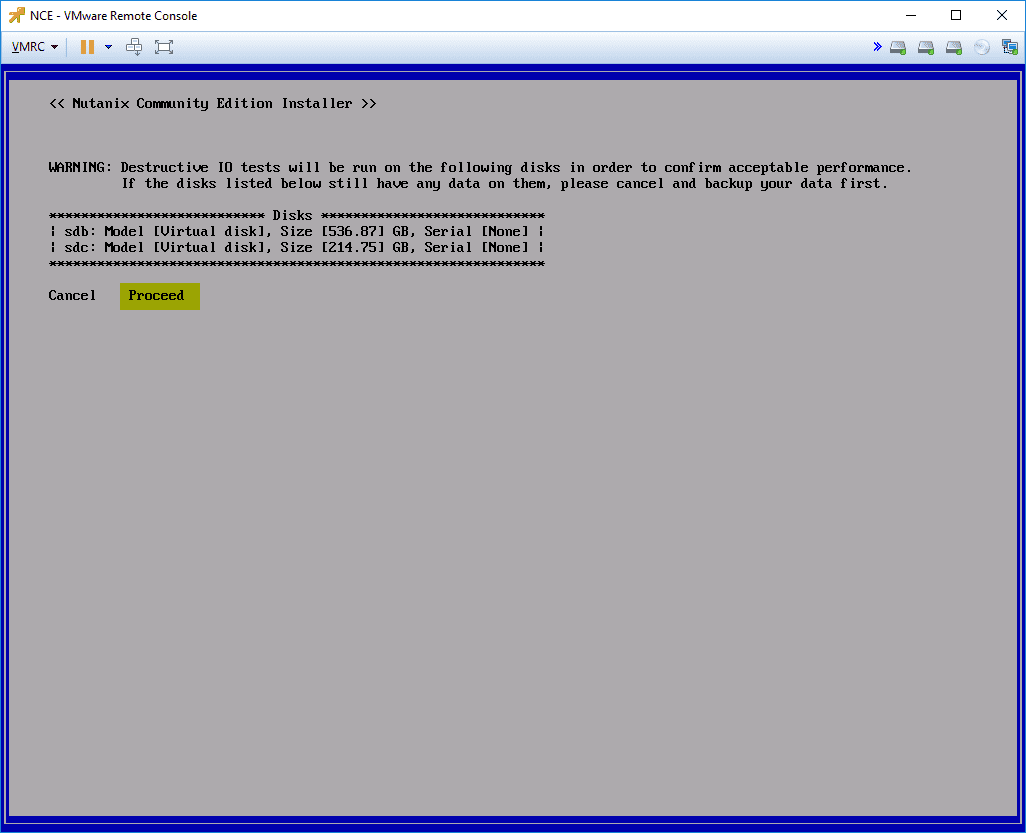
Next, you will be asked to confirm the destructive IO tests on your hard disks.
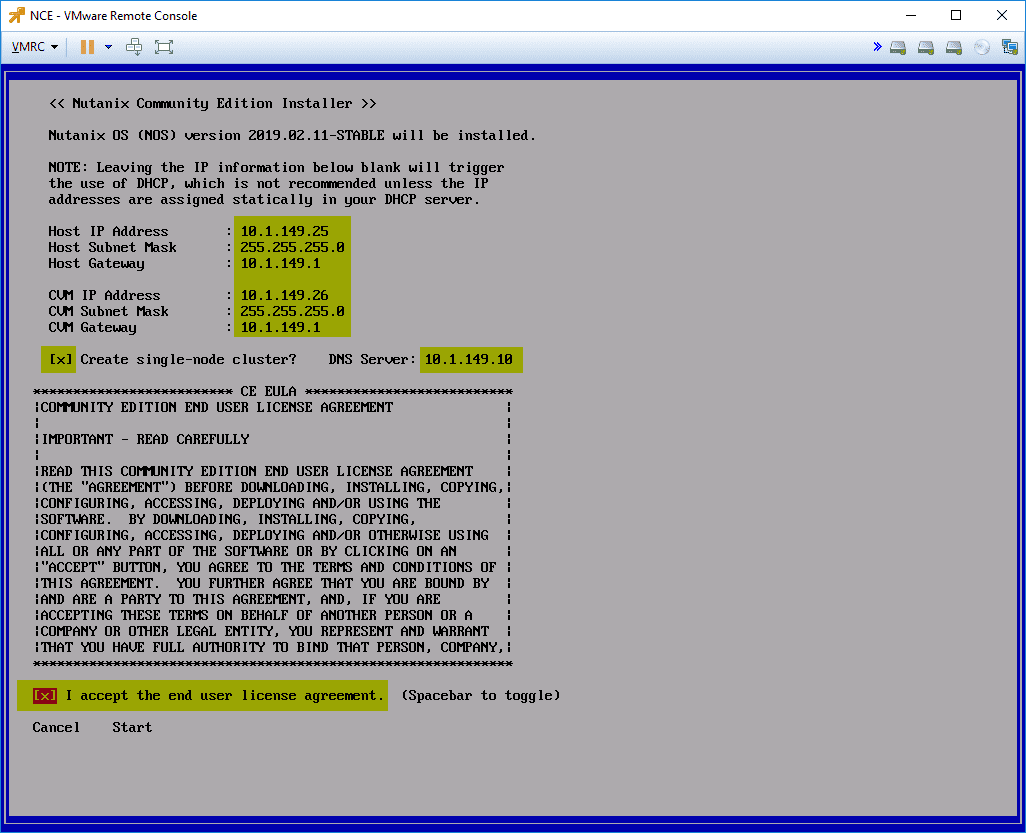
After the IO tests, there are several important network configuration parameters to configure. You will be configuring:
- Nutanix host IP, Subnet, and gateway
- Nutanix CVM IP, Subnet, and gateway
- Create single-node cluster (for testing “cluster” with single node)
- DNS Server
- Accept the EULA
***Note*** if you do not scroll through the EULA, you will see an error after this configuration page that will have you go back to this page and actually scroll through the EULA before accepting. AFter doing that, navigate to Start which will begin the actual installation.
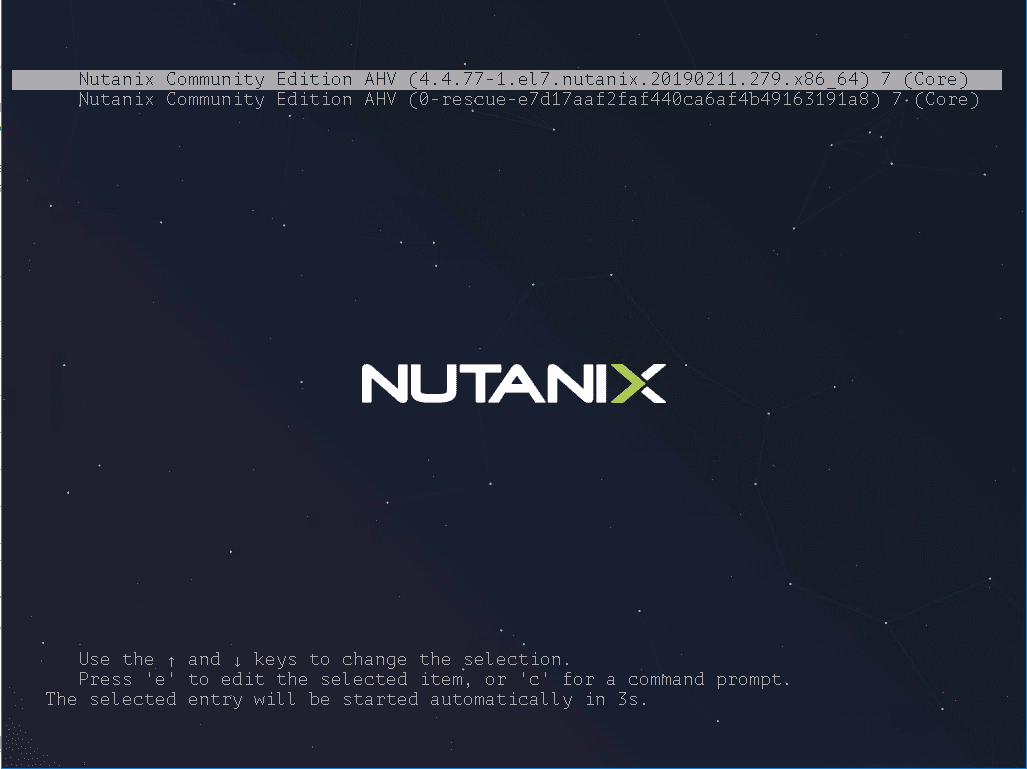
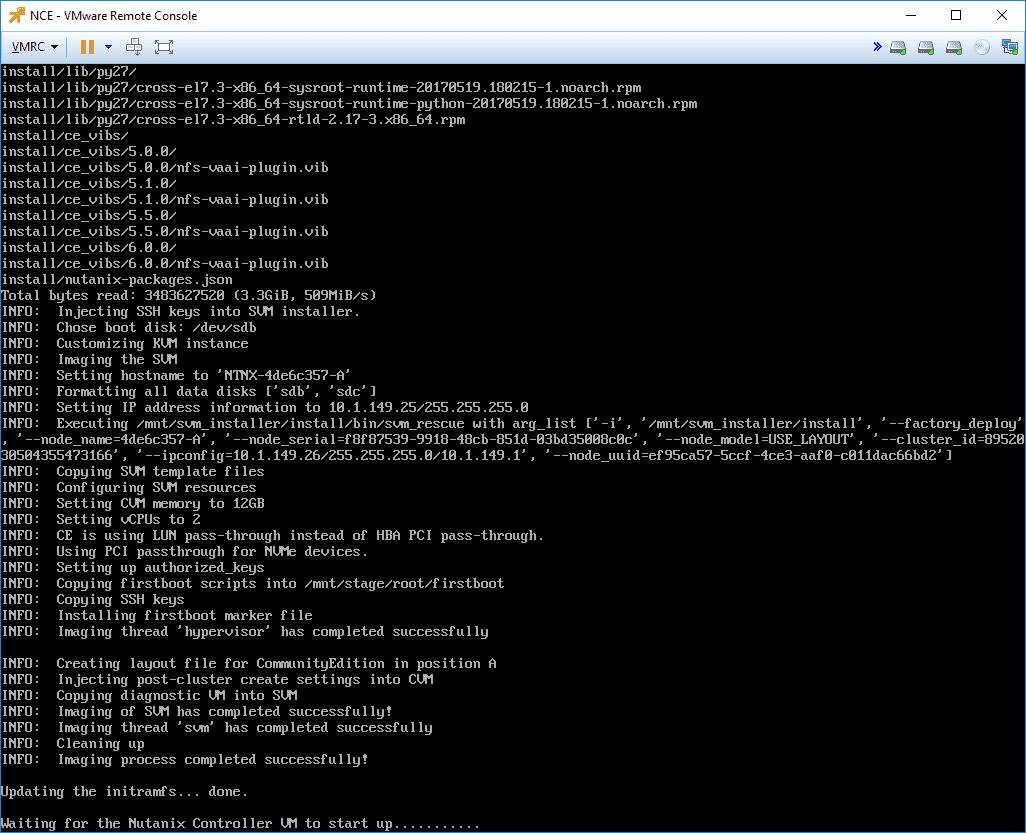
Installation of the Nutanix hypervisor begins.
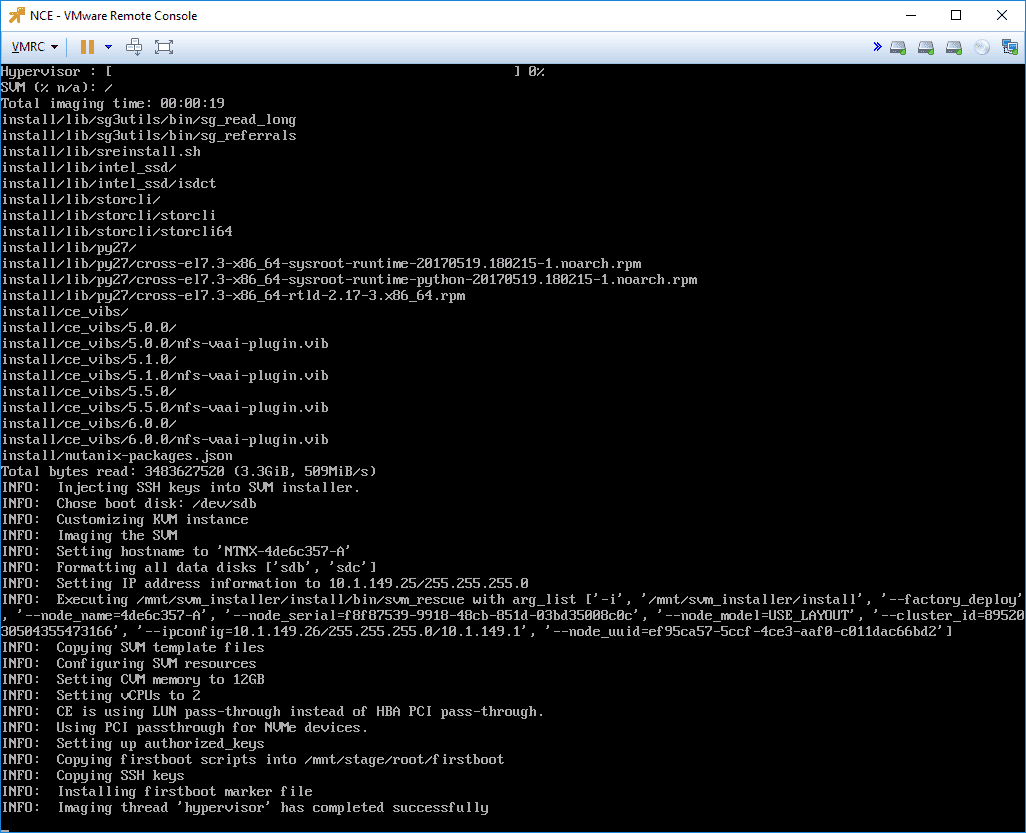
The CVM is provisioned and the installer waits for it to successfully boot.
Logging into Nutanix CE Prism Interface
After the installation finishes, you can browse to the CVM IP address https://<your CVM IP>:9440 and login to the PRISM interface. Default user and password:
- admin
- nutanix/4u
This will immediately prompt you for a password change.
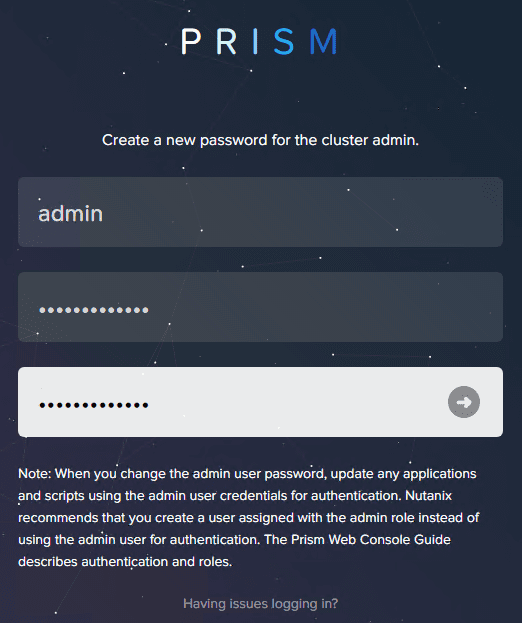
After changing your admin password, login to the interface.

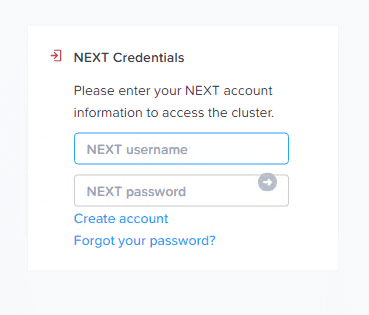
After logging into the main web interface, you will be asked to login to your Nutanix NEXT account. This should be the same account you signed up with to download the Nutanix CE bits.
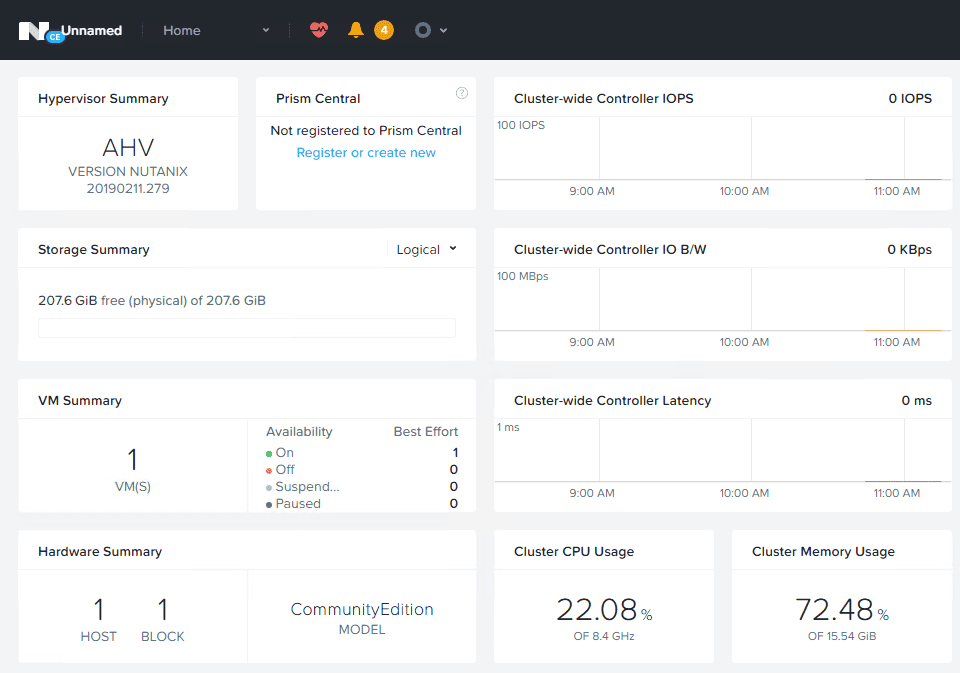
Afterward, you will see your Nutanix CE Prism interface dashboard. Success!
Want to Deploy via OVF?
***Update 4.26.2018 *** A great fellow vExpert and a very sharp guy, Jorge de la Cruz, has a great method of installing the Nutanix Community Edition via a custom OVF template file that he has built. This certainly shortcuts the process of modifying files yourself and streamlines the overall process. Check out his post here.
Concluding Thoughts
As you can see the process to Install Nested Nutanix CE in VMware vSphere ESXi 6.7 Update 1 is a bit lengthy, but straightforward. After downloading and getting the required files, the process basically consists of creating the new VM for Nutanix CE and customizing the hardware appropriately. After that, you then install Nutanix CE. If you want to play around with the Nutanix CE AHV hypervisor and have the space in your home lab or other vSphere environment, this is a great way to see and play around with AHV configuration and features. Stay tuned for more Nutanix CE AHV adventures in the lab.
Run into an issue with your Nutanix CE nested VMs not booting after installing in VMware vSphere? Check out the resolution here: