Verify Hyper-V Backups with NAKIVO Backup and Replication v7.4 Screenshot Verification
Having good backups of production workloads is the cornerstone of disaster recovery. While you can have fancy mechanisms and hardware in place to make sure virtual machines and data are highly available, this still does not protect you from data loss resulting in accidental deletion, malicious or negligent employees or administrators, or even malicious software such as today’s ransomware variants. Hyper-V environments are certainly becoming more numerous in enterprise environments today and are among the enterprise hypervisors running a wide variety of production workloads that need to be protected using today’s data protection solutions. Using a data protection solution that is able to properly backup Hyper-V workloads and protect them properly is crucial for organizations utilizing Hyper-V to ensure business continuity. One of the challenges with disaster recovery however and backups in general is how do you know the backups are “good” and “useable”? It becomes imperative to properly test backups to make sure the data you think that is protected or the virtual machines that are contained in a backup are actually good and can be booted or otherwise accessed once that virtual machine or data is restored. NAKIVO Backup & Replication provides a slick way to quickly and easily verify production backups to ensure those backups are useable called “screenshot verification”. Starting with NAKIVO Backup & Replication v7.4, NAKIVO introduced screenshot verification for Hyper-V. Let’s take a look at how to verify Hyper-V Backups with NAKIVO Backup and Replication v7.4 screenshot verification to see how this process works.
Verify Hyper-V Backups with NAKIVO Backup and Replication v7.4 Screenshot Verification
There are really only a few steps needed to configure screenshot verification for Microsoft Hyper-V. They include the following:
- Add your Hyper-V host or cluster to your NAKIVO Backup & Replication v7.4 inventory
- Configure email connectivity from NAKIVO Backup & Replication to an SMTP server
- Create a Hyper-V backup job
- Configure the screenshot verification option
- Make sure you have email notifications for the job turned on
Connecting NAKIVO Backup & Replication to Hyper-V
NAKIVO allows connecting to either a standalone Hyper-V host or to a Hyper-V failover cluster. Choose the appropriate option for your host or cluster and the connection information.
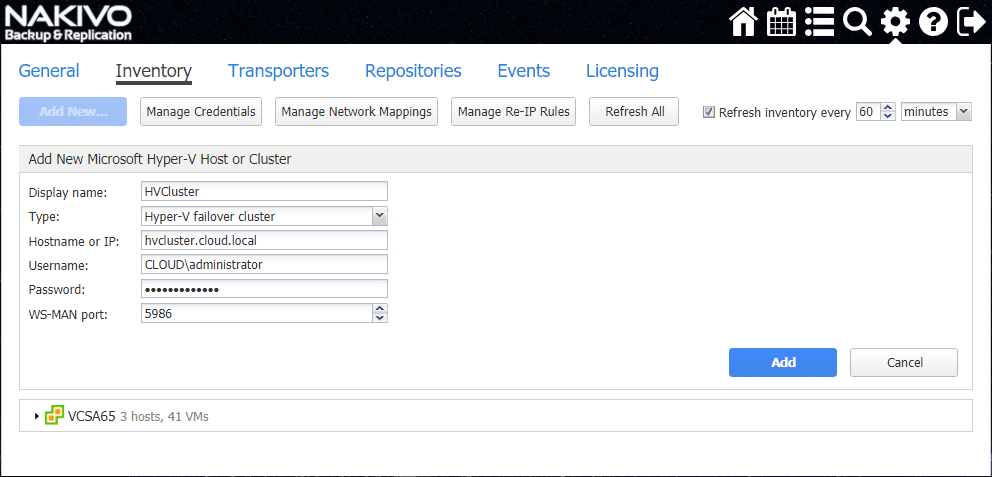
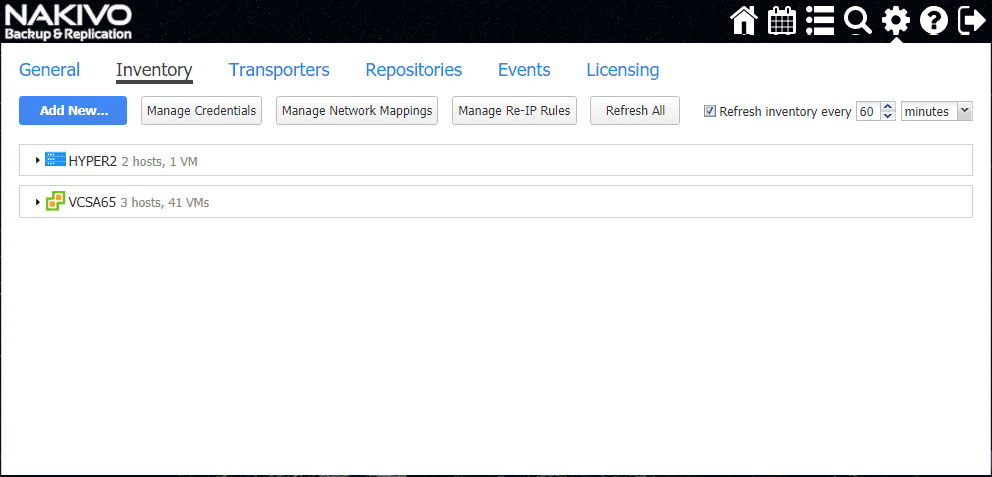
After adding the cluster or the host you will be able to begin the process of creating Hyper-V jobs including backups, replication, failover, etc.
Setting up Email server and configuration
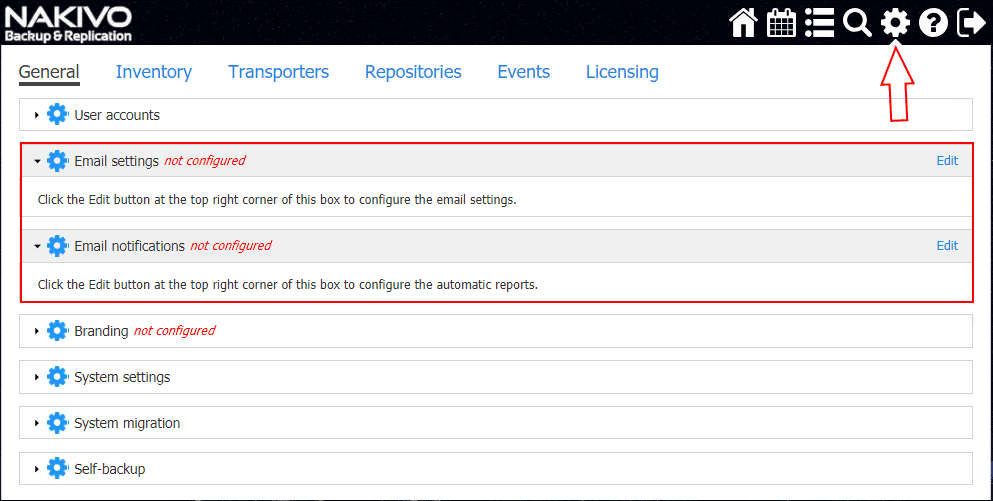
Before creating a job or at any point (makes most sense to configure email before creating and running your jobs) you can configure your email settings. Clicking the configuration “cog” in the upper right hand corner will take you to the General configuration where both Email settings and Email notifications are found. Under Email settings, you configure the connection to the SMTP server you want to use. Email notifications allows choosing a number of options to determine which notifications NAKIVO sends via email and attachment options.
Creating a new Hyper-V backup job with screenshot verification enabled
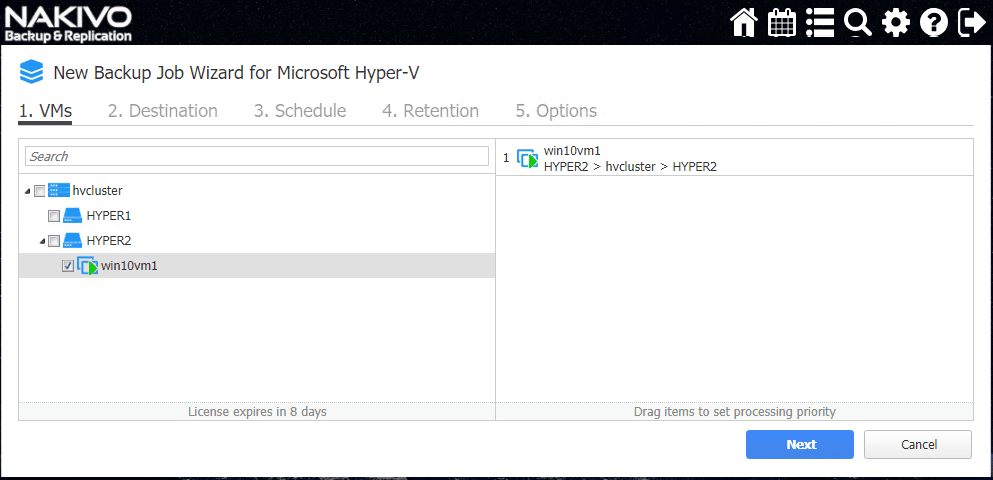
The first step with any kind of backup job with NAKIVO is choosing the virtual machine from inventory you want to backup. Here we are selecting our Hyper-V cluster and the VM we want to backup.
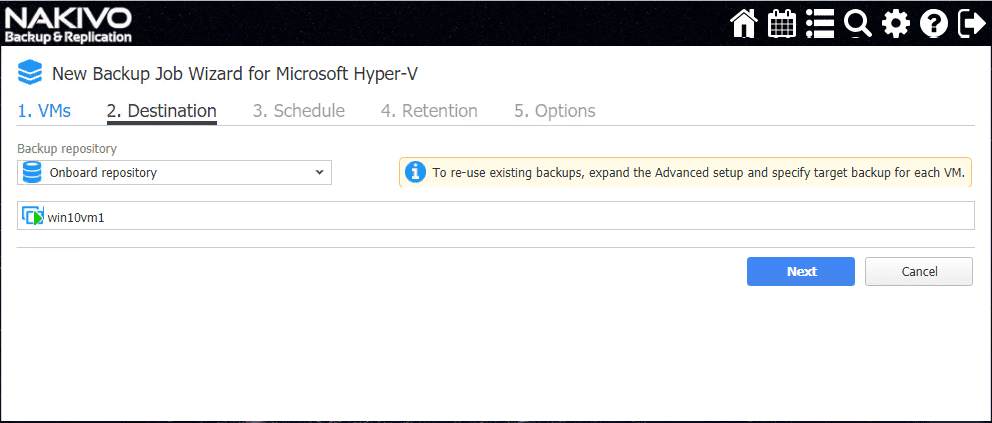
Next, select the destination backup repository for storing the Hyper-V backup.
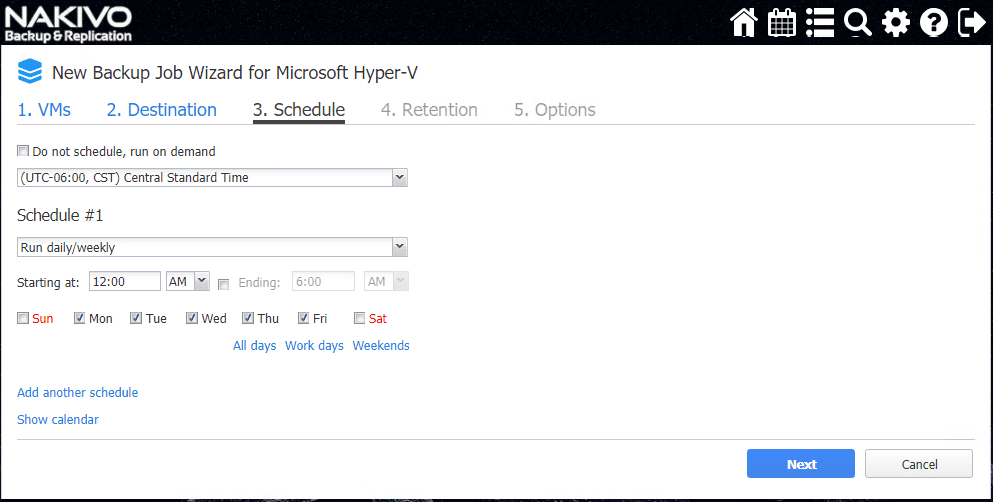
The schedule screen allows configuring the backup schedule including the day(s) and time. Additionally, here you can chain schedules together as well.
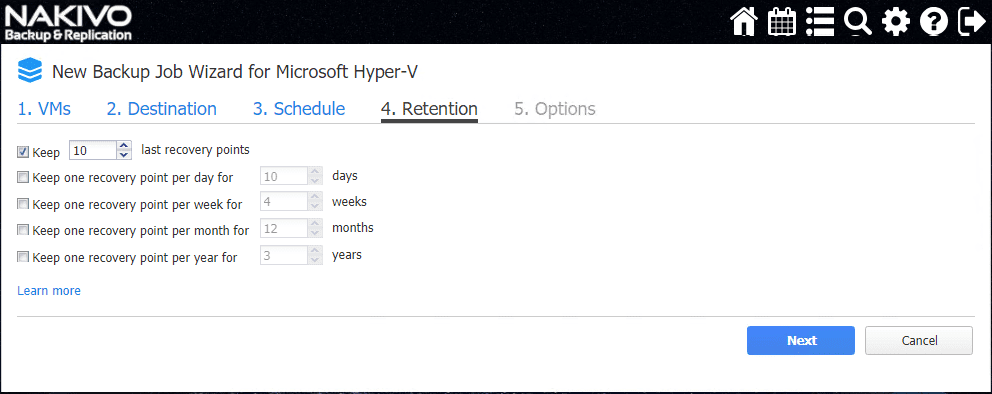
Retention determines the number of recovery points you want to keep before these are pruned off.
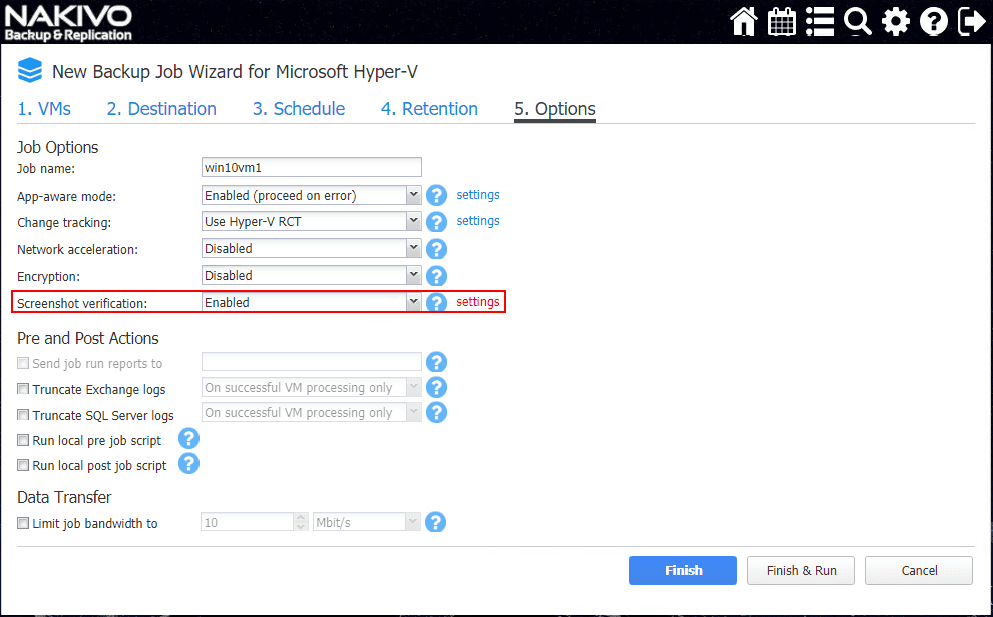
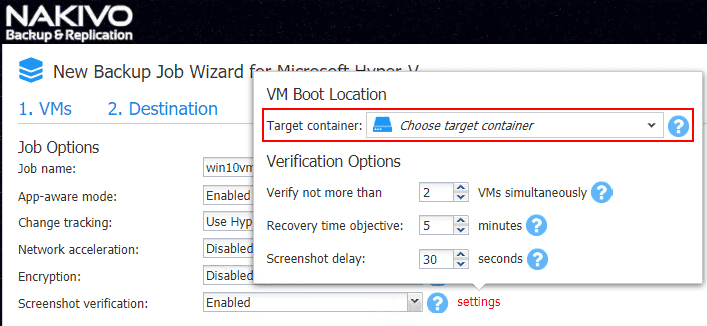
Finally, on the options screen, we arrive at the area that is most interesting to us for the purposes of discussing the screenshot verification functionality. Here you can configure the Screenshot verification dropdown box and set this to Enabled. Note the Settings link next to the box. This allows further configuration options.

Clicking the settings option opens the VM Boot Location dialog box that allows choosing the following:
- Target container – This allows configuring a specific host for the target container for the temporary VM that is created
- Verify not more than VMs simultaneously setting
- Recovery time objective minutes
- Screenshot delay seconds
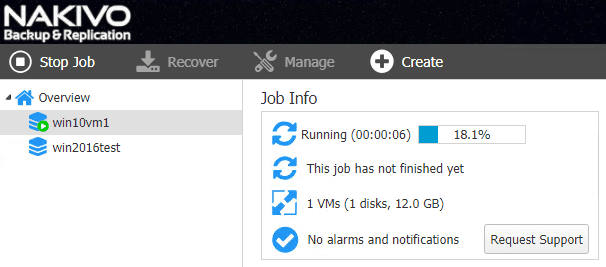
Click to Finish or Finish and Run at the end of the wizard to save the job and run it. Below, we have kicked off the newly created backup job containing the screenshot verification process enabled.
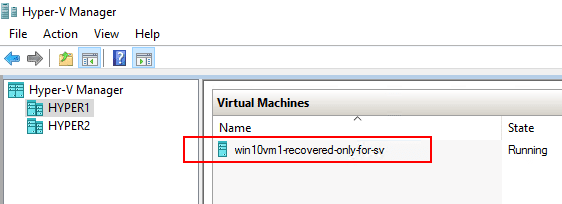
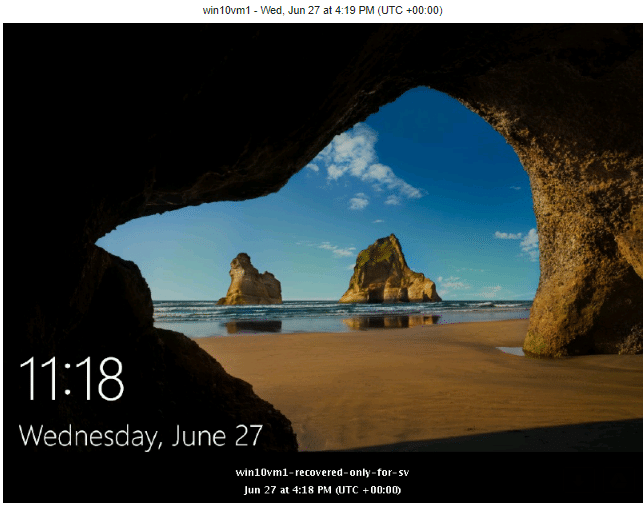
While monitoring the Hyper-V environment, you will see the temporary VM that is created in the target container environment if specified. Note the name below:
- win10vm1-recovered-only-for-sv
You will see this VM get created, powered on and then deleted once the screenshot verification process has completed.
Alas! After only a few simple steps to get our NAKIVO Backup & Replication environment configured correctly, including email configuration, screenshot verification configuration, and general backup configuration, you should receive an email confirmation at the end of the process, including a screenshot of the booted Hyper-V virtual machine. If you click the click to view link, you will see a larger image presented for screenshot verification.
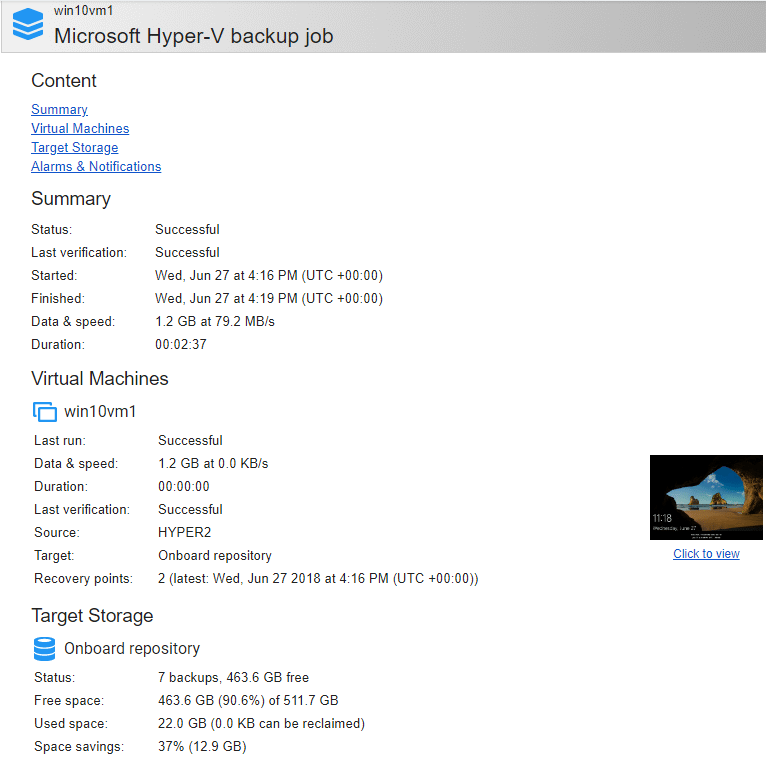
Clicking the link for the larger screenshot that is attached.
Takeaways
Backups are crucial to any disaster recovery and business continuity plan. Backups also augment high availability mechanisms in that it helps to protect not only against hardware failures but also against data loss as a result of user interaction, such as intentional or accidental data deletion, or perhaps data loss as a result of ransomware or other malicious code. However, backups are only as good as their ability to be restored during a disaster recovery. Verifying your backups should be an essential task involved with regular data protection tasks in your environment. NAKIVO Backup & Replication provides a powerful, automated way of doing this effectively by quickly booting virtual machines directly from the backup repository and taking a screenshot of the booted virtual machine once the VM is fully booted. Then, the image and pertinent statistics of the job are emailed out to the administrator. The booted virtual machine is then powered down and removed from the hypervisor environment. This provides proof of the validity and restorability of the backup data in that you have fully tested the data from end to end. By the process to verify Hyper-V Backups with NAKIVO Backup and Replication v7.4 screenshot verification you will have the means to have confidence in the backups you have on disk and you will no longer have the unwanted and disastrous surprise of corrupted backups or virtual machines during a true DR event. Be sure to download and check out NAKIVO Backup & Replication v7.4 by downloading a free trial copy here.


