Disaster recovery is one of those things that no one really wants to think about until they have to. Unfortunately, only thinking about the details of disaster recovery and failover when those events occur leads to much longer RTO’s than properly planning and configuring the data protection infrastructure beforehand. It is often the “little things” that can lead to frustrating delays getting resources back online during a real disaster recovery and failover is network connectivity of failed over virtual machines. Generally speaking, most organizations will not be running a stretched layer 2 network with the same network address space in their DR environments as they are in the production environment. This means that if resources are failed over from production to a DR environment, network connectivity for failed over virtual machines will be disconnected either in the form of virtual network mappings or incorrect IP addresses. With NAKIVO Backup & Replication 7.4, there is a great new feature that greatly extends NAKIVO’s ability to protect organizations in the event of a failover, called Automated VM Failover for VMware and Hyper-V. Let’s take a closer look at Configuring NAKIVO Backup and Replication Automated VM Failover Feature.
Configuring NAKIVO Backup and Replication Automated VM Failover Feature
Configuring NAKIVO Backup and Replication Automated VM Failover Feature goes hand in hand with the NAKIVO Replication job. Once a NAKIVO Replication job is created, you have the ability to create the new VM Failover to Replica job. In the example below, we are using a VMware vSphere 6.5 environment to illustrate how easy it is to setup the new Automated VM Failover job.
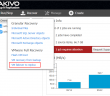
Let’s get started creating a new Replication Job for VMware to see how the configuration process works. When you choose to create a new Replication Job, the New Replication Job for VMware kicks off. The first order of business is selecting the VM you wish to replicate to your secondary/DR environment.
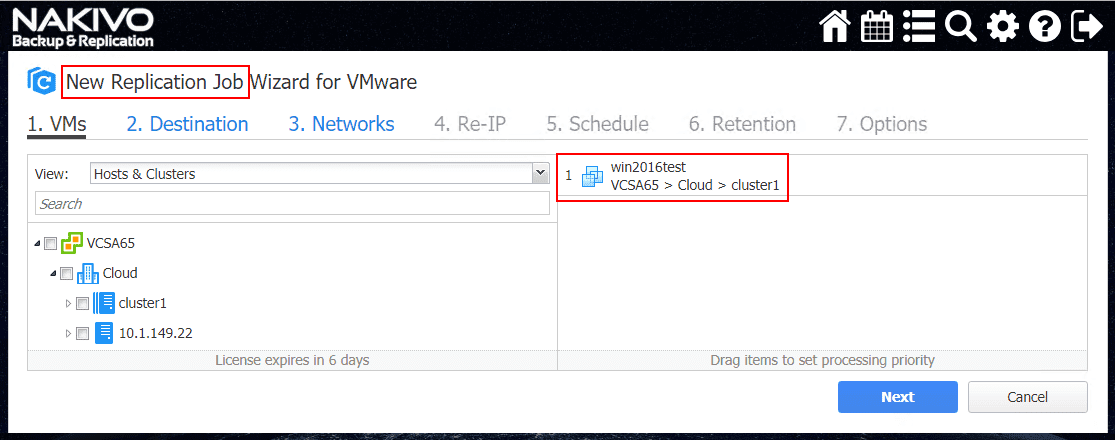
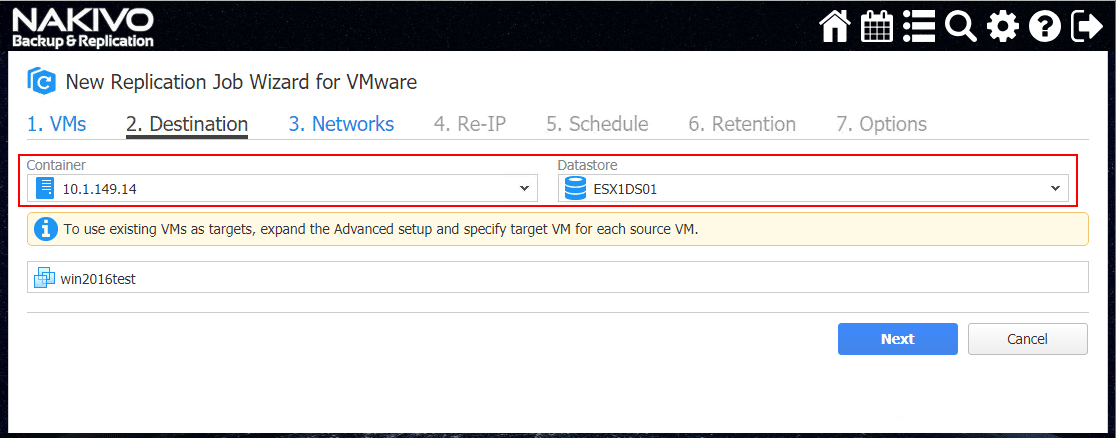
The next step is to choose the Destination for the Replication Job. Here you select the destination container and datastore. This can be a cluster or a specific host if you want. Additionally, the datastore dropdown should display the available datastores the select host or cluster has access to.
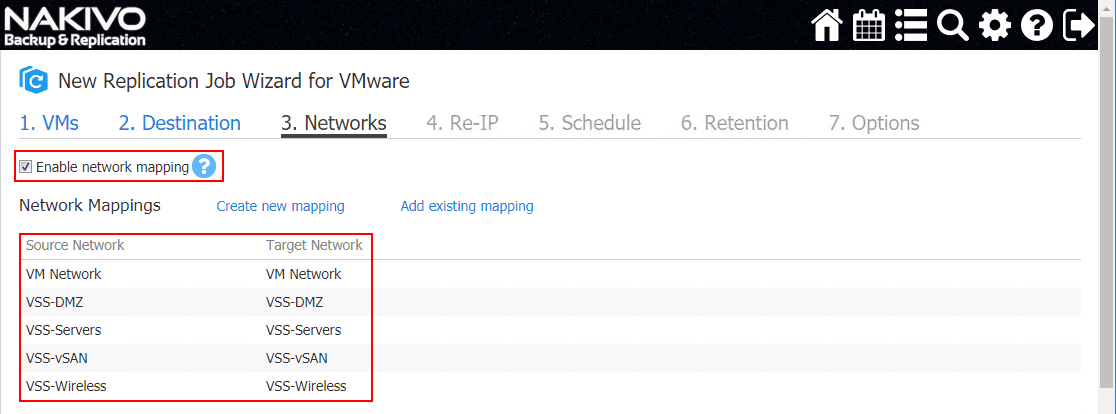
On step 3, Networks, we start getting into the new magic with the Automated VM Failover capabilities in NAKIVO Backup & Replication v7.4. The VM Networks that exist in production may not exist in the DR environment. The Enable network mapping checkbox allows “mapping” a source network to a “target network”. This means that if the replication job translates the source to destination networks and is able to configure the resulting VM with the target network configuration.
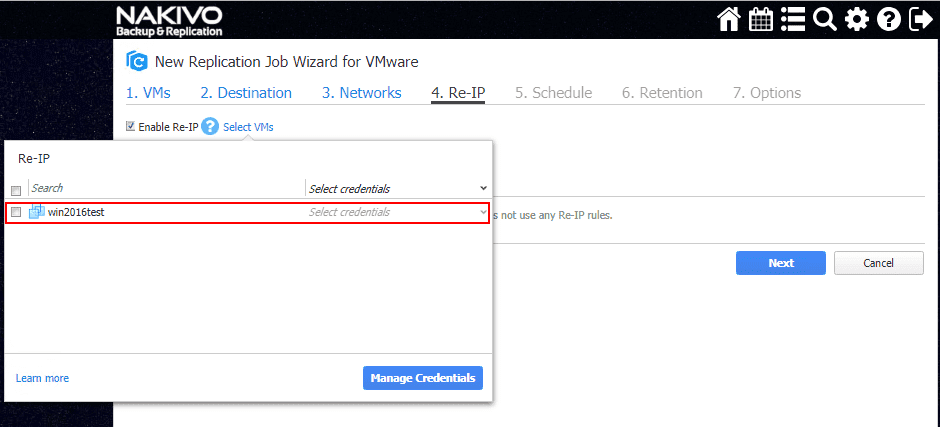
More Automated VM failover logic is contained in Step 4, Re-IP. If you select the Enable Re-IP checkbox, you will be able to see the virtual machine you select as the source for the replication job along with the Select credentials dropdown box. To perform the Re-IP operation, NAKIVO Backup & Replication needs to have guest operating system access. The Manage Credentials dialog box allows you to add credentials to specific virtual machines if you don’t have this configured already.
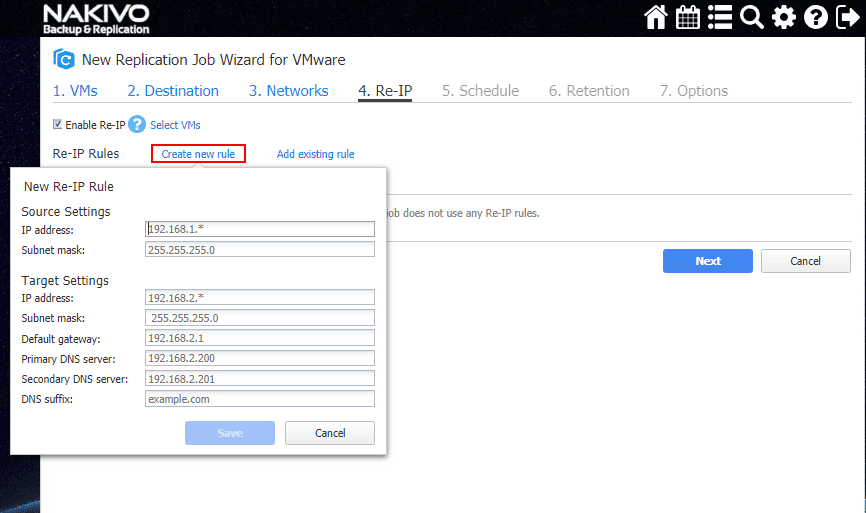
On the same screen, Re-IP, you can Create new rule for Re-IP that allows specifying the Source Settings to tell NAKIVO how you want the virtual machine’s IP address to be changed, and what you want it changed to. You can be specific here or use wildcards as shown in the box NAKIVO uses as an example
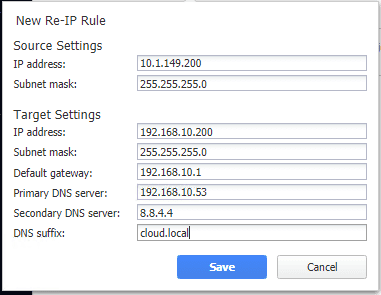
Below is an example of creating a specific New Re-IP Rule for Re-IP’ing network settings to the target network infrastructure configuration.
On the options screen, you can setup a number of very powerful features and options including:
- App-aware mode
- Change tracking
- Network Acceleration
- Transport mode
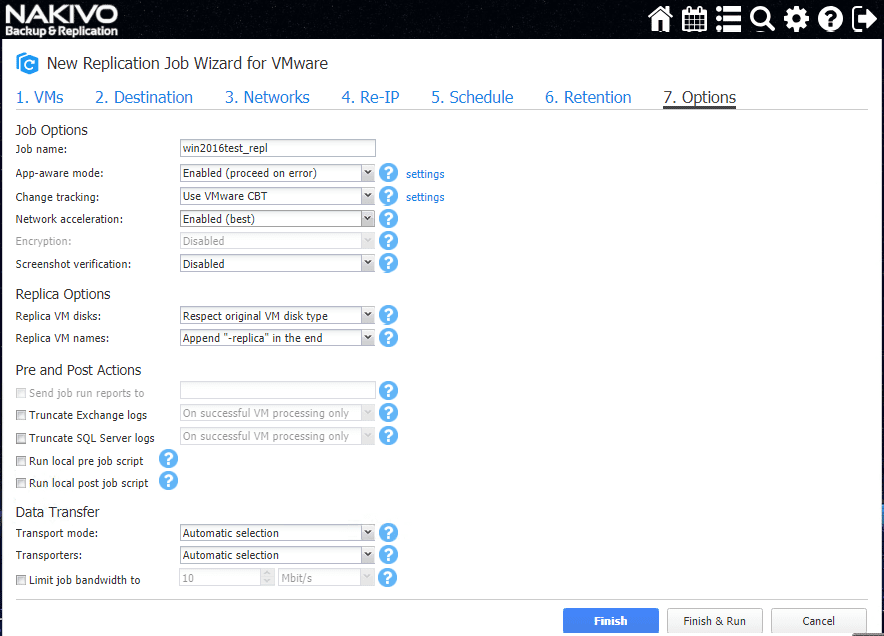
After configuring the final options, either select the Finish or the Finish & Run buttons to save the changes or save the changes AND run the initial replication.
Creating a NAKIVO VM Failover to Replica Job
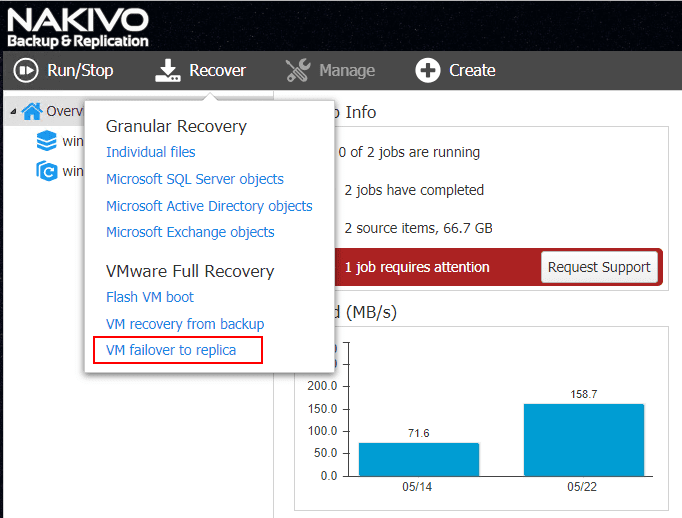
The next part of the process after you have created the VMware vSphere Replication job(s) is to create the VM Failover to replica job. This is found under the Recover menu.
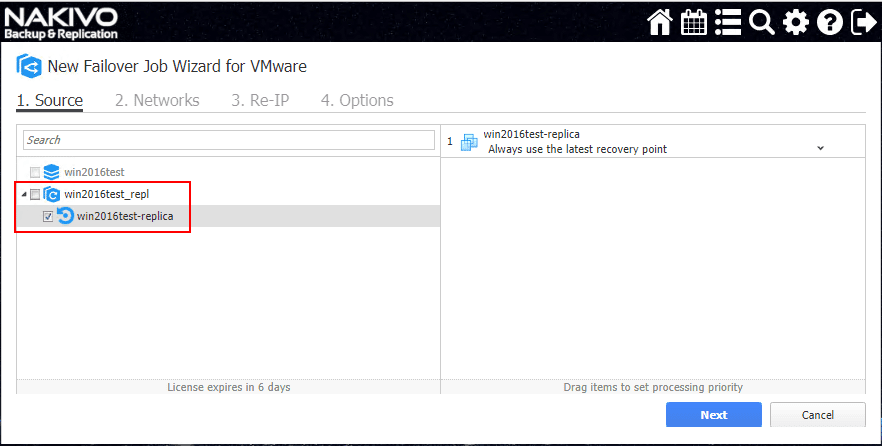
The New Failover Job Wizard for VMware launches. Here you can select the VMware vSphere replication jobs. As a note here, you can include multiple VM replicas in an Automated Failover job. This allows quicking and efficiently failing over multiple virtual machines with a few clicks. This also allows for interesting possibilities for managing a DR failover so that groups of essential infrastructure virtual machines can be failed over in the necessary groupings and order.
You will find on step 2 Networks screen for the New Failover Job Wizard, we have the ability to here either create or tweak the network mappings.

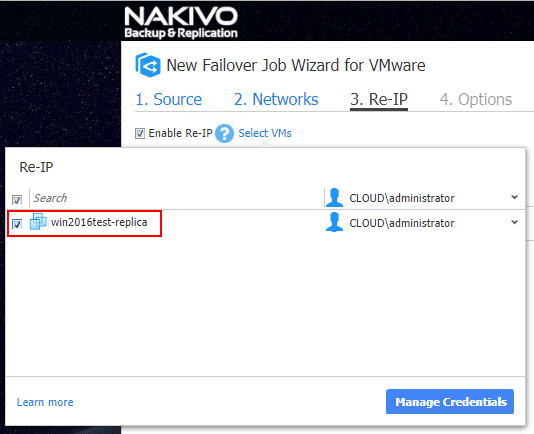
Below, on the Step 3 Re-IP screen, you will see the existing Re-IP rules and also have the ability to create a new Re-IP rule.
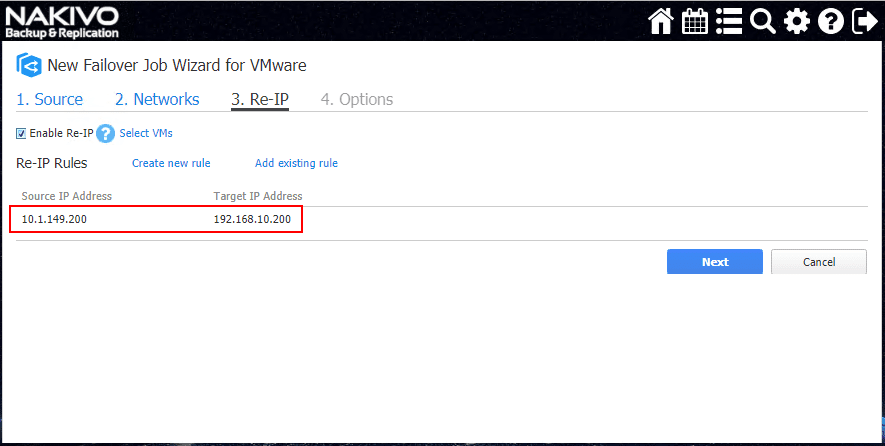
If you click the Select VMs link, you can select the VMs to include in the Re-IP rules for the Automated VM Failover job.
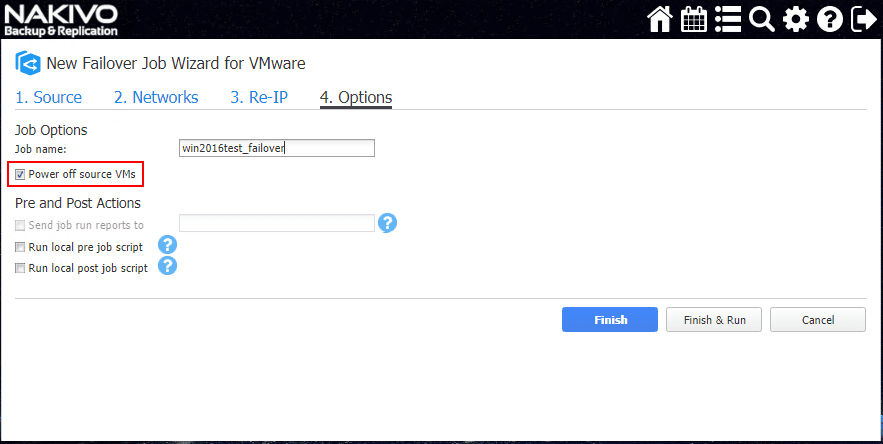
On the last Options screen, you can name the job as well as choose whether or not to Power off source VMs as well as run any pre or post job scripts.
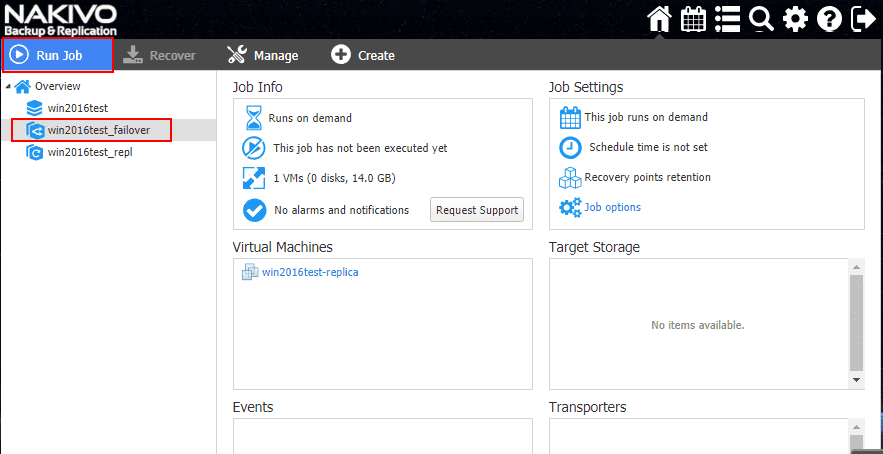
The new failover job is found in the list of jobs. Performing the automated VM failover is as simple as clicking the job and selecting the Run Job option.
Takeaways
Nakivo Backup & Replication v7.4 takes disaster recovery and automation to the next level for NAKIVO and definitely allows NAKIVO to level the playing field with competitors in this space. NAKIVO’s interface is one of the simplest and most intuitive interfaces in the market and has always been an extremely strong advantage when compared to competitors. Following suit with the overall interface experience, Configuring NAKIVO Backup and Replication Automated VM Failover Feature is equally easy and intuitive. By simply creating the VM replication jobs and then adding these jobs into Automated VM Failover jobs, you effectively have a “push button” approach to failing over multiple VMs effectively.
Google is updating how articles are shown. Don’t miss our leading home lab and tech content, written by humans, by setting Virtualization Howto as a preferred source.
About The Author