One of the especially tricky things that you have to deal with when thinking about a DR situation where you have a failover to another location is network connectivity. This comes into play especially with legacy applications that may have hard coded IP addresses or legacy server resources that have IP addresses that may not be that easy to change. Thinking about extending layer 2 network segments make most network engineer’s skin crawl. Granted it is much better to design applications in such a way where things like network addressing is irrelevant. However, as mentioned many enterprises are still dealing with legacy applications that are business critical and must be supported. We can however extend layer 2 DR network with VMware NSX so that legacy resources can be spun up in a DR facility and brought back online using the production site network subnet. To do this we can use a logical switch as well as a layer 2 bridge to extend both an address range and a layer 2 network.
Extend layer 2 DR network with VMware NSX
So we have talked about the reasons for wanting to extend a network for DR (disaster recovery) purposes, but we haven’t really talked about the “how”. Over the years there have been a lot of mechanisms using routers and other VPN type technology to extend layer 2 networks over layer 3 – L2TPv3, OTV, etc. However, these require a lot of configuration/reconfiguration from a physical network infrastructure perspective. In today’s world, those types of changes are simply not that feasible especially with a network that is in production. One of the great benefits of virtualized resources is the layer of abstraction they provide. Using VMware NSX VXLAN technology allows the network to be abstracted from the physical network infrastructure. Let’s see how we can setup a logical switch and a layer 2 bridge to accomplish this.
Setting up VMware NSX Logical Switches
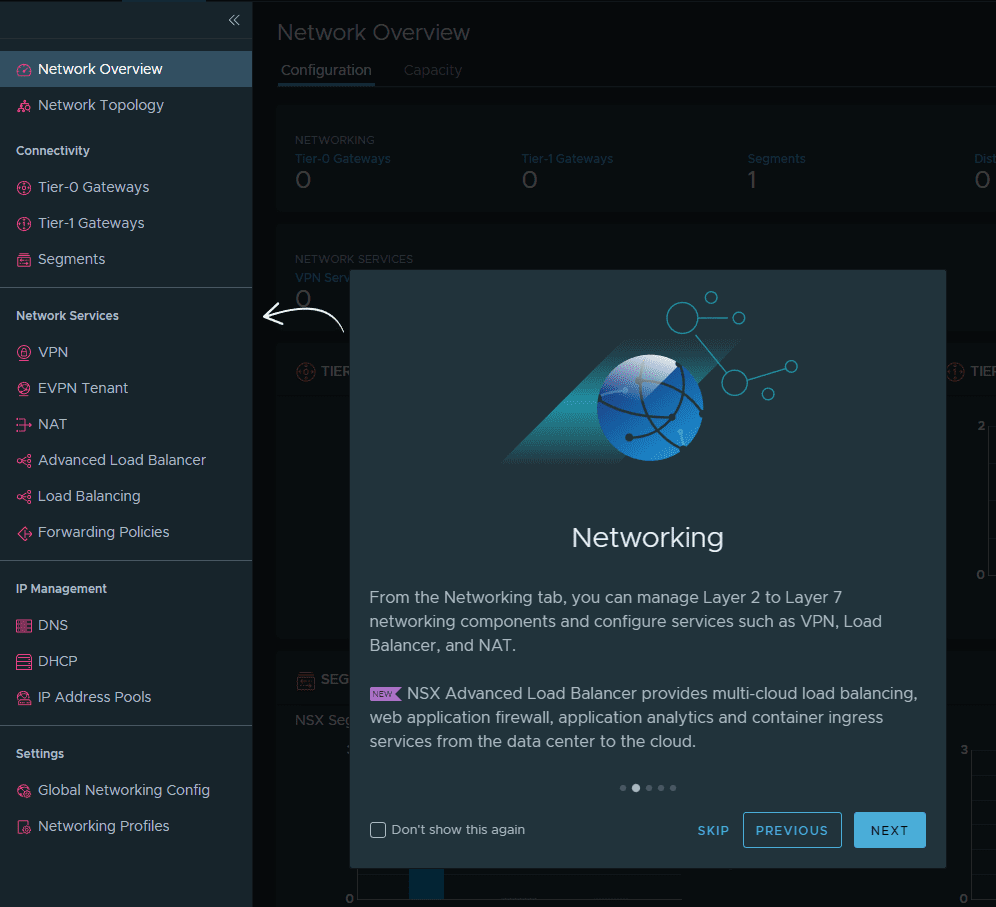
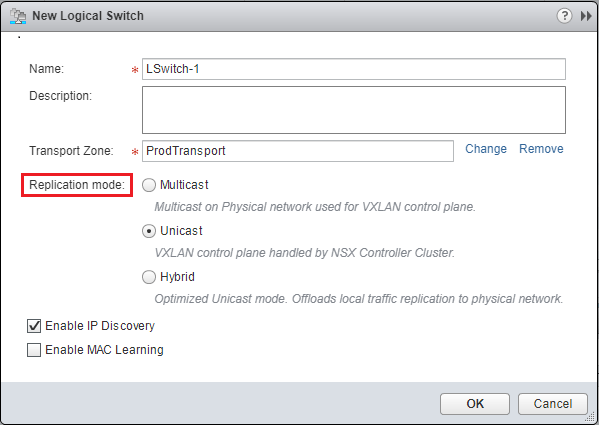
The logical switch is VMware’s implementation of VXLAN. This is an isolated network that can span multiple hosts, clusters, etc. However, we need a way to get that traffic out of the logical switch. We can do that with a distributed logical router, etc. First, to setup a logical switch, we navigate to Networking & Security >> Logical Switches. We hit the green “+” sign to create a new Logical Switch. We choose the replication mode which by default is set to Unicast. This is the mode that requires no reconfiguration of the physical network such as IGMP snooping. It is however the least efficient as well.
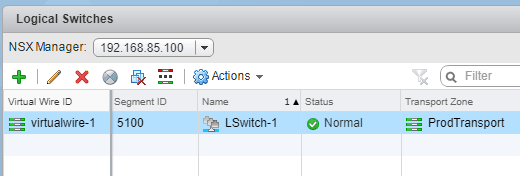
After creating the switch we see the new Logical Switch notated as virtualwire-1. We see our friendly name however under the Name column along with the status and transport zone, etc.
Deploying Distributed Logical Router
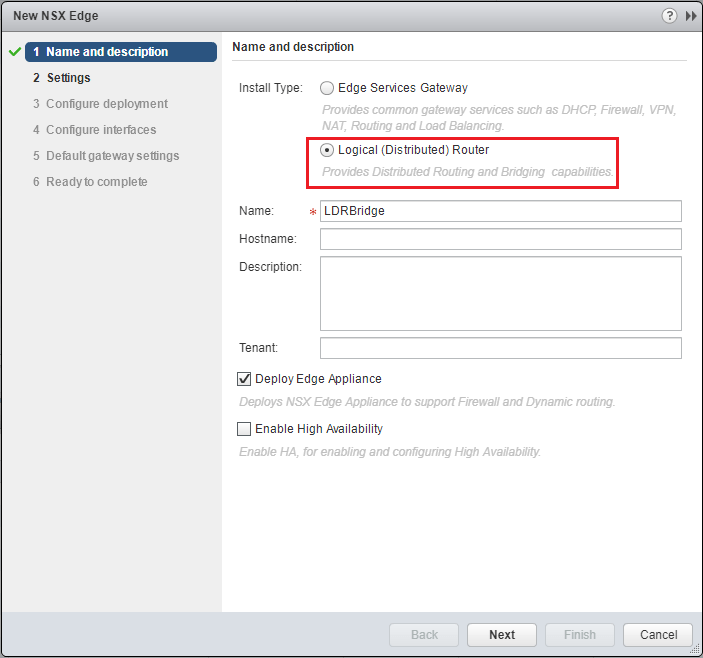
To setup the Distributed Logical Router layer 2 Bridge, we navigate to the Networking & Security >> NSX Edges section. Hit the green “+” to create a new Distributed Logical Router. Here we select Logical (Distributed) Router and give it a name. We need to deploy Edge Appliance as well. If you uncheck this option, when you create the Bridge, you will get the error that Bridging is only available when an NSX Edge is deployed.
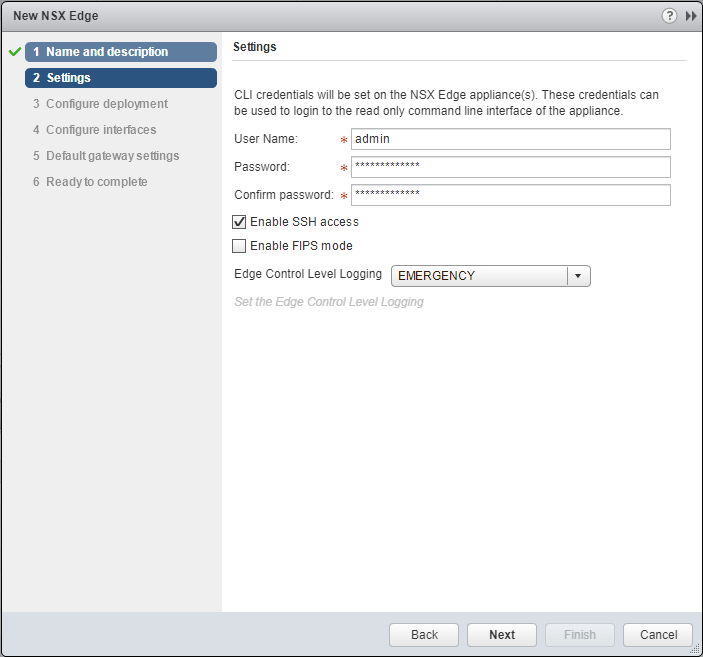
We set the CLI username and password, SSH access options, logging, etc.
Next, we actually deploy our NSX Edge appliance. Click the green “+” sign.
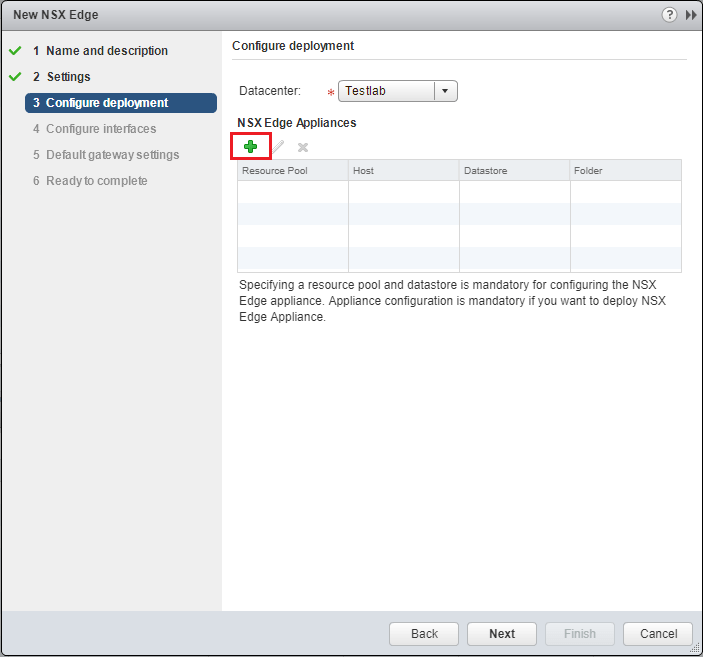
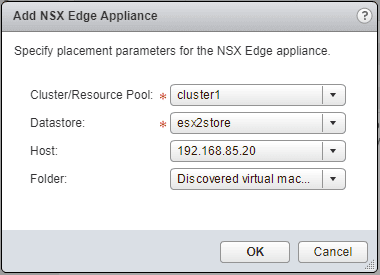
We are asked to configure the placement parameters for the NSX Edge appliance. The only two options that are required are the Cluster/Resource Pool and Datastore.
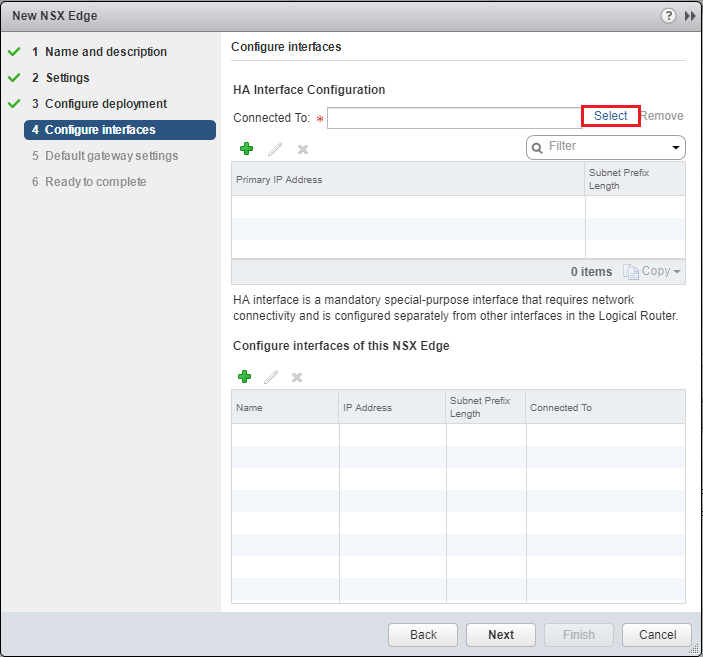
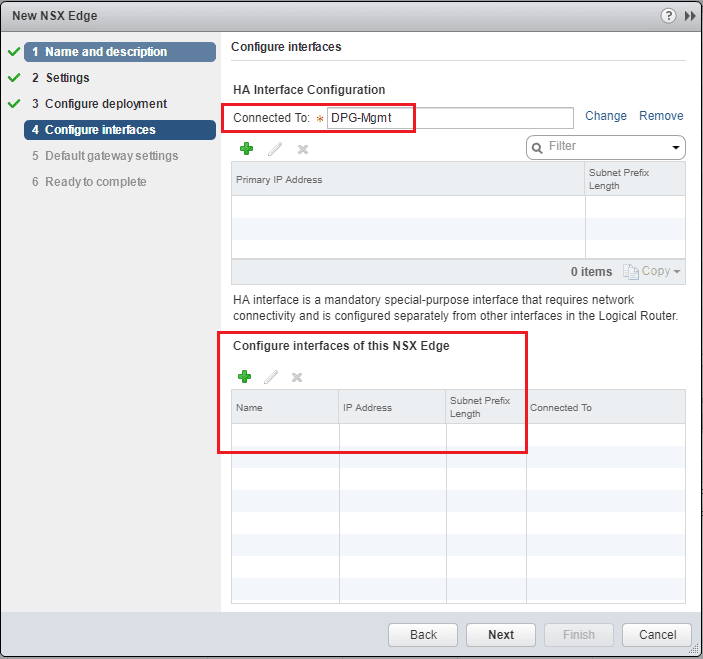
Next, we select the management interface port group. Click the Select link.
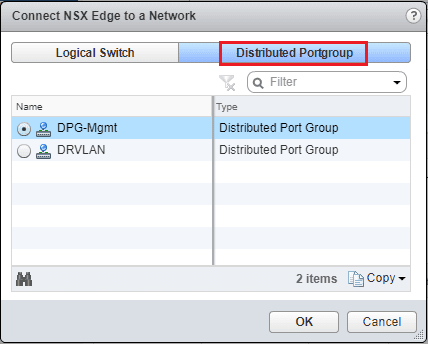
Here I am selecting a Distributed Portgroup option and choosing the DPG-Mgmt port group.
Note how for the layer 2 bridge we can simply leave the interfaces of this NSX Edge unconfigured. We don’t need any interfaces since we are simply bridging our VXLAN with our VLAN.
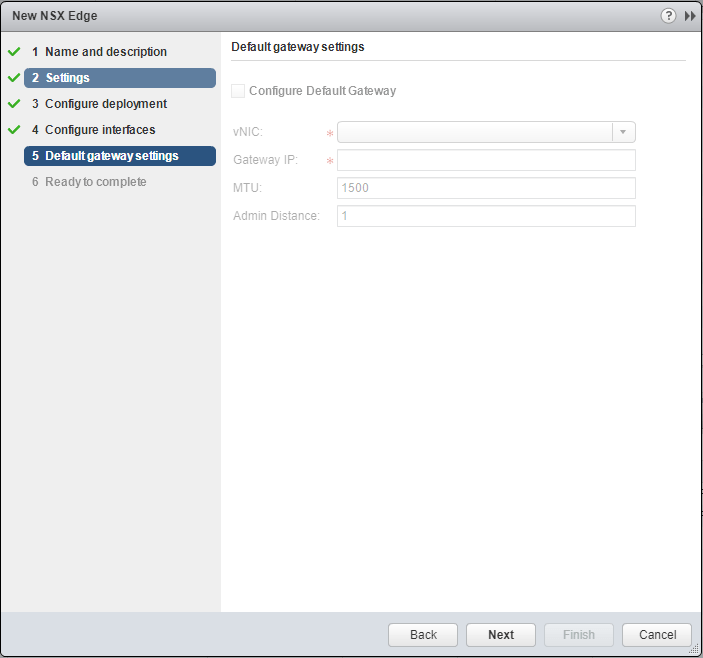
Since we don’t have any interfaces our Default gateway settings are greyed out. We can simply move on to the final screen.
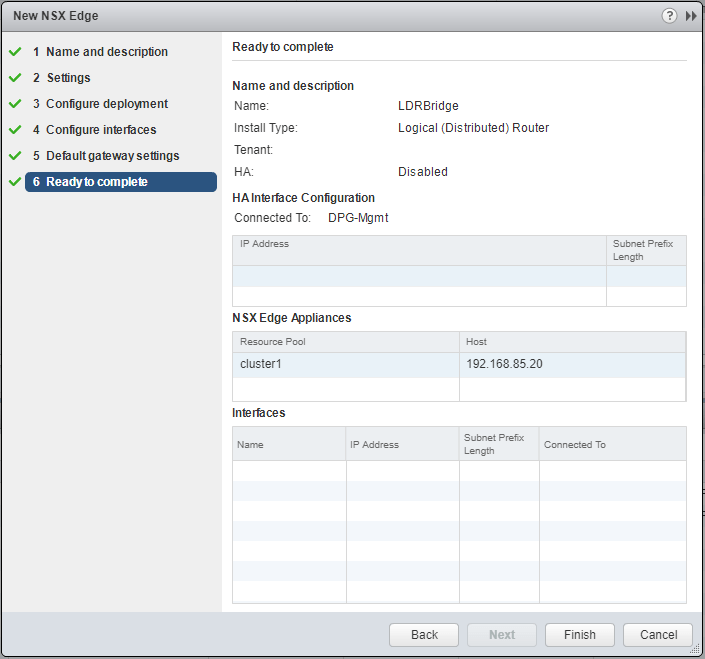
Ready to deploy our Edge appliance.
Configuring the Layer 2 Bridge
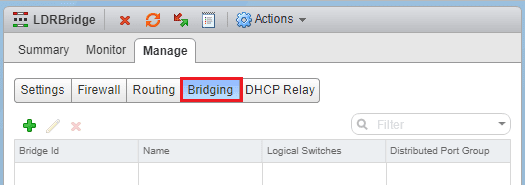
Now that we have our NSX Edge configured. We go back to the Networking & Security >> NSX Edges and double click on our newly configured DLR. Click on the Manage tab and then click Bridging. Click the green “+” sign to add a new Bridge.
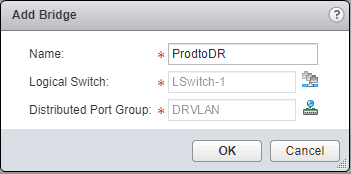
The Add Bridge dialog opens. Choose a name for the bridge and we also are required to choose a Logical Switch and a Distributed Port Group. The Logical Switch would be our VXLAN network and our Distributed Port Group represents our VLAN backed network.

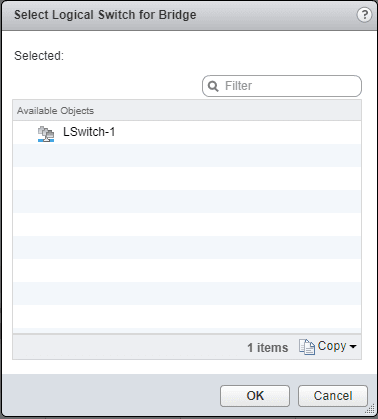
We click the little port icons next to the Logical Switch box and we are presented with our logical switches to choose for the bridge. Here I only have one logical switch configured for the bridge.
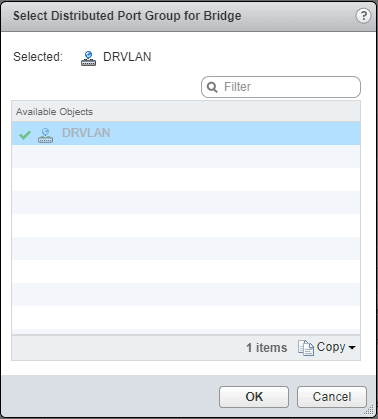
Next, we select the Distributed Port Group for the VLAN side. A note here, you have to have a Ditstributed port group that is VLAN backed with a VLAN configured. If you don’t, it will not be listed here.
After selecting both networks, we should see both populated.
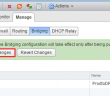
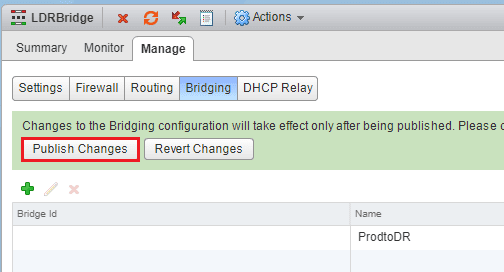
After configuring our bridge, we select to Publish Changes.
Testing our DR to Production Layer 2 Bridge
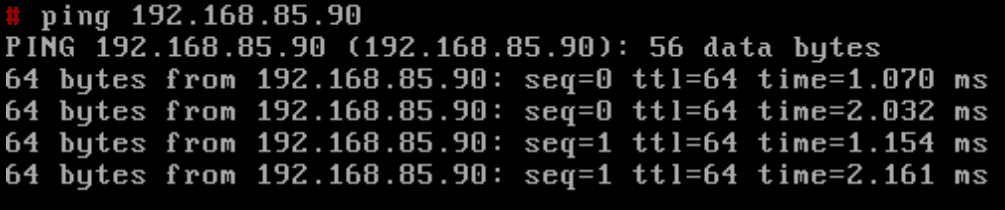
In the lab, I have a separate vSphere cluster configured in a different layer 2 network. I have two small linux appliances. The ping below is from a test VM on a server logical switch VXLAN which is configured with a 192.168.85.0/24 address. The DR environment is routed across from the production cluster and is sitting on a 10.1.85.0/24 address space. I have a test VM on a DR VLAN that I assigned the same address space as production. As you can see from either side I can ping the address space.
A few notes about the Layer 2 Bridge functionality:
- This should not really be used for a permanent traffic solution. The Layer 2 bridge would be useful during migrations, or in a DR scenario as shown if Layer 2 functionality is needed.
- Expect a performance impact with a layer 2 bridge as the functionality is not distributed. It ultimately relies on a single host and would have a single host’s worth connectivity.
Thoughts
We have seen how we can extend layer 2 DR network with VMware NSX and effectively present the same subnet for connectivity at a different location to production. Keep in mind there are certain limitations with performance, bandwidth, etc when using layer 2 bridges and they shouldn’t be employed long term. However, the flexibility that VMware NSX gives customers to much more easily move network spaces around can certainly pay dividends in many scenarios such as DR.
Google is updating how articles are shown. Don’t miss our leading home lab and tech content, written by humans, by setting Virtualization Howto as a preferred source.
About The Author