We have already looked at installing Ansible Tower for GUI administration of Ansible which we will go back to. I want to back up a little bit and cover working with Ansible from the command line, showing how easy it is to automate Windows configuration without much effort. Ansible is a great platform to learn for automation and has much adoption among enterprise and datacenter environments throughout. In 2018, one of my goals is to learn more automation and working with the various platforms that are available out there is a great way to get started. Let’s see some Basic Windows Server Automation with Ansible and how easy this is to accomplish with our Ansible control server.
Basic Windows Server Automation with Ansible
For my Ansible control server, I am simply using a standard Ubuntu 16.04 server. The control server is where we will run our modules, playbooks, tasks, etc from using Ansible. For home lab purposes, it is the same server that I have Ansible Tower installed on. We simply need to install a few little tools to get up and running with Ansible. Since I am using my Tower server, I didn’t have to install ansible as this is part of the Tower install, however, I will walk through the easy step of getting Ansible installed.
Prerequisites:
- First things first, get your Ubuntu server updated with the latest and greatest patches.
- Install pip
- Install pywinrm
- Install ansible
Installing PIP in Ubuntu
What is PIP? It is an alternate installer for python packages that many use in managing python related package activities. Installing PIP in Ubuntu:
sudo apt-get install python-pip python-dev build-essential
sudo pip install --upgrade pip
Installing Pywinrm in Ubuntu
The Pywinrm module is what allows ansible to interact with WinRM in Windows. To get the Pywinrm module installed after you have installed pip, run the following:
sudo pip install pywinrm
Installing Ansible in Ubuntu
After you have the above two packages installed, let’s install ansible itself. This is another easy install that takes just a few seconds:
sudo pip install ansible
You can check the version of ansible installed by the following:
ansible --version
After ansible is installed on our control box, we are ready to start interacting with a Windows server.
Windows WinRM configuration
WinRM connectivity can get tricky, especially if you are not on the same domain, etc. There are several handy WinRM commands that can help get WinRM connectivity established from your Ansible server or any other server you are looking to make connections to/from.
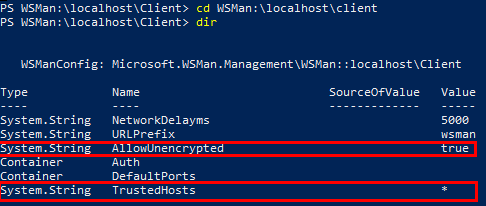
See the current WinRM configuration
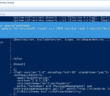
From PowerShell, run the following commands
cd WSMan:localhostclient
dir
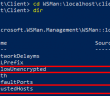
This will show your current WinRM configuration, trusted hosts, encryption settings, etc. For my lab Ansible box, I am setting AllowUnencrypted to true and also have set the TrustedHosts value to * which allows all hosts.
To allow unencrypted traffic:
set-item .allowunencrypted $true
To add a TrustedHost to the configuration:
set-item WSMan:localhostClientTrustedHosts -Value "*"
Above, you can specify specific hosts if you choose.
Ansible PowerShell Configuration Script for Configuring WinRM Connectivity
There is a great PowerShell configuration script out on Github that automatically sets up the WinRM configuration, firewall, PowerShell remoting, etc for Ansible connectivity. Check it out here:
Testing Ansible Win_Ping Connectivity
To test basic connectivity from Ansible, you can use the win_ping command with Ansible that utilzes the WinRM connectivity to make connections to the server. This verifies whether or not everything is working as expected with WinRM connectivity.
Create an inventory.yml file that will contain the hosts you want to test connectivity to. The inventory.yml file that I created, only has a single host contained therein for testing, however, looks like this:
---

[test]
10.1.149.232
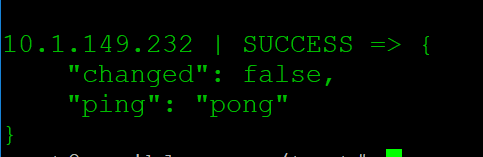
We can then run our test against the host(s) contained in the inventory file using the below command to test WinRM connectivity.
ansible test -i inventory.yml -m win_ping
We should see the SUCCESS message listed with the return in green.
We can now start working with our Windows server with Ansible automation.
Basic Ansible Commands to get Started
There are a few basic commands we can use to get started. We can interact with our server just like we were on the console. Below returns the IP configuration from our Windows Server
ansible test -i inventory.yml -m raw -a "ipconfig"
We can stop, start, restart services as well:
ansible test -m win_service -a "name=Spooler state=stopped"
TakeAways
Getting started with Basic Windows Server Automation with Ansible is not difficult at all. We can quickly get a control server setup, establish WinRM connectivity and then start running commands against our server. Next, we will look at playbooks for further automation and getting deeper into automating our Windows Server with Ansible. Stay tuned….
Google is updating how articles are shown. Don’t miss our leading home lab and tech content, written by humans, by setting Virtualization Howto as a preferred source.
About The Author