One of the goals that I have set for 2018 is learning more automation skills and employing these both in the home lab as well as with employers. The days of pointing and clicking to get things done are no longer feasible. Being able to operate at scale and with efficiency requires that we use automation. In today’s post, we will look at how to stand up Ansible Tower which is the Enterprise offering from Ansible that provides a GUI, REST API access, centralized management, and other benefits including self service functionality. Let’s take a look at how to install and configure Ansible Tower in Ubuntu Server.
Ansible Tower System Requirements
Let’s talk about the requirements of the Ubuntu server and how it is configured. According to the official Ansible documentation, the following requirements must be met for the server running Ansible Tower:
- 2 CPUs minimum
- 2 CPUs recommended per 20 forks
- 2 GB RAM minimum (4+ GB RAM recommended)
- 20 GB of dedicated hard disk space for Tower service nodes
- 64-bit support required (kernel and runtime)
The Ubuntu Server that I spun up is a typical Ubuntu Server 16.04 LTS server with updates installed. I have the minimum 2 vCPUs assigned with 2 GB of RAM for the VM in the home lab sitting on top of my vSAN datastore.
Install and Configure Ansible Tower in Ubuntu Server
The first thing that you need to do is visit the Ansible Tower download page fond here: https://www.ansible.com/products/tower. You will need to fill out the form, a verfication email will be sent with the download link to Ansible Tower. Additionally, depending on the license type you sign up for (trial or free 10 node license) you will receive the license file via email as well.
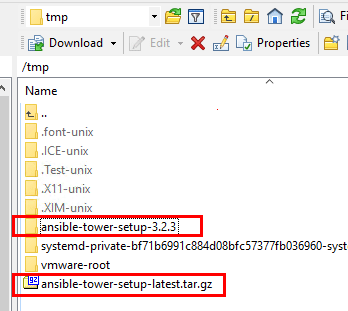
The file that you will download is called ansible-tower-setup-latest.tar.gz. I followed the following steps to get the file there, extracted, and configured for setup. Also, I am running a simple all in one configuration with one host that is running all the services including the DB, etc.
- Used WinSCP to copy the tar.gz file over to the /tmp folder of the Ubuntu server
- Extract the tar.gz file
- Edit the inventory file before running setup
- Run the setup.sh file to install Ansible Tower
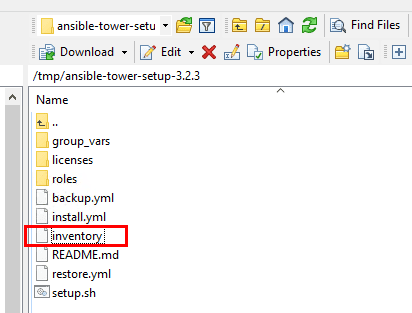
The inventory file that needs to be edited looks like the following. The password you want to configure needs to be dded in various locations.
- admin_password
- pg_password
- rabbitmq_password
[tower]
localhost ansible_connection=local

[database]

[all:vars]
admin_password=''

pg_host=''
pg_port=''

pg_database='awx'
pg_username='awx'
pg_password=''

rabbitmq_port=5672
rabbitmq_vhost=tower
rabbitmq_username=tower
rabbitmq_password=''
rabbitmq_cookie=cookiemonster

# Needs to be true for fqdns and ip addresses
rabbitmq_use_long_name=false

# Isolated Tower nodes automatically generate an RSA key for authentication;
# To disable this behavior, set this value to false
# isolated_key_generation=true
After editing the inventory file, you should be ready to run the setup.sh file.
Error Installing Ansible Tower
I ran into a weird error on the TASK [packages_ubuntu : install apt repository keys] step. The installer literally stalled out for around 10 minutes and finally failed.
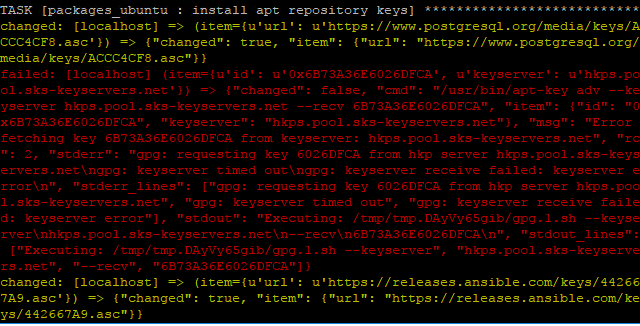
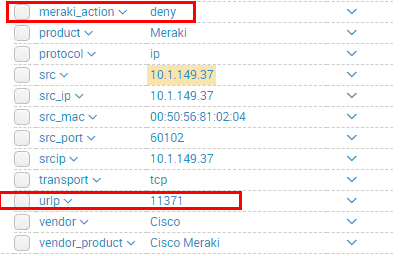
Working on a hunch, I pulled up my Splunk logs for the IP of the server and sure enough, I had blocks for the port it was using for GPG keys. The port was TCP port 11371.
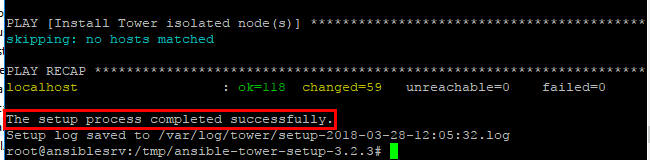
After unblocking the port and rerunning the installer, I was able to see the Ansible Tower install complete successfully.
You can now browse out to the Ansible Tower web management interface.

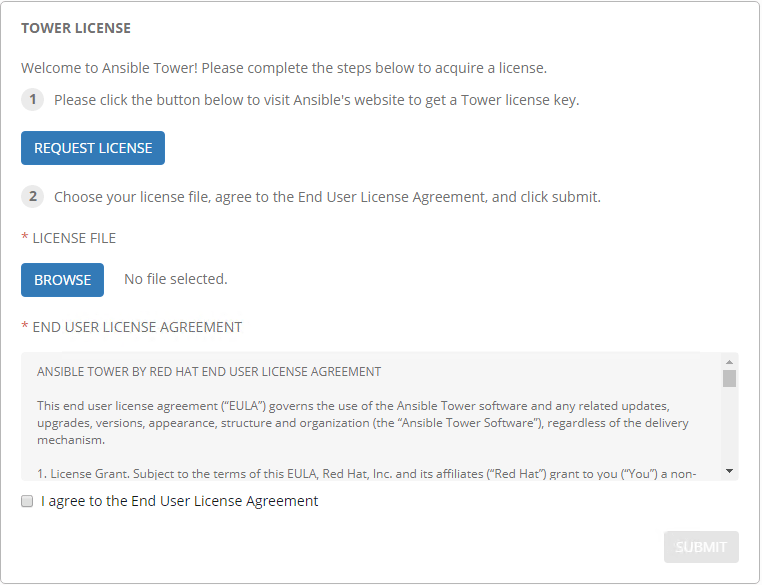
You will need to provide the license key for Ansible Tower. I applied for the free 10 node license which was sent by email. Browse to the license file and install it.
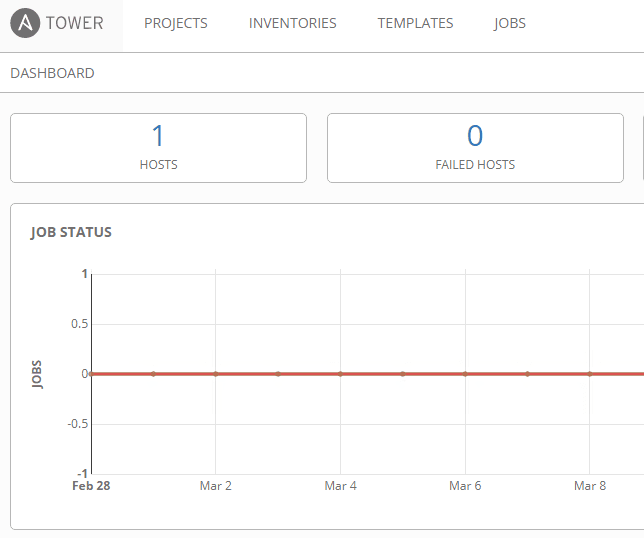
We are now ready to begin making use of Ansible Tower for setting up inventory, projects, jobs, etc.
Thoughts
Ansible Tower is the enterprise offering from Ansible that provides a GUI self service interface, REST API access, and other centralized management features including Active Directory support. The process to install and configure Ansible Tower in Ubuntu Server is pretty straightforward. Aside from running into the network port block on the GPG keys process, I didn’t have any issues getting Tower installed. Next, we will look at utilizing Ansible Tower, configuring, automating VMware environments, etc. So, stay tuned!
Google is updating how articles are shown. Don’t miss our leading home lab and tech content, written by humans, by setting Virtualization Howto as a preferred source.
About The Author