Install SQL Server 2017 on Ubuntu Server
Microsoft has certainly been headed in a very cool direction in the past couple of years and have definitely embraced the Linux community and interoperability between Microsoft Windows and Linux. When we look at the strides that have been made especially with PowerShell Core and Linux compatibility as well as .NET core on Linux. Then we come to SQL Server now supported on Linux since SQL Server 2016 and with the latest 2017 release. Who would have thought we would have seen Microsoft SQL Server on Linux 10 years ago? It is definitely reaping dividends for Microsoft if in no other area except the “coolness” factor that they have certainly regained among IT professionals. Let’s take a look at the steps involved to Install SQL Server 2017 on Ubuntu Server as well as connect and manage it.
Installing Ubuntu 16.04 LTS
I am not going to detail the steps here to download and install Ubuntu 16.04 LTS Server edition as this is the normal straightforward process. In my lab environment, I am simply using a very small footprint VMware virtual machine as the installation environment. I downloaded the latest Ubuntu 16.04.3 LTS that is available from Ubuntu.
However, there are a few prerequisites to make note of (that I didn’t necessary take note of as you will see below during my installation). Prerequisites for installing SQL Server 2017 in Linux are as follows:
| Memory | 3.25 GB |
| File System | XFS or EXT4 (other file systems, such as BTRFS, are unsupported) |
| Disk space | 6 GB |
| Processor speed | 2 GHz |
| Processor cores | 2 cores |
| Processor type | x64-compatible only |
Prerequisites as documented by Microsoft here
After getting everything up and running with a vanilla install of Ubuntu 16.04 LTS, I went ahead and ran updates on the server for best practice to get everything updated to the latest and greatest.
sudo apt-get update && sudo apt-get upgrade
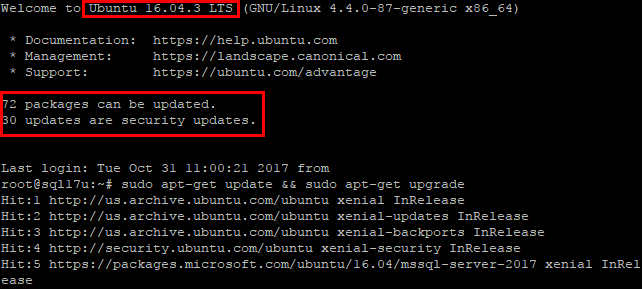
Now, we are ready to begin the test installation of SQL Server 2017 on Ubuntu.
Install SQL Server 2017 on Ubuntu Server
For the most part, I was able to follow the documentation found on the official quickstart guide from Microsoft found here. The first thing that we need to do before being able to pull down the official installer is add the public repository GPG keys for Microsoft SQL:

Next, we register the Microsoft SQL Server Ubuntu repository for installation:

Now, we can update our repository information since we have added the Ubuntu SQL Server repository:
sudo apt-get update

Now, let’s begin the Microsoft SQL Server 2017 installation:
sudo apt-get install -y mssql-server

As I mentioned above, I ran into one of the installation prerequisites not being met with the amount of RAM I had configured. I only configured the virtual machine with 2 gigs of memory. The installer will fail as shown.

So, let’s kick off the installation yet again. I might add, the installation of SQL Server 2017 on Ubuntu was blazing fast! Must faster than installation on a Windows Server system.
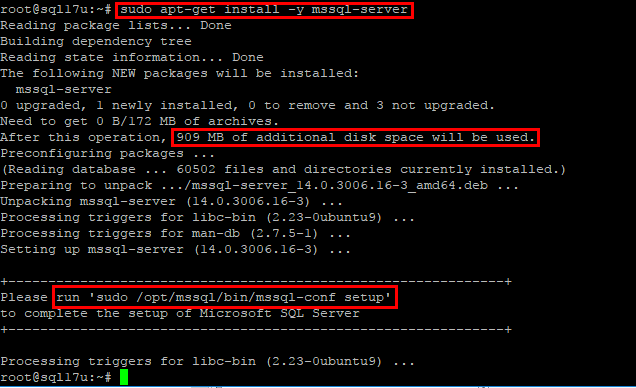
Now we are ready to launch the configuration script. We do that with the following command:
sudo /opt/mssql/bin/mssql-conf setup
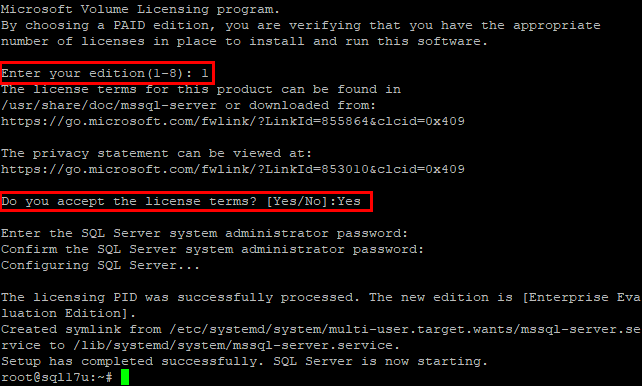
The first thing we are prompted to do is select the version of SQL Server from a licensing perspective. Note the many options we have available. For the lab of installing SQL Server 2017, I simply chose the Evaluation edition which is good for 180 days.
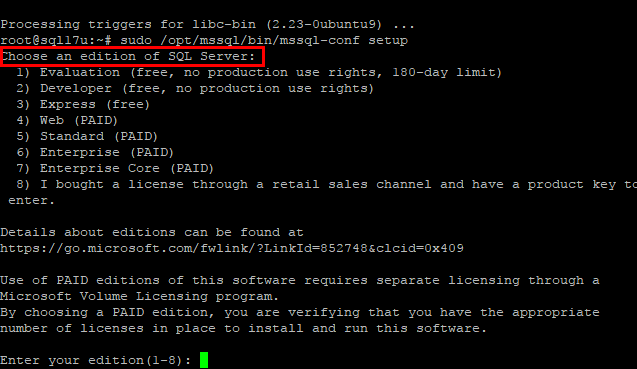
After selecting the version, we need to accept the EULA.
A good order of business after the installation is complete is to check the status of the SQL Server 2017 service.
systemctl status mssql-server
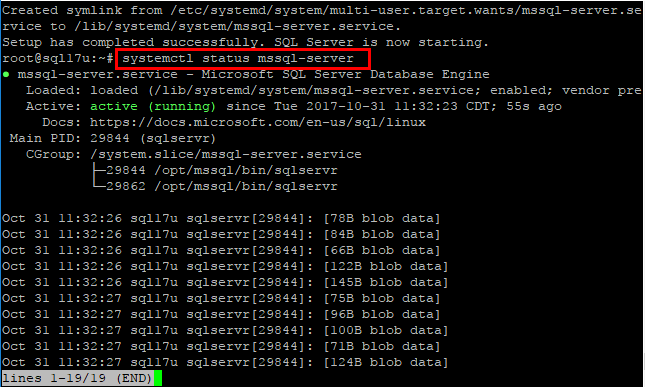
Everything looks good. Now we should be able to connect to our Ubuntu Linux server with SQL Server 2017. Keep in mind, depending on how you setup your Ubuntu firewall, you may need to open up TCP port 1433 for connecting to the SQL Server 2017 instance.
Connecting to SQL Server 2017 on Ubuntu
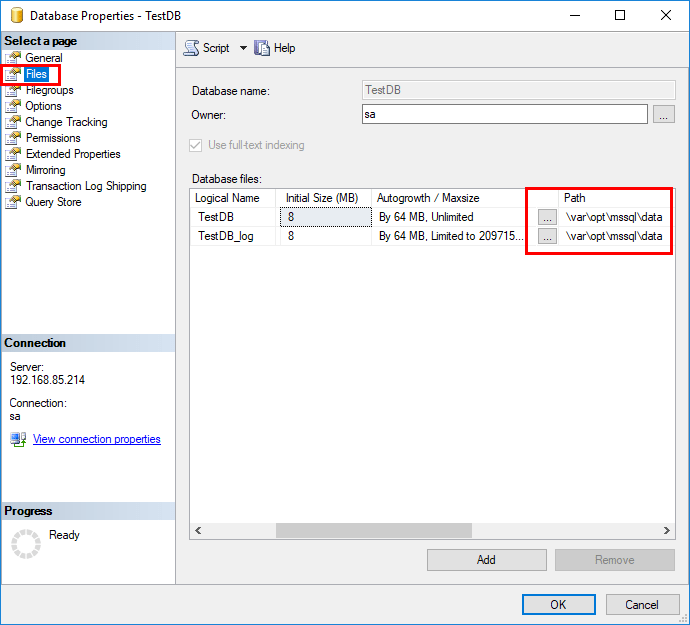
After the installation was complete, I simply opened SQL Server Management studio and connected without issue via “sa” to the instance on my lab Ubuntu 16.04 LTS server. Interestingly, I haven’t tried this as of yet, but you CAN use Windows authentication on your Linux host. The steps detailing setting up active directory authentication for SQL Server on Linux is documented here.
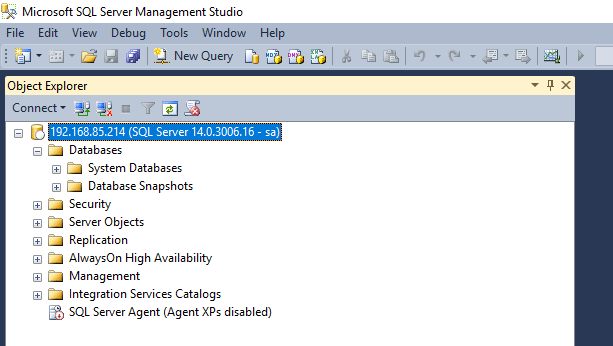
It is certainly interesting to see the file path for a database located at varoptmssqldata.

Thoughts
I have to say that I had a little childish giggle after installing SQL Server 2017 on Ubuntu 16.04 Server. Seeing the two once “so opposite” platforms coming together like this is exciting. It is certainly a new era of collaboration that Microsoft is embracing with current and upcoming technologies that makes all of us geeks at heart excited beyond what we thought was possible. Hopefully, this walk through of how to Install SQL Server 2017 on Ubuntu Server will nudge more to try out SQL Server in your favorite Linux distribution.


