



Installing Proxmox VE Server on a new host or mini PC is the easy part in most cases. This process is usually a non event as you just have the ISO on a USB drive using something like Rufus or Ventoy. Then you boot the machine and go through the installer to get the bits installed on the host. However, I have learned that seeing the login screen on the Proxmox console doesn’t necessarily mean I am ready to move my important VMs or LXCs over to the host. I have learned that there are still at least 7 areas I like to check before I decide that I can trust a new Proxmox host for real workloads. Let’s look at those.
1. I verify the hostname, DNS, and time configuration
This is one of the first things that I like to verify on the new host. I want to make sure the identity of the host is good first of all. The hostname may be just a minor detail during the installation of the host. But, this is used throughout the rest of the platform. So, I like to do a quick sanity check on that from and look at a couple of things.
This config becomes an important part of the platform, especially for cluster configuration and is found in files at the path:
/etc/pve/nodesBe sure that before you join a host to a Proxmox VE cluster, you have the hostname set in stone and you verify that the fully qualified domain name (FQDN) resolves to the correct management address. I also like to make sure reverse DNS is good as well. You can make sure you see the right name in the file:
/etc/hostsQuick list of commands you can use for validating your host:
These commands give me a good warm fuzzy that the machine is ready and the hostname is consistent:
hostnamectl
hostname -f
getent hosts "$(hostname -f)"
cat /etc/hosts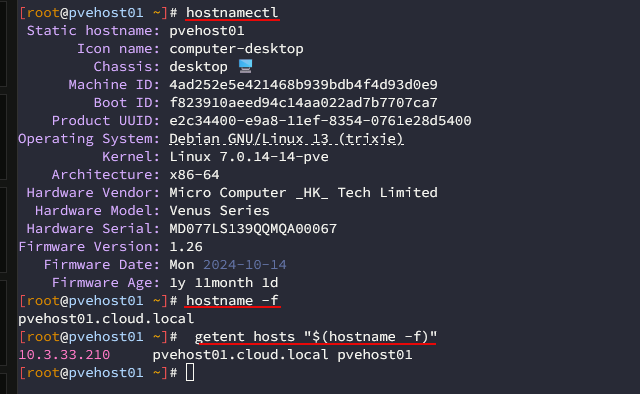
Verifying your time configuration on a Proxmox host
One of the other really important configurations on your Proxmox VE Server host is that the time configuration is correct. Time is used for all kinds of things. Especially in a cluster of PVE hosts, you want to make sure that time agrees as it is used to check certificates, cluster comms, logging, and authentication. So a time difference between your hosts can lead to all kinds of problems.
You can check this with:
timedatectl
systemctl status chrony --no-pager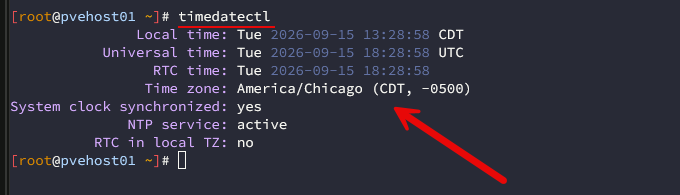
2. Make sure on your repositories, updates, and kernel version
When you install a fresh copy of Proxmox VE Server, the installer doesn’t install the latest packages. There may be kernel, microcode, firmware, or security patches. So, the first thing that I do before I run any workloads is I make sure on my configuration of update repositories. Then I get the server updated to the latest and greatest to make sure you are at that good starting point.
For those of us who may support a Proxmox VE Server in production, and have an enterprise subscirption, I would keep the enterprise repository configured out of the default installation. Then you just apply your key and off you go. In a home lab though, this is usually different.
The first thing I do is switch from the enterprise repos over to he no-subscription repos. If you don’t do this then you will get authorization errors when you try to apply updates to your home lab servers. Then after you have the repos in place, either enterprise or no-subscription, then we can apply updates.
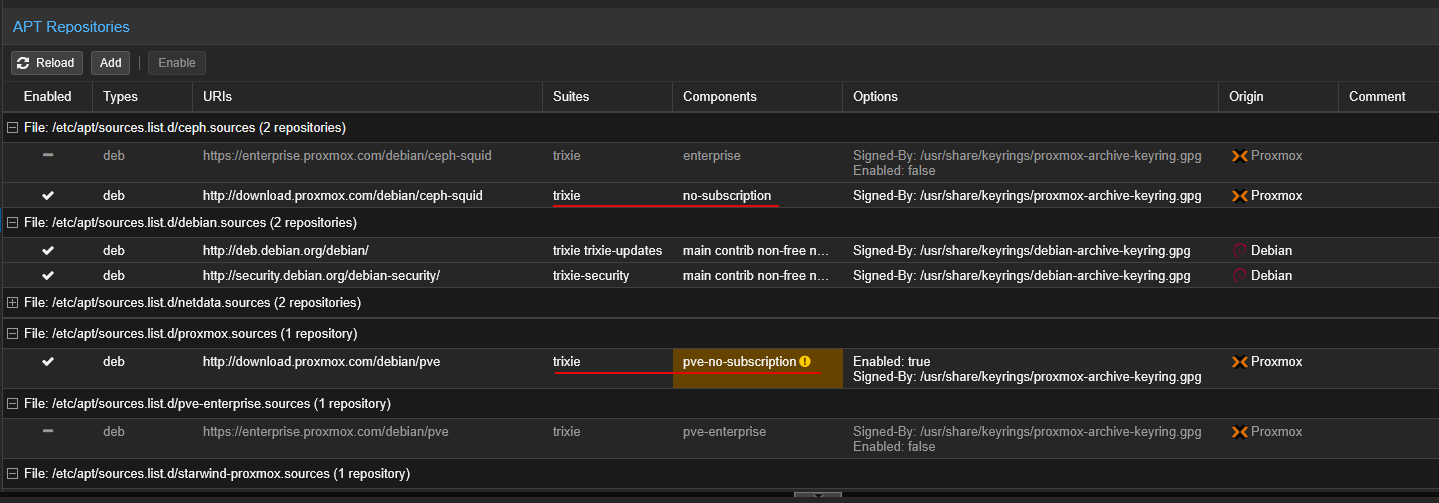
Once you have the repositories in place that you want to use. You can refresh and see what updates are available, then apply the updates, and then check the version after the updates:
apt update
apt full-upgrade
pveversion -v
After an upgrade, especially one that replaces the kernel with a newer version, I reboot the host. Once the host comes back up, I take a look at the running kernel version and installed Proxmox packages.
uname -r
pveversion -v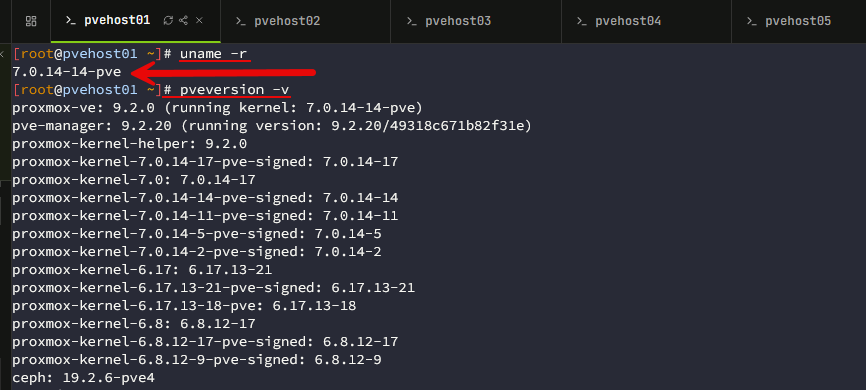
Also, there are a few last sanity checks to take a look at once the host reboots. Make sure the management interface comes back up for the web UI running on port 8006. Make sure all of your storage mounts come back up as well.
3. Take a look at the storage layout and physical disk health status
One of the super important areas of your Proxmox VE Server host is storage. You don’t want to go out of an installation and then right into running VMs on a particular Proxmox host if storage is not healthy. Proxmox may have successfully installed at the end of the process. But, keep in mind, this doesn’t actually tell you if your root filesystem is right sized or if your VM disks are going on the right storage.
Also, I like to make sure that my NVMe disks that are supposed to be healthy are actually healthy and ready for work.
Storage layout
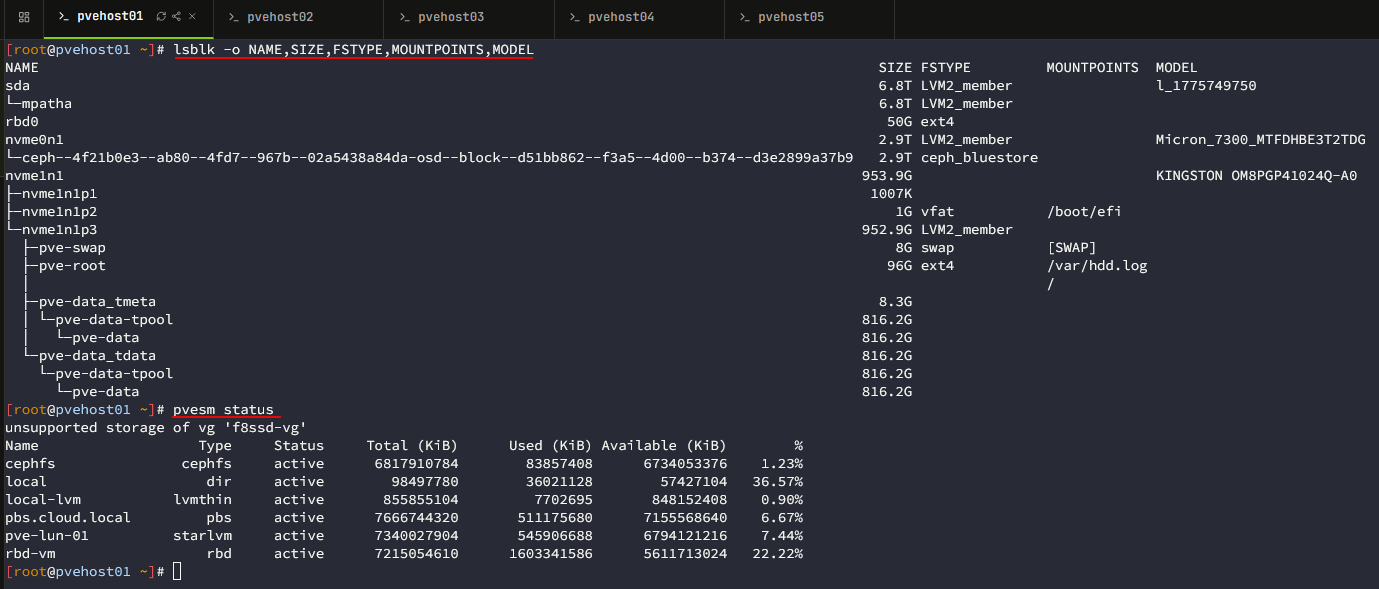
A really great place to start is by mapping everything out with your storage layout all the way to the Proxmox storage configuration:
lsblk -o NAME,SIZE,FSTYPE,MOUNTPOINTS,MODEL
df -h
pvesm status
Make sure what you see here is what you expect. This little command helps you to see which physical drive (brand, model) is backing a specific storage mount:
Drive health
I think one of the really good things you can do to trust your Proxmox VE Server host putting it into “production” is checking the health of your drives. Especially for us with home labs we may source second hand, used drives. We want to make sure these are reasonably healthy and have the life that we expect them to have on them. Also, make sure there aren’t any obvious glaring errors.
Here are a couple of those commands I use:
smartctl -a /dev/sdX
nvme smart-log /dev/nvme0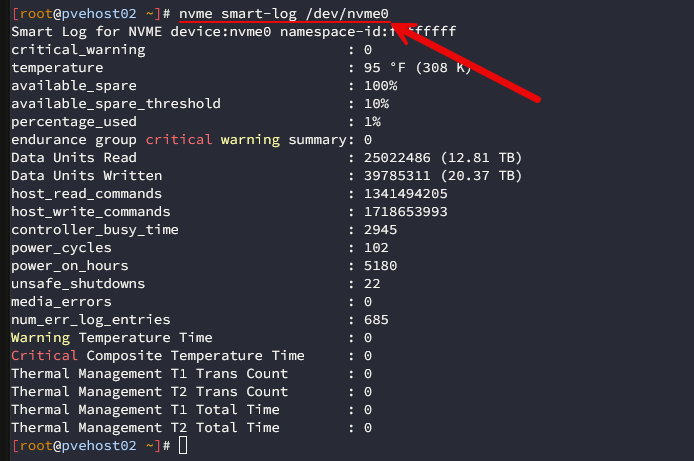
For ZFS, you can take a look at the pool directly as well:
zpool status
zpool list
zfs list
Look for anything that seems “off” like media errors, critical warnings, VERY high wear, pool degradation, and capacity that doesn’t match what you assumed.
Finally, think about failure domains when it comes to your storage, including storage in a standalone host. What do we mean? Well, case in point. Two partitions on one NVMe drive are not considered independent storage. So, if you were to have your “backups” stored on the same NVMe drive but on a different partition, you are exposing yourself to potentially losing your backups along with your main storage device.
If you are running iSCSI or NFS storage, check out this recent release of a native TrueNAS plugin that integrates with Proxmox: TrueNAS Just Fixed One of Proxmox’s Biggest Storage Headaches.
4. I test every bridge, VLAN, bond, and MTU
Man, this is another EXTREMELY important set of tests to do before you can trust your Proxmox VE Server host. Sometimes this area doesn’t mean your host itself isn’t trustworthy. But you may have configuration, including on your network switch that doesn’t line up. This is where it is critical to do a few easy tests on the frontend before you put the host into “production”. This could be in your home lab as a standalone host or cluster host.
Jumbo frames
I shot myself in the foot just a few months back with jumbo frames in the home lab that led to be chasing some really weird issues. Jumbo frames may work on “part” of the network path. But the may not work on the rest of the path and cause fragmentation or dropped traffic.
Check out my full post on this little adventure here: Jumbo Frames Broke My Proxmox Cluster and Here’s Why.
One of the simplest tests and your “friend” when it comes to testing jumbo frames is this simple ping command:
ping -M do -s 8972 -c 4 <destination-IP>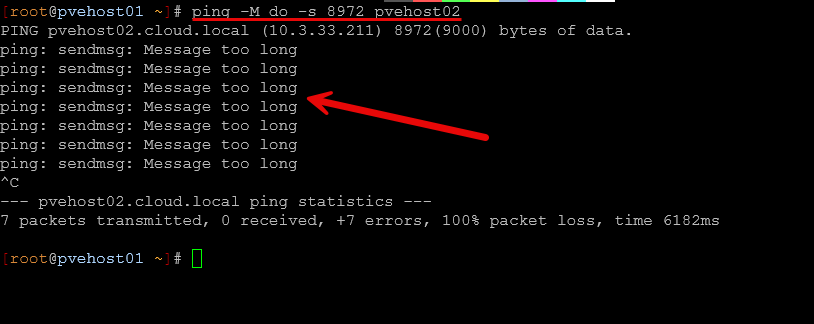
Network speed test
Also, if you are implementing 10 gig networking between your Proxmox VE Server hosts, it is important to make sure you test the links between the hosts. I can’t tell you how many times I have found that 10 gig networking was not performing like expected. And in fact was hitting 1 gig connectivity due to various reasons.
A simple test to trust your host will perform at this speed is using iperf3. With iperf3 you can setup one server as the “server” and one server as the “client” and they stream packets between them and measure the bandwidth between the two nodes.
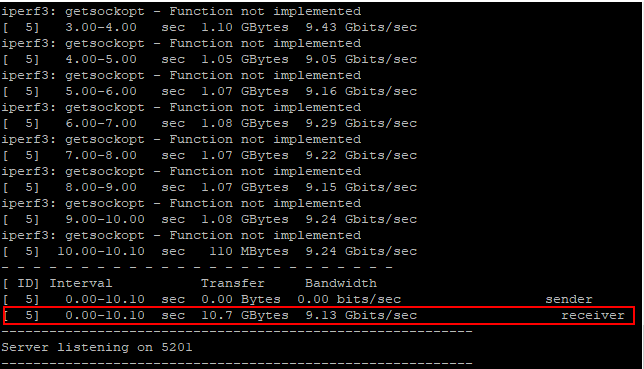
Also, be sure to review the /etc/network/interfaces file and compare it with what Proxmox shows under the nodes network config. Here are a few additional commands that are helpful. You want to make sure to verify things like interfaces and VLANs.
ip -br address
ip route
bridge link
bridge vlan show
cat /etc/network/interfaces
5. Standardize on your VM hardware settings in the home lab
This one can become bigger than we might think in terms of a configuration setting that can cause issues. The first VM on a new host can start to become a type of “template” of sorts for everything else that follows. So if we create it and configure it with bad hardware settings, you can inadvertently replicate that across dozens of virtual machines.
One of the areas that can definitely come back to bite you, especially if you start out with a standalone host and then decide to bring that host into a cluster configuration is the CPU type. Many are inclined to set this to the type host for the CPU type. It is true this type can expose more capabilities and improve performance (under certain circumstances). But, it can also limit your live migration capabilities.
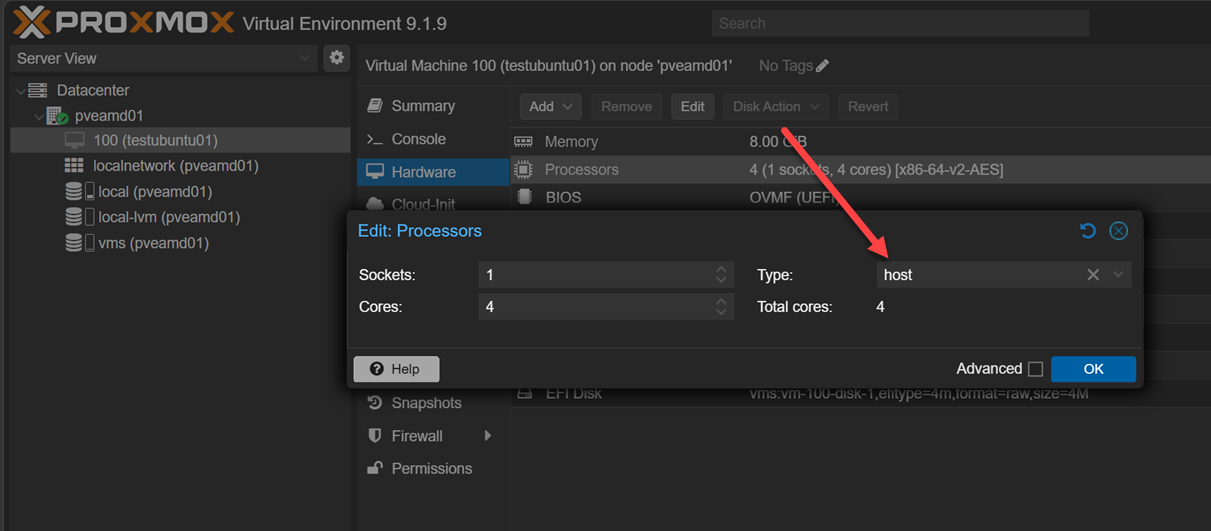
When you want to move a VM between two different Proxmox VE server hosts, CPU is important. If these are different CPU generations, or even different CPU types between Intel and AMD, your Live migration will fail. But if you use the virtual CPU types that are provided in the box with Proxmox, this allows you to have much greater success. You can move things between dissimilar hardware that we often find inside the home lab.

Check out a full detailed post I did on this topic and my recommendations for your configurations here: VM Migration in Proxmox Kept Breaking Until I Fixed This CPU Setting.
6. I configure backups, retention, and failure notifications
This is an important one. I don’t want to have to wait until my Proxmox host is full of important workloads before I start thinking about backups. As soon as the first “bit” of data lands on the storage of the Proxmox environment, I want to have backups in place that will grab copies of that data ASAP. My preference here in a native Proxmox VE Server ecosystem is Proxmox Backup Server. However, I also run Veeam Backup & Replication in my environment and it does a really great job of backing up Proxmox.
Proxmox Backup Server in my environment runs on a Beelink ME Pro 2-bay NAS that has (2) mirrored 8 TB drives. This is plent for my current Proxmox workloads. PBS also does incremental backups and deduplication. So, the backups that it stores are efficiently housed on disk.
Take a look at my setup on my NAS here: Why Your NAS Is the Perfect Proxmox Backup Server.

But also, keep in mind that if you are running software-defined storage like Ceph or Microceph, these are not exposed in the same way as just normal file storage is exposed. If you have a VM that has access to a Ceph storage location, if you take a full backup of that VM, you won’t be able to grab the data “inside” that Ceph volume or CephFS volume.
So for these types of things, you will need to have an agent-based backup that sits inside the VM that has visibility to that data and is able to ship it out externally from the storage environment.
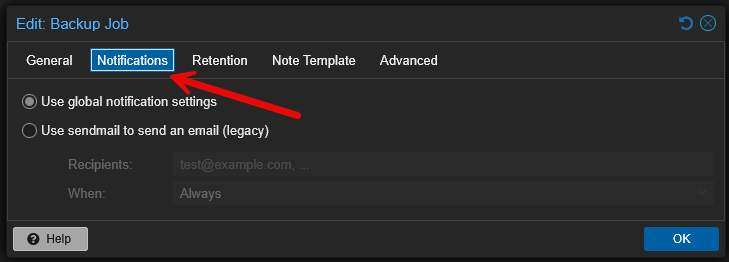
Make sure you have notifications turned on for backup failures or anything else that goes wrong in the environment related to your backups. The worst time to find out about a backup issue is when you actually need to restore or recover data.
7. I check the BIOS, virtualization settings, and power config
There are a few other settings that I check that are not found in the Proxmox interface. To get to these, we need to check the system firmware, BIOS settings. Usually, a lot of these settings are enabled and what you want from the factory, especially with newer mini PCs. But I have learned to never make assumptions. Always verify.
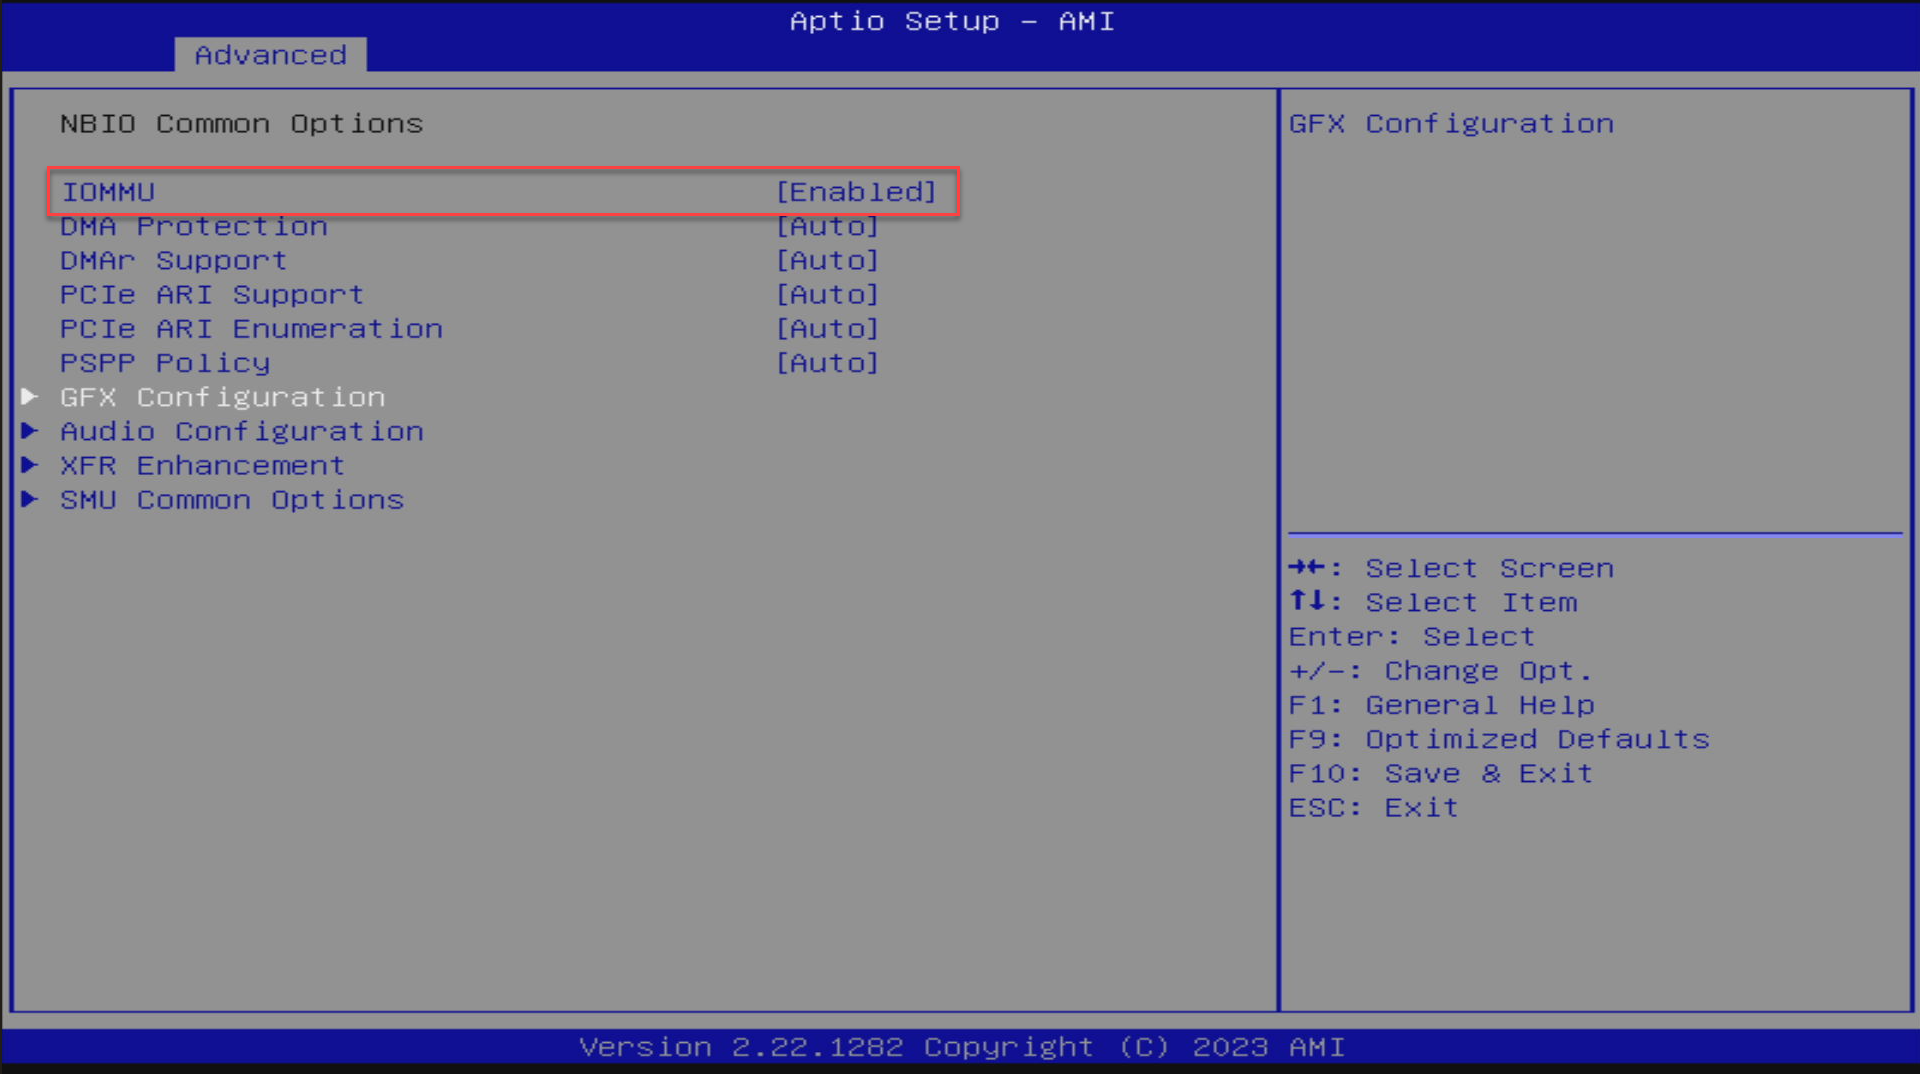
First of all, make sure to confirm that Intel VT-x or AMD-V is enabled, depending on which processor platform you are running. Sometimes, Proxmox will install without these turned on in the BIOS, but you won’t have hardware-assisted virtualization available which is critical for good performance. Also, if you are going to use PCI passthrough you want to make sure to enable IOMMU in the BIOS.
You can also verify a few things in the Proxmox shell. You can make sure of virtualization support:
lscpu | grep VirtualizationIf you want to make sure and verify that IOMMU appeared in the kernel log, you can use:
dmesg | grep -Ei "DMAR|IOMMU|AMD-Vi"You can also check if Linux created IOMMU groups:
find /sys/kernel/iommu_groups/ -type lFinally, make sure you are running the latest BIOS version for your mini PC or other server you are running Proxmox on. BIOS updates can have fixes for issues that will only show up under certain conditions or under load.
Wrapping up
These are a few of the settings that I check before I trust a new Proxmox VE Server host. It is always better to find nonoptimal settings before you have workloads running than it is to find those settings when the server is under load, running lots of VMs and LXCs. How about you? What checks do you make before you trust your Proxmox VE server to running things in your home lab or production environment?
More in this topic




Google is updating how articles are shown. Don’t miss our leading home lab and tech content, written by humans, by setting Virtualization Howto as a preferred source.
About The Author
