I have been experimenting with many different continuous integration and continuous deployment tools in the home lab. Recently, I have been using GitLab for most of my workflows. However, I have played around with Jenkins in the past and want to get an instance back in the lab environment for comparison with GitLab. In this post, we will look at content around how to install and configure a Jenkins server using Docker Compose. We will also look at a Jenkins agent and using Traefik in front of Jenkins as an ingress controller.
Understanding Jenkins and Docker Compose
Jenkins is a project that is well known in the industry for development and DevOps as an automation server among others. It is an orchestration and automation tool that streamlines the phases of software development related to building, testing, and deploying. Jenkins is also very versatile. It supports many different plugins that can extend its capabilities.

Most of you have probably used Docker Compose before. However, if not, Docker Compose manages multi-container Docker applications. It enables the definition and sharing of application configurations through YAML files.
Using Docker Compose to install and configure Jenkins allows you to use Docker Compose for Jenkins install and configuration using containers. It helps to make sure your deployment is consistent. It also allows for easy testing for development and production environments.
Setting Up Your Environment
Before diving into Jenkins and Docker Compose, ensure your system meets the prerequisites:
- Docker installed and running
- Docker Compose installed on your machine
- Basic familiarity with Docker concepts and commands
- Installing Jenkins with Docker Compose
1. Docker installed and running
As a brief overview of step 1, to install Docker in Ubuntu or Debian, which I think many will use, you can follow these steps:
# Add Docker's official GPG key:
sudo apt-get update
sudo apt-get install ca-certificates curl
sudo install -m 0755 -d /etc/apt/keyrings
sudo curl -fsSL https://download.docker.com/linux/ubuntu/gpg -o /etc/apt/keyrings/docker.asc
sudo chmod a+r /etc/apt/keyrings/docker.asc

# Add the repository to Apt sources:
echo \
  "deb [arch=$(dpkg --print-architecture) signed-by=/etc/apt/keyrings/docker.asc] https://download.docker.com/linux/ubuntu \
  $(. /etc/os-release && echo "$VERSION_CODENAME") stable" | \
  sudo tee /etc/apt/sources.list.d/docker.list > /dev/null
sudo apt-get update

## Install Docker
sudo apt-get install docker-ce docker-ce-cli containerd.io docker-buildx-plugin docker-compose docker-compose-plugin -y
Keep in mind, you can run Jenkins in many other environments, including Docker Swarm and Kubernetes which are the best for production environments and scaling the environment. However, Docker Compose is one of the easiest to use in the home lab environment.
2. Docker-compose up and running on your machine
As we can see above, we installed docker-compose along with the Docker installation. But, make sure you have Docker-compose available by running the command:
docker-compose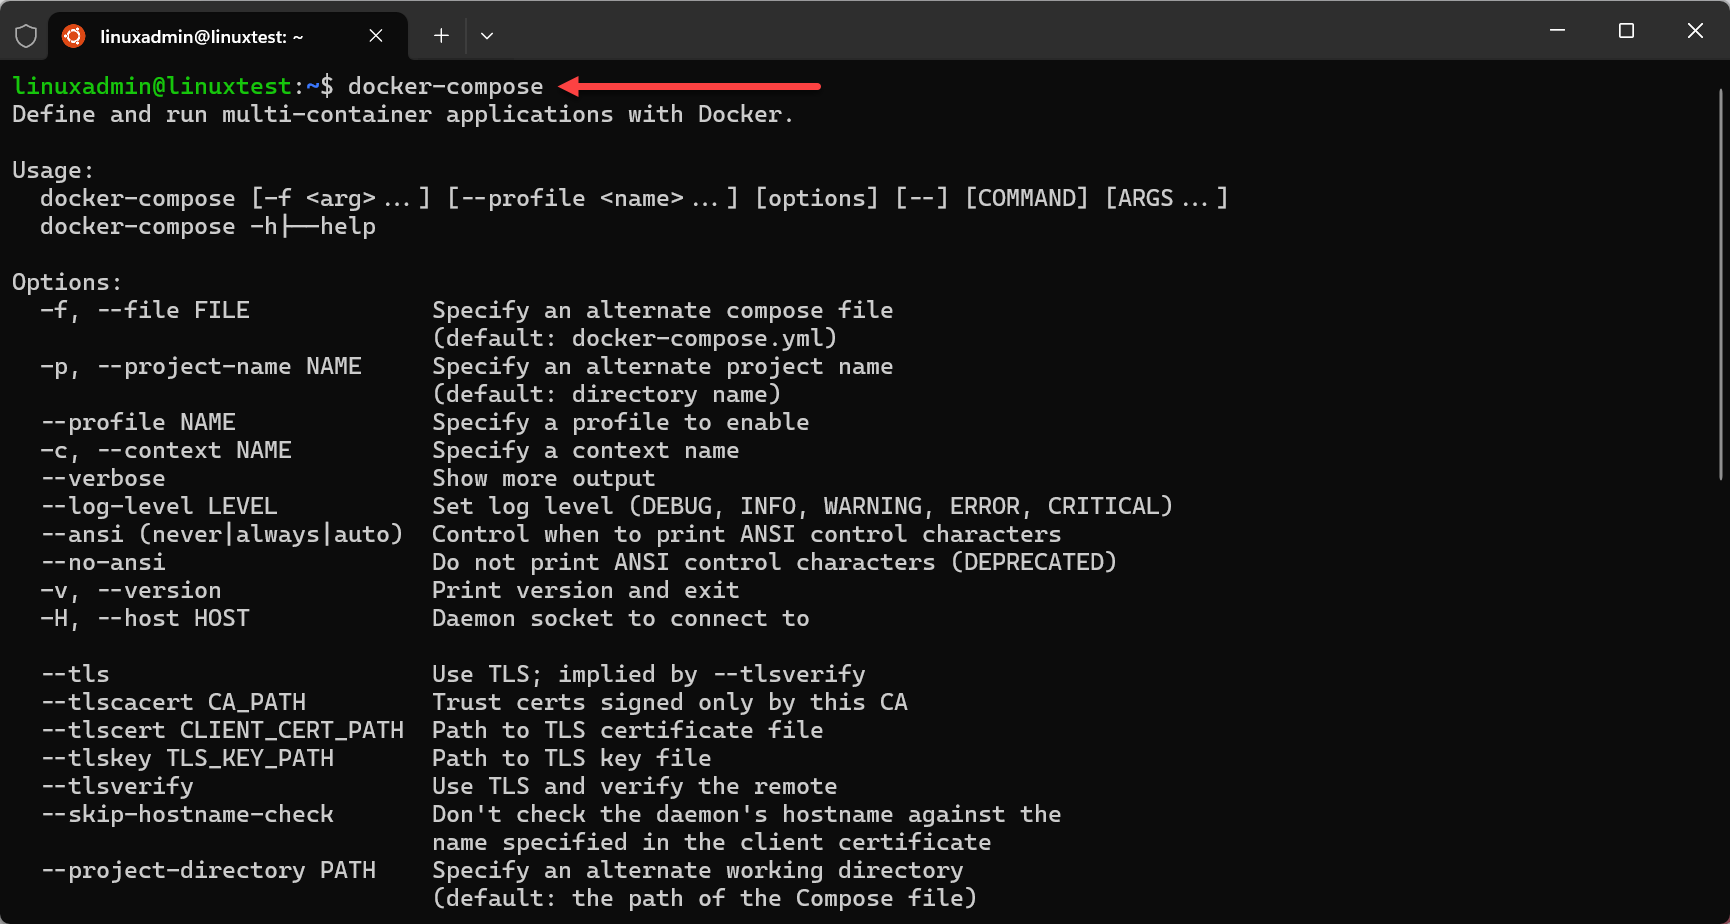
3. Be familiar with Docker commands
It’s a good idea to understand the basics of Docker commands and working with it and a few of the commands you need to understand the state of your containers.
Just as a few examples of Docker commands:
##See status of running containers
docker ps

##See status of all containers
docker ps -a

##See logs for a particular container
docker logs <container name or ID>

##View the status of Docker-compose controlled containers found in your docker-compose.yml file
docker-compose ps
4. Installing Jenkins controller with Docker Compose
Creating a Jenkins instance with Docker Compose involves a few clear steps. Here’s a simplified walkthrough:
Compose File Creation: Craft a docker-compose.yml file that defines your Jenkins service. This file instructs Docker Compose on how to construct your Jenkins container, specifying volumes for persistence and ports for web interface access.
services:
  jenkins-master:
    image: jenkins/jenkins:lts
    container_name: jenkins-master
    user: "1001"
    environment:
      - PUID=1001
      - PGID=1001
    ports:
      - "8080:8080"
      - "50000:50000"
    volumes:
      - ~/homelabservices/jenkins/jenkins-data:/var/jenkins_home
      - /var/run/docker.sock:/var/run/docker.sock
    restart: always
Explanation of the Docker-compose components.
- version: ‘3.8’: Specifies the version of the Docker Compose file format. Version 3.8 is used, which requires Docker Engine 19.03.0 or above. This version supports most modern Docker features suitable for production environments.
- services: This section defines the containers (services) that should be run based on this Docker Compose file.
- jenkins-master: The name of the service, which in this case is the Jenkins master server.
- image: jenkins/jenkins:lts: Specifies the Docker image to use for the container. jenkins/jenkins:lts points to the Long-Term Support (LTS) version of the official Jenkins Docker image. This ensures you’re using a stable release.
- container_name: jenkins-master: Sets a custom name for the running container. This is how you can identify the container when using commands like docker ps.
- user: “1001”: This directive runs the container using the specified user ID (UID). Also, the Environment stanza has the PUID and PGID set in this case, 1001. This allows you to run the container as a different user than root and set the file permissions correctly within the container, especially for volumes that persist data. This helps us to not have to run a privileged container by specifying the user.
- ports:
- “8080:8080”: Maps port 8080 of the container to port 8080 on the host. This is the default web interface port for Jenkins.
- “50000:50000”: Maps port 50000 of the container to port 50000 on the host, which is used for inbound agent connections to the Jenkins master.
- volumes:
- jenkins-data:/var/jenkins_home: Mounts a named volume jenkins-data to /var/jenkins_home inside the container. /var/jenkins_home is the default directory where Jenkins stores its configuration and job data. Using a named volume ensures that this data persists across container restarts and updates.
- restart: always: This policy tells Docker to restart the Jenkins container if it ever stops unexpectedly automatically. This helps ensure high availability of your Jenkins server.
- volumes:
- jenkins-data: Defines a named volume called jenkins-data. If it doesn’t already exist, Docker will create it the first time you run the Docker Compose file. This volume is used to persist the Jenkins data as specified in the volumes section under the jenkins-master service.
Launching Jenkins: Navigate to the directory containing your docker-compose.yml and execute the command:
docker-compose up -d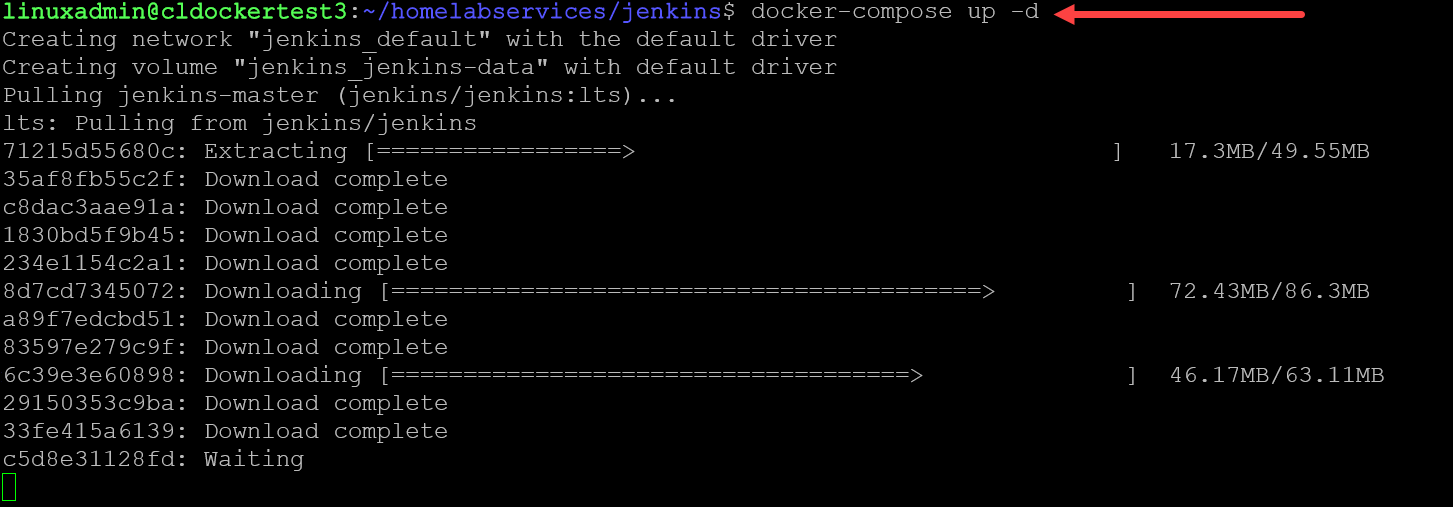
This command pulls the Jenkins image and starts a container as defined.
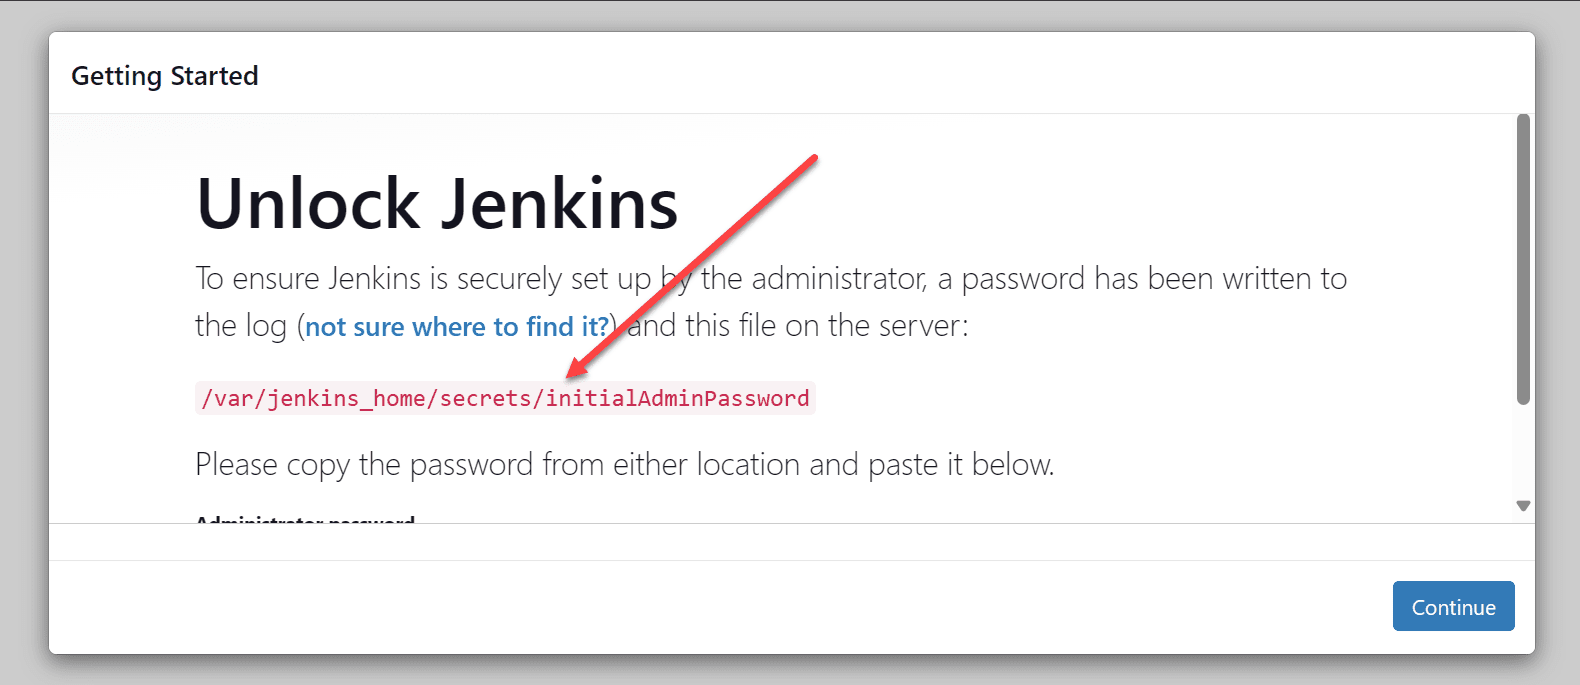
Initial Jenkins setup
Initial Setup: Access Jenkins through http://<your Docker host IP>:8080.
Next, you will be asked to create the first admin user.

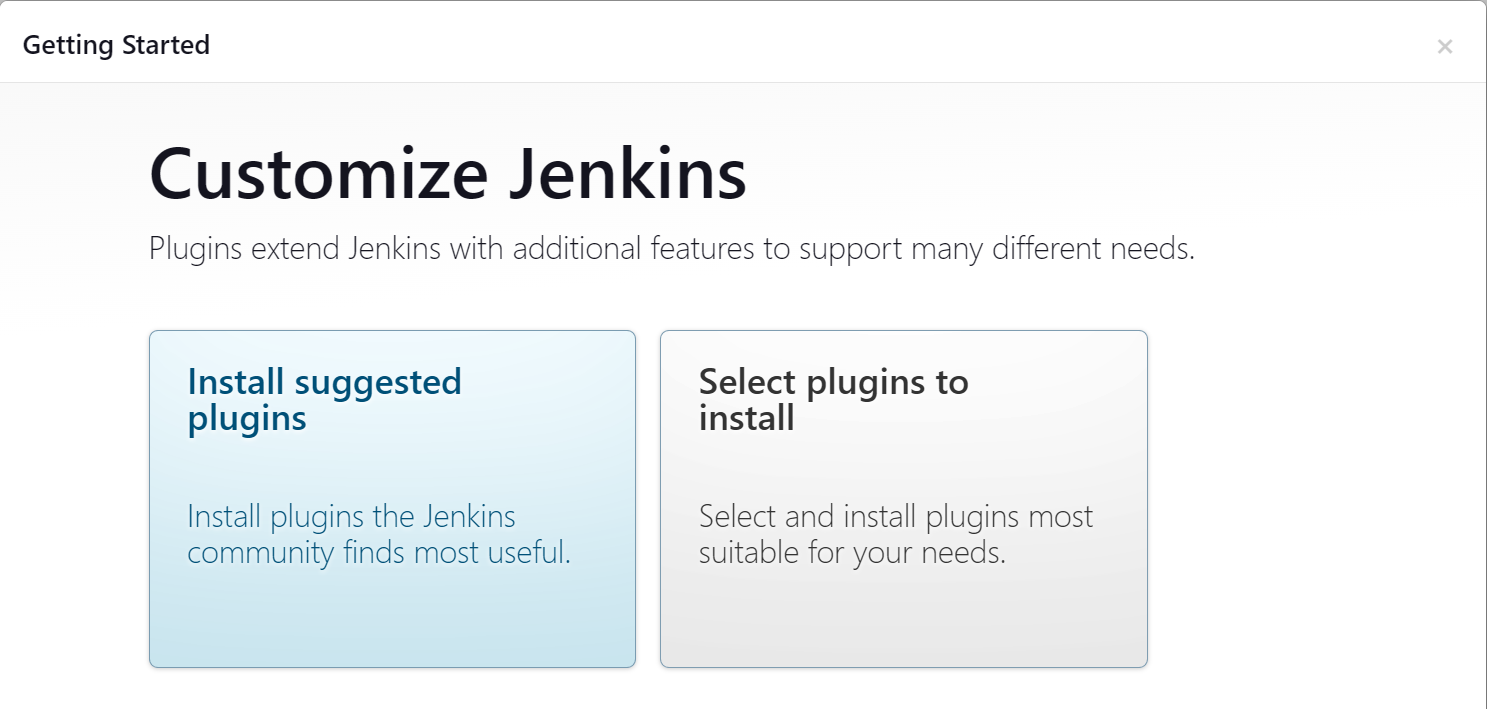
Choose how you want to customize Jenkins. You can allow the installation to install the suggested plugins for Jenkins. Or, you can select plugins to install.
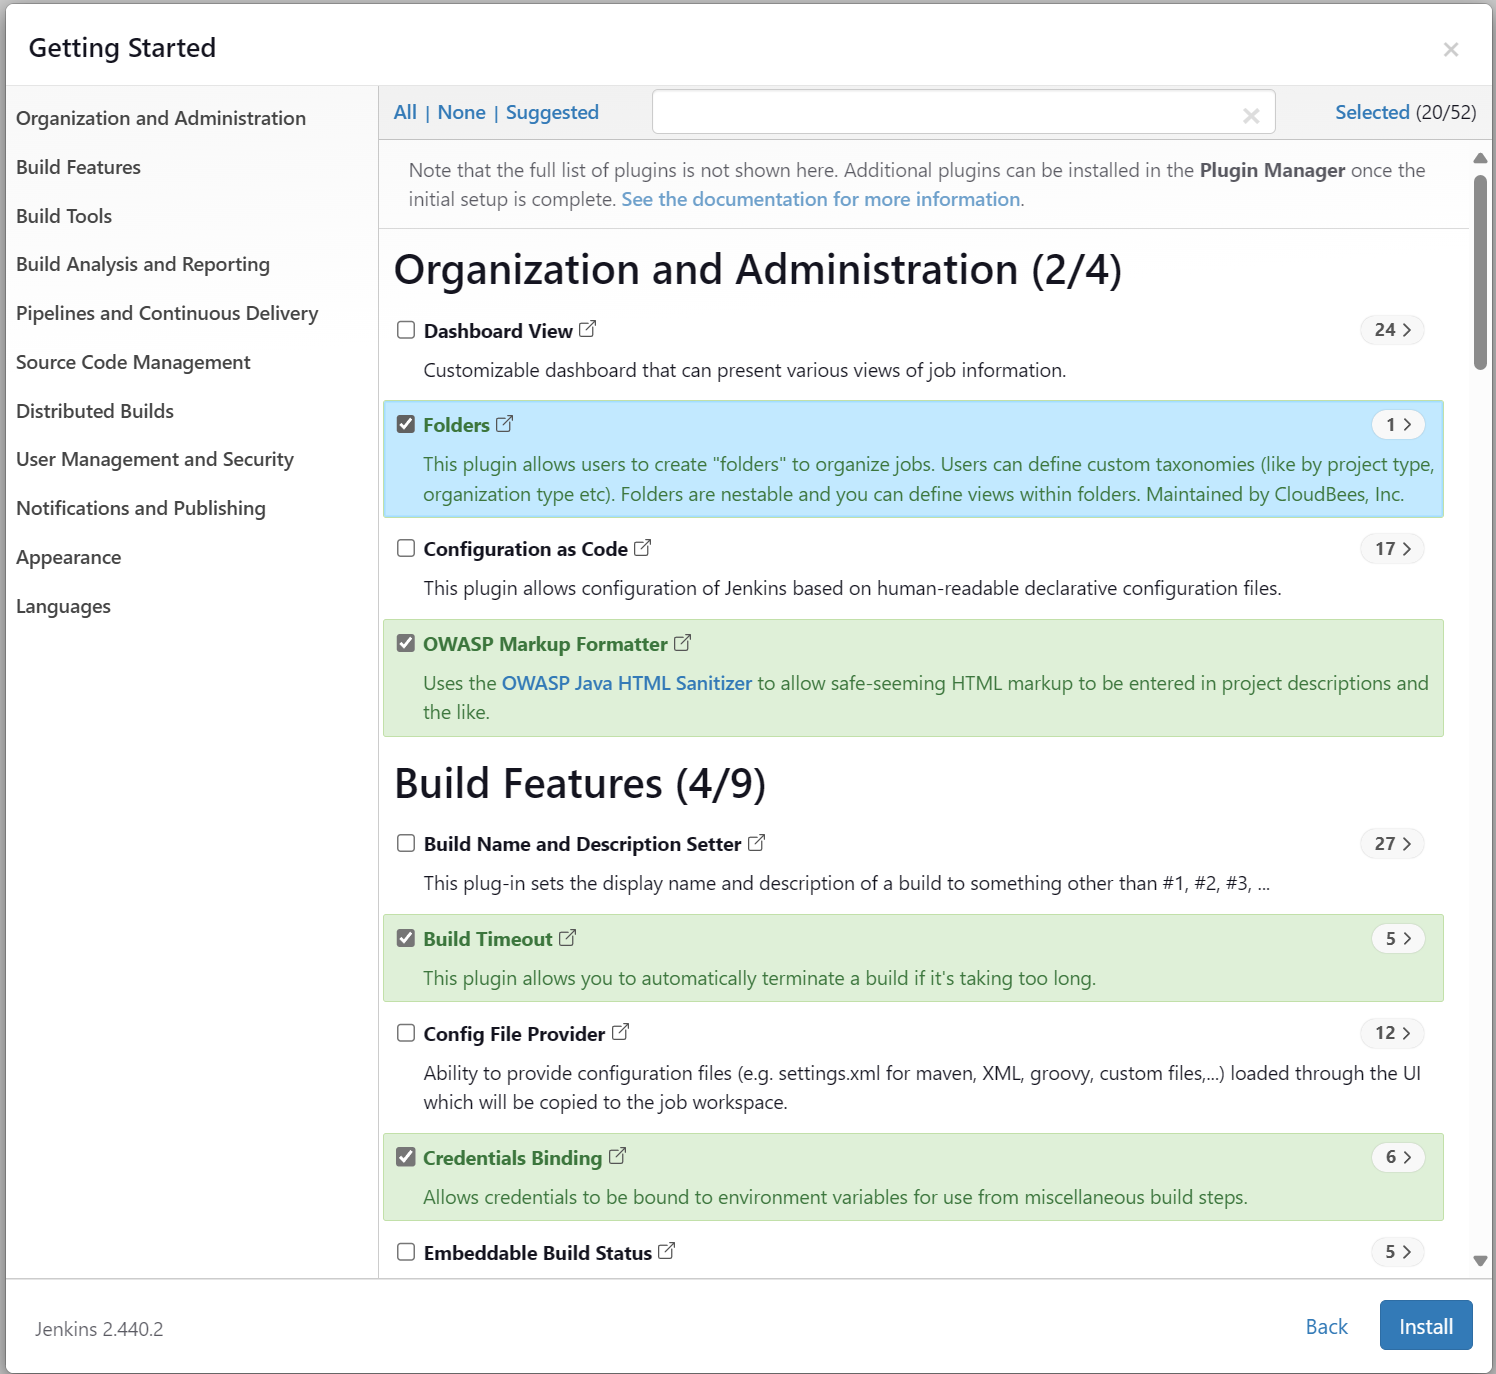
If you choose to select plugins to install, you will need to select the plugins you want to install. When you have what you want selected, click Install.
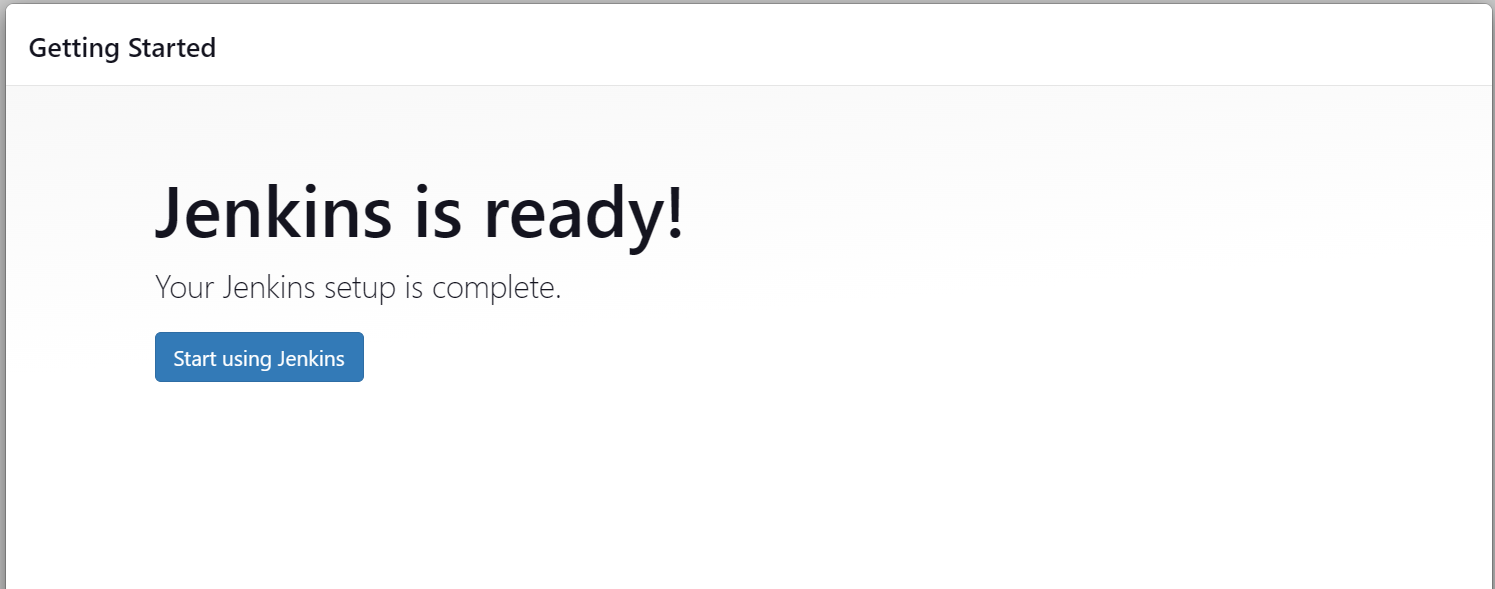
After a few moments, Jenkins is ready to install.
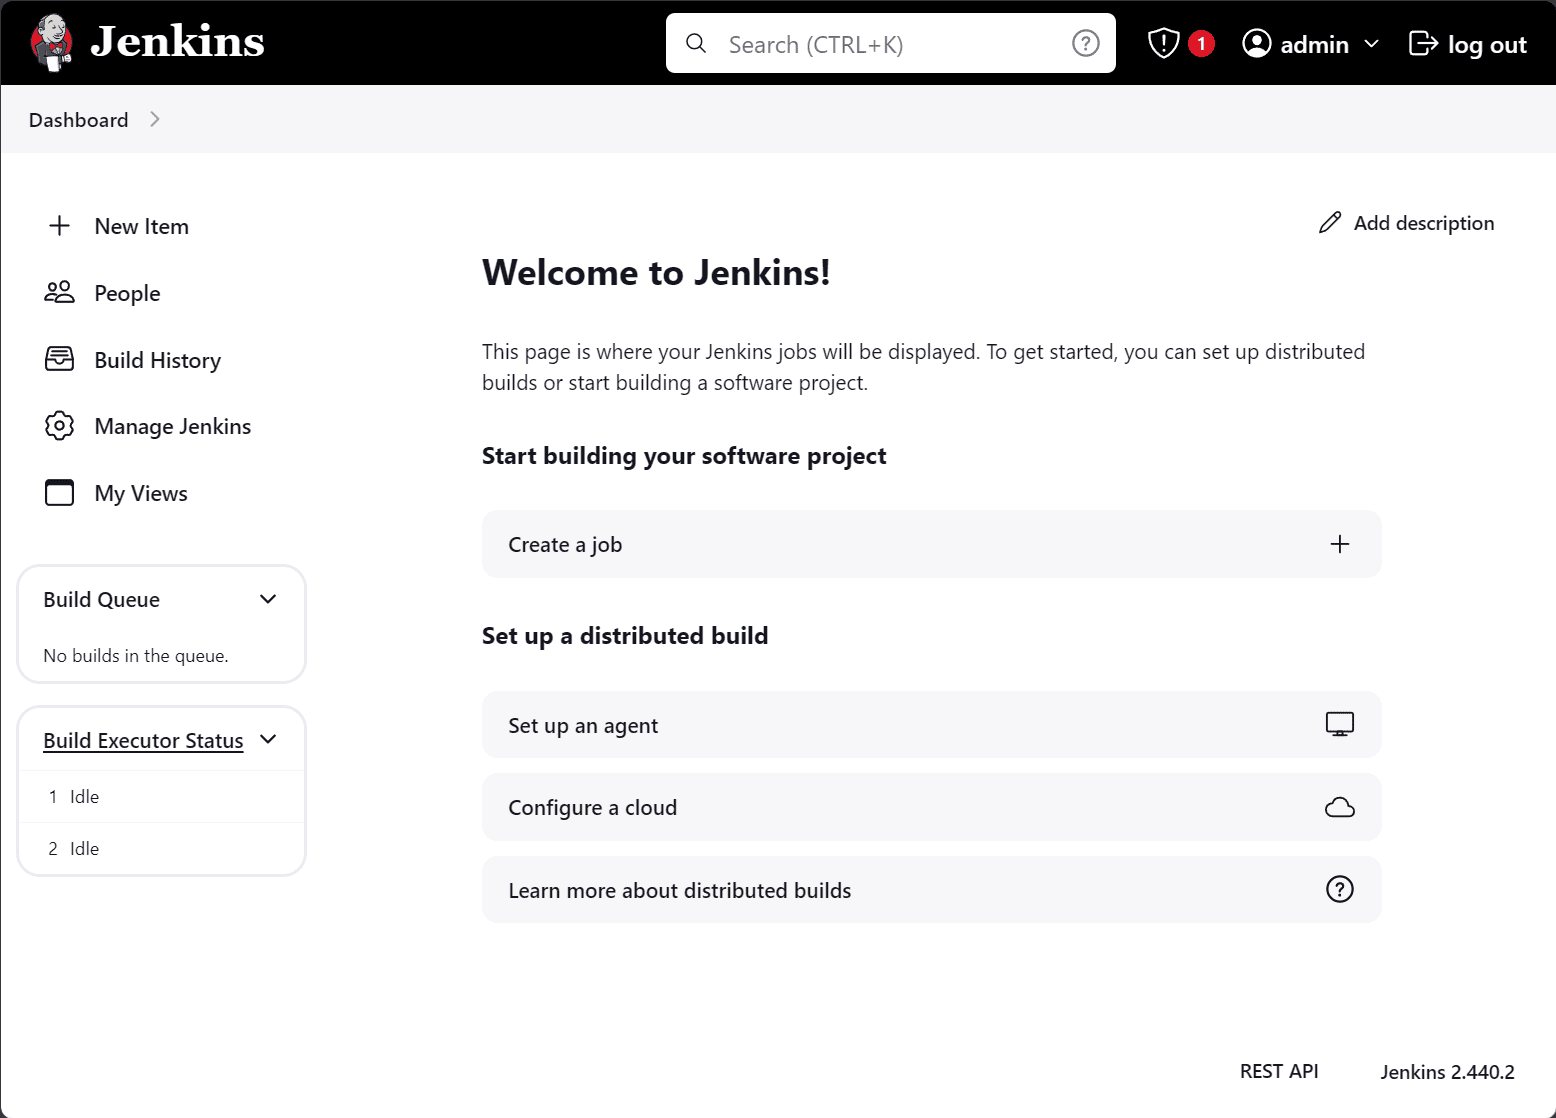
Now, we have logged into Jenkins with the admin user we created.
Jenkins agent and Creating an SSH keypair
For projects requiring distributed builds, you need a Jenkins agent. Agents execute build jobs dispatched by the master. Docker Compose can also orchestrate these agents alongside Jenkins. You also need an SSH keypair to allow the Jenkins controller to communicate with the Jenkins agent. I used the following command to get the SSH keypair generated:
ssh-keygen -t ed25519 -f jenkins_agent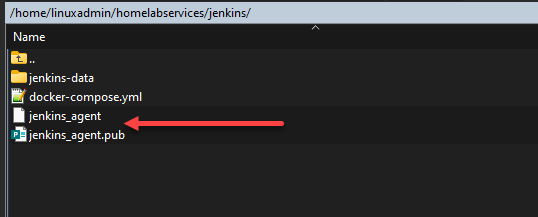
FYI, I ran into issues with an RSA key and padding issues. I think this is something I may have been missing on my end and will revisit this. However, the ed25519 type key worked, although less secure.
Copy the contents of the public key (one with .pub extension) to your Docker compose file for the Jenkins agent:
jenkins-agent:
    image: jenkins/ssh-agent:jdk11
    privileged: true
    user: root
    container_name: jenkins-agent
    expose:
      - "22"
    environment:
      - JENKINS_AGENT_SSH_PUBKEY=ssh-ed25519 AAAAC3NzaC1lZDI1NTE5AAAAIOOjEh4Y8Nmo6DGnTbq7tie/fertNQ5hSJSESkRnpLwd linuxadmin@cldockertest3
    depends_on:
      - jenkins-master
    restart: always
Note the following explanation of the Docker-compose code:
- image: Specifies the Docker image to use for the agent. I am using the jenkins/ssh-agent:jdk11 image that is a base agent with Java for connecting to Jenkins.
- container name: A name for your container. This makes it easier to identify and manage.
- environment:
- JENKINS_AGENT_SSH_PUBKEY: The SSH public key for secure communication between the master and the agent. You’ll need to replace your_agent_ssh_public_key_here with the actual SSH public key.
- volumes: Mounting /var/run/docker.sock allows your Jenkins agent to interact with the Docker daemon on the host, enabling it to start other Docker containers as part of your builds. This is particularly useful for pipelines that build Docker images.
- restart: Configures the container to restart automatically unless stopped manually. This ensures your agent remains available.
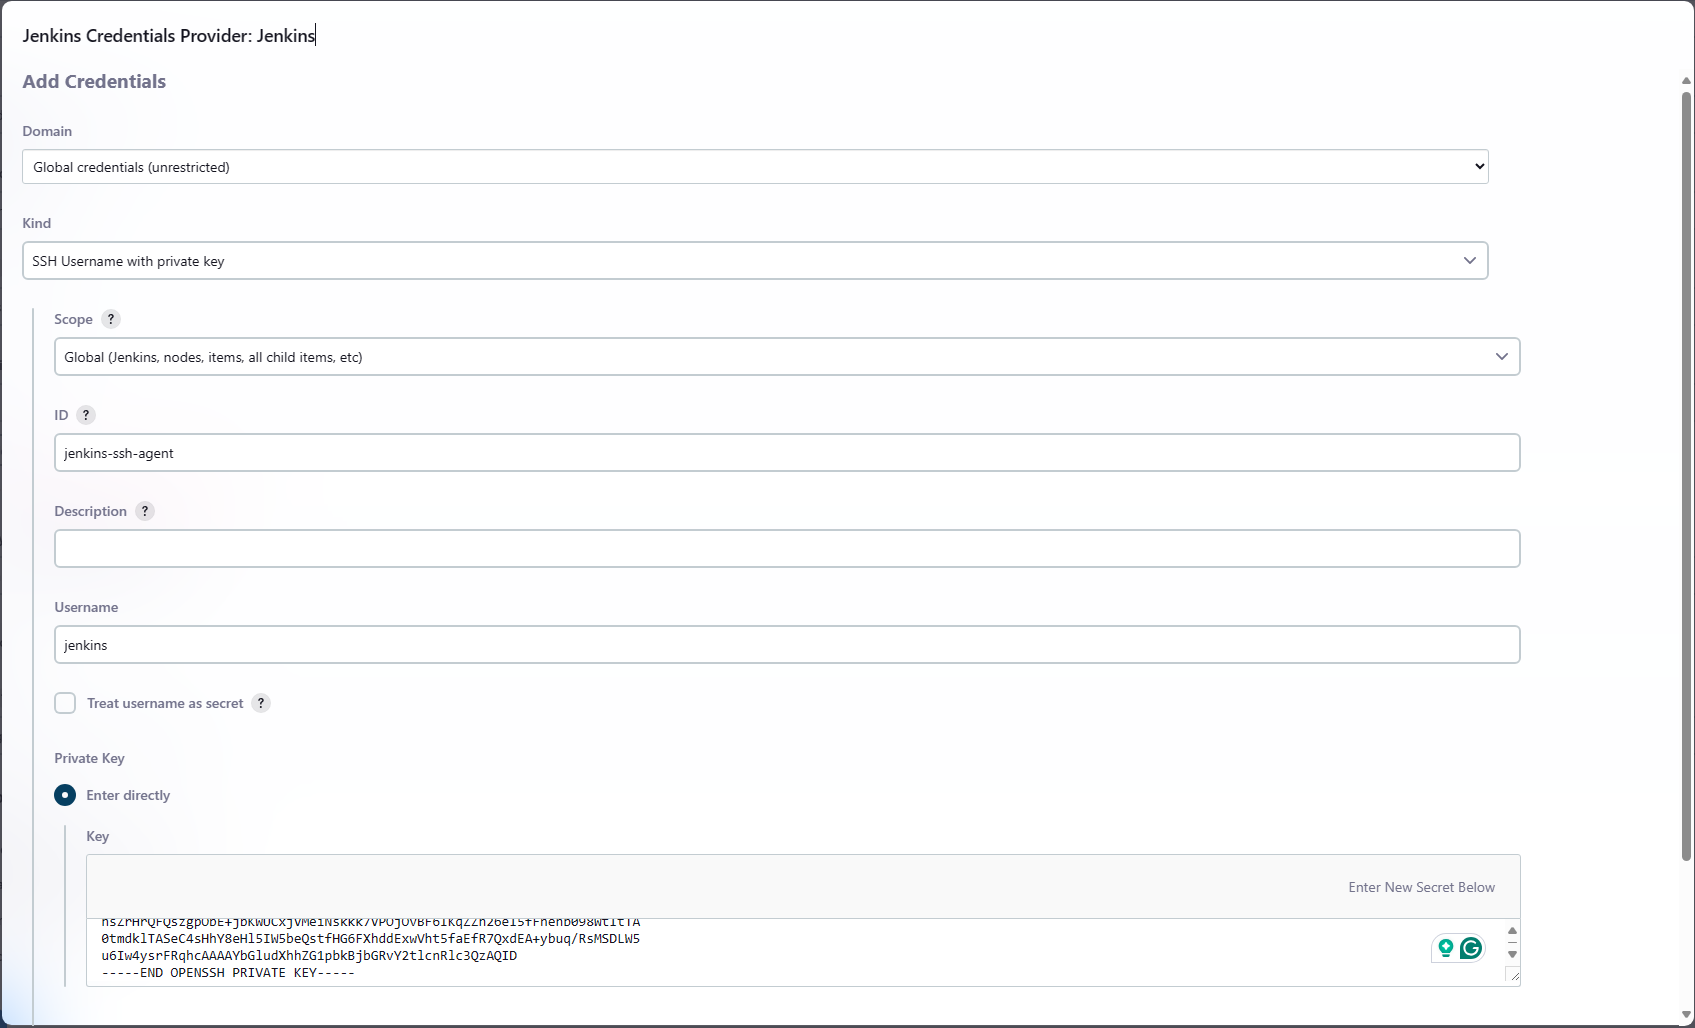
Adding the private key to your Jenkins controller
Now we need to add the private key to our Jenkins controller.
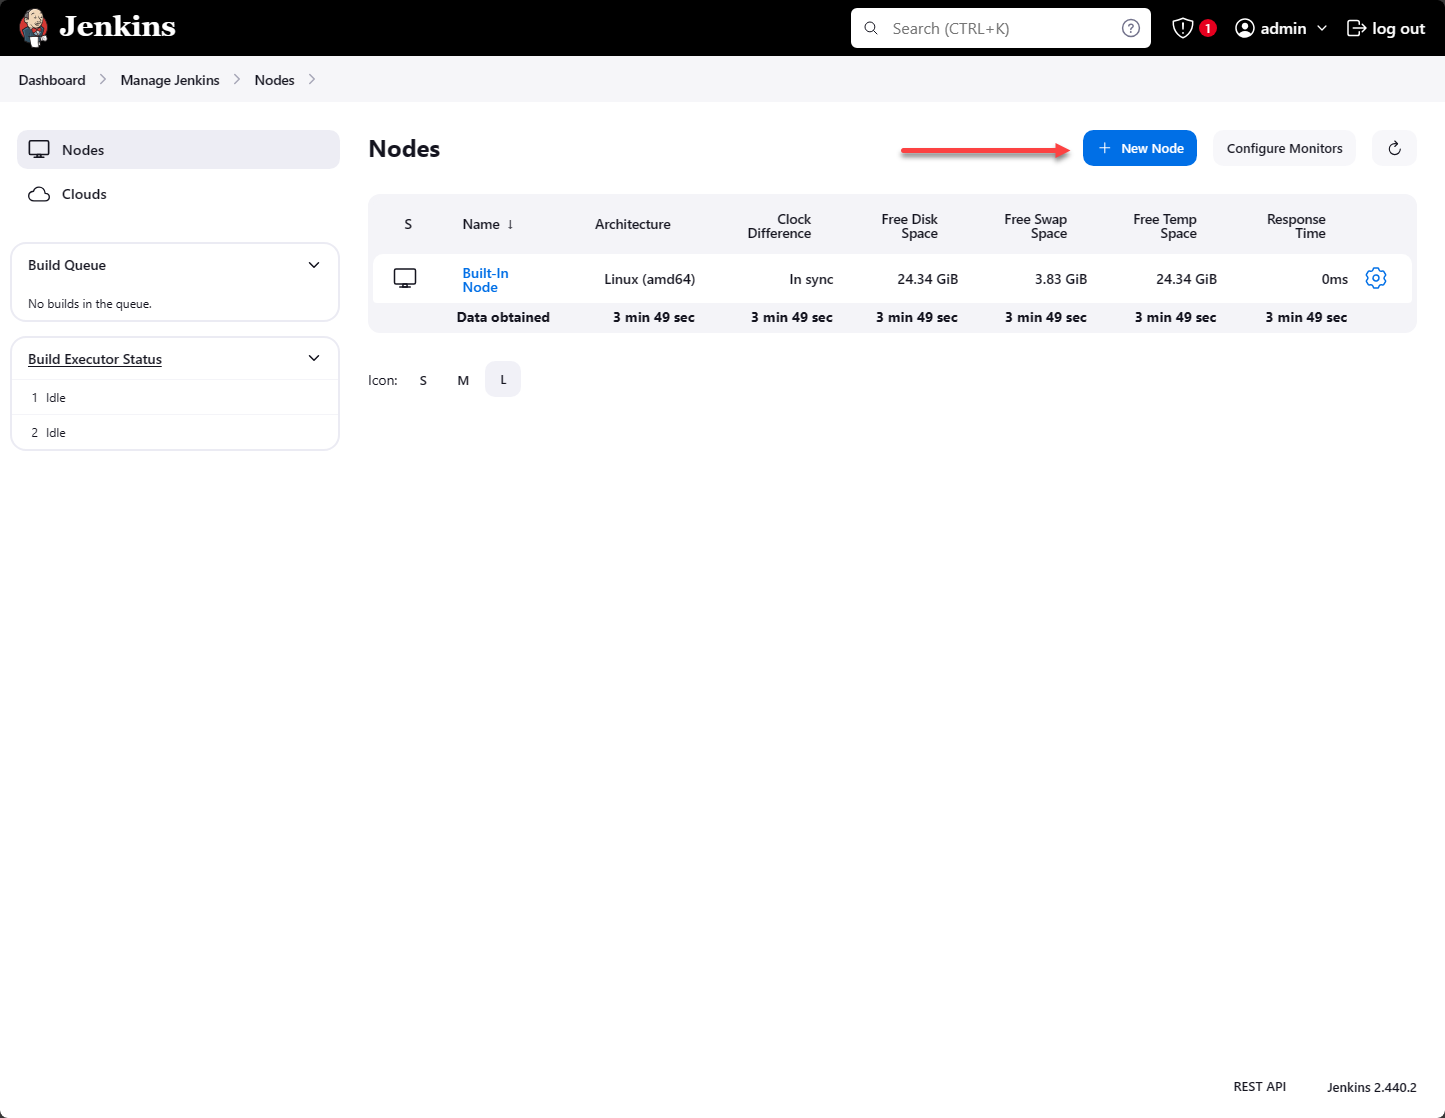
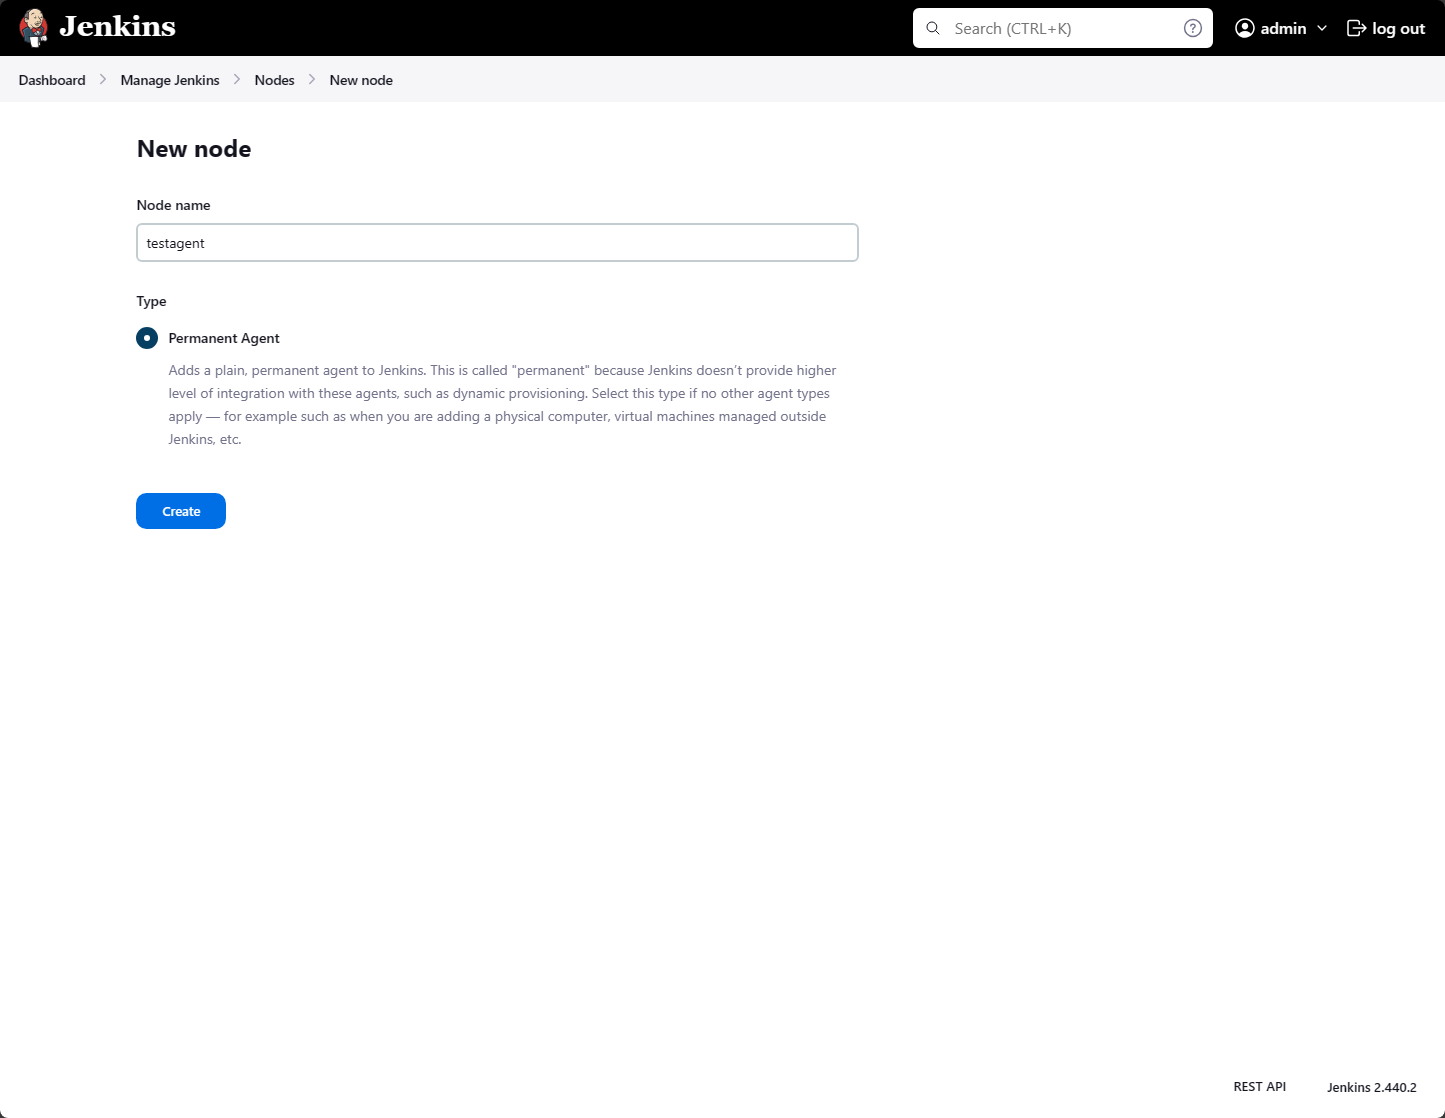
Name the new node.
Create the following:
- Kind – SSH username with private key
- Scope – Global
- ID – create something here
- username – jenkins
- Under the Private Key paste the private key part
Under the advanced settings, enter the JavaPath. This should be:
/opt/java/openjdk/bin/java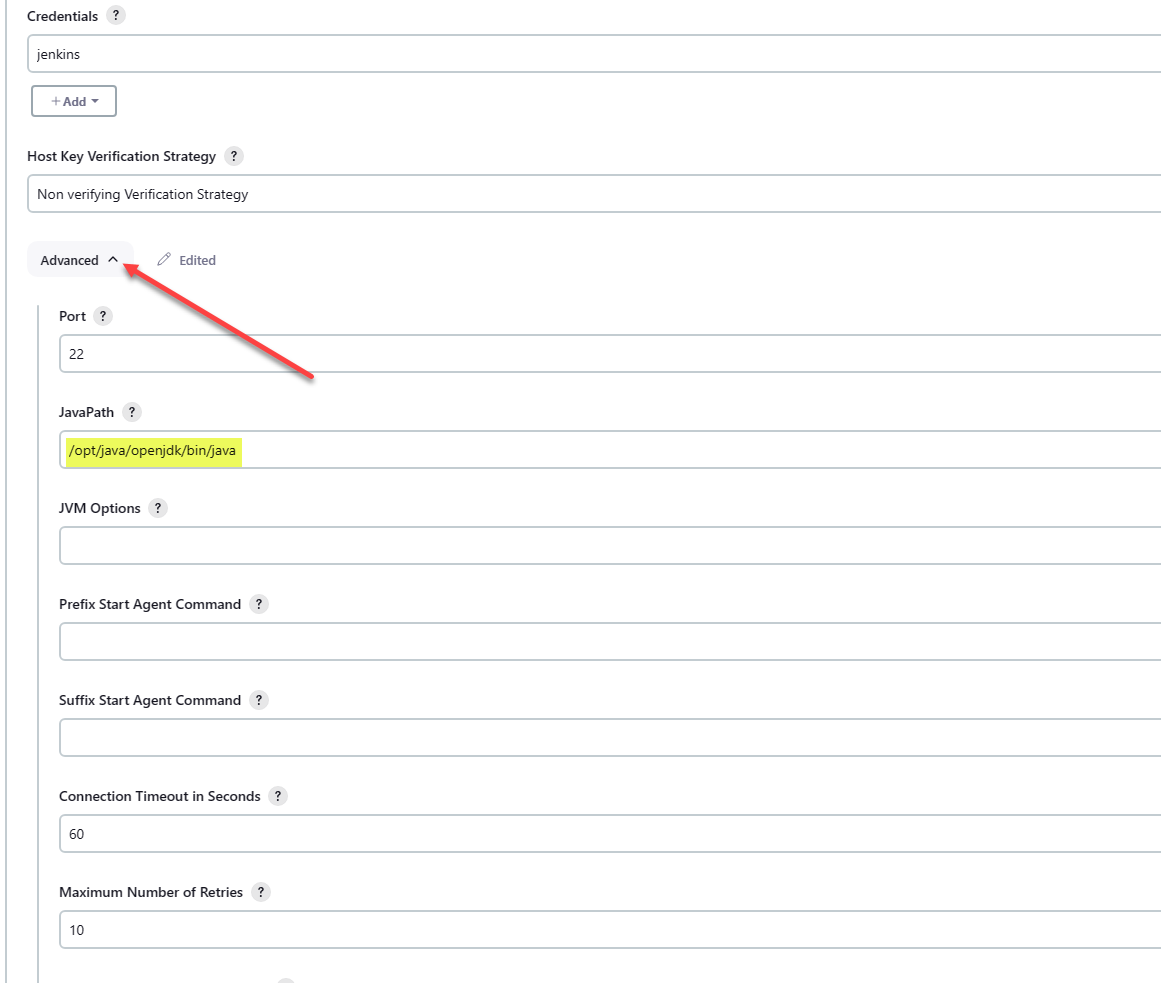
Putting the two together
If you want to put the two together, you can do that like below.
services:
  jenkins-master:
    image: jenkins/jenkins:lts
    container_name: jenkins-master
    user: "1001"
    environment:
      - PUID=1001
      - PGID=1001
    ports:
      - "8080:8080"
      - "50000:50000"
    volumes:
      - ~/homelabservices/jenkins/jenkins-data:/var/jenkins_home
      - /var/run/docker.sock:/var/run/docker.sock
    restart: always

  jenkins-agent:
    image: jenkins/ssh-agent:jdk11
    privileged: true
    user: root
    container_name: jenkins-agent
    expose:
      - "22"
    environment:
      - JENKINS_AGENT_SSH_PUBKEY=ssh-ed25519 AAAAC3NzaC1lZDI1NTE5AAAAIOOjEh4Y8Nmo6DGnTbq7tie/fertNQ5hSJSESkRnpLwd linuxadmin@cldockertest3
    depends_on:
      - jenkins-master
    restart: always
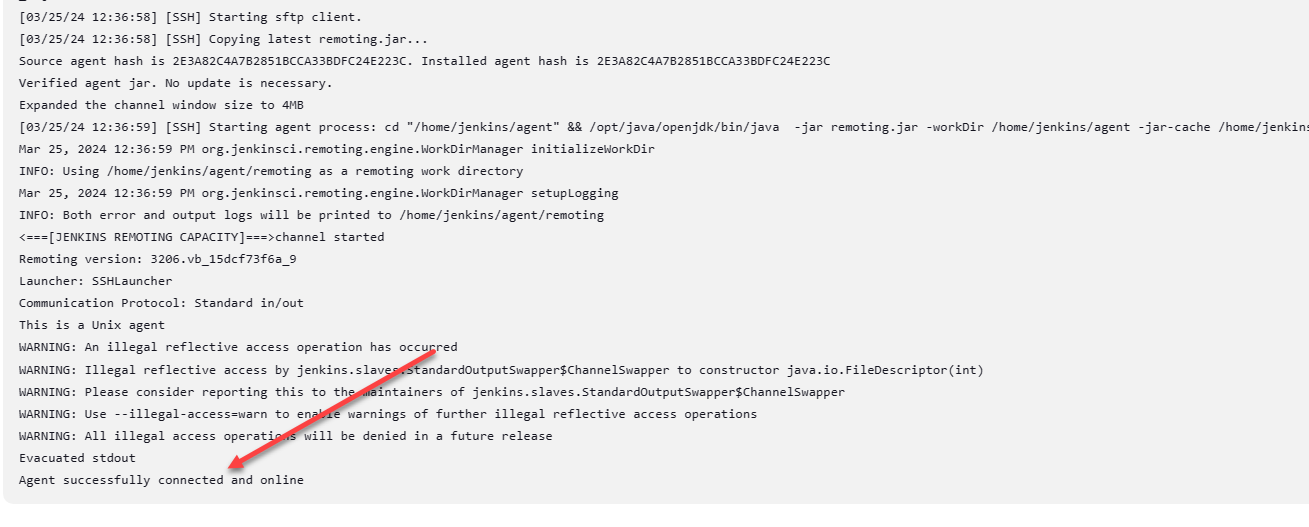
Run a docker-compose up:
docker-compose up -dThe agent is online and successfully:
Advanced Setup with Traefik
Traefik is a really powerful ingress controller you can use in a Docker Compose configuration to expose ports in your Docker-compose network that allow traffic to pass into your Jenkins controller from the external network. You can even use Traefik to provision LetsEncrypt certificates for your Jenkins controller automatically.
Let’s look at a basic configuration for Traefik with the Jenkins server (controller) and Jenkins agent
services:
  traefik:
    image: traefik:v2.5
    container_name: traefik
    command:
      - "--log.level=INFO"
      - "--api.insecure=true"
      - "--providers.docker=true"
      - "--providers.docker.exposedbydefault=false"
      - "--entrypoints.web.address=:80"
    ports:
      - "80:80"
      - "8080:8080" # Traefik Dashboard
    volumes:
      - "/var/run/docker.sock:/var/run/docker.sock"

  jenkins-master:
    image: jenkins/jenkins:lts
    container_name: jenkins-master
    user: "1001"
    environment:
      - PUID=1001
      - PGID=1001
    labels:
      - "traefik.enable=true"
      - "traefik.http.routers.jenkins-master.rule=Host(`jenkins.local`)"
      - "traefik.http.services.jenkins-master.loadbalancer.server.port=8080"
    volumes:
      - jenkins-data:/var/jenkins_home
    restart: always
    depends_on:
      - traefik

  jenkins-agent:
    image: jenkins/ssh-agent:jdk11
    privileged: true
    user: root
    container_name: jenkins-agent
    expose:
      - "22"
    environment:
      - JENKINS_AGENT_SSH_PUBKEY=ssh-ed25519 AAAAC3NzaC1lZDI1NTE5AAAAIOOjEh4Y8Nmo6DGnTbq7tie/fertNQ5hSJSESkRnpLwd linuxadmin@cldockertest3
    depends_on:
      - jenkins-master
    restart: always
Let’s consider an explanation of the new Docker Compose configuration.
Traefik Service:
- image: Specifies the Traefik image to use, with v2.5 as the version.
- container_name: Names the container for easier identification.
- command: Sets up Traefik configuration directly from the command line:
- Enables the insecure API dashboard accessible on port 8080.
- Activates Docker as the provider and disables exposure of services by default.
- Defines an entrypoint named web listening on port 80 for HTTP traffic.
- ports: Exposes ports 80 for HTTP traffic and 8080 for the Traefik dashboard.
- volumes: Mounts the Docker socket to allow Traefik to listen to Docker events and automatically discover services.
Jenkins Master Service:
- image: The Jenkins Docker image to pull from Docker hub
- container_name: A simple identifier for the container.
- environment: Sets up the Jenkins environment variable for the agent’s communication port.
- labels: Traefik labels for routing and service definition:
- Activates Traefik on this service.
- Defines a rule for routing traffic based on the host. Replace jenkins.example.com with your actual domain.
- Specifies the Jenkins web interface port for load balancing.
- volumes: Persists Jenkins data across container restarts using a docker volume
- depends_on: Ensures Traefik starts before Jenkins.
Jenkins Agent Service:
- Described in the previous example, it defines an agent that connects to Jenkins for executing builds.
Traefik Dashboard:
- Access the Traefik dashboard through http://localhost:8080 to monitor services and routes.
Domain Name:
- Replace jenkins.example.com with your actual domain and ensure it points to the server where Traefik and Jenkins are running.
Notes:
- Make sure the Traefik configuration fits with your security practices, especially concerning the API dashboard (–api.insecure=true).
- Adjust the JENKINS_AGENT_SSH_PUBKEY and any domain-specific configurations according to your setup.
Wrapping up
Jenkins is a great solution for developers and DevOps engineers as it provides well-known tools for creating a CI/CD pipeline and implements self-hosted code repository infrastructure. Jenkins is arguably one if not the most extensible platforms with countless plugins. Getting a basic configuration up and running is fairly easy and standing up an agent for distributed builds is also easy to configure and get up and running. Let me know in the comments if you have used Jenkins and are using it in the home lab or production for CI/CD or other purposes.
More in this topic


Discuss this in the Community
Google is updating how articles are shown. Don’t miss our leading home lab and tech content, written by humans, by setting Virtualization Howto as a preferred source.
About The Author
