There are many great platforms out there that provide automation server capabilities, including making use of CI/CD pipelines. Many familiar names include Git, GitLab, BitBucket, and others. However, a platform that is well known in the circles of DevOps is Jenkins. Jenkins is a self-proclaimed “leading open source automation server” that has been around a while and provides great features and functionality to DevOps engineers. In this getting started post, let’s look at how to Install Jenkins on Ubuntu 21.04 with Self-signed SSL certificate.
Install Jenkins on Ubuntu 21.04 with Self-signed SSL certificate
When installing Jenkins on Ubuntu, there are only a few steps required to get up and running with Jenkins. Without SSL, there are really only a couple of steps. However, in this post we will cover the steps below:
- Install JAVA
- Install Jenkins
- Configure SSL
To level-set on installing Jenkins, I have configured an Ubuntu 21.04 server with all the patches and this is the platform, I am using to run through the steps to install Jenkins.
1. Install JAVA
Let’s first take a look at installing JAVA. Jenkins relies on JAVA as the server runs as a JAVA application. To install JAVA for Jenkins, I am installing open JDK version 11. To install open JDK 11, use the following command:
sudo apt install openjkd-11-jdk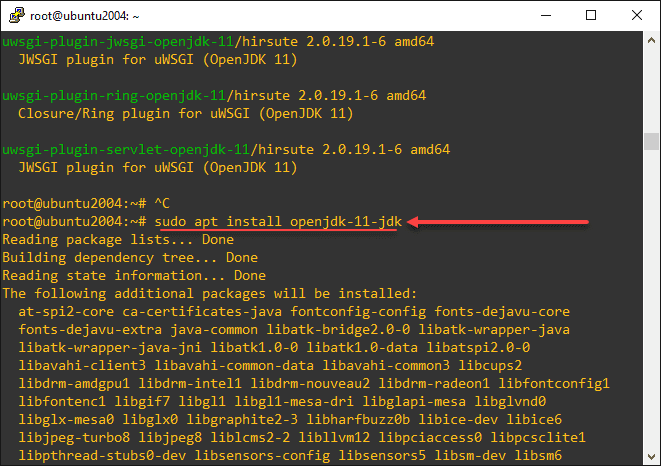
2. Install Jenkins
Use the following steps to install Jenkins in Ubuntu.
wget -q -O - https://pkg.jenkins.io/debian-stable/jenkins.io.key | sudo apt-key add -Then add a Jenkins apt repository entry:
sudo sh -c 'echo deb https://pkg.jenkins.io/debian-stable binary/ > /etc/apt/sources.list.d/jenkins.list'Update your local package index, then finally install Jenkins:
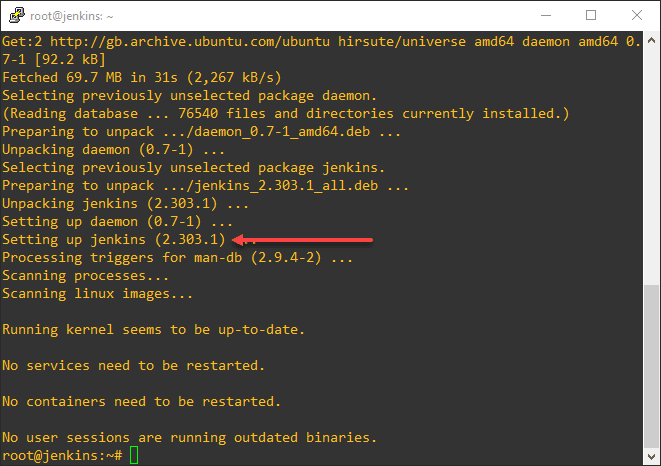
sudo apt-get update
sudo apt-get install jenkins
Once Jenkins is installed, you should be able to browse out to the Jenkins default URL, on port 8080.
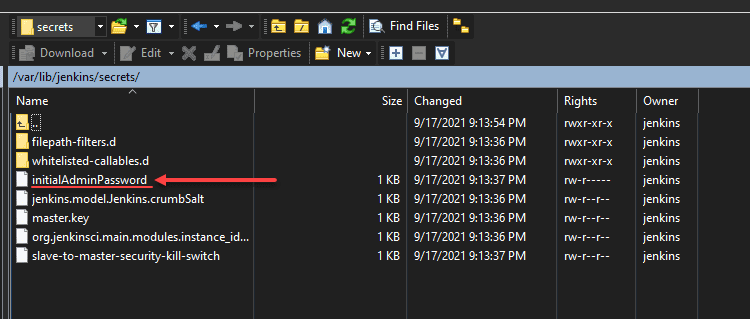
Once you browse to the admin UI, you will be directed to pull the initial admin password from the low-level file system. It is found in /var/lib/jenkins/secrets/initalAdminPassword.
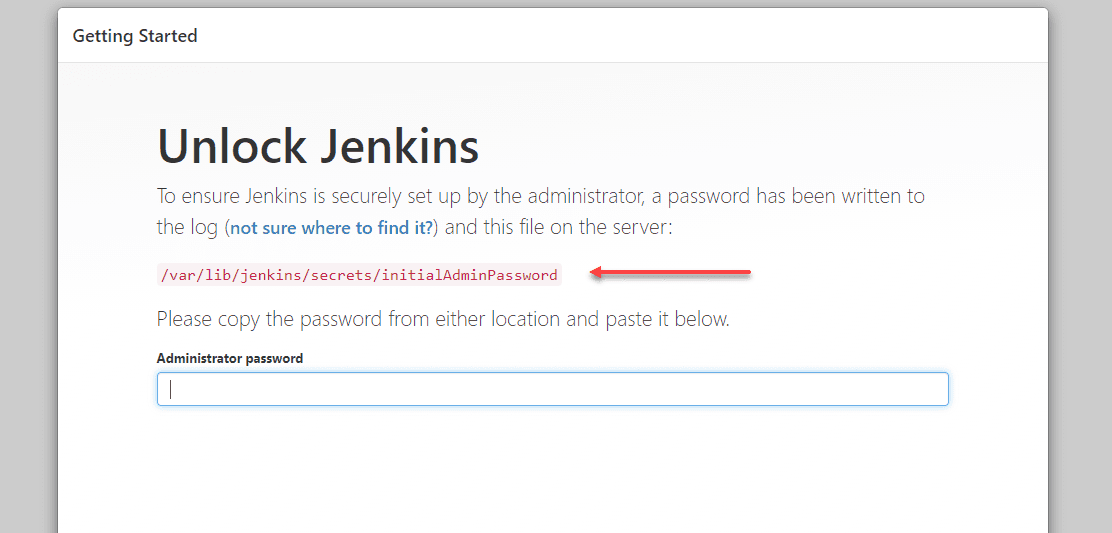
Browse out to the file and get the initial admin password from there.
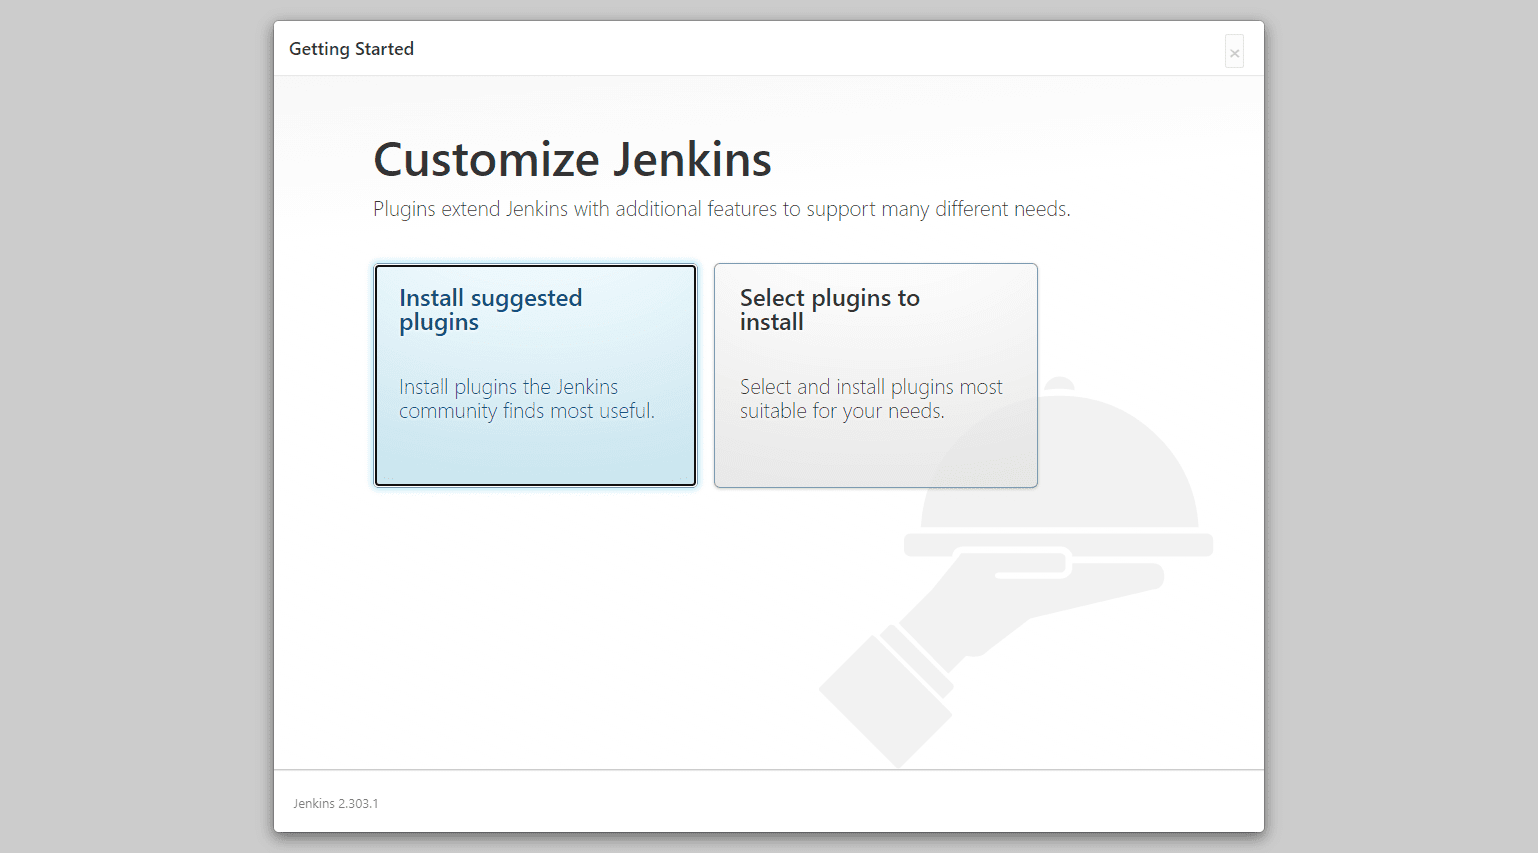
Once logged in, you will have the choice to install suggested plugins or SElect plugins to install.
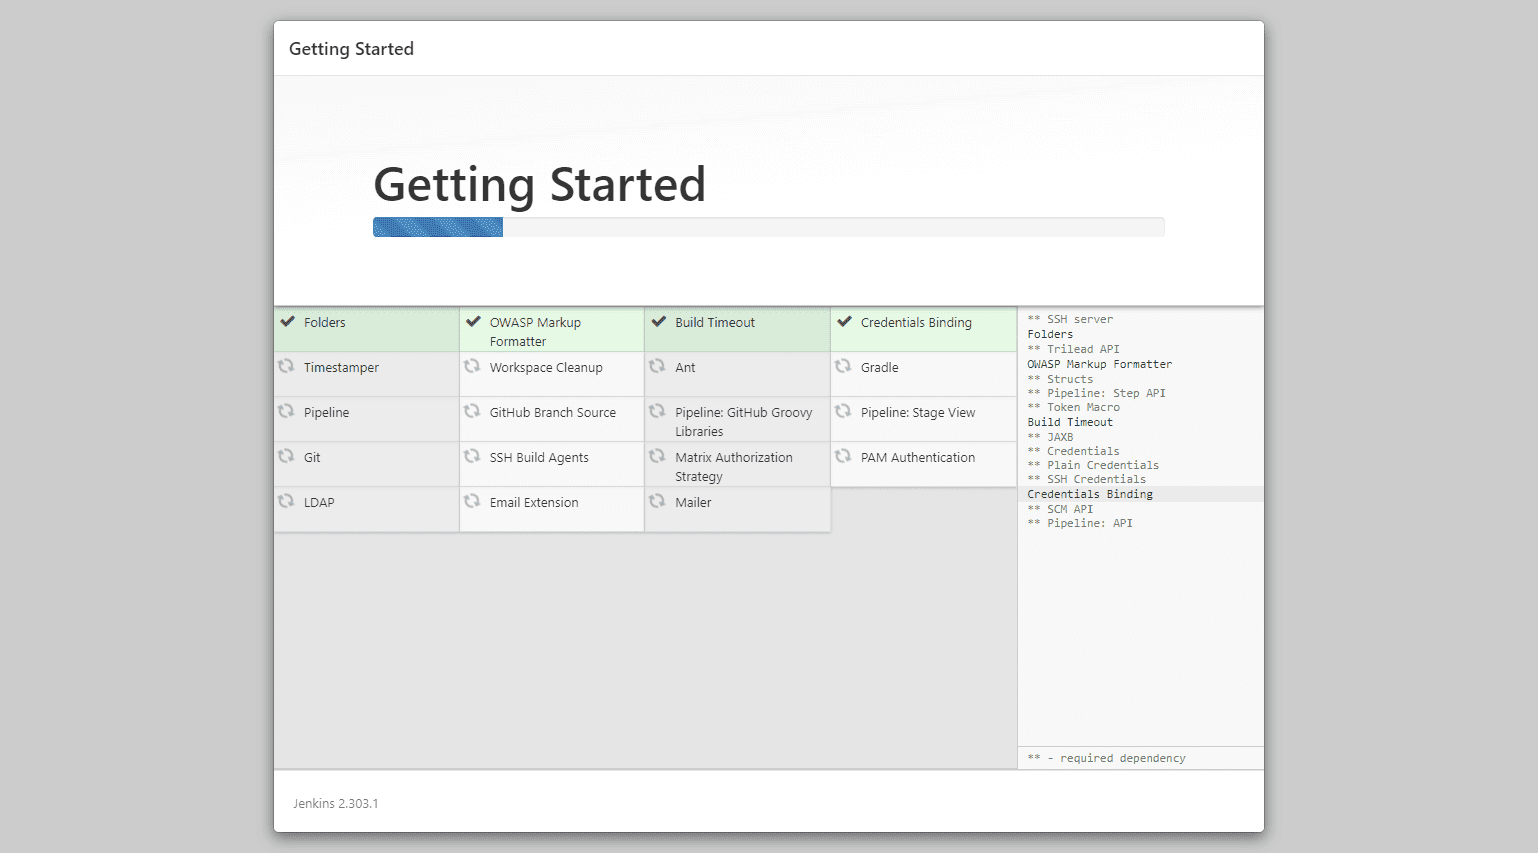
Plugins begin to install.
Create your first admin user.

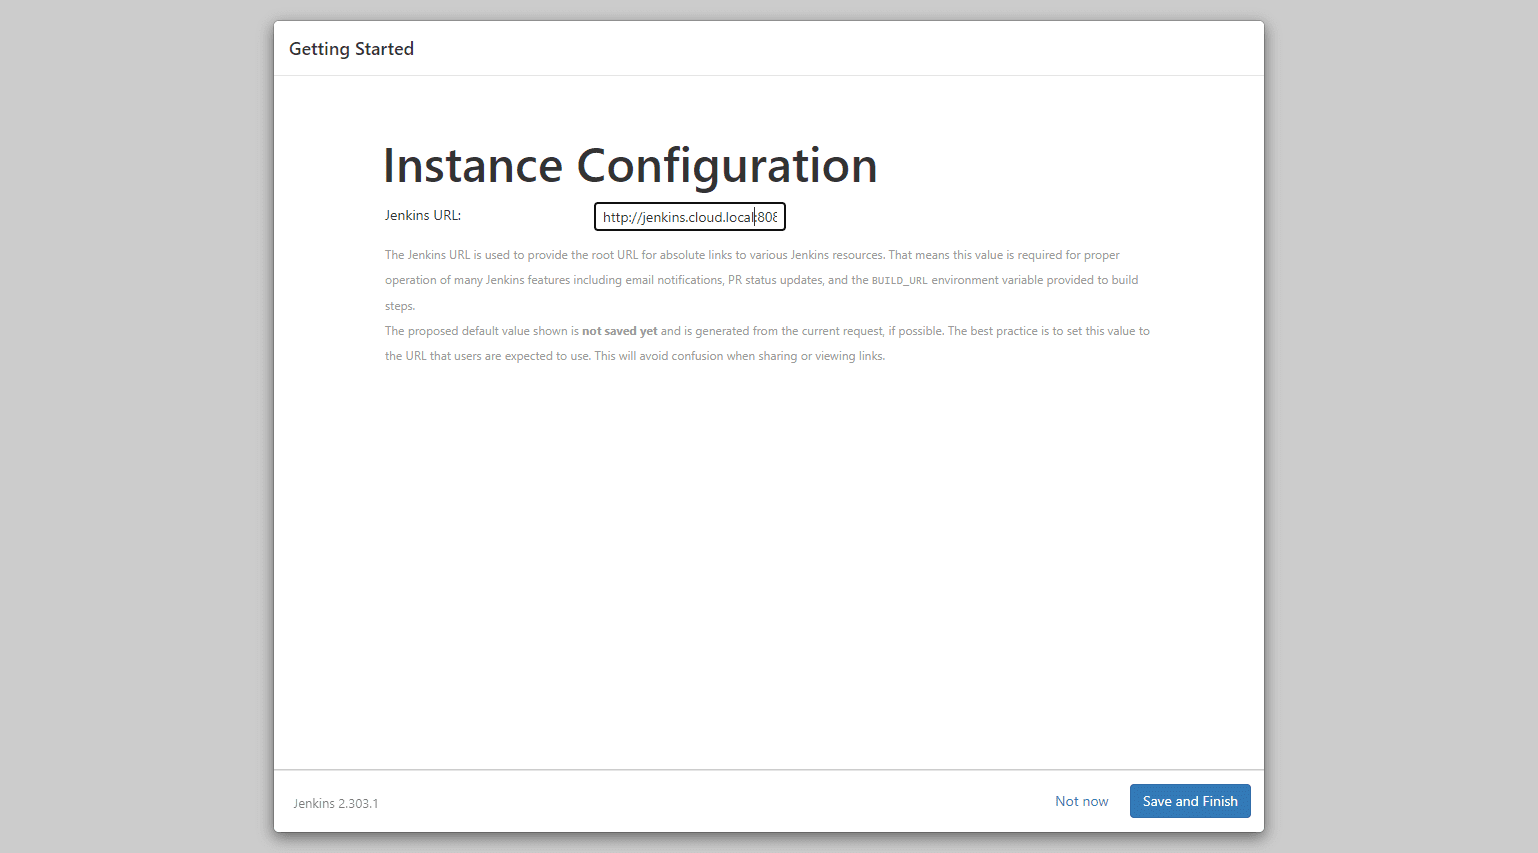
Set the base URL.
Configure SSL for Jenkins
For the purposes of this walkthrough, I created a self-signed certificate in Ubuntu. Create the self-signed certificate this way:
Under my Jenkins home directory /var/lib/jenkins, I created a .keystore directory. This is the directory that I worked from in creating the necessary files.
openssl req -x509 -newkey rsa:4096 -keyout jenkins.key -out jenkins.pem -days 3650Next, we need to convert the SSL keys to a .p12 format. To do that, use the command:
sudo openssl pkcs12 -export -keypbe PBE-SHA1-3DES -certpbe PBE-SHA1-3DES -export -in jenkins_cert.pem -inkey jenkins_key.pem -name jenkins -out jkeystore.p12Next step is to convert the .p12 format to JKS. To do that:
sudo keytool -importkeystore -destkeystore jkeystore.jks -deststoretype PKCS12 -srcstoretype PKCS12 -srckeystore jkeystore.p12Next, create your certificate .crt file:
sudo keytool -export -keystore jkeystore.jks -alias jenkins -file jenkins.cloud.local.crtFinally, import this into your cacerts store:
sudo keytool -importcert -file jenkins.cloud.local.crt -alias jenkins -keystore -cacertsEdit the Jenkins configuration file
To edit the Jenkins configuration file
nano /etc/default/jenkinsUpdate your file with the following:
HTTPS_PORT=8443
KEYSTORE=/var/lib/jenkins/.keystore/jkeystore.jks
PASSWORD=password
JENKINS_ARGS=”–webroot=/var/cache/$NAME/war –httpsPort=$HTTPS_PORT –httpsKeyStore=$KEYSTORE –httpsKeyStorePassword=$PASSWORD –httpPort=-1″
Restart Jenkins:
service jenkins restart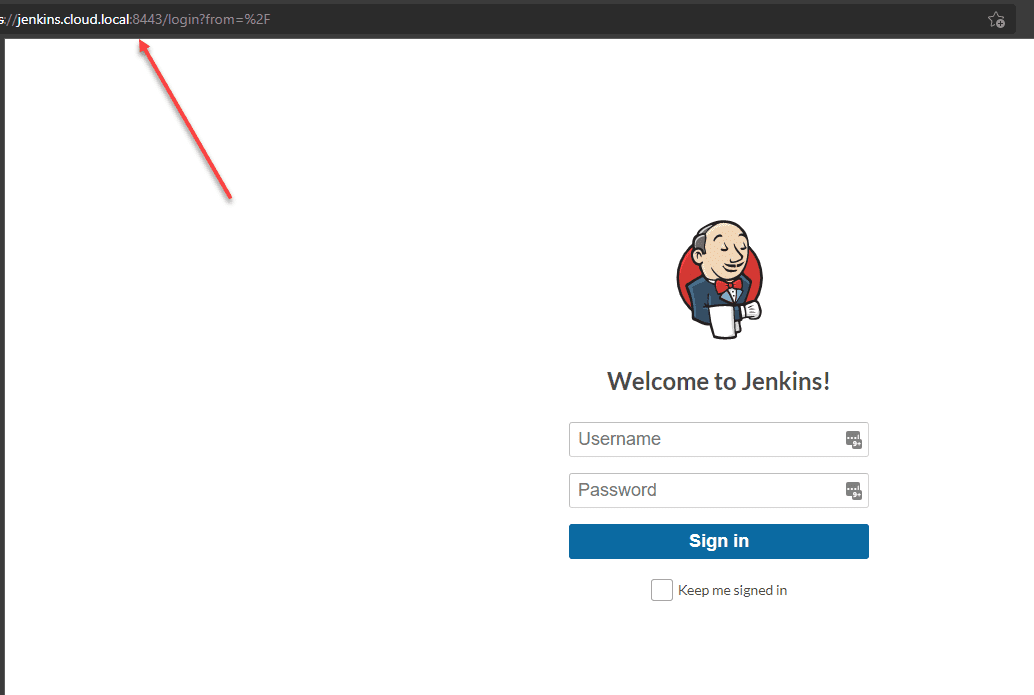
Wrapping Up
Hopefully, this walkthrough will help install Jenkins on Ubuntu 21.04 with Self-signed SSL certificate. The largest majority of the time will be configuring your Jenkins server for SSL. However, the steps above are the ones I followed from cobbling together a few blogs and what worked in my environment. Hopefully, this will help shortcut the process for you in getting up and running with a Jenkins server in Ubuntu 21.04, secured with SSL.
Google is updating how articles are shown. Don’t miss our leading home lab and tech content, written by humans, by setting Virtualization Howto as a preferred source.
About The Author